
Boost's Performance Attempt


Senior Member
Certified GM nut
Joined: Jul 2004
Posts: 1,912
Likes: 0
From: New York City

Originally Posted by 2000SilverBullet
I also monitor the exhaust temp coming out of the heads. It has not increased since removing the EGR.
If combustion temps have increased, I haven't noticed any detrimental effects.
If anything it gives me more complete combustion.
If combustion temps have increased, I haven't noticed any detrimental effects.
If anything it gives me more complete combustion.


Senior Member
True Car Nut
Joined: May 2005
Posts: 3,448
Likes: 7
From: _Phoenix, AZ_ _WCBF '05, '06, '07 Survivor_ ____NEBF '07 Remnant___
Everything is in the bay and he is working on the installing the gen V. Seems to be a slight issue with spacing between the Gen V and alternator. On the 96-99, there may be a nub....edit, make that part of the alternator that needs to be ground away to allow clearance. Air grinder is in operation as I speak to him 

Senior Member
True Car Nut
Joined: Jun 2004
Posts: 3,459
Likes: 1
From: Glendale, AZ
That'* funny... I was talking to Doug earlier and he had an air grinder in operation as well... lol.
Boosty, I am duly impressed by the progression of this project. That engine looks beautiful, and I can't wait to see how it runs when you get the tune dialed in. Keep us updated!
Boosty, I am duly impressed by the progression of this project. That engine looks beautiful, and I can't wait to see how it runs when you get the tune dialed in. Keep us updated!
Thread Starter
DINOSAURUS BOOSTUS


Expert Gearhead
Joined: Mar 2005
Posts: 41,391
Likes: 30
From: Enfield, CT

I'm inside...and pics are loading.
Ever know that you were the first person to do something? I'm feeling that right now and can offer lots of advice to the rest of the clubbers. Don't do a Gen V swap (cause I wanna be faster than you)
First up..I put the engine in the engine bay and went to put in the backwards bolt. Anyone that'* ever pulled the motor knows all about finding this little gem. The painted engine and the non painted transmission with the light placed in the A arm for vision...OMG the perfect shot. Here'* a little progression for anyone ever wanting to see it'* location.
First pic..look right of the strut and between the wheel well bottom edge and the rotor.


And here it is..up close and very personal.

Next up..Oil pan and oil filter adapter...hence the first part to modify for my application.
The oil pan fits beautifully as expected

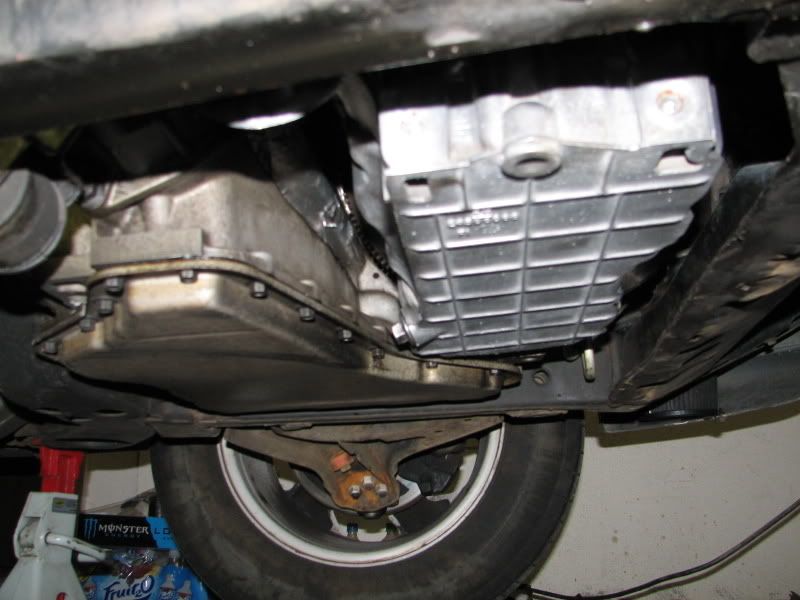
Filter adapter fits great too


Overall..I am impressed and love it. BUT... there'* a small nub on the top of the oil filter adapter. Merely a piece of aluminum that needed to be ground off. Didn't know until the power steering pump didn't want to line up. If you compare the two adapters..it'* obvious where to grind now that we know it needs to be done.
I'll look around for pics of the adapter.
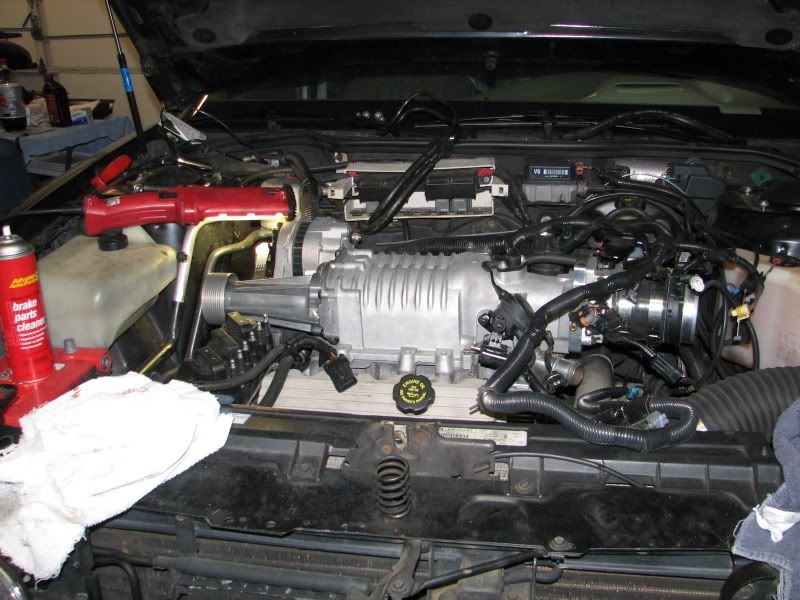
Some general pics of the motor in.. BTW..plugs, exhaust...everything is easy w/o power steering pump and the accessory bracket.


Hey...what'* this gasket for?


What the F***!!!!!! This doesn't fit.

I guess..I could run WITHOUT an alternator? :?

With a grind grind here and a piece cut off the alternator there

Darn..still rubbing a weee bit

Got it..and here'* what it looks like after I finished working over the alternator


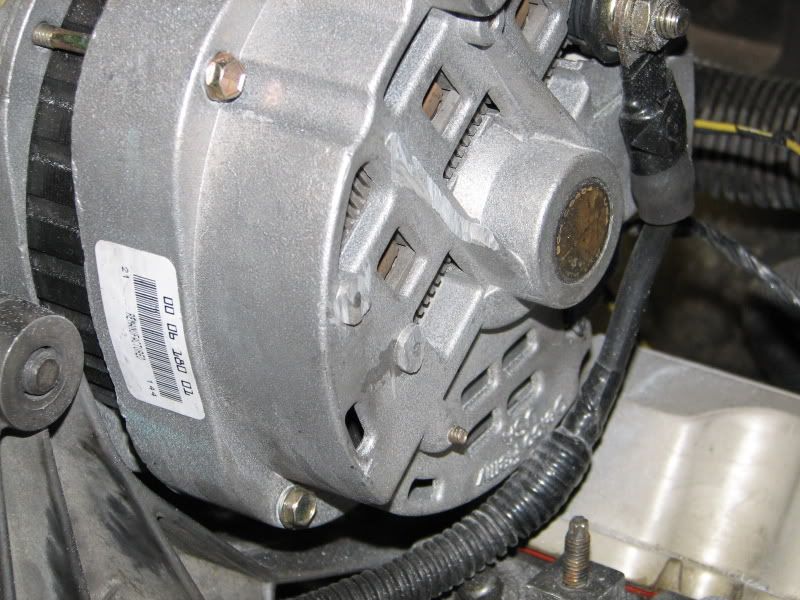


Ahhhh at last


After my alternator alterations .... IT FITS!!! and it'* on. that'* it for the night. I'll finish up tomorrow, load the programming from Intense to get it running and maybe have more infor tomorrow.
Ever know that you were the first person to do something? I'm feeling that right now and can offer lots of advice to the rest of the clubbers. Don't do a Gen V swap (cause I wanna be faster than you)
First up..I put the engine in the engine bay and went to put in the backwards bolt. Anyone that'* ever pulled the motor knows all about finding this little gem. The painted engine and the non painted transmission with the light placed in the A arm for vision...OMG the perfect shot. Here'* a little progression for anyone ever wanting to see it'* location.
First pic..look right of the strut and between the wheel well bottom edge and the rotor.
And here it is..up close and very personal.
Next up..Oil pan and oil filter adapter...hence the first part to modify for my application.
The oil pan fits beautifully as expected
Filter adapter fits great too
Overall..I am impressed and love it. BUT... there'* a small nub on the top of the oil filter adapter. Merely a piece of aluminum that needed to be ground off. Didn't know until the power steering pump didn't want to line up. If you compare the two adapters..it'* obvious where to grind now that we know it needs to be done.
I'll look around for pics of the adapter.
Some general pics of the motor in.. BTW..plugs, exhaust...everything is easy w/o power steering pump and the accessory bracket.
Hey...what'* this gasket for?
What the F***!!!!!! This doesn't fit.
I guess..I could run WITHOUT an alternator? :?
With a grind grind here and a piece cut off the alternator there
Darn..still rubbing a weee bit
Got it..and here'* what it looks like after I finished working over the alternator
Ahhhh at last
After my alternator alterations .... IT FITS!!! and it'* on. that'* it for the night. I'll finish up tomorrow, load the programming from Intense to get it running and maybe have more infor tomorrow.


Thread Starter
DINOSAURUS BOOSTUS
Expert Gearhead
Joined: Mar 2005
Posts: 41,391
Likes: 30
From: Enfield, CT
Originally Posted by Peterg22000
very impressive work Bill, im amazed how well its coming along 