
What I've been working on... Turbo GP SOLD!

Senior Member
Posts like a Northstar
Joined: Jul 2010
Posts: 615
Likes: 0
From: Camden, MI

actually.... it probably would. it'* doing nothing more than making heat on a 3.5 past 4PSI. on a 1.0 liter metro motor with a similar VE... it could run up to ~14PSI before peaking.

Thread Starter
Senior Member
True Car Nut
Joined: Jul 2010
Posts: 2,469
Likes: 0
From: Danville, Illinois
Honestly Andrei, I see us getting to the 1/4 mile next year lining up, doing our burnouts. I get up the light, punch it get about 10ft down the track before I run over my transmission.

No but seriously, I need to get in some serious test and tune time at the track to get my spark table made. Right now I'm using a hybrid spark table that I got from 3 different maps. One of them I downloaded from another Megasquirt guy who has a turbo 3400. One is the stock ASC/Mclaren tune, and the other is the TopGun160 tune for the 3.1Turbo.
Not only that, but I will likely max out these fuel injectors at 280hp or about 7 psi. I'll also be maxing out that little turbo at 7psi. So I really need to spend some money on some good injectors and a larger turbo.
Thread Starter
Senior Member
True Car Nut
Joined: Jul 2010
Posts: 2,469
Likes: 0
From: Danville, Illinois
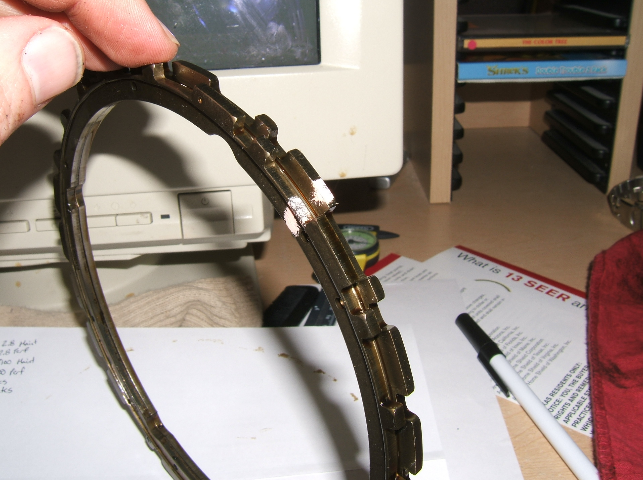
Well, today I've dune a bunch of research on the LX9'* crank reluctor wheel. When I did this build, I opted for an external 7x crank trigger. I thought that I couldn't use the strange reluctor that comes on the LX9. The reason it'* so strange is that the LX9 doesn't use DIS that we are used to. It uses a waste spark coil near plug setup (CNP). With CNP, the coils are fired directly from the megasquirt (no ICM). Whats the point of all this? So that I can get rid of this:

And use these instead:

Again, in order to do that, I need the megasquirt to understand the crank reluctor on the LX9. So I did some research and noticed how similar the reluctor looks to a LS1 reluctor:
LX9:
LS1:

So I verified
A is long, B is short, 0 is front, 1 is back
LS1 = A0 B1 A0 B1 A0 B1 A0 B1 A0 A1 B0 B1 A0 A1 B0 B1 A0 B1 A0 B1 A0 A1 B0 A1 B0 B1 A0 B1 A0 A1 B0 A1 B0 A1 B0 B1 A0 A1 B0 A1 B0 A1 B0 A1 B0 A1 B0 B1
LX9 = A0 B1 A0 B1 A0 B1 A0 B1 A0 A1 B0 B1 A0 A1 B0 B1 A0 B1 A0 B1 A0 A1 B0 A1 B0 B1 A0 B1 A0 A1 B0 A1 B0 A1 B0 B1 A0 A1 B0 A1 B0 A1 B0 A1 B0 A1 B0 B1
They're identical. So now I'm working with a developer of the MSextra code on a V6 version of the LS1 code. The code he'* building assumes that TDC #1 compression is in the same spot on each reluctor. Tonight I'll be flashing the new firmware to my megasquirt and wiring in the factory CPS.
It'* a very exciting day for me.
And use these instead:
Again, in order to do that, I need the megasquirt to understand the crank reluctor on the LX9. So I did some research and noticed how similar the reluctor looks to a LS1 reluctor:
LX9:
LS1:
So I verified
A is long, B is short, 0 is front, 1 is back
LS1 = A0 B1 A0 B1 A0 B1 A0 B1 A0 A1 B0 B1 A0 A1 B0 B1 A0 B1 A0 B1 A0 A1 B0 A1 B0 B1 A0 B1 A0 A1 B0 A1 B0 A1 B0 B1 A0 A1 B0 A1 B0 A1 B0 A1 B0 A1 B0 B1
LX9 = A0 B1 A0 B1 A0 B1 A0 B1 A0 A1 B0 B1 A0 A1 B0 B1 A0 B1 A0 B1 A0 A1 B0 A1 B0 B1 A0 B1 A0 A1 B0 A1 B0 A1 B0 B1 A0 A1 B0 A1 B0 A1 B0 A1 B0 A1 B0 B1
They're identical. So now I'm working with a developer of the MSextra code on a V6 version of the LS1 code. The code he'* building assumes that TDC #1 compression is in the same spot on each reluctor. Tonight I'll be flashing the new firmware to my megasquirt and wiring in the factory CPS.
It'* a very exciting day for me.


Thread Starter
Senior Member
True Car Nut
Joined: Jul 2010
Posts: 2,469
Likes: 0
From: Danville, Illinois
Alright I got my updated code. Here'* the email I got with it.
Attached is the updated code, but first, take a deep breath.
Download and load the MS2/Extra 3.1.0 release code as-is.
Be confident it has loaded and you can communicate with it in
TunerStudio.
If you were using a different MS2 code version before it _might_ be
worth getting your engine running on MS2/Extra with your existing GMDIS
setup - so you have a baseline.
Once that is ok and you understand the process, save the attached
ms2_extra.s19 in the place of the one you extracted from the zip file
and go through the firmware loading process again.
You won't need to change any project properties in TunerStudio this time
and it should connect ok.
In the title bar you should see the version as 3.1.+ and today'* date.
If that passes ok, then remove power to your coils and injectors.
Load in your settings but this time set the spark mode to "LS1" and
output to wasted spark. Burn, power off, power on.
If you crank the engine, hopefully you will see some rpms and the three
LEDs will flash in sequence.
Next step is to hook up the coils (direct coil control) and strobe the
timing to see if it is anywhere close. The wheel phasing is set the same
as LS1 - you will have to find out if this is the same for the V6.
take things a step at a time and feel free to ask questions on the
forum.
Oh boy, what did I get myself into!? I can get most of that done tonight, but the last step will take a while. In order to hook up the coils, I need to build 3 driver circuits on the megasquirt PCB.
Thread Starter
Senior Member
True Car Nut
Joined: Jul 2010
Posts: 2,469
Likes: 0
From: Danville, Illinois
First, a modification to the tach input

Then, build a circuit for cam position sensor input

Then the modifications for output directly to the coils. Only need 3 circuits since I'm using waste-spark on a V6. (So no need for SparkD)
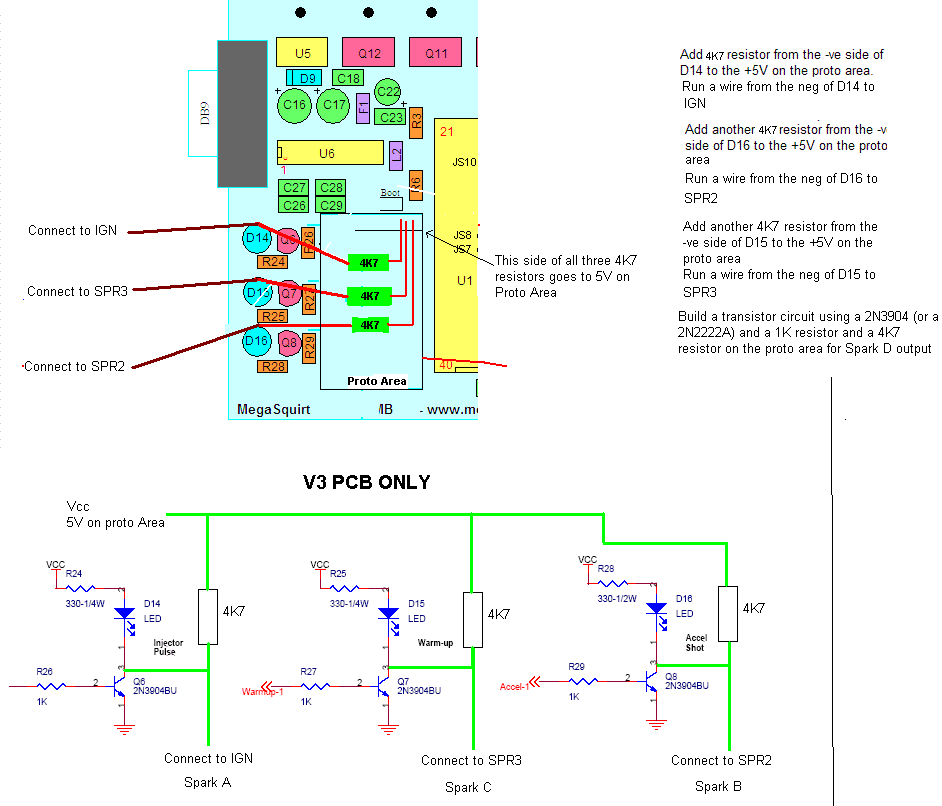
To wire it in, the crank position sensor goes to Pin 24. Cam position sensor to Pin 3.
Then, build a circuit for cam position sensor input
Then the modifications for output directly to the coils. Only need 3 circuits since I'm using waste-spark on a V6. (So no need for SparkD)
To wire it in, the crank position sensor goes to Pin 24. Cam position sensor to Pin 3.
