
Transmission & dyno tune TIME: Ed's Bonne Bulid Up

DINOSAURUS BOOSTUS


Expert Gearhead
Joined: Mar 2005
Posts: 41,391
Likes: 30
From: Enfield, CT


Originally Posted by McGrath
I forgot to mention above that the balancer was reinstalled with our friend MR. IMPACT.

Some things are in need of being tight. HB is one of them. You won't snap that bolt.

Thread Starter
Senior Member
Certified GM nut
Joined: May 2005
Posts: 2,155
Likes: 0
From: Wickliffe, Ohio
Well today was productive & insanely humid which made us work faster so we could get back to our cool houses. I installed the INTENSE oil pressure kit in the L32 and used some of my left over �Cam Shaft and Lifter pre-lube� on the plunger. I also used the oil filter adapter from the L67 since the Grand Prix�* adapter was so much different. Dropped the motor in and bolted it all up. Got the AC compressor bolted onto the motor again. Tomorrow should be a bunch of little stuff.
The Gasket almost came off whole, 2 swipes with a razor and the mating surface was clean!


My expensive engine cover. I�m still working on my valve covers which I�m hoping are going to turn out like Tommygloves'

Ed
The Gasket almost came off whole, 2 swipes with a razor and the mating surface was clean!
My expensive engine cover. I�m still working on my valve covers which I�m hoping are going to turn out like Tommygloves'
Ed
Thread Starter
Senior Member
Certified GM nut
Joined: May 2005
Posts: 2,155
Likes: 0
From: Wickliffe, Ohio
Originally Posted by BillBoost37
Ed...got your message a little bit ago.
You found that bolt right?
You found that bolt right?
No progress today at all some family issues came up :( Maybe tomorrow I'll get into the shop, get some work done..
Ed
Thread Starter
Senior Member
Certified GM nut
Joined: May 2005
Posts: 2,155
Likes: 0
From: Wickliffe, Ohio
Progress has been kinda slow the last few days. I didn't get much at all done over the weekend due to family stuff that came up. I had hoped on getting a lot done today after work but instead I got no where but pissed off. Got my valve covers on and dropped in a new battery and proceeded to bolt my front header on.... The Mac tools air ratchet I was using striped out one of the bolt holes on the head  then I figure WTF I'll just bolt in the cross over pipe and worry about that bolt hole later.
And this is what I'm up against with these headers yet again....
Front of the crossover matches up perfectly

Rear

When I first put theses on it was the opposite but with two other guys none of us could get this crossover pipe to line up perfectly so we found a happy medium and cranked the hell out of the bolts. I don't want to be dealing with this crap again.
Ed
And this is what I'm up against with these headers yet again....
Front of the crossover matches up perfectly
Rear
When I first put theses on it was the opposite but with two other guys none of us could get this crossover pipe to line up perfectly so we found a happy medium and cranked the hell out of the bolts. I don't want to be dealing with this crap again.
Ed
Thread Starter
Senior Member
Certified GM nut
Joined: May 2005
Posts: 2,155
Likes: 0
From: Wickliffe, Ohio
Well I bolted the Jenny 5 on today (still need to clean her case) & ran into another problem with my heater hose lines.
So what to do...? I called Bill! He gave me some good advice and such thanks a lot again Bill.
But here are some pictures�
Dirty� But Jenny likes that

Don�t bother trying to get those clamps without the tool, it�* only $45 at Sears.


Hose clamp tool

04 Comp G belt� I need one 4� longer; I�m off to Autozone to exchange it after I post this.

Ed
So what to do...? I called Bill! He gave me some good advice and such thanks a lot again Bill.
But here are some pictures�
Dirty� But Jenny likes that
Don�t bother trying to get those clamps without the tool, it�* only $45 at Sears.
Hose clamp tool
04 Comp G belt� I need one 4� longer; I�m off to Autozone to exchange it after I post this.
Ed

DINOSAURUS BOOSTUS
Expert Gearhead
Joined: Mar 2005
Posts: 41,391
Likes: 30
From: Enfield, CT
The pics I said I'd get for you.
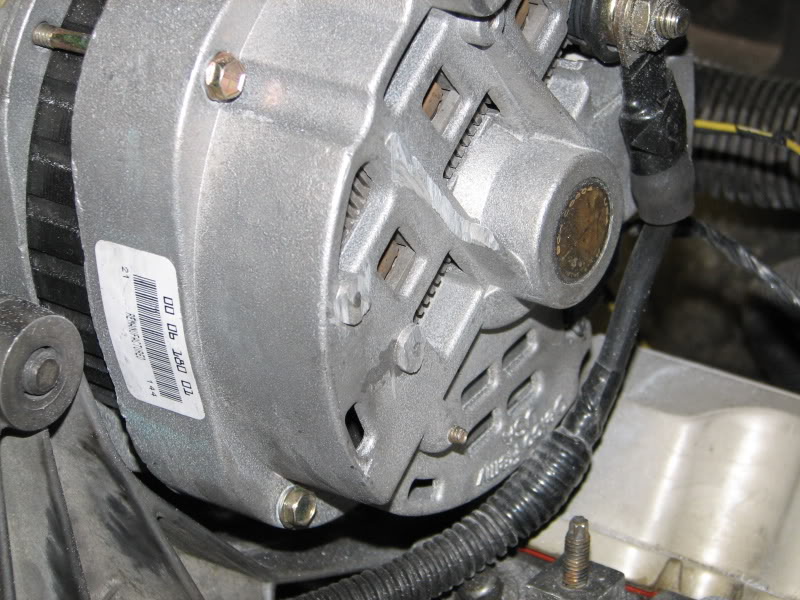
These first two show the offending parts that need a shave. Look in the hole for the SC bolt. You can see how much needs to go.


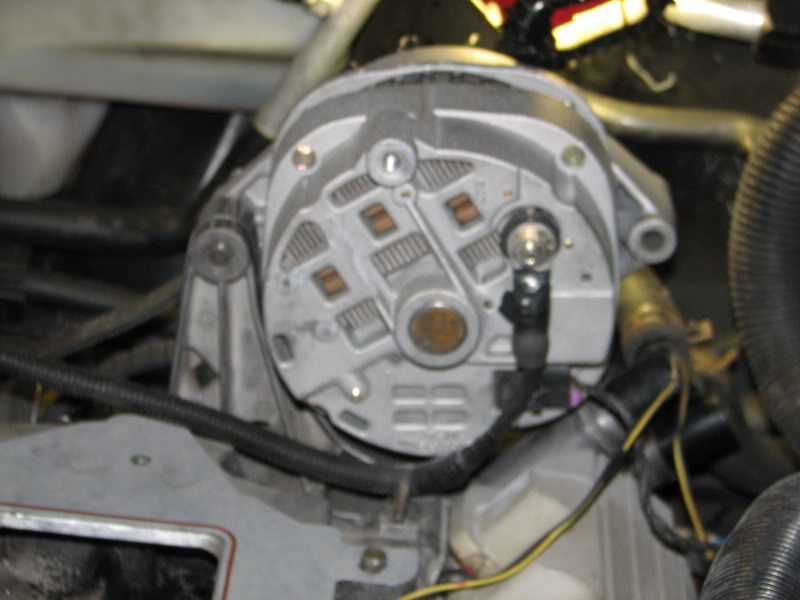
These show the modified areas. The nubs of the bolts..the thick part that stands out (some of it at least) and the fin to add support to the bearing.

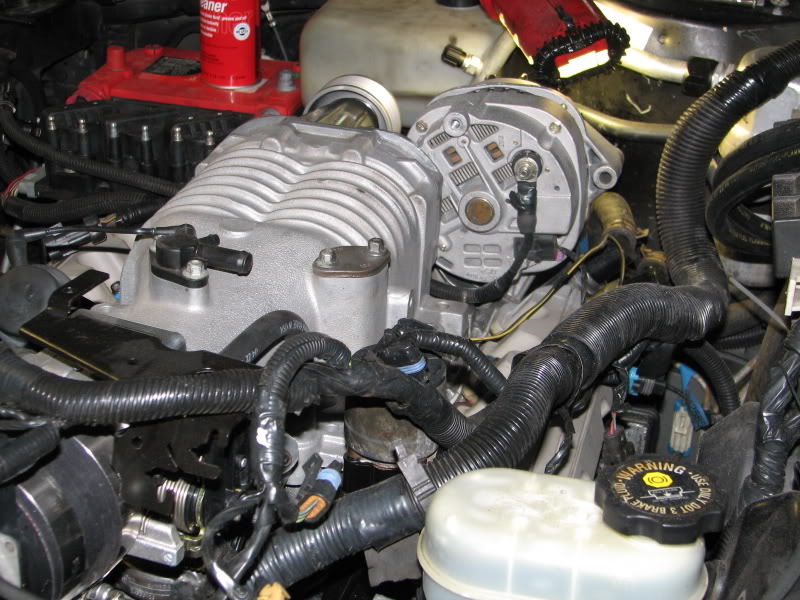
Overall view of the modifications

Where it all sits so that you can tell where the change has to happen.
These first two show the offending parts that need a shave. Look in the hole for the SC bolt. You can see how much needs to go.
These show the modified areas. The nubs of the bolts..the thick part that stands out (some of it at least) and the fin to add support to the bearing.
Overall view of the modifications
Where it all sits so that you can tell where the change has to happen.