
Retrofitting again!

Thread Starter
Senior Member
Posts like a Turbo
Joined: Feb 2007
Posts: 494
Likes: 0
From: Alabama

Some of you may remember my LeSabre and it'* retrofit. I'm not sure if I ever posted it here, but I ended up having to sell the car. Miss the car but don't regret the decision. However playing around with various bright lighting options in my truck has failed to yield the satisfaction of a true retrofit, so I'm about to tackle one of the most difficult retrofit jobs anyone is likely to encounter (reason why I haven't done it yet) and get my truck outfitted with genuine D2S bixenon projectors.

They'll be going in my little luxo-truck here...


As you may be able to tell, I have little to no space to work with. The headlights are tiny, space around them is cramped...pretty much limited in every direction. I think I can do it though. The results will be well worth it in the end.
I'll keep you guys posted!
.
.
.
They'll be going in my little luxo-truck here...
As you may be able to tell, I have little to no space to work with. The headlights are tiny, space around them is cramped...pretty much limited in every direction. I think I can do it though. The results will be well worth it in the end.
I'll keep you guys posted!
.
.
.
Thread Starter
Senior Member
Posts like a Turbo
Joined: Feb 2007
Posts: 494
Likes: 0
From: Alabama
Well either I missed the edit post time window or I just don't see the edit button...probably the former...
Got some spare time on my hands so imma throw up these pictures of the problems I'm facing both for my benefit to think it over and yours for anyone else who encounters problems like these...
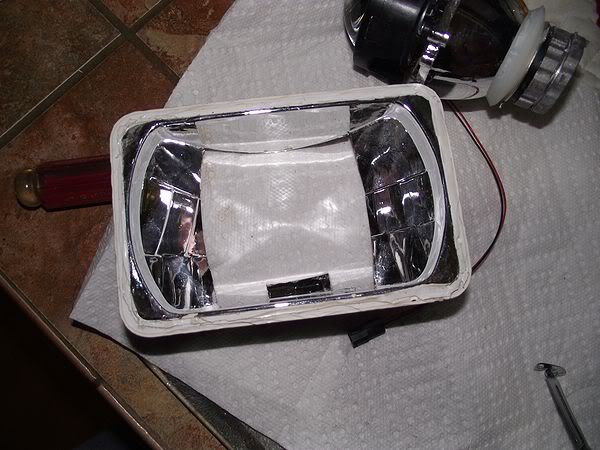
This is the headlight assembly.
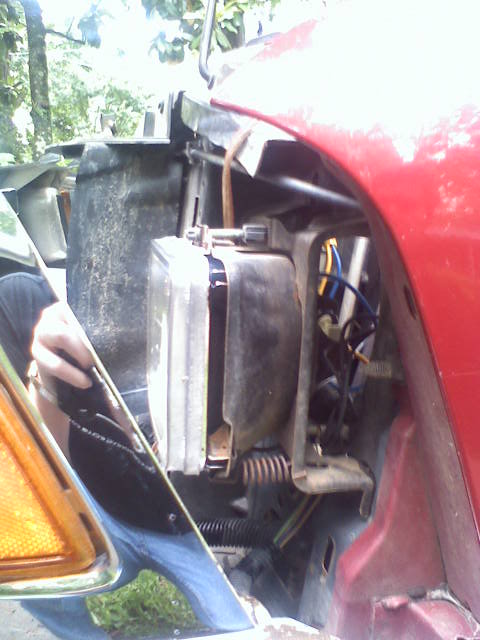
That infernal bucket behind the headlamp is one of my biggest problems...it'* going to make mounting a projector onto the housing very difficult at best. It pinches down at the end like so:

Meaning it will have to be cut...a lot.
Next problem...
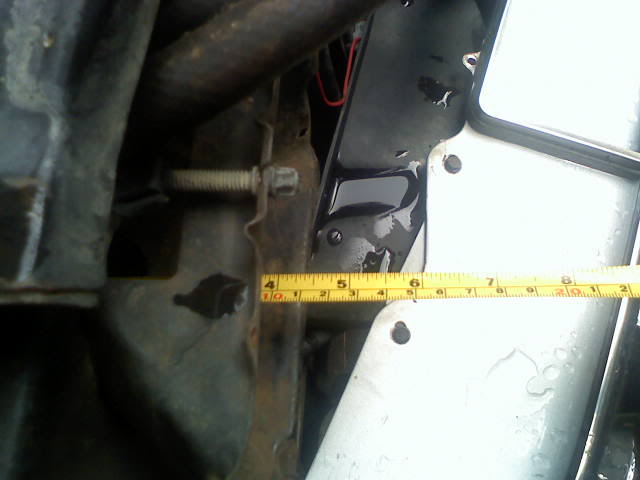
That'* how much space I have behind the headlight to the nearest obstruction, the battery, which can neither be moved or cut obviously. The shortest D2S bixenon projector I could find? 5". Ouch...gonna be close...
Likely I will have to extend the entire assembly as well as the headlamp itself forward by about an inch total. I'm hoping it won't be noticeable.

Shouldn't be. I may not have to move it an entire inch but that'* one of those things I'll just have to find out once I get the parts...
More later once stuff starts moving.
.
.
.
Got some spare time on my hands so imma throw up these pictures of the problems I'm facing both for my benefit to think it over and yours for anyone else who encounters problems like these...
This is the headlight assembly.
That infernal bucket behind the headlamp is one of my biggest problems...it'* going to make mounting a projector onto the housing very difficult at best. It pinches down at the end like so:
Meaning it will have to be cut...a lot.
Next problem...
That'* how much space I have behind the headlight to the nearest obstruction, the battery, which can neither be moved or cut obviously. The shortest D2S bixenon projector I could find? 5". Ouch...gonna be close...
Likely I will have to extend the entire assembly as well as the headlamp itself forward by about an inch total. I'm hoping it won't be noticeable.
Shouldn't be. I may not have to move it an entire inch but that'* one of those things I'll just have to find out once I get the parts...
More later once stuff starts moving.
.
.
.
Thread Starter
Senior Member
Posts like a Turbo
Joined: Feb 2007
Posts: 494
Likes: 0
From: Alabama
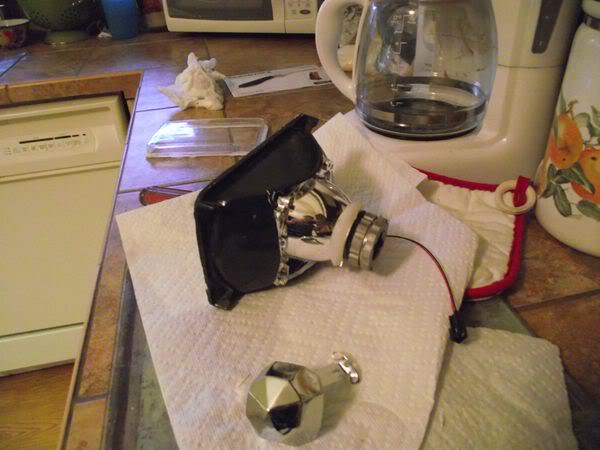
Projectors, bulbs, and the shrouds I'm gonna use arrived in the mail today.
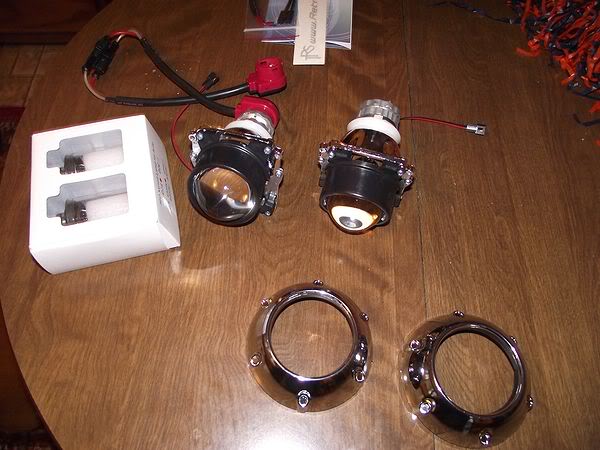
Also got a measurement on these. From tip of the projector to the base of the bulb connector is about 6" exactly.
The last part, the housings, are due to arrive in the mail tomorrow. More then, might start working on them then too.
.
.
.
Also got a measurement on these. From tip of the projector to the base of the bulb connector is about 6" exactly.
The last part, the housings, are due to arrive in the mail tomorrow. More then, might start working on them then too.
.
.
.


Thread Starter
Senior Member
Posts like a Turbo
Joined: Feb 2007
Posts: 494
Likes: 0
From: Alabama
Big updates today.
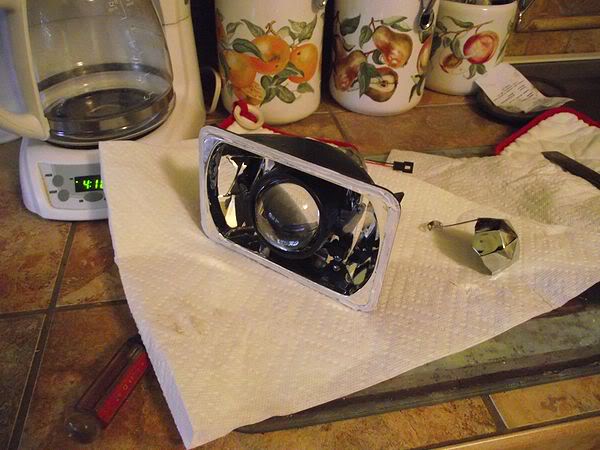
Housings arrived. Not much to say on those other than they are just the generic ebay 4x6 clear housings. These were not the 'projector' versions.
I could not, no matter how much heat I applied, get the glass lenses to come off. I ended up cracking one of the glass lenses (though the housing itself was okay) trying to get it off. Eventually, I just cut the glass off. Here'* what I did:
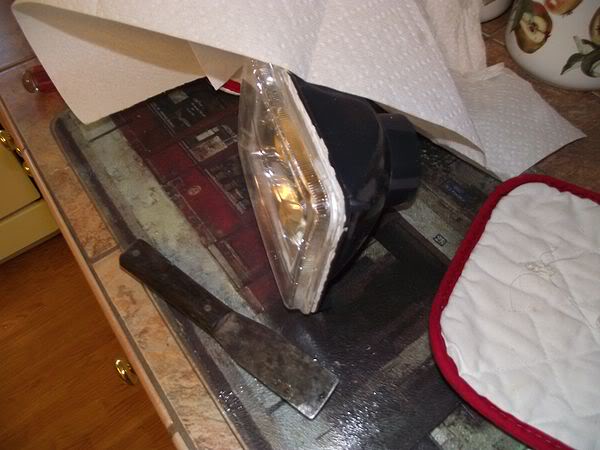
It'* hard to see, but I cut around the outside until I had just barely reached the bottom of the glass. By then, I was able to easily stick my gasket scraper in and scrape the lens off. Unfortunately it was too late to save the glass, but I'll know what to do for the next one. I ended up ordering another set so I could replace the glass. Make sure you wear a dust mask when cutting the housings.
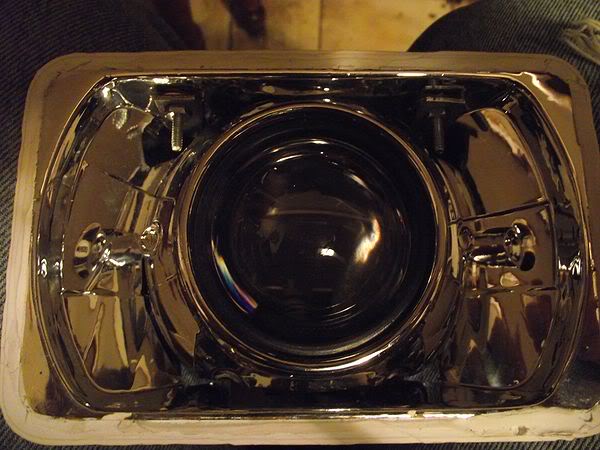
But, here it is with the glass off.

Next, it'* time to cut the back of the housing to fit the projector. I ended up realizing that the projector was just too huge to do anything but cut out a hole exactly it'* size.
Just resting in there:
Next it'* time to fab up some mounting brackets. I just used some 90 degree brackets that I believe are cabinet hardware, and it worked perfectly.
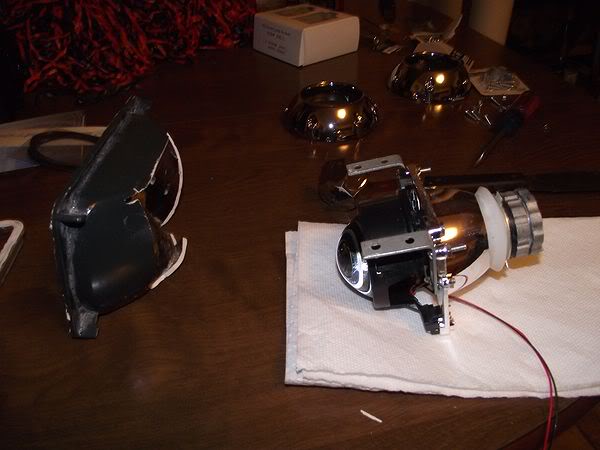
Drilled holes then bolted in:
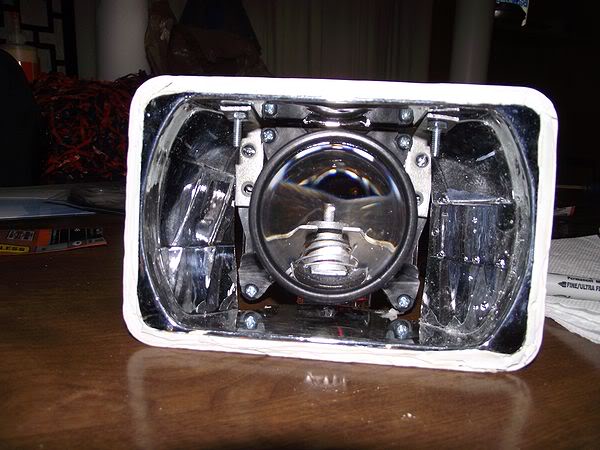
Checked the alignment, and everything seems fine including rotation.
Next it'* time to cut the shroud to fit.
Shroud in.

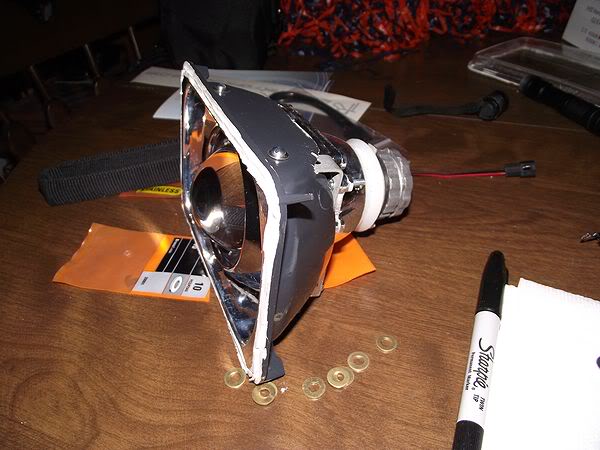
Unfortunately because of the incredibly tight space I have to work with in here I could not get the shroud to hide the mounting bolts. Oh well. It hides the rest of the hardware well.
That makes one side 98% done. All I have to do is seal up the rear, which I will do with lots of 3M aluminum foil tape.
Now I need to do the other side and begin modifying my truck to fit these housings. More later.
.
.
.
Housings arrived. Not much to say on those other than they are just the generic ebay 4x6 clear housings. These were not the 'projector' versions.
I could not, no matter how much heat I applied, get the glass lenses to come off. I ended up cracking one of the glass lenses (though the housing itself was okay) trying to get it off. Eventually, I just cut the glass off. Here'* what I did:
It'* hard to see, but I cut around the outside until I had just barely reached the bottom of the glass. By then, I was able to easily stick my gasket scraper in and scrape the lens off. Unfortunately it was too late to save the glass, but I'll know what to do for the next one. I ended up ordering another set so I could replace the glass. Make sure you wear a dust mask when cutting the housings.
But, here it is with the glass off.
Next, it'* time to cut the back of the housing to fit the projector. I ended up realizing that the projector was just too huge to do anything but cut out a hole exactly it'* size.
Just resting in there:
Next it'* time to fab up some mounting brackets. I just used some 90 degree brackets that I believe are cabinet hardware, and it worked perfectly.
Drilled holes then bolted in:
Checked the alignment, and everything seems fine including rotation.
Next it'* time to cut the shroud to fit.
Shroud in.
Unfortunately because of the incredibly tight space I have to work with in here I could not get the shroud to hide the mounting bolts. Oh well. It hides the rest of the hardware well.
That makes one side 98% done. All I have to do is seal up the rear, which I will do with lots of 3M aluminum foil tape.
Now I need to do the other side and begin modifying my truck to fit these housings. More later.
.
.
.

Senior Member
True Car Nut
Joined: Jun 2003
Posts: 7,270
Likes: 465
From: Las Cruces, NM

Why make your housings when these are around?\
http://cgi.ebay.com/ebaymotors/10000...Q5fAccessories
Or is there something special about these projectors?
http://cgi.ebay.com/ebaymotors/10000...Q5fAccessories
Or is there something special about these projectors?
Thread Starter
Senior Member
Posts like a Turbo
Joined: Feb 2007
Posts: 494
Likes: 0
From: Alabama
Thanks for the comments guys!
Radomir, I would but unfortunately I don't have a rivet gun. I think what I am going to do is once this gets closer to being done and I know everything is set okay I will cut off the part of the bolt below the nut in both housings so it minimizes what can be seen in there.
Rjolly, those housings aren't real projectors. They don't even have a cutoff shield. They are just a housing that looks sort of like projectors.
More fast progress for you guys.
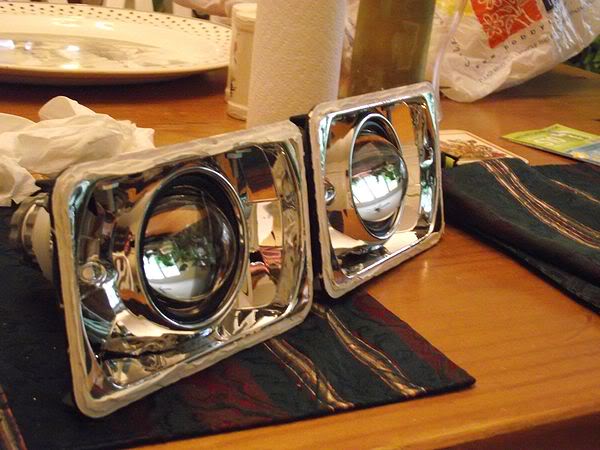

Other side is all caught up. Now it'* time to start modifying the truck to fit them. Hopefully I will be done today.
.
.
.
Radomir, I would but unfortunately I don't have a rivet gun. I think what I am going to do is once this gets closer to being done and I know everything is set okay I will cut off the part of the bolt below the nut in both housings so it minimizes what can be seen in there.
Rjolly, those housings aren't real projectors. They don't even have a cutoff shield. They are just a housing that looks sort of like projectors.
More fast progress for you guys.
Other side is all caught up. Now it'* time to start modifying the truck to fit them. Hopefully I will be done today.
.
.
.