
Retrofitting again!


Senior Member
True Car Nut
Joined: Apr 2009
Posts: 3,301
Likes: 1
From: STC, MN

Very nice. I liked watching the progress on the buicks retro fit, and I am enjoying this one as well. Have you thought about changing the mounting bolts direction so the threads and nut are on the outside of the housing and the head is inside? That might hide it better
Thread Starter
Senior Member
Posts like a Turbo
Joined: Feb 2007
Posts: 494
Likes: 0
From: Alabama
Thanks guys!
I think I know what you're saying about inverting the bolts, but unfortunately I can't because of clearance issues with the headlight bucket.
Honestly though they aren't even really that visible once on the truck!
Well this is 99% done. Unfortunately the 1% is keeping it from lighting up! Turns out my ballasts are crap. I got in contact with Matt at The Retrofit Source and he rushed a new set of quality ballasts my way. Really got to give those guys props.
But other than not lighting up (lol) this retrofit is DONE!
These 6mm bolts are needed to attach the headlight bucket onto the truck. I got some extended bolts (6mm x 50mm) so I could bring the assembly out a bit for spacing. 50mm was a bit unnecessary though, I think I could have gotten away with 30 or 40mm.

First, it'* time to modify the buckets...

As it turns out, it'* only necessary to cut the 'wings' off of them for the projector to fit.

Projector in snugly.

Time to figure out how much I need to space the headlamp assembly away from the truck. For me, the magic number of washers for all mounting bolts was 10.

All mounted up...
Next it'* time to seal these up...

I used aluminum tape wrapped in several layers to seal the holes around the back. Works great.
3M window weld works great to seal the lenses up front.

A thin line of it all around is all that is necessary...

All sealed up.

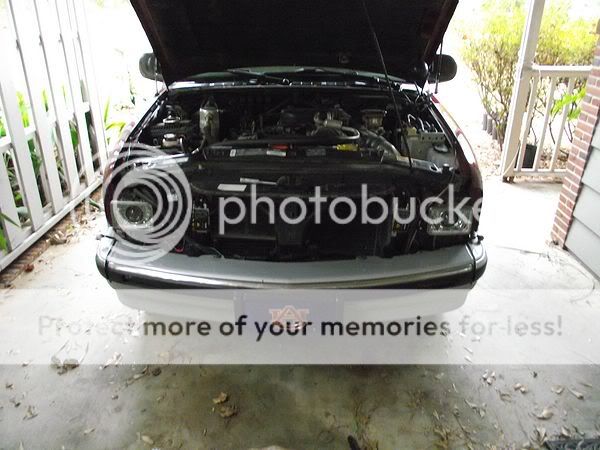
I found out much to my happiness that I didn't have to modify the grille at all even with the headlights extended outward. So, I just went ahead and put the grille back on and snapped some finished shots!


The lights don't stick out far at all...
Unfortunately as I mentioned earlier, they don't light up. At least not reliably, so no output shots yet. When one did fire up though the output looked great.
More Friday or Saturday when the ballasts arrive, or maybe some more shots of the truck outside of my driveway...
.
.
.
I think I know what you're saying about inverting the bolts, but unfortunately I can't because of clearance issues with the headlight bucket.
Honestly though they aren't even really that visible once on the truck!
Well this is 99% done. Unfortunately the 1% is keeping it from lighting up! Turns out my ballasts are crap. I got in contact with Matt at The Retrofit Source and he rushed a new set of quality ballasts my way. Really got to give those guys props.
But other than not lighting up (lol) this retrofit is DONE!
These 6mm bolts are needed to attach the headlight bucket onto the truck. I got some extended bolts (6mm x 50mm) so I could bring the assembly out a bit for spacing. 50mm was a bit unnecessary though, I think I could have gotten away with 30 or 40mm.
First, it'* time to modify the buckets...
As it turns out, it'* only necessary to cut the 'wings' off of them for the projector to fit.
Projector in snugly.
Time to figure out how much I need to space the headlamp assembly away from the truck. For me, the magic number of washers for all mounting bolts was 10.
All mounted up...
Next it'* time to seal these up...
I used aluminum tape wrapped in several layers to seal the holes around the back. Works great.
3M window weld works great to seal the lenses up front.
A thin line of it all around is all that is necessary...
All sealed up.
I found out much to my happiness that I didn't have to modify the grille at all even with the headlights extended outward. So, I just went ahead and put the grille back on and snapped some finished shots!
The lights don't stick out far at all...
Unfortunately as I mentioned earlier, they don't light up. At least not reliably, so no output shots yet. When one did fire up though the output looked great.
More Friday or Saturday when the ballasts arrive, or maybe some more shots of the truck outside of my driveway...
.
.
.

Thread Starter
Senior Member
Posts like a Turbo
Joined: Feb 2007
Posts: 494
Likes: 0
From: Alabama
Me either! Here'* half of it though.
Well I couldn't resist, and I just had to get some kind of output shot. So I managed to get one of them firing and took some shots of the low and high beam!
Remember this is just with ONE light working...
Low beam...

High beam...

I cannot wait until both are working.
By the way, my rotation isn't off, the driveway is just sloped to the left. Driving it up and down my street, the rotation seems to be absolutely perfect.
.
.
.
Well I couldn't resist, and I just had to get some kind of output shot. So I managed to get one of them firing and took some shots of the low and high beam!
Remember this is just with ONE light working...
Low beam...
High beam...
I cannot wait until both are working.
By the way, my rotation isn't off, the driveway is just sloped to the left. Driving it up and down my street, the rotation seems to be absolutely perfect.
.
.
.