
Custom gauge pod for SilverBullet (split from forced inducti


Senior Member
Posts like a Northstar
Joined: Jun 2005
Posts: 700
Likes: 0
From: Yulee , FL ___ SEBF Survivor

I would glass over the cardboard, sand it down and get it as smooth as possible. I would then spread bondo over the whole thing, smooth it out as much as possible (this may take 2 times with bondo. I would then prime it, then lightly dust it with black spray paint. After that sand some more, and the black spray paint will sand off, but leave black paint in the low spots that you will have to smooth over some more. After all that you have left is adhesion promoter, texture, and paint.

Junior Member
Joined: Jun 2002
Posts: 0
Likes: 0
I would glass over the cardboard, sand it down and get it as smooth as possible. I would then spread bondo over the whole thing, smooth it out as much as possible (this may take 2 times with bondo. I would then prime it, then lightly dust it with black spray paint. After that sand some more, and the black spray paint will sand off, but leave black paint in the low spots that you will have to smooth over some more. After all that you have left is adhesion promoter, texture, and paint.

Looks like a time consuming process, with all the drying time and sanding, but I'm sure the end result would be a perfect showpiece.
Good way to spend the winter. Puttering away on little projects like this. Breaks up the monotony.
How much should I overlap the fibreglass onto the plastic?

Senior Member
True Car Nut
Joined: Aug 2005
Posts: 5,798
Likes: 0
Originally Posted by ChaseSmith
I would glass over the cardboard, sand it down and get it as smooth as possible. I would then spread bondo over the whole thing, smooth it out as much as possible (this may take 2 times with bondo. I would then prime it, then lightly dust it with black spray paint. After that sand some more, and the black spray paint will sand off, but leave black paint in the low spots that you will have to smooth over some more. After all that you have left is adhesion promoter, texture, and paint.
Originally Posted by 2000SilverBullet
Thanks Chase.
Looks like a time consuming process, with all the drying time and sanding, but I'm sure the end result would be a perfect showpiece.
Good way to spend the winter. Puttering away on little projects like this. Breaks up the monotony.
How much should I overlap the fibreglass onto the plastic?
Looks like a time consuming process, with all the drying time and sanding, but I'm sure the end result would be a perfect showpiece.
Good way to spend the winter. Puttering away on little projects like this. Breaks up the monotony.
How much should I overlap the fibreglass onto the plastic?
Junior Member
Joined: Jun 2002
Posts: 0
Likes: 0
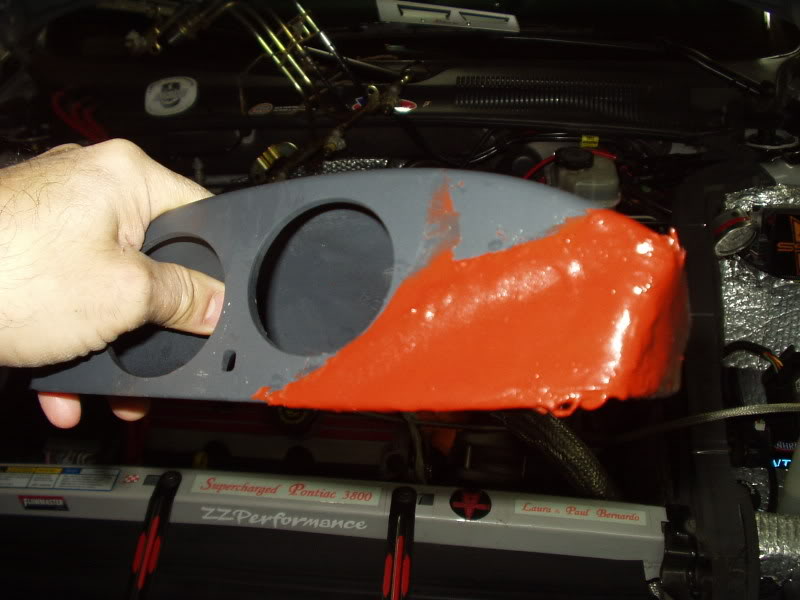
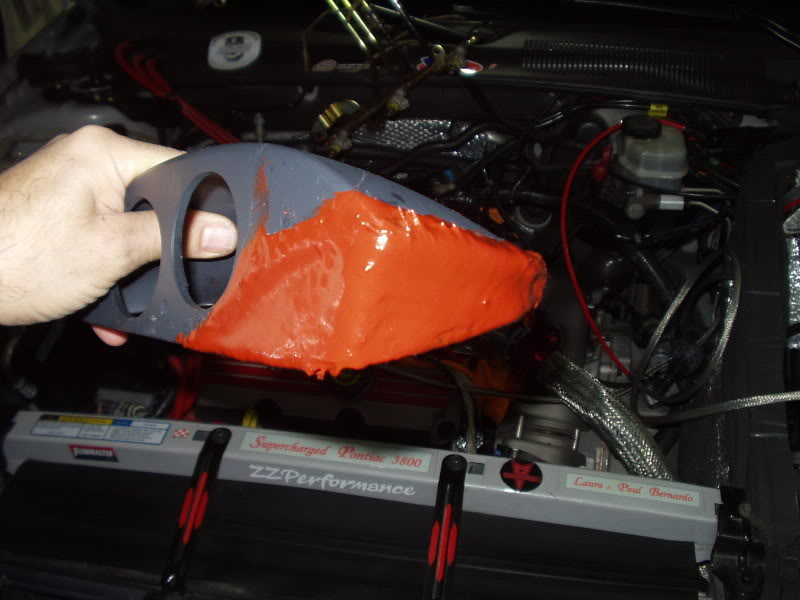
Well, I gave it a coat of fibreglass.............. 
I HATE this kind of work.
What a fricken mess
I almost thru the whole disaster in the garbage. Glass fibres sticking out everywhere....fibre glass resin everywhere..yuckkkk.
My hands are covered with this craap and I have to go to the company Christmas party in about 2 hours. :(
.....so I put it down in frustration to dry and back to polishing my throttle body. :P


Thread Starter
Senior Member
Certified Car Nut
Joined: Oct 2003
Posts: 19,756
Likes: 1
ok looking good....it still seems that you have a little evidence of the seam from the new addition....now blend in the conrners......you can either choose to add more glass or start the bondo at this point...the bondo is easier to make smooth 
Junior Member
Joined: Jun 2002
Posts: 0
Likes: 0
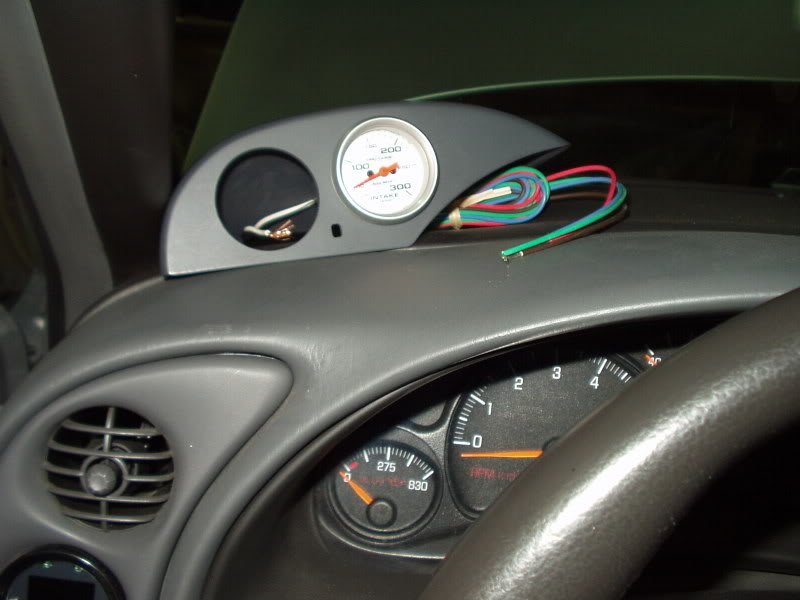
Ya Peter, but I didn't have much choice on the shape, so have to make due with what I have. I'm sure you could turn this into a show piece.
The pic above is roughly where it will end up.
You can see in the other pics above how well the back fits to the odd contour of the Bonne dash.