
Badge overlay, step by step. And a problem. UPDATE 4/26


Senior Member
True Car Nut
Joined: Nov 2002
Posts: 6,042
Likes: 5
From: Texarkana, Texas

I'd definatly do it on the doors, Trunk badges kinda break the 'smooth' look of the back end. Those badges look factory and the factory position is the perfect place to hide them.

Thread Starter
Junior Member
Posts like a Ricer Type-R
Joined: Aug 2002
Posts: 11
Likes: 13
It'll actually be more of a sleeper. 
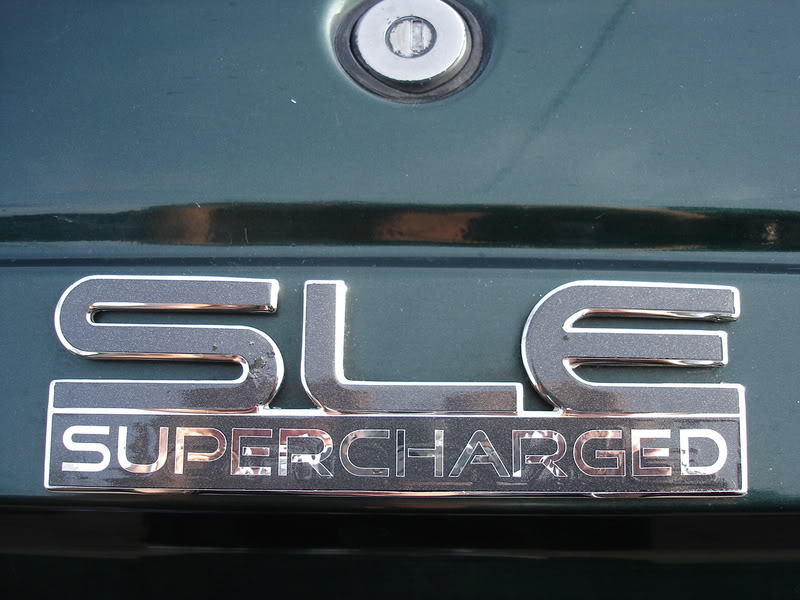
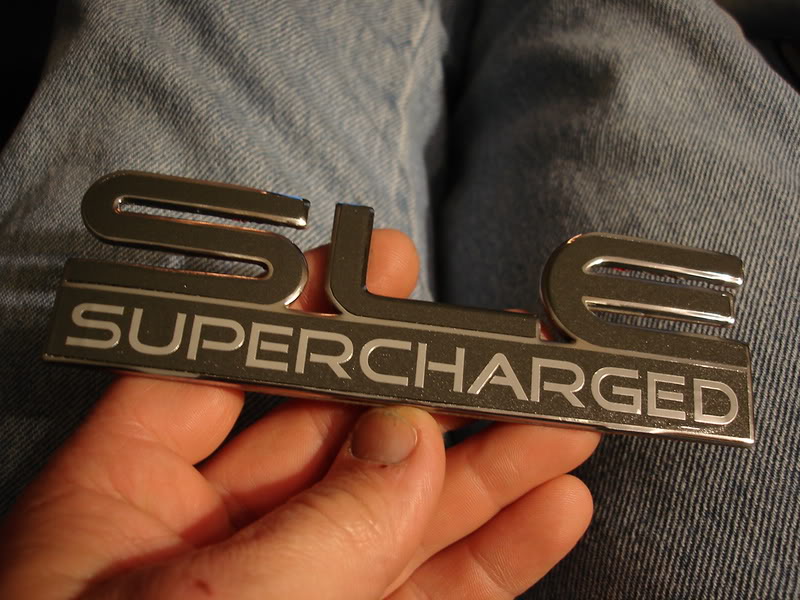
The Supercharged text on these is much smaller than the factory badges. I'll take a comparison pic shortly (I don't have the SLE here, but I do have two spare badges for it still, OEM style).
The Supercharged text on these is much smaller than the factory badges. I'll take a comparison pic shortly (I don't have the SLE here, but I do have two spare badges for it still, OEM style).
Thread Starter
Junior Member
Posts like a Ricer Type-R
Joined: Aug 2002
Posts: 11
Likes: 13
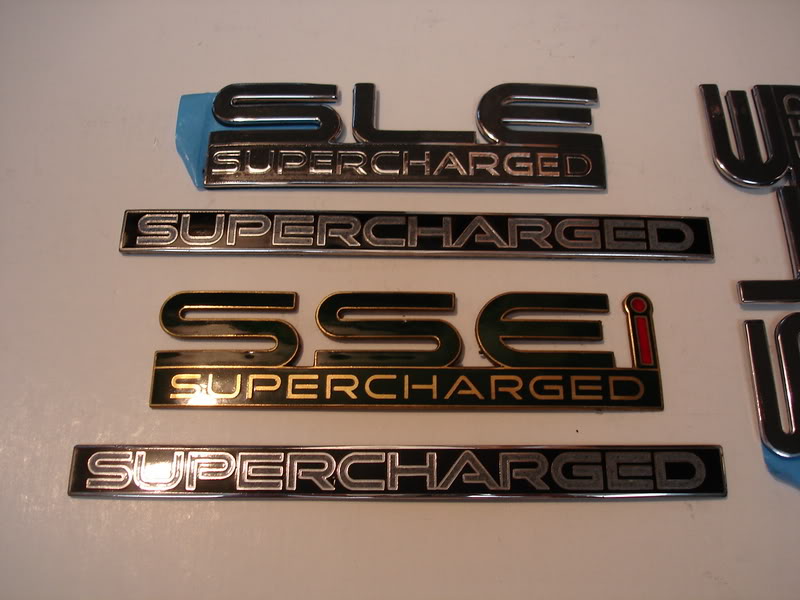
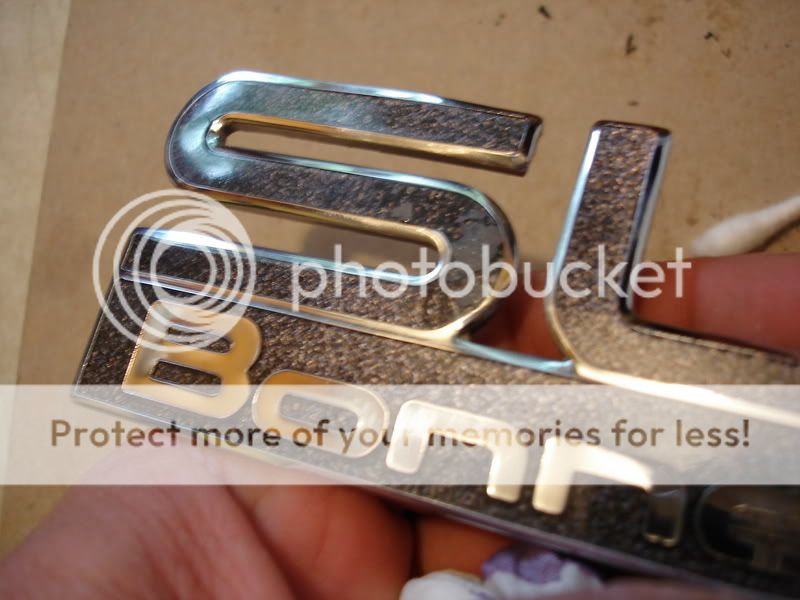
Here'* the badges for comparison. OEM SLE(sc) and SSE(sc) get the black and silver ones.
I like the matching theme between the cars much better now, and a more subtle and hard to read supercharged text:
I like the matching theme between the cars much better now, and a more subtle and hard to read supercharged text:


Thread Starter
Junior Member
Posts like a Ricer Type-R
Joined: Aug 2002
Posts: 11
Likes: 13
I'm considering a light wet-sanding, and a few more coats before install. I won't have the car back until Tues/Wed.
Then the trunk badge comes off for repair and re-overlay/clearcoat.
Then the trunk badge comes off for repair and re-overlay/clearcoat.
Thread Starter
Junior Member
Posts like a Ricer Type-R
Joined: Aug 2002
Posts: 11
Likes: 13
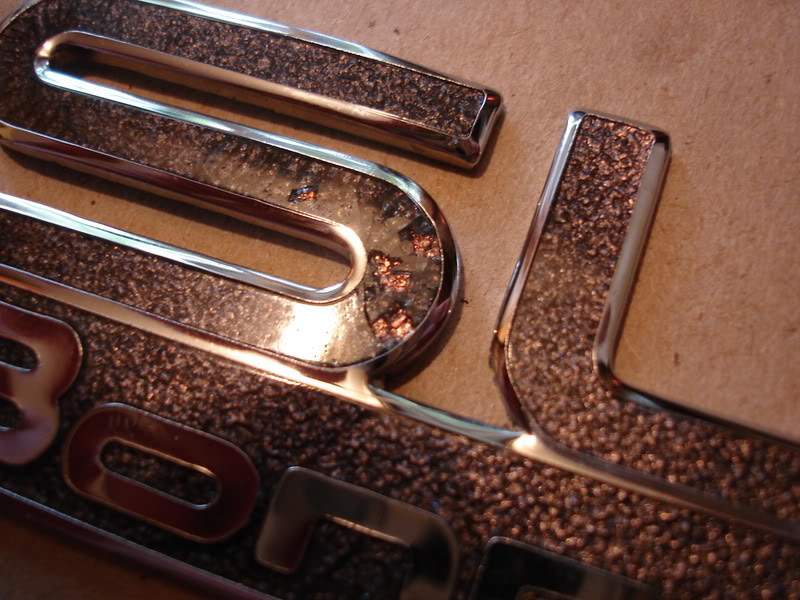
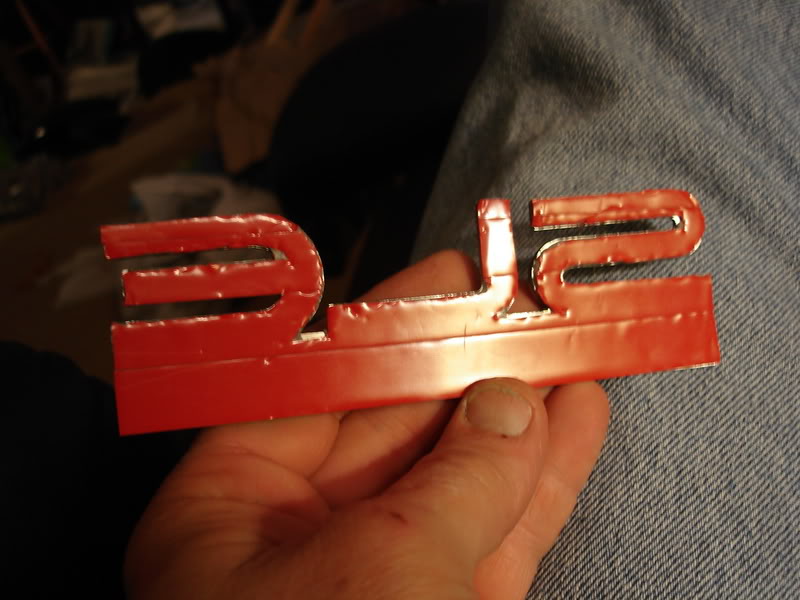
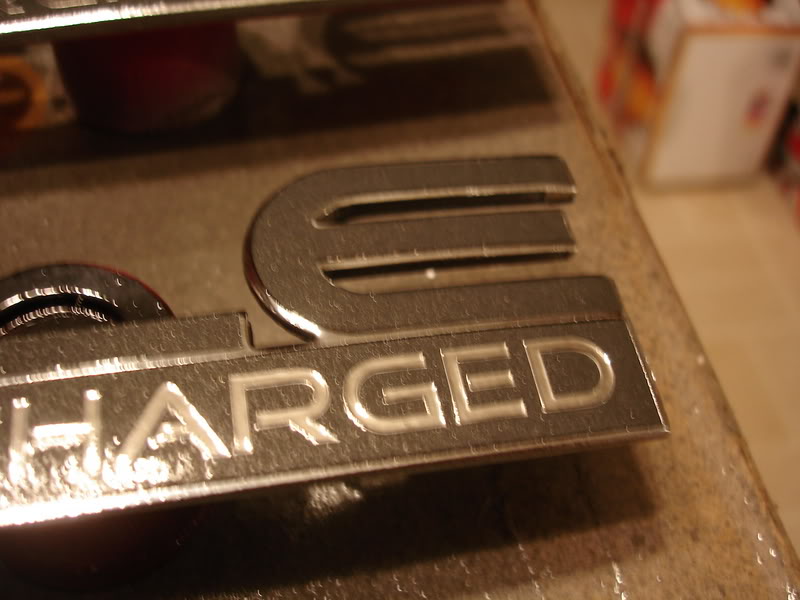
Back to the problem with the *. Remember this?
I removed the badge from the car (still haven't installed the other two yet either) for repairs.
damage:

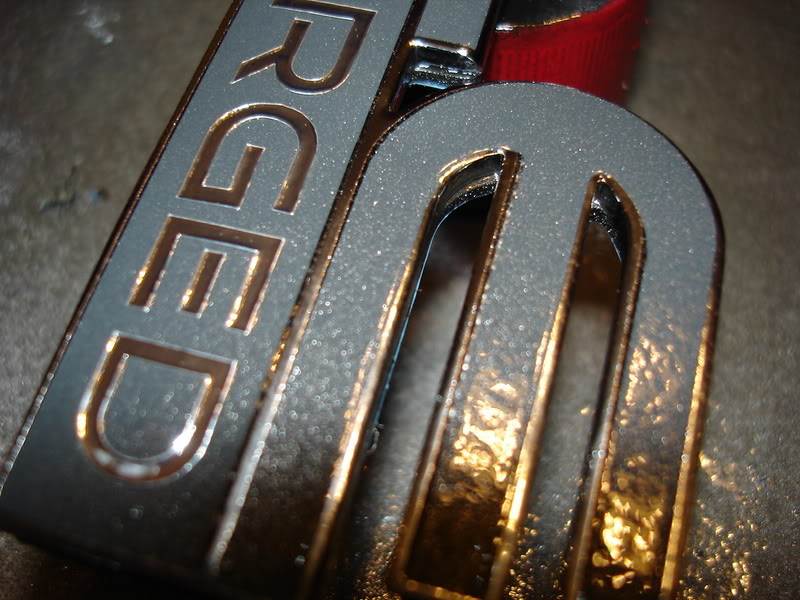
jb weld going on:


Some careful sanding:
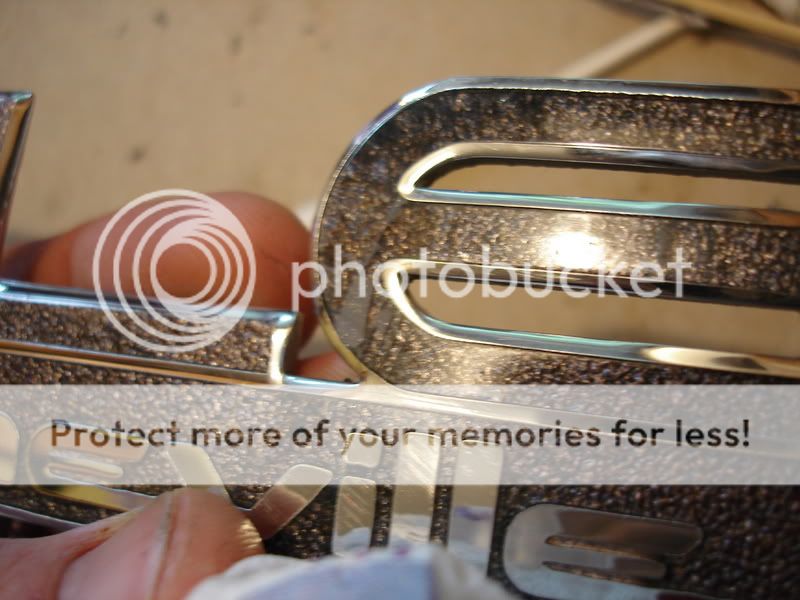
New adhesive:


New overlay again:
IMPORTANT NOTES:
1. Cut these apart, letter by letter and install them one letter at a time on the big part. The lower text can be applied all at once. By doing the large letters one at a time, you get much better alignment and a more factory look.
2. The clearcoat serves two purposes. First, it makes it look factory. Second, it protects the overlay. Makes it nearly as durable and long-lasting as factory badges.
3. LIGHTLY DUST on the first 3 or 4 coats of clear in a warm area that dries quickly. This allows it to 'tack' the vinyl overlay down, so the solvents in subsequent coats of clear don't try to lift the edges of the overlay text. This happened to me on one badge, so I peeled it and started over.


These may get a couple more medium/heavy coats this afternoon. Almost there.
I removed the badge from the car (still haven't installed the other two yet either) for repairs.
damage:
jb weld going on:
Some careful sanding:
New adhesive:
New overlay again:
IMPORTANT NOTES:
1. Cut these apart, letter by letter and install them one letter at a time on the big part. The lower text can be applied all at once. By doing the large letters one at a time, you get much better alignment and a more factory look.
2. The clearcoat serves two purposes. First, it makes it look factory. Second, it protects the overlay. Makes it nearly as durable and long-lasting as factory badges.
3. LIGHTLY DUST on the first 3 or 4 coats of clear in a warm area that dries quickly. This allows it to 'tack' the vinyl overlay down, so the solvents in subsequent coats of clear don't try to lift the edges of the overlay text. This happened to me on one badge, so I peeled it and started over.
These may get a couple more medium/heavy coats this afternoon. Almost there.


Thread
Thread Starter
Forum
Replies
Last Post
harofreak00
Your Ride: GM Pictures & Videos
0
Nov 11, 2006 09:54 PM
vptruman
Detailing & Appearance
10
Apr 24, 2006 11:21 AM
ga93sle
Your Ride: GM Pictures & Videos
16
Dec 8, 2005 09:54 PM
killer_cr80r
Lounge
8
Apr 3, 2004 07:16 PM
evilsaint
1992-1999
2
Oct 22, 2003 01:09 AM