
Badge overlay, step by step. And a problem. UPDATE 4/26


Thread Starter
Junior Member
Posts like a Ricer Type-R
Joined: Aug 2002
Posts: 11
Likes: 13

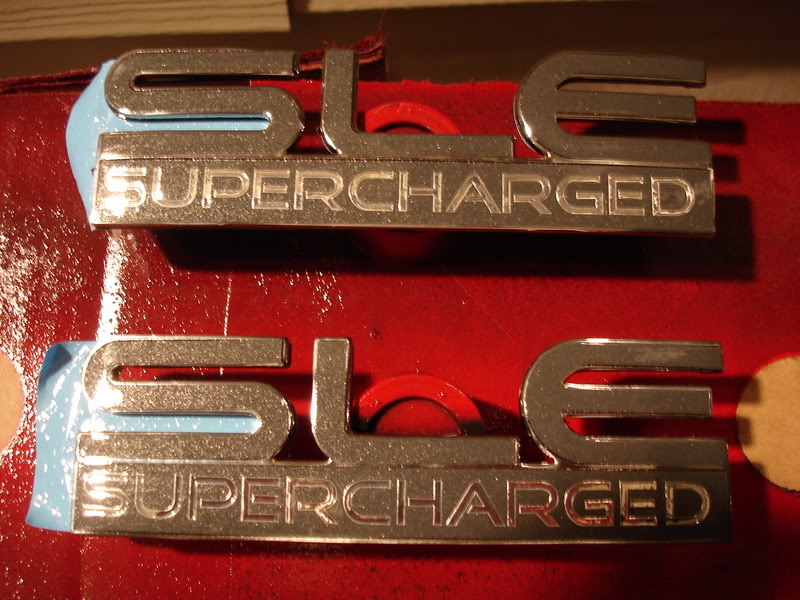
Before:

Target:
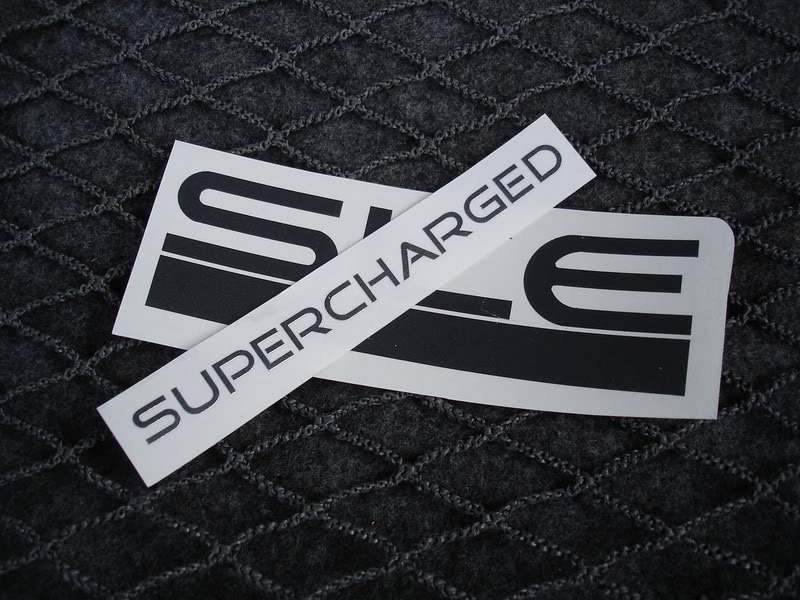
Ready to roll. The clear retainer layer really helps when aligning:
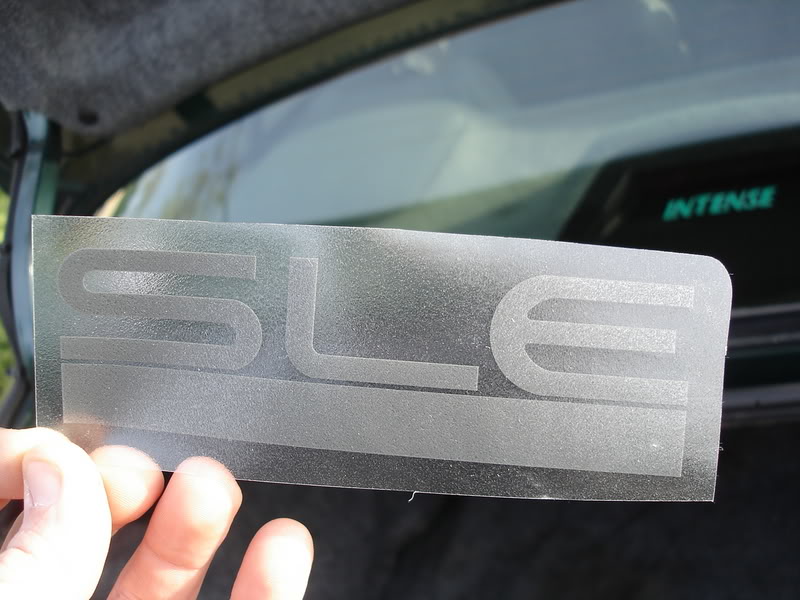
Notice the problem on the *? Some of the 'glass' insert was pitted, and coming apart. Good thing I ordered extra sets. I'll have to fill those pits later and replace the *.

My advice? Inspect your badge for problems first. Little pieces coming out of my * were caused by the big letters not being a PERFECT match. Had to peel it, and it took some of the badge material out.
My advice is to do this LETTER BY LETTER. Cut them out seperately. Perfect overlay can be achieved this way.
I'll peel and repair the *, then re-overlay it later.
Target:
Ready to roll. The clear retainer layer really helps when aligning:
Notice the problem on the *? Some of the 'glass' insert was pitted, and coming apart. Good thing I ordered extra sets. I'll have to fill those pits later and replace the *.
My advice? Inspect your badge for problems first. Little pieces coming out of my * were caused by the big letters not being a PERFECT match. Had to peel it, and it took some of the badge material out.
My advice is to do this LETTER BY LETTER. Cut them out seperately. Perfect overlay can be achieved this way.
I'll peel and repair the *, then re-overlay it later.

Thread Starter
Junior Member
Posts like a Ricer Type-R
Joined: Aug 2002
Posts: 11
Likes: 13
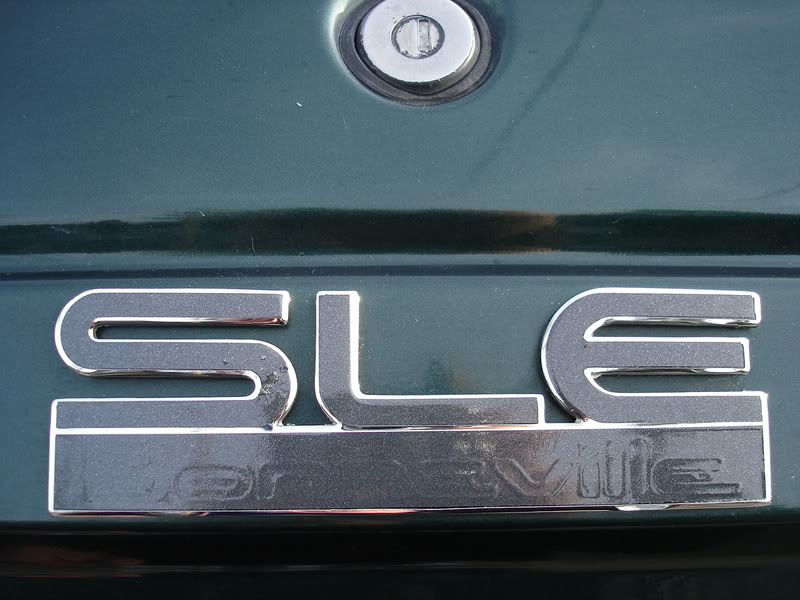
I need to get my hands on a new badge, or one in better condition. I'd like to do the overlay, letter by letter, then clearcoat it all in before I put the badge on the car.

Senior Member
Posts like a Turbo
Joined: Aug 2006
Posts: 424
Likes: 0
From: bloomington, IN
Originally Posted by willwren
I need to get my hands on a new badge, or one in better condition. I'd like to do the overlay, letter by letter, then clearcoat it all in before I put the badge on the car.
I know what you mean, I ruined one of my "Supercharged" overlays the first time I stuck it on there, Besides that I ordered the ones in CHROME and got RED overlays which were even better! the Seller offered to send me chrome ones but the red looks way better IMO, I used mine on the rear deck lid just under the center taillamp to the right side not centered and the result was undeniable
 I need to e-mail him back and ask if he has any "Reflective" ones


Thread Starter
Junior Member
Posts like a Ricer Type-R
Joined: Aug 2002
Posts: 11
Likes: 13
The E was only a challenge because I didn't do it seperately. I did it with the L. I should have done all 3 letters one at a time.
I will do it that way when I either repair the pitted * on this badge, or get a replacement. For now, you have to look very close to see the issues.
I will do it that way when I either repair the pitted * on this badge, or get a replacement. For now, you have to look very close to see the issues.
Thread Starter
Junior Member
Posts like a Ricer Type-R
Joined: Aug 2002
Posts: 11
Likes: 13
UPDATE:
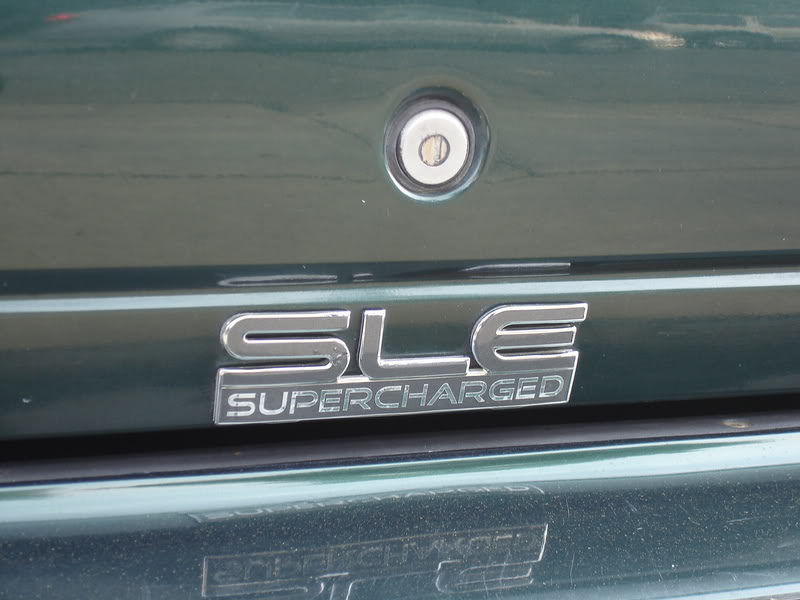
Still haven't fixed the tail badge (the car is in the trans shop) but that will come soon. I have the replacement overlay for use after I fix the badge. It will be removed from the car for that so I can do the same to it as I did these new ones. Results were much better with each letter/piece of the overlay applied seperately. I cut them out and applied them, then put 6 coats of acyrlic clear coat over them to give them more of a factory look and protect the vinyl. These will never peel.


Still haven't fixed the tail badge (the car is in the trans shop) but that will come soon. I have the replacement overlay for use after I fix the badge. It will be removed from the car for that so I can do the same to it as I did these new ones. Results were much better with each letter/piece of the overlay applied seperately. I cut them out and applied them, then put 6 coats of acyrlic clear coat over them to give them more of a factory look and protect the vinyl. These will never peel.

Thread Starter
Junior Member
Posts like a Ricer Type-R
Joined: Aug 2002
Posts: 11
Likes: 13
If the SLE was my only car, I'd stick the one on the trunk, but considering I have two, and the SSEi has door badges that are TOTALLY different than the plain Supercharged badges on the SLE, I'm very close to putting these on the doors to keep the theme the same between the two cars.