
67 Camaro stereo build.


Thread Starter
Junior Member
Posts like a Ricer Type-R
Joined: Aug 2012
Posts: 18
Likes: 0

Next I wanted to add a little detail to the amp rack cover.
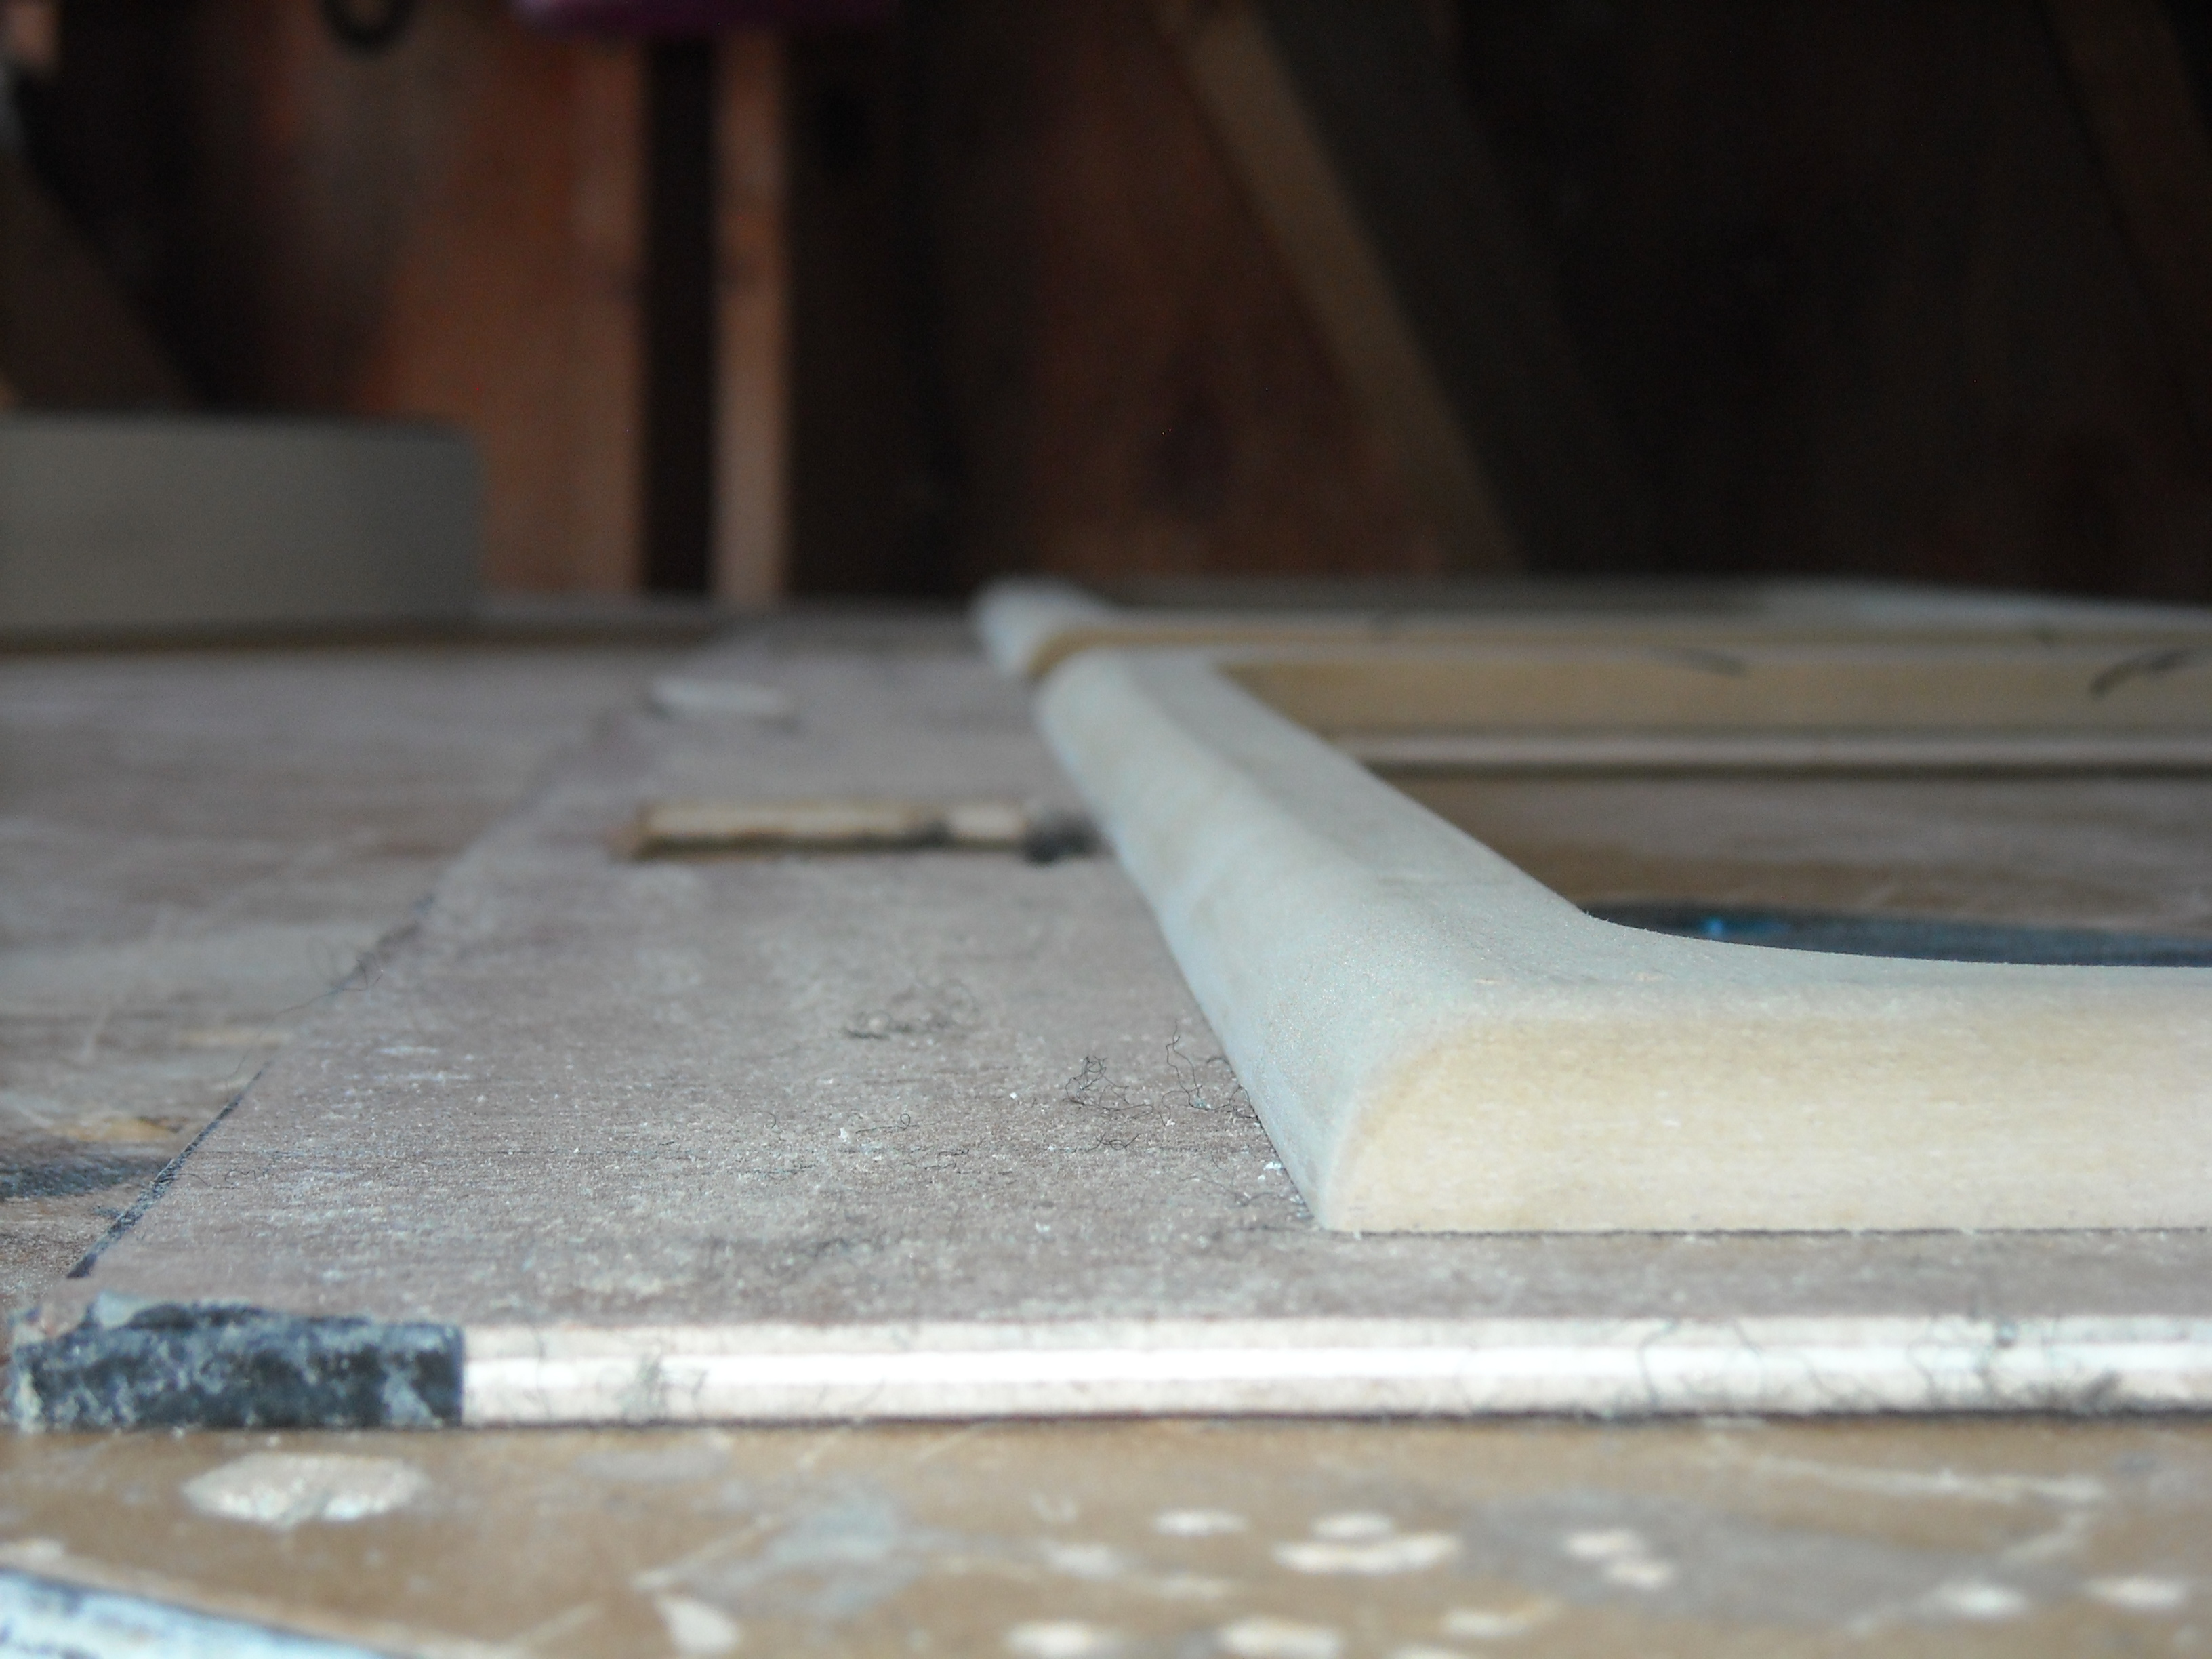
I started off with a couple profile trims, then used the roundover bit and sanded smooth.
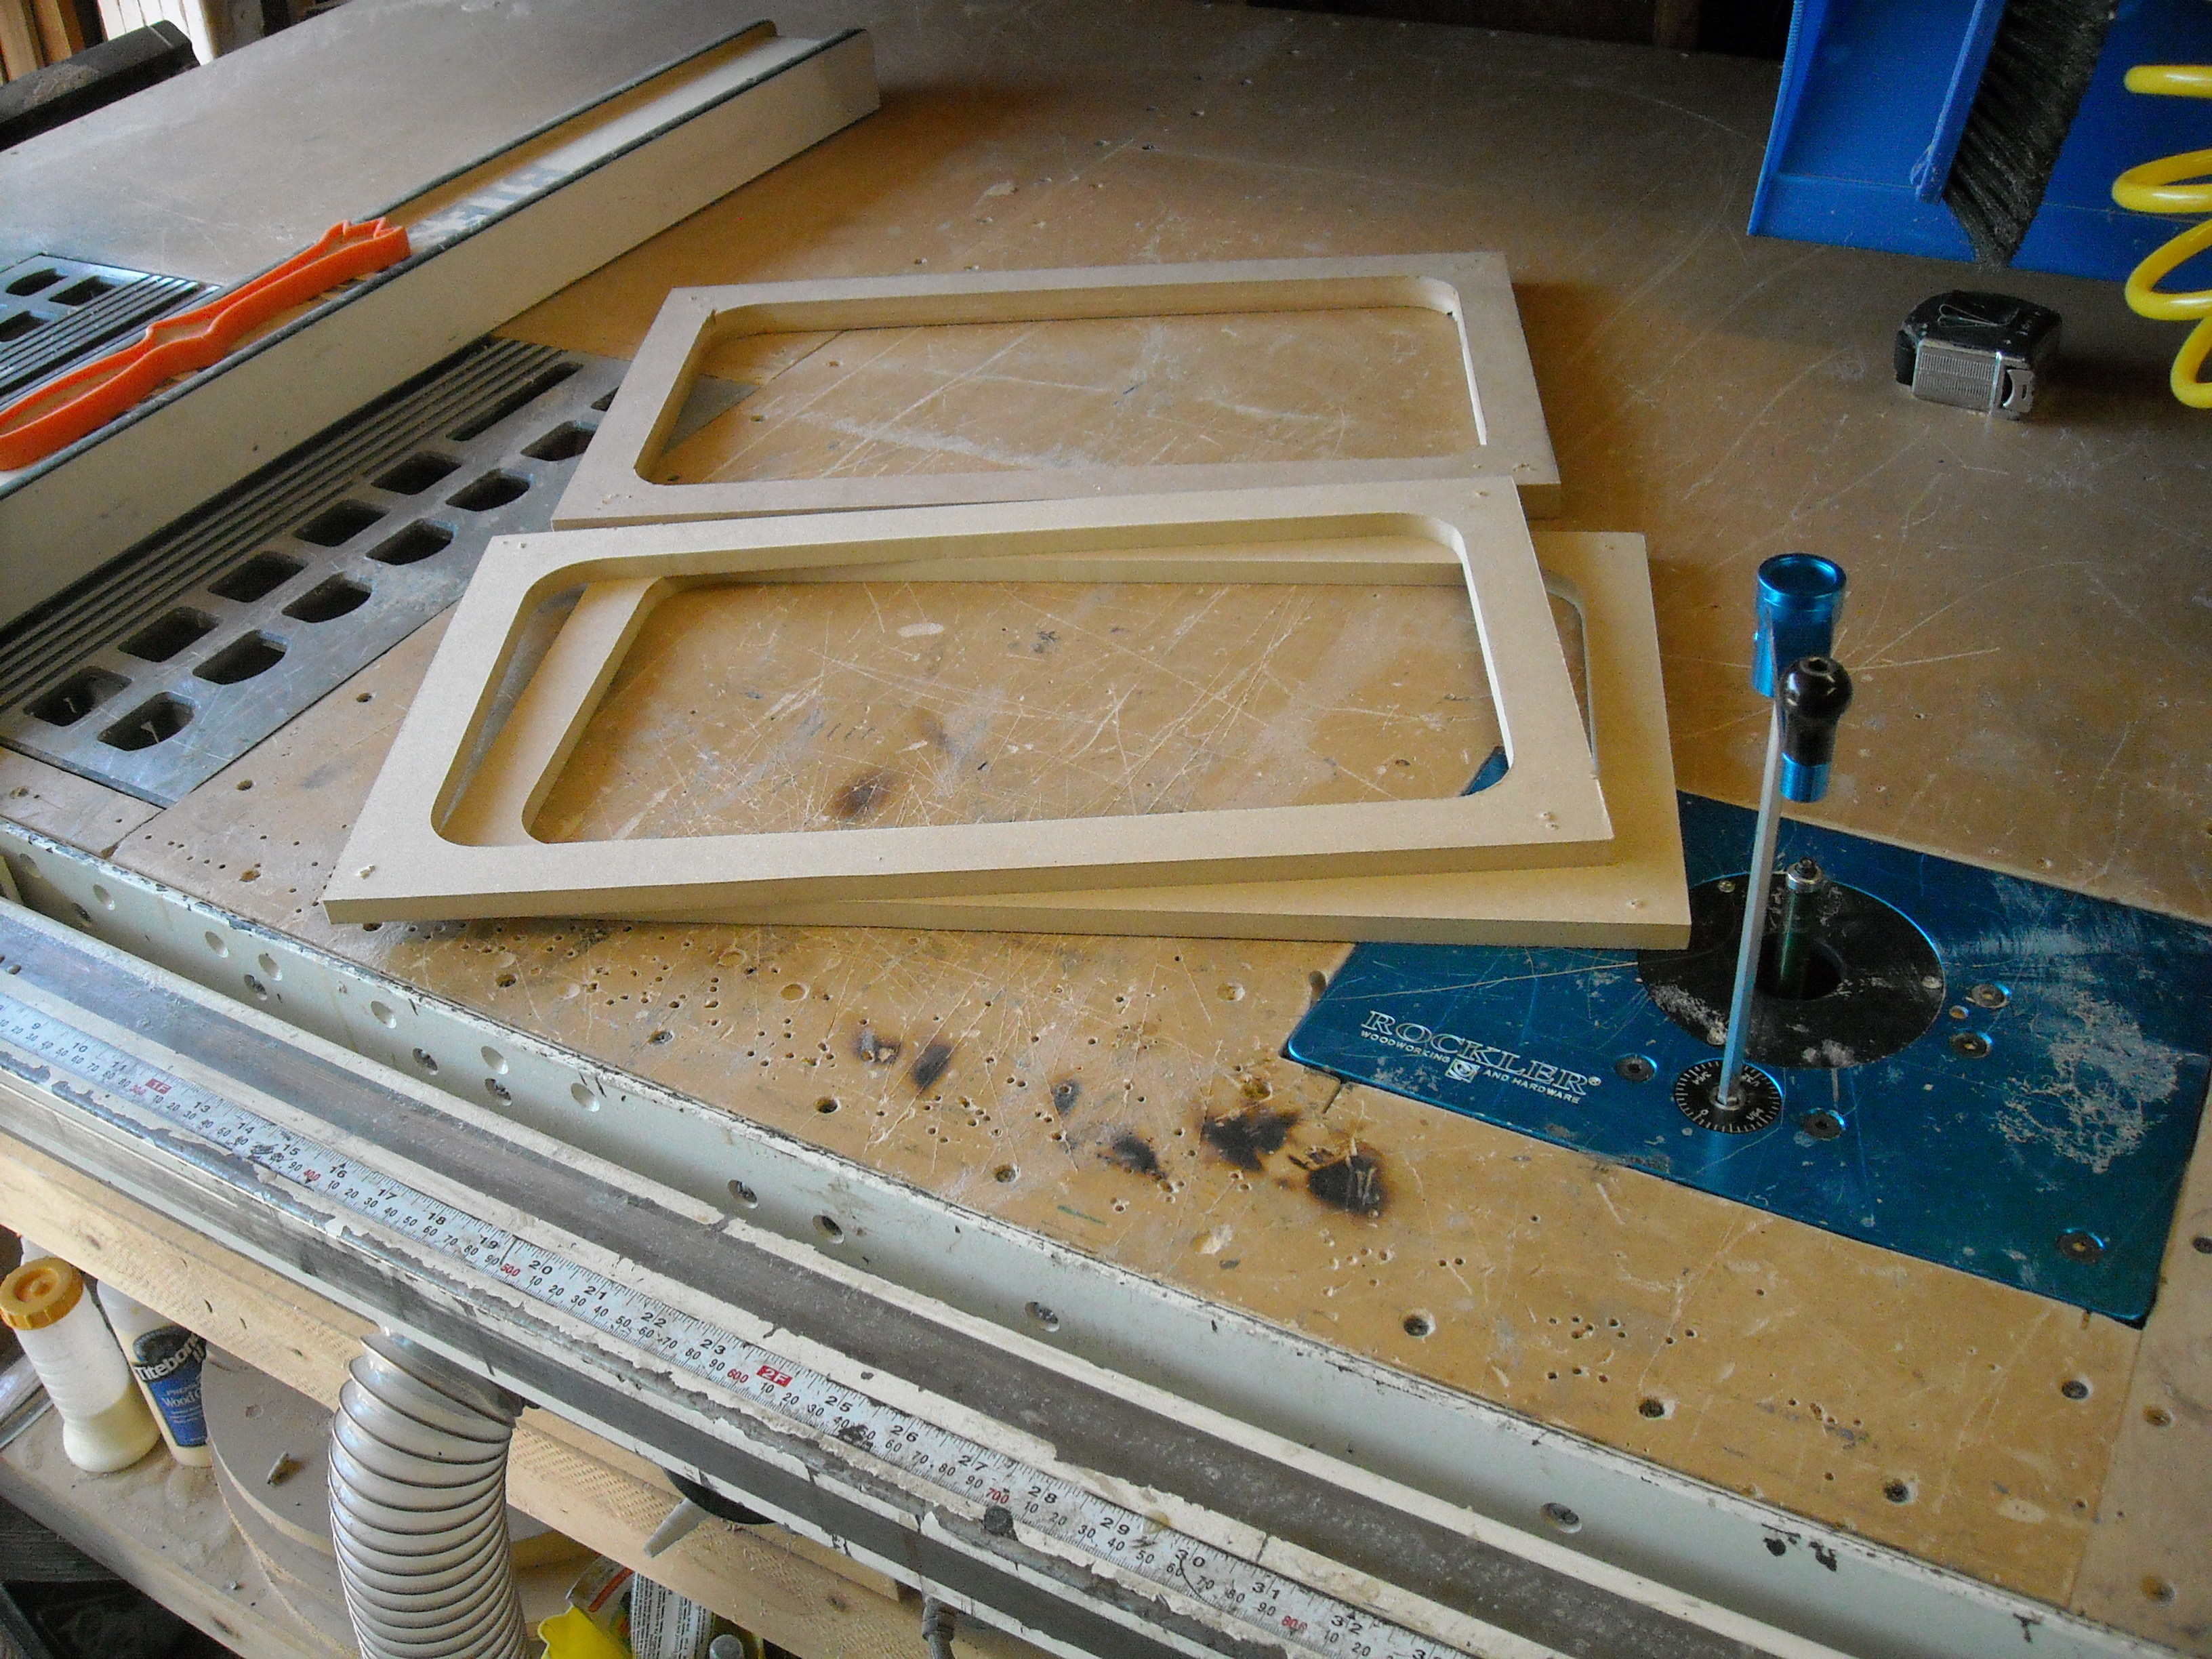
Attached to the amp cover.


The owner is a ducks fan, So i made this template from scratch.
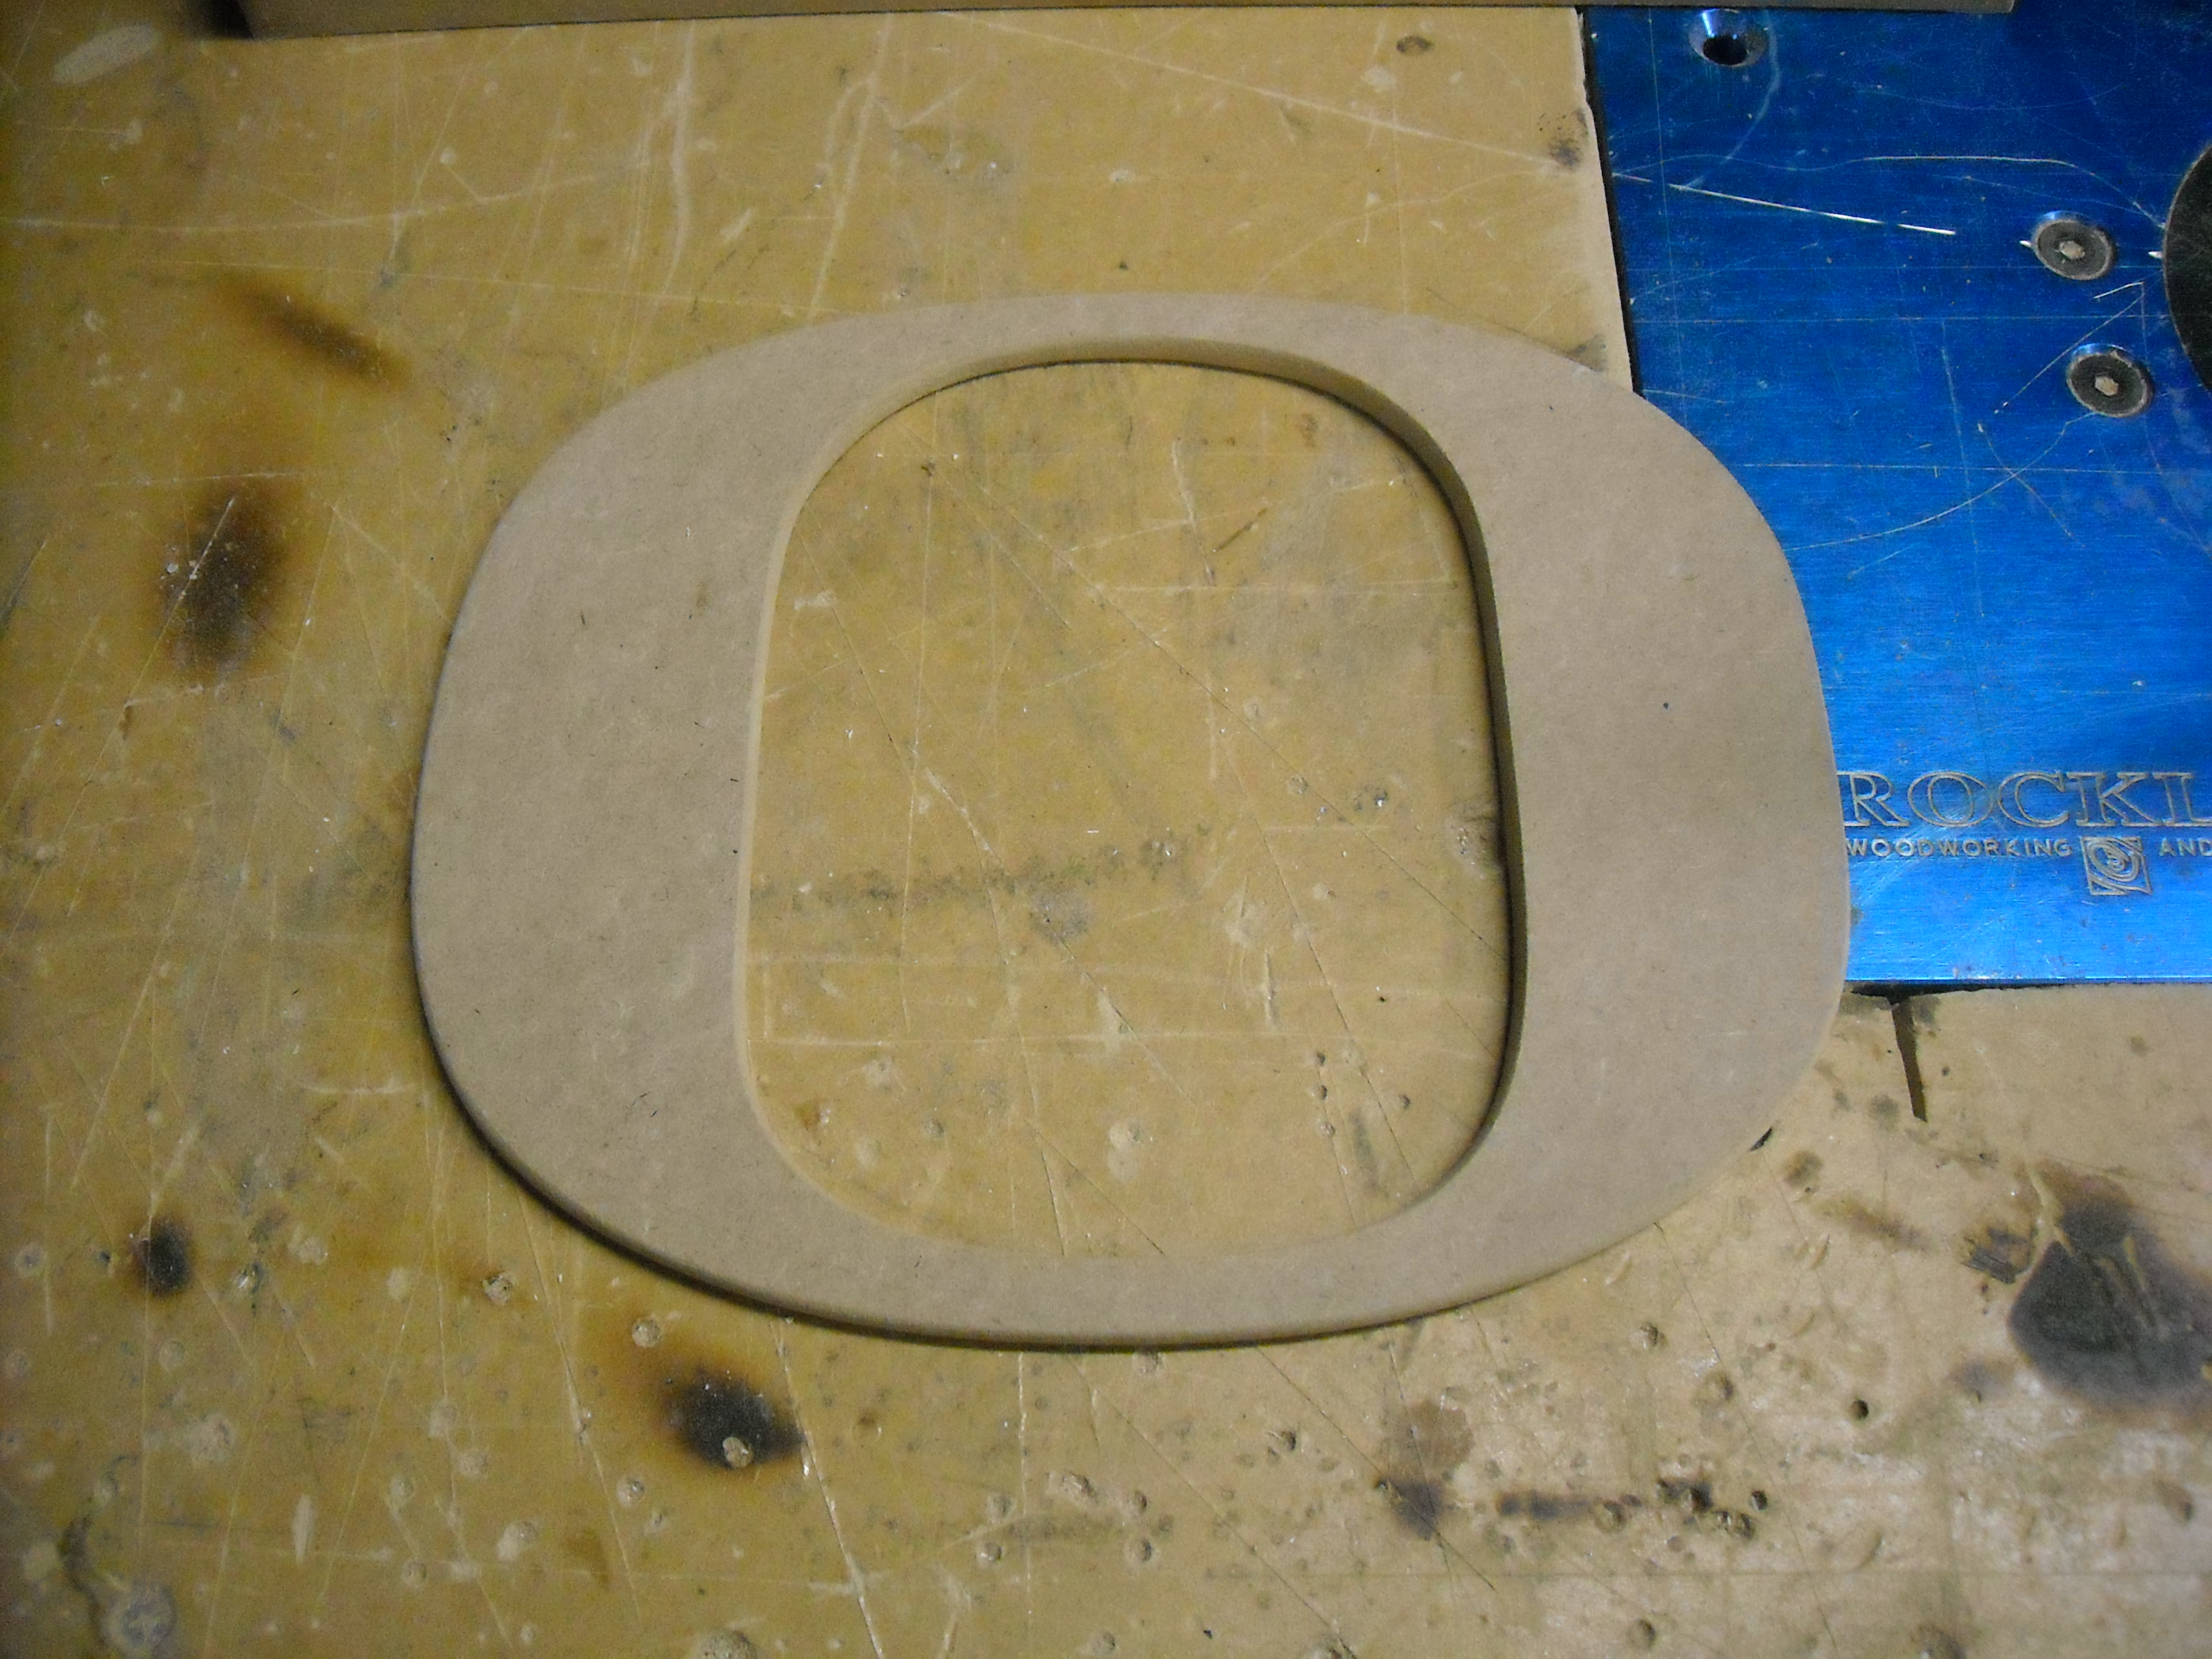
Transfered it to a thicker wood.

The hand sanded the profile so it would look right.
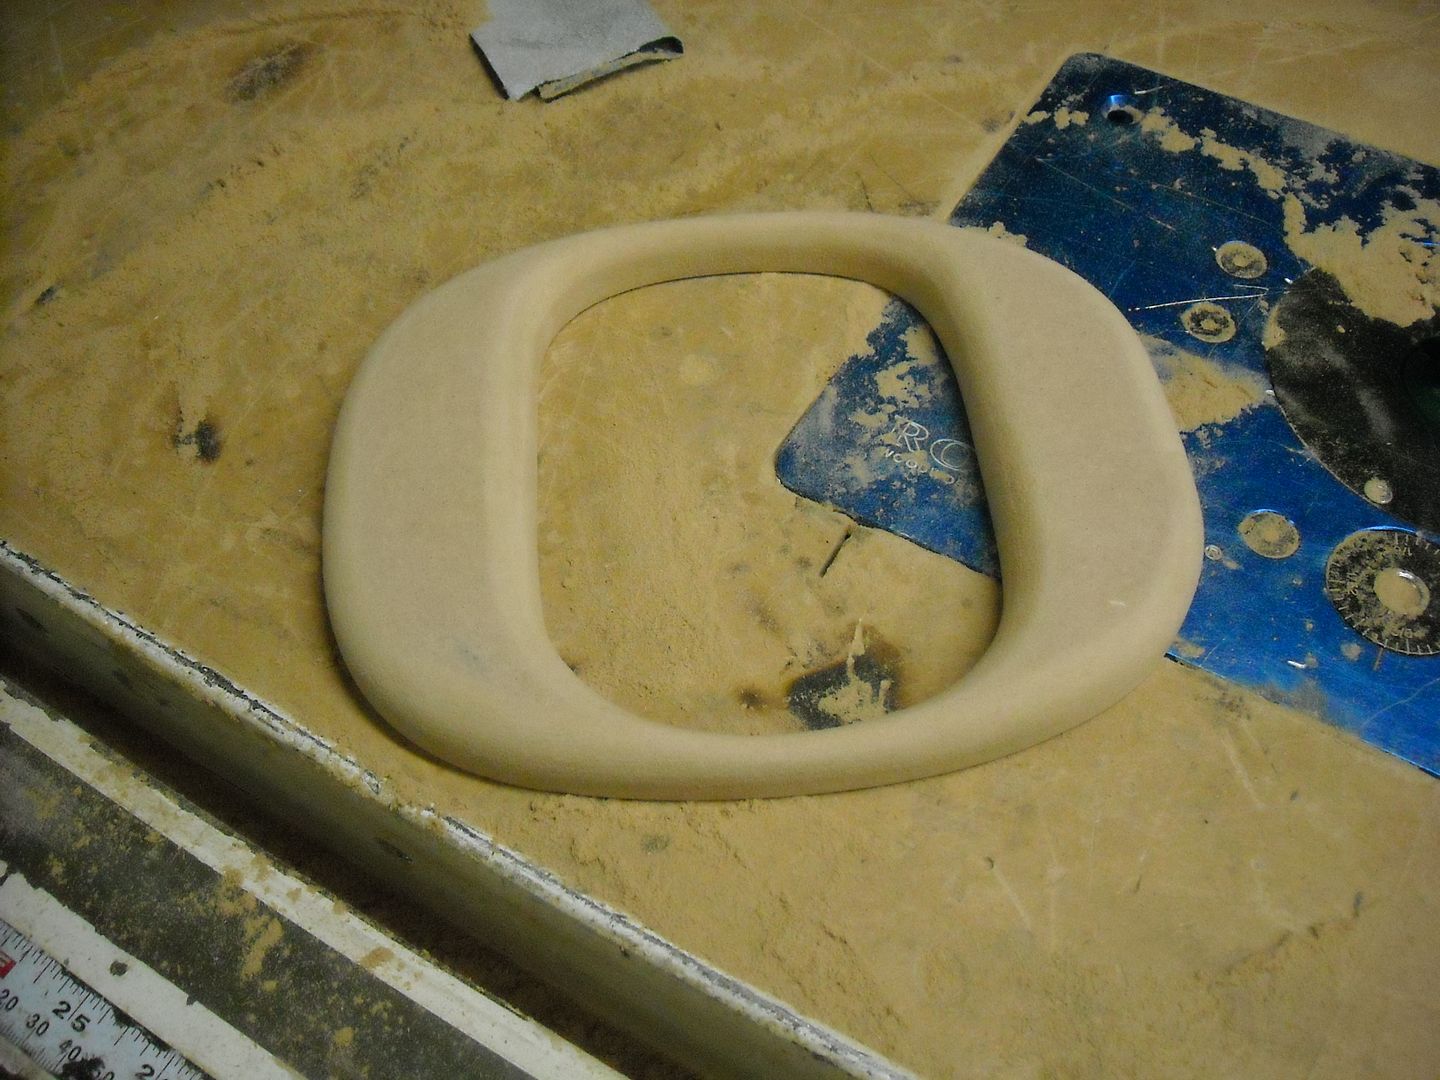
Covering the O took more then a few times to get right. Wrapping the inside part was nothing nice.

Mounted to the amp rack.
Took the amp cover and trimed it to fit the O then wrapped it in carpet.


I started off with a couple profile trims, then used the roundover bit and sanded smooth.
Attached to the amp cover.
The owner is a ducks fan, So i made this template from scratch.
Transfered it to a thicker wood.
The hand sanded the profile so it would look right.
Covering the O took more then a few times to get right. Wrapping the inside part was nothing nice.
Mounted to the amp rack.
Took the amp cover and trimed it to fit the O then wrapped it in carpet.
Thread Starter
Junior Member
Posts like a Ricer Type-R
Joined: Aug 2012
Posts: 18
Likes: 0
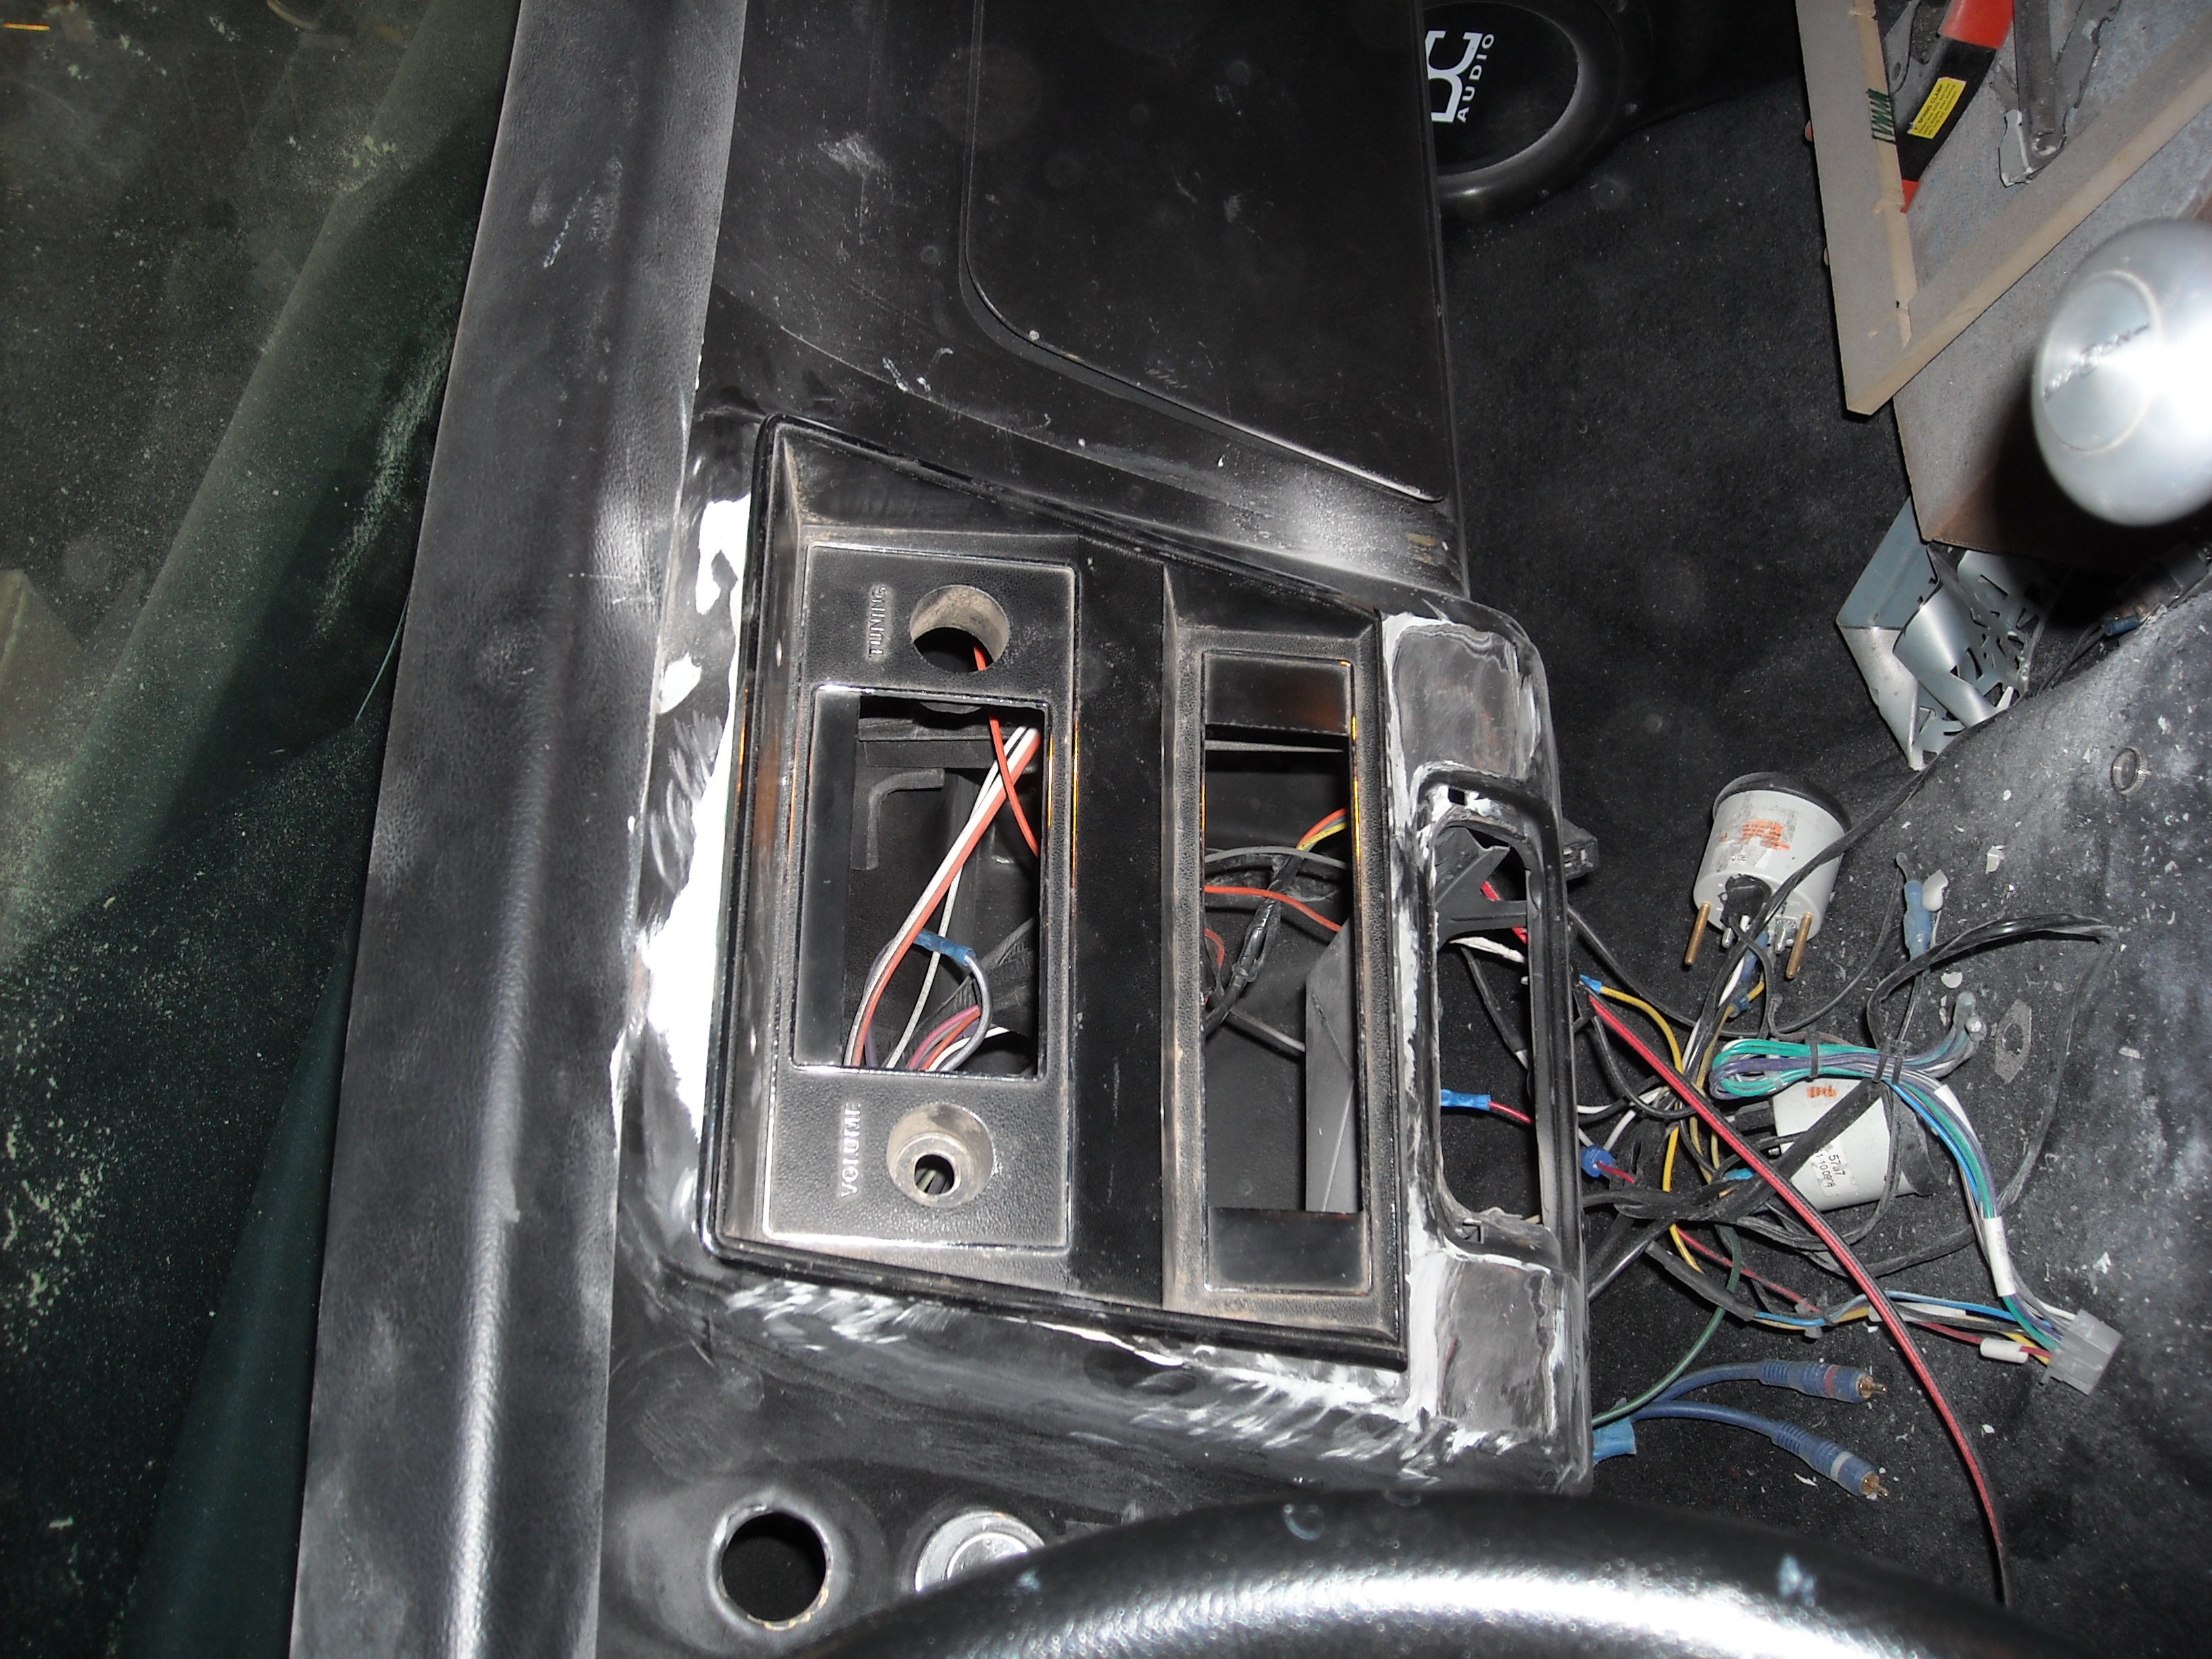
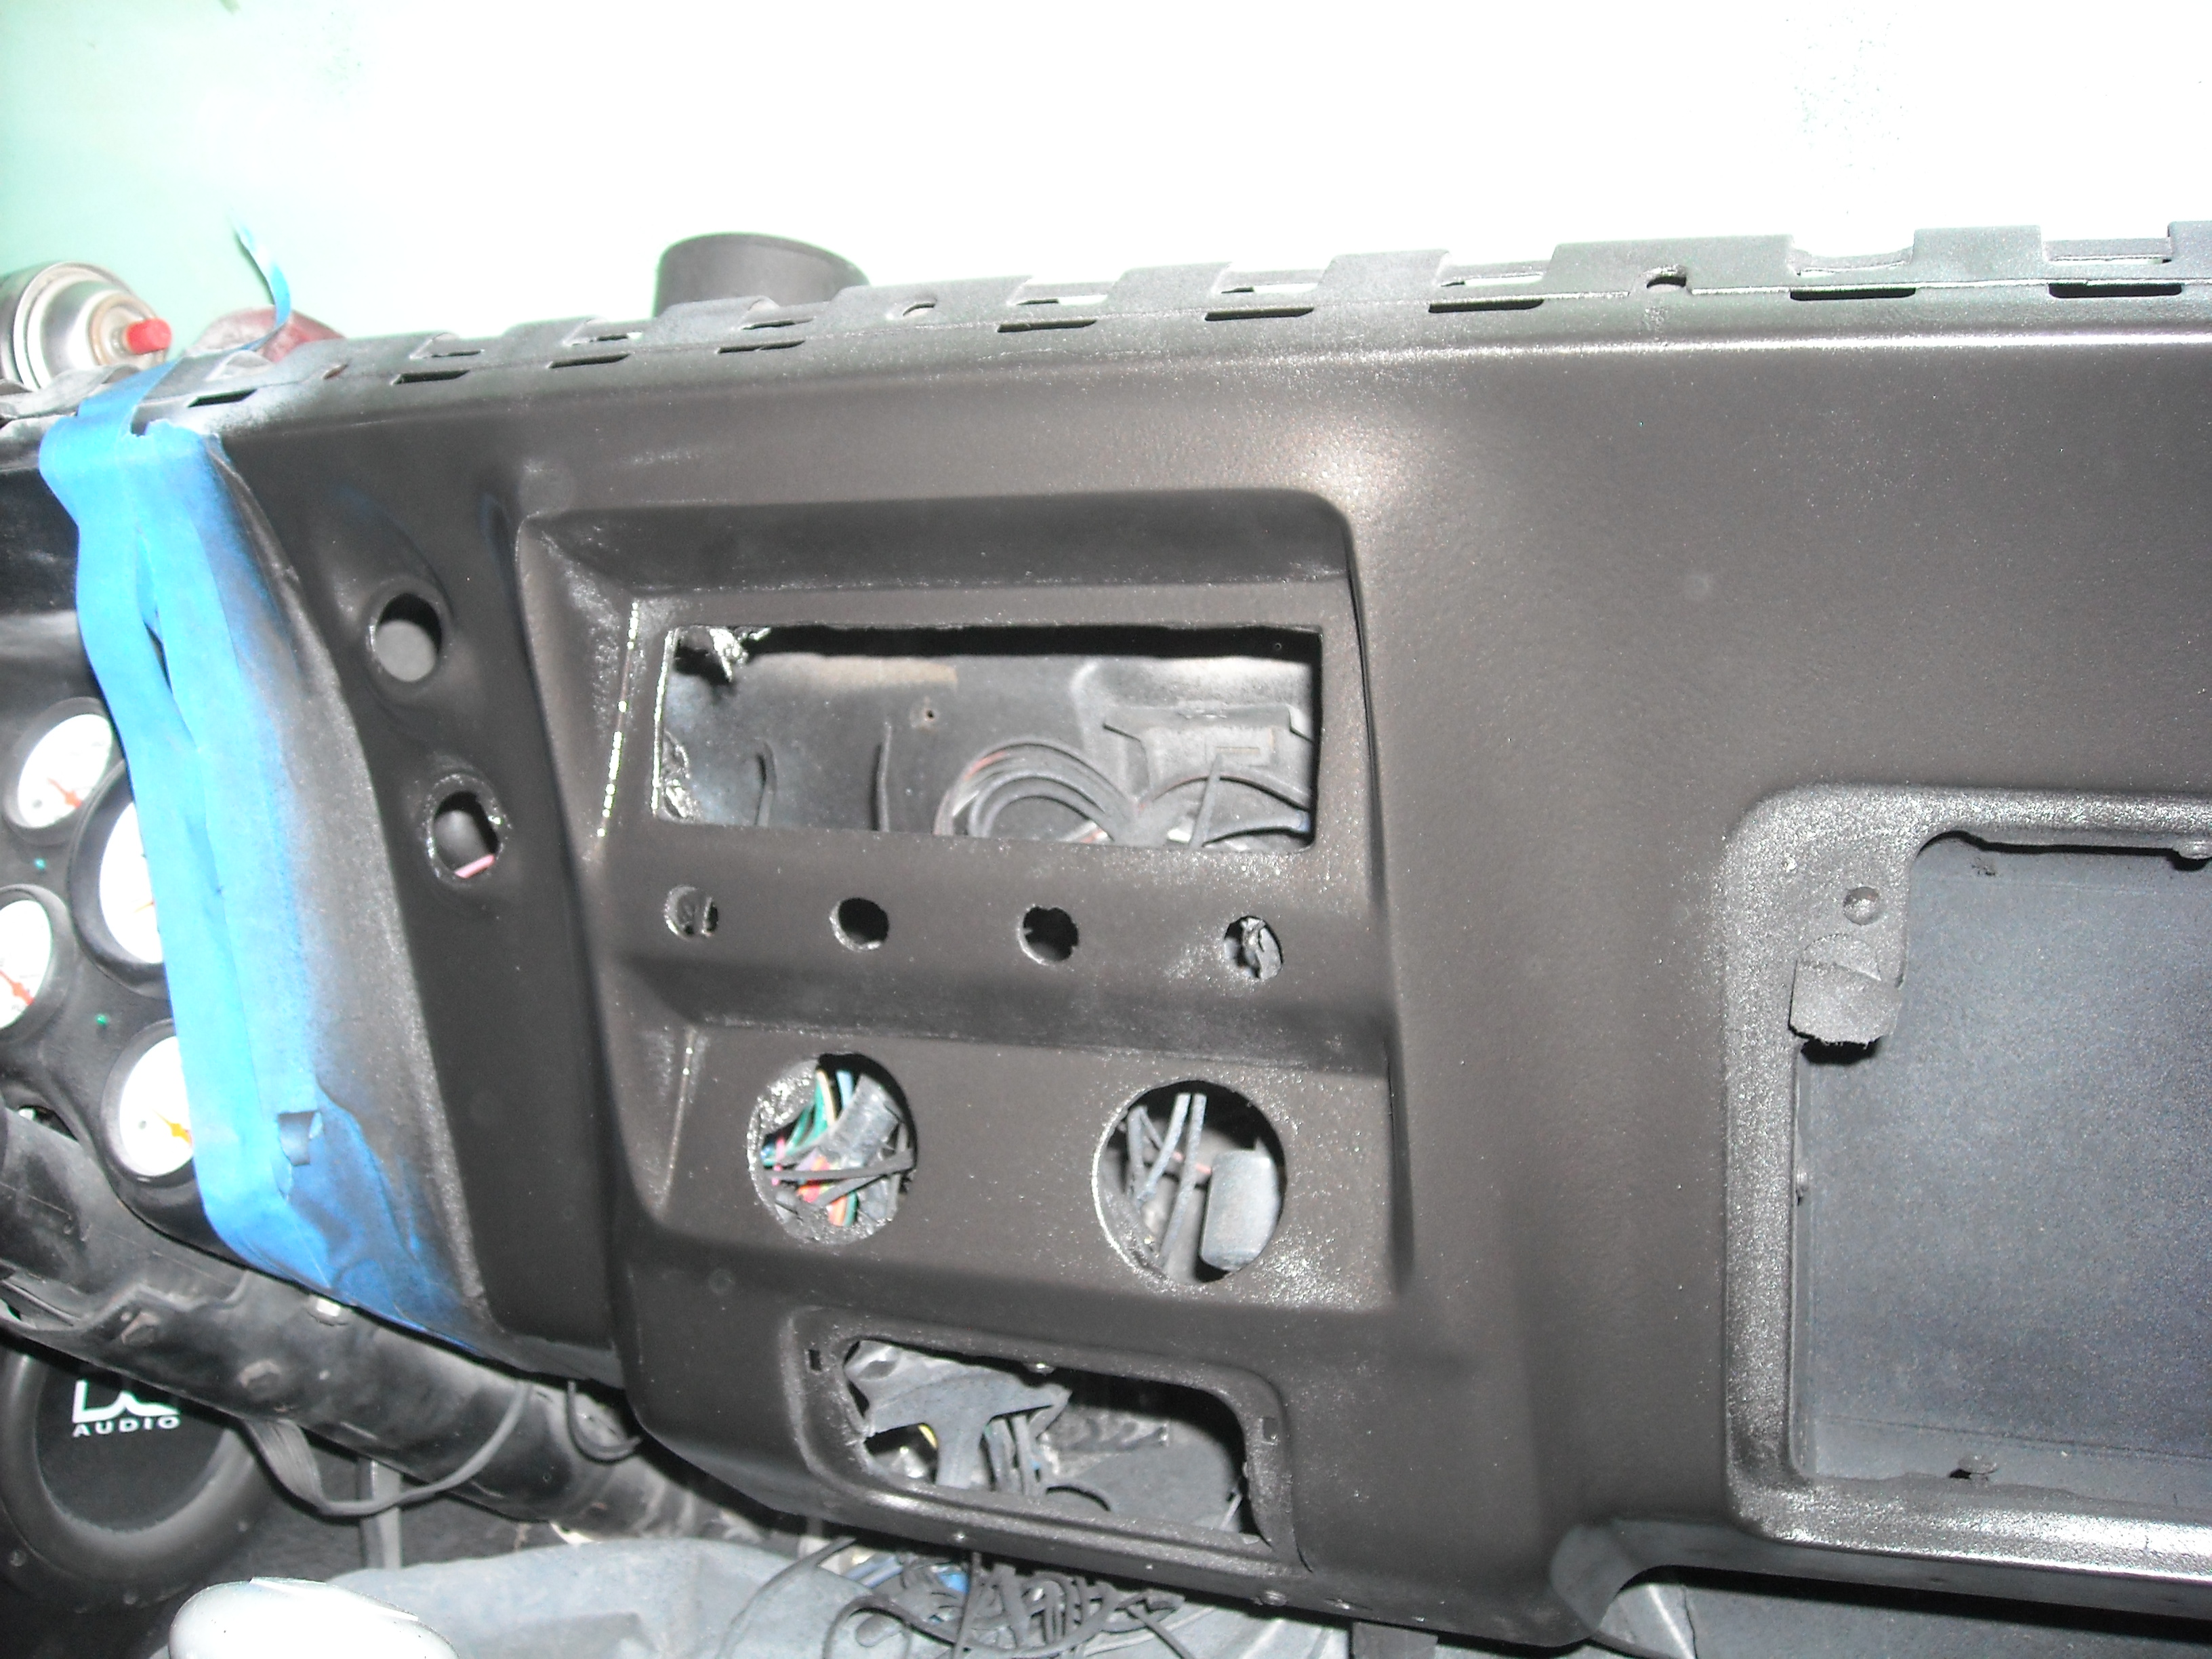
Had a buddy over and i let him have at the dash with a grinder.
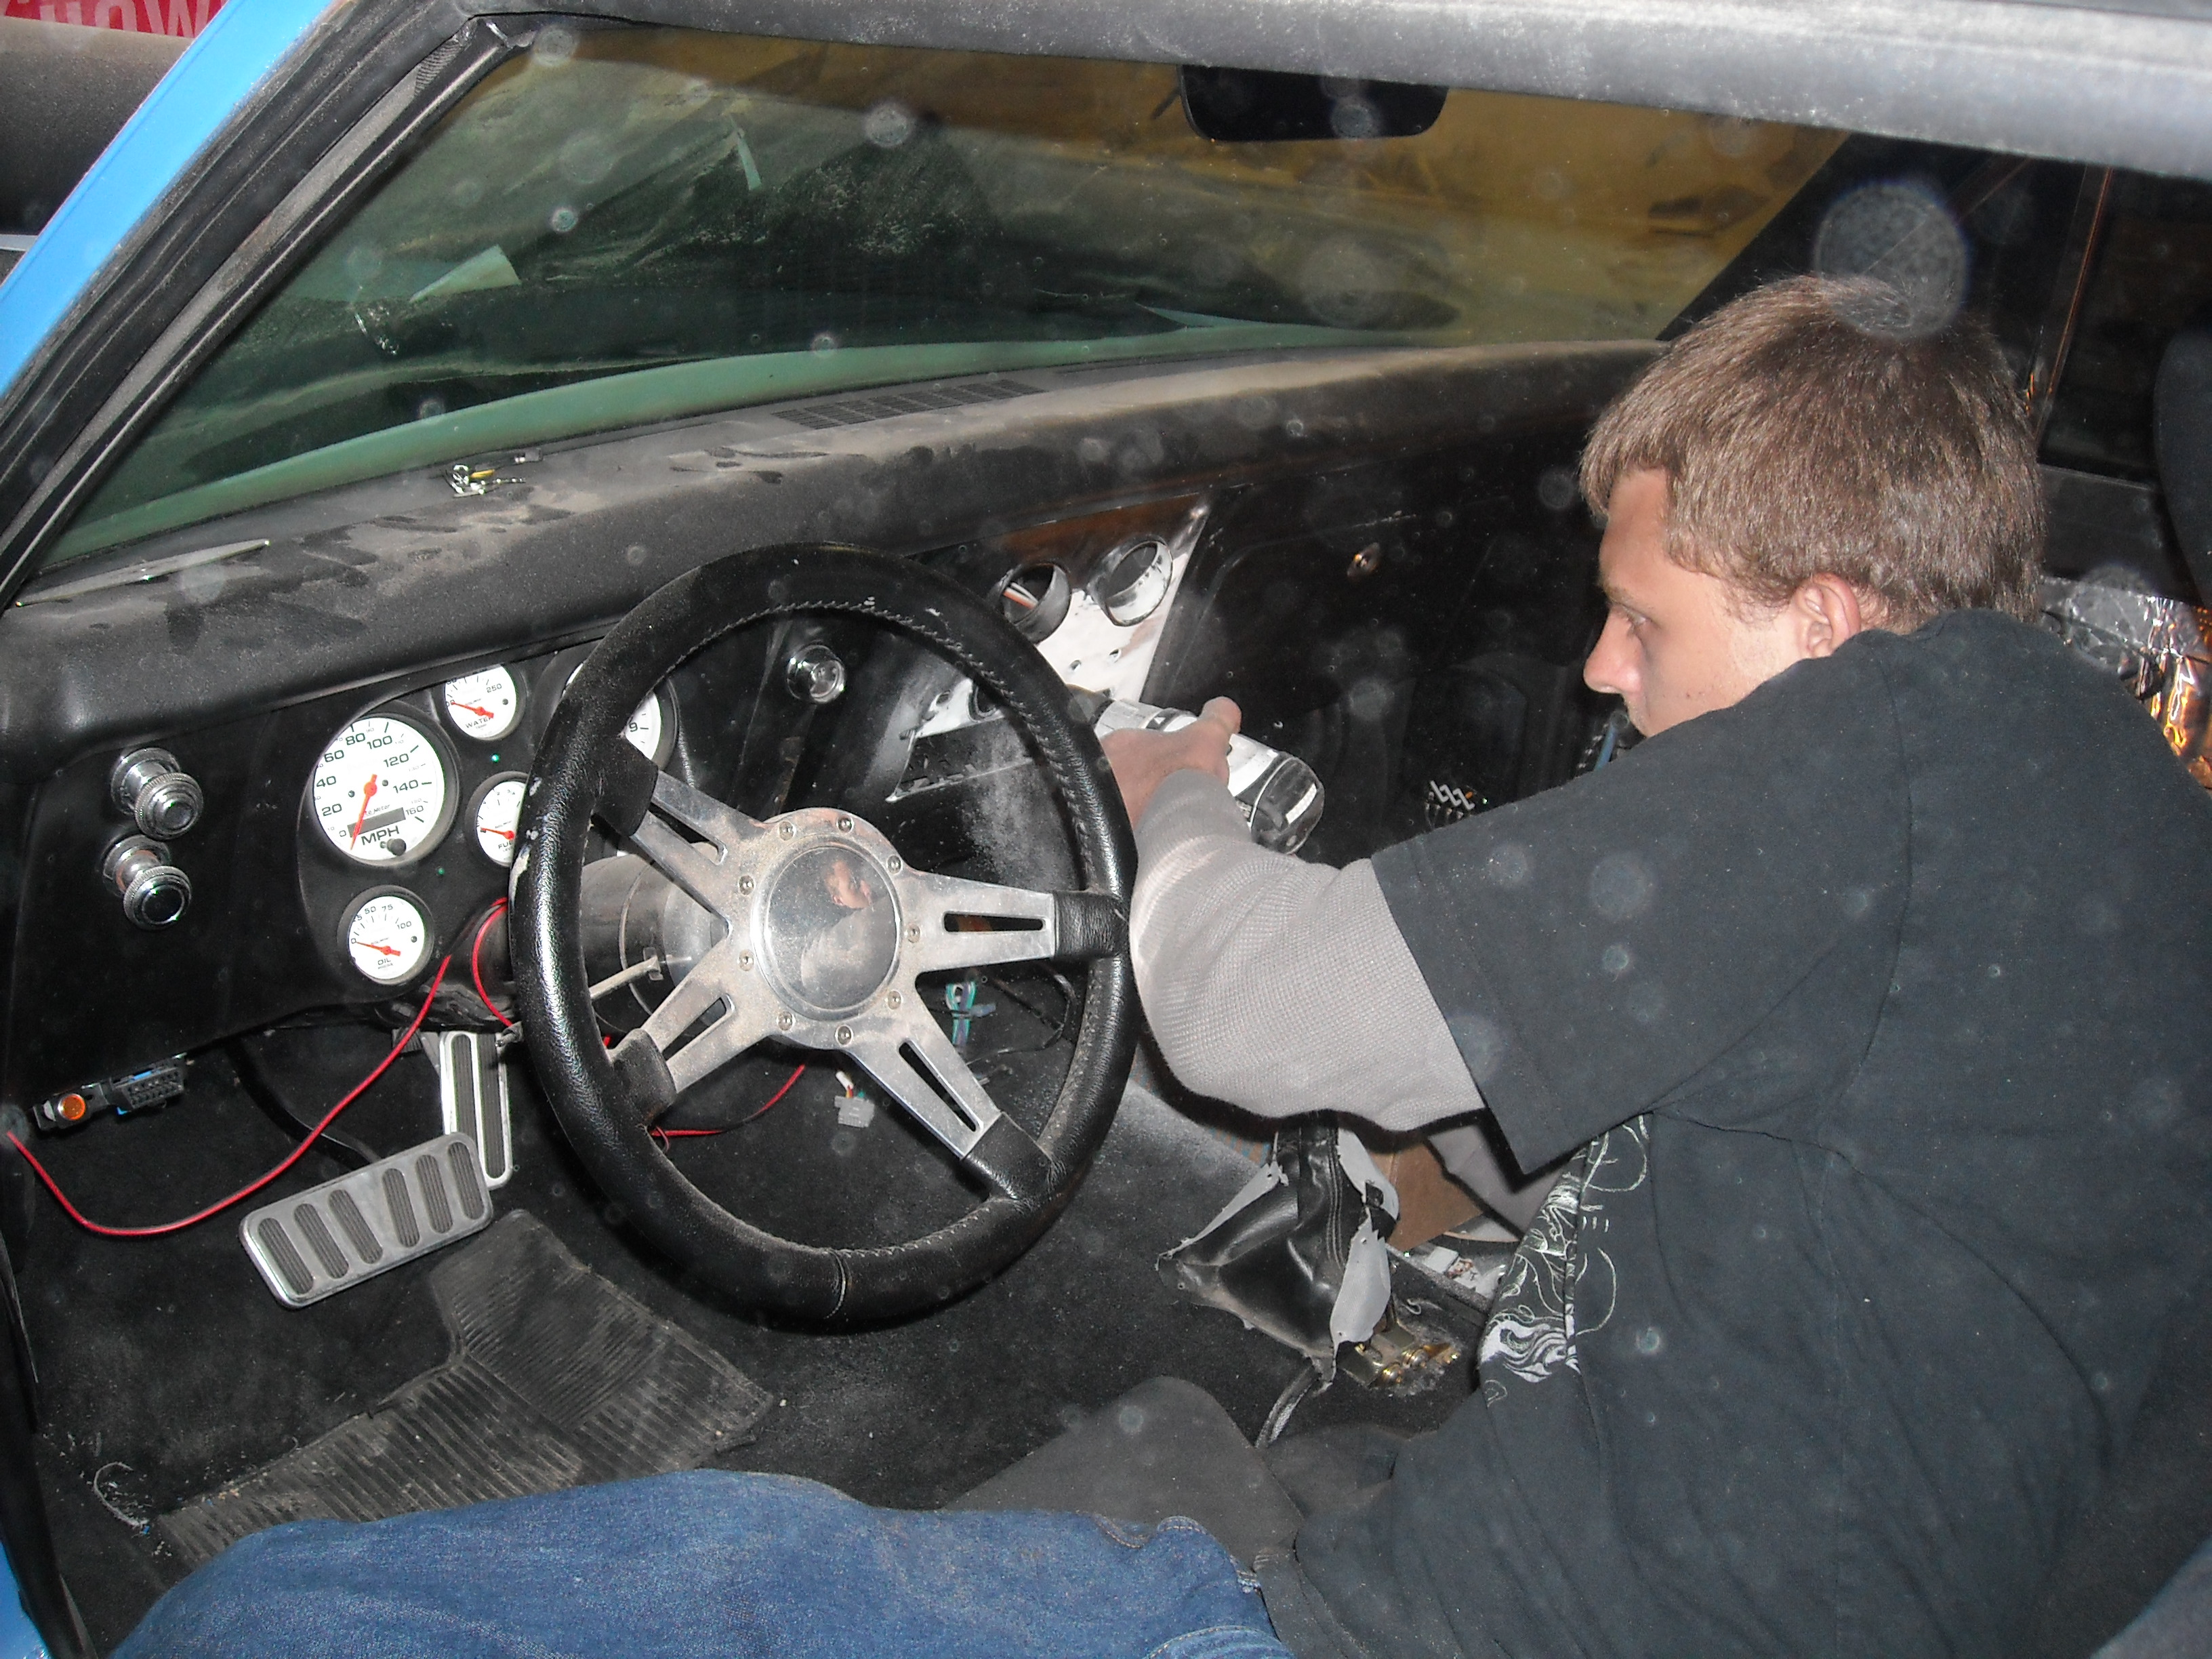
Once we got everything down to metal, I could then get a good look at what we were working with.

I ended up cutting out most of what was in the dash. i used a radio piece from a 72 mustang as my template.

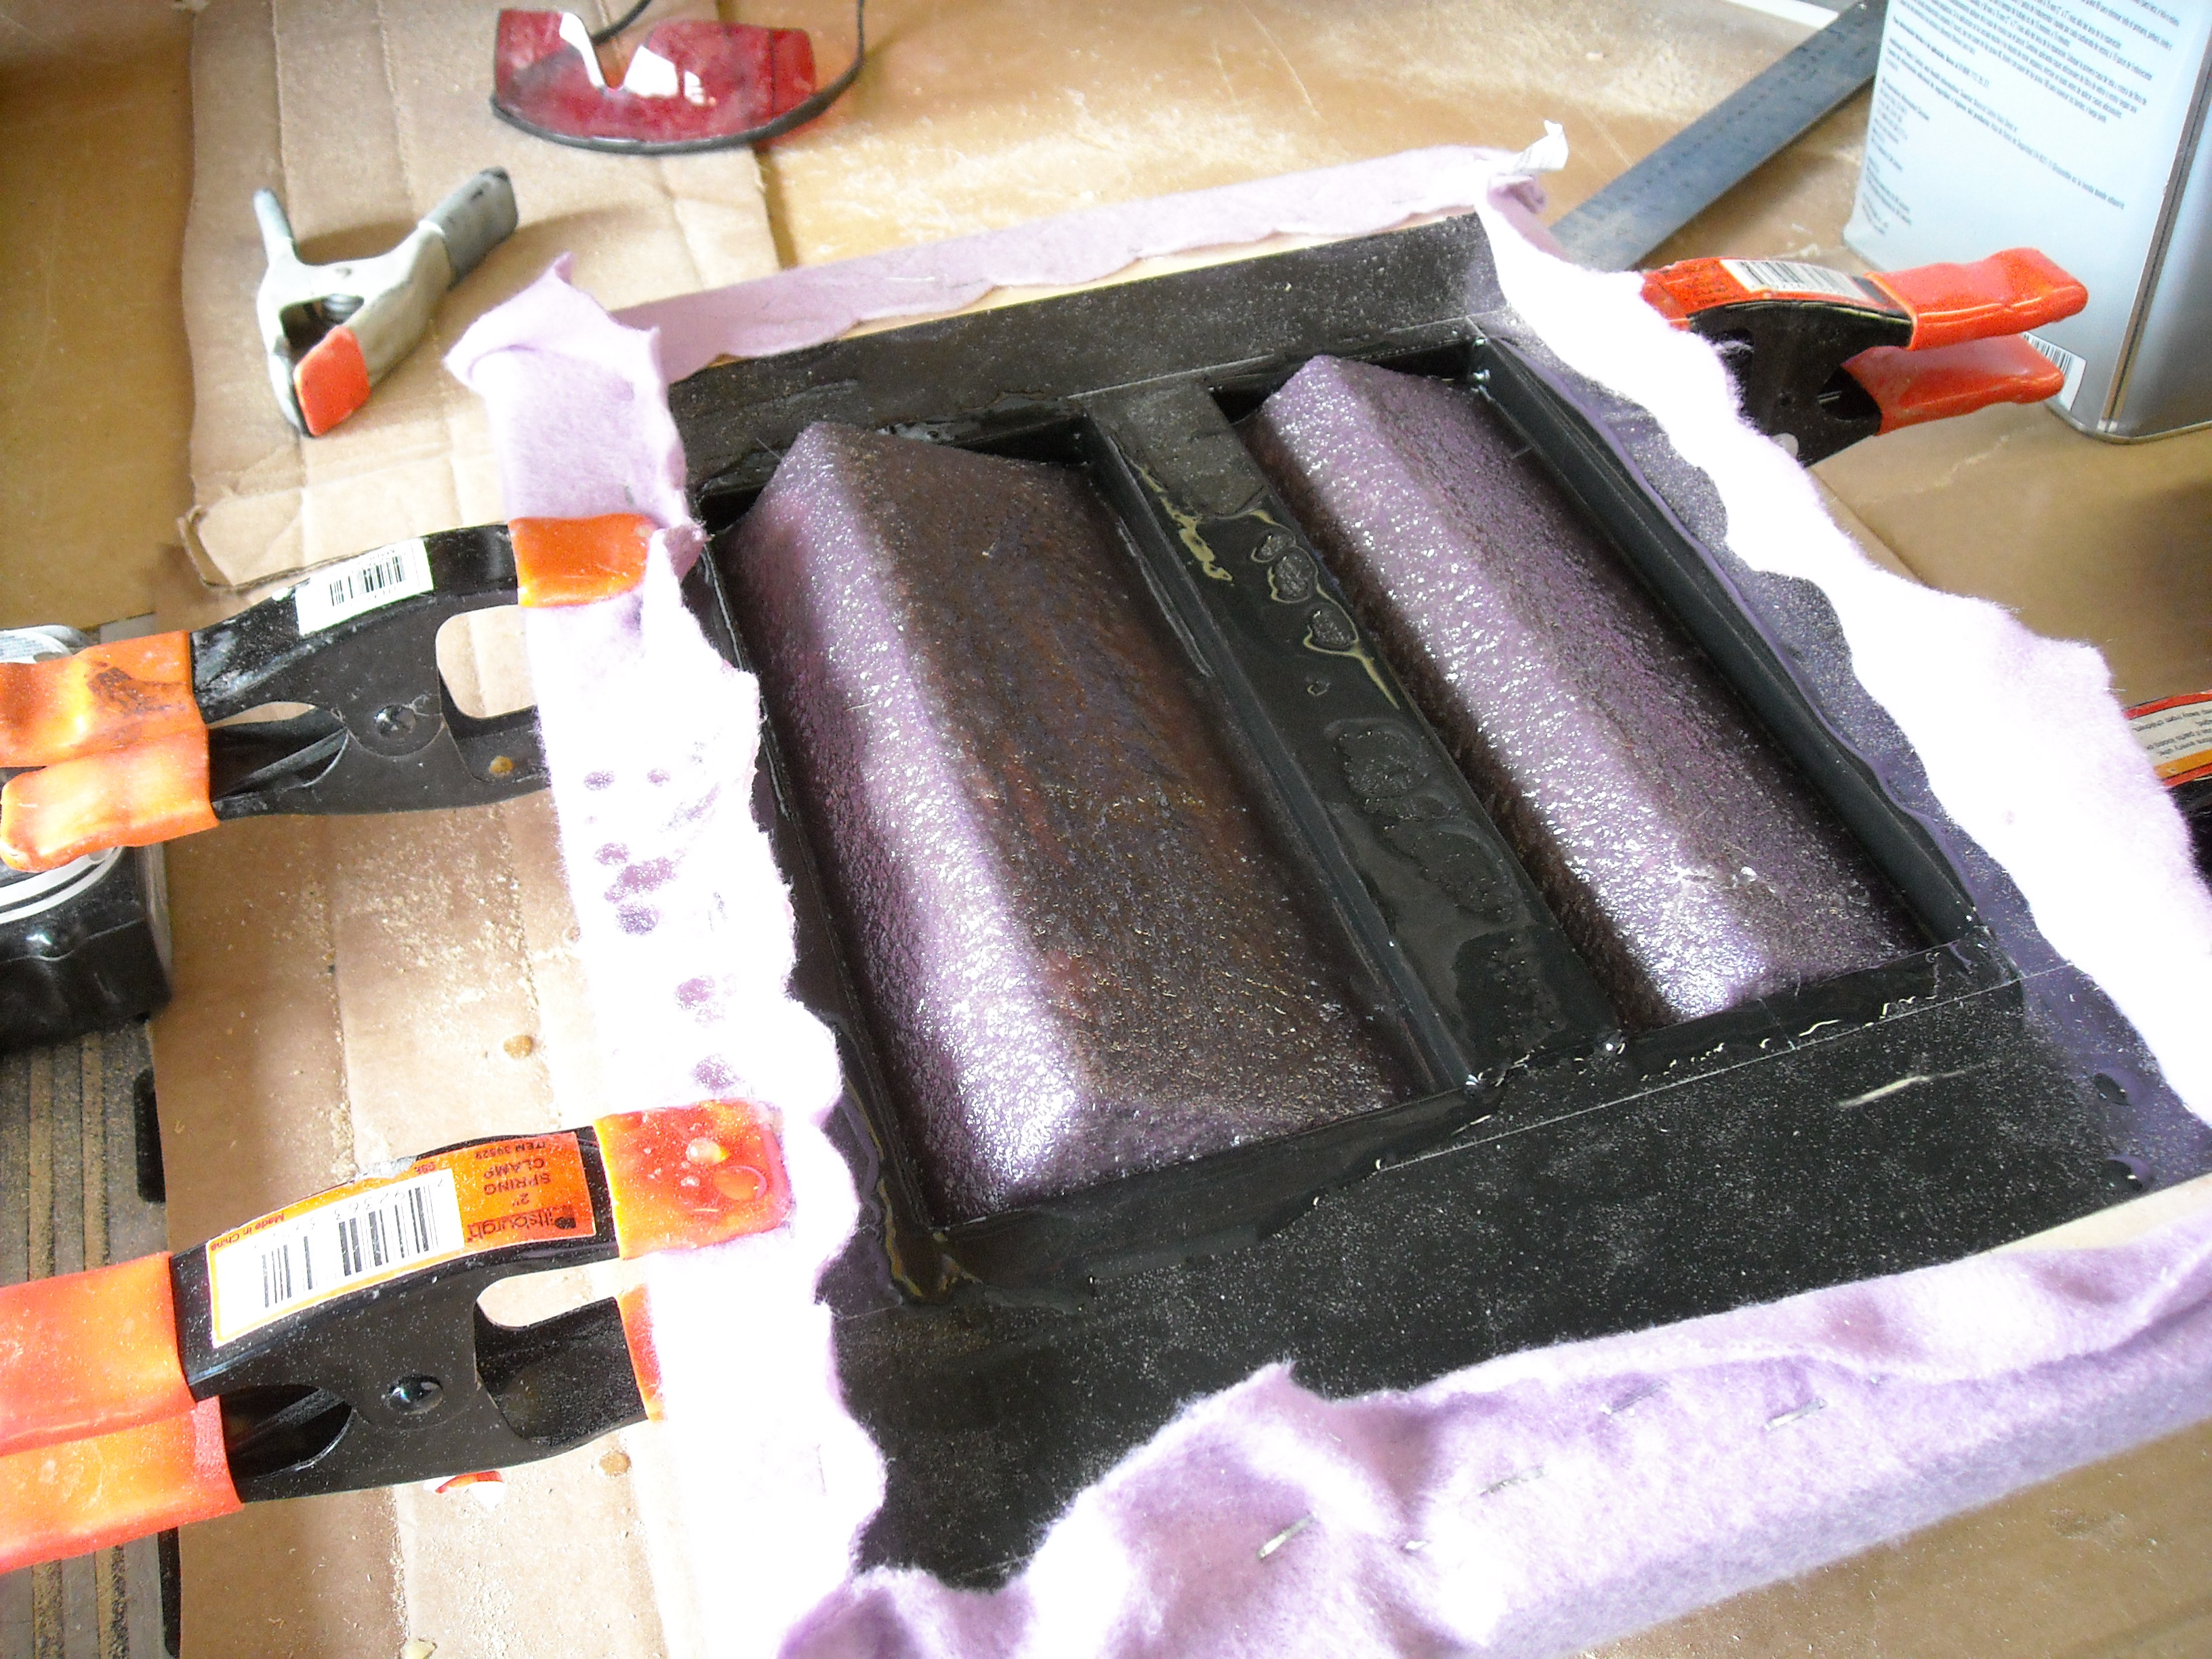
I then needed to make a frame to strech the fleece over the radio bezel.


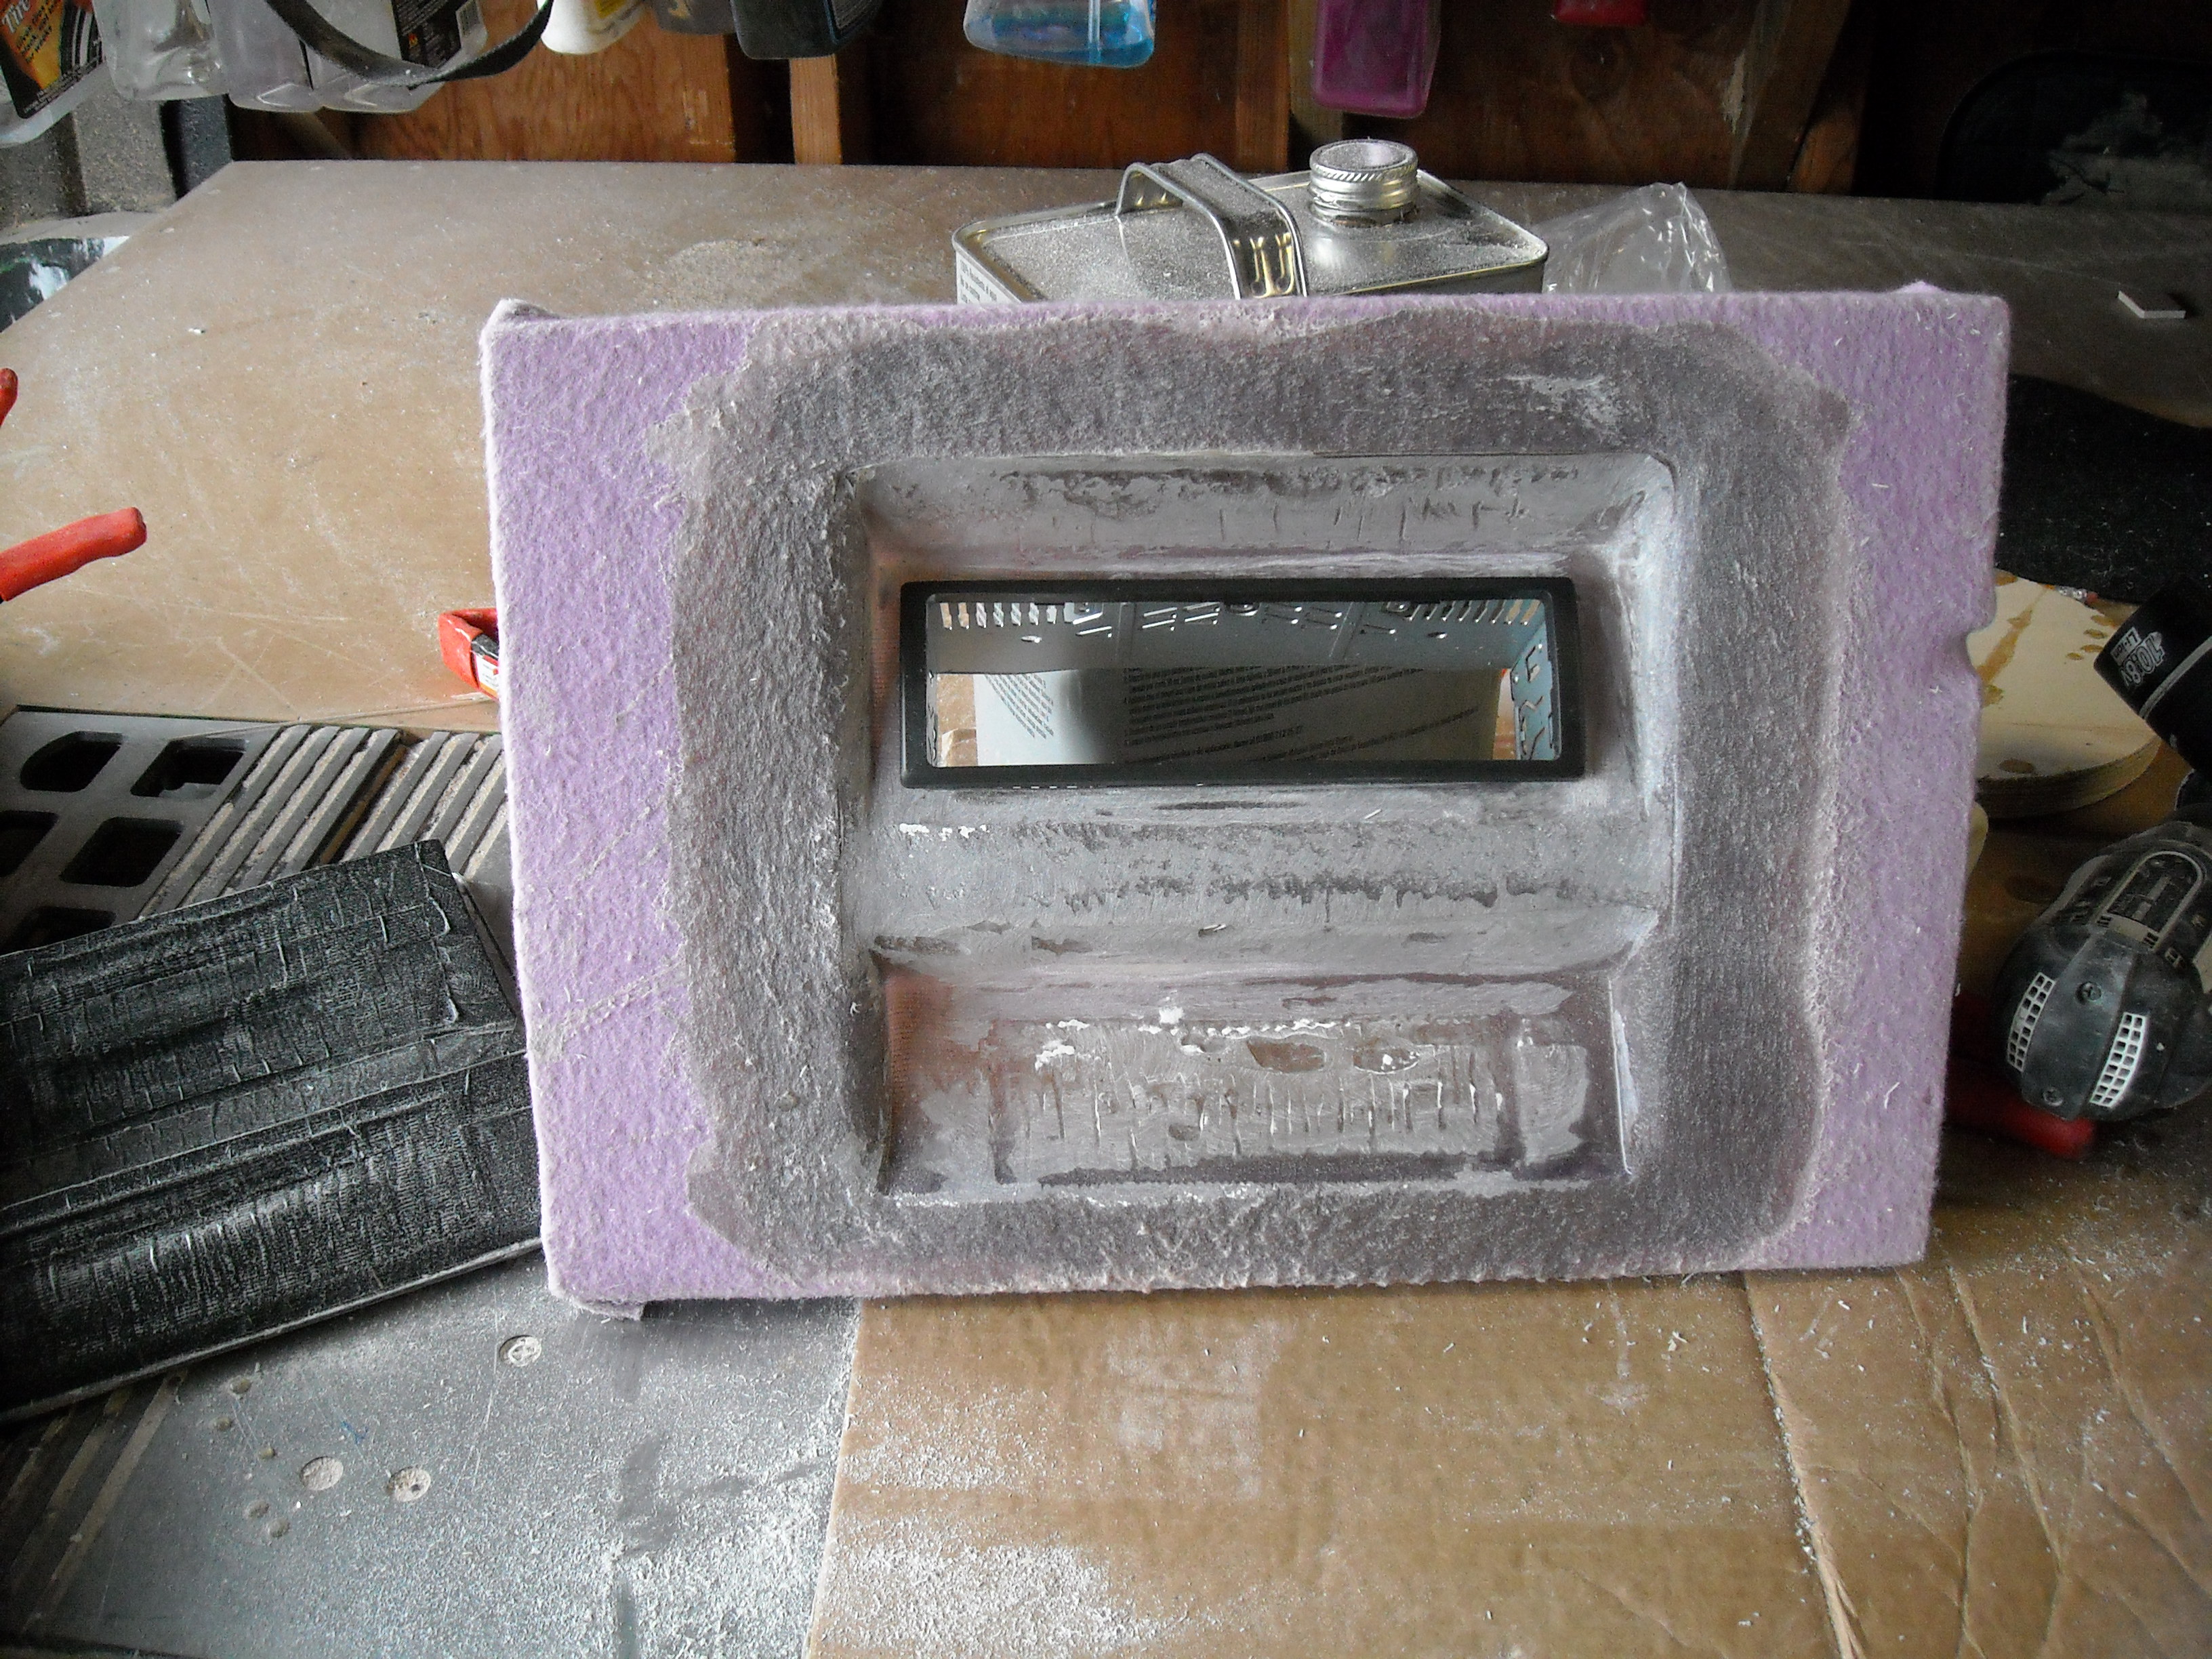
Broke the fleece from the mold and cut out the radio opening.
Got busy on hand sanding and shaping.

Added strength to the backside.

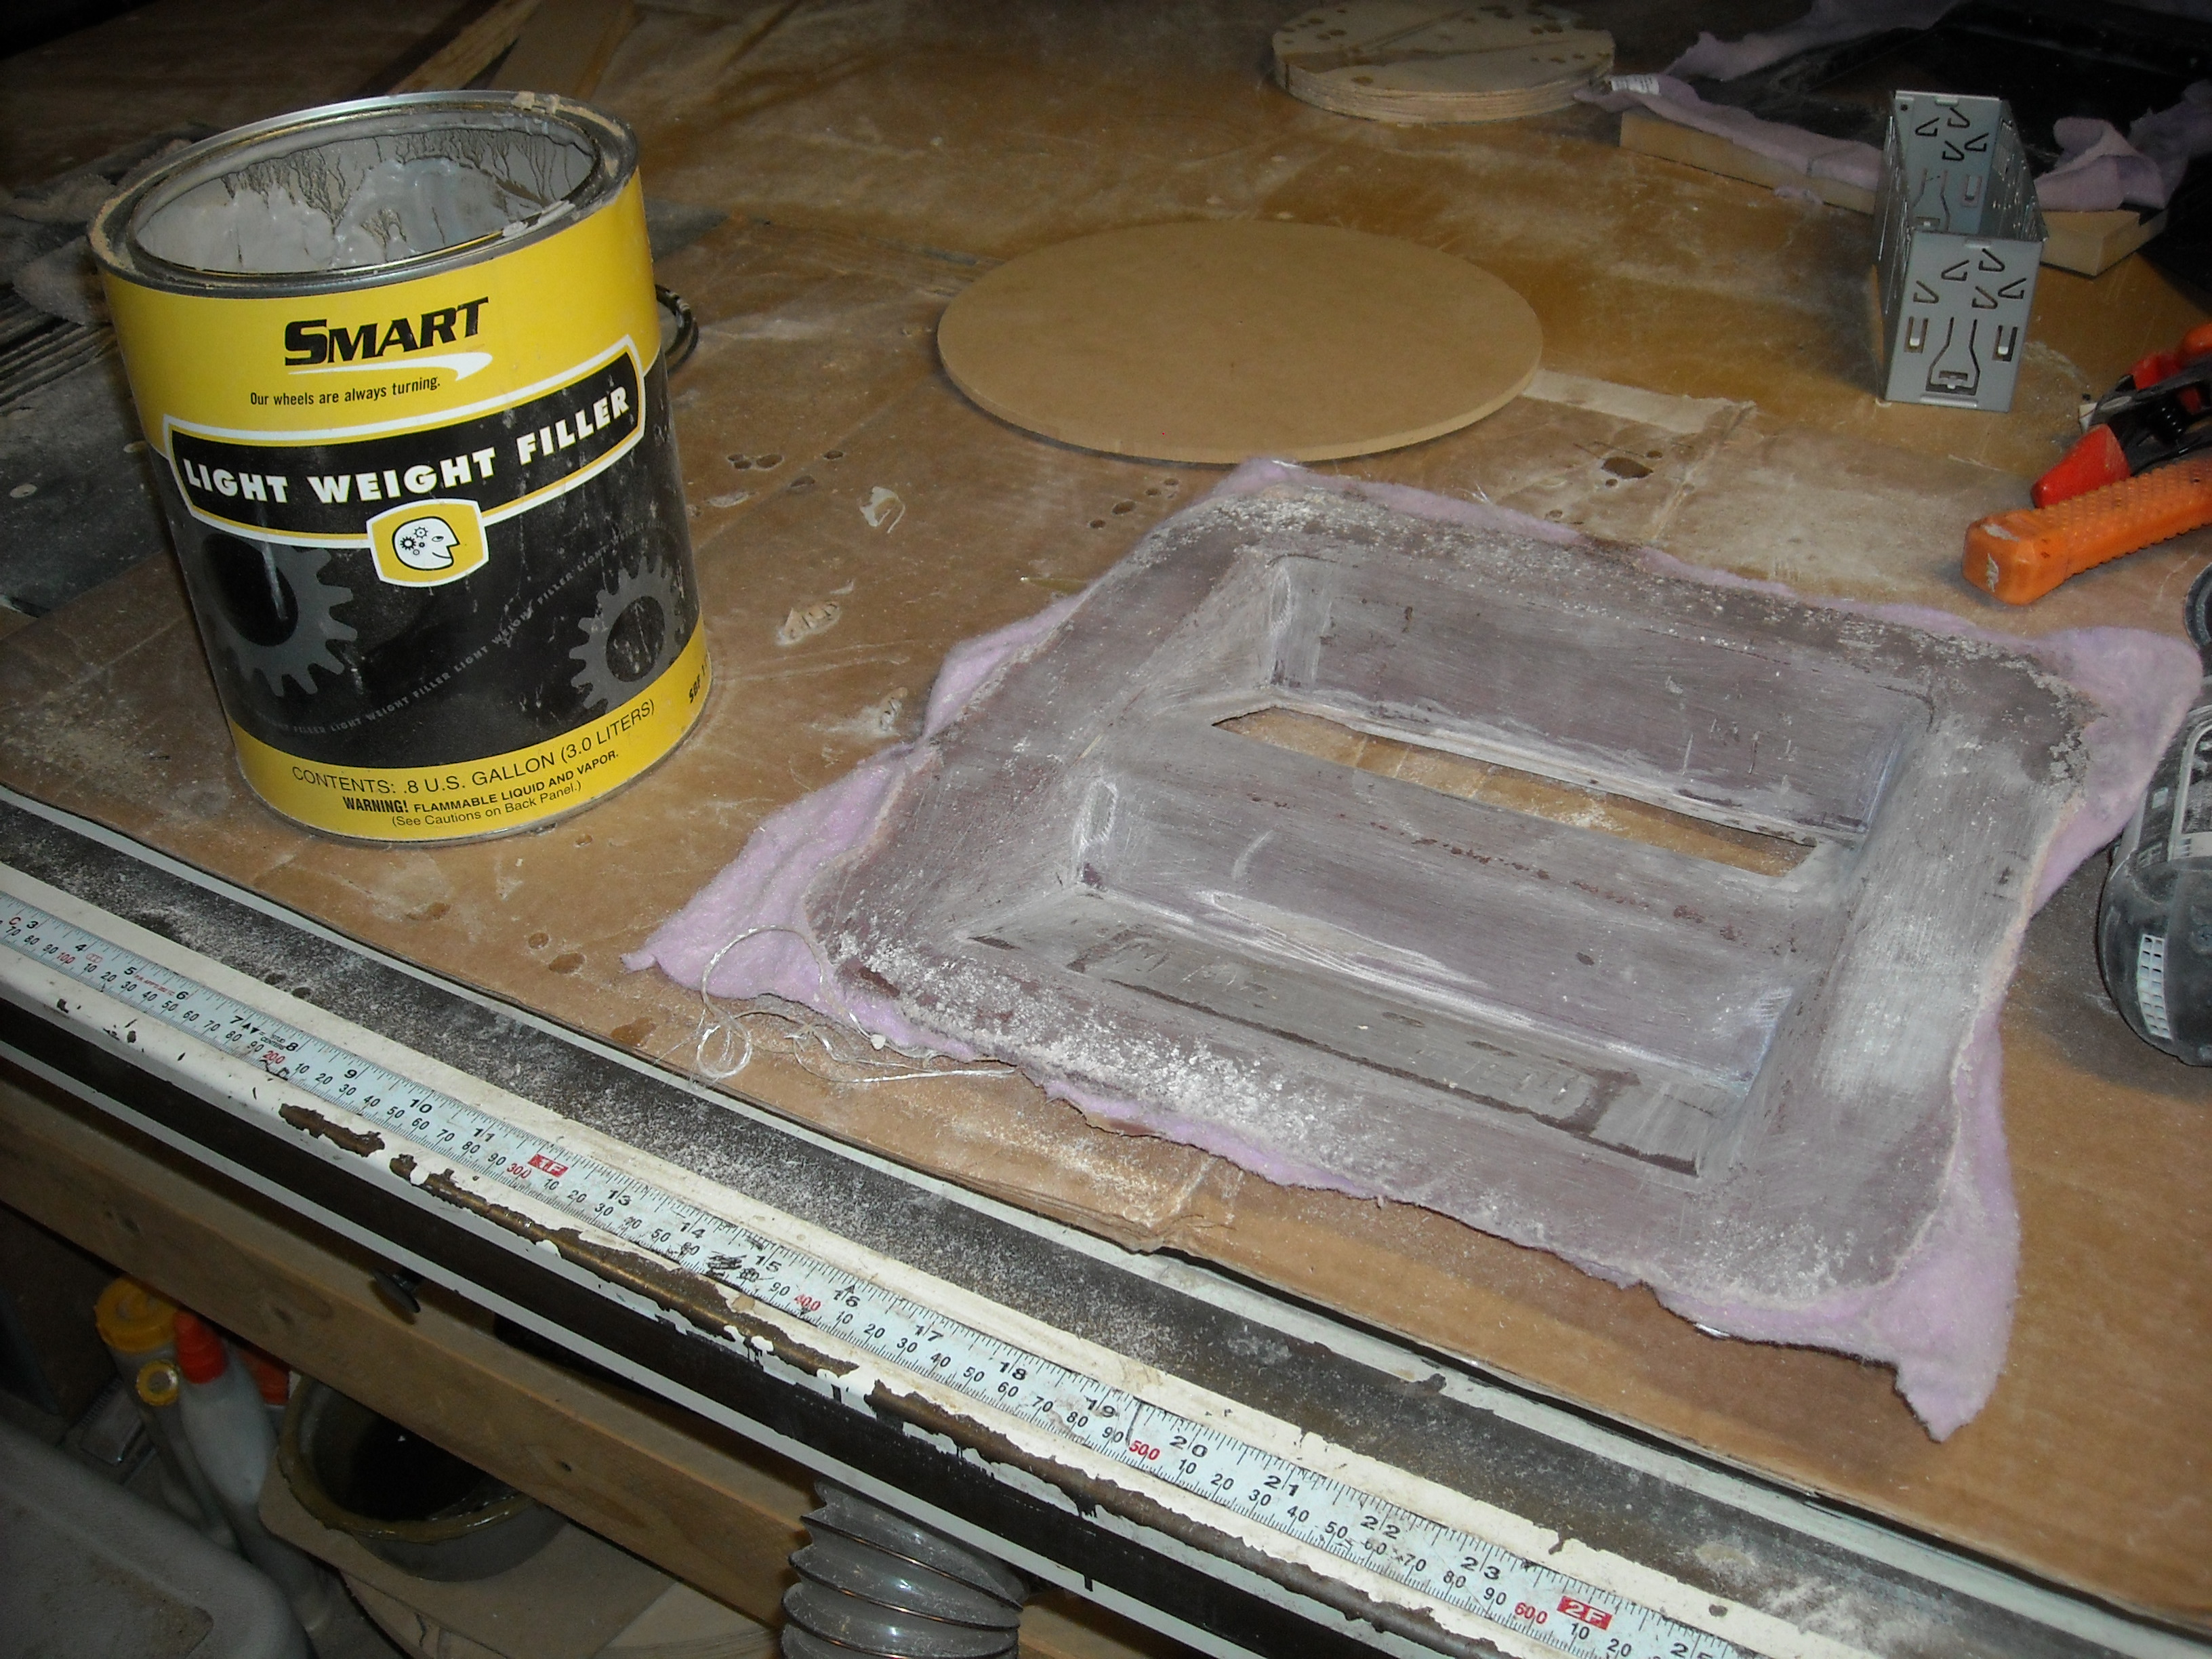
added a couple coats of filler to smooth everything out.


sanded down and ready to go in.
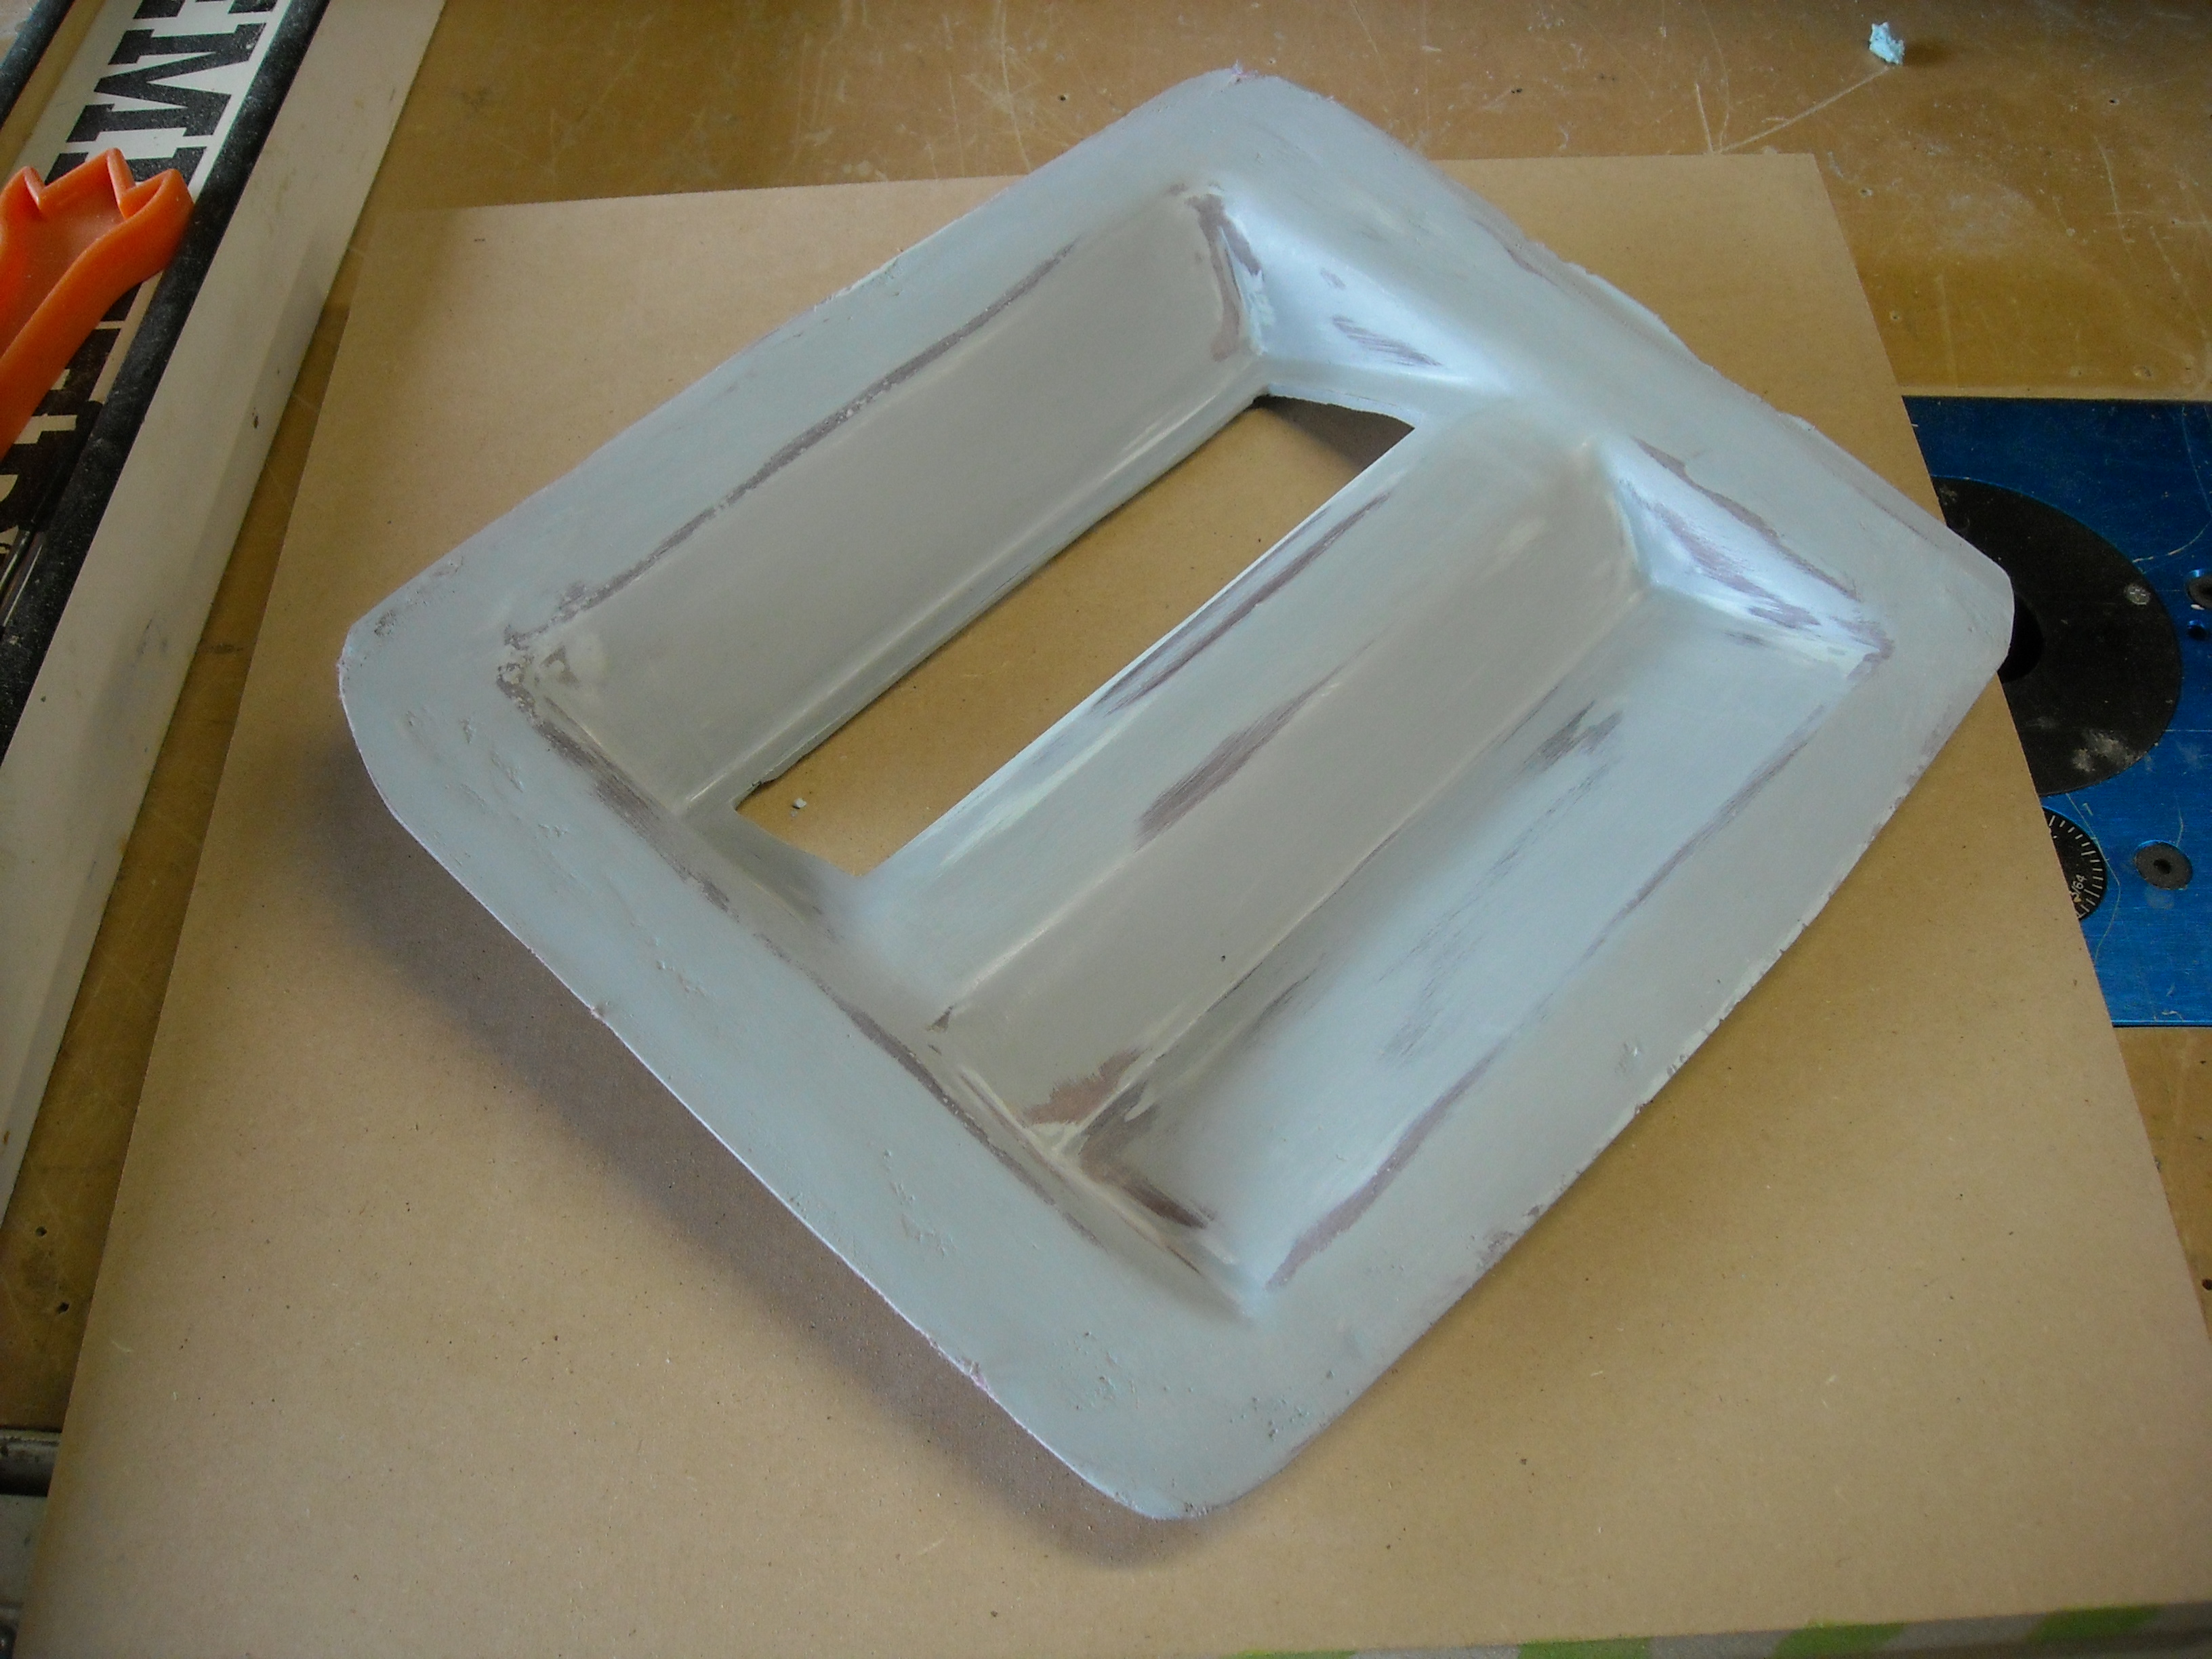
While it was out, I decided to cut out for the gauges and switches.

Once we got everything down to metal, I could then get a good look at what we were working with.
I ended up cutting out most of what was in the dash. i used a radio piece from a 72 mustang as my template.
I then needed to make a frame to strech the fleece over the radio bezel.
Broke the fleece from the mold and cut out the radio opening.
Got busy on hand sanding and shaping.
Added strength to the backside.
added a couple coats of filler to smooth everything out.
sanded down and ready to go in.
While it was out, I decided to cut out for the gauges and switches.
Thread Starter
Junior Member
Posts like a Ricer Type-R
Joined: Aug 2012
Posts: 18
Likes: 0
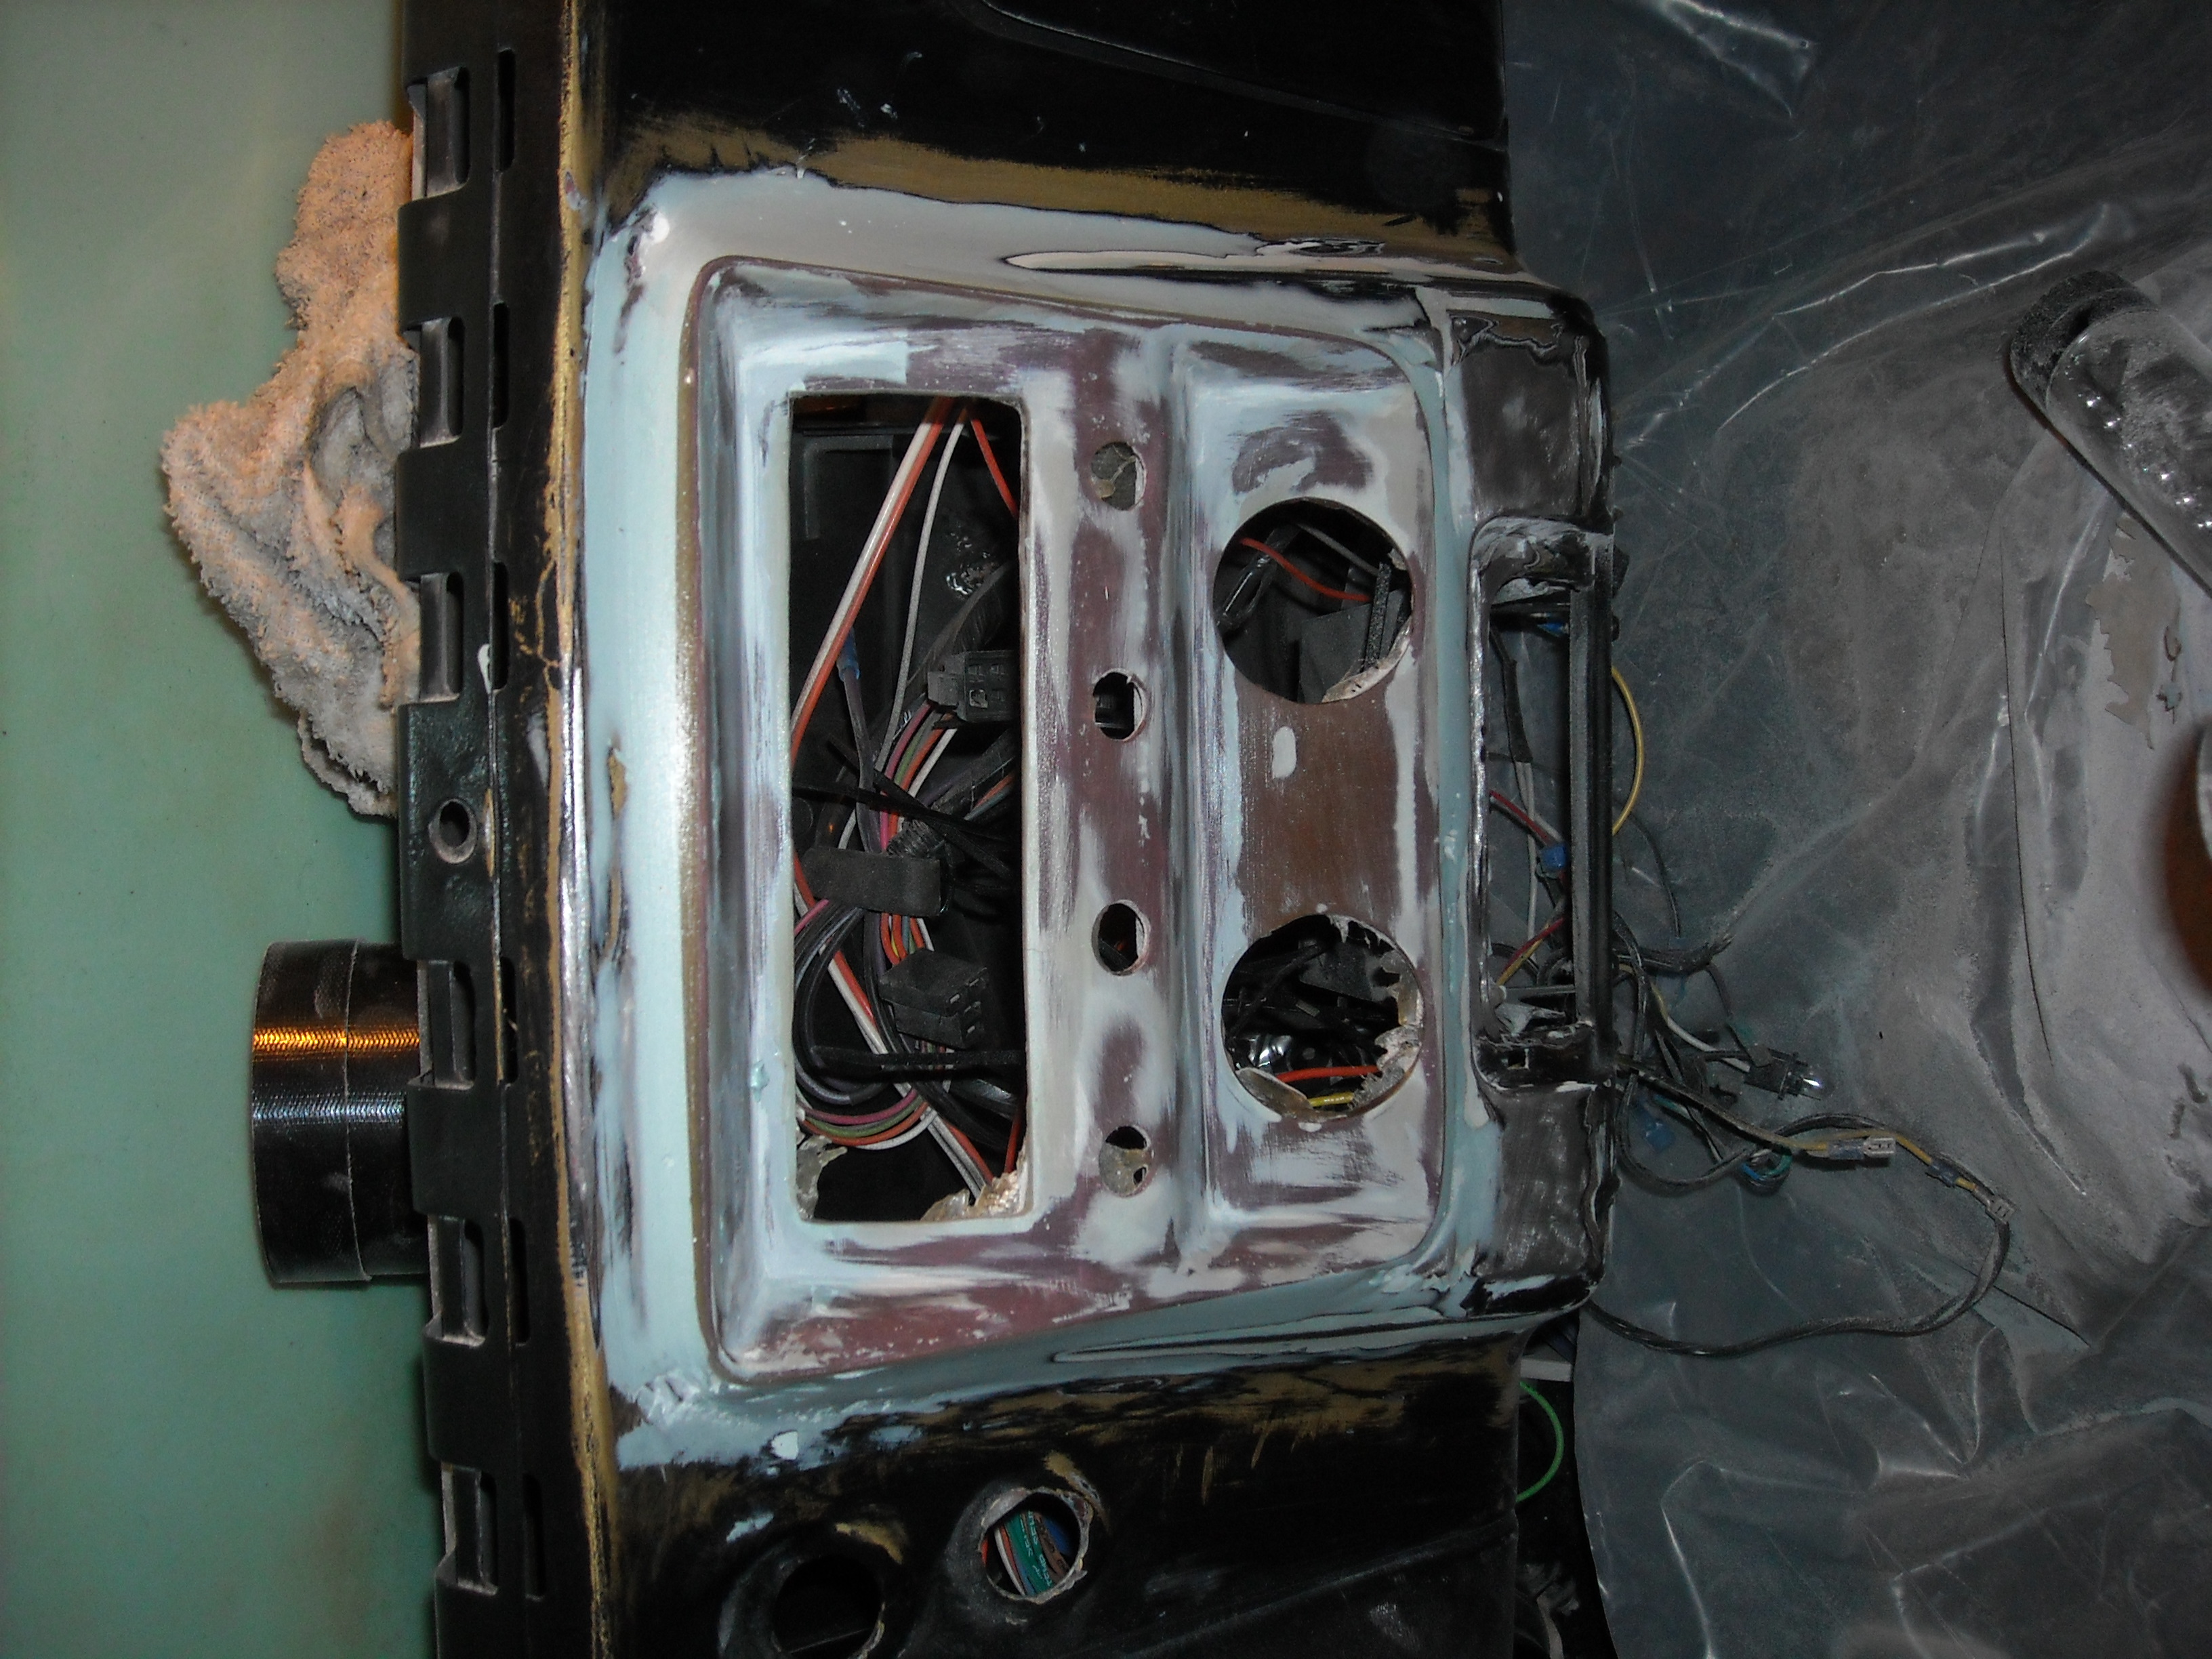
Now it'* time to mount the radio bezel to the dash. I started out by attaching it with zip ties to hold it steady i then glassed it in from the underside. Working under the dash isn't fun as it is, let alone when working with fiberglass.

Once secure, it was time to mold it into the dash.
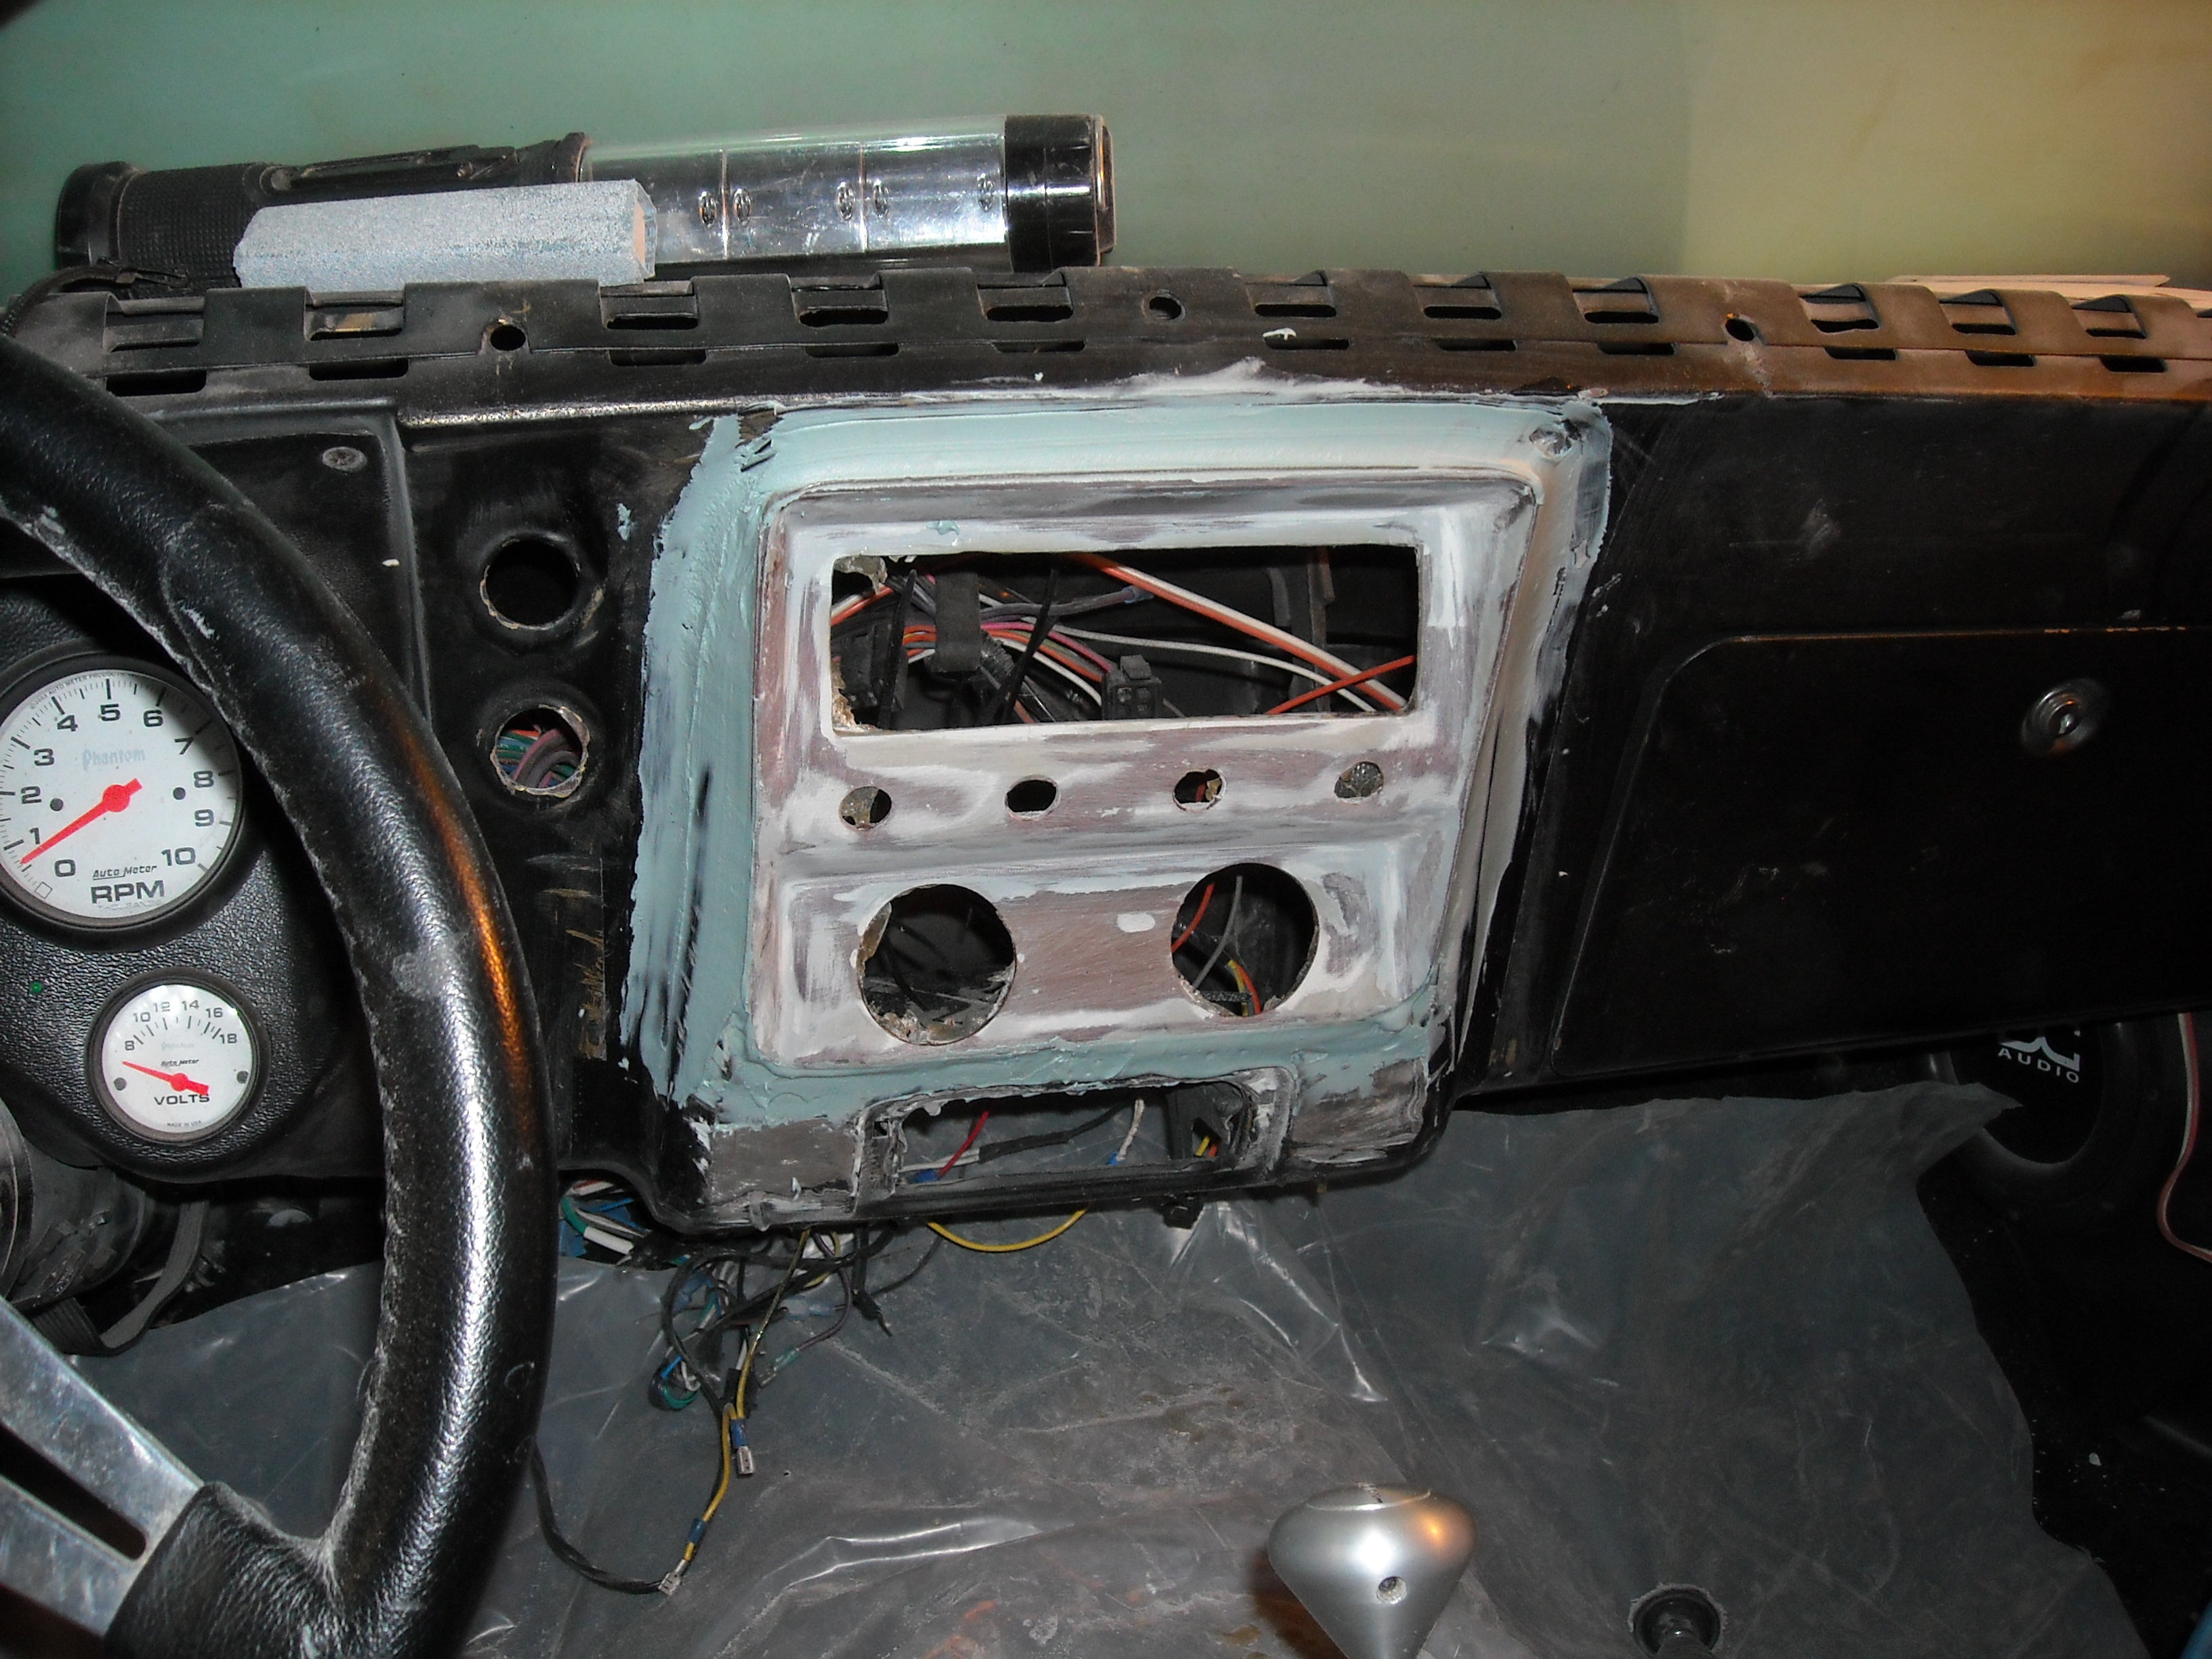

This took more then a few layers and tries to get that look of it was designed from the factory that way.

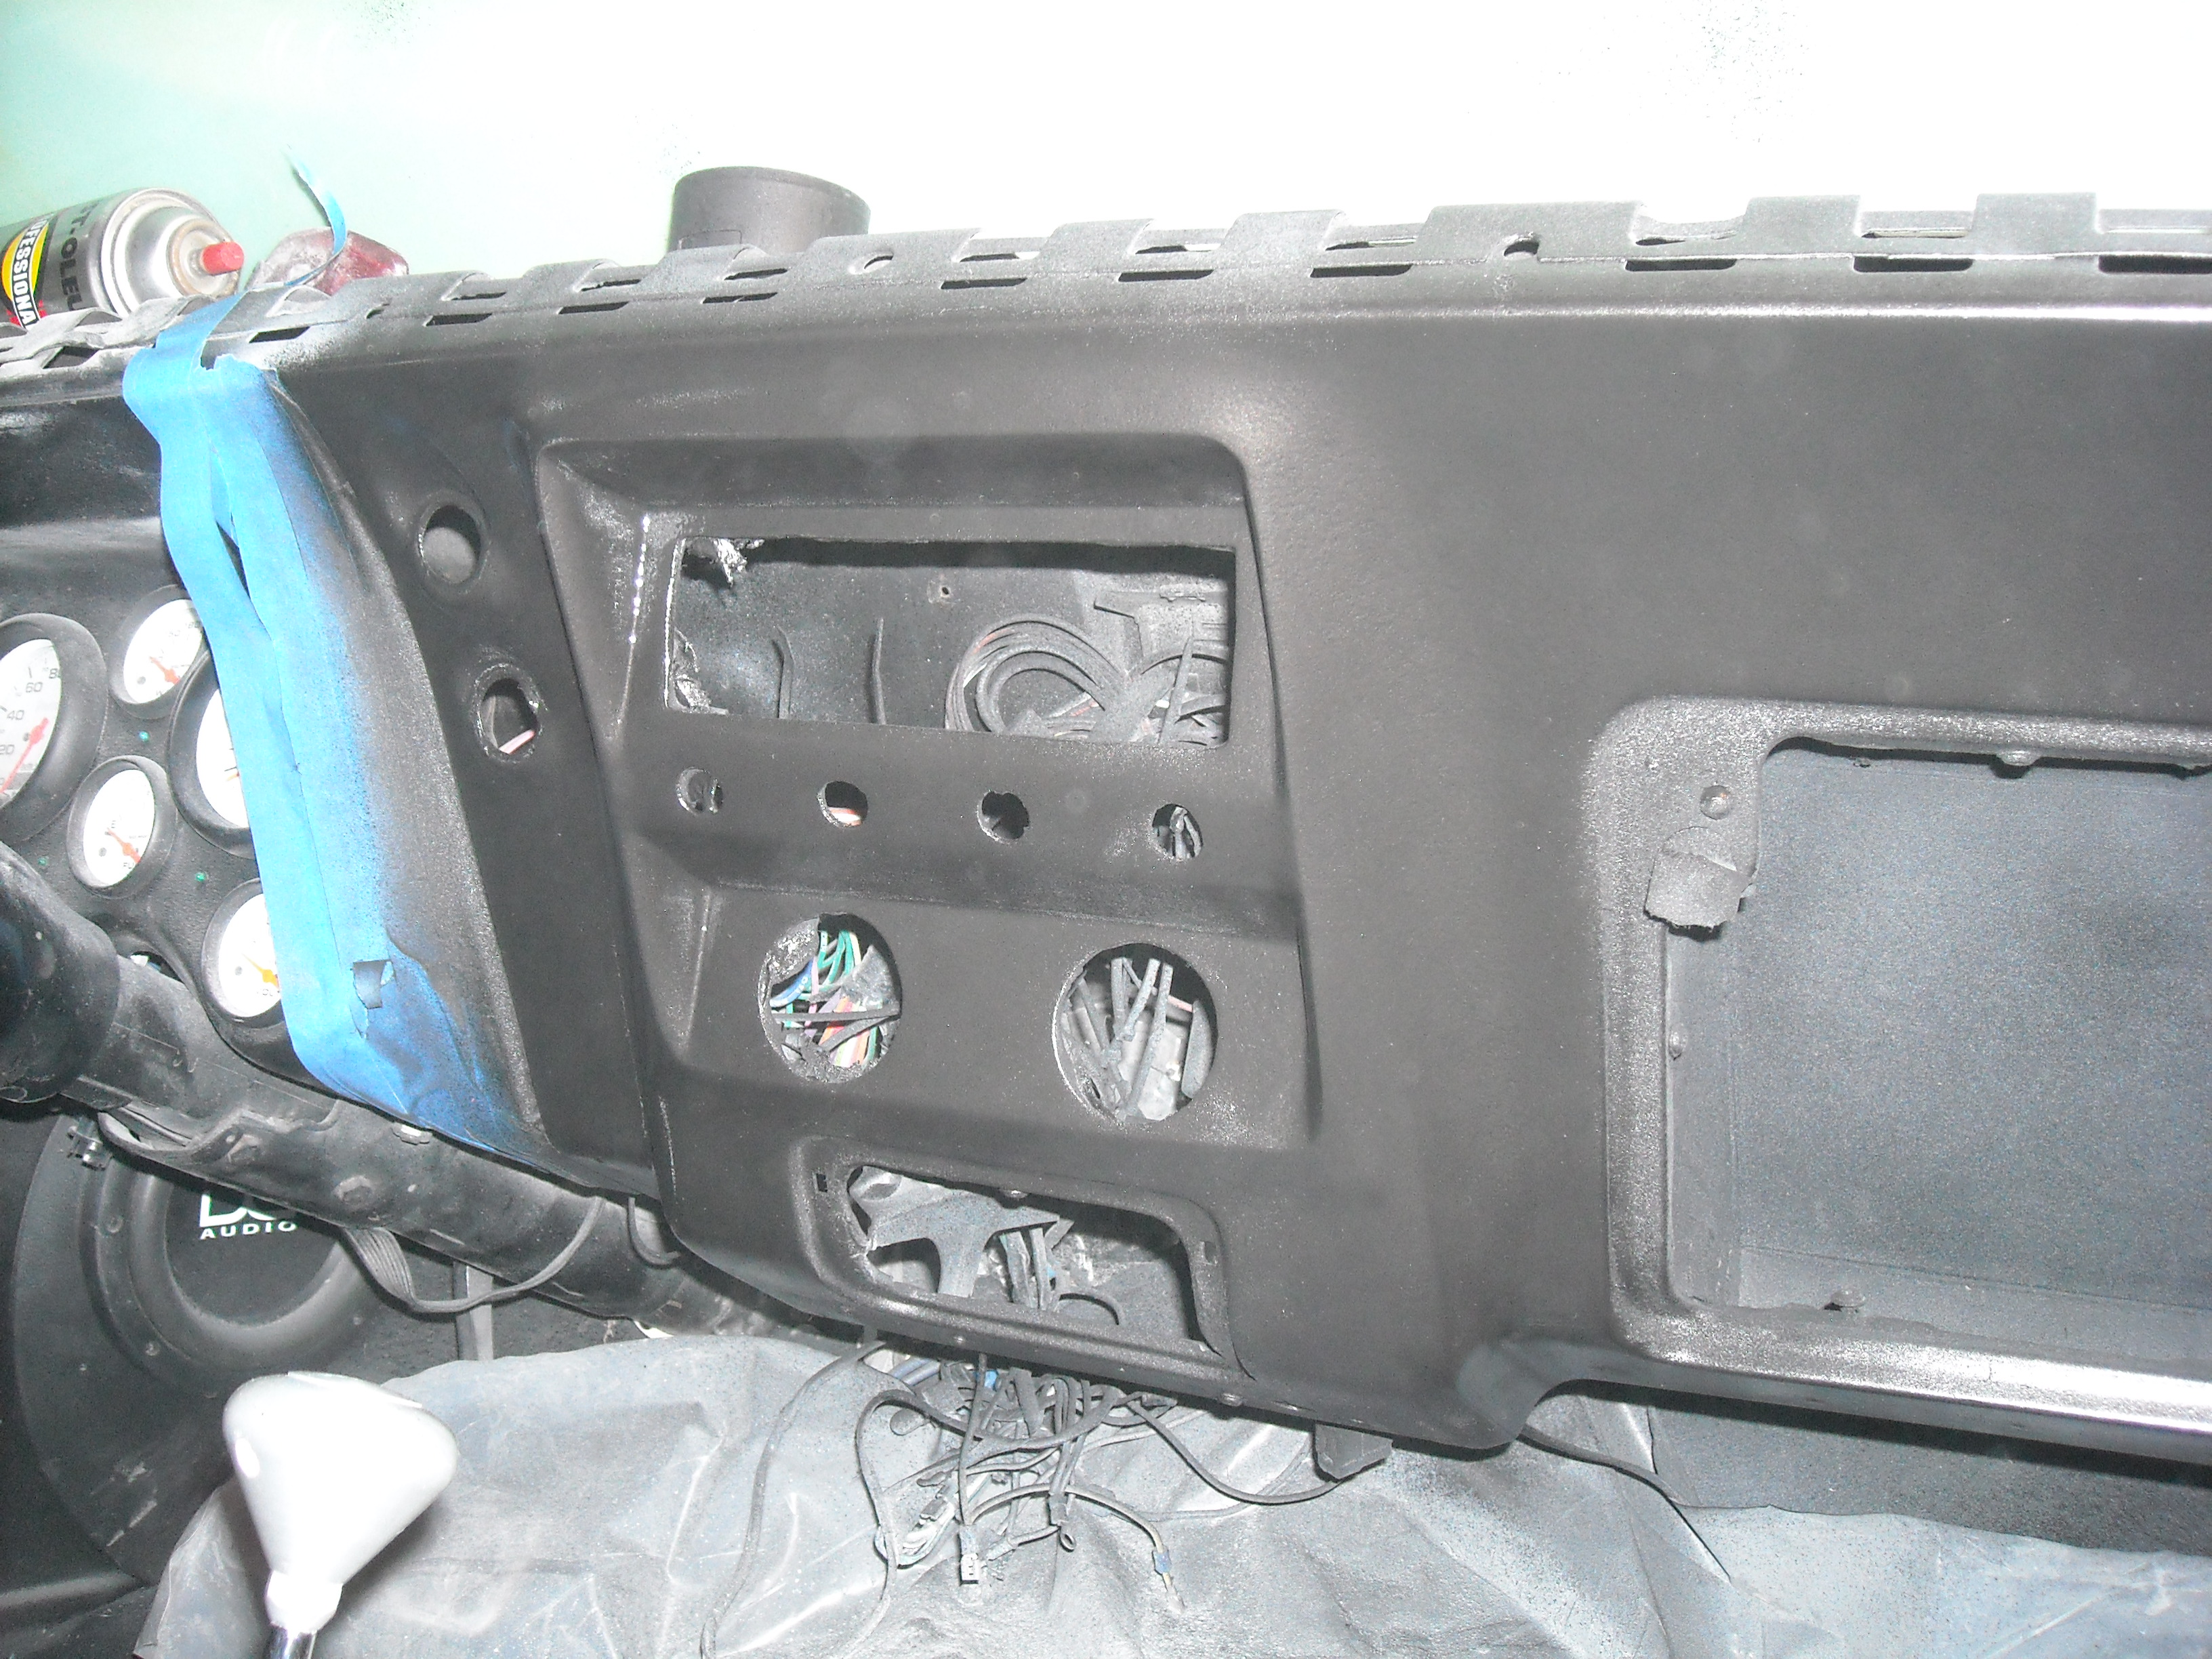
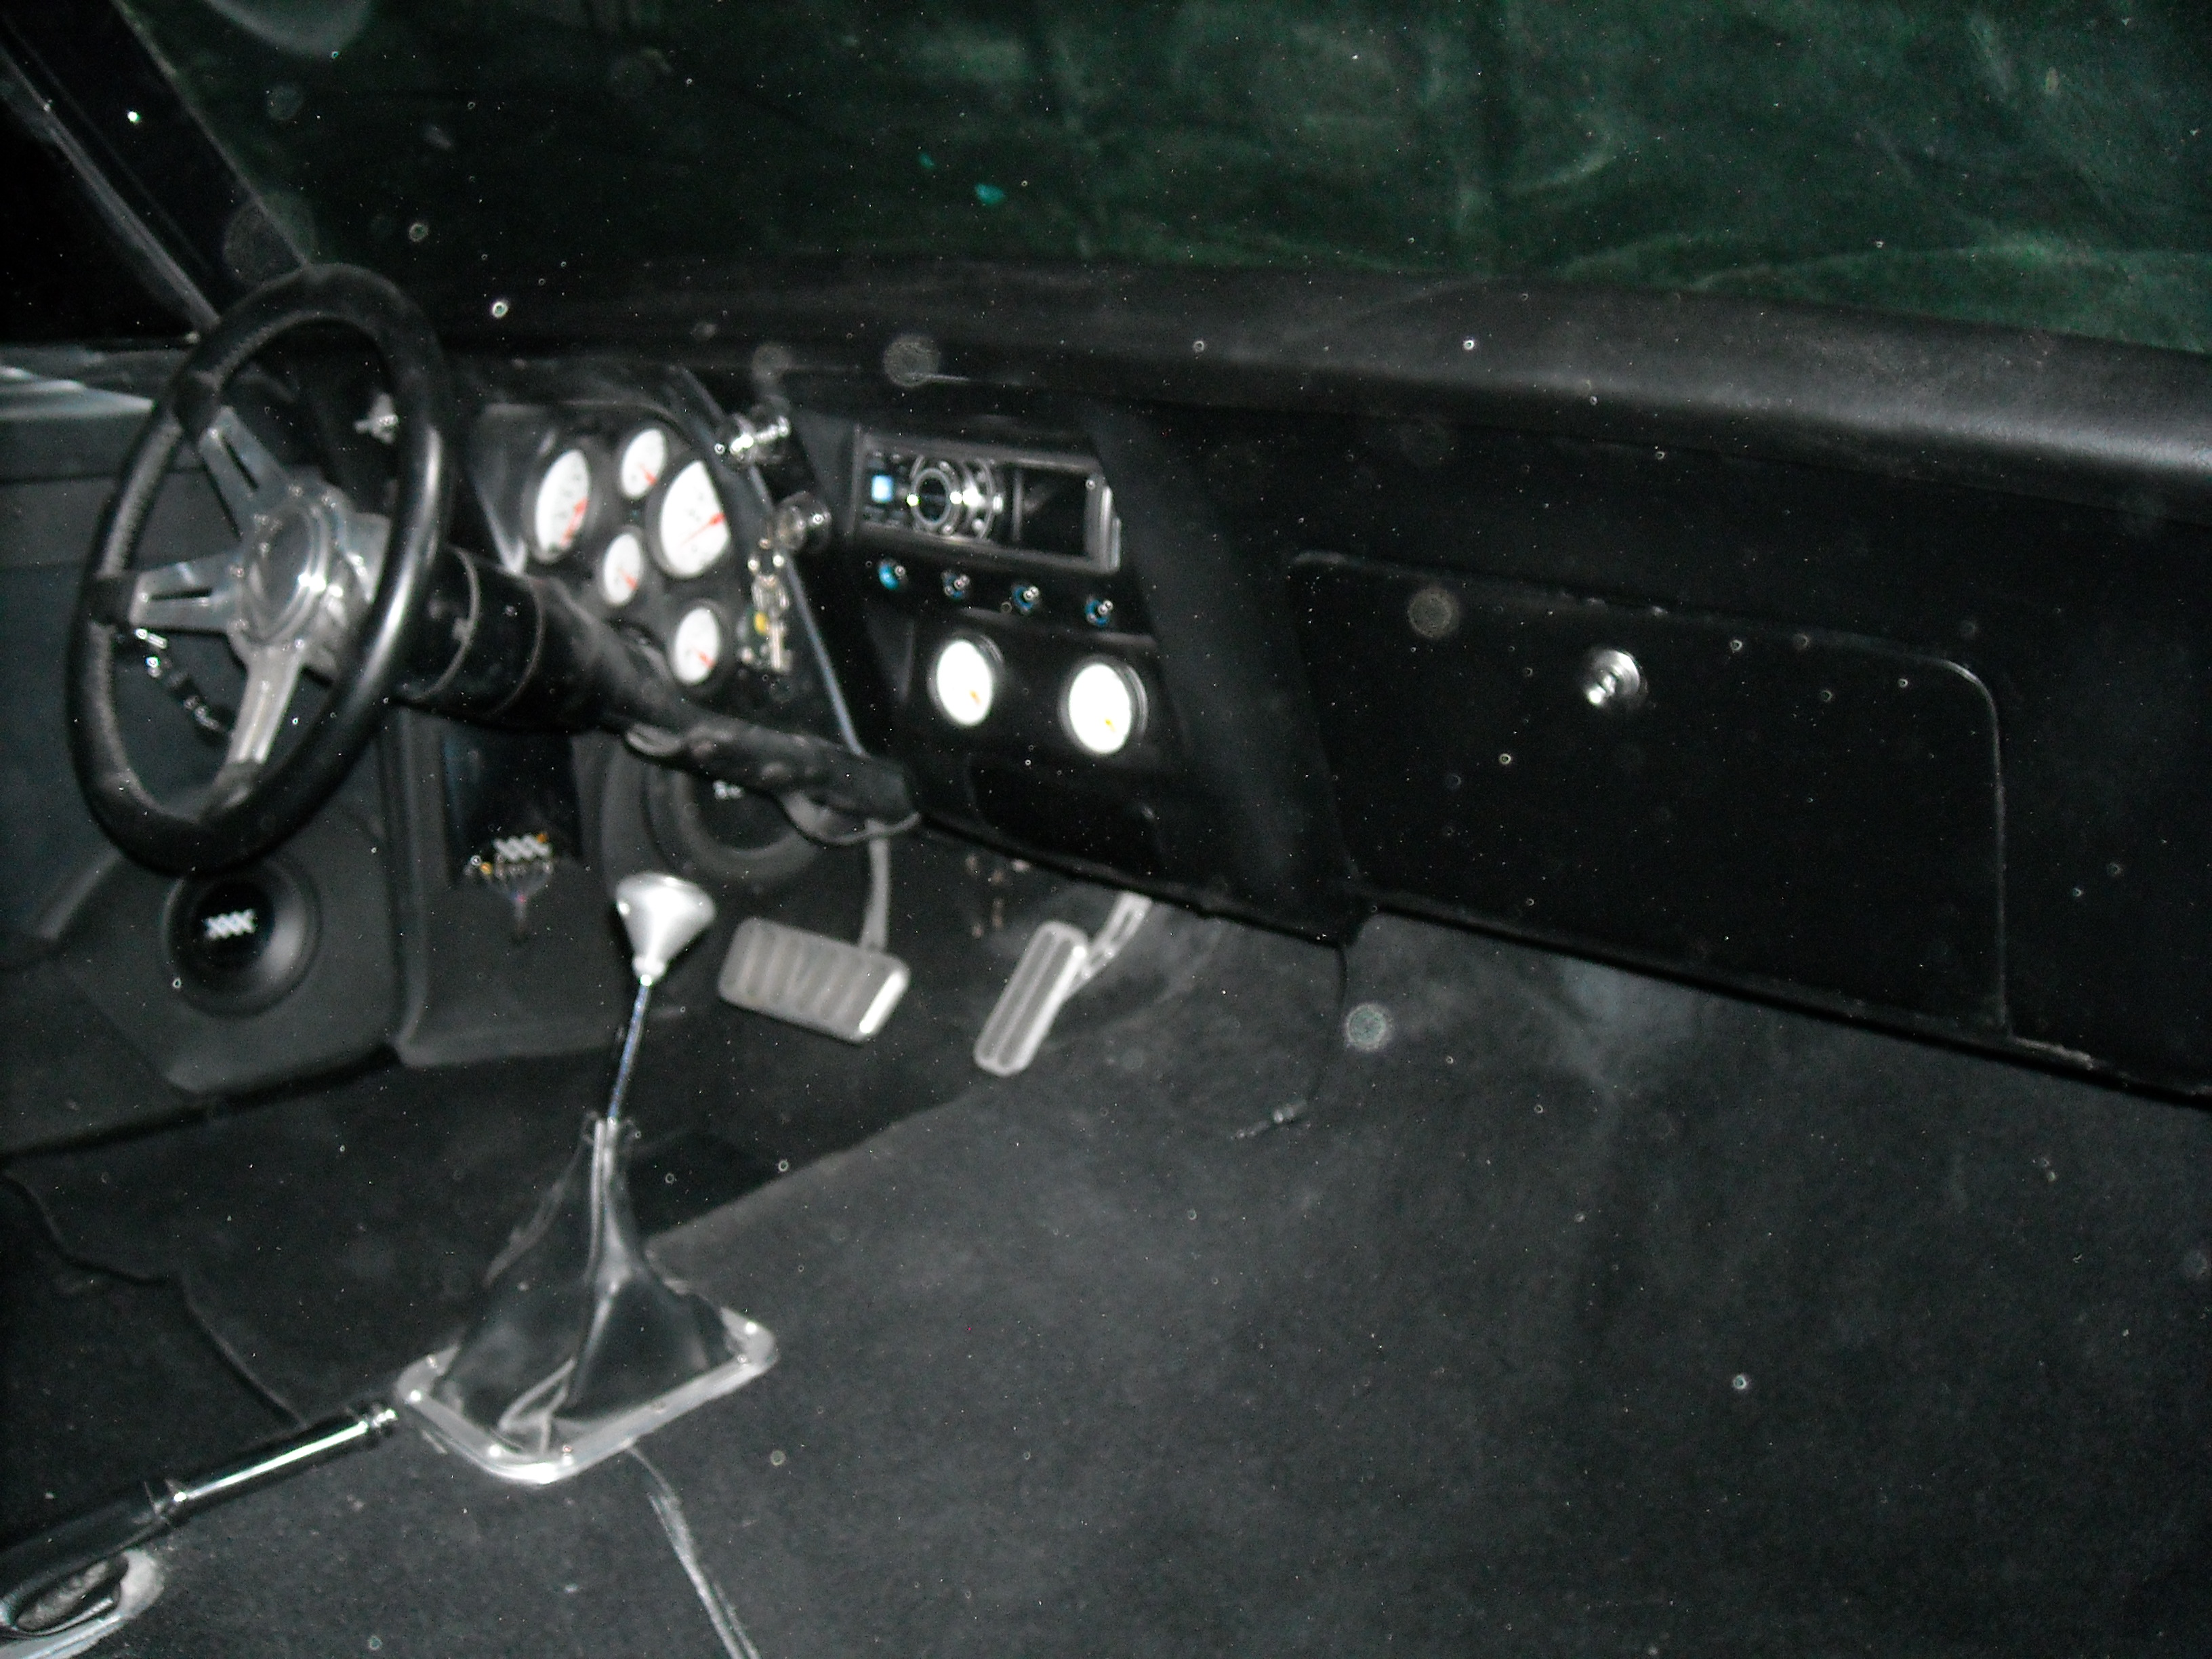
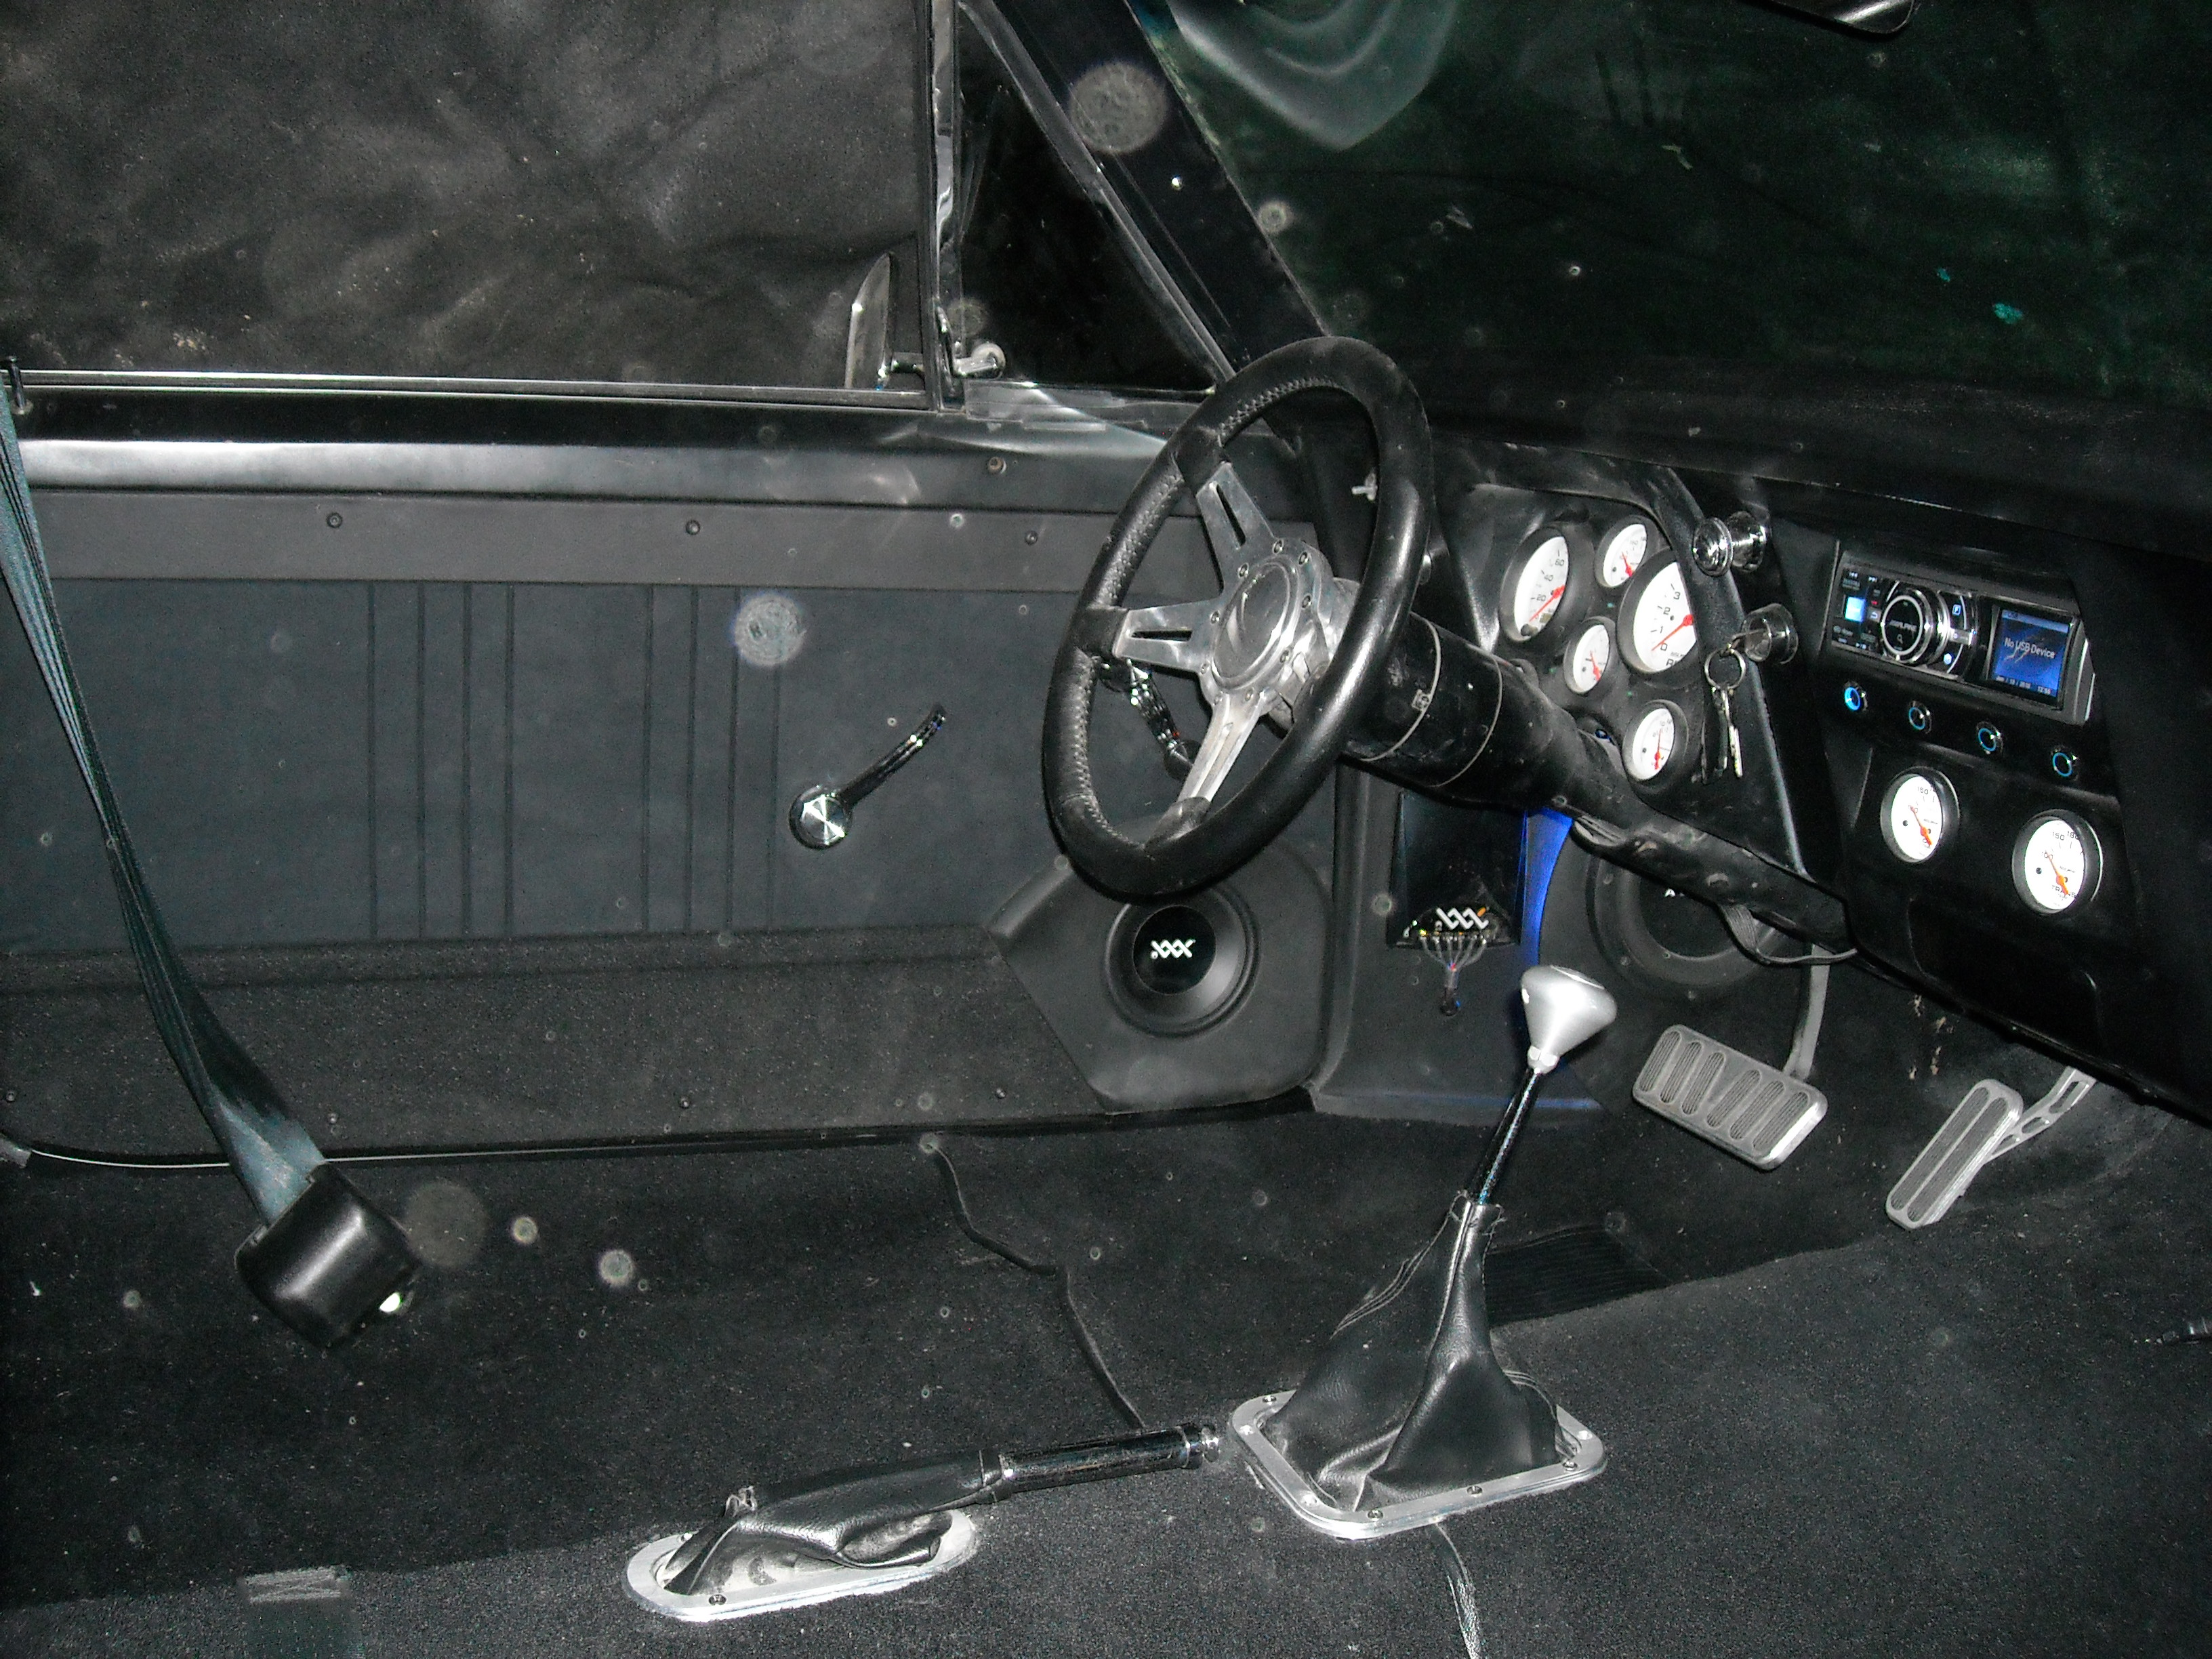
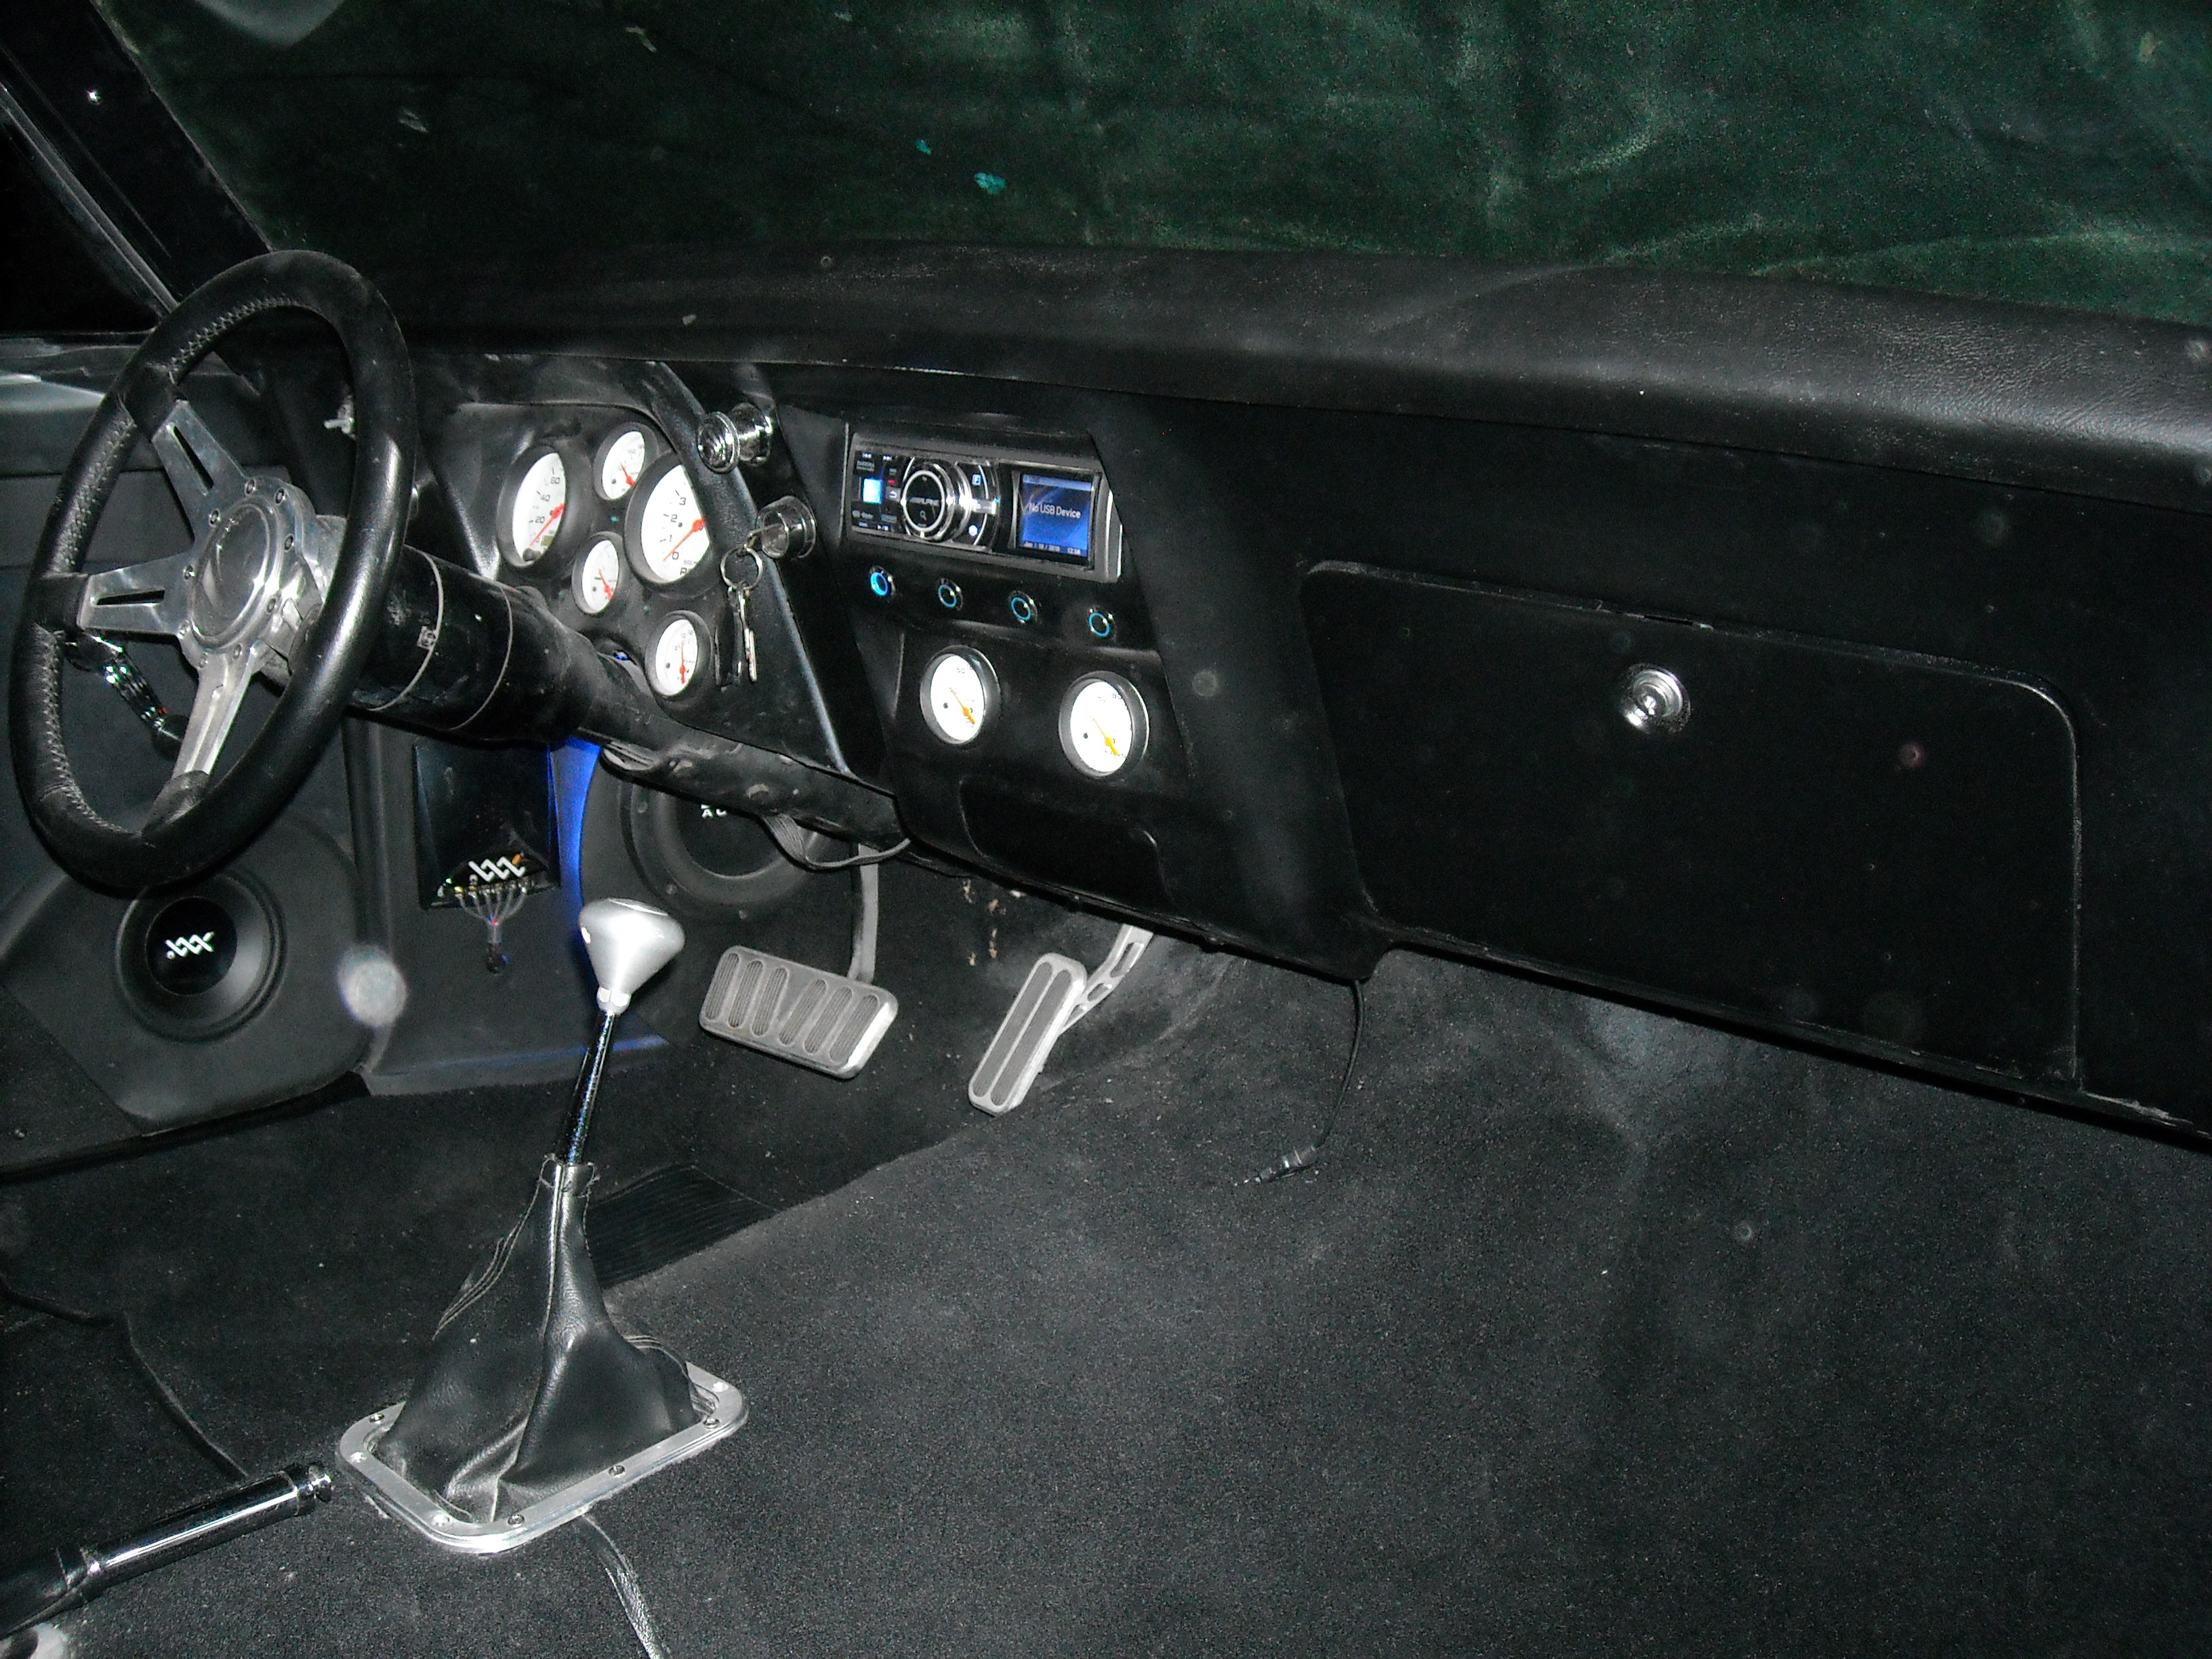
Once I had it looking good, After HOURs of hand sanding, it was time to paint her.


The dash was painted by the owner in a satin black. i used a few different types of paint to give the dash a textured look that could of been stock. It ended up being a textured paint with a hammered finished paint over that with a satin black coat over that.

Once secure, it was time to mold it into the dash.
This took more then a few layers and tries to get that look of it was designed from the factory that way.
Once I had it looking good, After HOURs of hand sanding, it was time to paint her.
The dash was painted by the owner in a satin black. i used a few different types of paint to give the dash a textured look that could of been stock. It ended up being a textured paint with a hammered finished paint over that with a satin black coat over that.
Thread Starter
Junior Member
Posts like a Ricer Type-R
Joined: Aug 2012
Posts: 18
Likes: 0
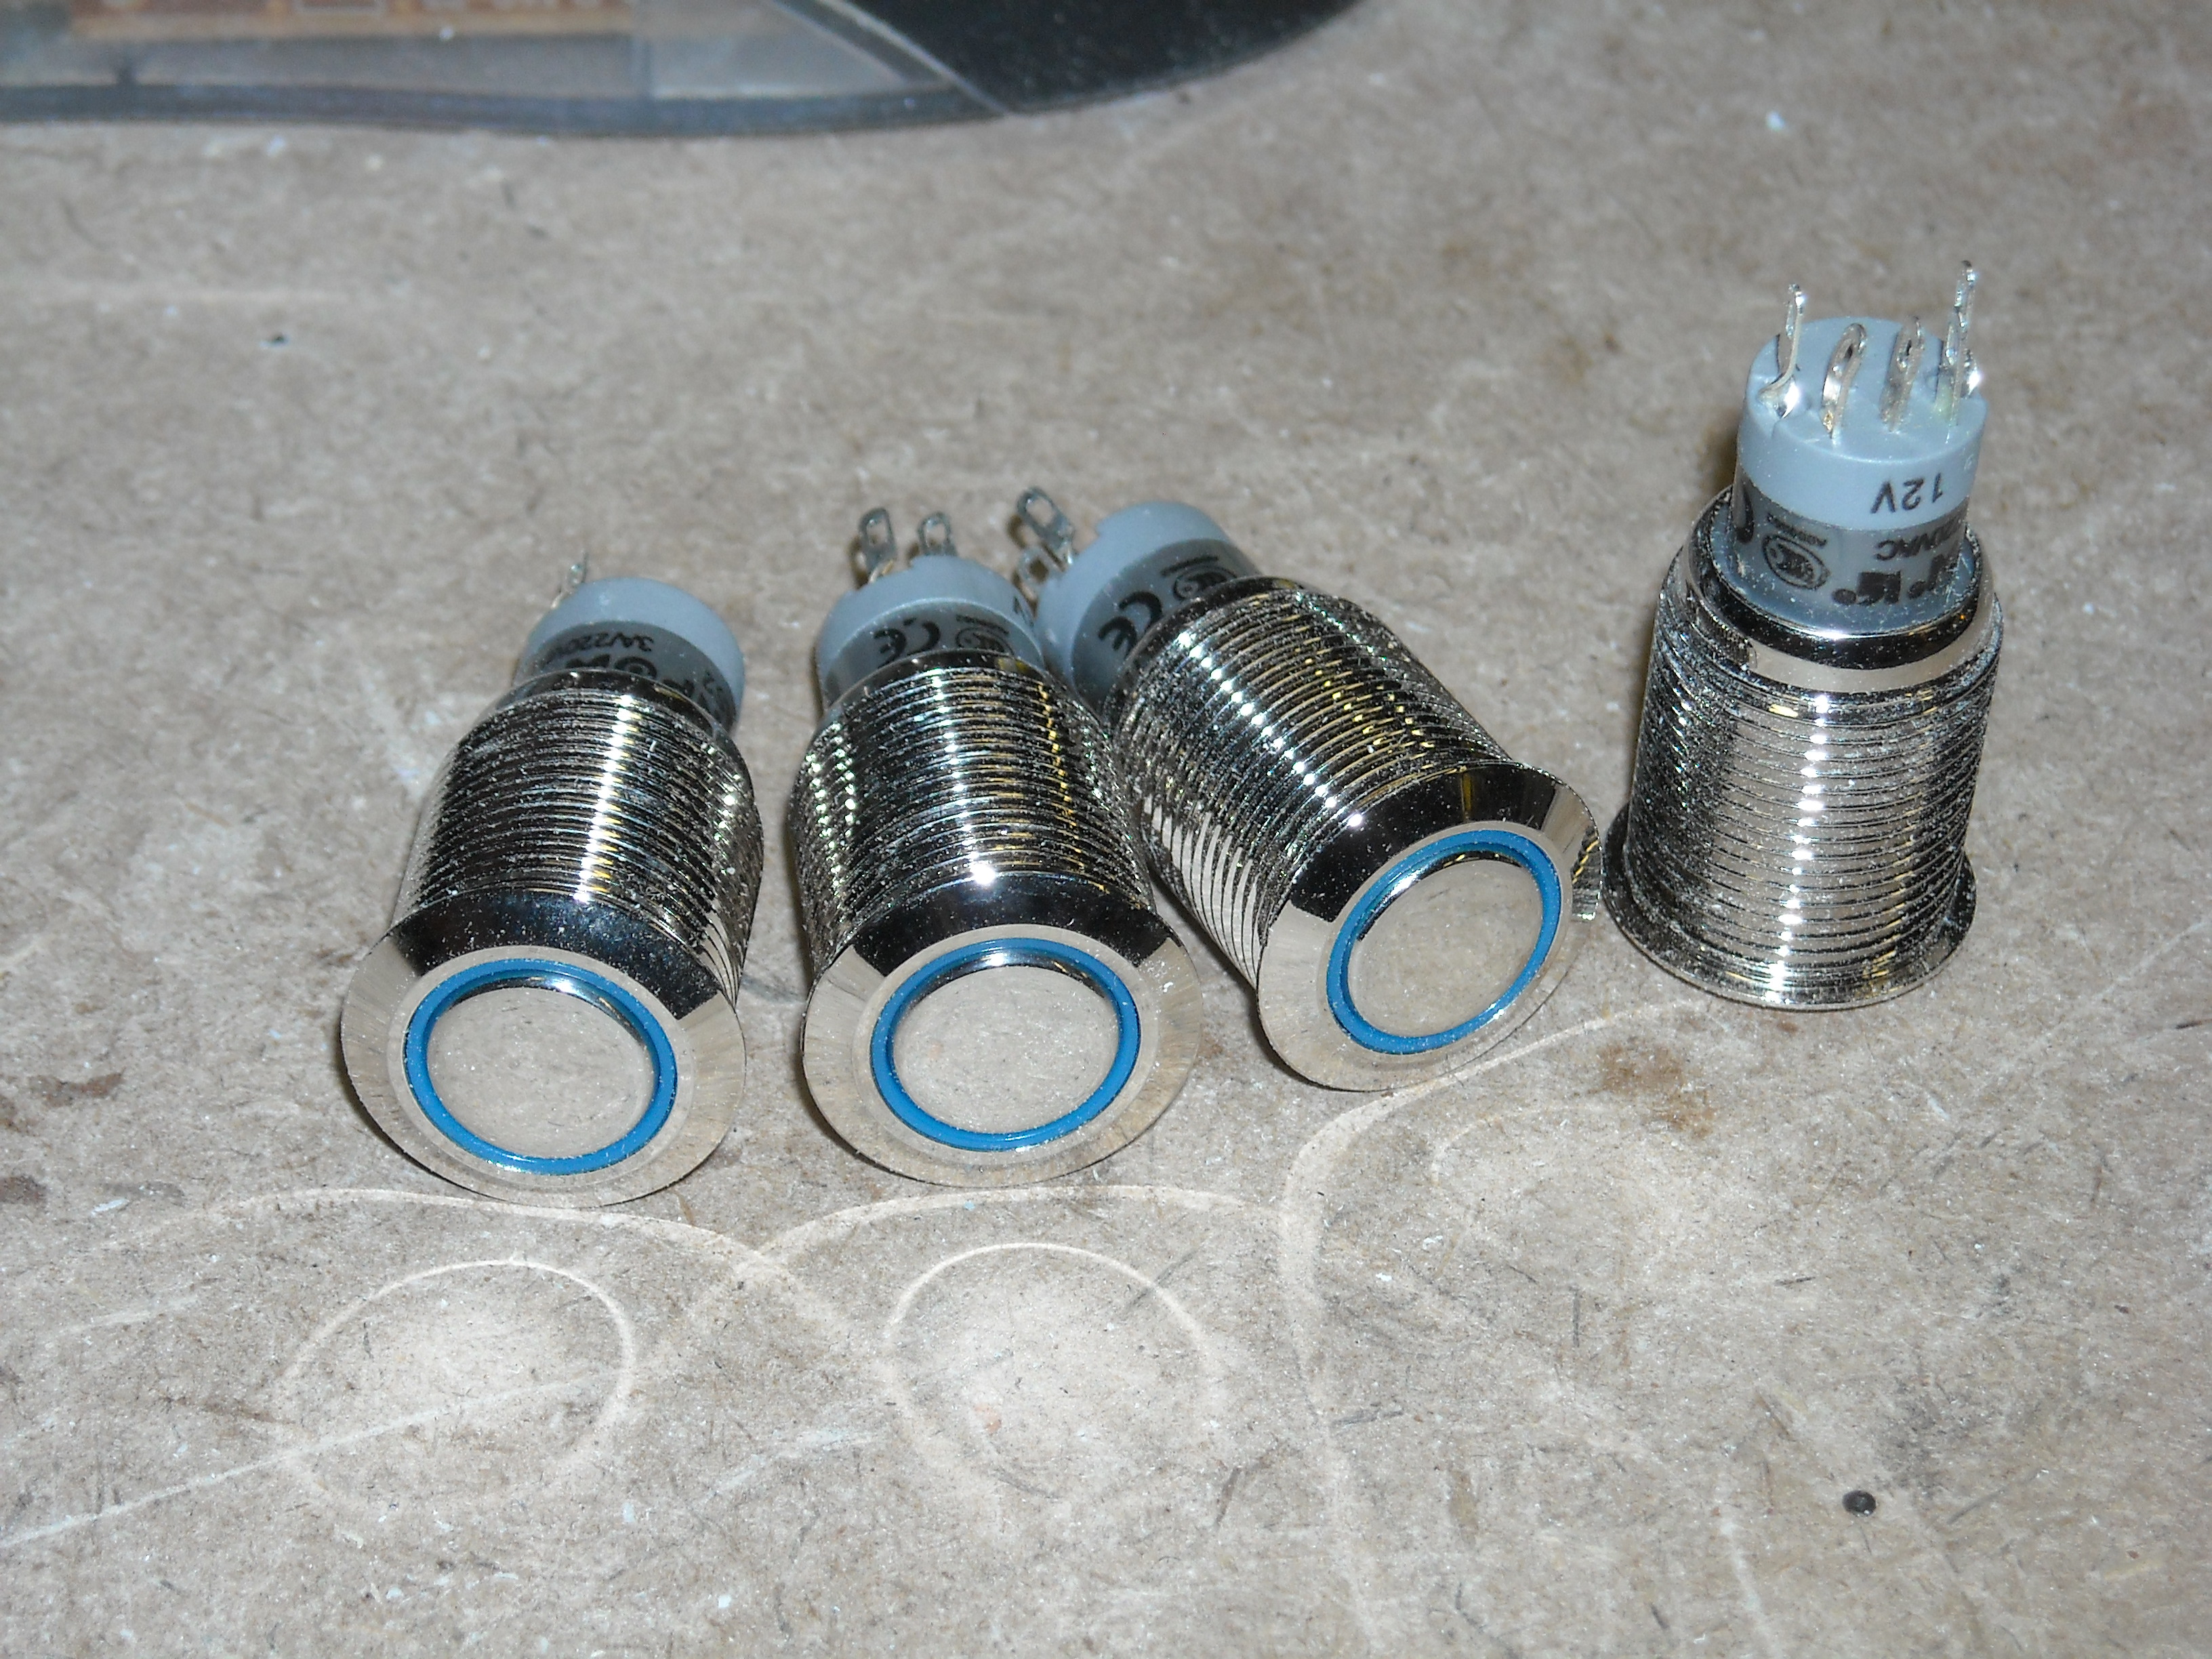
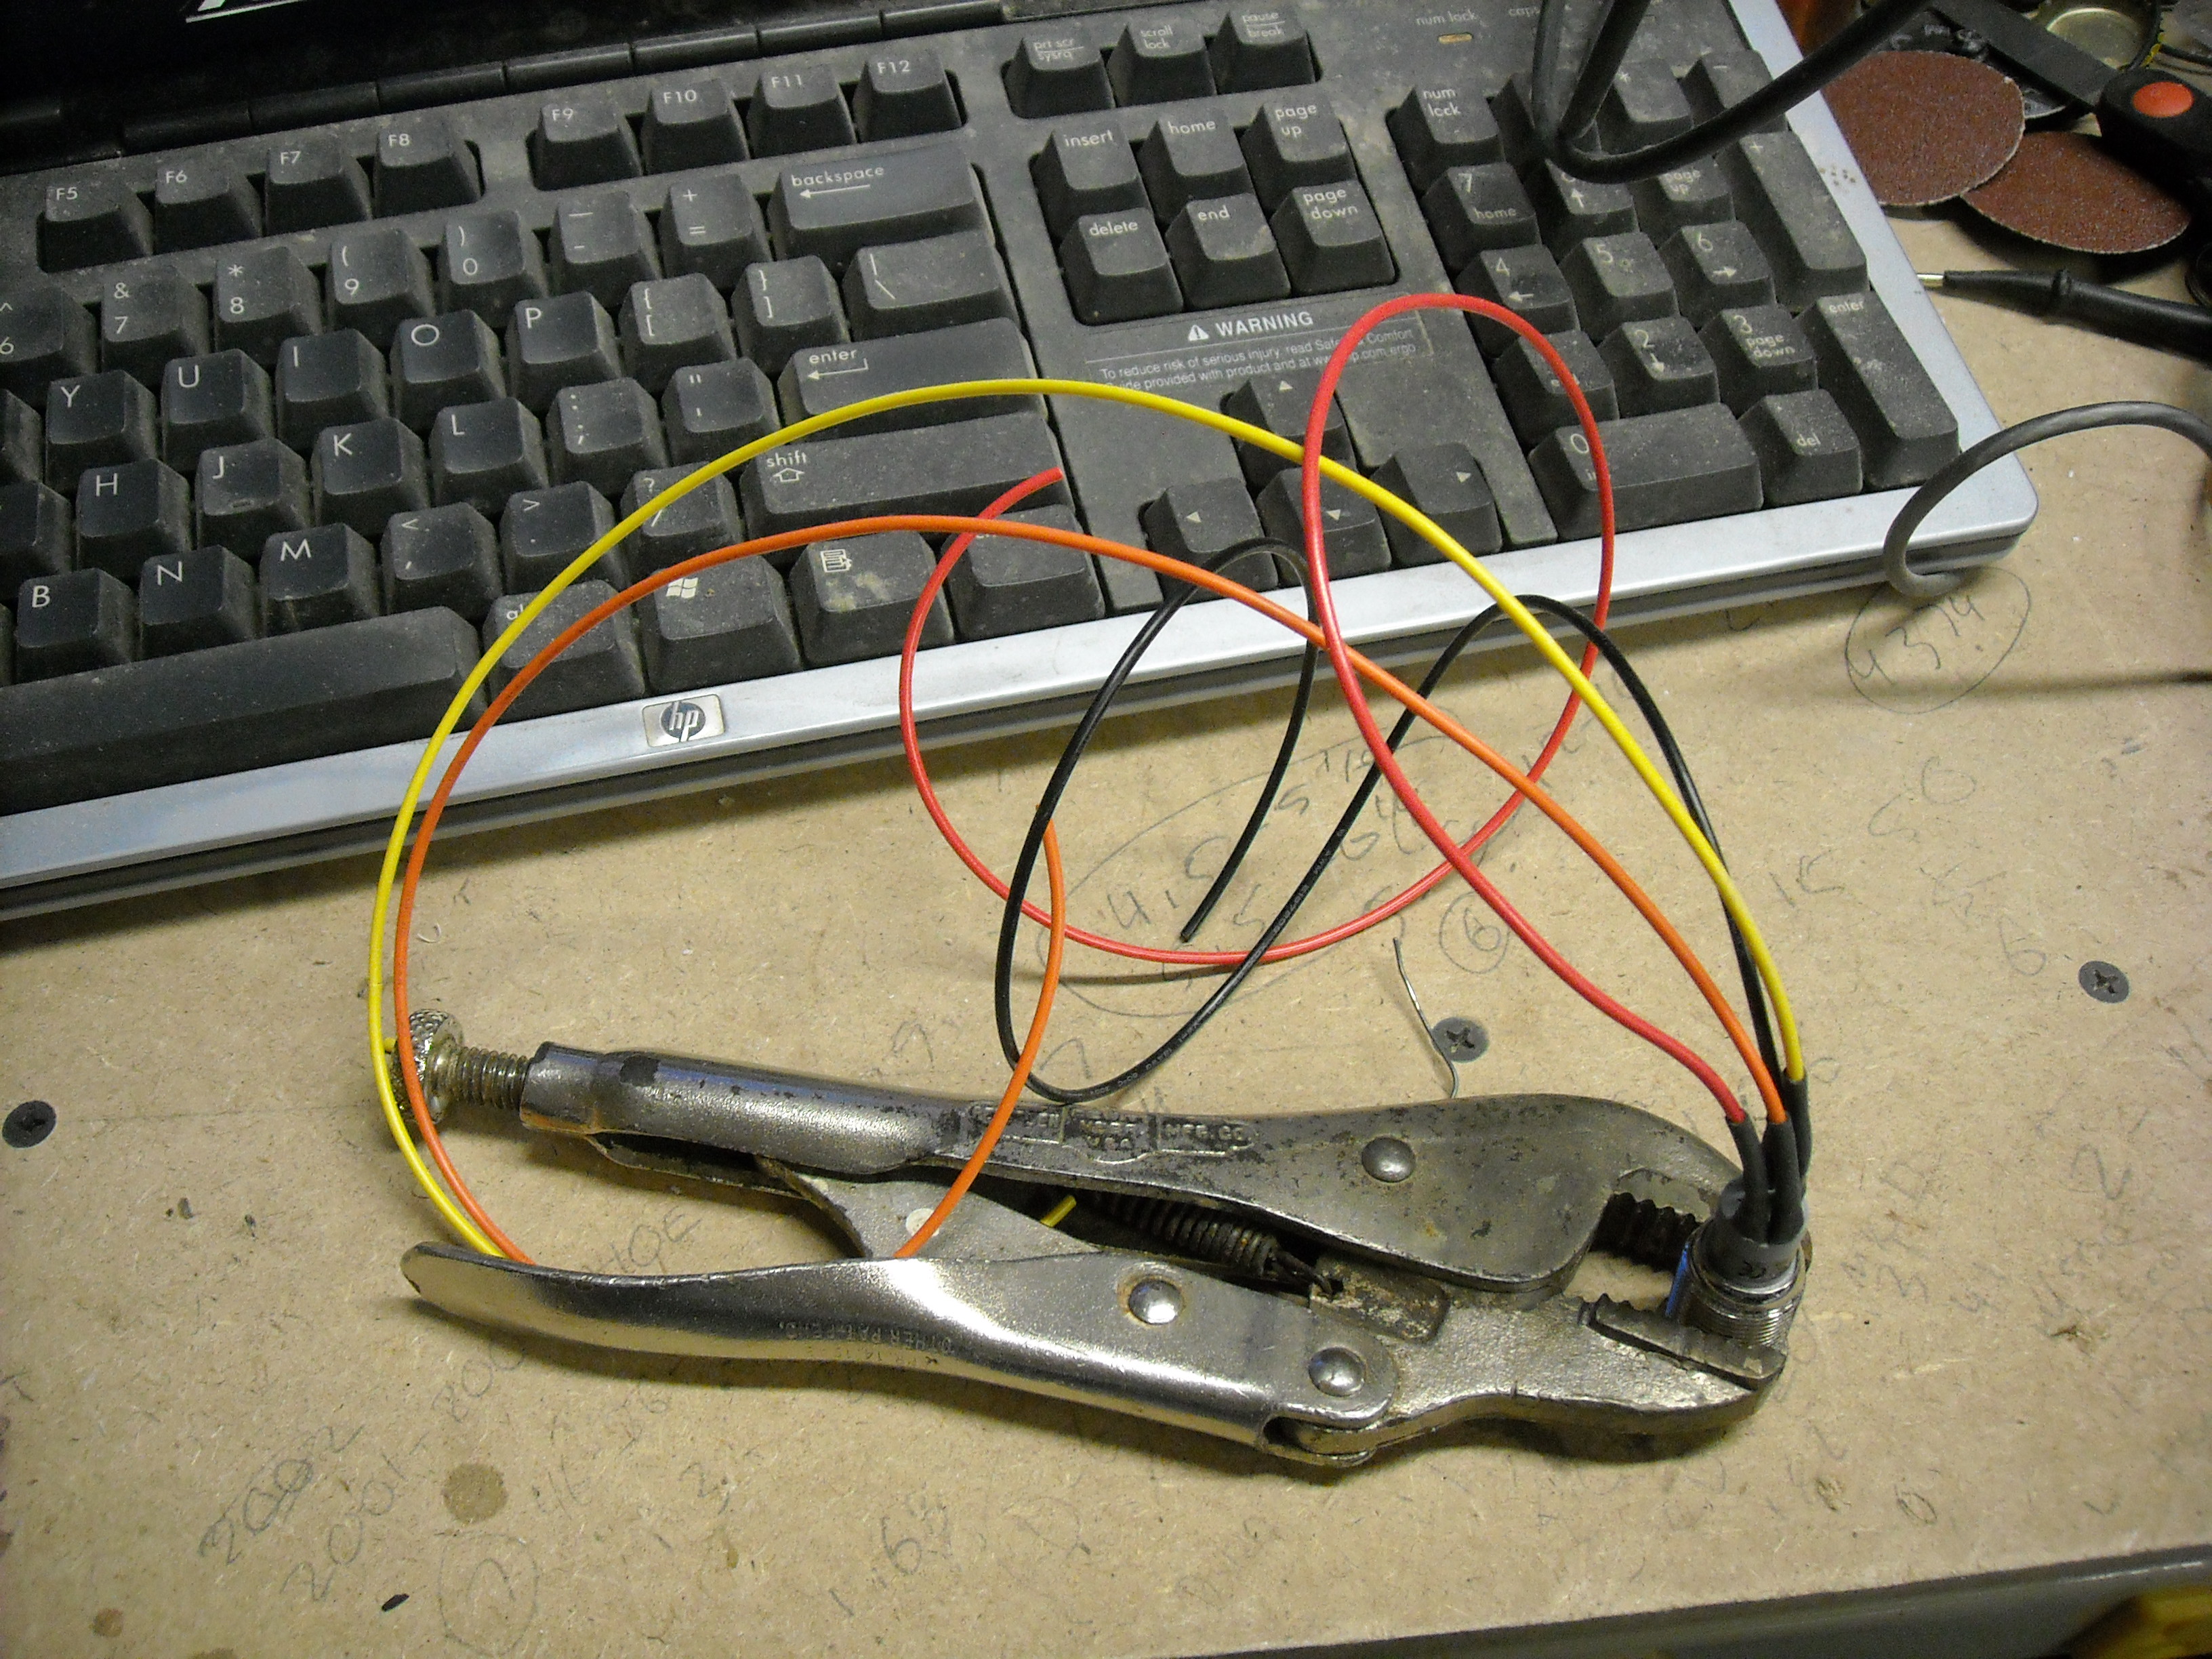
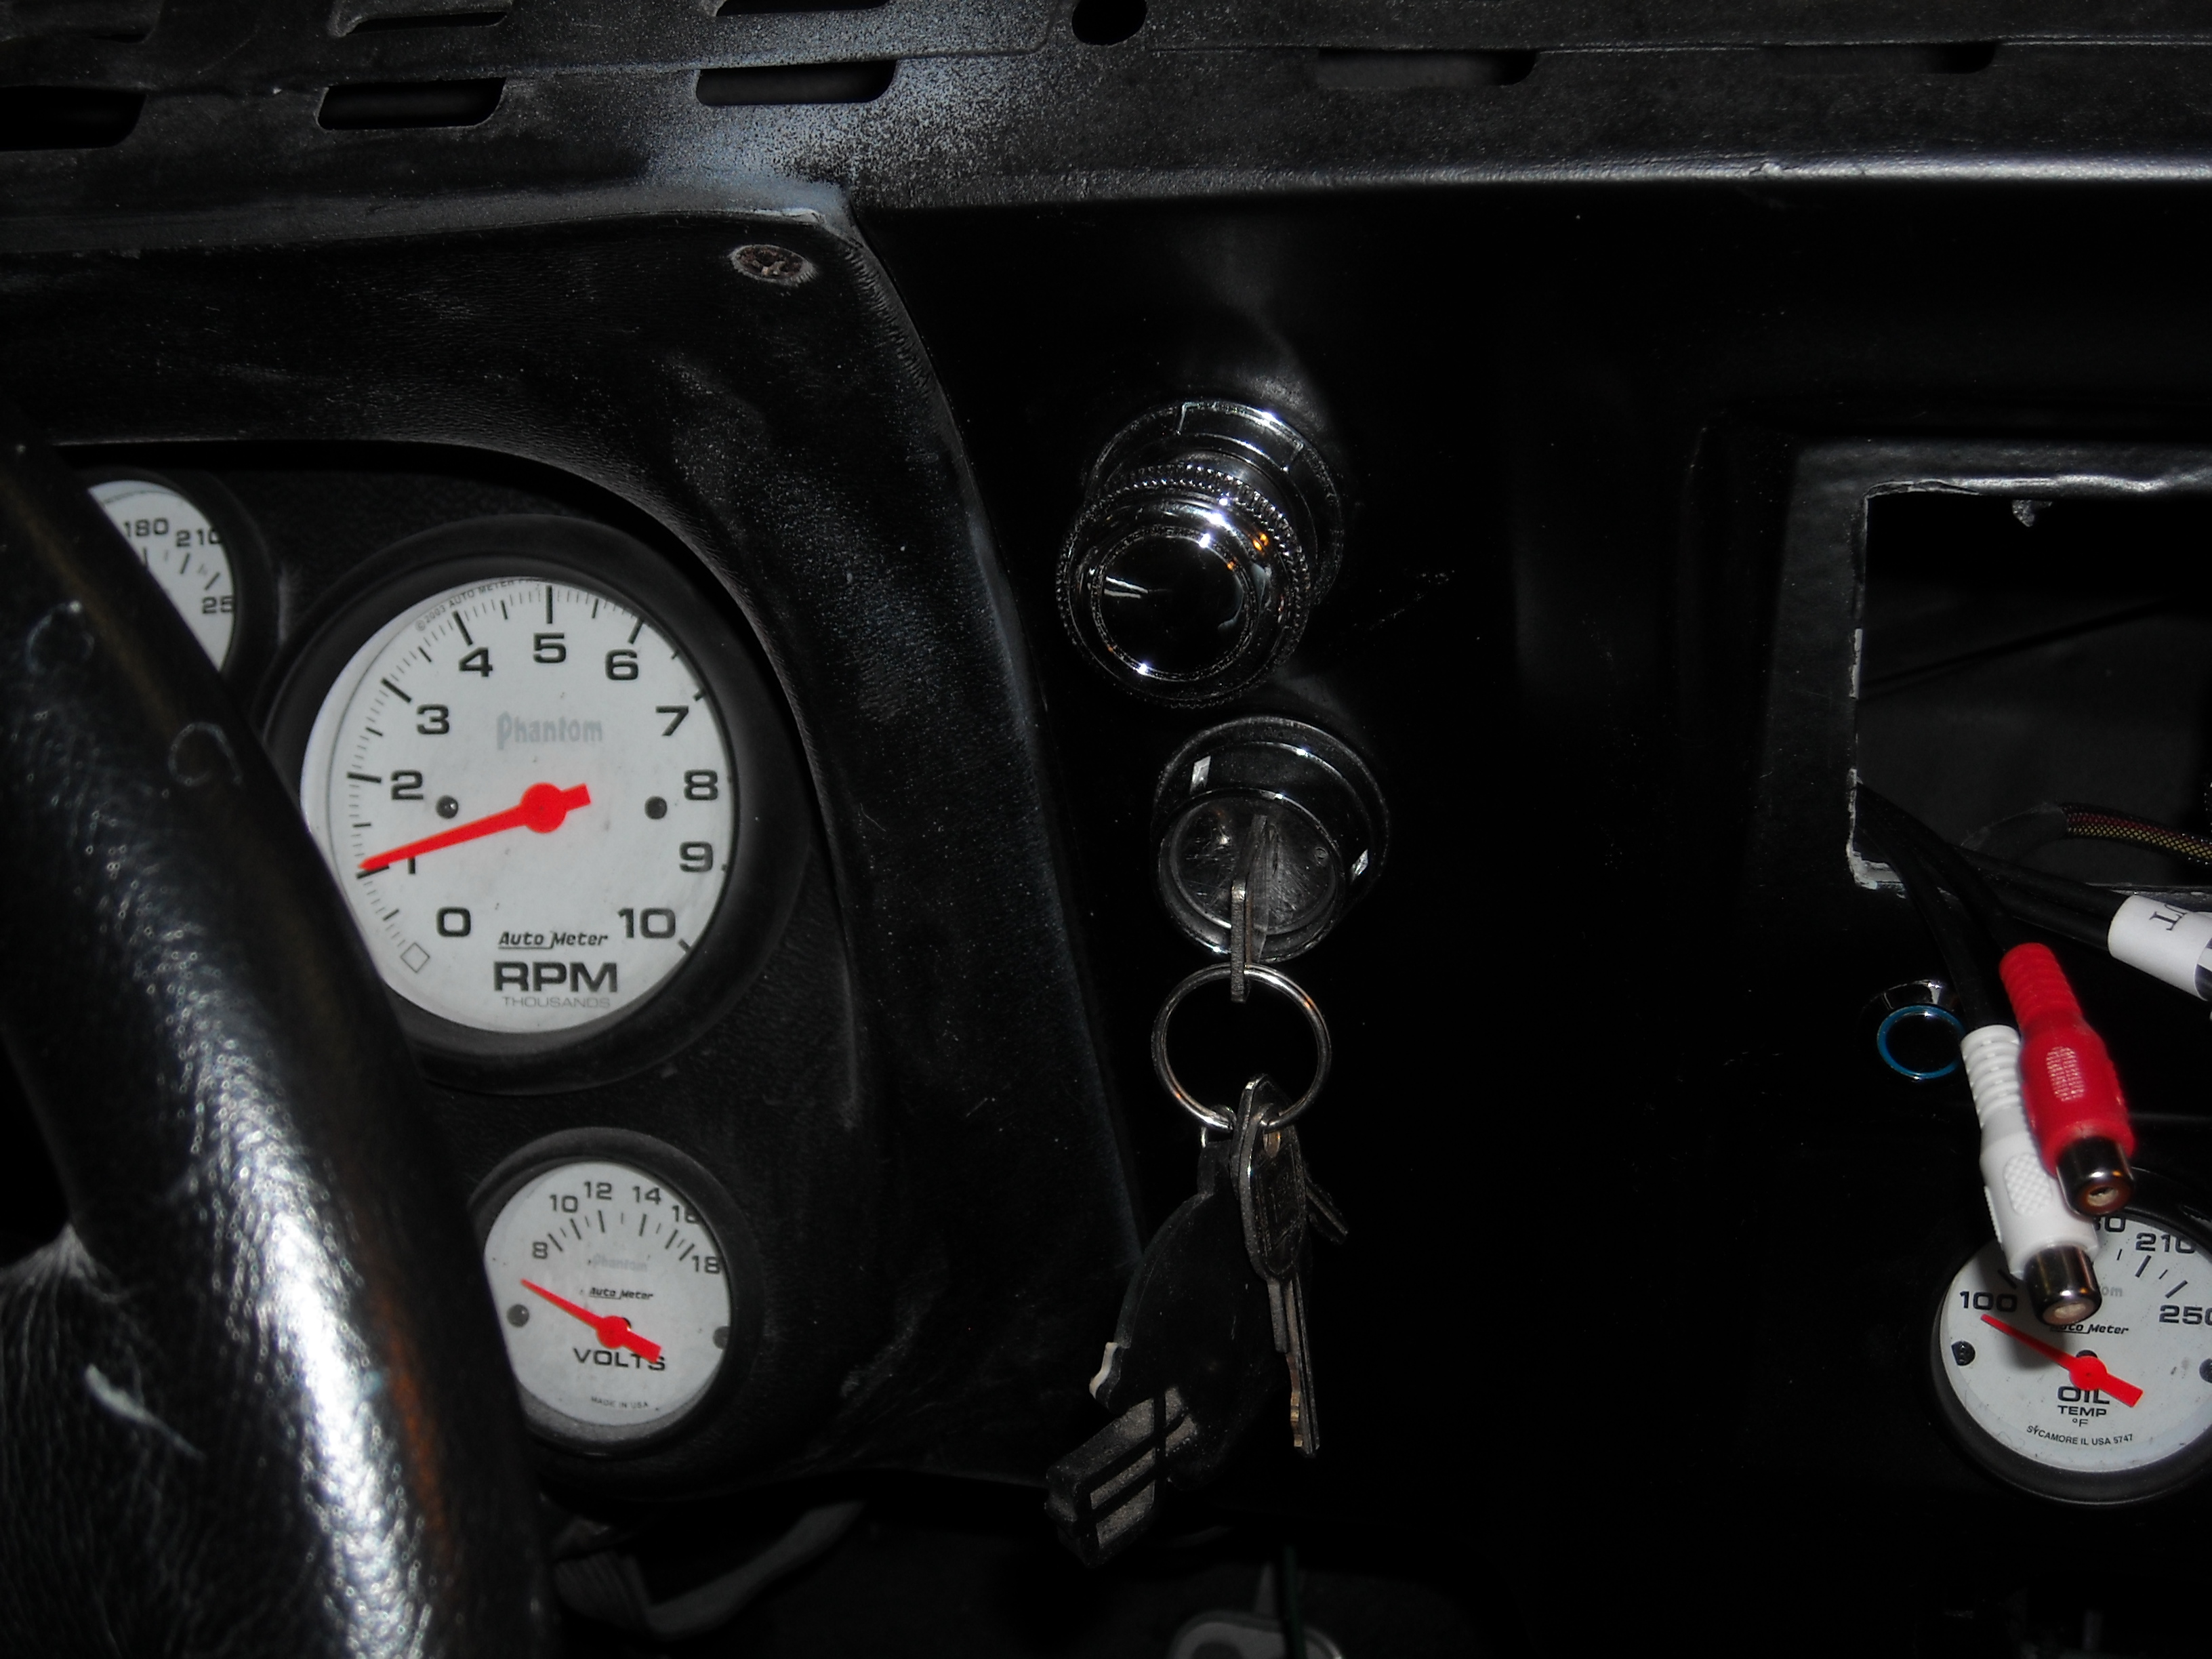
Last part was the wiring. I needed a switch for the fans, one for the amps for a kill switch, and then the led lights. The 4th is a spare for fog lights when they come in.
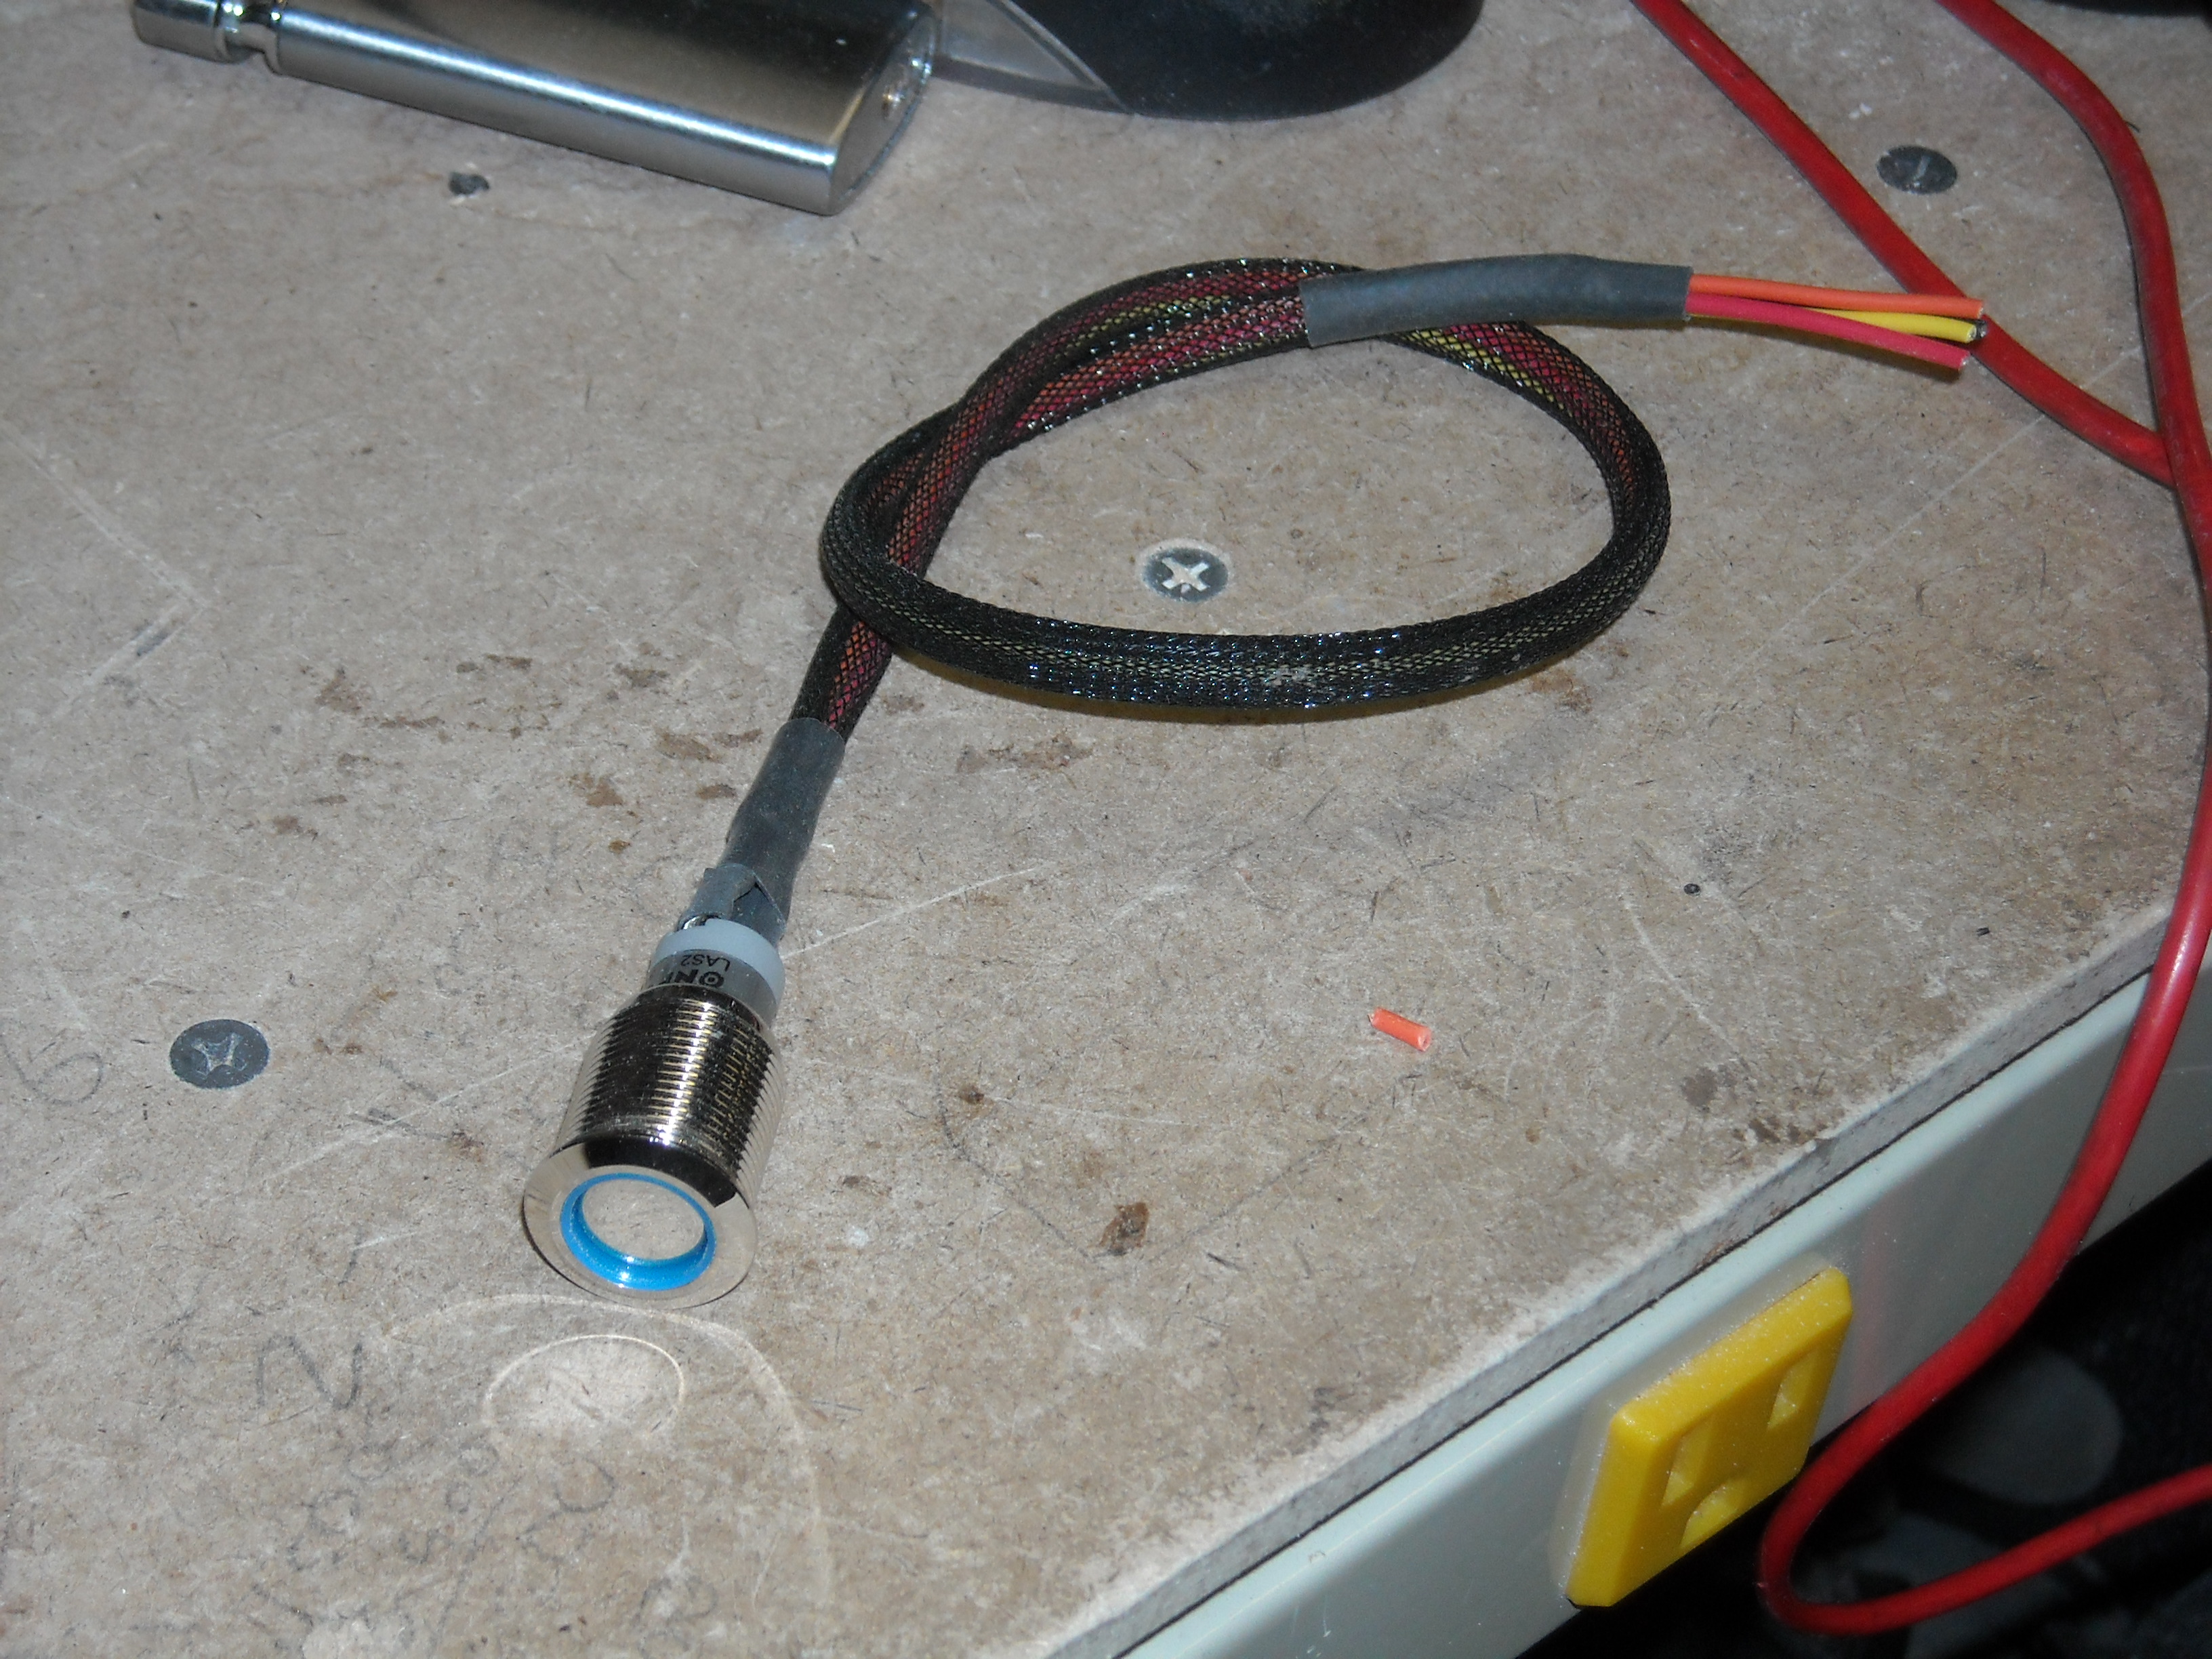
These are a very nice switch. My only complaint is the very thin lip to mount them. You have to be perfect in your hole cutout.
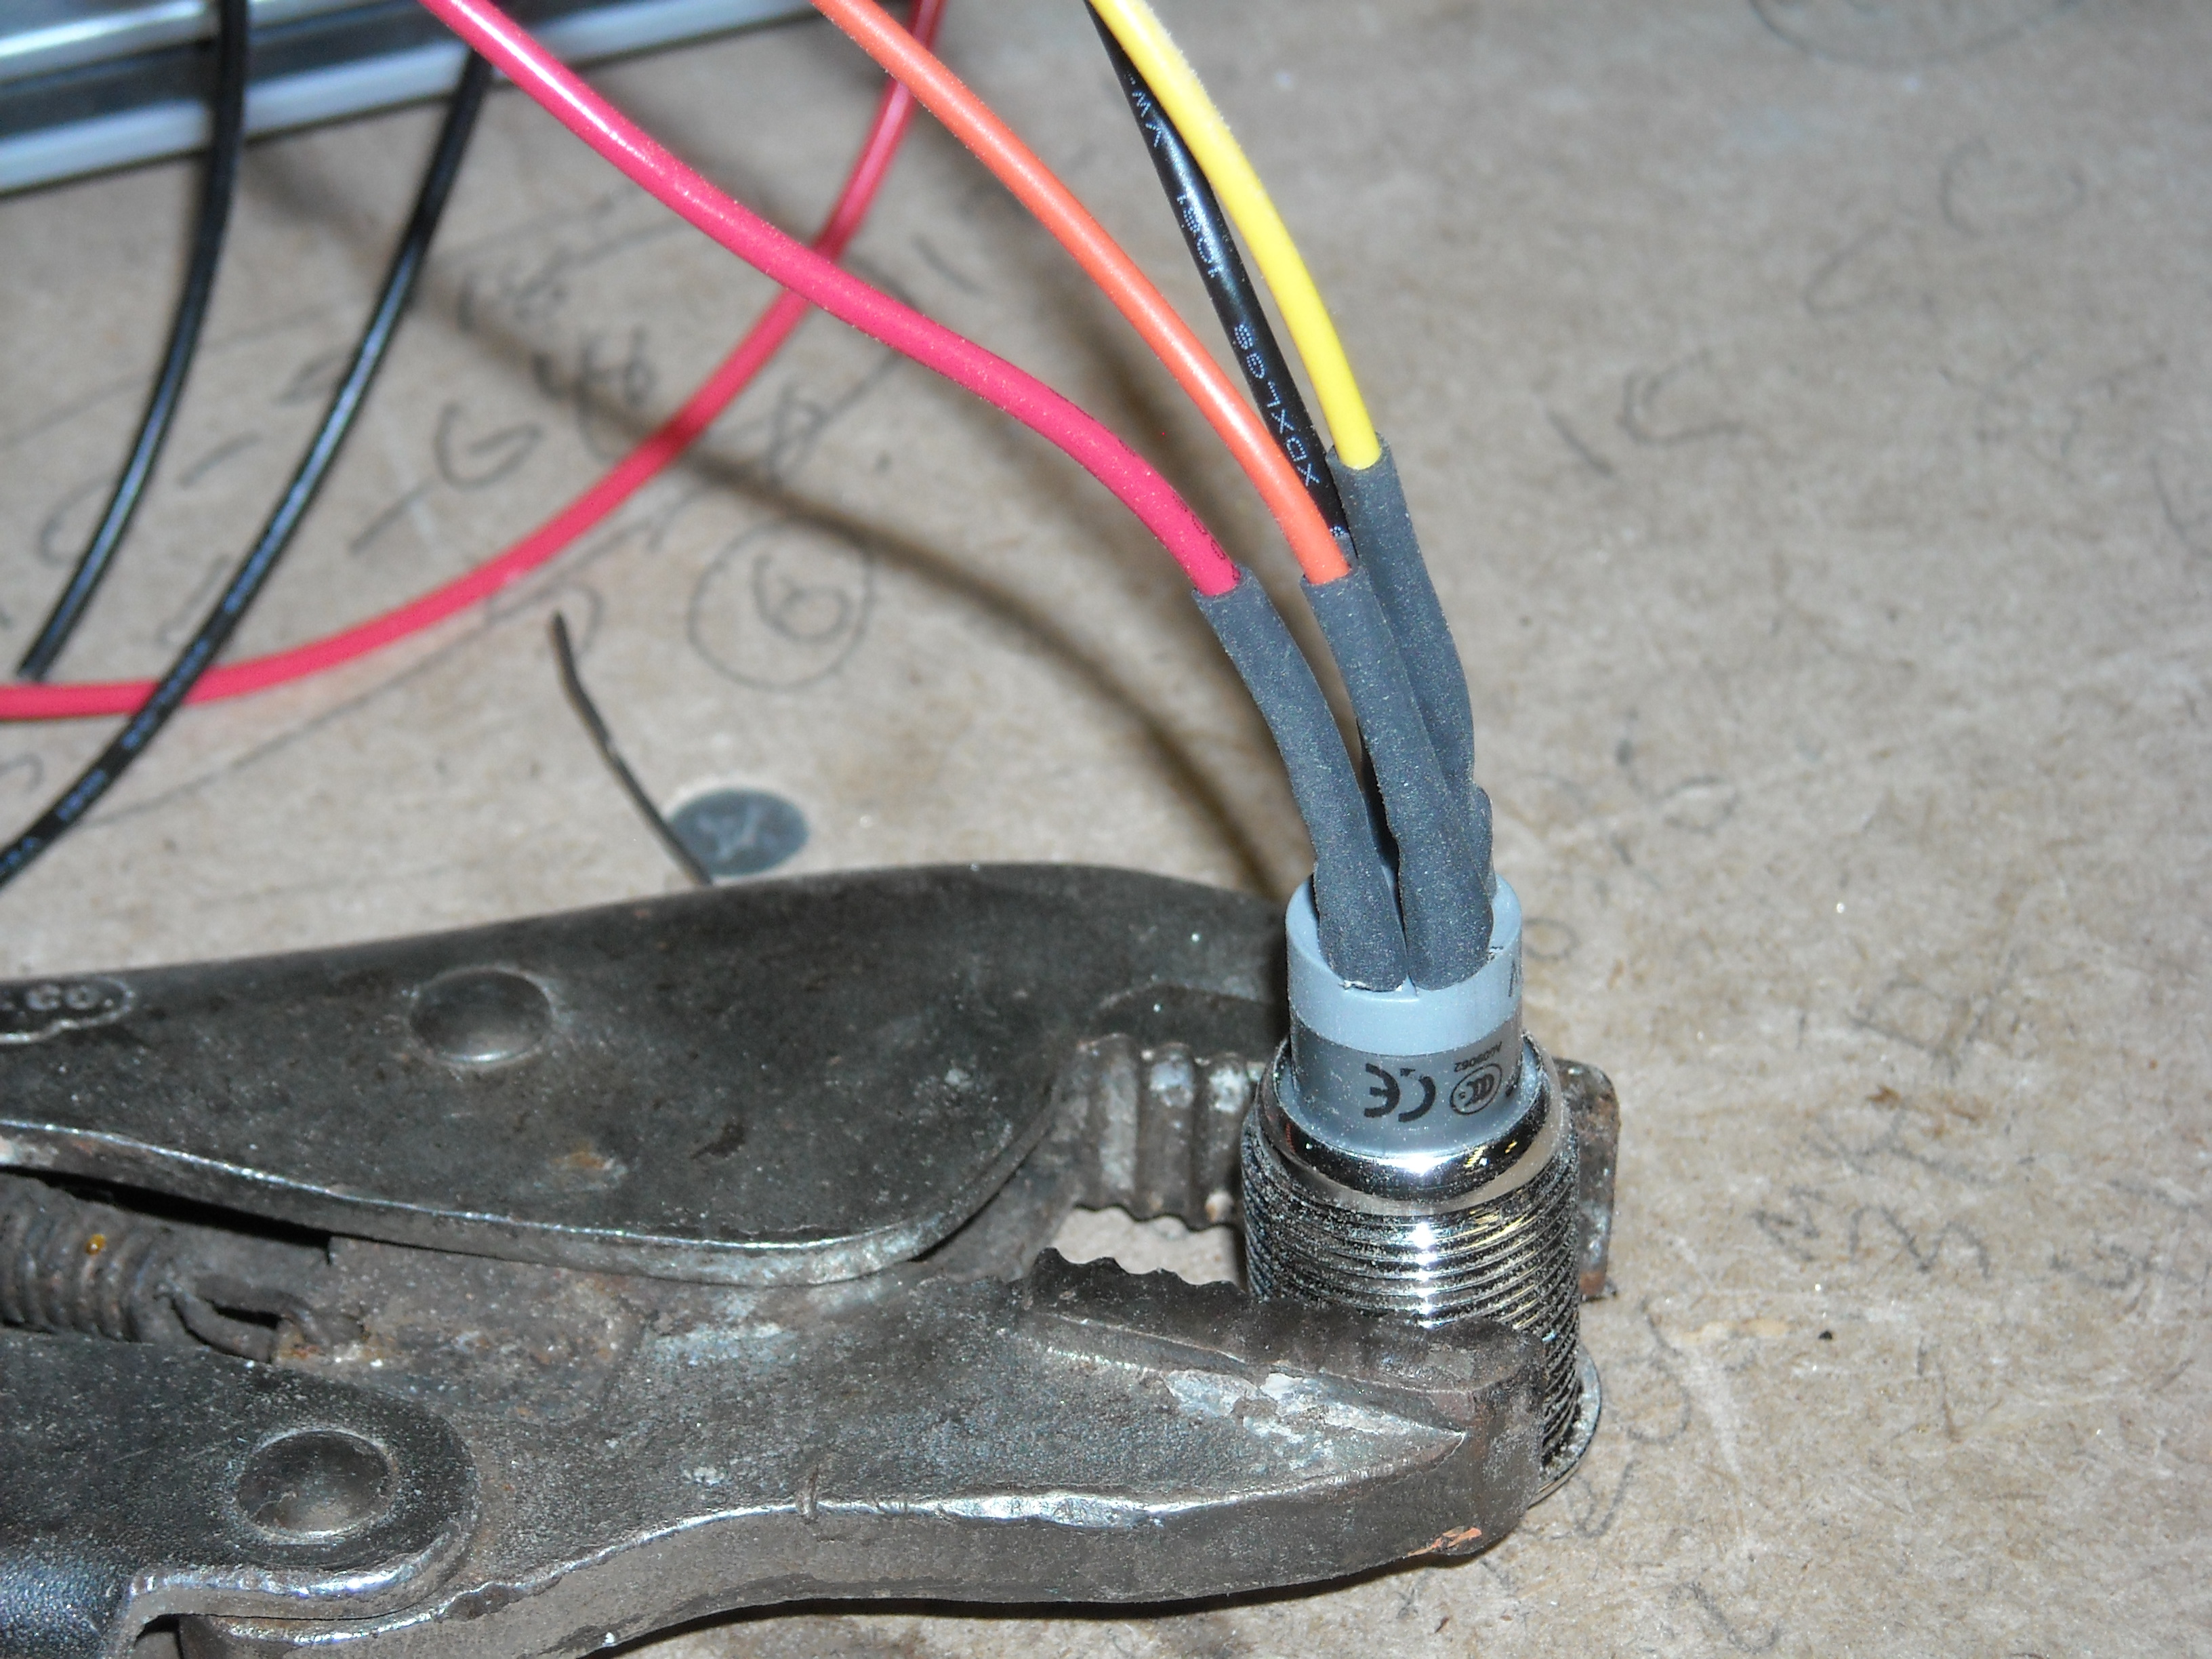
Soldered and shrink wrap
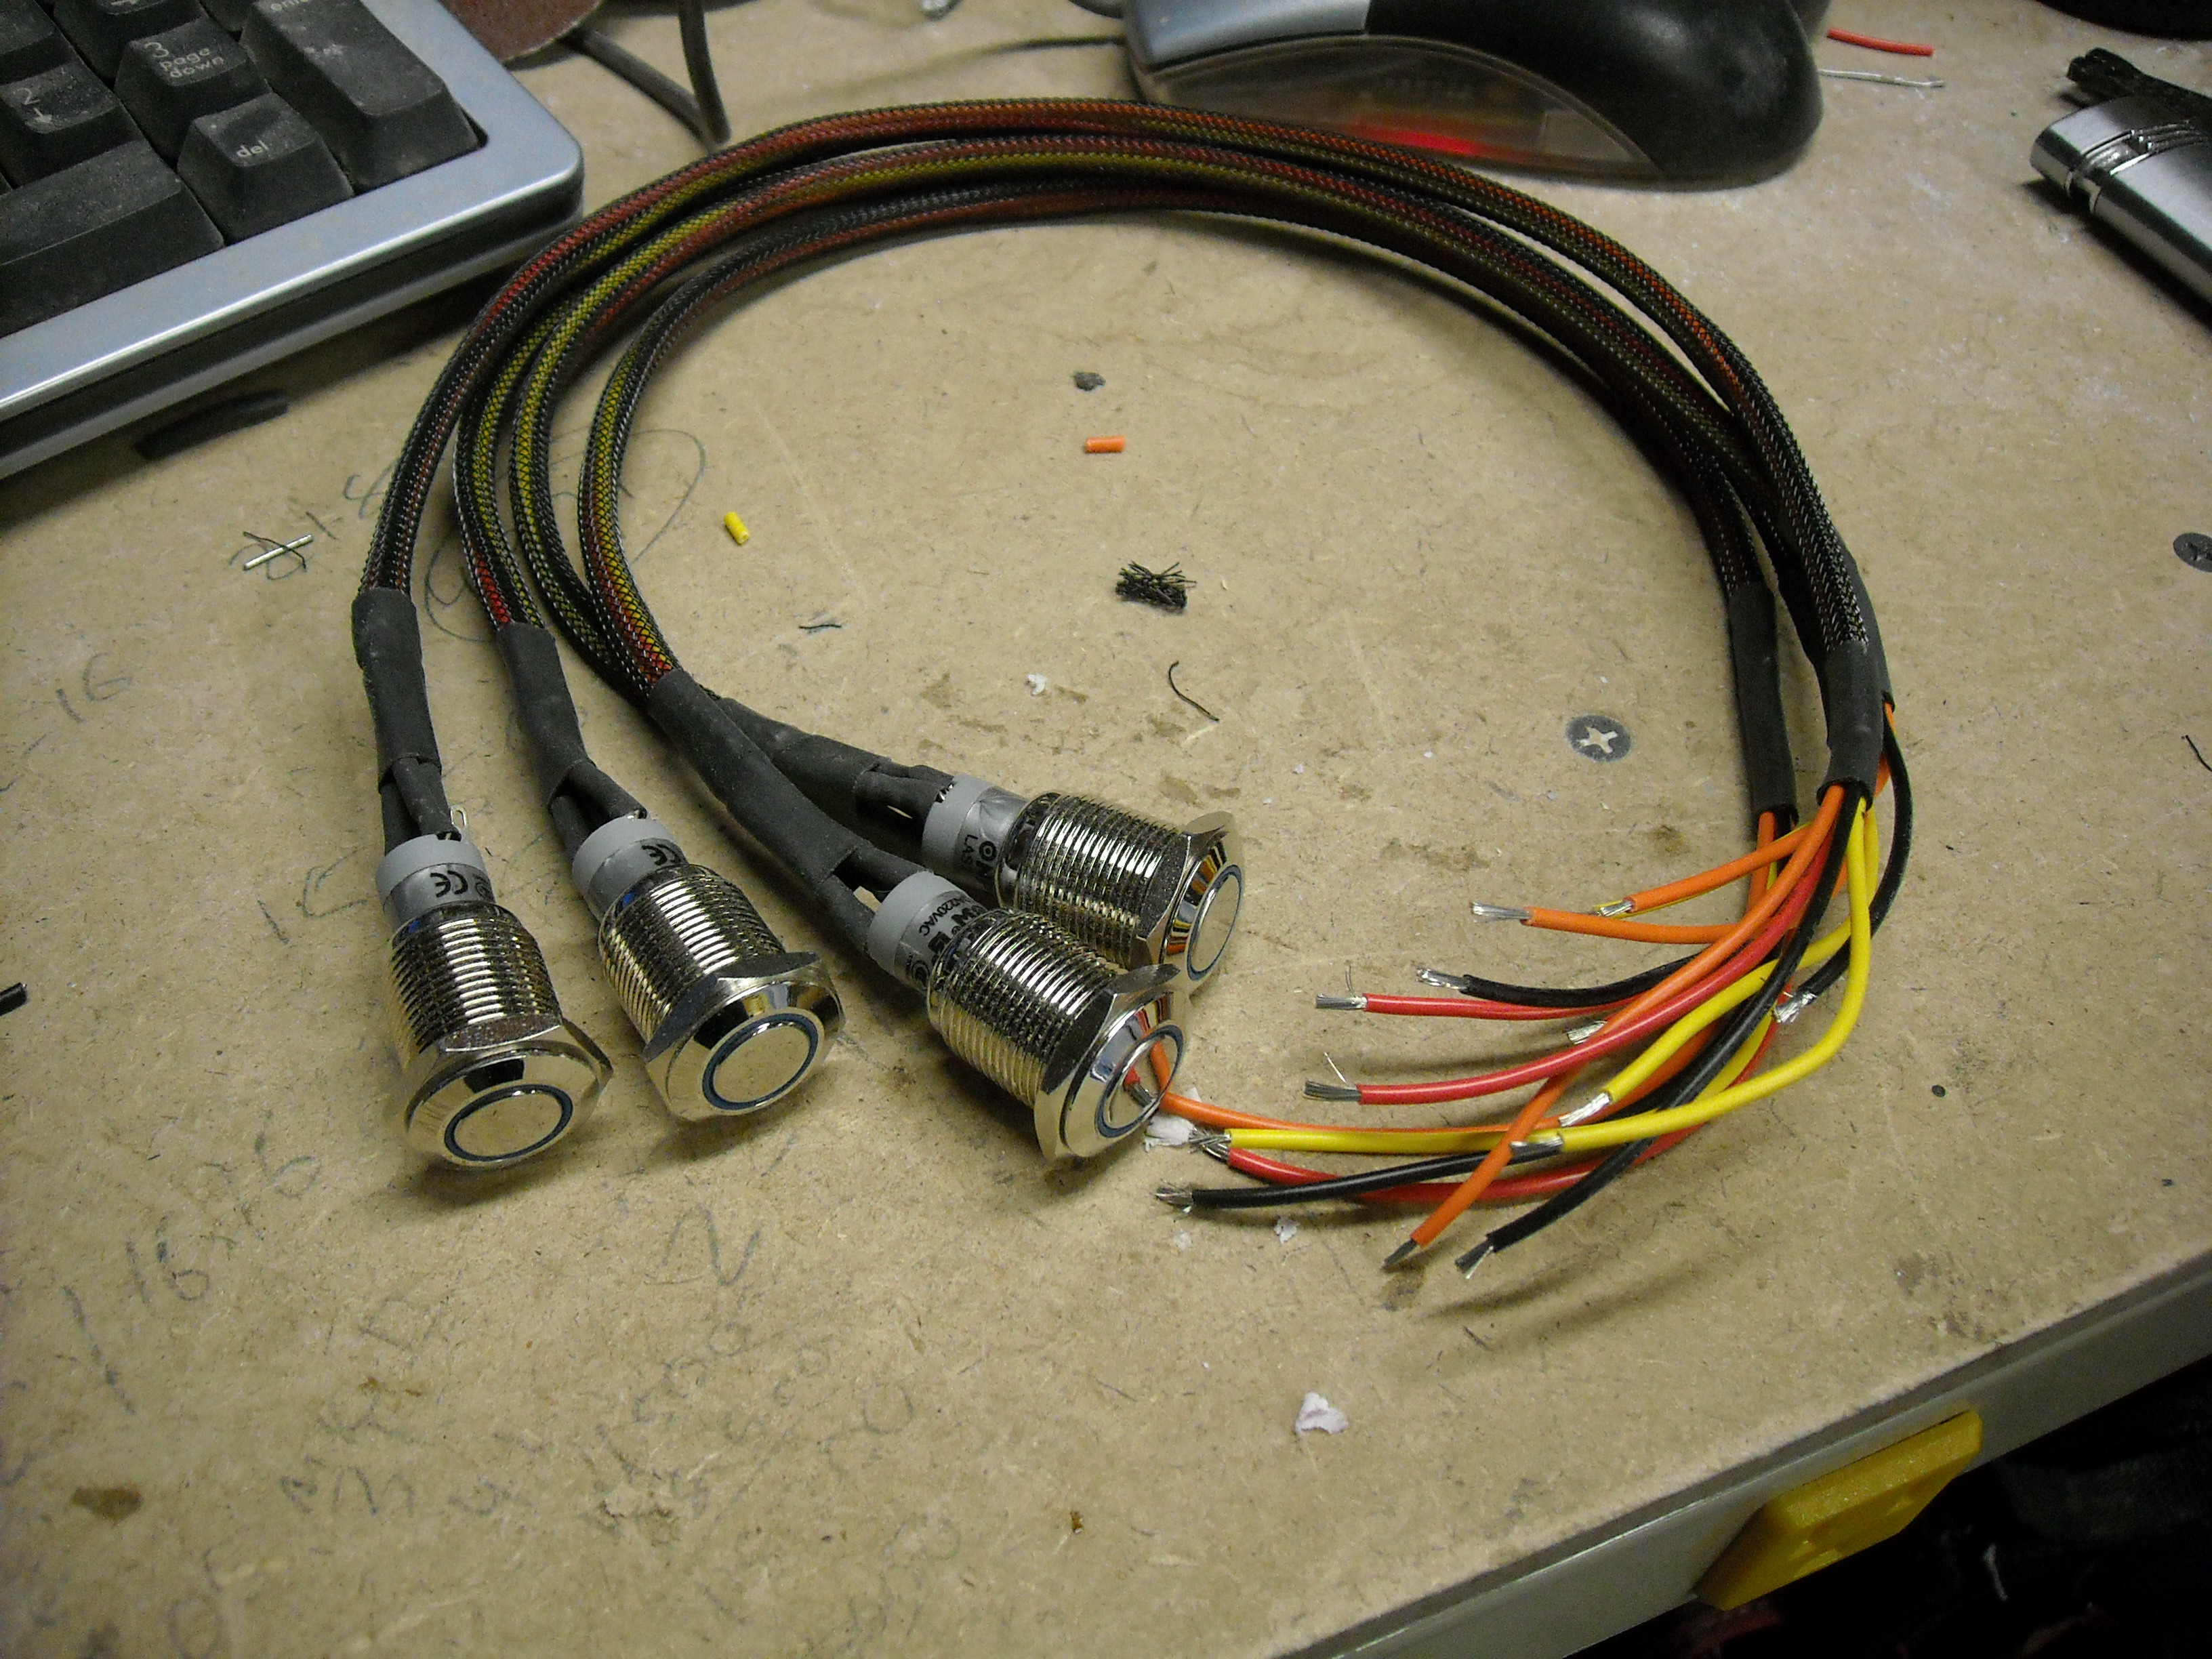
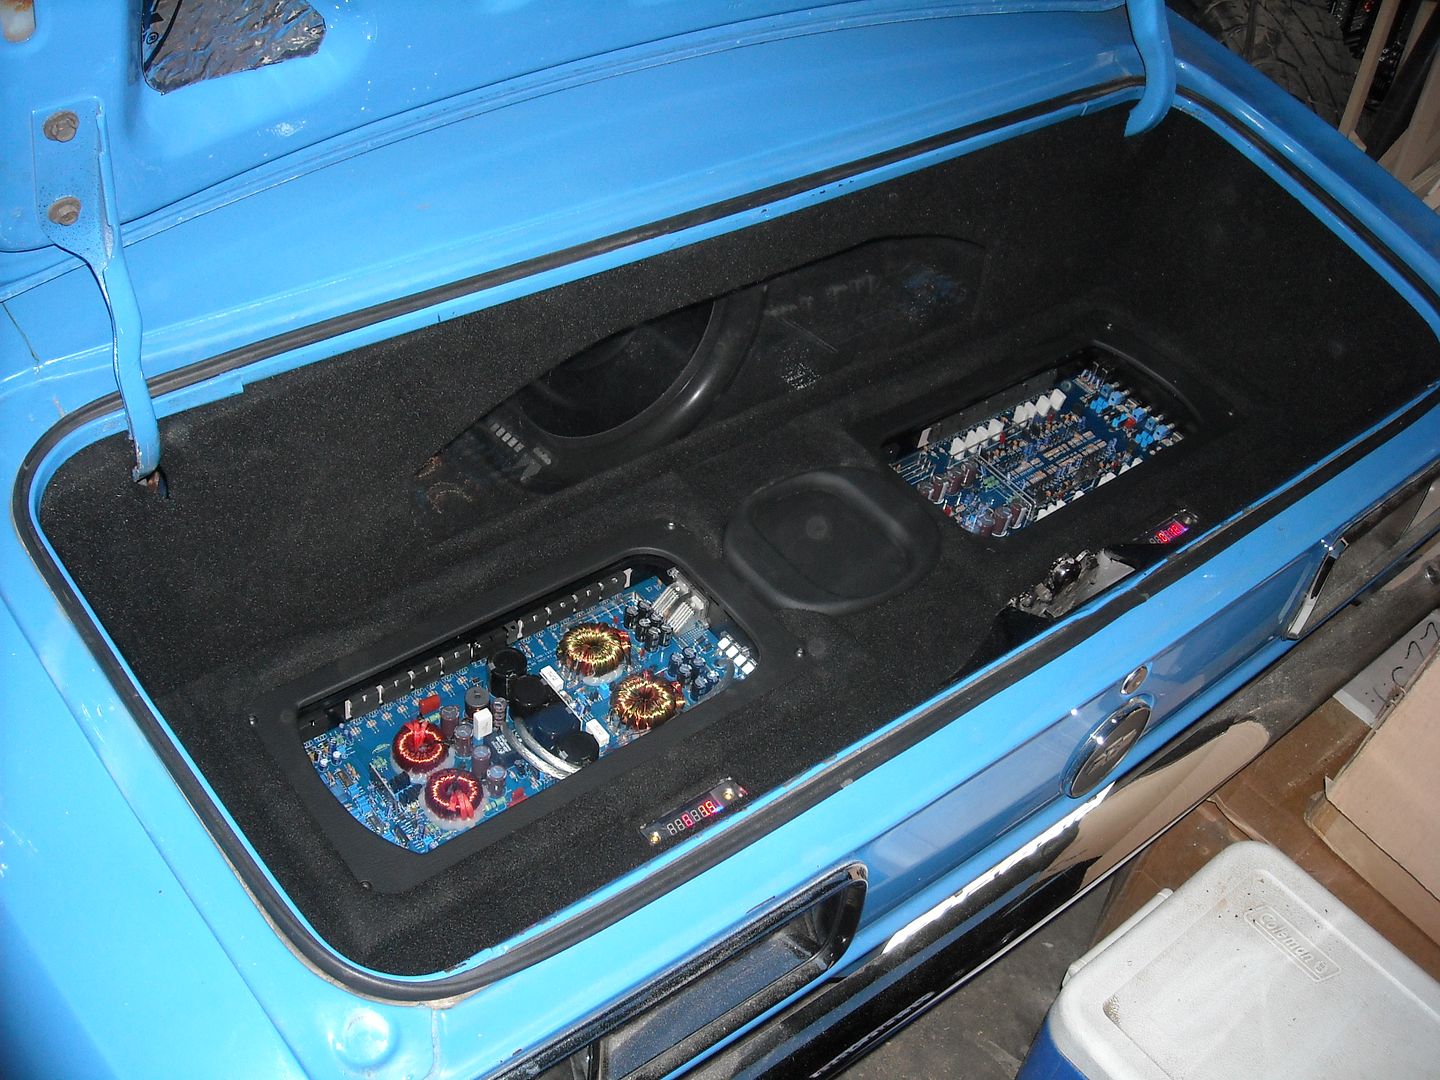
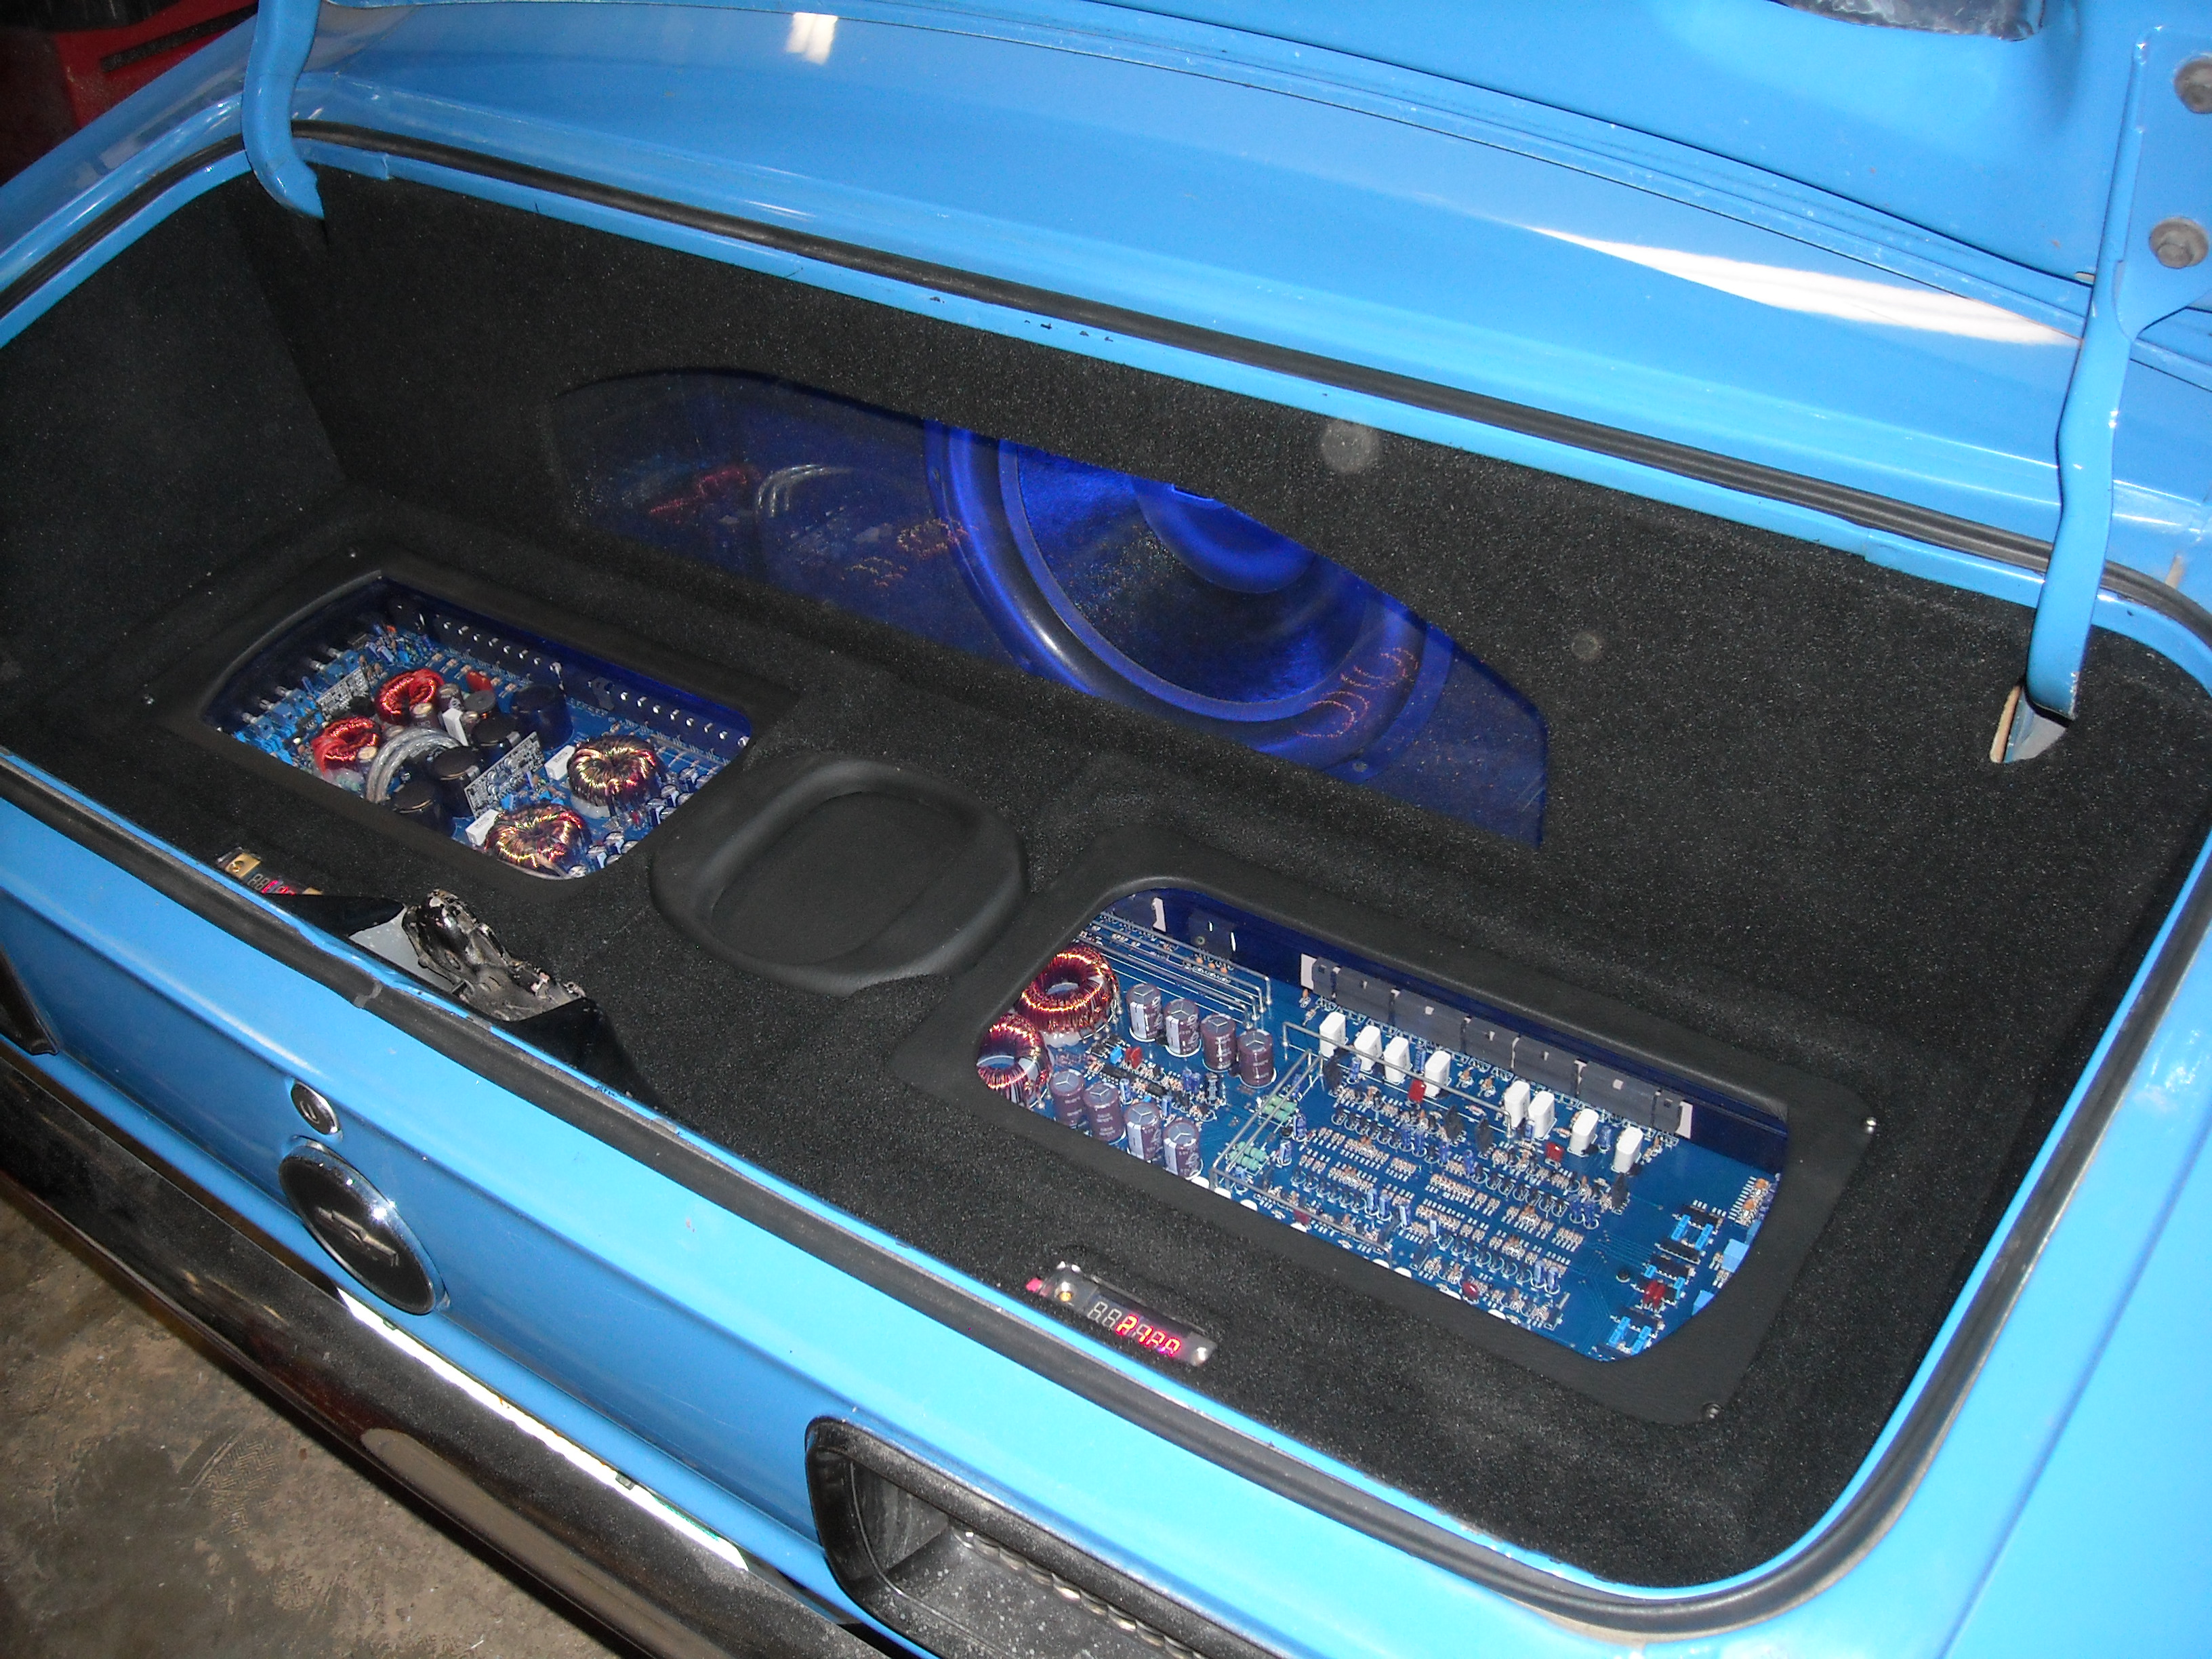
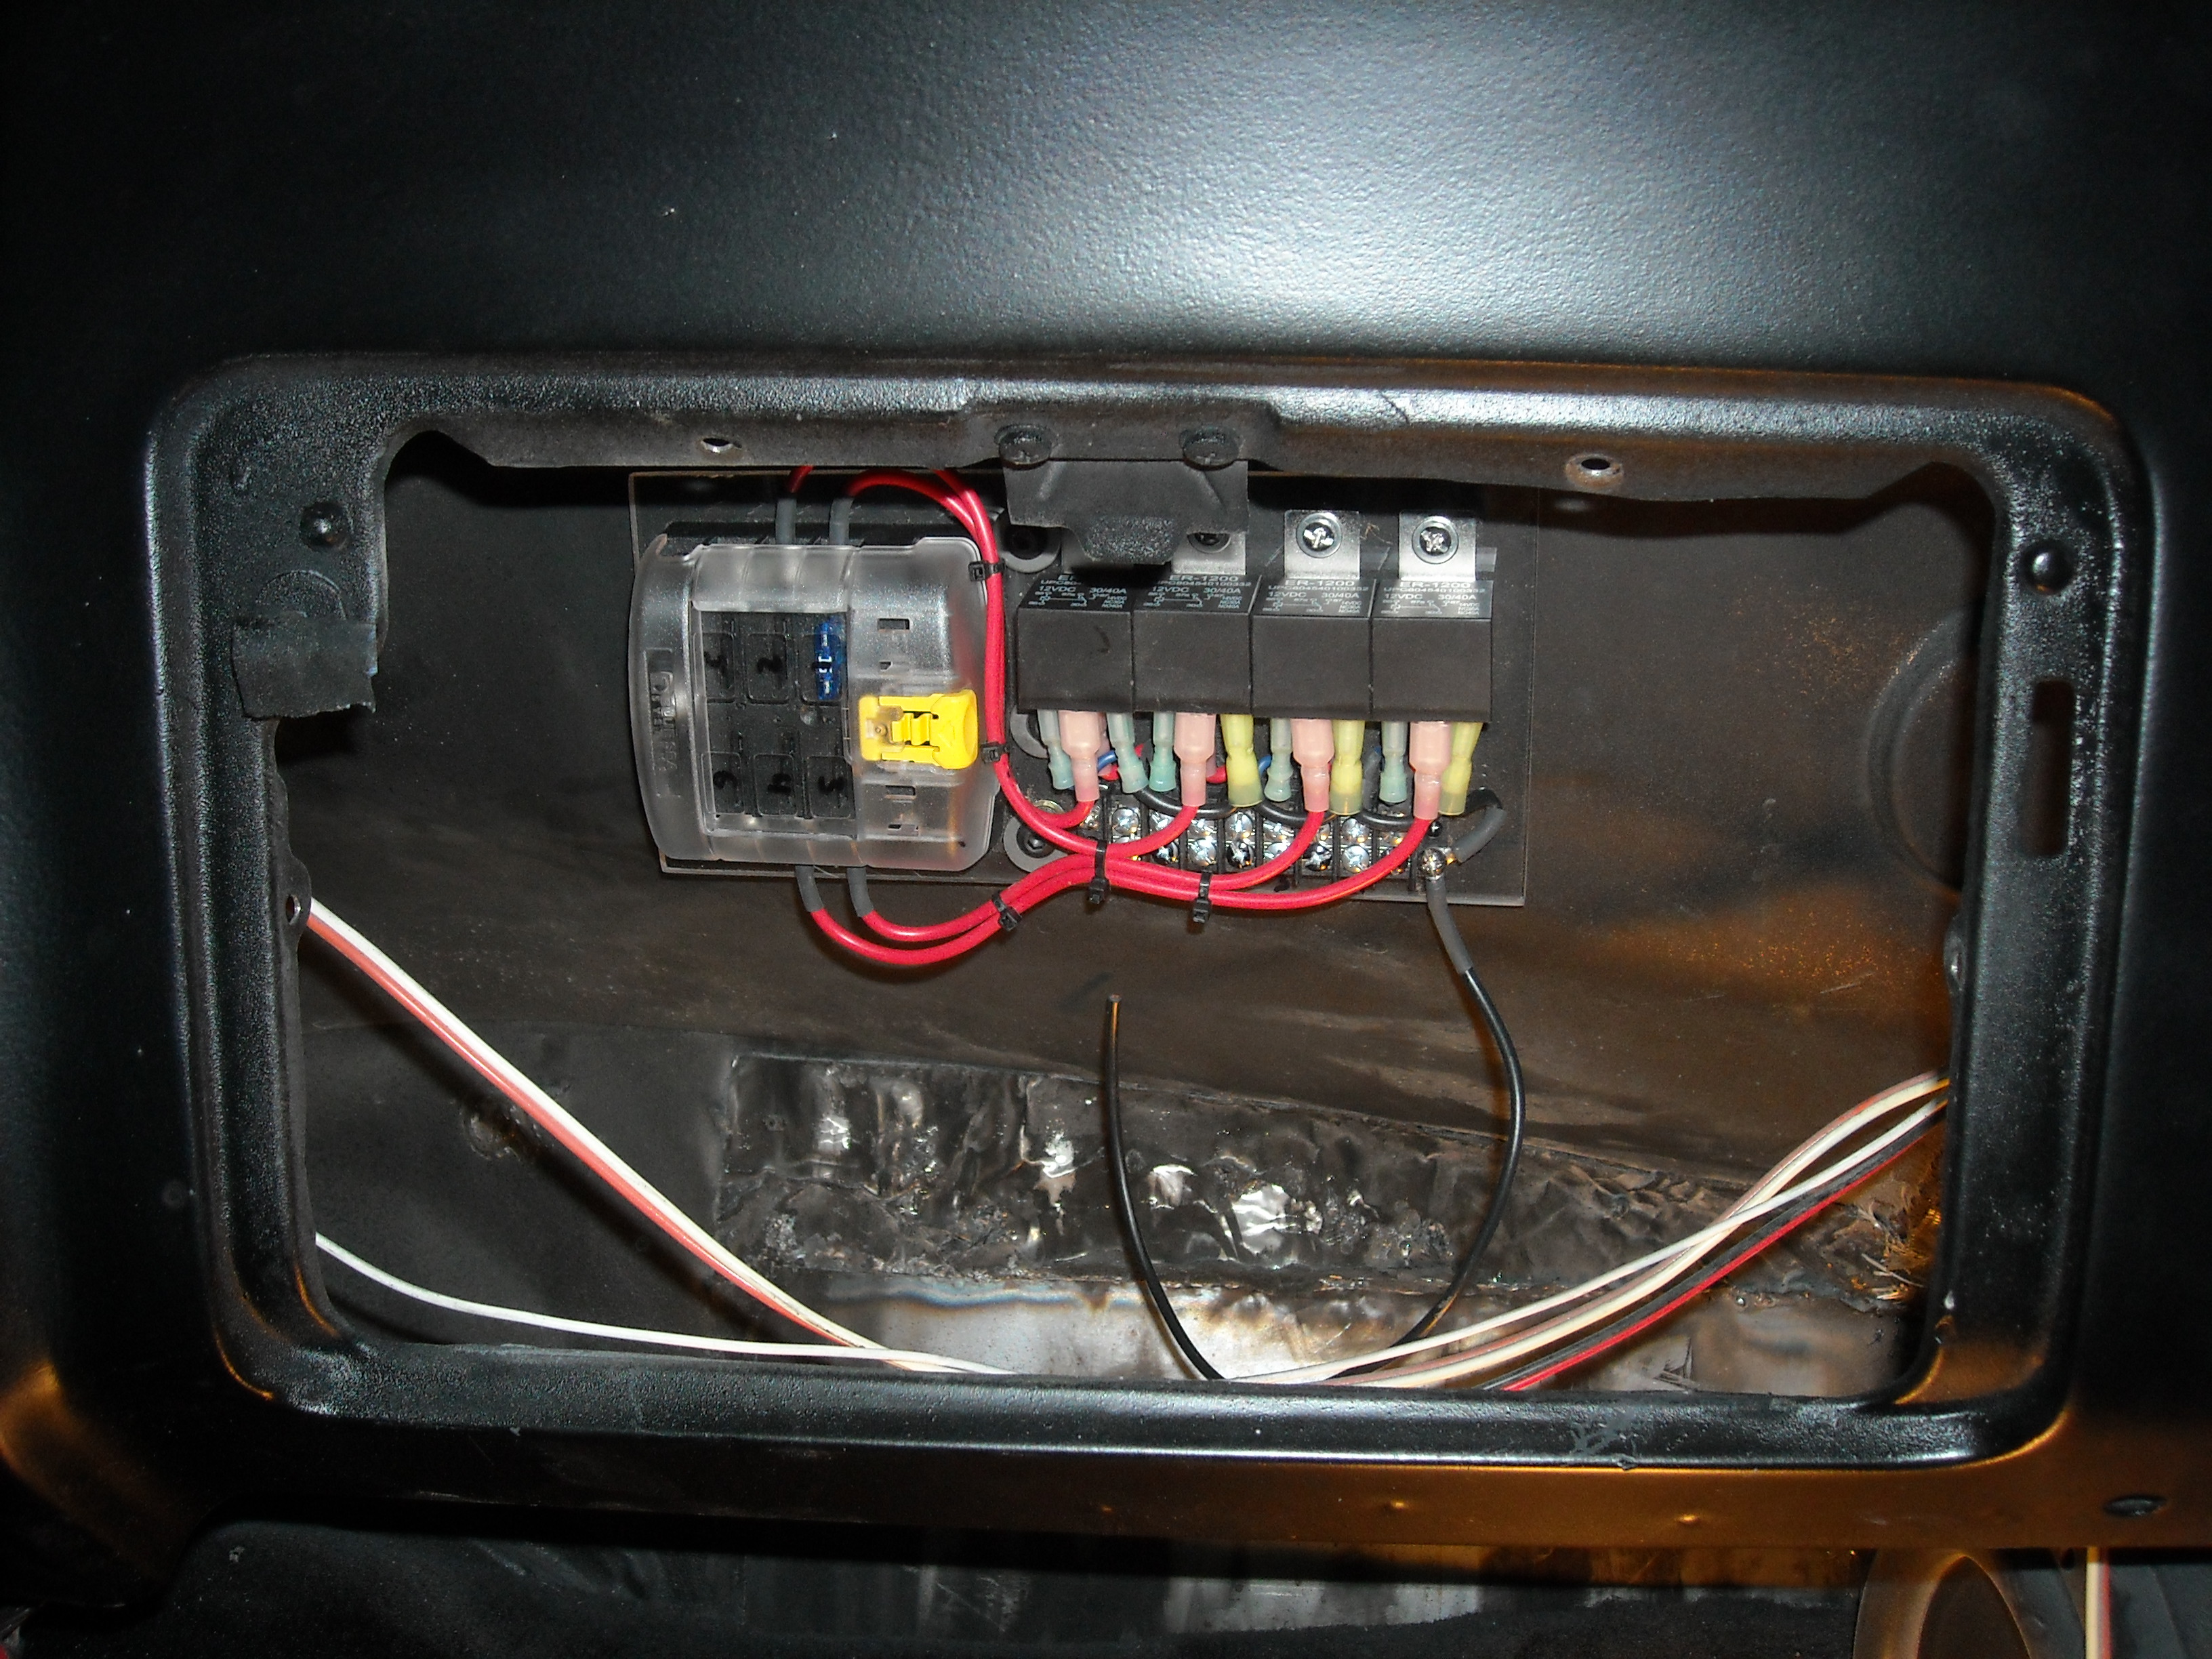
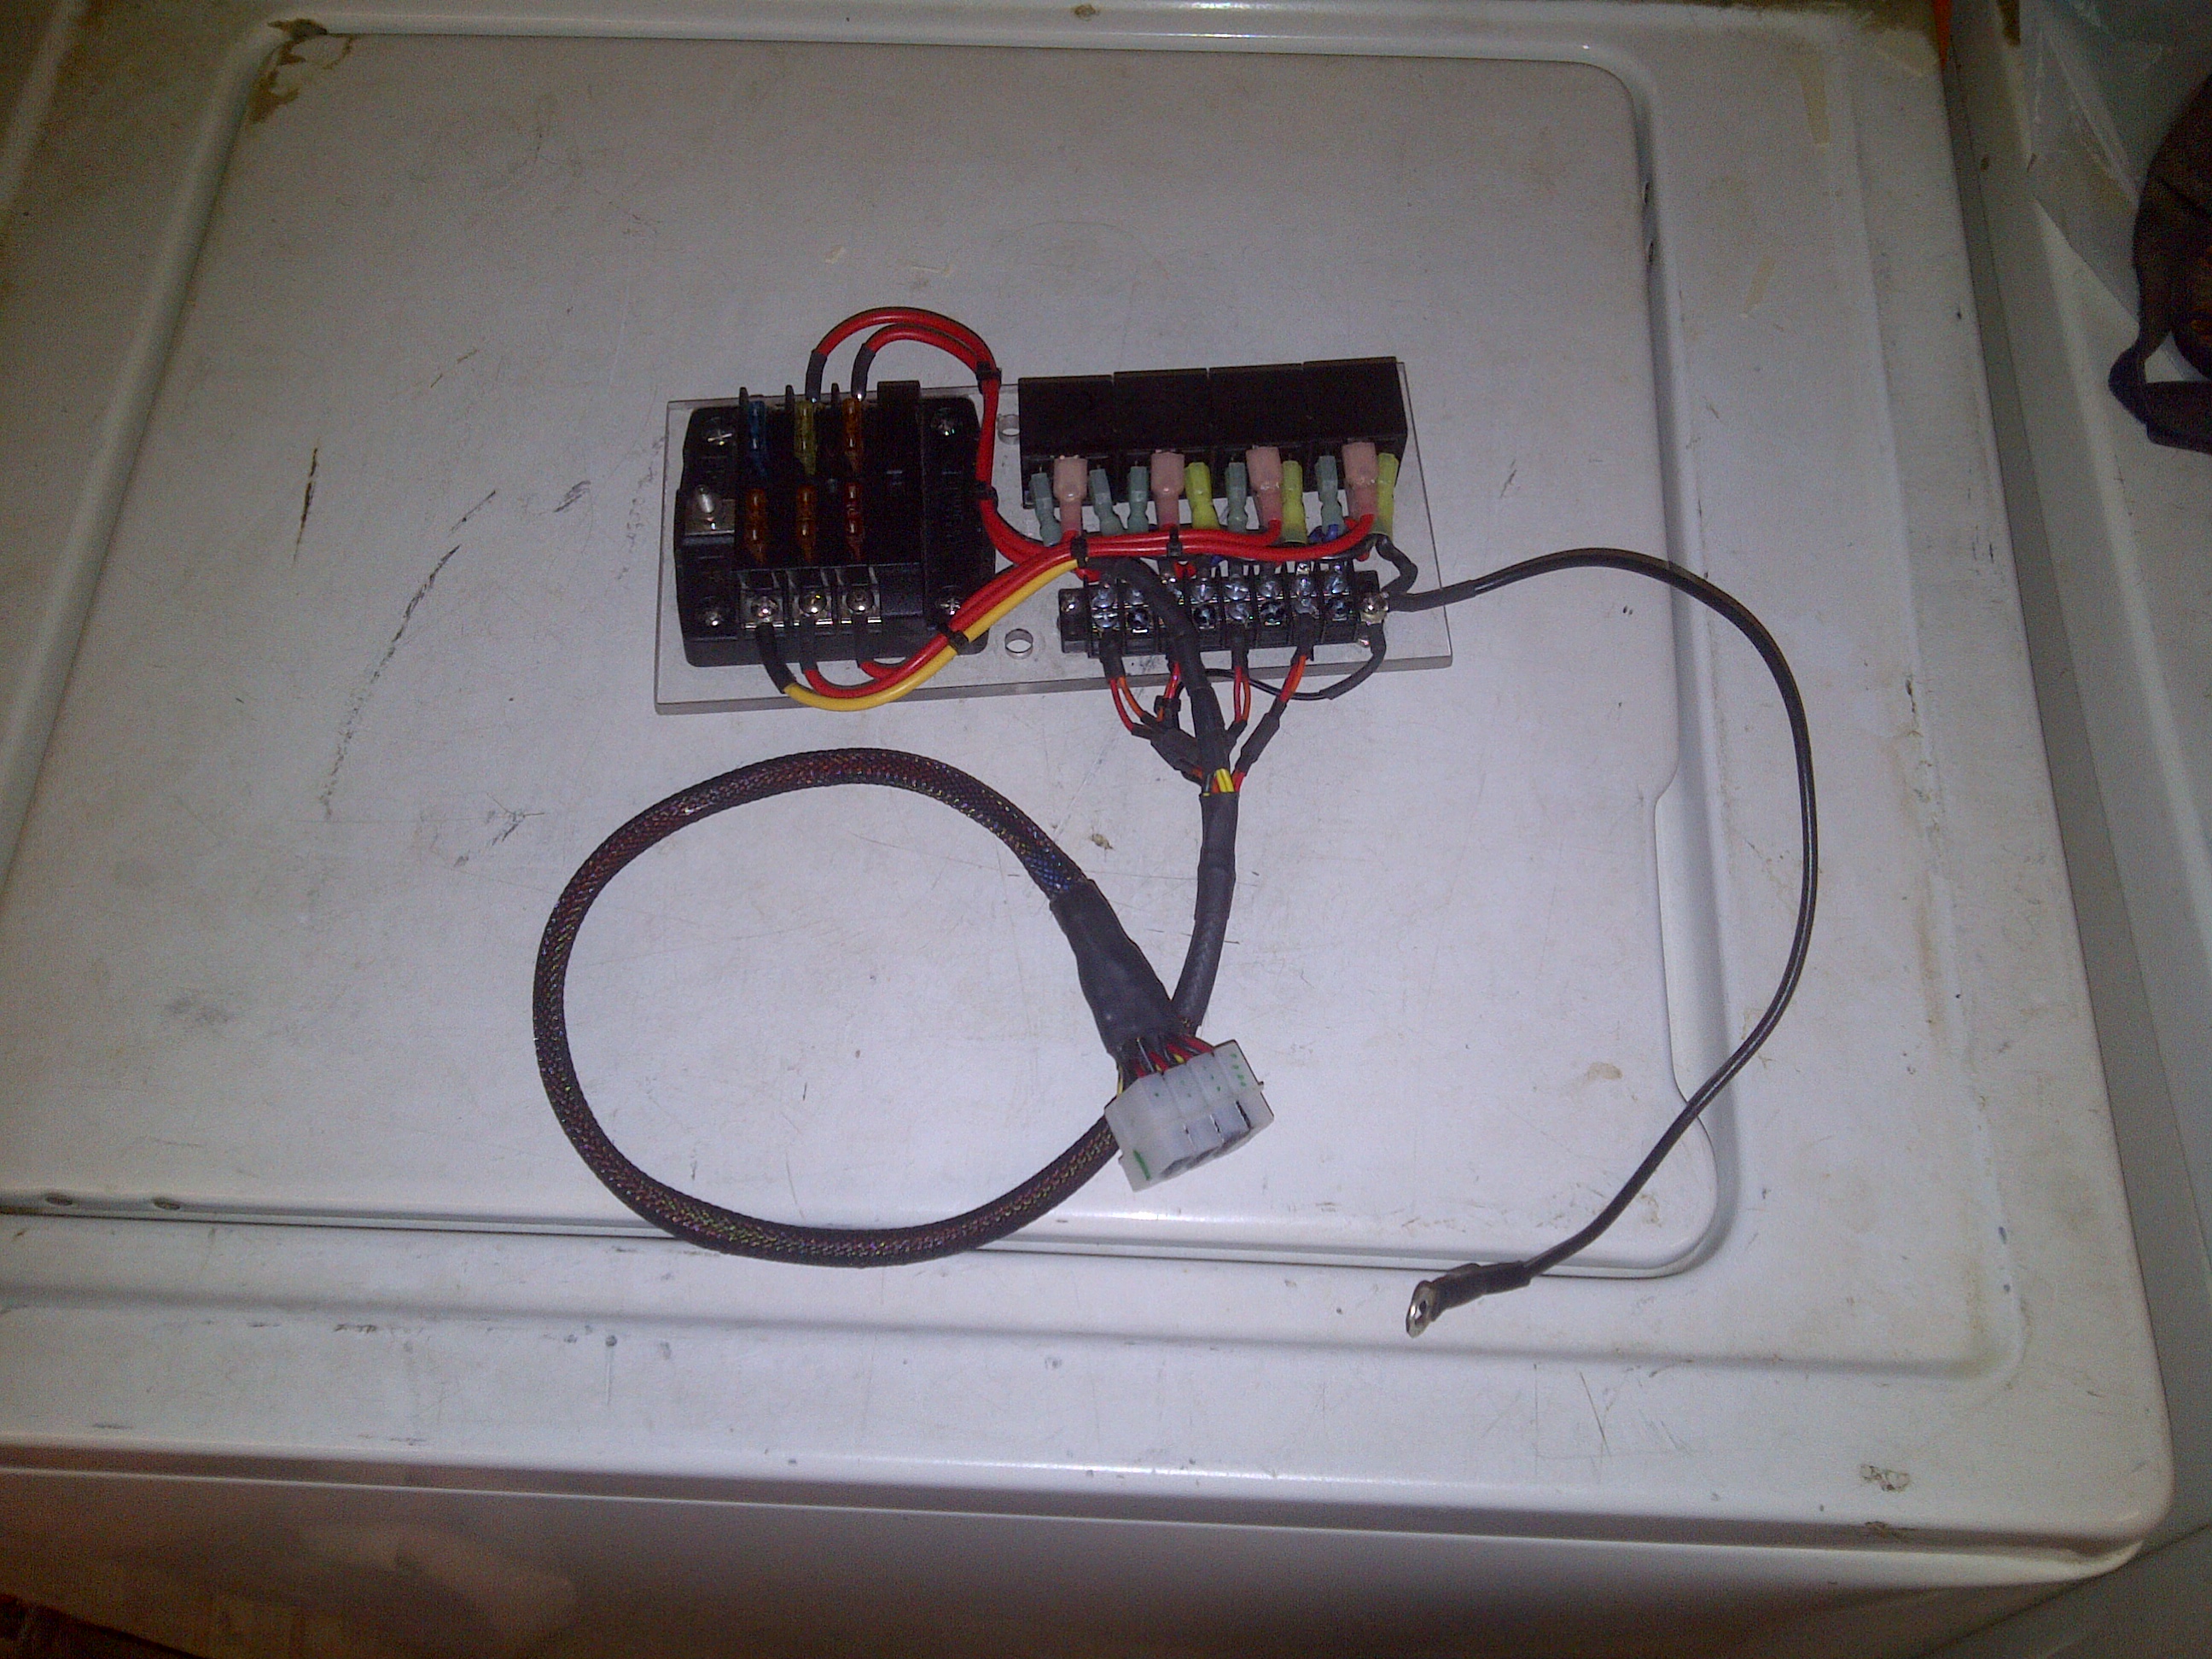
Next is the replay bank.
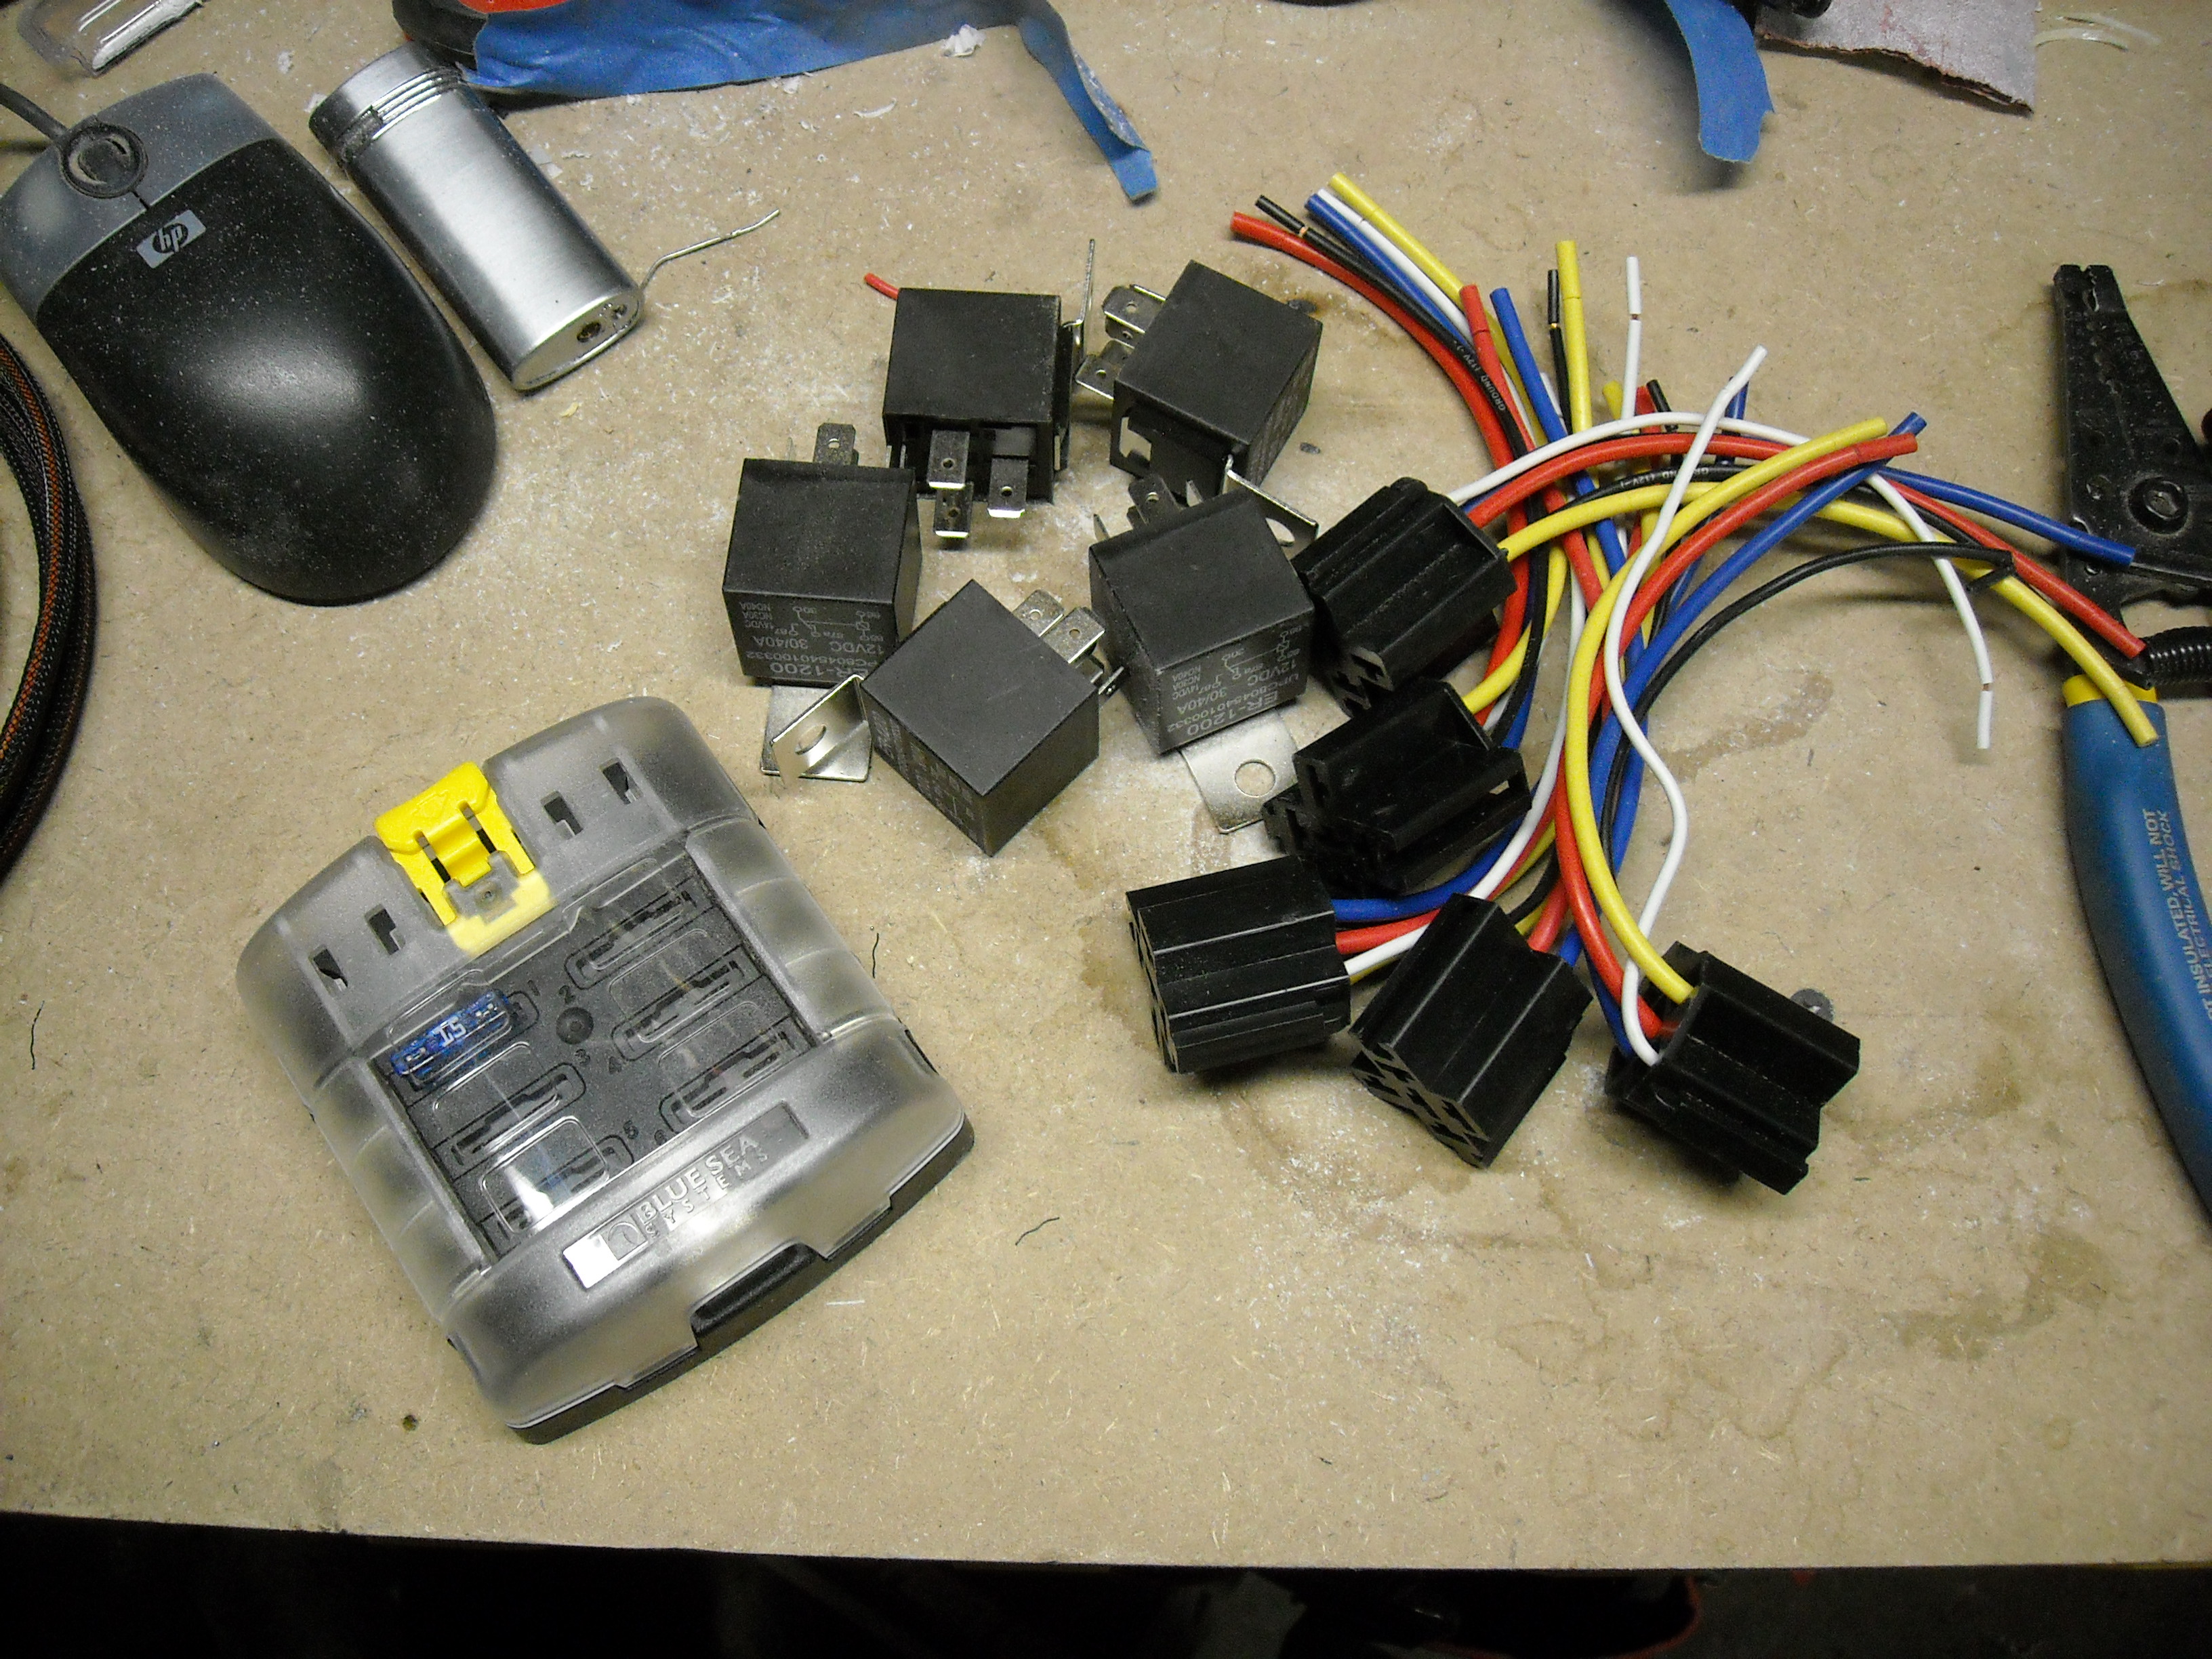
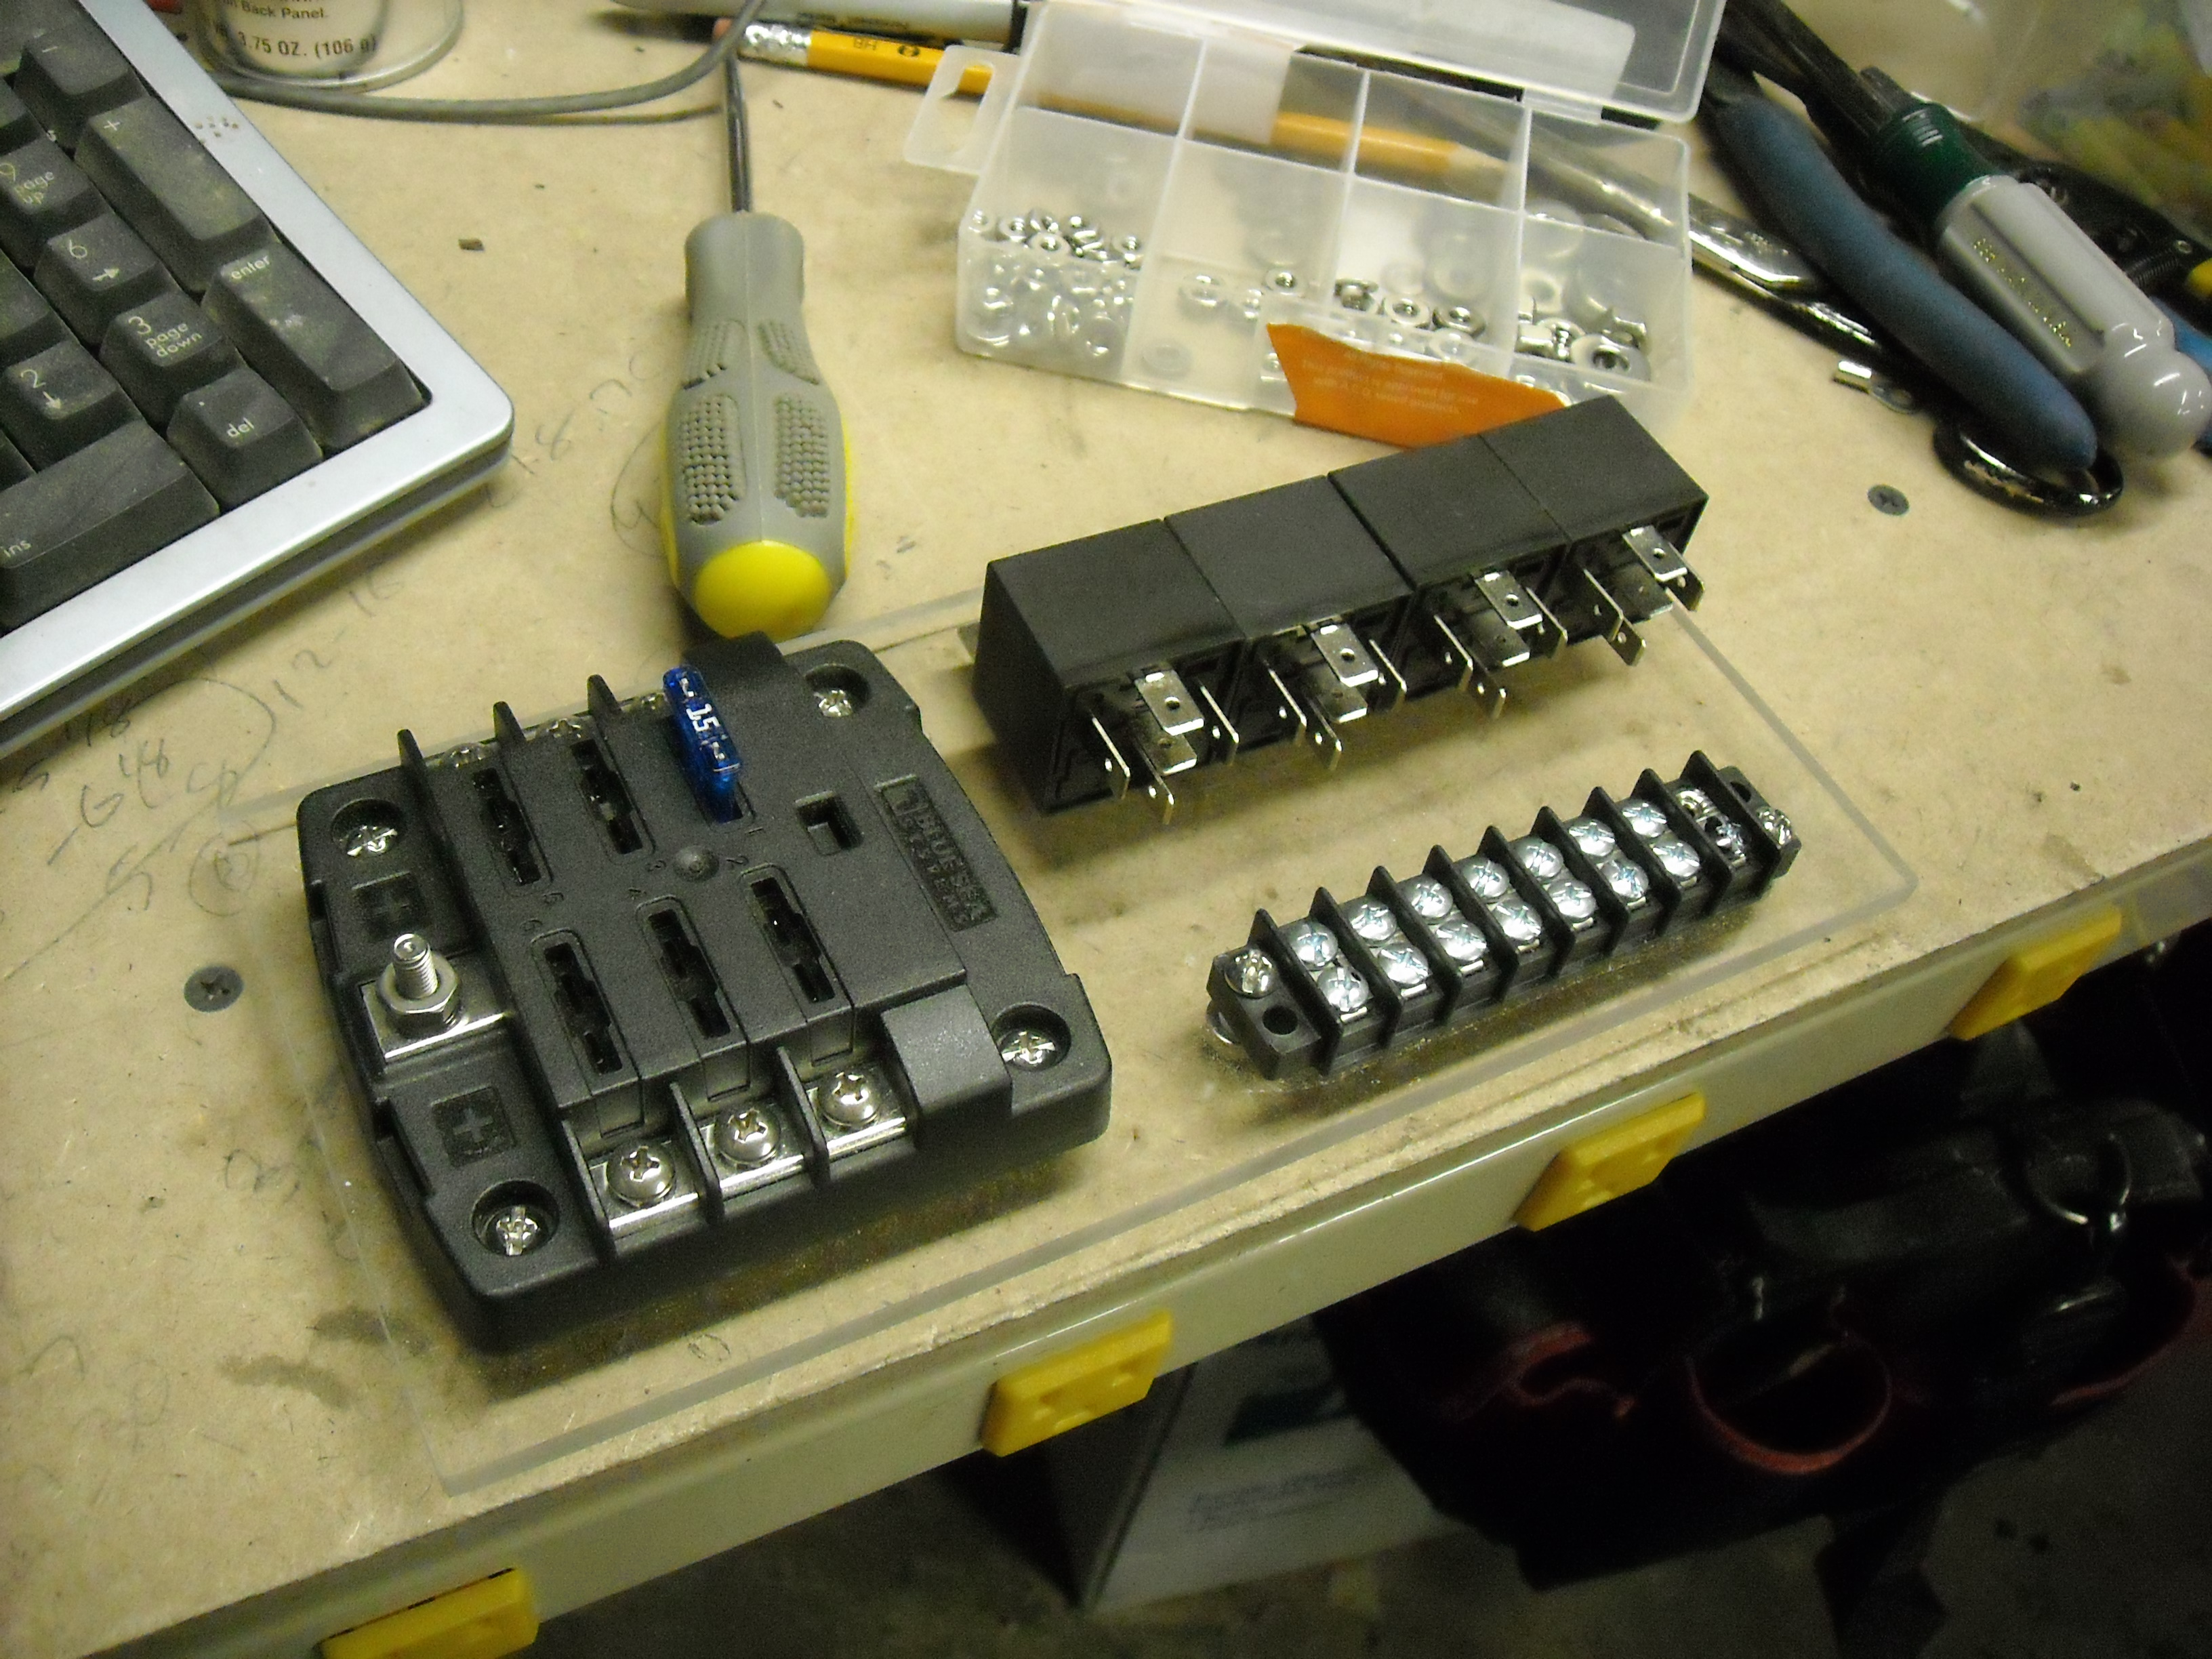


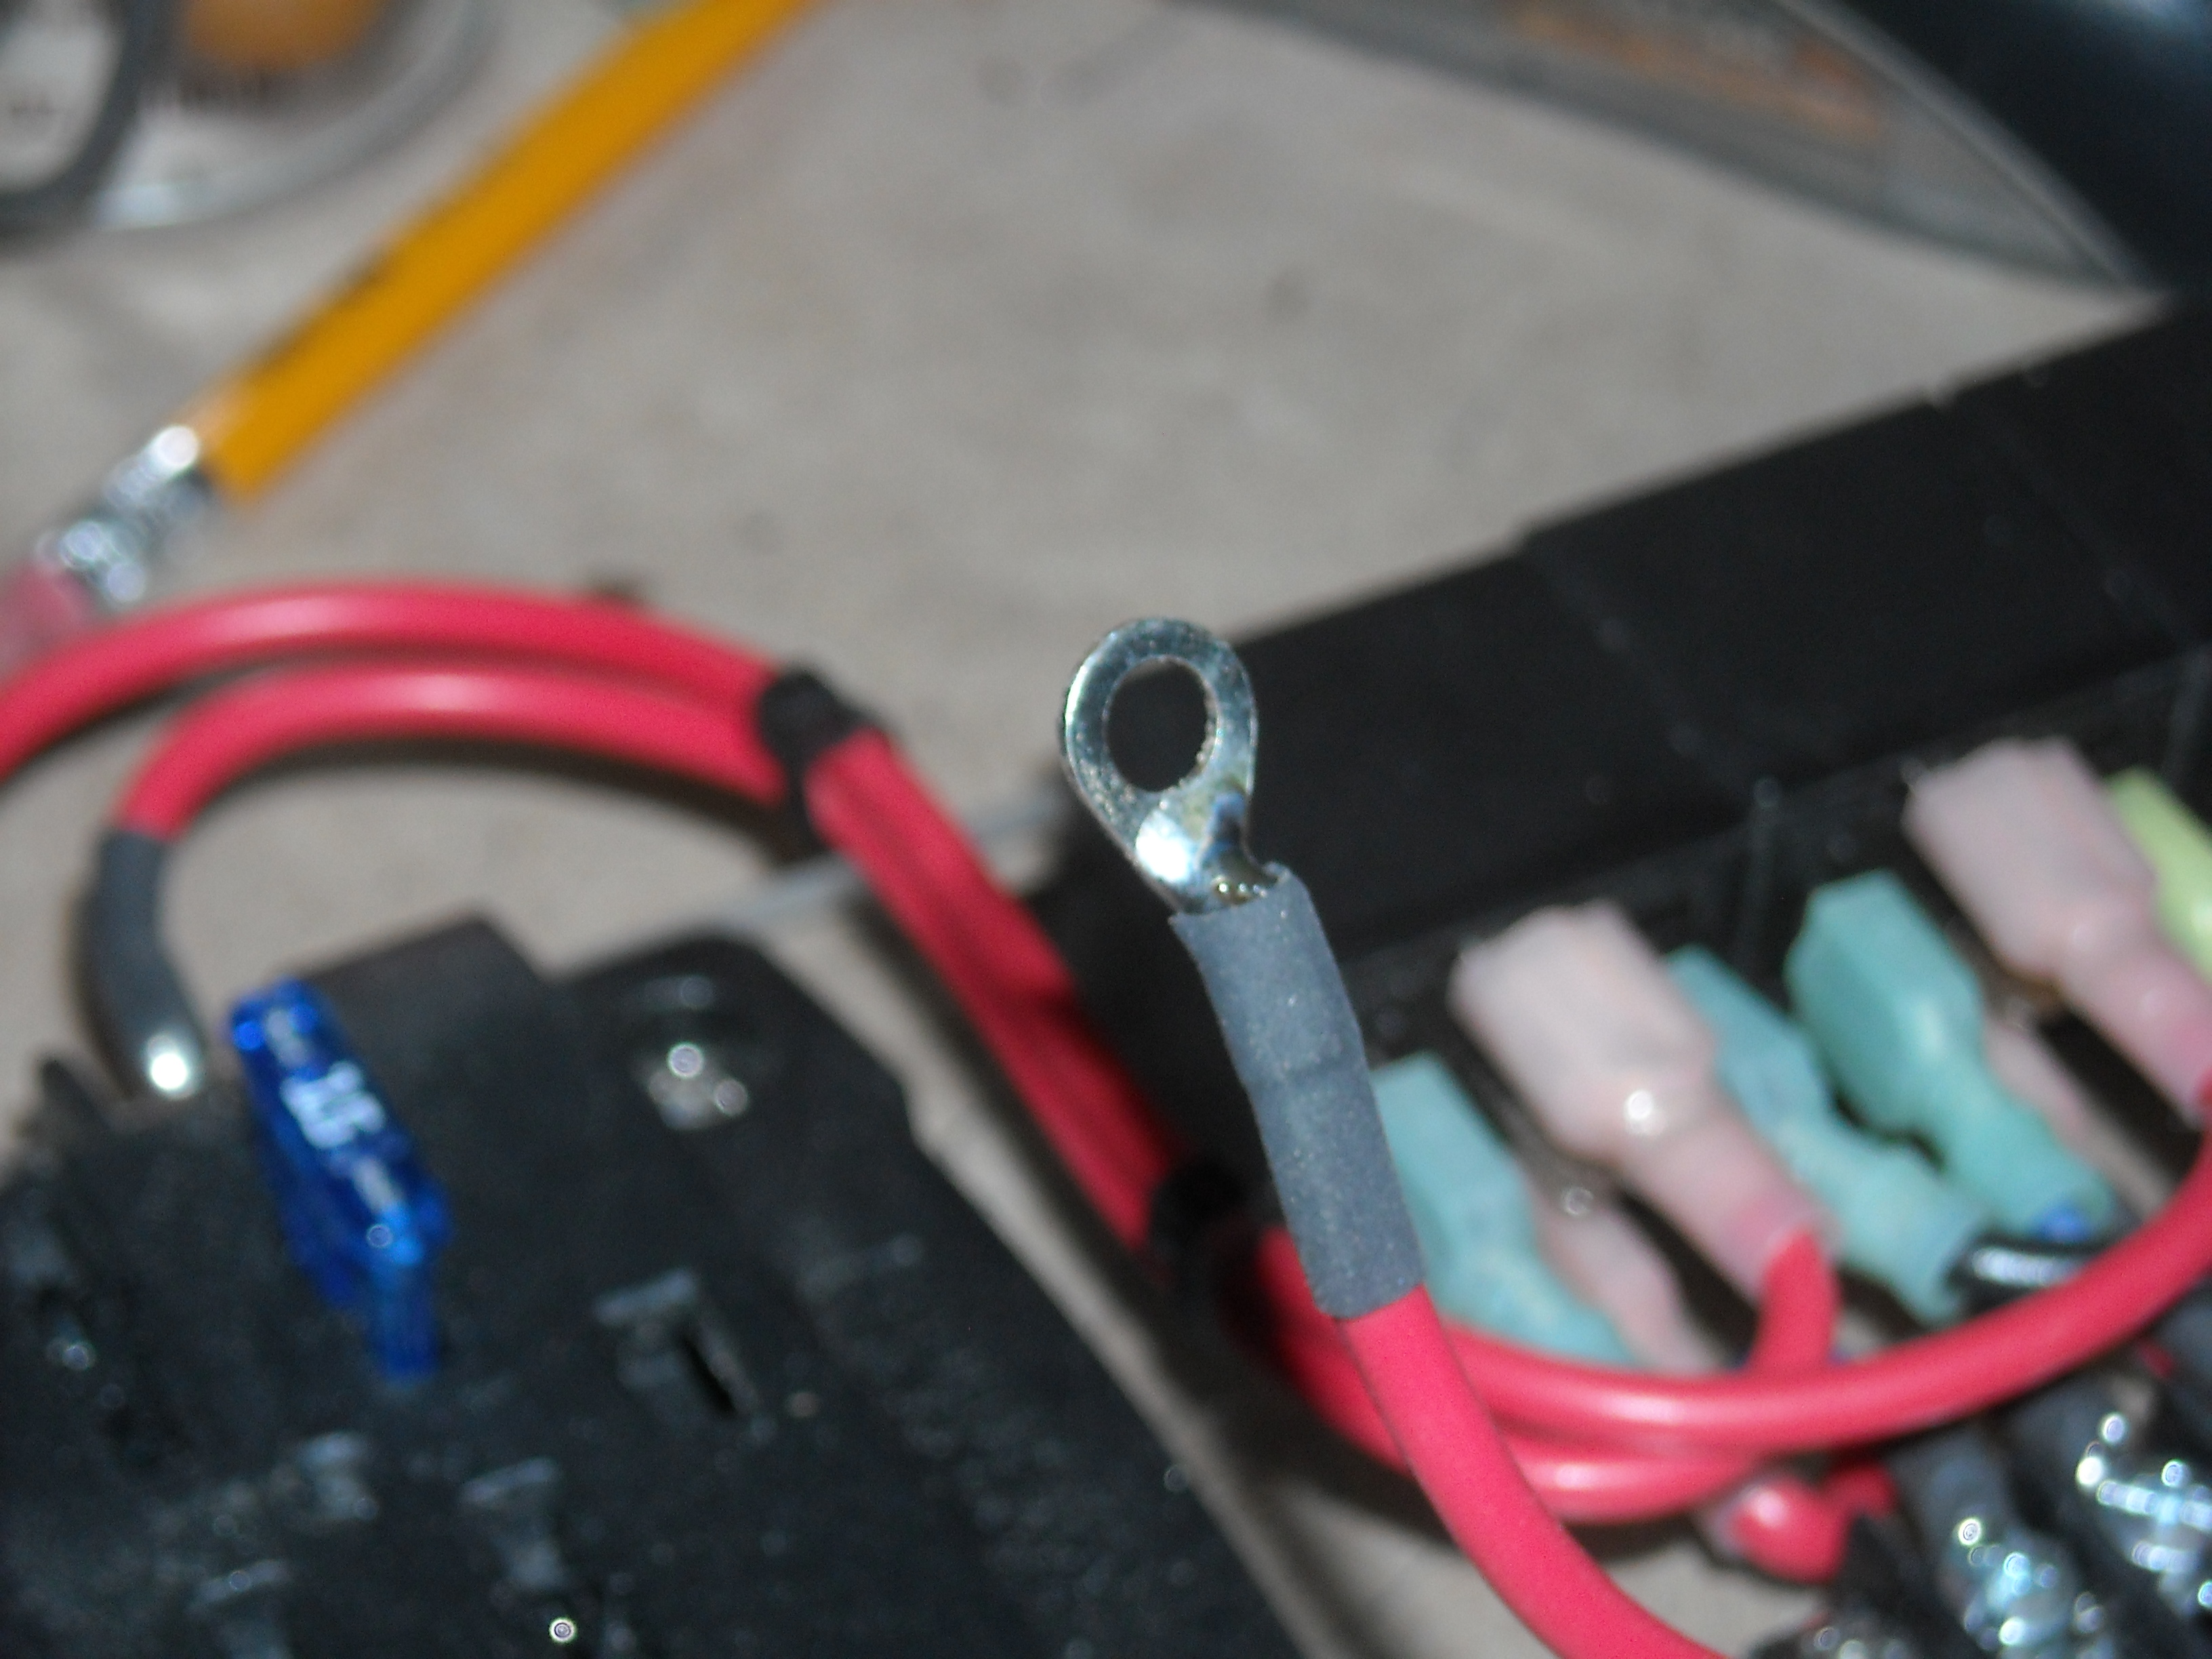
protected by fuses and mounted up for a clean look.

Fits behind the glove box perfectly
These are a very nice switch. My only complaint is the very thin lip to mount them. You have to be perfect in your hole cutout.
Soldered and shrink wrap
Next is the replay bank.
protected by fuses and mounted up for a clean look.
Fits behind the glove box perfectly
Thread Starter
Junior Member
Posts like a Ricer Type-R
Joined: Aug 2012
Posts: 18
Likes: 0
More dash wiring as we go.
This is the connector between the switches and the relay block.

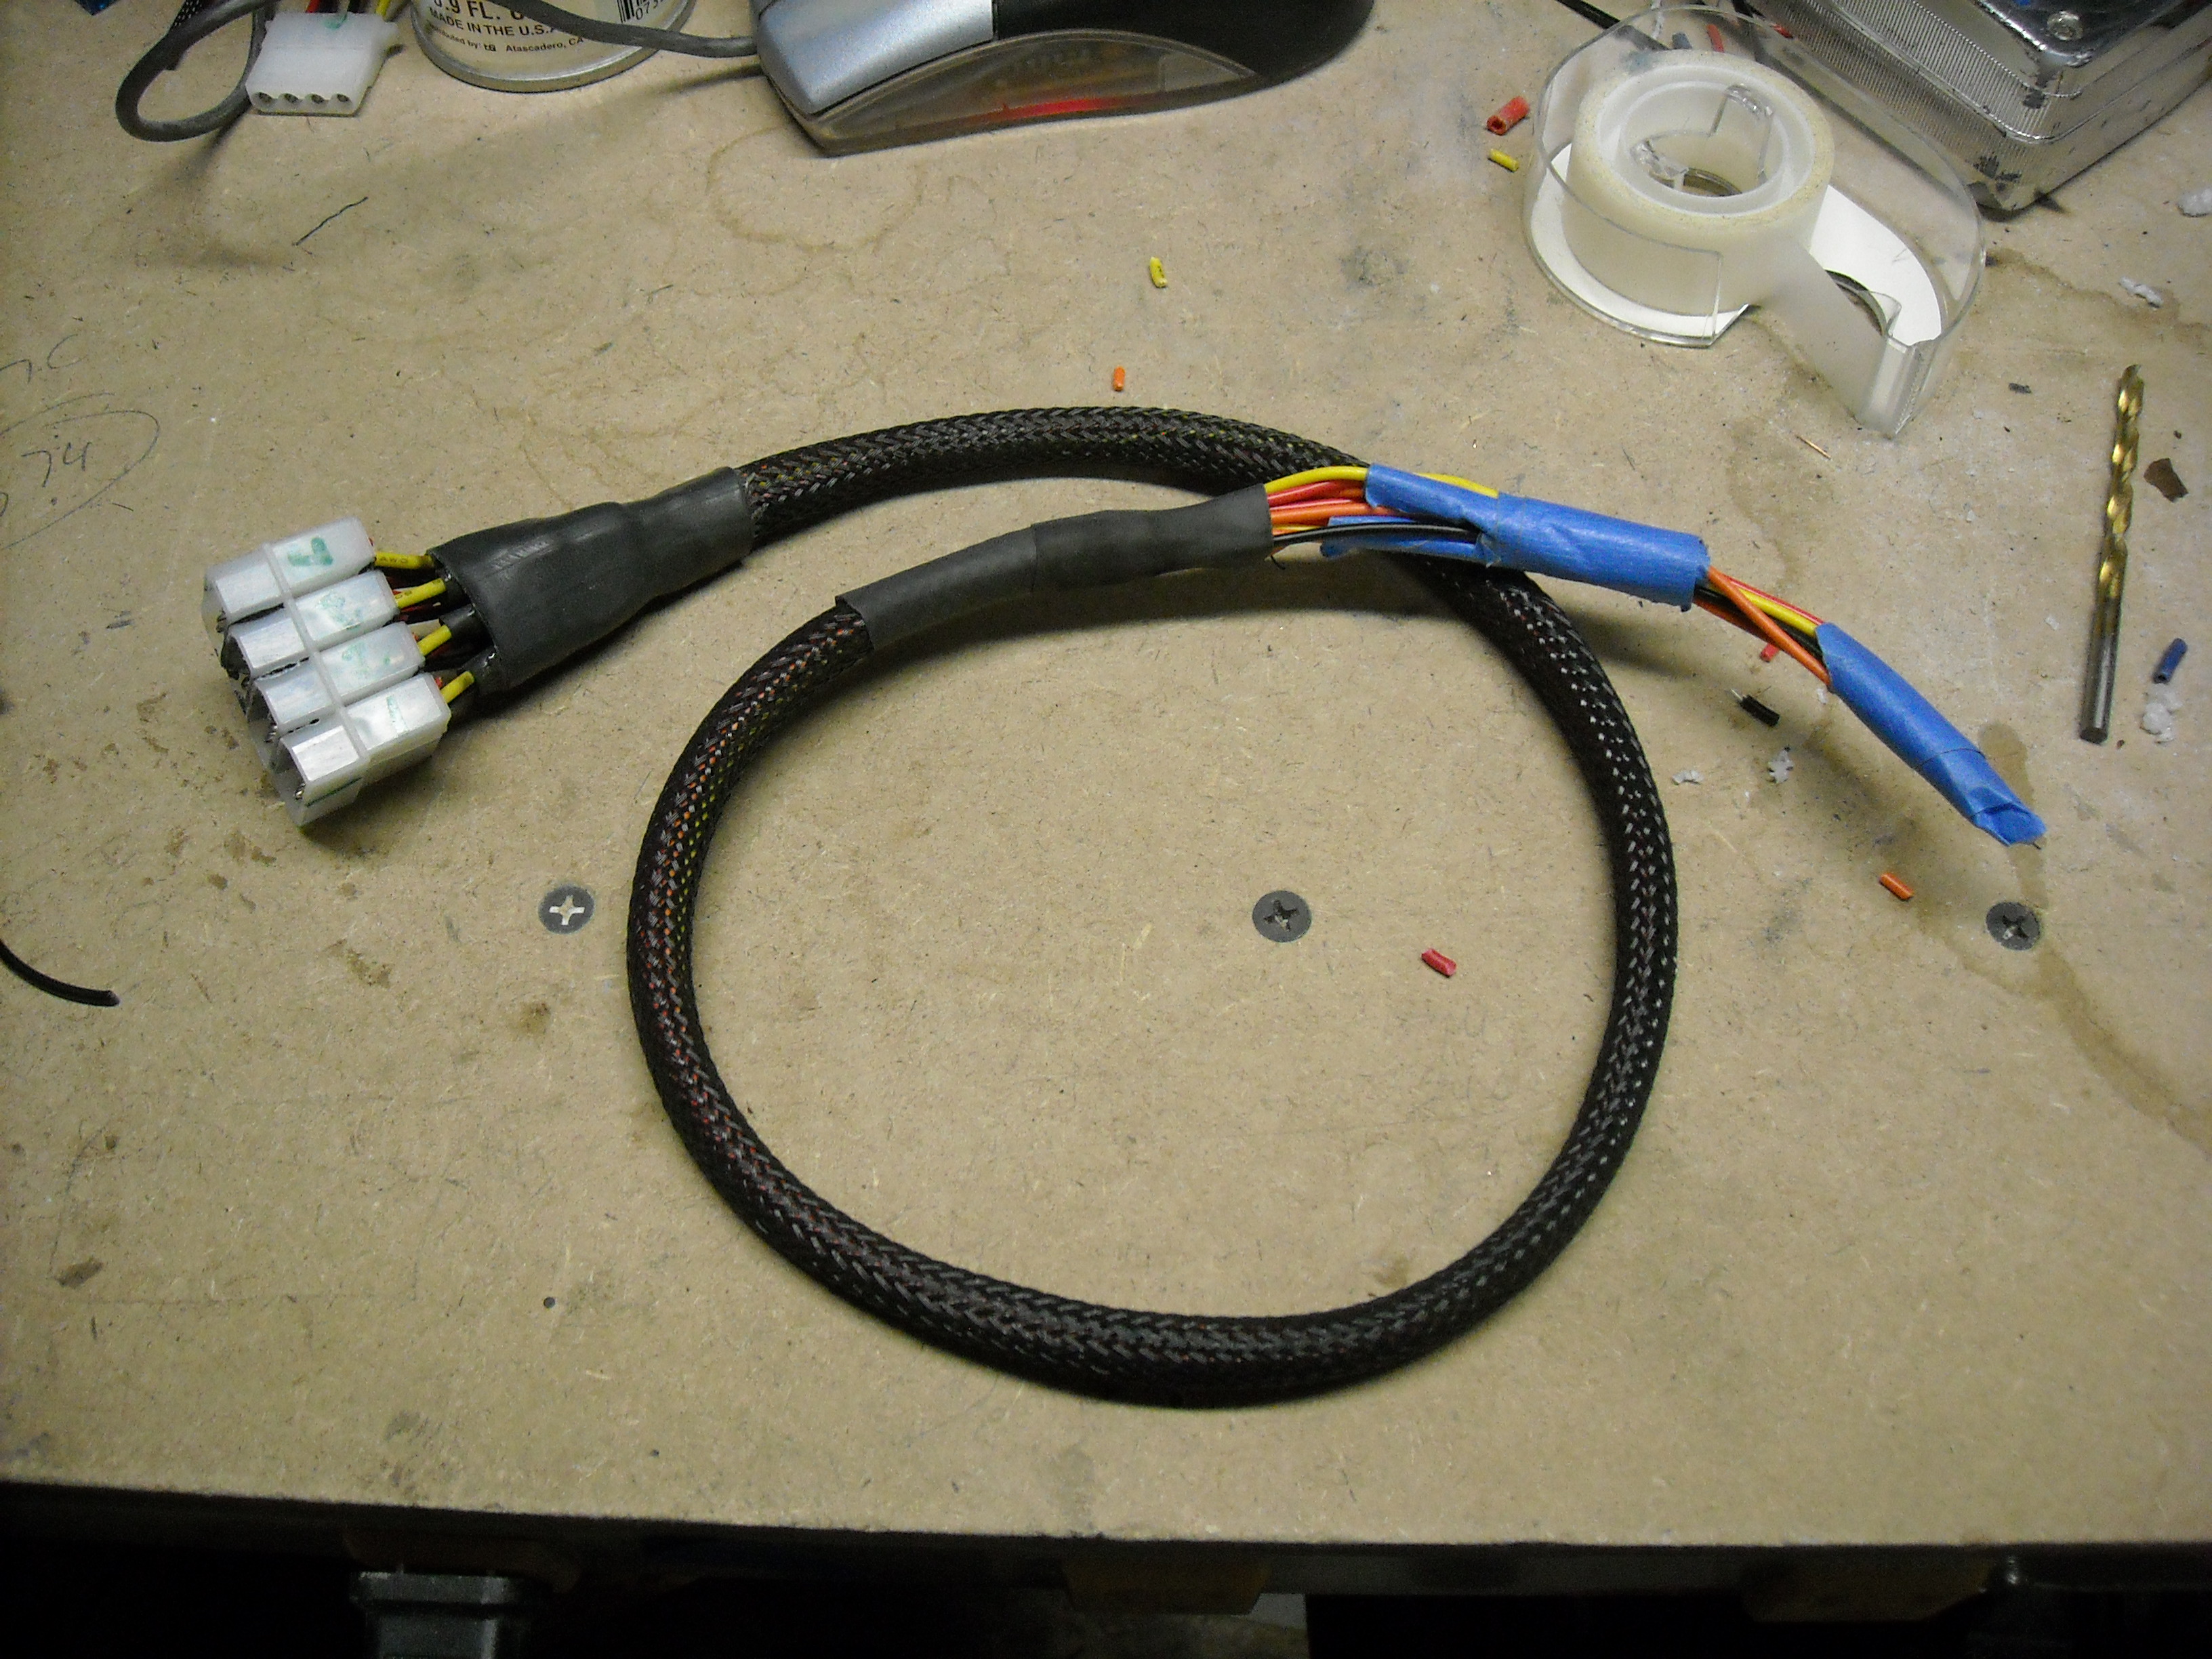
The switch side soldered in the car.


All ready to be hooked up.

Ready to be hooked into the relay block.

This is the connector between the switches and the relay block.
The switch side soldered in the car.
All ready to be hooked up.
Ready to be hooked into the relay block.
Thread Starter
Junior Member
Posts like a Ricer Type-R
Joined: Aug 2012
Posts: 18
Likes: 0
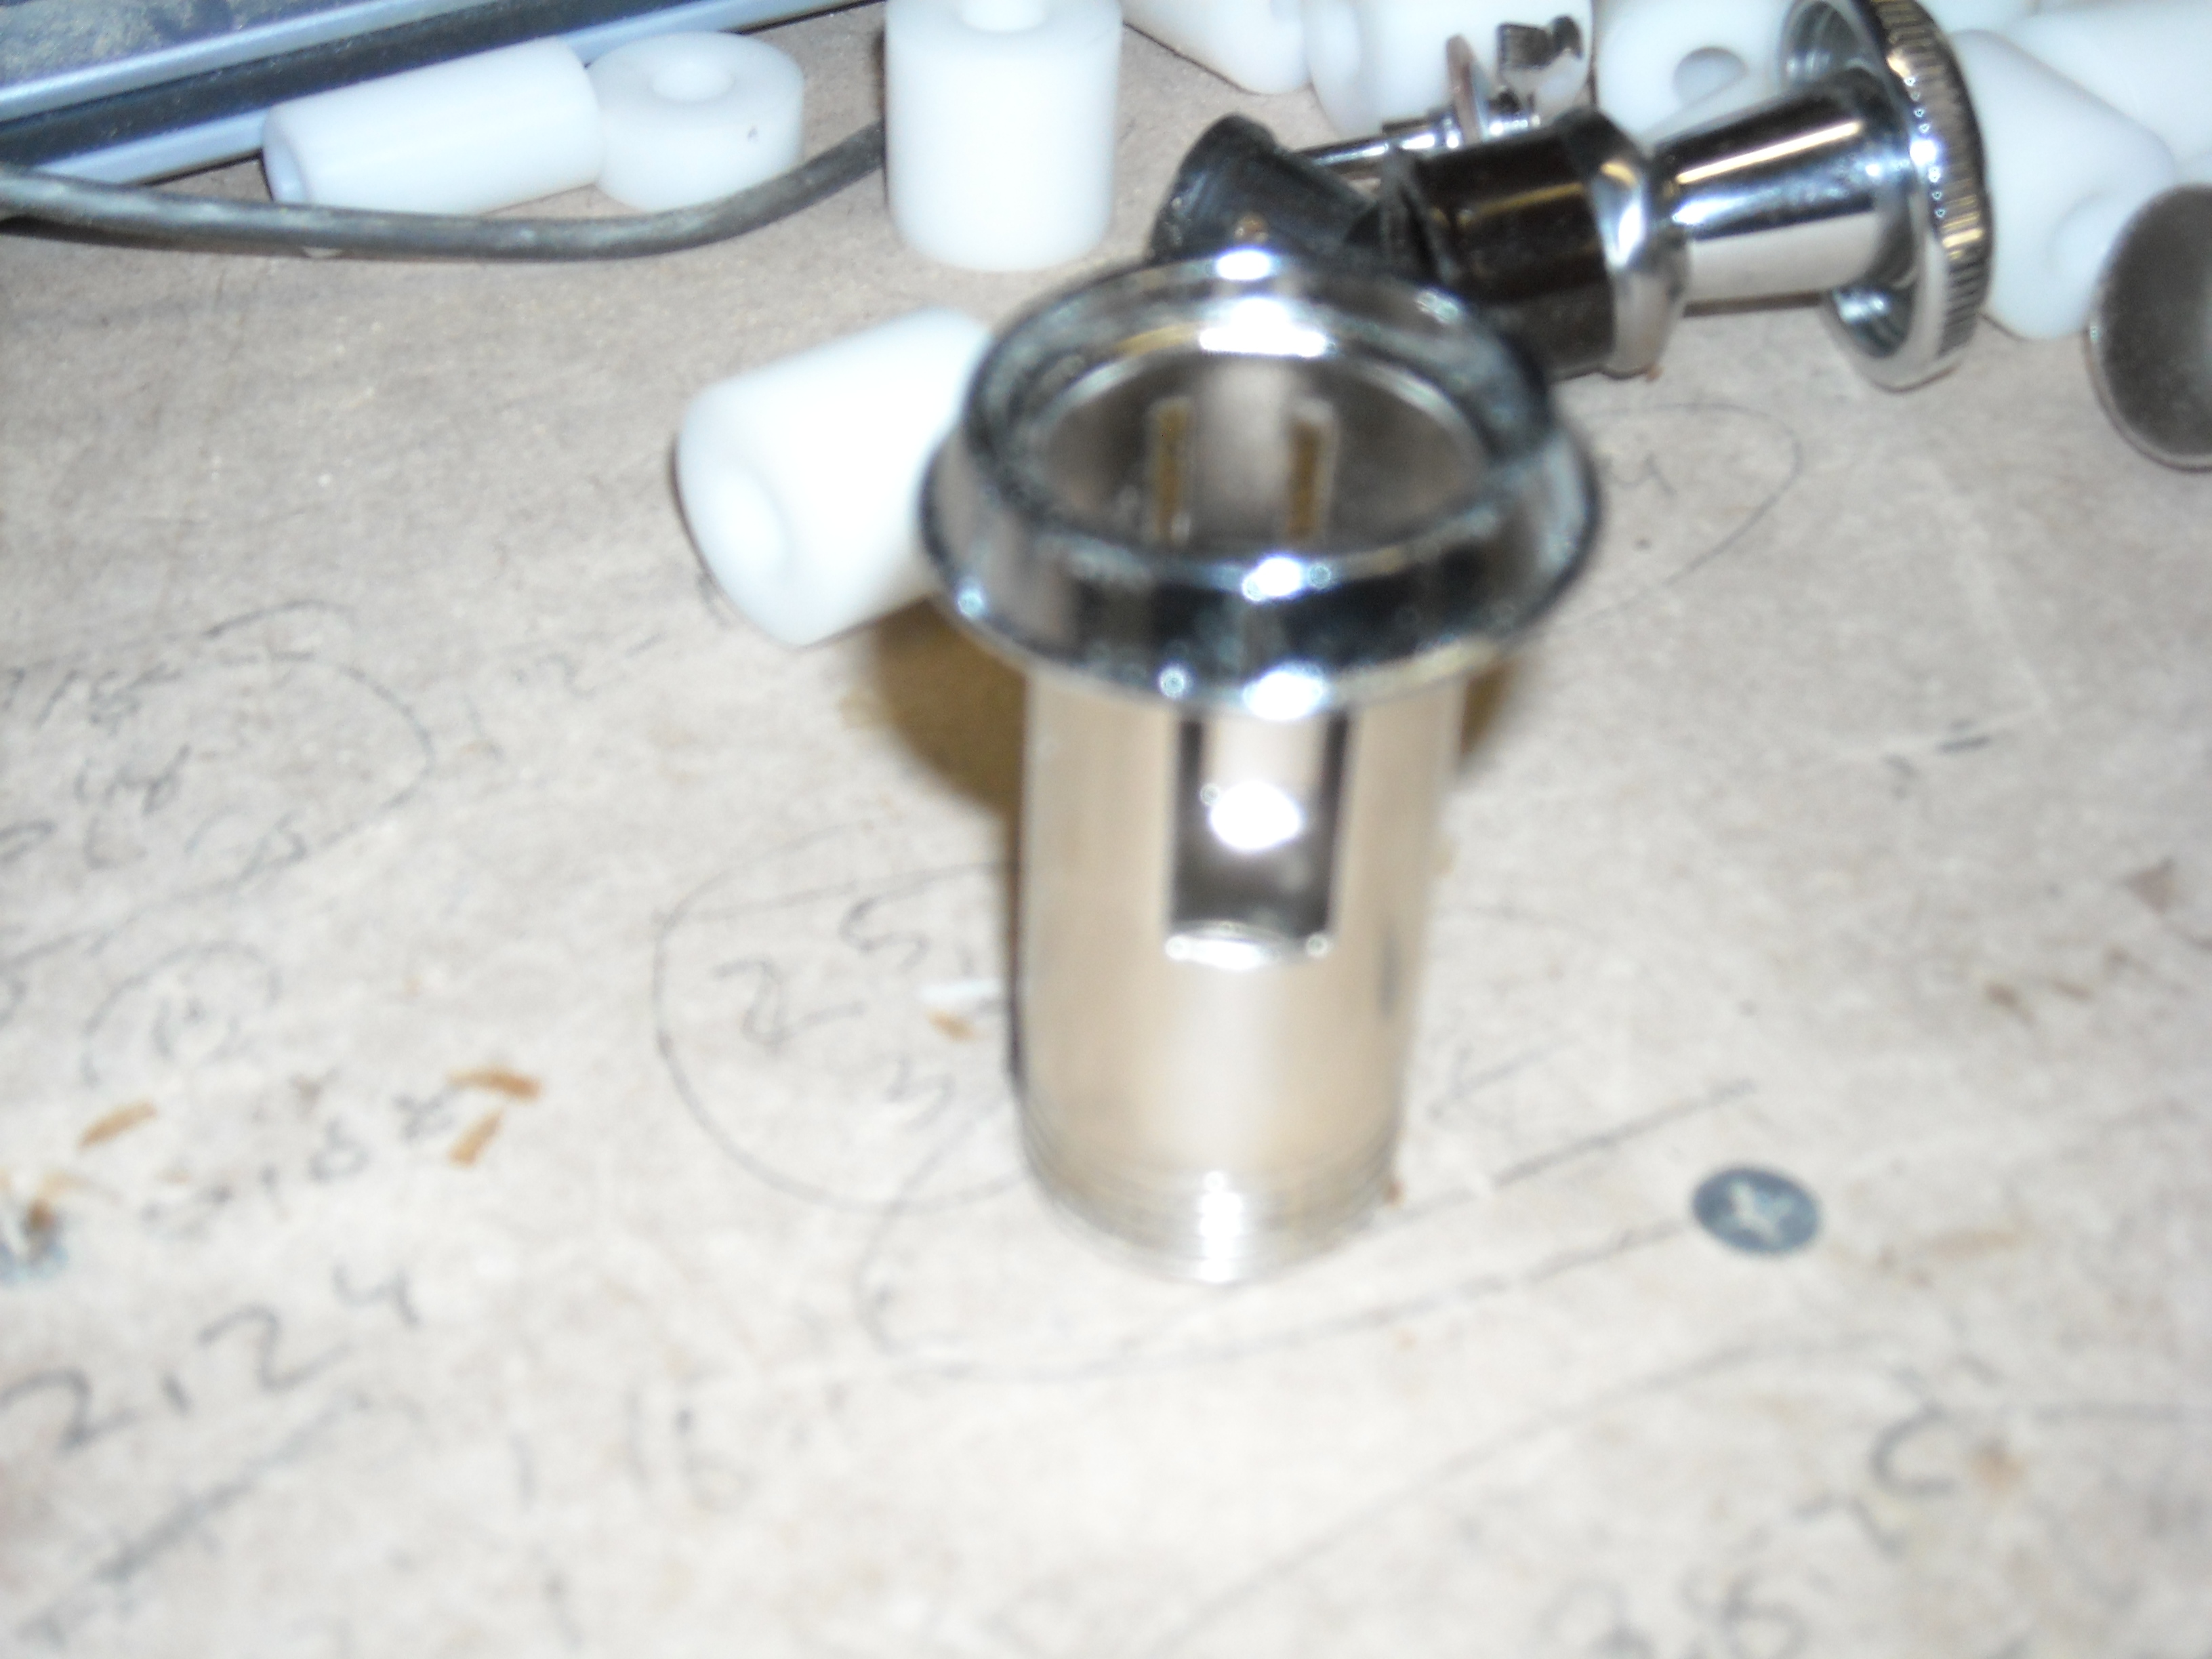
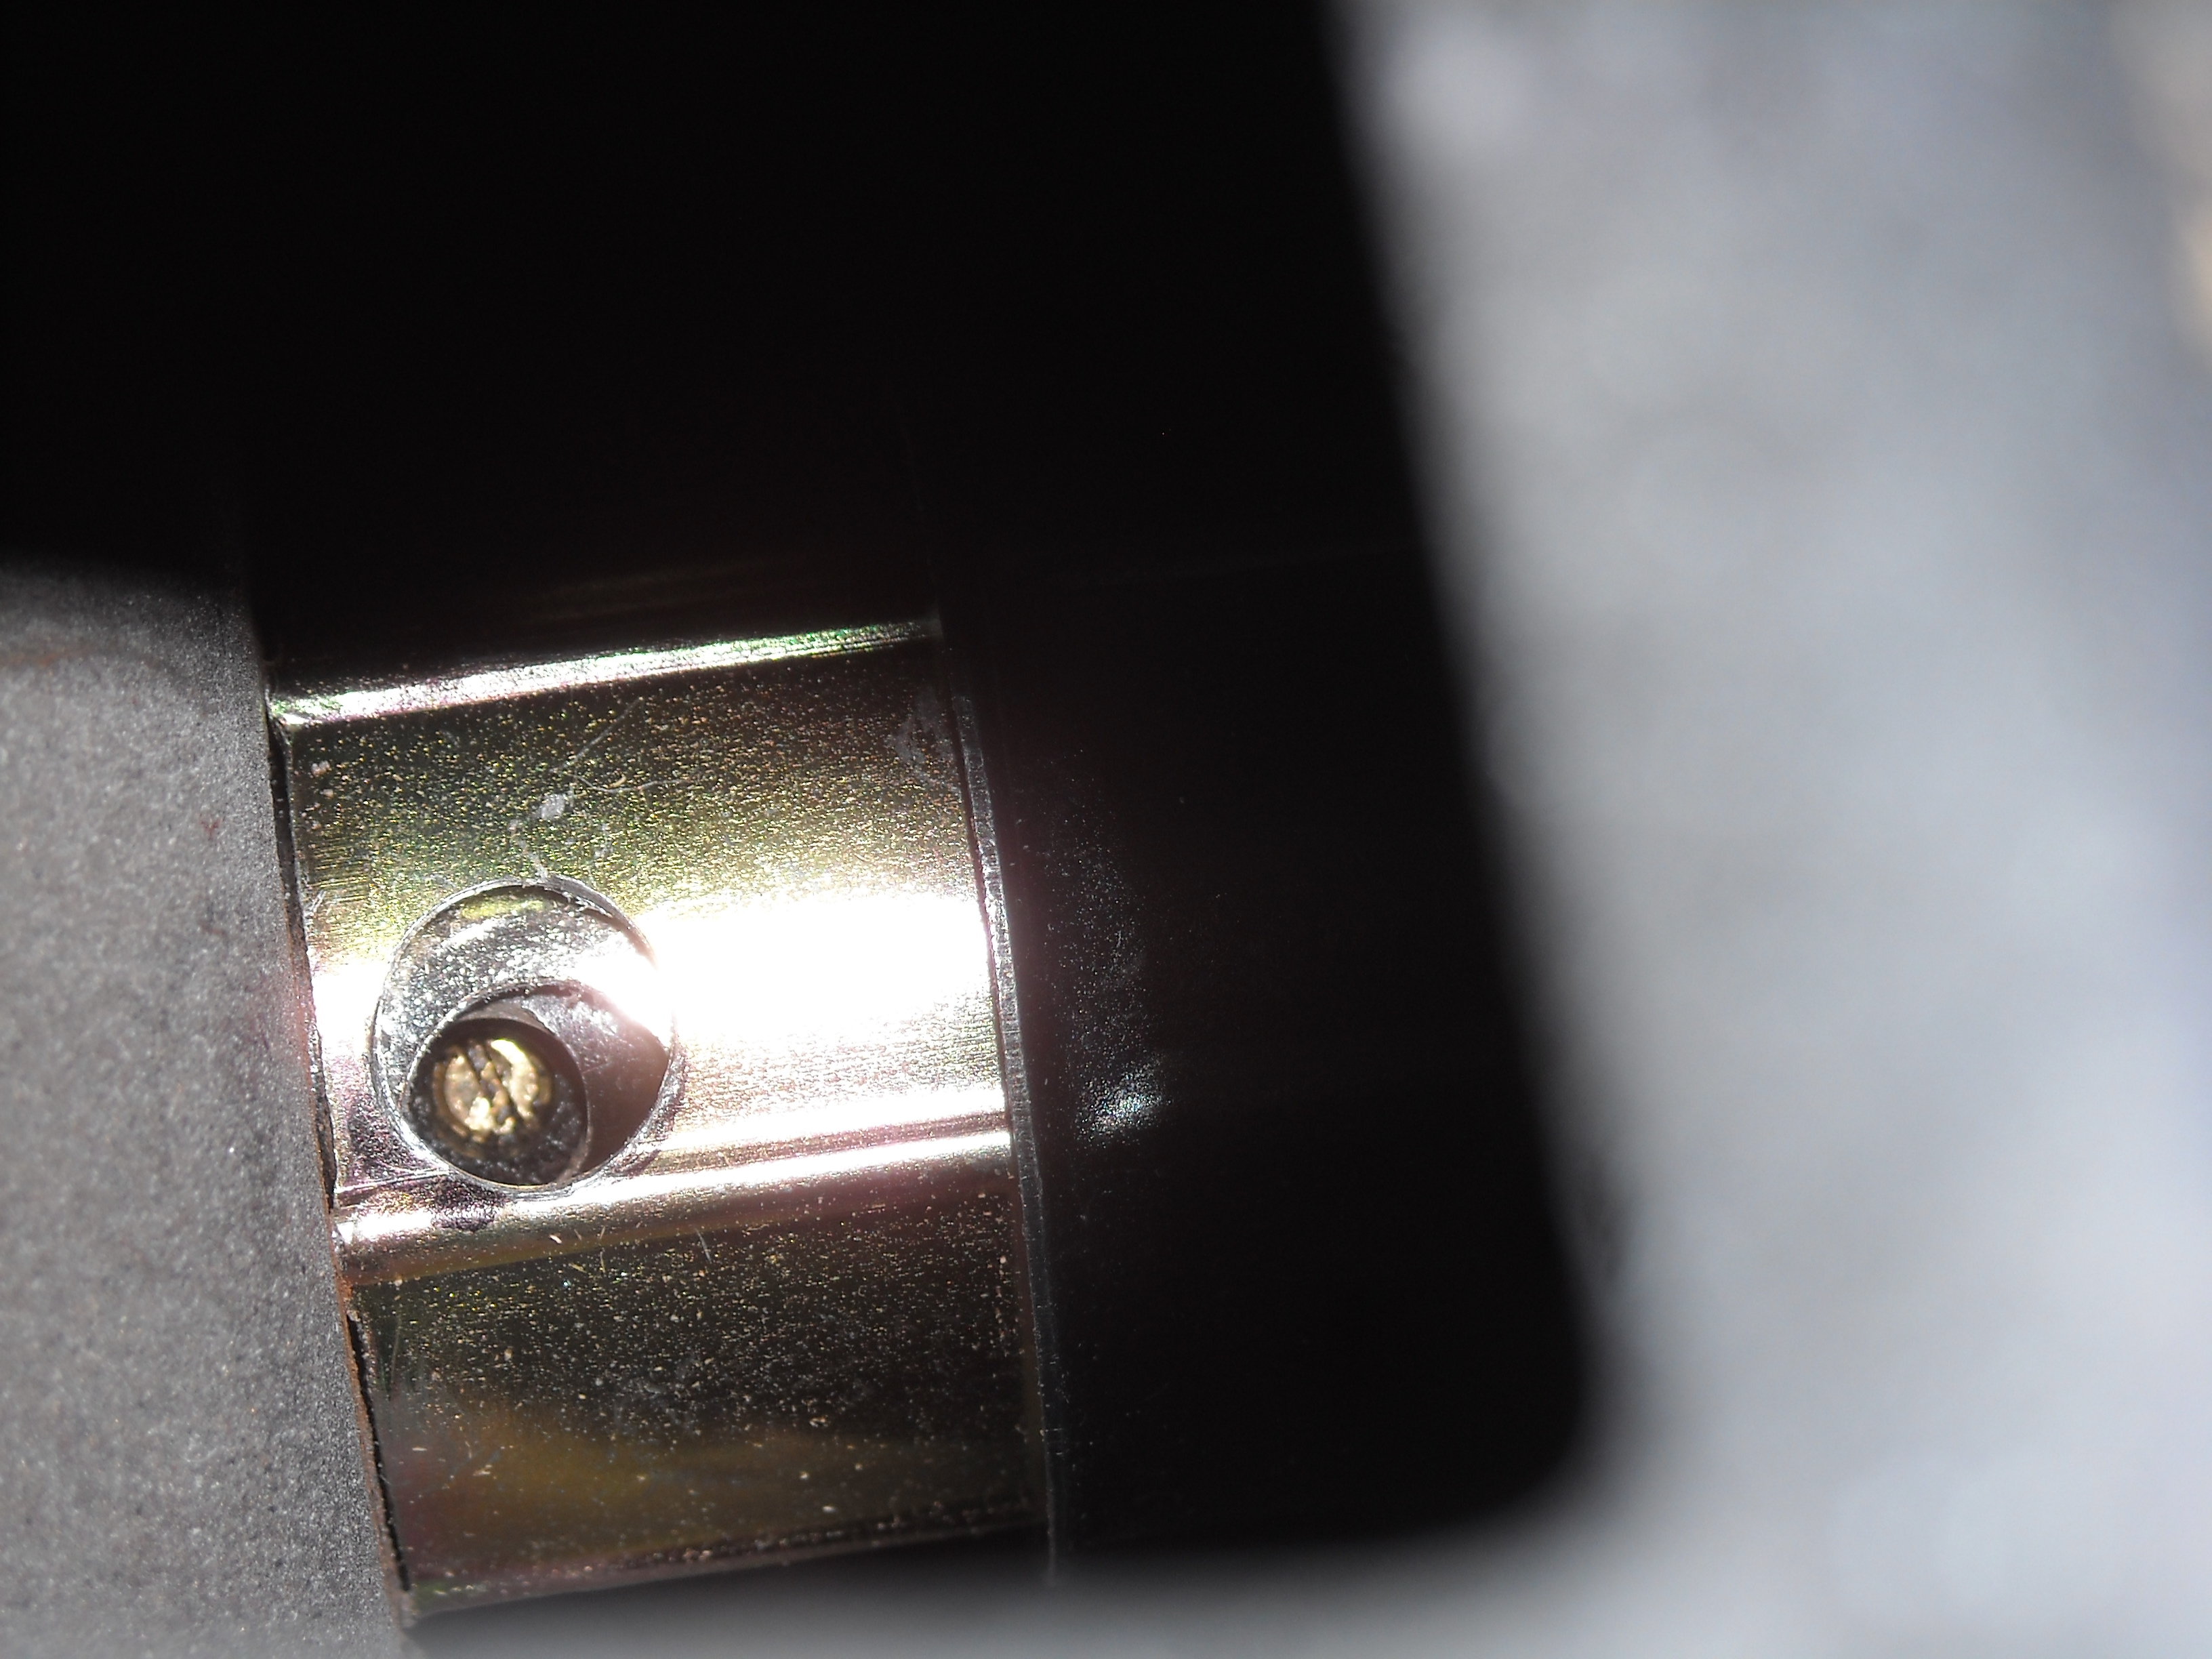
Next item was to add a bass **** into the dash. I didn't want some funky random **** on the dash so i decided the cig lighter looked like a good spot.
Disassembled the lighter.
Glued in a nylon block for the **** to screw into.
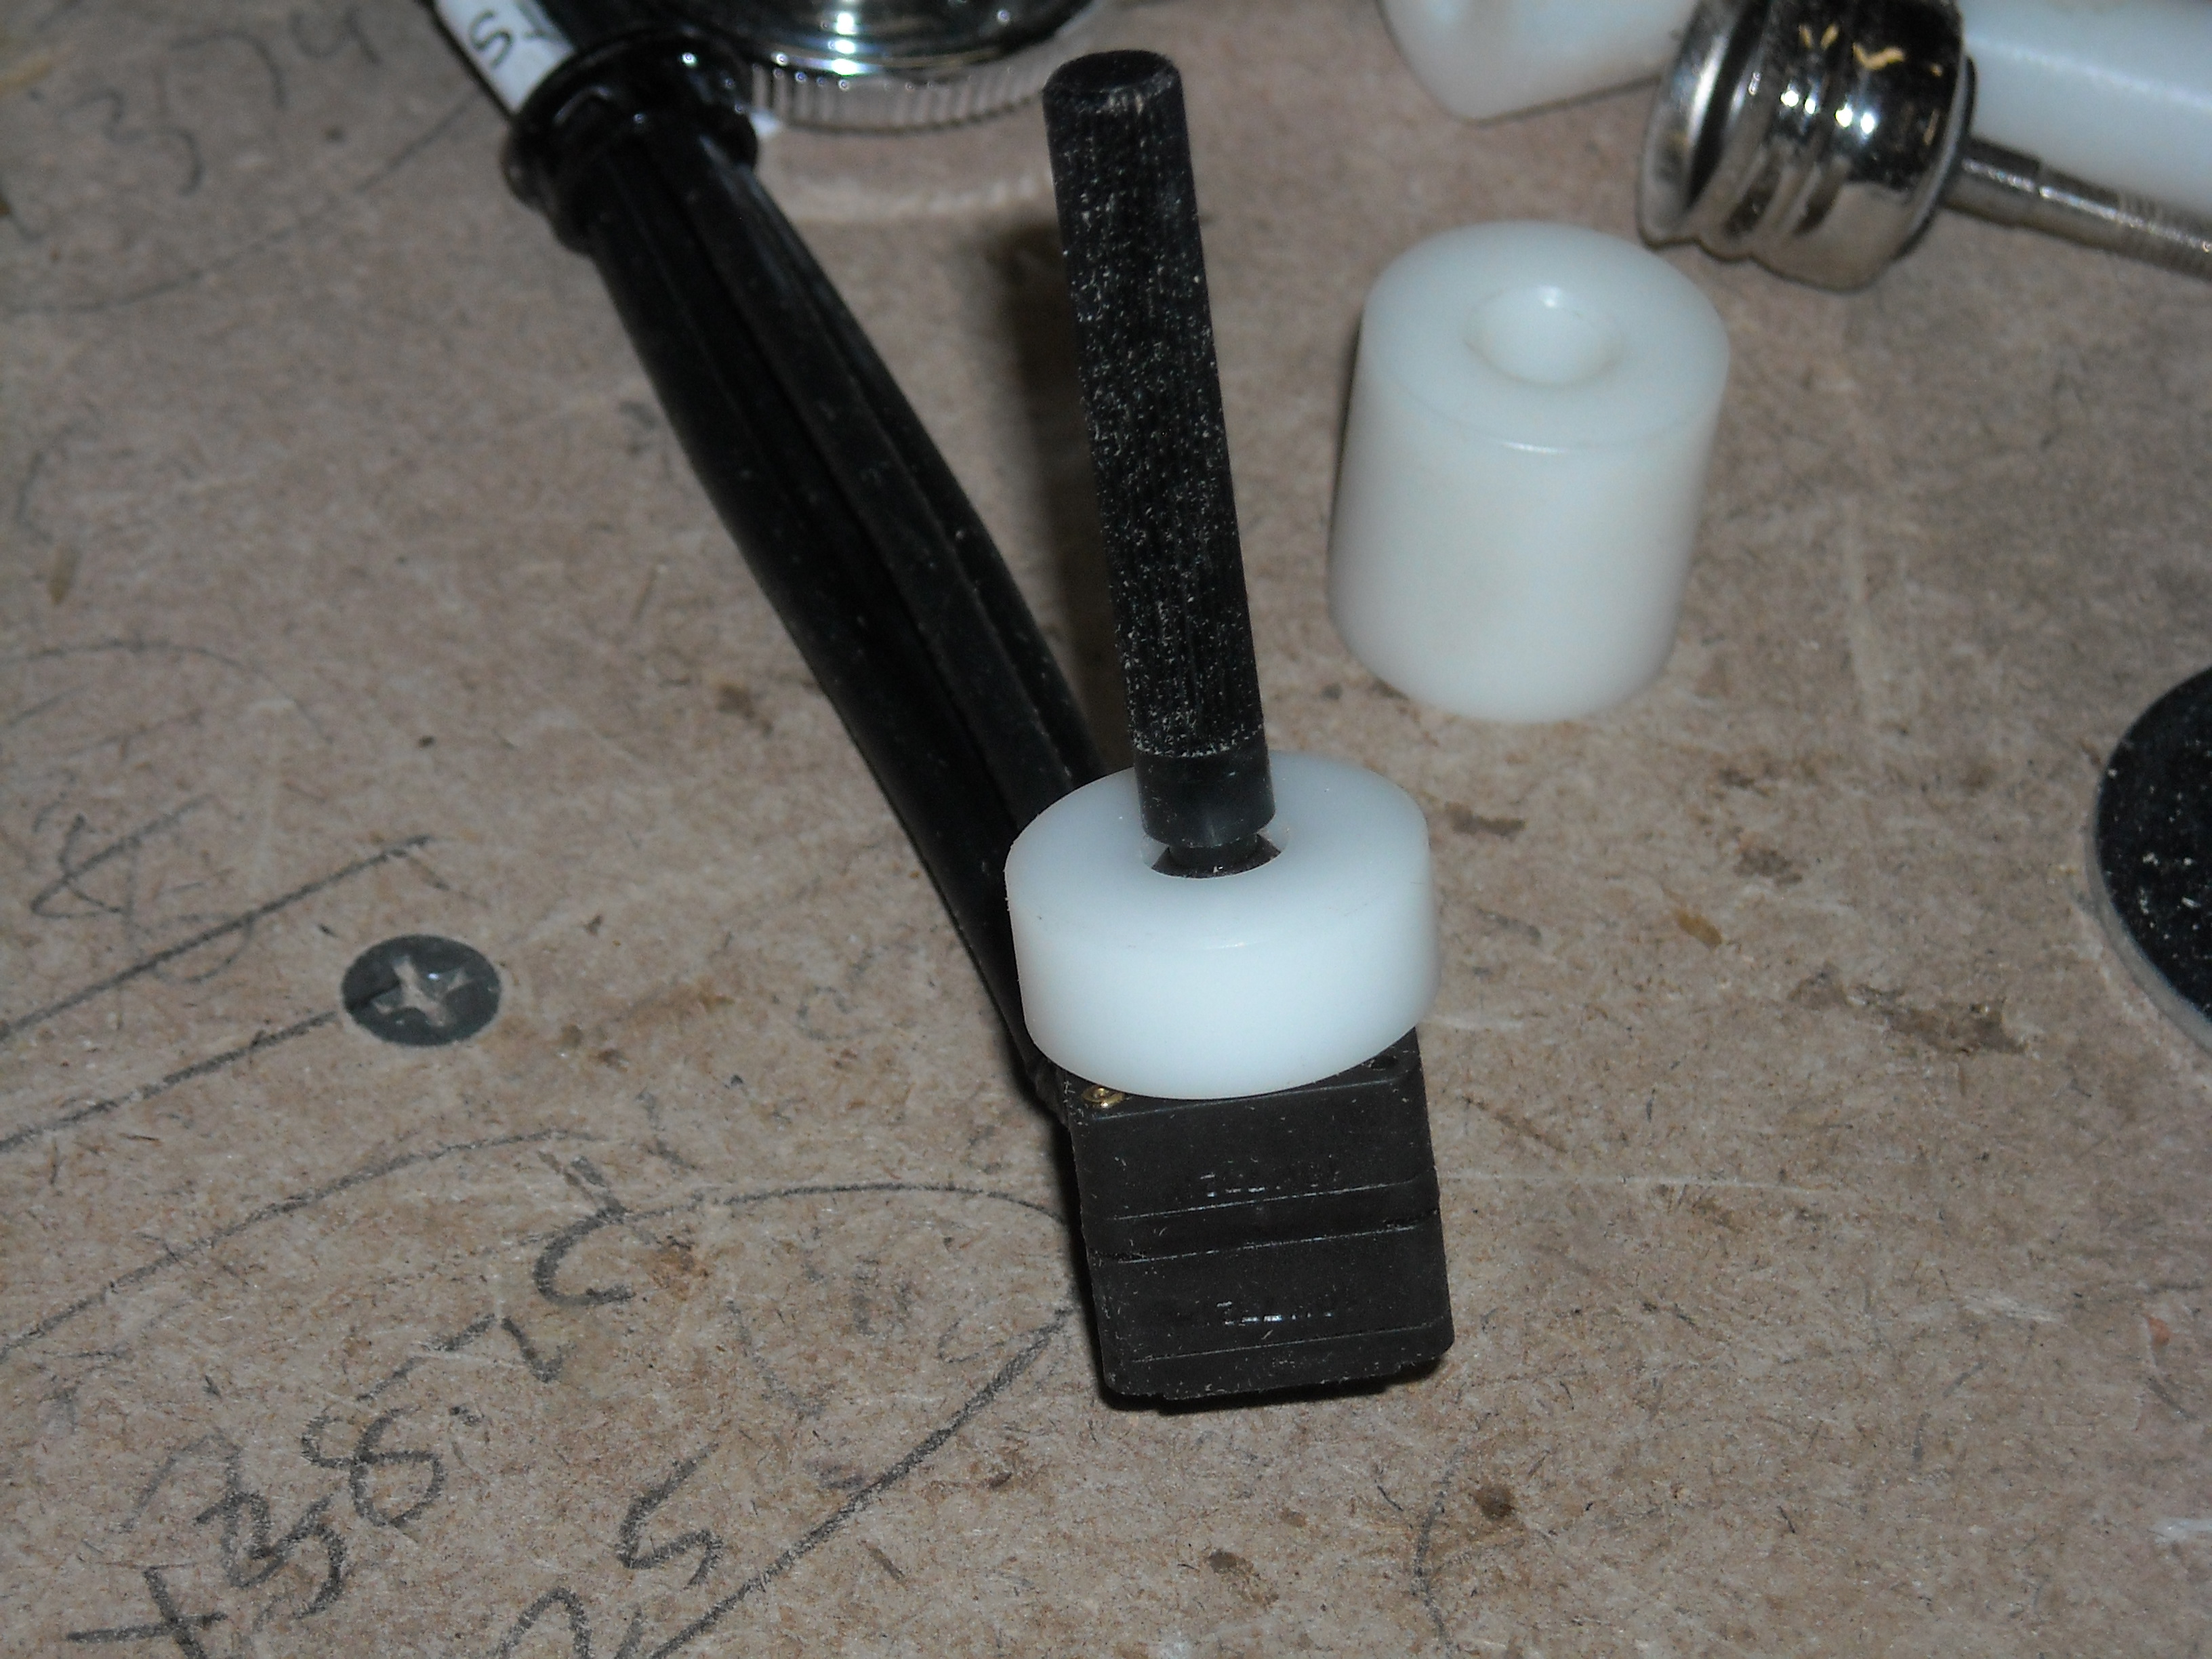
then glued the **** into the lighter.
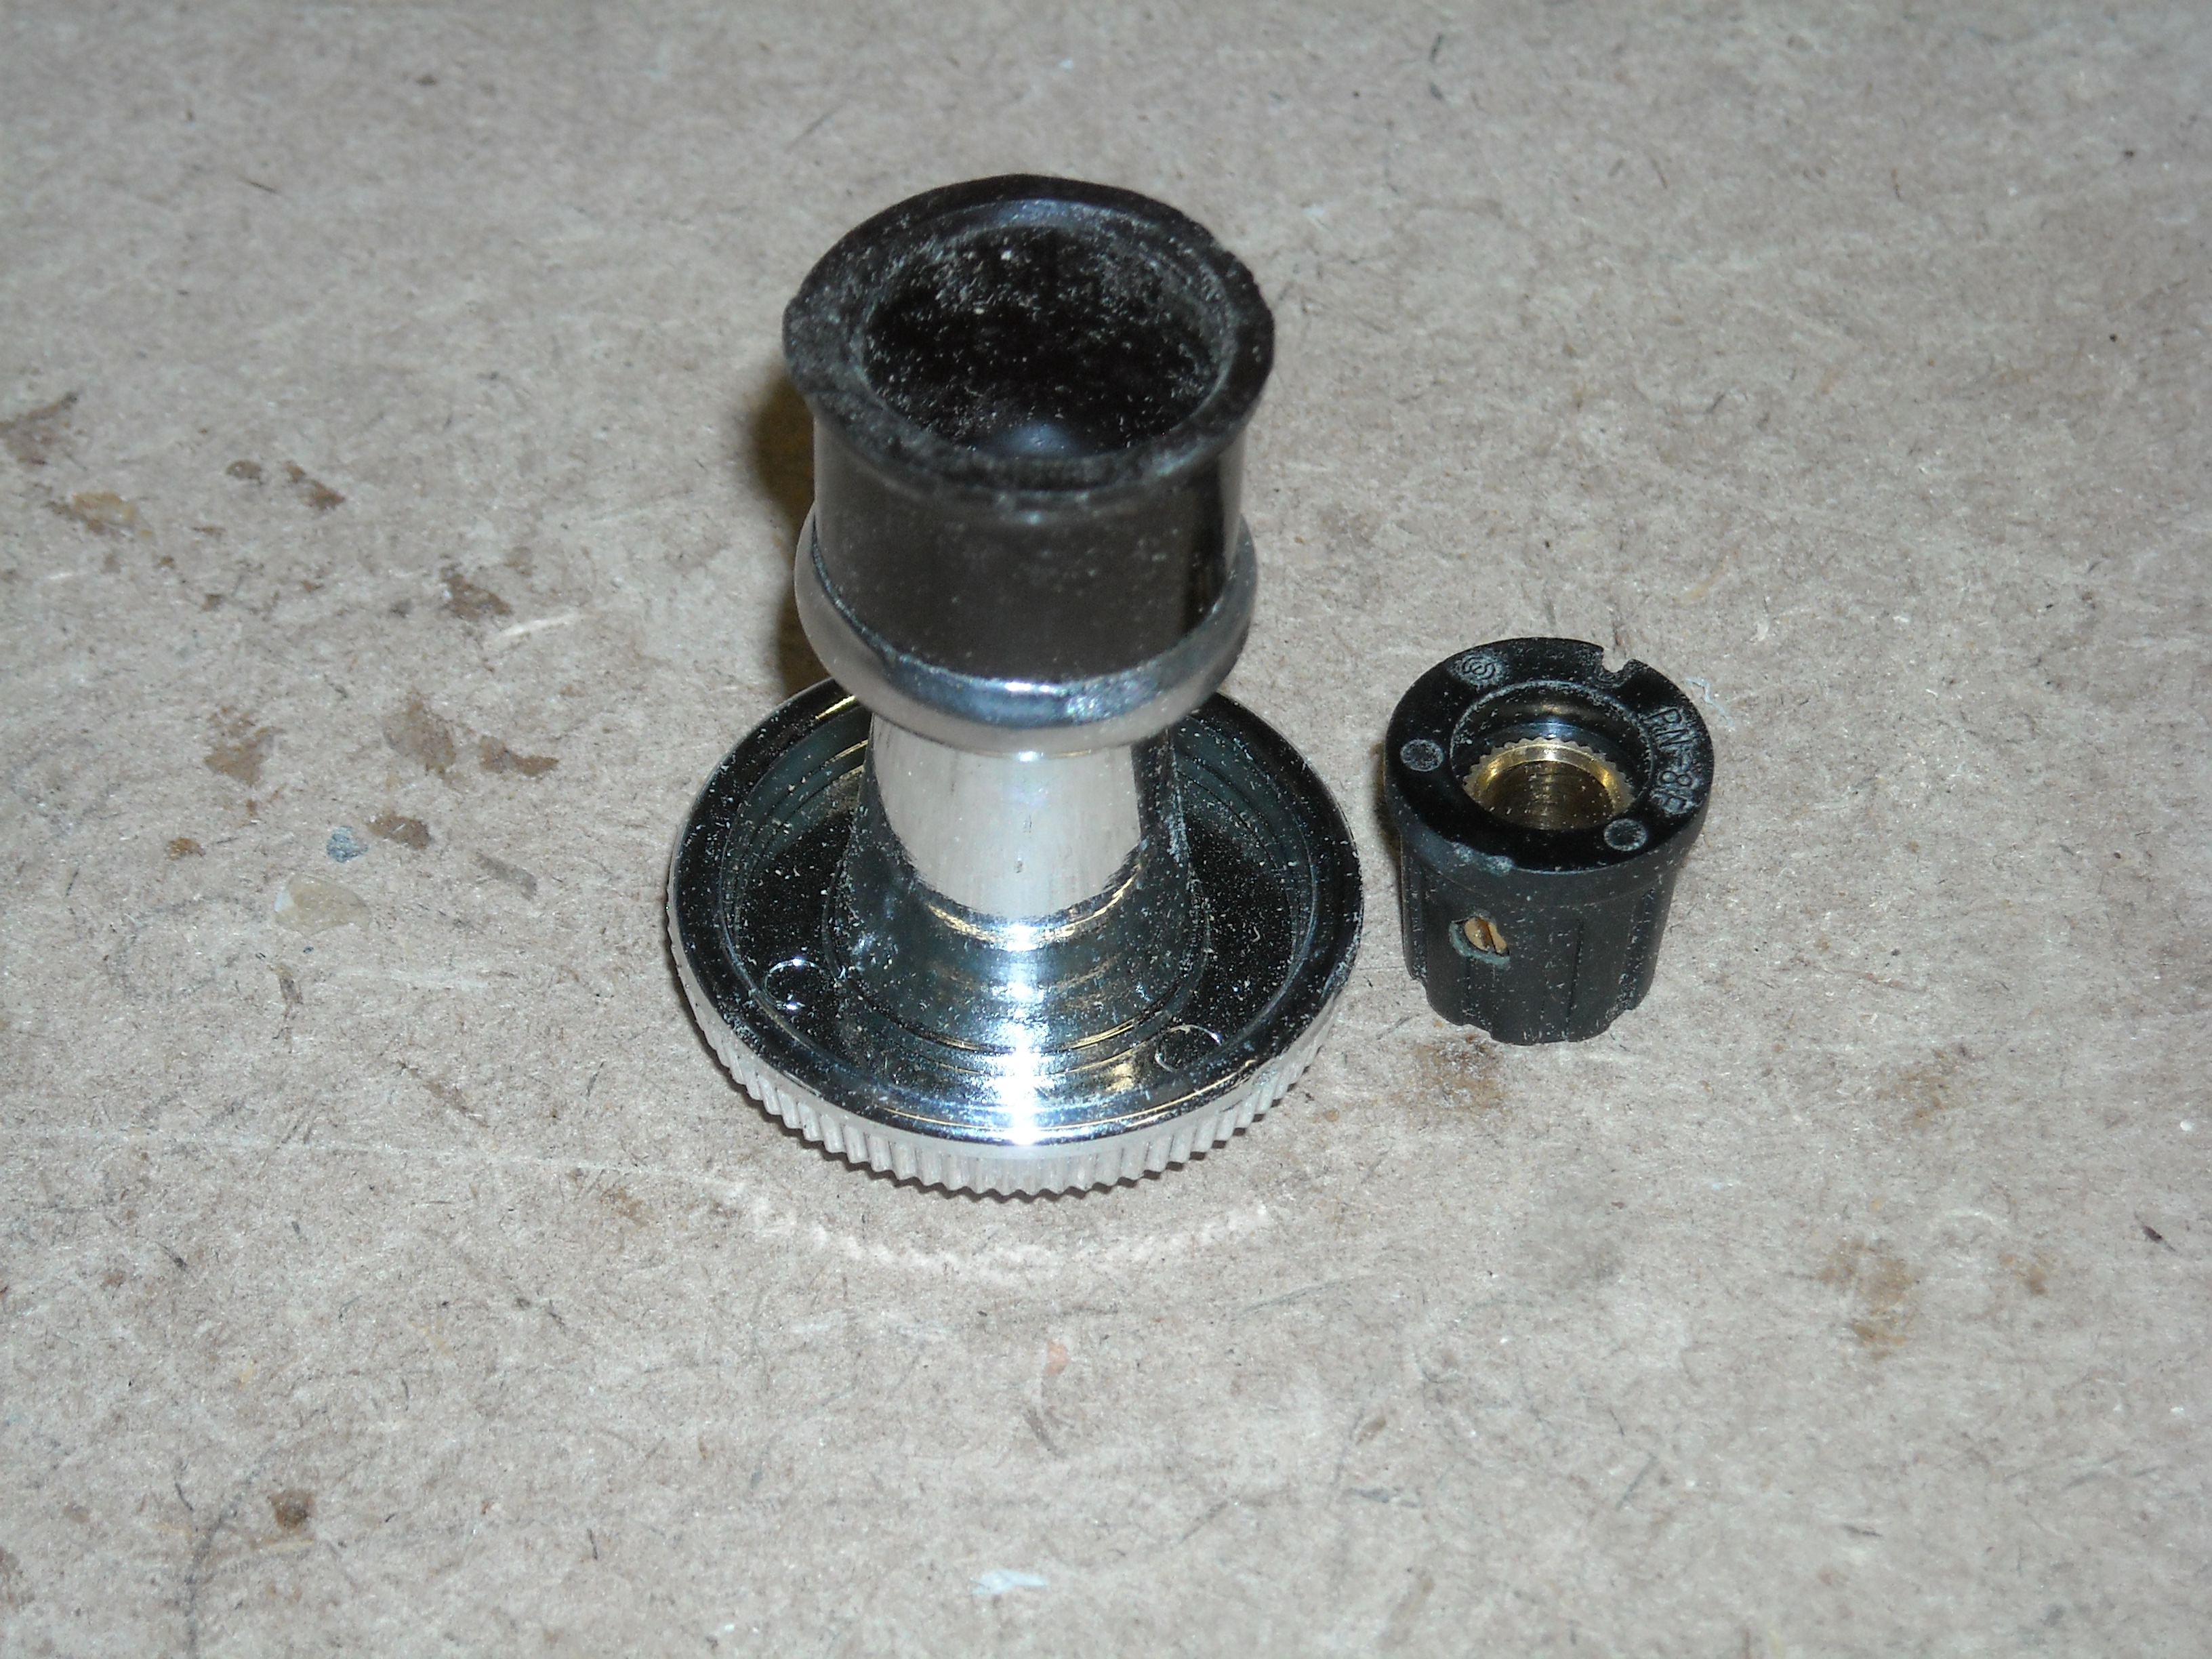
Next I had to drill out for the set screw to hold the pair together.

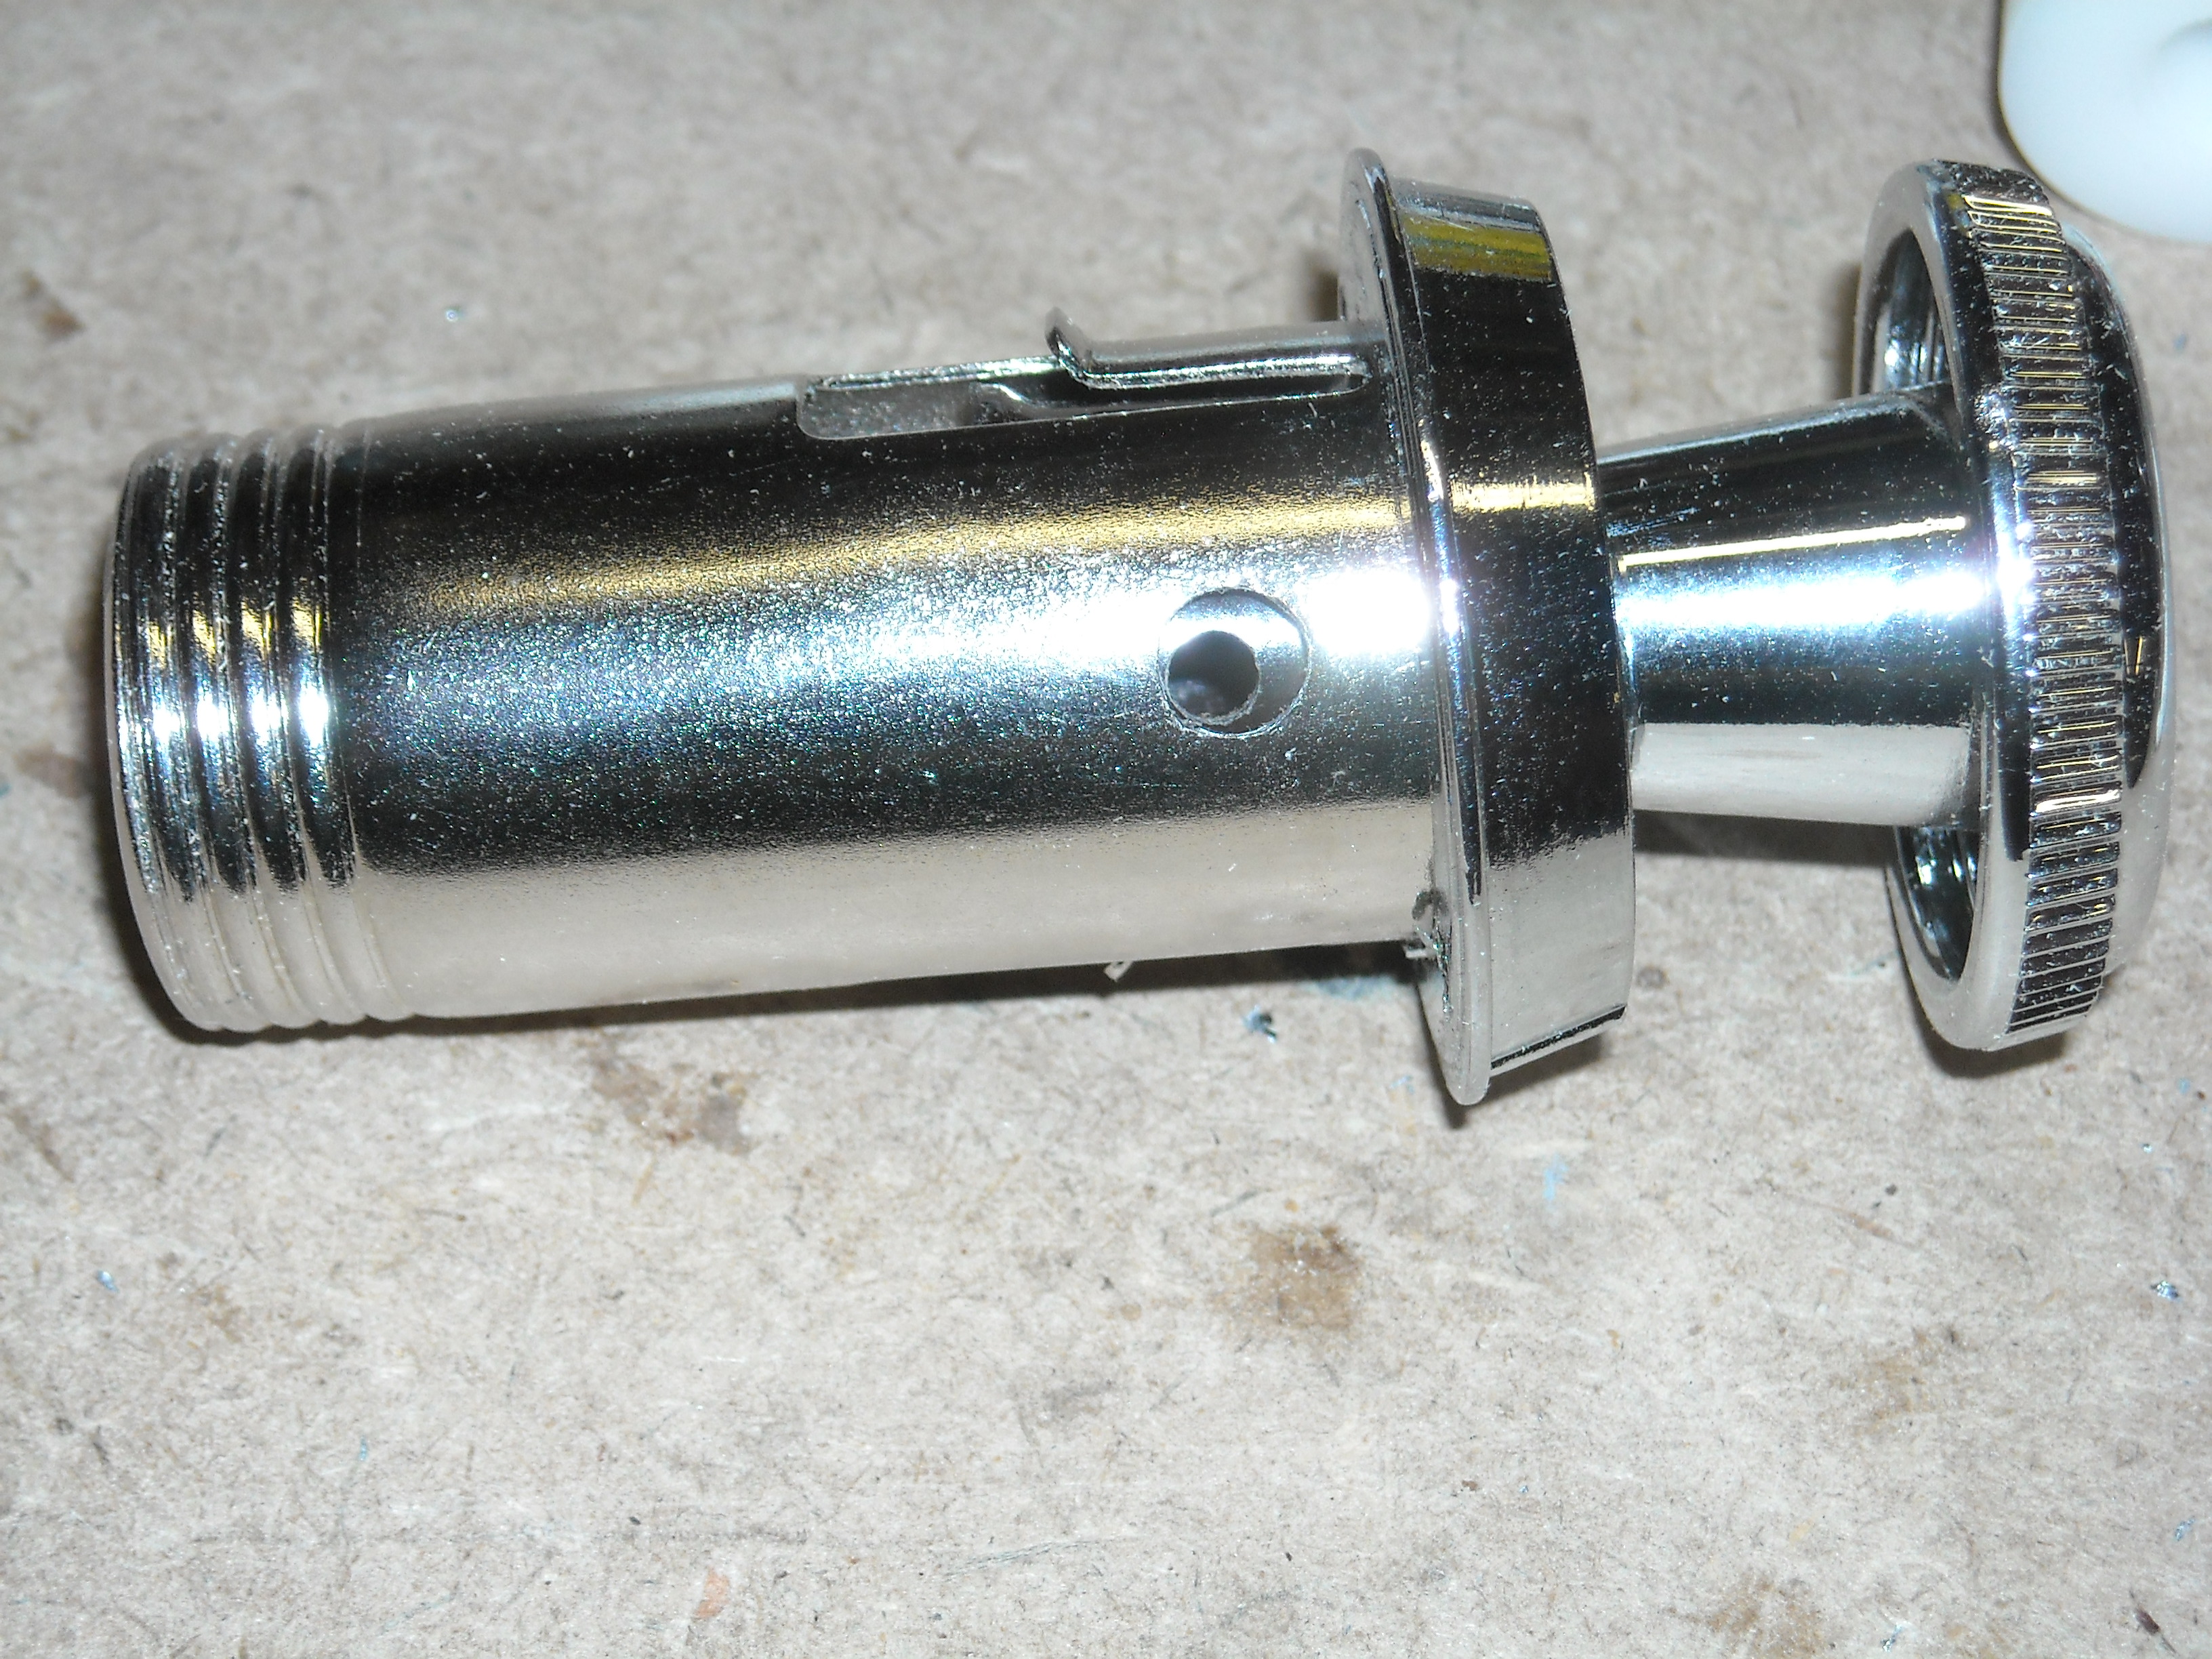
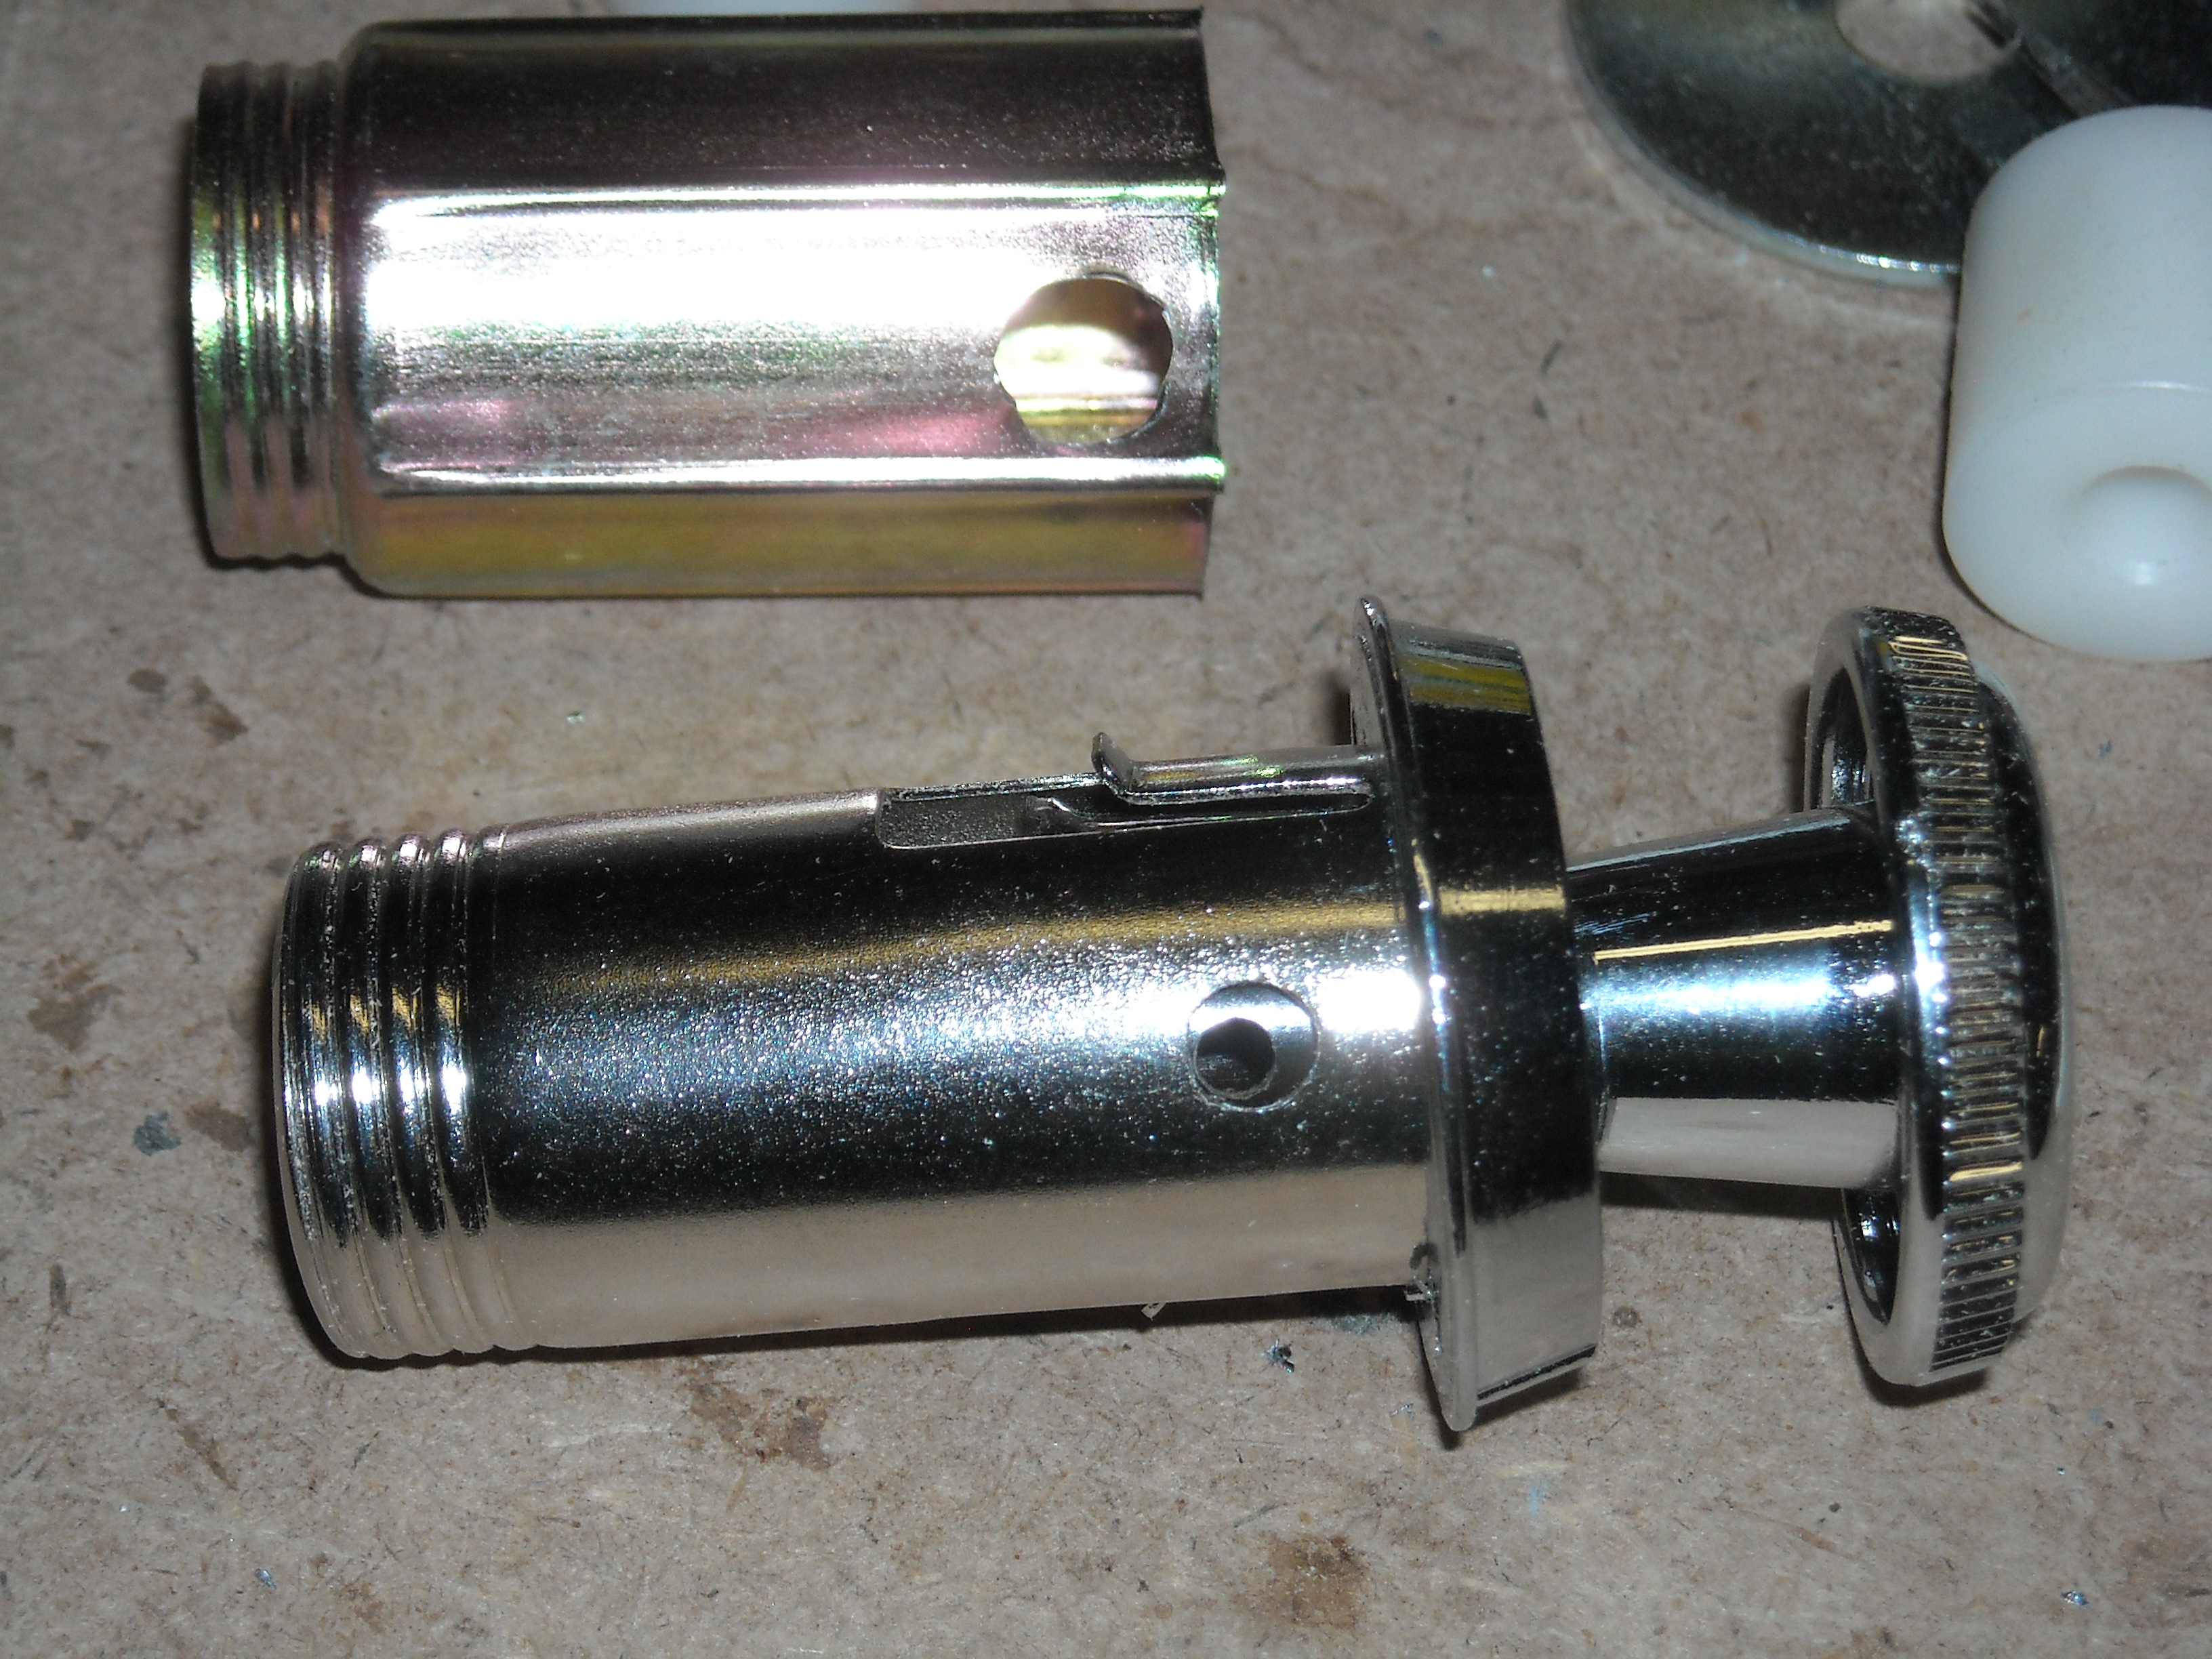
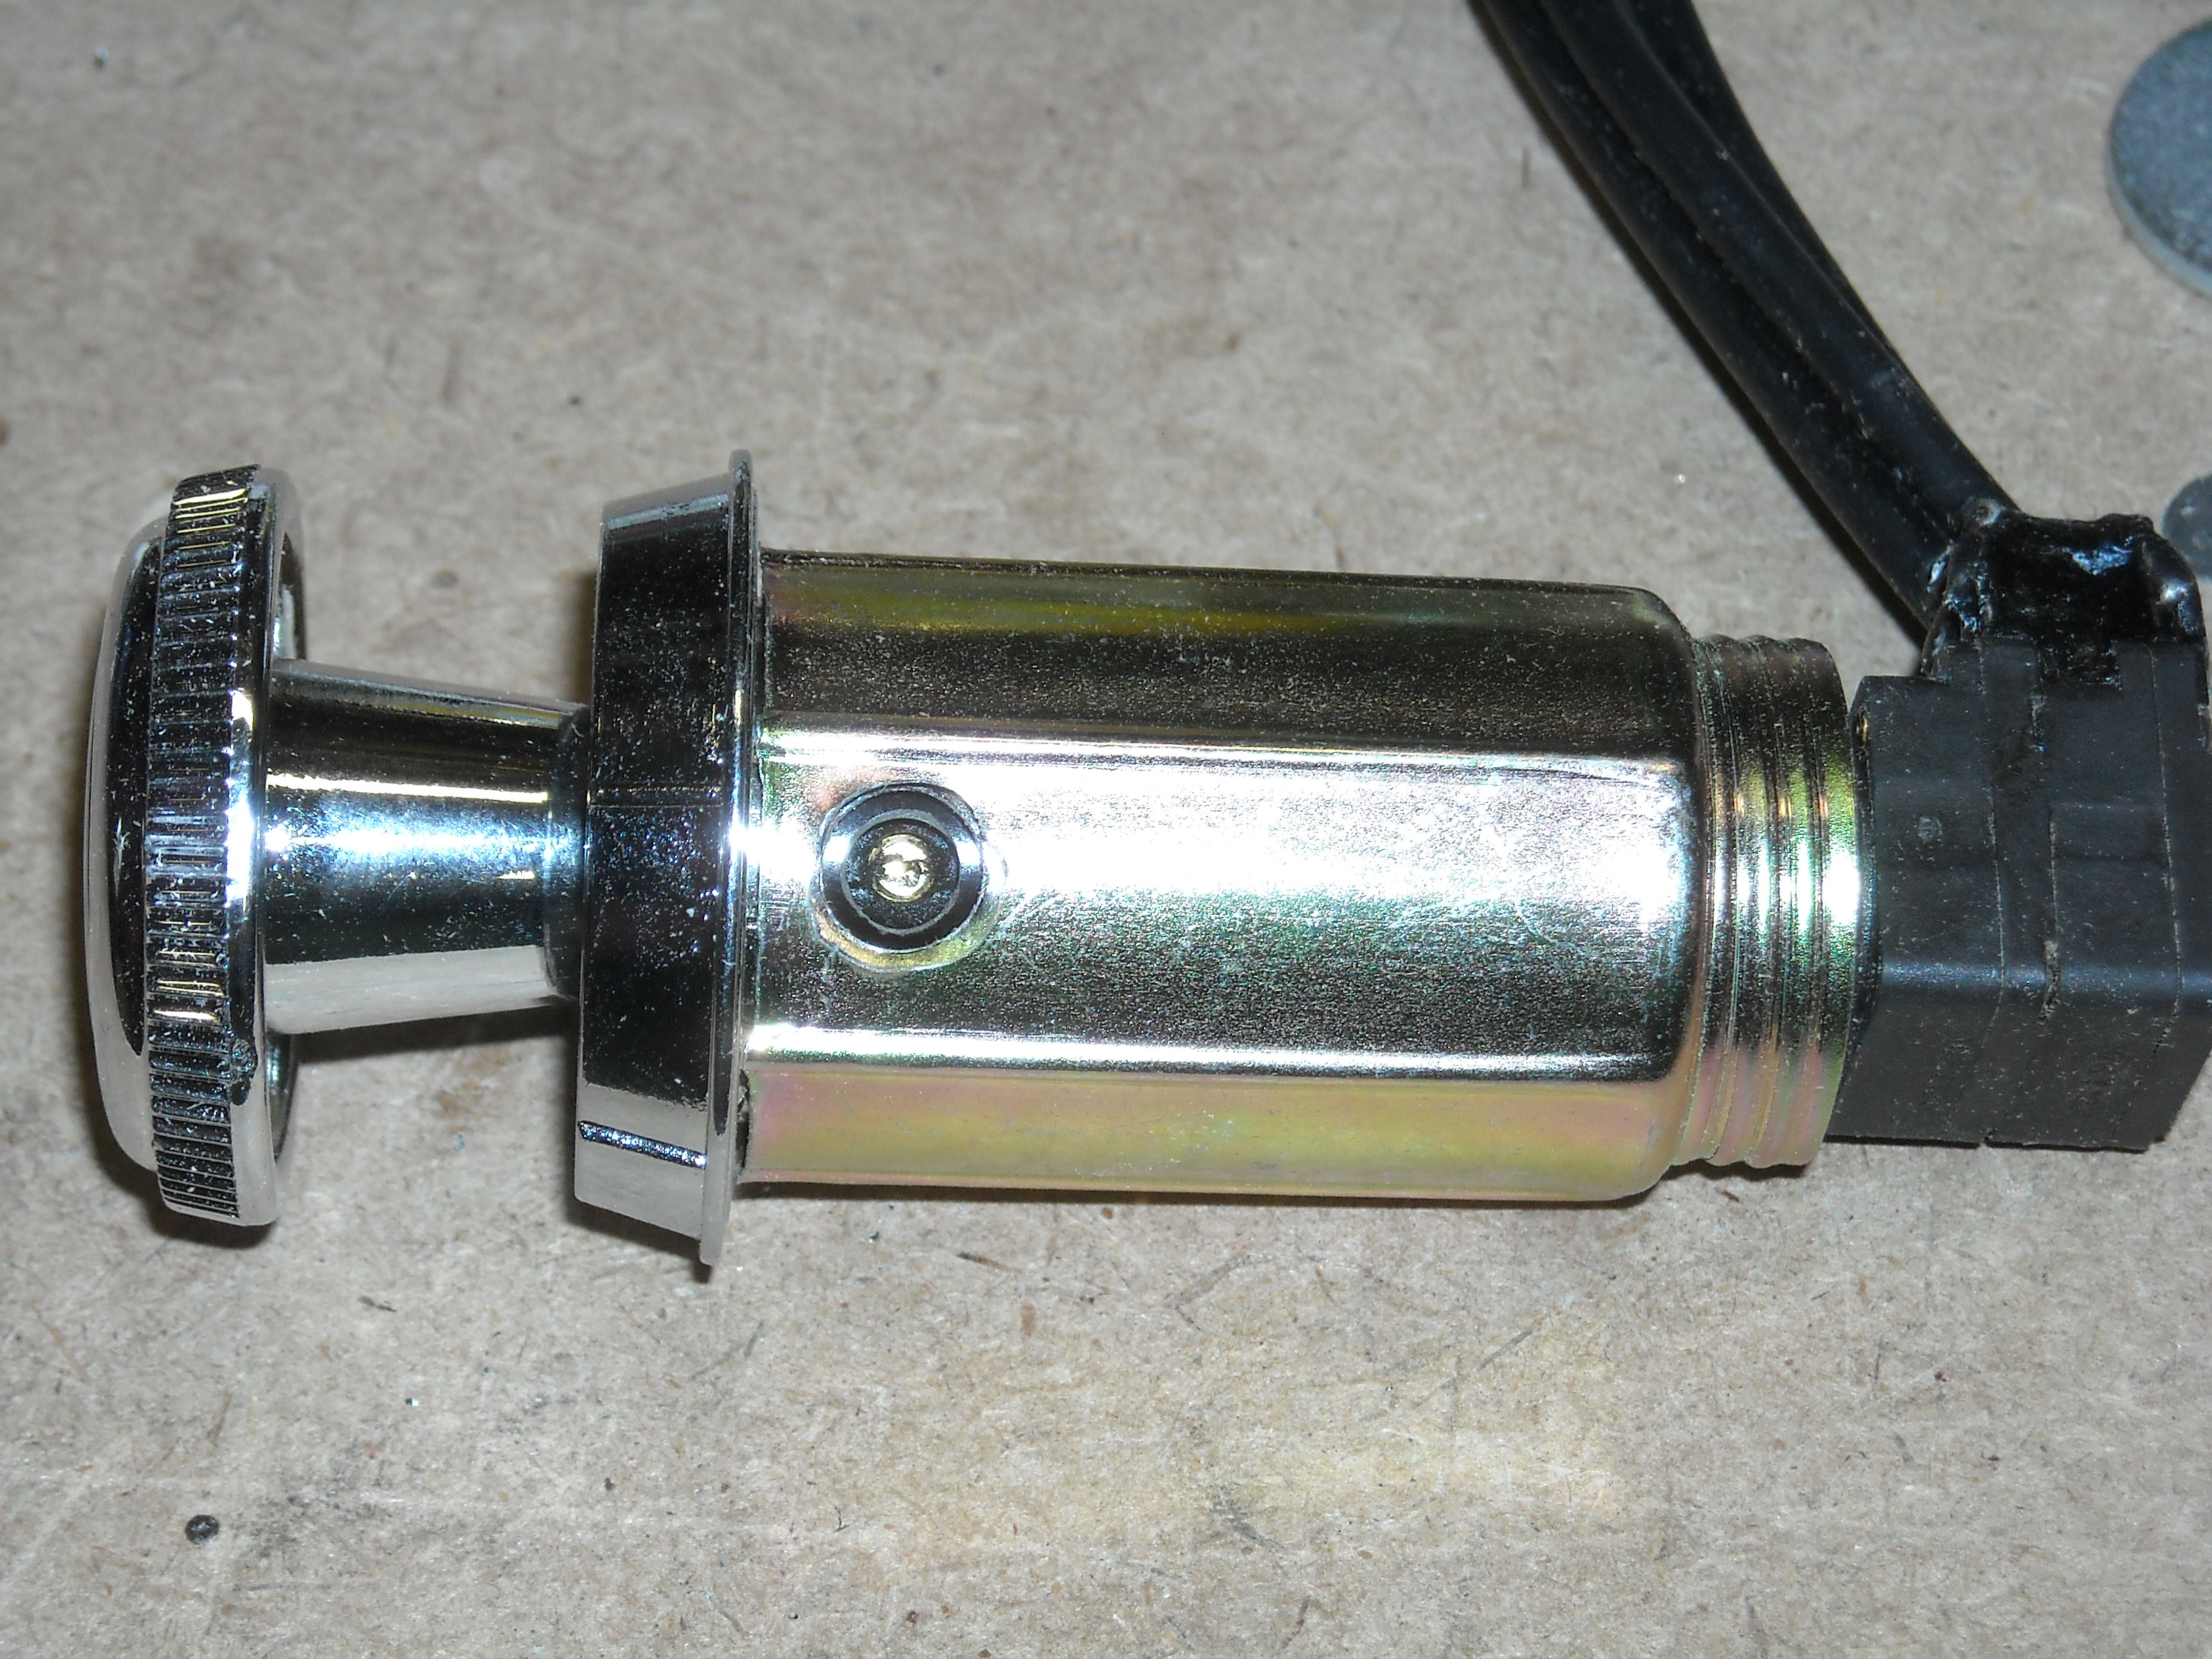
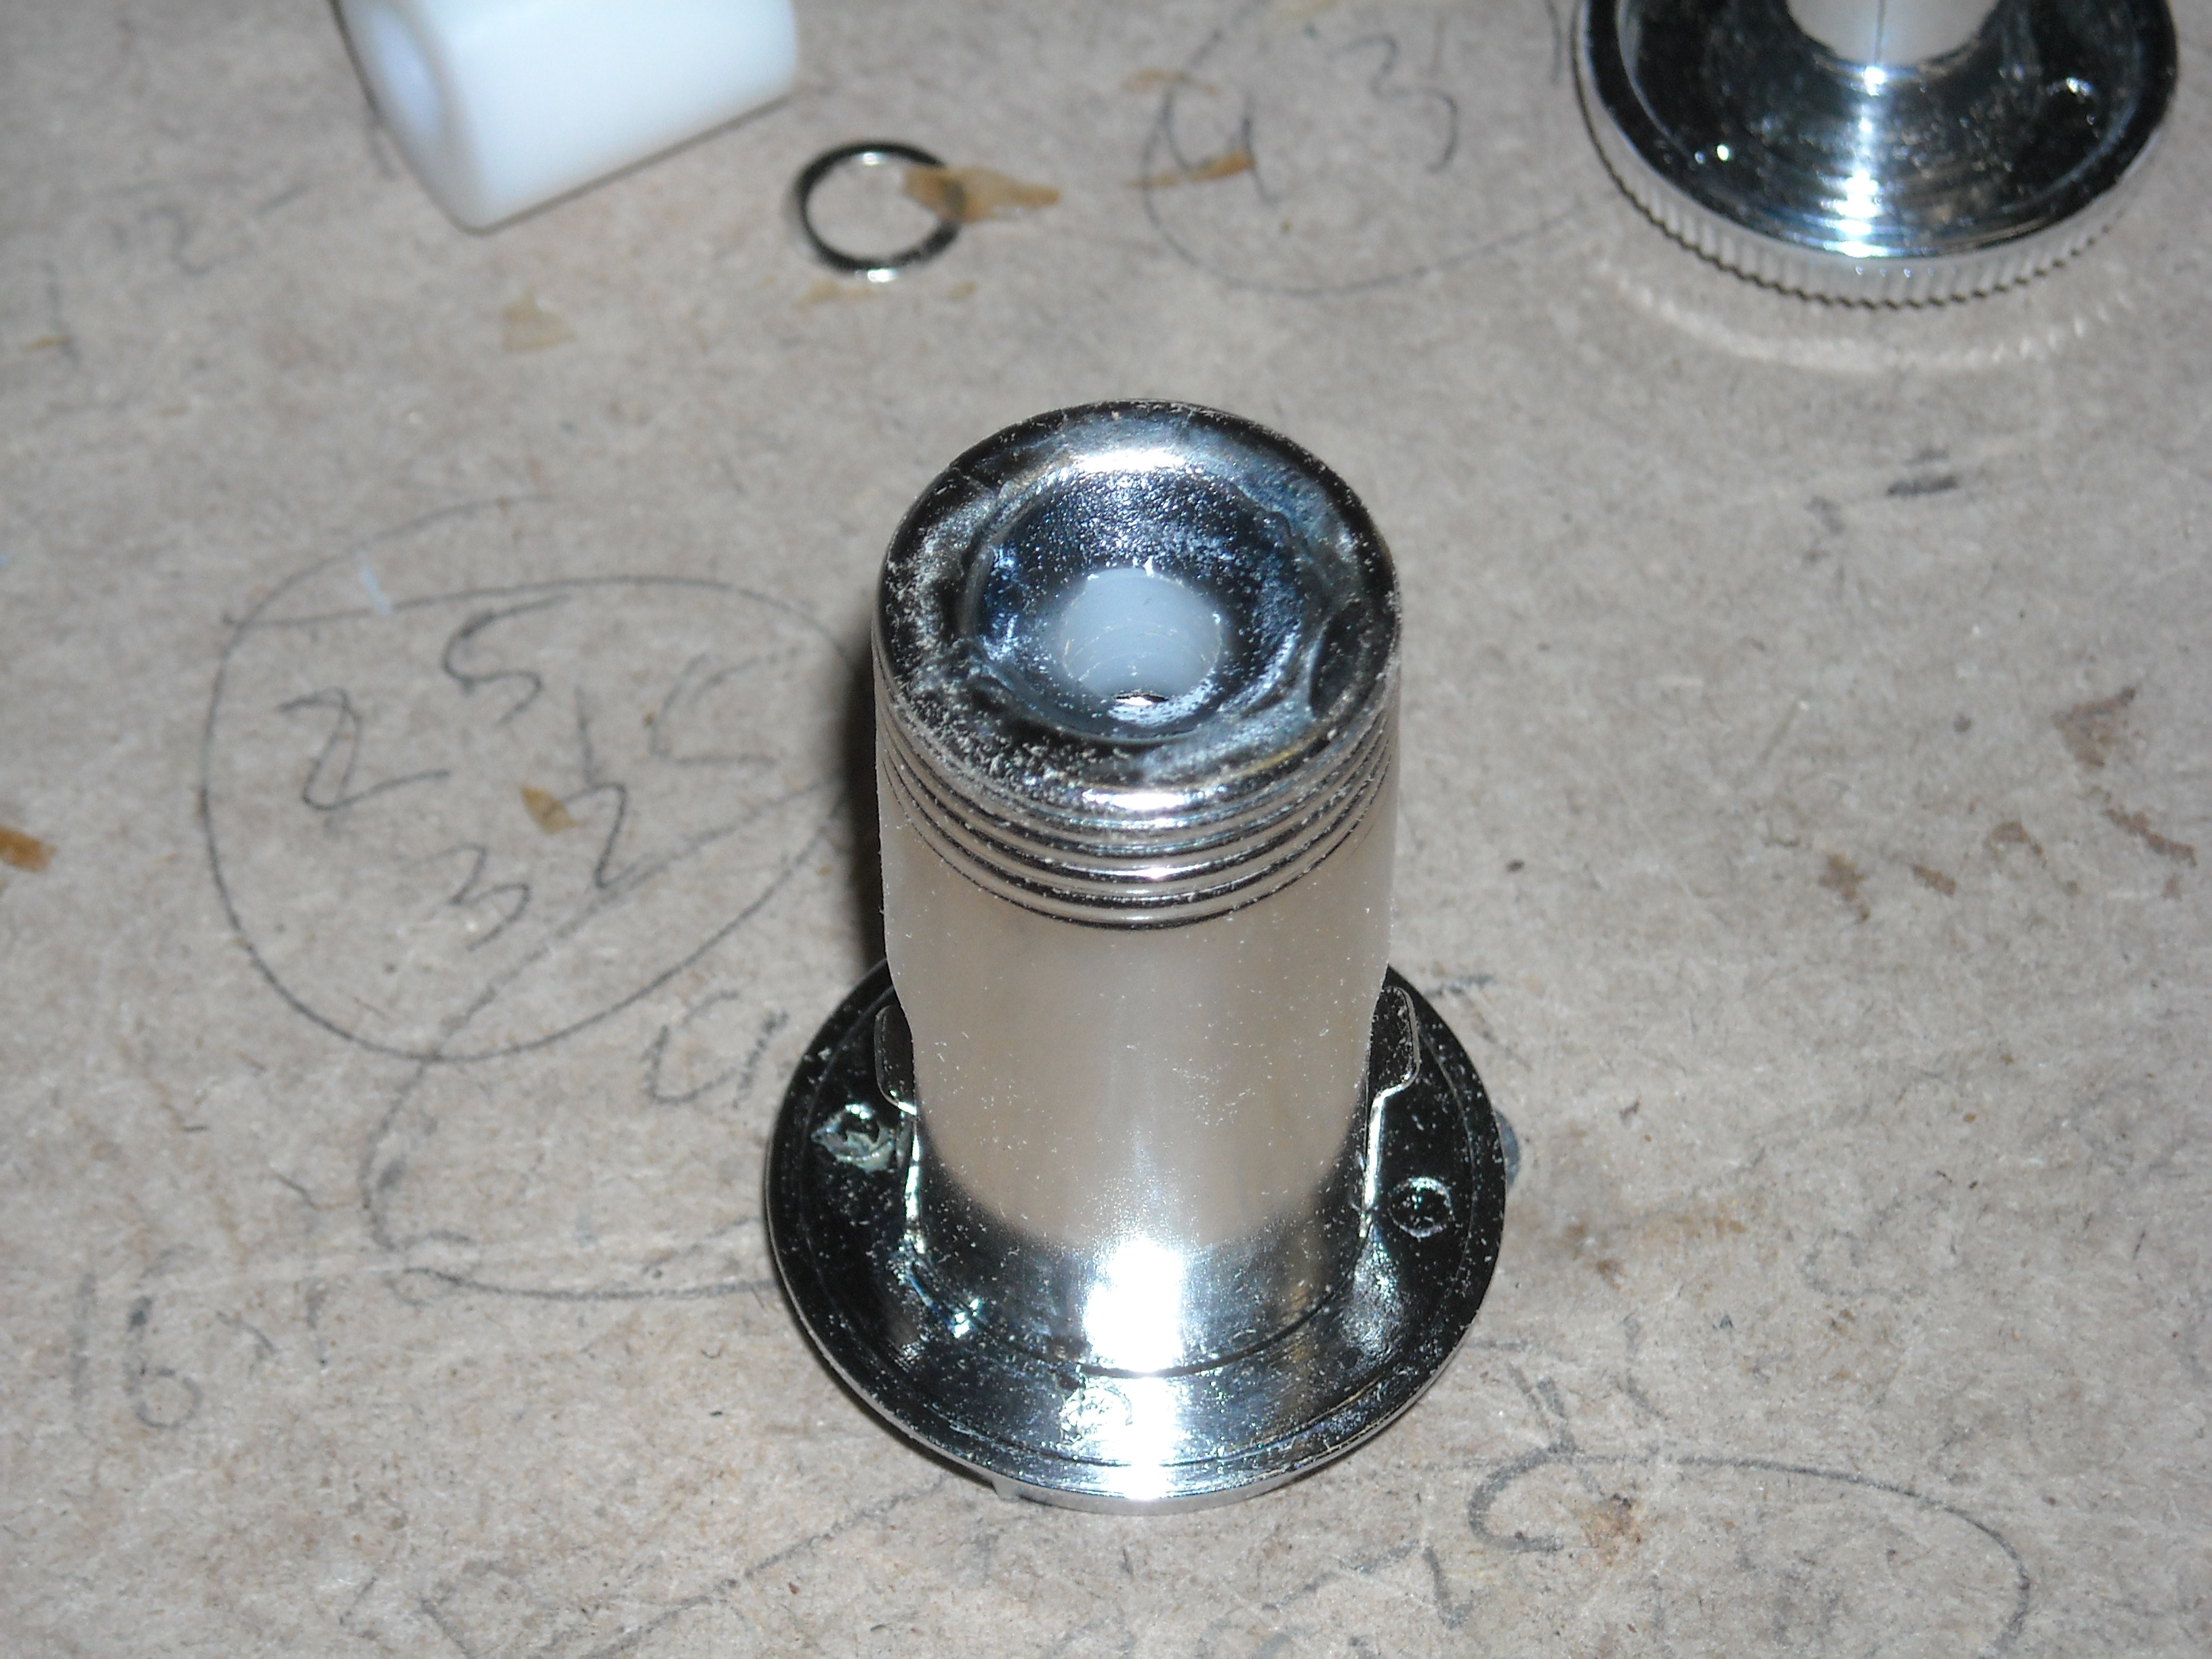
All lined up mounted in the car.

Disassembled the lighter.
Glued in a nylon block for the **** to screw into.
then glued the **** into the lighter.
Next I had to drill out for the set screw to hold the pair together.
All lined up mounted in the car.
Thread Starter
Junior Member
Posts like a Ricer Type-R
Joined: Aug 2012
Posts: 18
Likes: 0
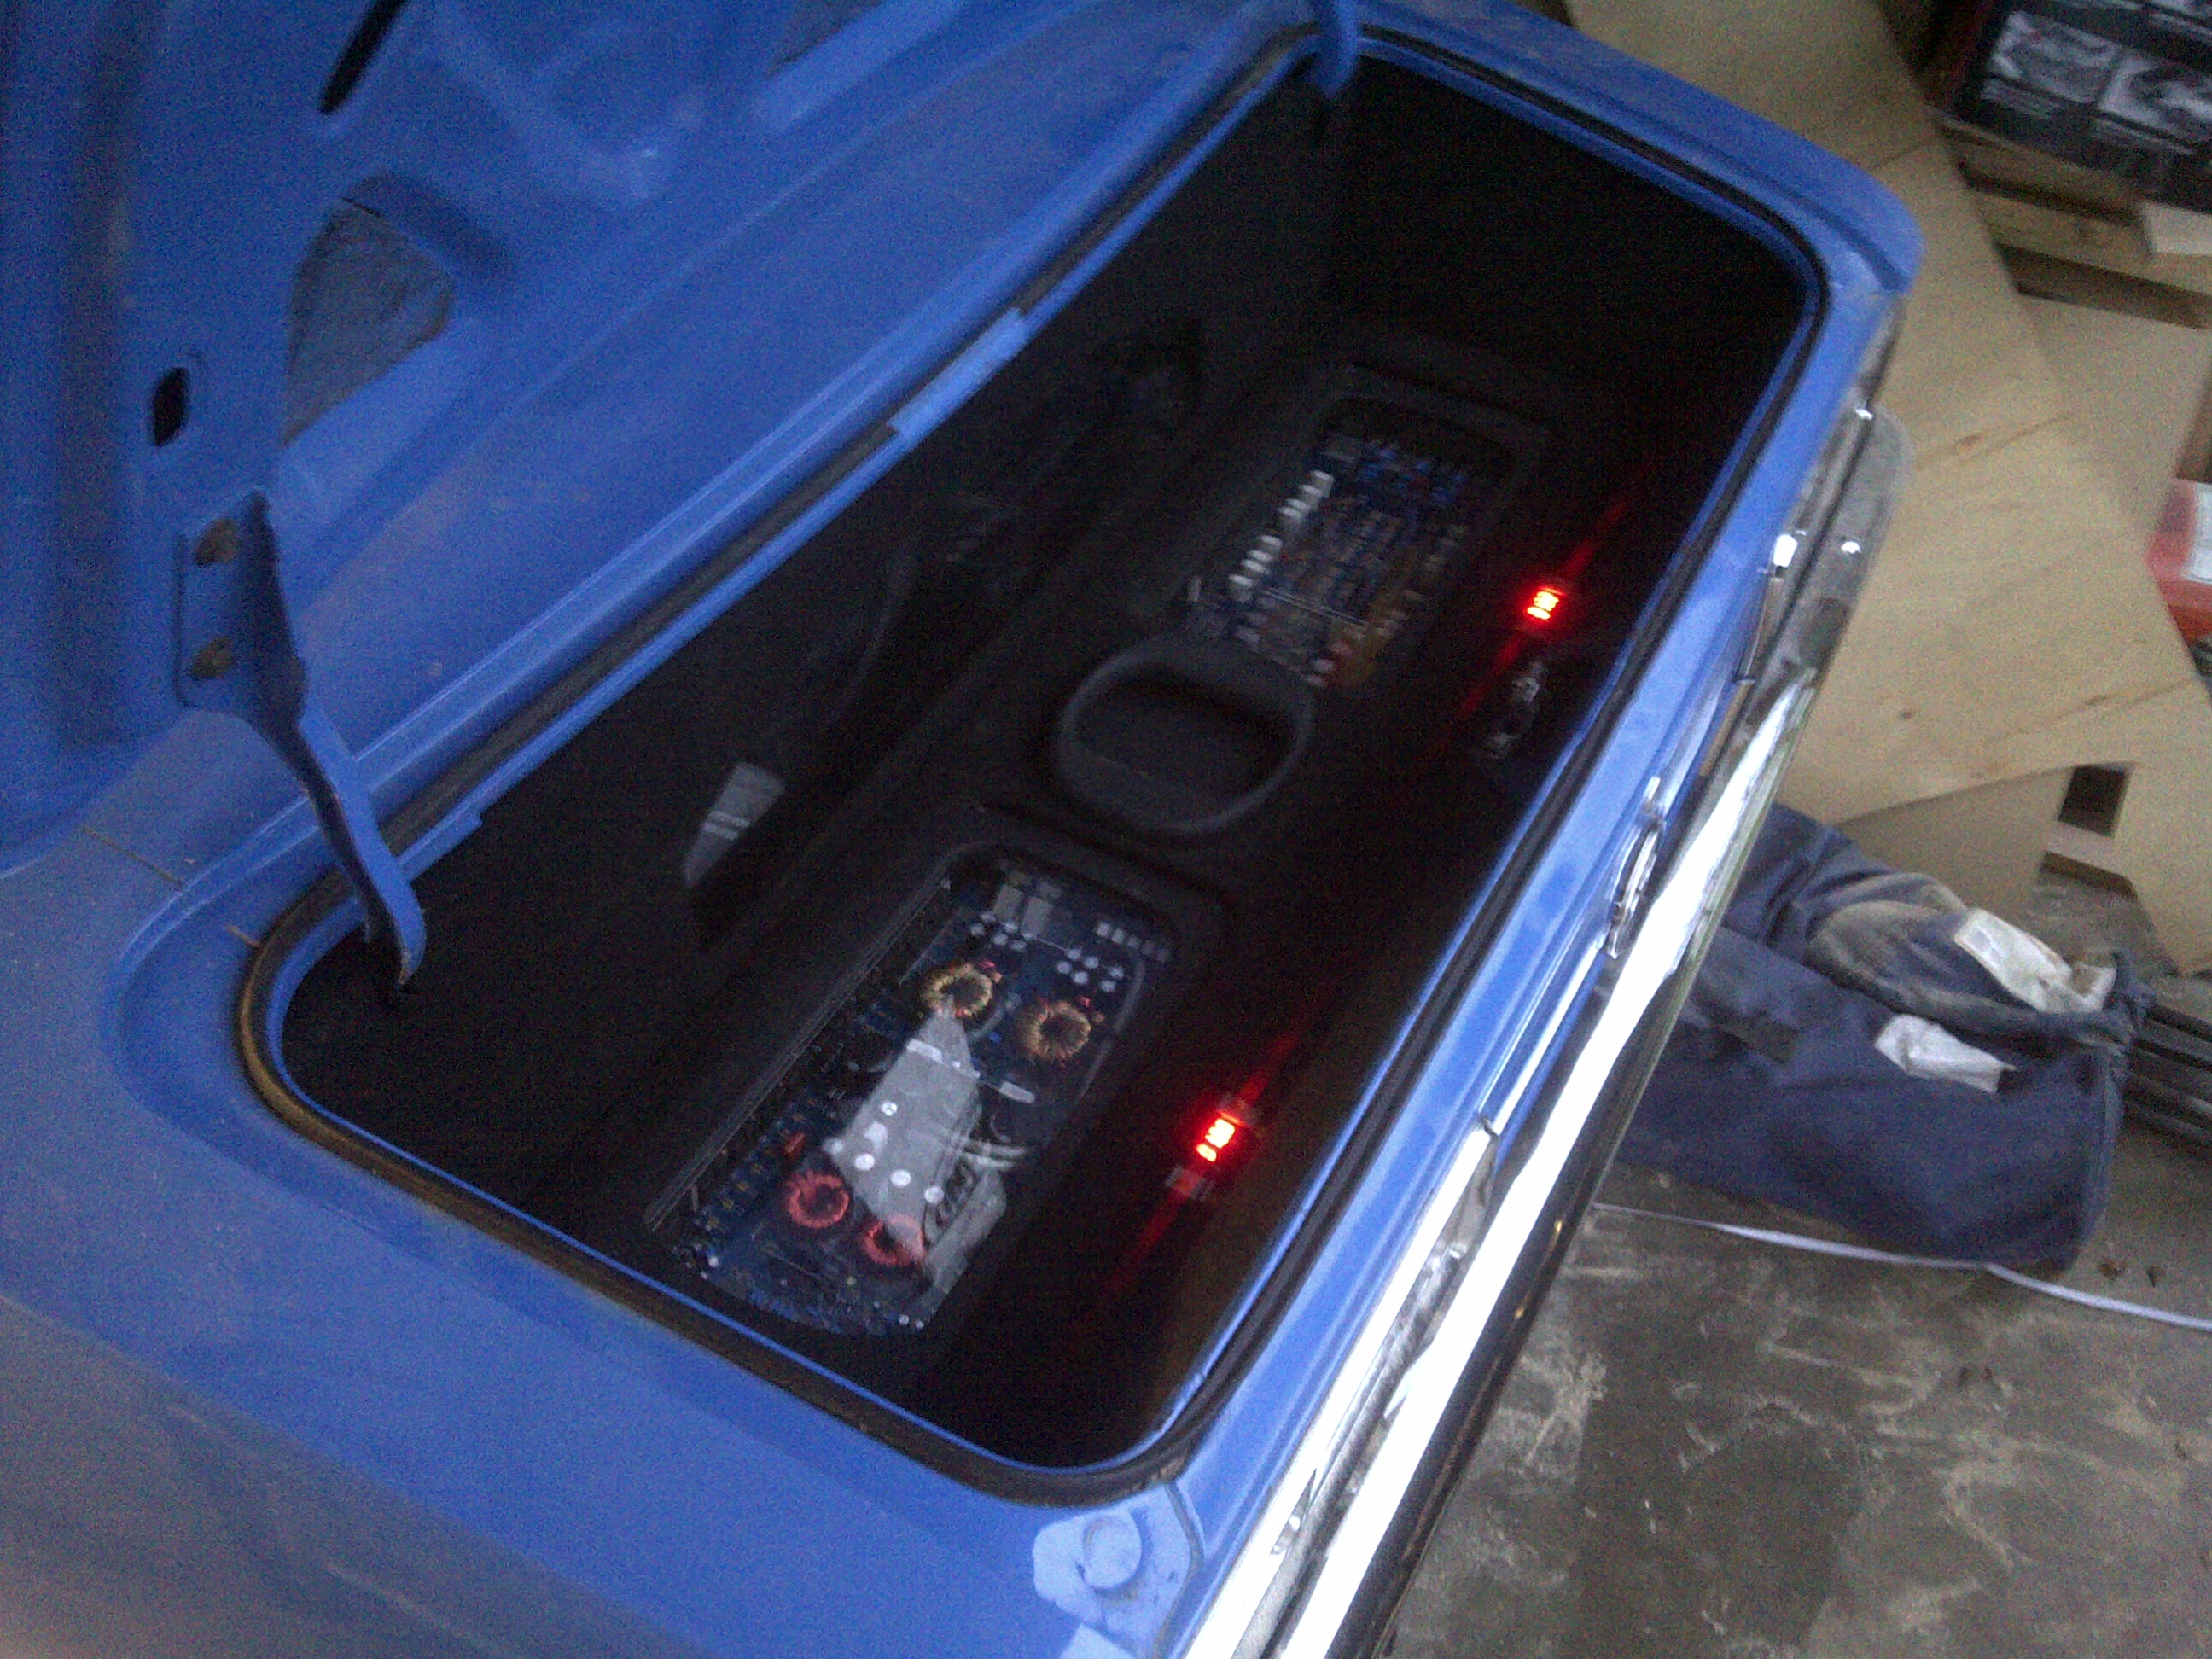
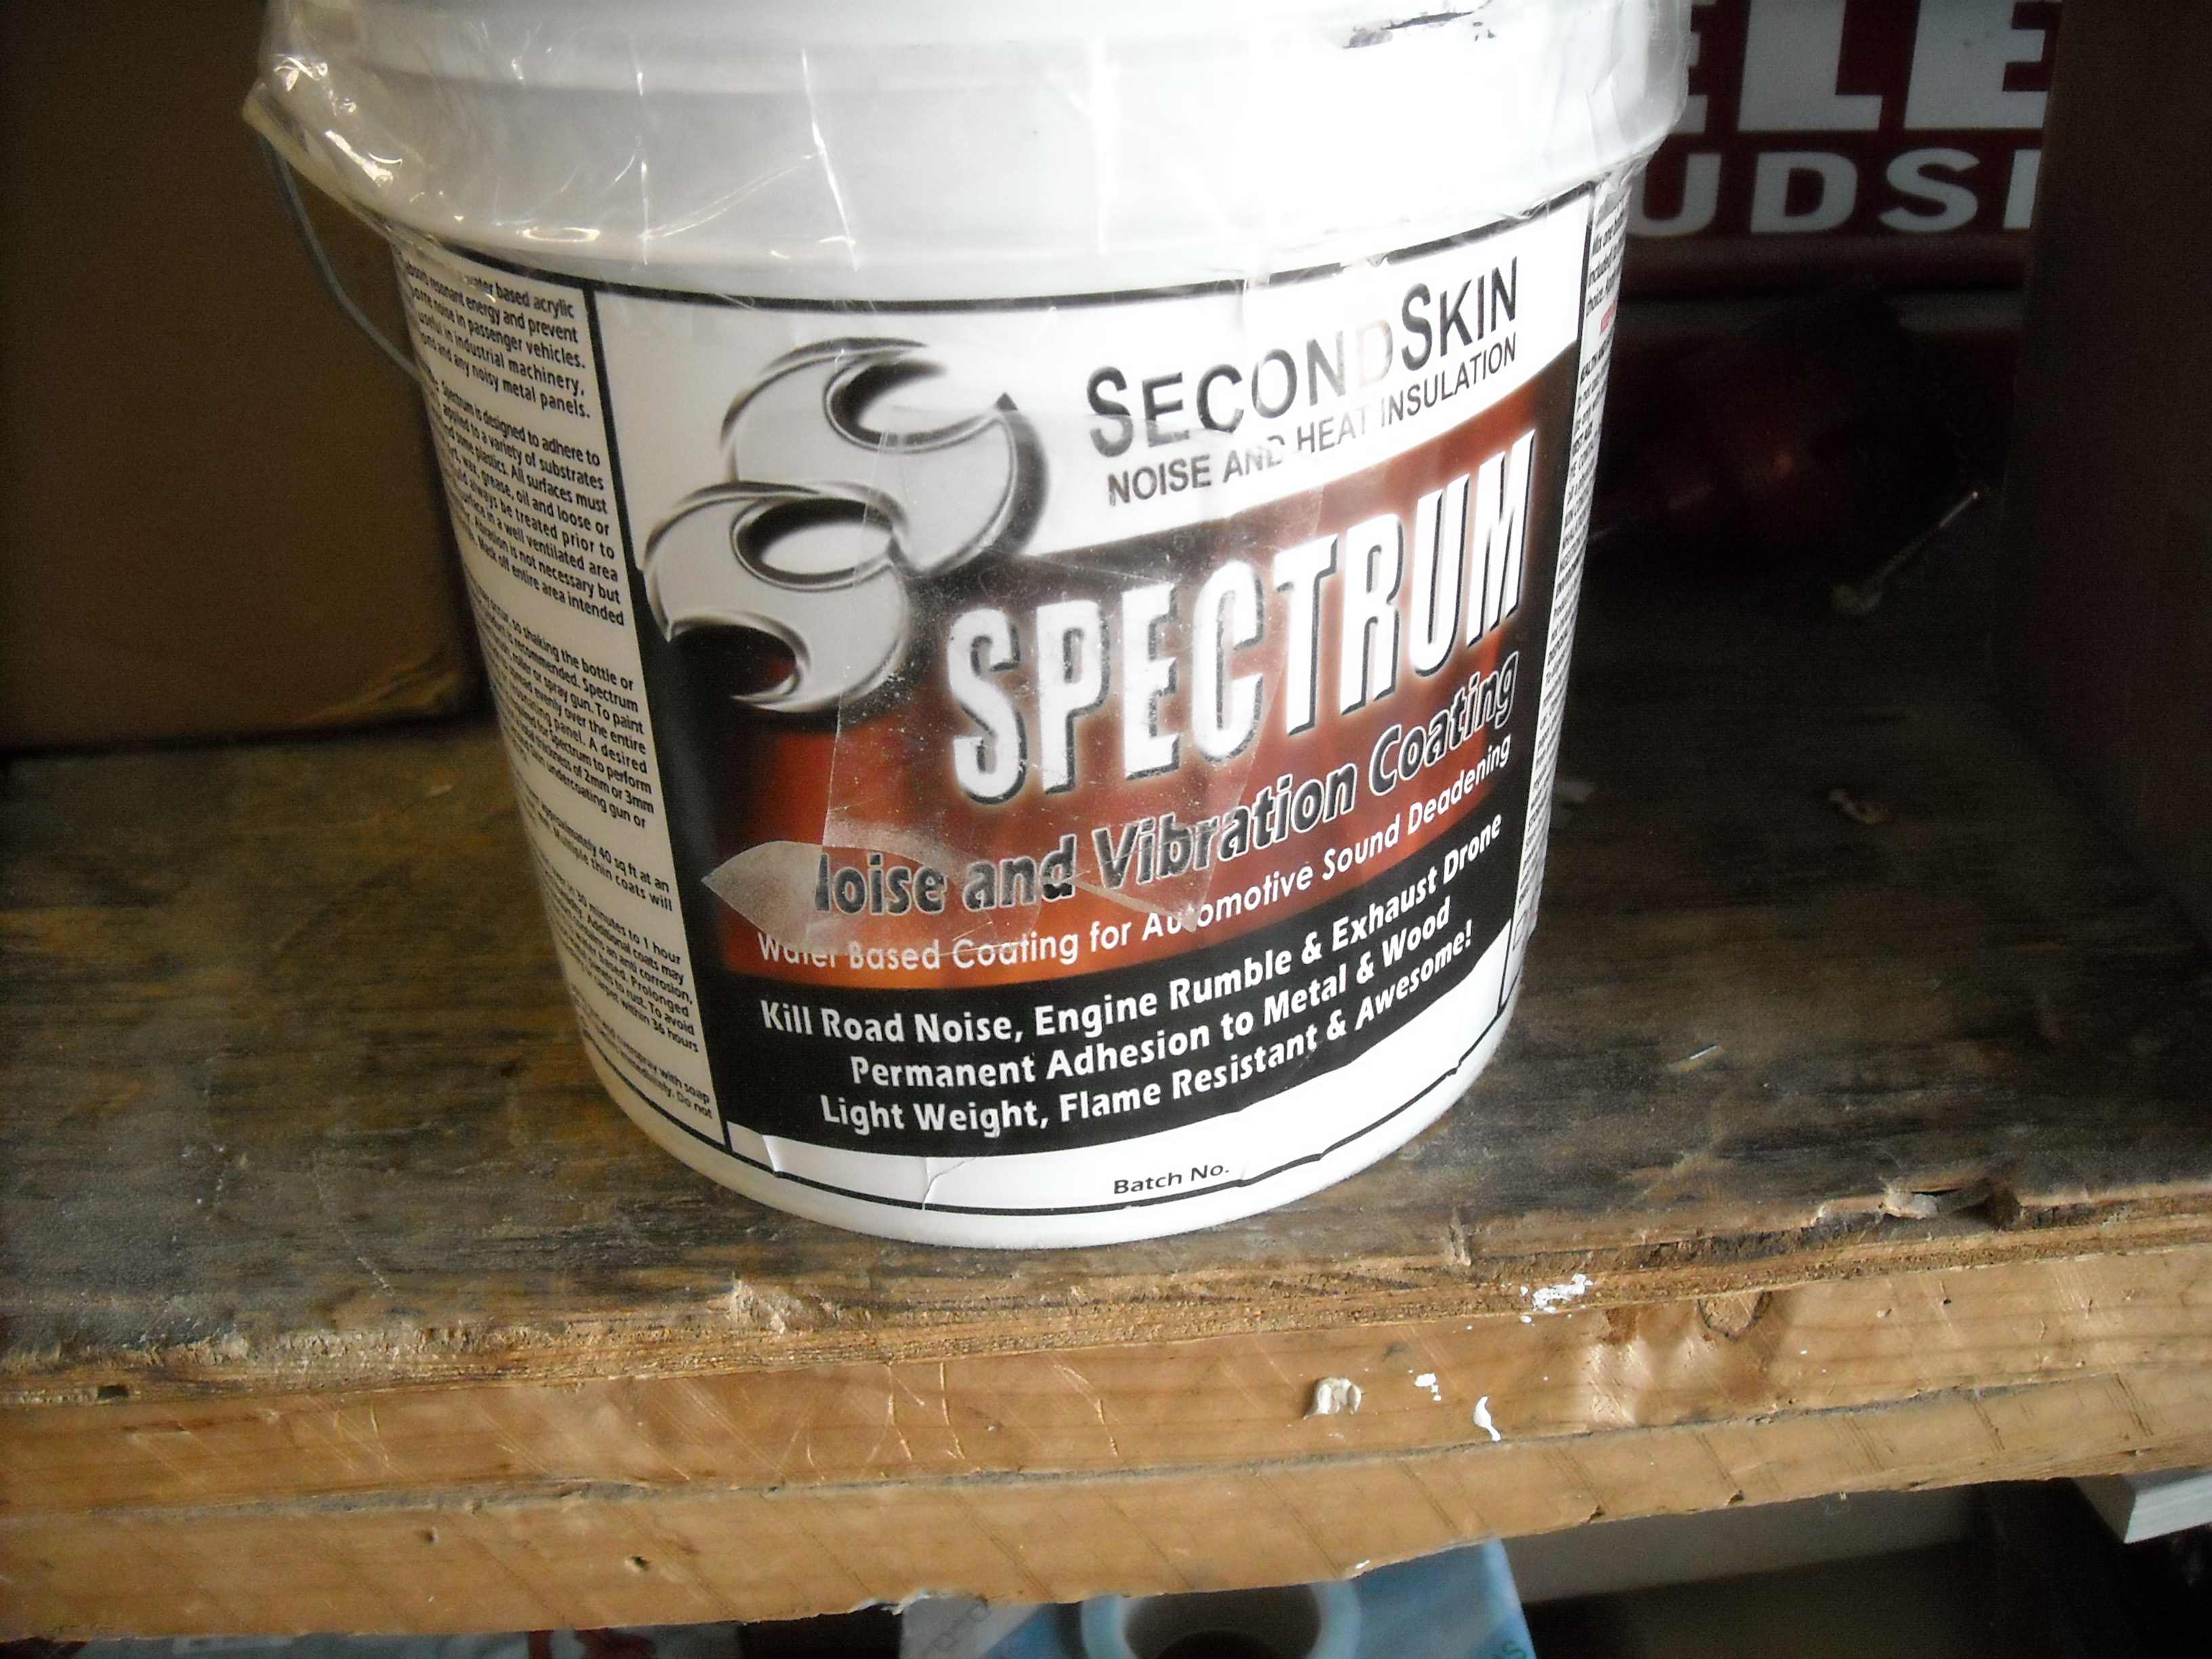
Last part was to put on a new trunk lid without the spoiler holes. I used this awesome little product from a company you may have heard of called Second Skin. It is their spectrum product. It is water base and will creep into any nook. You can also apply it with a spray gun.
Taped off where I wanted to pour to advoid drips.
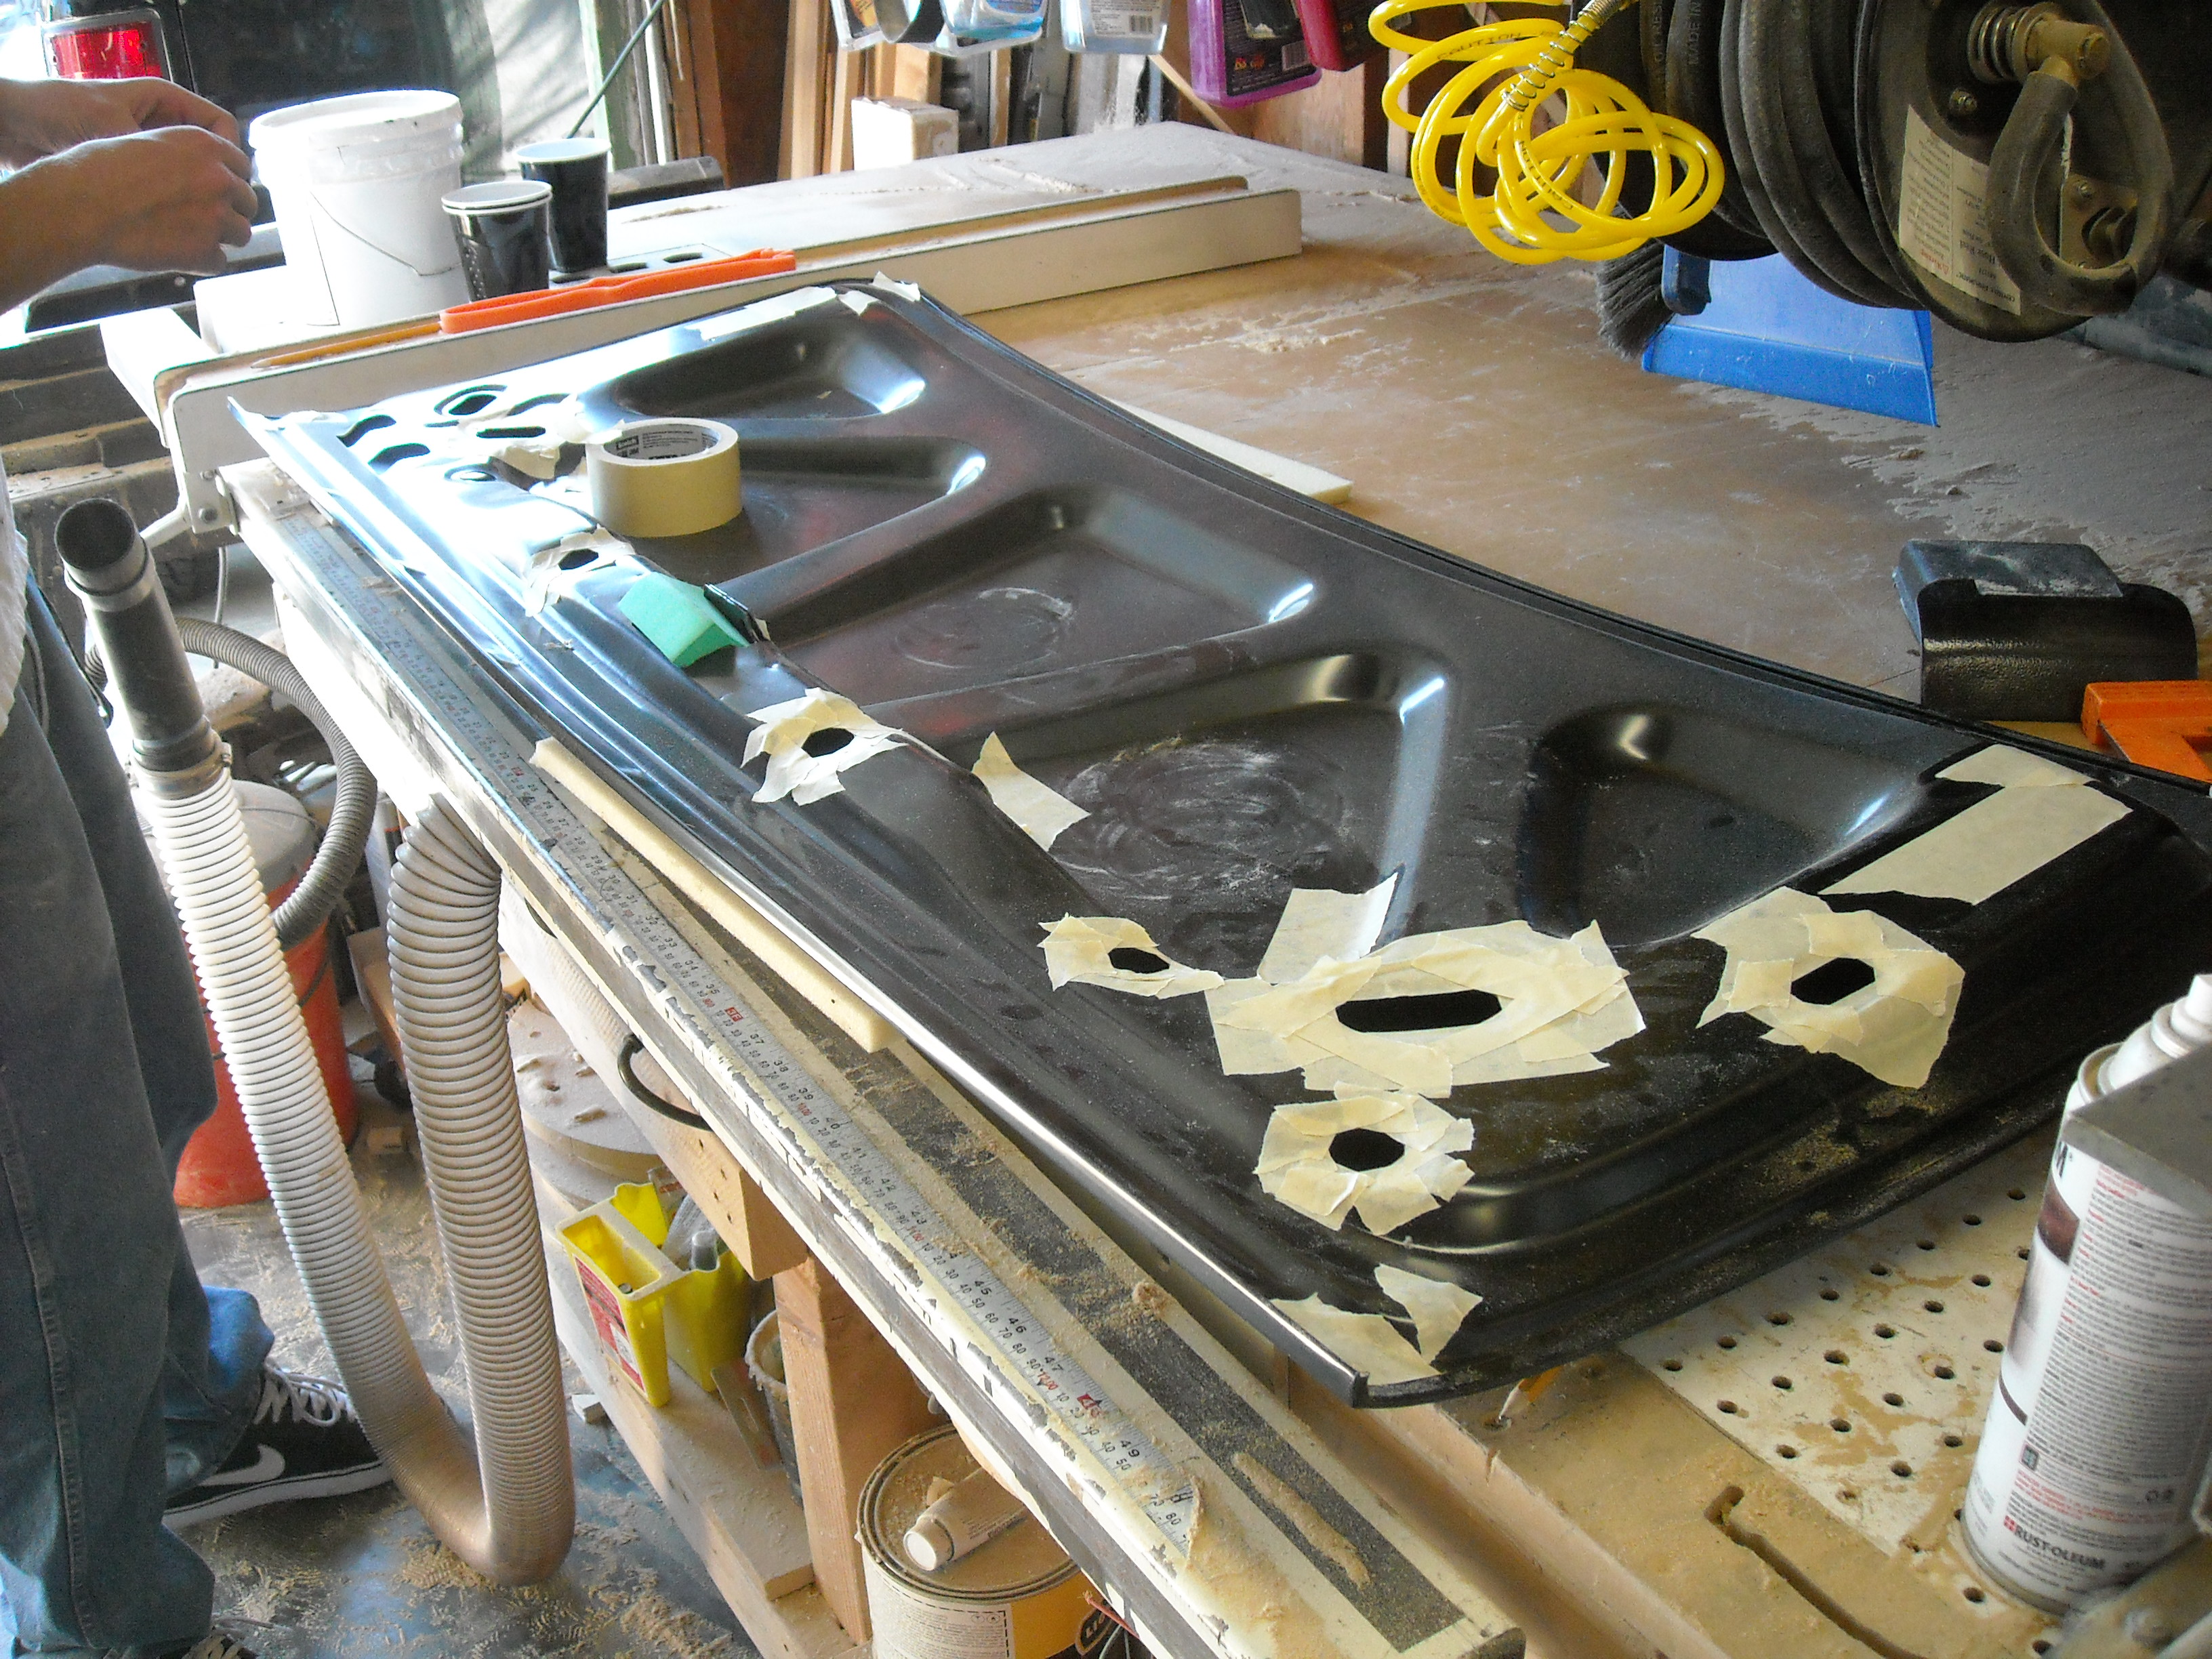
No mixing required in this product. Pour in and let air dry. make sure its in thin batches so it dries right

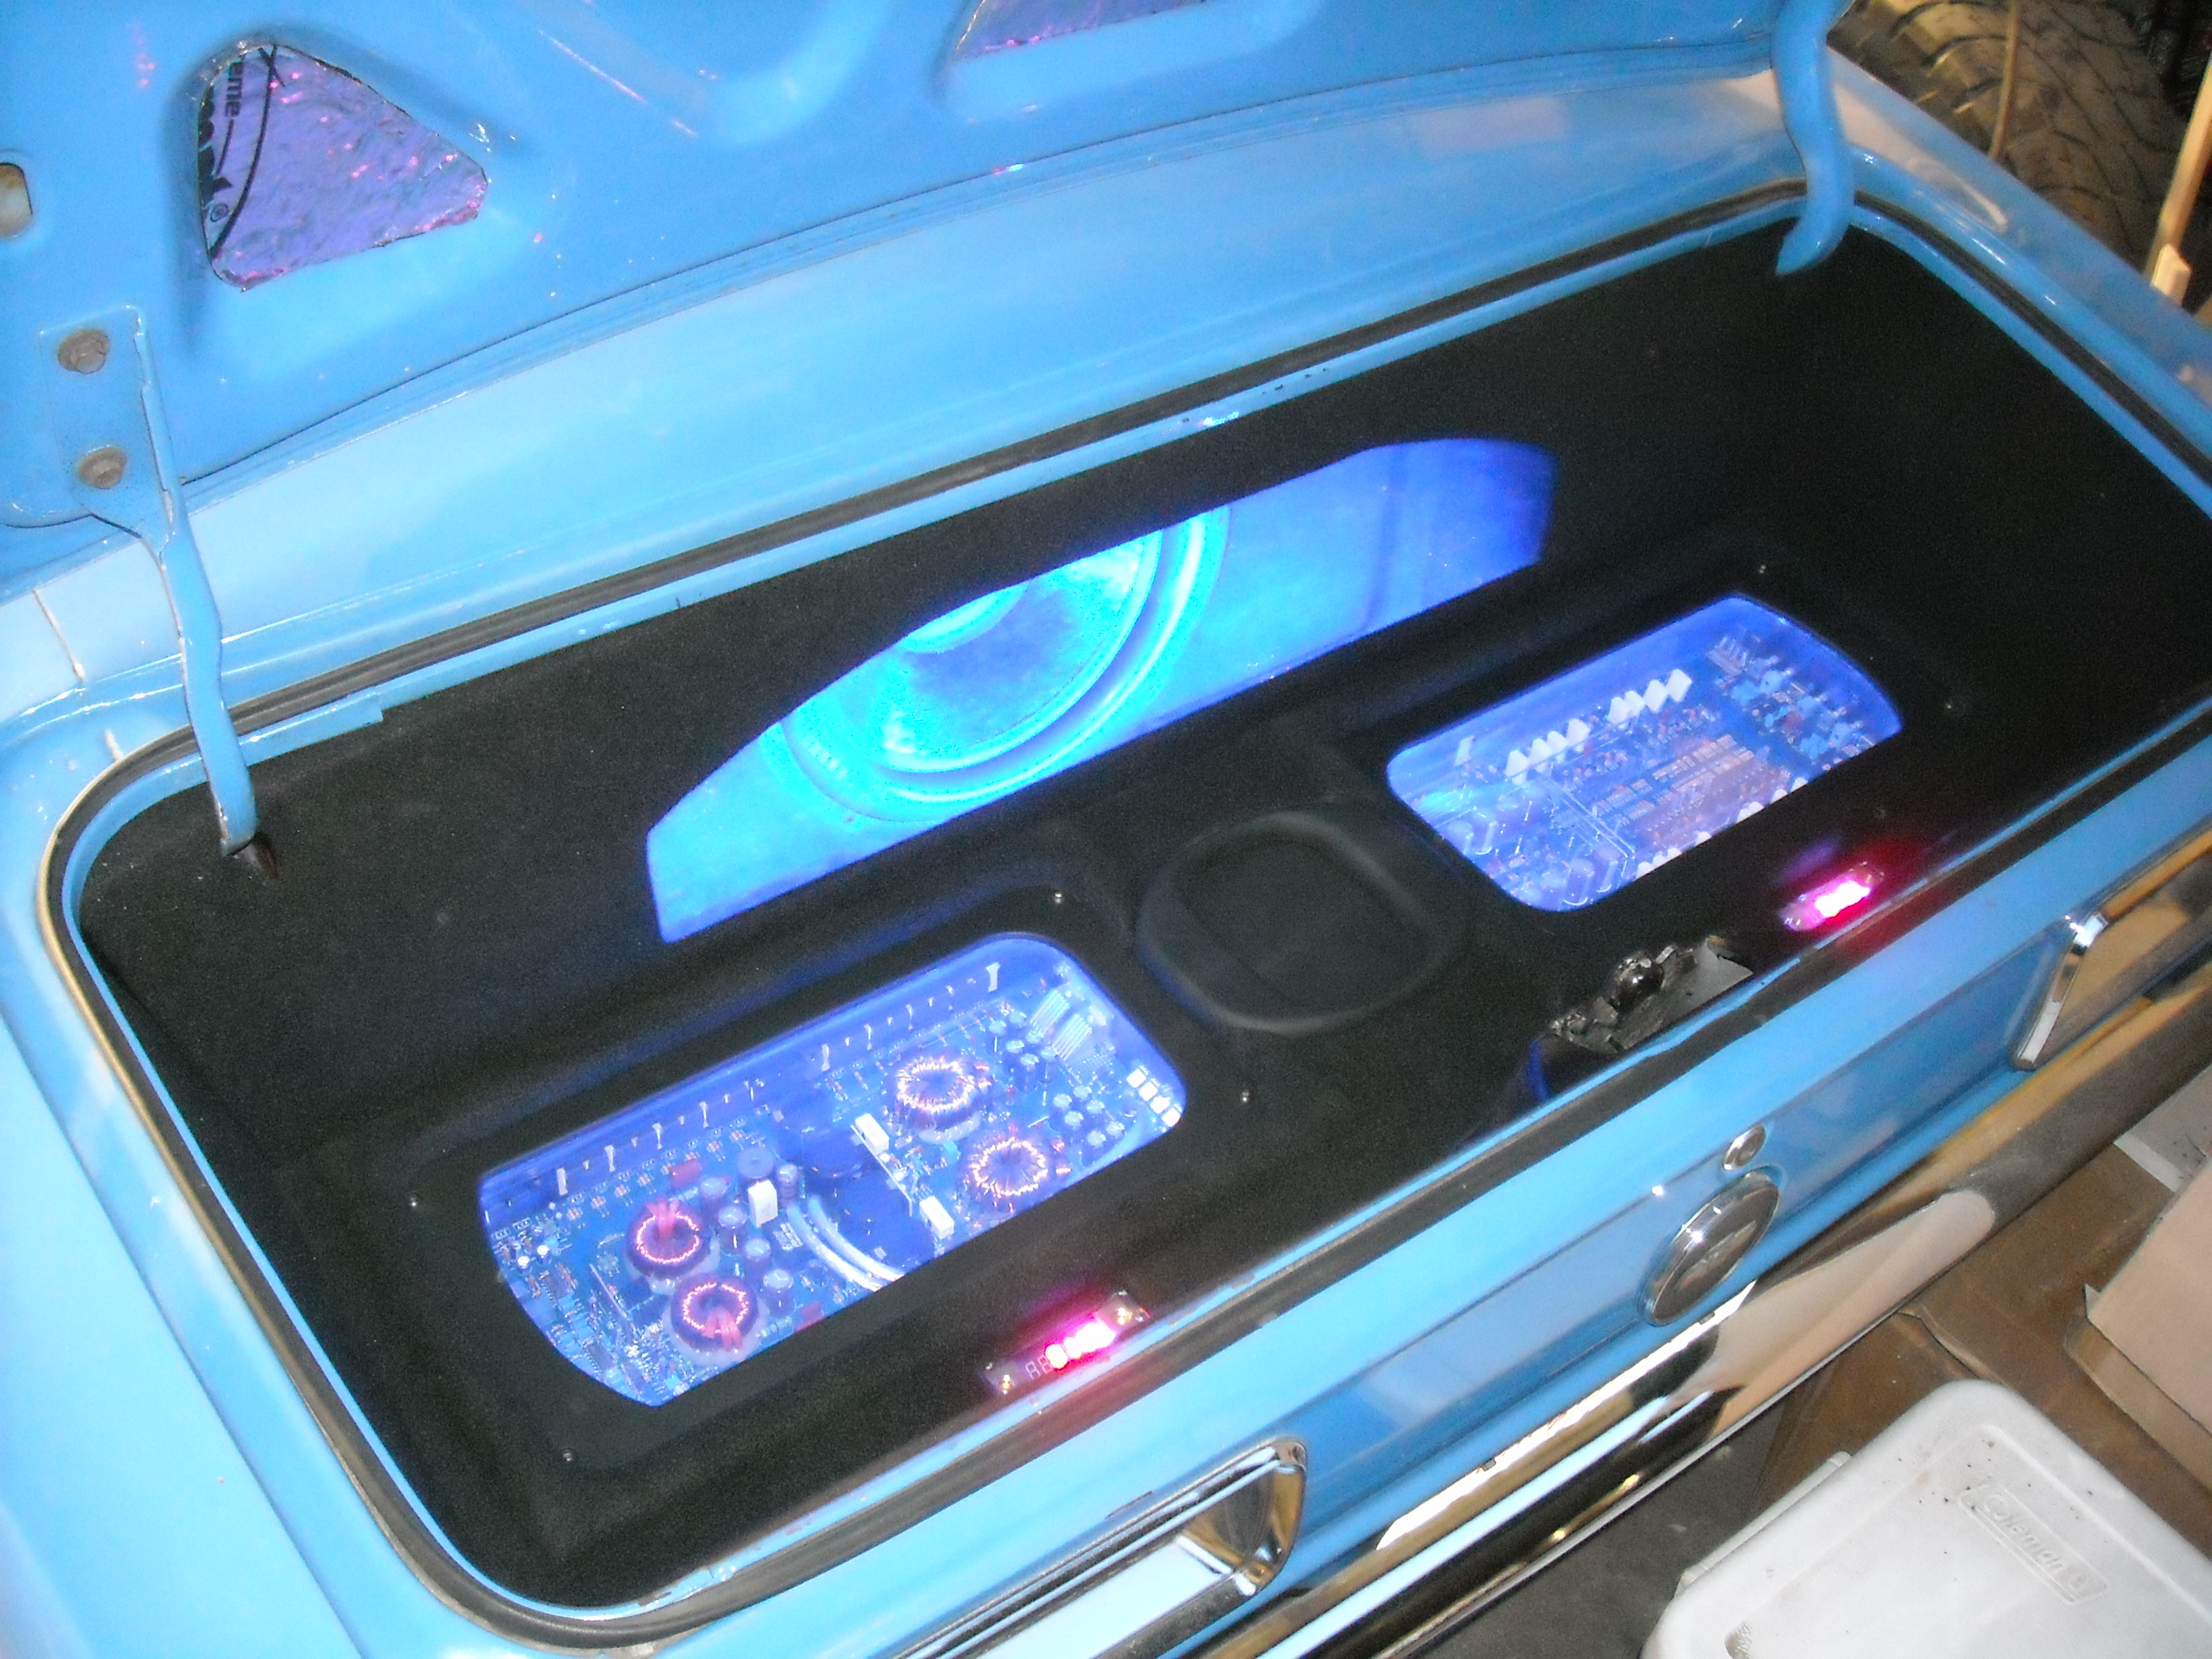
And with that, this car is done. here'* a few last completed pics. i hope you all enjoyed looking.
Thanks,
Bill


Taped off where I wanted to pour to advoid drips.
No mixing required in this product. Pour in and let air dry. make sure its in thin batches so it dries right
And with that, this car is done. here'* a few last completed pics. i hope you all enjoyed looking.
Thanks,
Bill

Thread Starter
Junior Member
Posts like a Ricer Type-R
Joined: Aug 2012
Posts: 18
Likes: 0
Thanks!
The fuse block is made by Blue Sea. They aren't cheap, but they do have a few different styles to choose from. I just picked up a few of their AGU fuse style, and I like them better for making relay kits.
The fuse block is made by Blue Sea. They aren't cheap, but they do have a few different styles to choose from. I just picked up a few of their AGU fuse style, and I like them better for making relay kits.

Thread
Thread Starter
Forum
Replies
Last Post
NERV
Audio (and aftermarket electronics)
6
Jun 18, 2004 08:53 AM
lowkey
Performance, Brainstorming & Tuning
22
Feb 18, 2003 06:21 AM