
CODE 0440


Junior Member
Joined: Sep 2005
Posts: 2
Likes: 0
From: Burlington, NJ

Here are some steps for you to follow to help locate your problem. I hope this helps.
The evaporative system includes the following components:
The fuel tank.
The Evaporative Emission (EVAP) vent solenoid.
The fuel tank pressure sensor.
The fuel pipes and hoses.
The fuel cap.
The EVAP vapor lines.
The EVAP purge lines.
The evaporative emission canister.
The EVAP purge solenoid.
The evaporative leak detection diagnostic strategy is based on applying vacuum to the EVAP system and monitoring vacuum decay. The PCM monitors vacuum level via the Fuel Tank Pressure sensor input. At an appropriate time, the EVAP purge solenoid and the EVAP vent solenoid are turned ON, allowing engine vacuum to draw a small vacuum on the entire evaporative emission system. It a sufficient vacuum level cannot be achieved, a large leak or a faulty EVAP purge solenoid is indicated. This can be caused by the following conditions:
Disconnected or faulty fuel tank pressure sensor.
Missing or faulty fuel cap.
Disconnected, damaged, pinched, or blocked EVAP purge line.
Disconnected or damaged EVAP vent hose.
Disconnected, damaged, pinched, or blocked fuel tank vapor line.
Disconnected or faulty EVAP purge solenoid.
Disconnected or faulty EVAP vent solenoid.
Open ignition feed circuit to the EVAP vent or purge solenoid.
Damaged evaporative emissions canister.
Leaking fuel sender assembly o-ring.
Leaking fuel tank or fuel filler neck.
Any of the above conditions can set DTC P0440.
CONDITIONS FOR SETTING THE DTC
No Throttle Position (TP) sensor, Output Driver Module (ODM) , Intake Air Temperature (IAT) sensor, or Manifold Absolute Pressure (MAP) sensor DTCs set.
Start up engine coolant temperature is between 4�C and 30�C (4O�F and 86�F).
Start up engine coolant temperature is not more than 8�C�(14�F) greater than start up intake air temperature.
Start up Intake air temperature is between 4�C and 3O�C (4O�F and 86�F).
Start up intake air temperature not more than 2�C (4�F) greater than start up engine coolant temperature.
Fuel tank level is between 15% and 85%.
BARO is greater than 75 kPa.
The vehicle has been driven at least 11 miles.
The EVAP system is unable to achieve or maintain vacuum during the diagnostic test.
ACTION TAKEN WHEN THE DTC SETS
The PCM will illuminate the Malfunction Indicator Lamp (MIL) during the first trip in which the diagnostic test has been run and failed.
The PCM will store conditions which were present when the DTC set as Freeze Frame and Fail Records data.
Note: Although these diagnostics are considered type A, they act like type B diagnostics under certain conditions. Whenever the EVAP diagnostics report that the system has passed, or if the battery has been disconnected, the diagnostic must fail during two consecutive cold start trips before setting a DTC. The initial failure is not reported to the diagnostic executive or displayed on a scan tool. A passing system always reports to the diagnostic executive immediately.
CONDITIONS FOR CLEARING THE MIL/DTC
The PCM will turn the MIL OFF when the diagnostic has been run and the fault condition is no longer present.
A history DTC P0440 will clear after 40 consecutive warm-up cycles have occurred without a fault.
DTC P0440 can be cleared by using the scan tool Clear Info function or by disconnecting the PCM battery feed.
DIAGNOSTIC AIDS
Check for the following conditions:
Cracked or punctured EVAP canister.
Damaged or disconnected source vacuum line, EVAP purge line, vent hose or fuel tank vapor line.
Poor connection at the PCM.
Inspect harness connectors for backed out terminals, improper mating, broken locks, improperly formed or damaged terminals, and poor terminal to wire connection.
Damaged harness. Inspect the wiring harness to the EVAP vent solenoid, the EVAP purge solenoid, and the fuel tank pressure sensor for an intermittent open or short circuit.
Kinked, pinched or plugged vacuum source, EVAP purge, or fuel tank vapor line. Verify that the fines are not restricted.
Faulty or damaged canister.
A faulty canister may intermittently allow charcoal into the EVAP purge solenoid, vacuum switch, and associated lines causing a DTC to be set. Use the following procedure to check for a carbon release condition:
Turn OFF the ignition switch.
Remove the EVAP purge solenoid. Refer to EVAP Canister Purge Solenoid.
Lightly tap the purge solenoid and (if applicable) the vacuum switch on a clean work area looking for carbon particles exiting either of the vacuum ports.
If no carbon release is evident, reinstall the components and continue with the DTC P0440 diagnostic table. If carbon is being released from either component, continue with this service procedure.
Remove the charcoal canister from the vehicle.
Ensure that the main cylinder valve is turned off on the J 41413 EVAP purge/pressure diagnostic station.
Disconnect the black hose that connects the nitrogen cylinder to the EVAP purge/pressure diagnostic station at the pressure regulator by unscrewing the knurled nut on the regulator. No tools are required to remove the black hose from the regulator.
Using a section of vacuum line, connect one end over the open threaded fitting of the EVAP purge/pressure diagnostic station pressure regulator.
Connect the remaining end to the purge solenoid end of the EVAP purge line at the vehicle and turn on the main nitrogen cylinder valve. Continue to blow any debris from the purge line for 15 seconds.
Return the EVAP Pressure/Purge Diagnostic Station to its original condition by re-installing the black hose that was disconnected in step 7.
Replace the following components:
The EVAP purge solenoid. Refer to EVAP Canister Purge Solenoid.
The EVAP canister. Refer to EVAP Canister.
Proceed with the DTC P0440 diagnostic table.
Reviewing the Fail Records vehicle mileage since the diagnostic test last failed may help determine how often the condition that caused the DTC to be set occurs. This may assist in diagnosing the condition.
TEST DESCRIPTION
Numbers(*) below refer to the step number(*) on the Diagnostic Table.
It a vent solenoid or EVAP purge solenoid electrical fault is present, the purge system will not operate correctly. Repairing the electrical fault will very likely correct the condition that set DTC P0440.
Checks the fuel tank pressure sensor at ambient pressure.
Determines whether or not the EVAP system can be sealed sufficiently to be pressurized. If not, the large leak must be located and corrected before continuing with diagnosis.
Verifies that the fuel tank pressure sensor accurately reacts to EVAP system pressure changes.
Checks for a blocked EVAP purge solenoid. The PCM commands the EVAP purge solenoid OFF (open) and the vent solenoid ON (closed) with the scan tool System Perf EVAP output control function activated. Any pressure in the system should be released through the EVAP purge solenoid within a few seconds when System Perf. is activated.
Ensures that sufficient source vacuum is present at the EVAP purge solenoid.

Senior Member
Posts like a Supercharger
Joined: Apr 2004
Posts: 185
Likes: 0
From: Wisconsin
Hey !! I have the same problem on my 97 SE 128,000 miles. I tried a new gas cap and reset the pcm...the lite stayed off for about 4 days, is now back on. The hoses look ok...ordered a new purge selenoid from gm parts direct.....23 bucks with shipping. The canister is about 53 bucks. Let me know what you find.....


Senior Member
True Car Nut
Joined: Oct 2005
Posts: 7,030
Likes: 2
From: Central Florida
Originally Posted by rdrichar
Isn't this the code for tighten your gas cap? Loosen it and then tighten till it clicks.
Threw this code three months ago and have been scratching my head about it for a while. Haven't had time 'till now to really get into it and now I've found this site to help me out. WOOHOO!!!
Studawg YOUR POST IS AWESOME!!!
I will be spending time this weekend working on mine to diagnose and fix it. vze3r85p never did repost to let everyone know what he found, but if I get mine fixed, I'll let all know.
A little background on my P0440 code:
This June, my fuel lines suddenly started spewing gas all over at a FAST rate, coming down right next to the hot tailpipe. Scared the CR*P out of me as I have a friend who'* Buick H-body burned to the ground from the same problem. Immediately took it to the dealer. $1200 later (another local dealer rip, IMO), it seems that my 4 years in Detroit took its toll in salt corrosion and I had to replace the fuel lines, pump and sender at the tank connections. Two weeks after I got it back from the dealer, it threw the code.
Went to AutoZone, the guy there says it'* the gas cap loose. So I tightened it and cleared the code. Two days later, it'* back. So I bought a new gas cap and made sure it was tight. Two days later, it'* back. Then it went off for about a week. Since then, it'* been on steady, without any noticeable power loss.
Haven't tried to dig back into it 'till now due to a string of "stuff" that has kept me too busy to do much but catch a little sleep now and then.
BTW, when I first started to look into the cannister, I had a be-atch of a time getting to the fasteners for the airbox. Could they have made that more awkward? Anyway, it made me buy more tools, and I never see that as all bad, lol.
AND, I'm still new, so I have to say one more time. THIS SITE ROCKS!!!

DINOSAURUS BOOSTUS


Expert Gearhead
Joined: Mar 2005
Posts: 41,391
Likes: 30
From: Enfield, CT

Lash you mention fighting your way to the evap canister under the airbox and pcm. Were you able to get there and check to see if the canister is full of fuel?
You will also want to check the Evap purge soleniod. Look at your radiator support cover for the location.
You will also want to check the Evap purge soleniod. Look at your radiator support cover for the location.
Senior Member
True Car Nut
Joined: Oct 2005
Posts: 7,030
Likes: 2
From: Central Florida
Actually, since I didn't have the right tools at the time and my daughter was down that week getting ready to be married, I never got the airbox off to get any further. I'll be working on it this weekend (barring any further un-planned disasters) and will do all the above diagnostics to try and get this annoying thing fixed.
Even though I really haven't noticed any specific power loss, it can't be good long term to leave this unfixed. So, it'* time!
Even though I really haven't noticed any specific power loss, it can't be good long term to leave this unfixed. So, it'* time!
DINOSAURUS BOOSTUS
Expert Gearhead
Joined: Mar 2005
Posts: 41,391
Likes: 30
From: Enfield, CT
While you are under the air box, I suggest replacing the rubber vacuum lines and pieces under there. most likely they are a big vacuum leak for you. (Possibly your problem as well)
Senior Member
True Car Nut
Joined: Oct 2005
Posts: 7,030
Likes: 2
From: Central Florida
Thanks, I will.
Vacuum hoses are pretty cheap and it makes sense to do that. This car has 155K on it and has (all-in-all) been pretty good. I plan on keepin' it for as long as possible.
Vacuum hoses are pretty cheap and it makes sense to do that. This car has 155K on it and has (all-in-all) been pretty good. I plan on keepin' it for as long as possible.
Senior Member
True Car Nut
Joined: Oct 2005
Posts: 7,030
Likes: 2
From: Central Florida
Ok, so here'* what I found after tearing everything out and doing a complete diagnostic on the EVAP system:
1st - Pulled the canister and checked it for cracks, leaks etc. Tested the purge valve for proper function and/or carbon deposits, and basically cleaned up things down there. A note for those that end up doing this. There are apparently two different kinds of charcoal canisters. One type can be opened at the bottom and has a removable, cleanable filter in it. The other (what I have) is completely sealed and cannot be serviced. Mine also was setting in a "bucket" that has a drain hole (see pic below).
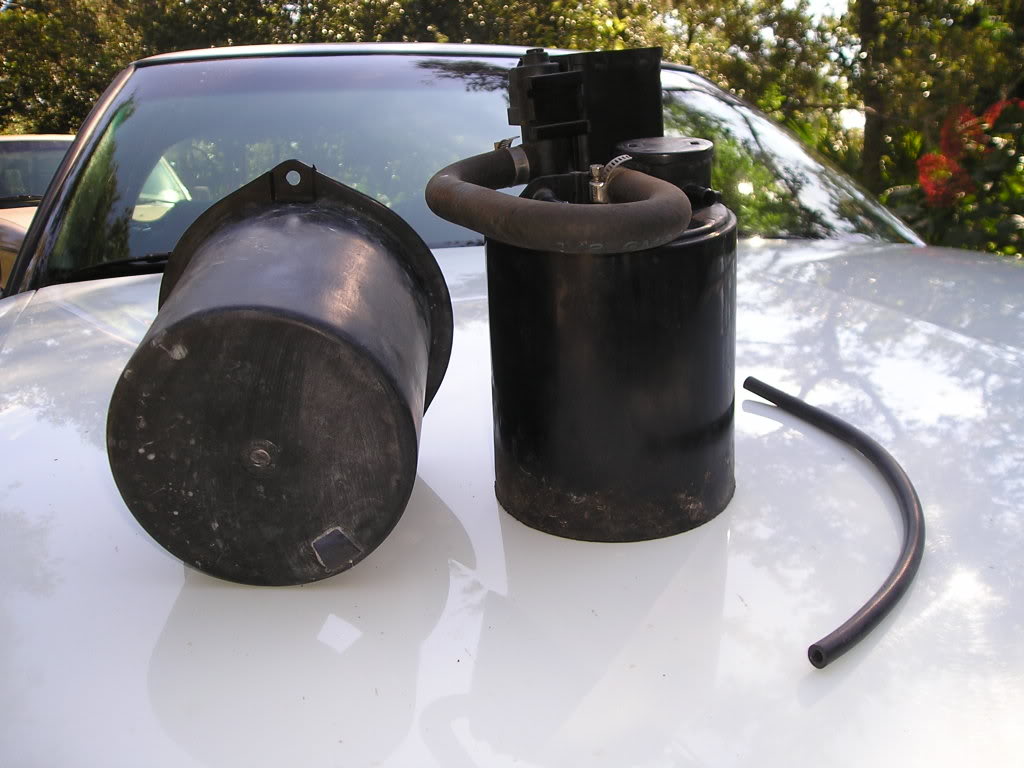
Note the piece of 7/32" vacuum hose I bought for $0.73 to replace all the rubber vacuum connections. It turns out that the real culprit was indeed a split piece of rubber vaccum hose that I found after completely tracing ALL the vacuum lines (just like BillBoost37 thought). Of course, it was literally the very last line that needed inspecting. It was in a VERY obvious place, but since I was tracing the EVAP system, I didn't take the engine cover off until last, DOH! It worked out anyway, as I replaced all the rubber connections (which meant that I had to get a short piece of 9/32" vac hose also).
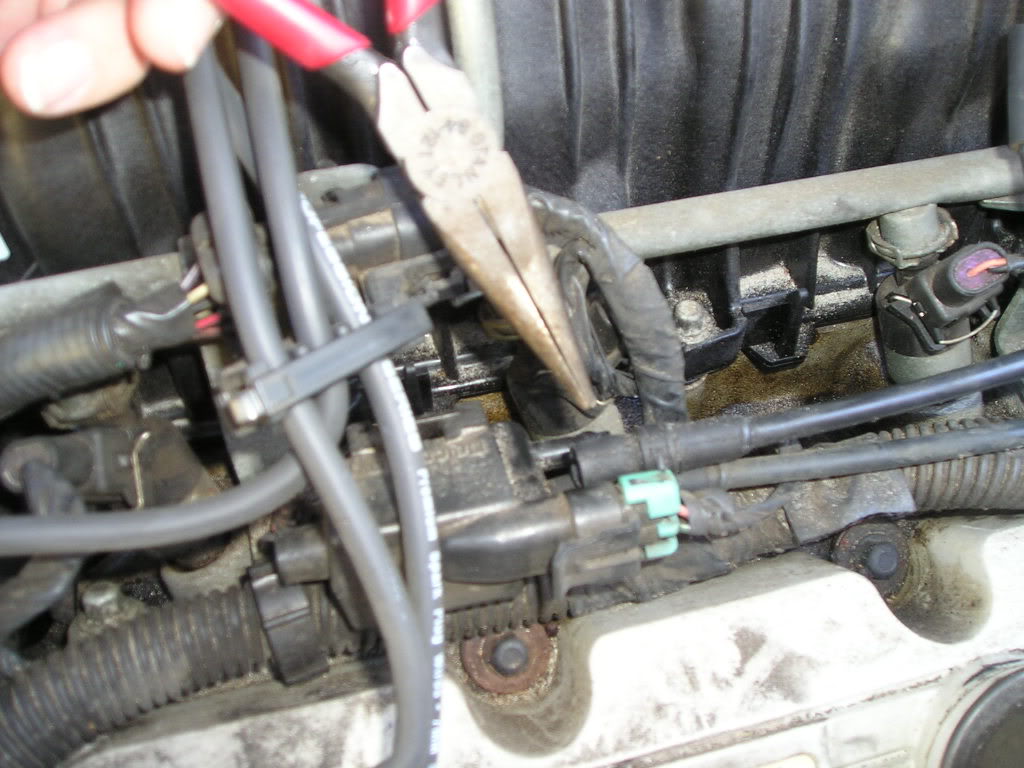
The hoses I replaced were mostly custom cast rubber pieces, but they don't need to be as they are easily replaced w/ the 7/32" and 9/32" pieces. The only problem piece is a wierd rubber tee at the throttle body that shows lots of cracking and I'll need to order, since autoparts don't carry them.
Anyway, The end result is great!! CEL is off and there is actually an improvement in the way it'* running! Not a huge surprise, as we all know that a vacuum leak will affect performance, but I hadn't realized how much it was affecting things. I guess I just got used to the slow decrease in performance.
1st - Pulled the canister and checked it for cracks, leaks etc. Tested the purge valve for proper function and/or carbon deposits, and basically cleaned up things down there. A note for those that end up doing this. There are apparently two different kinds of charcoal canisters. One type can be opened at the bottom and has a removable, cleanable filter in it. The other (what I have) is completely sealed and cannot be serviced. Mine also was setting in a "bucket" that has a drain hole (see pic below).
Note the piece of 7/32" vacuum hose I bought for $0.73 to replace all the rubber vacuum connections. It turns out that the real culprit was indeed a split piece of rubber vaccum hose that I found after completely tracing ALL the vacuum lines (just like BillBoost37 thought). Of course, it was literally the very last line that needed inspecting. It was in a VERY obvious place, but since I was tracing the EVAP system, I didn't take the engine cover off until last, DOH! It worked out anyway, as I replaced all the rubber connections (which meant that I had to get a short piece of 9/32" vac hose also).
The hoses I replaced were mostly custom cast rubber pieces, but they don't need to be as they are easily replaced w/ the 7/32" and 9/32" pieces. The only problem piece is a wierd rubber tee at the throttle body that shows lots of cracking and I'll need to order, since autoparts don't carry them.
Anyway, The end result is great!! CEL is off and there is actually an improvement in the way it'* running! Not a huge surprise, as we all know that a vacuum leak will affect performance, but I hadn't realized how much it was affecting things. I guess I just got used to the slow decrease in performance.