
My version of a neon lighted front grill


Thread Starter
Senior Member
Posts like a Northstar
Joined: Feb 2005
Posts: 757
Likes: 0
From: Southern Maine

Ok, here is my attempt at adding some flair to my 2001 SSEi.
I don't want to mod the hell out of my car because after all it is my daily driver and whenever I attempt to do something myself I will either %^&# it up or take the risk of getting stranded somewhere so I figured adding some color to my car couldn't hurt.
Ok, step one finding some lights. After seeing the prices in my local parts stores I figured I would compare them on Ebay and see what was out there. I came across an auction (7965863767) for a pair of purple cold cathode neon lights, each being 300 mm long. They looked promising so I bought 1 kit.

Come to find out this is actually a PC case neon kit, I wasn't to happy at first but after I got looking at the lights I worked out a plan, first was to make the lights and transformer water proof, so out comes the glue gun. In my experience a glue gun is good for nothing but making thin stringy strands of glue all over the place and burning the heck out of your fingers, but as you can see I started by gluing the ends of the neon tubes to each other.

These are the two ends where the leads enter the tubes. I wanted the leads near each other because the wires are not that long and would not have reached the transformer if they were apart from each other. As you can see in the previous picture the type of glue I was using in the glue gun actually did a fantastic job of bonding the two square end caps to each other, I also glued all the seams on the ends of the tubes and the leads going into the tubes. In this next picture you will see an example of making the transformer water proof as well.

I had to use a lot of glue on the transformer to make it water tight, each end had wires, one for the 12v power and the other end for the leads to the lights. Seams on the transformer case were sealed up as well.
Below is the burn-in test I gave the lights before I started on actually mounting them in the car. It would have really ticked me off if I got them mounted just to find out they didn't work.

I ran the lights for about 2 hours before I started on the install. Below is a picture of the possible locations in the grill area for mounting the lights. You will see Red dots on the frame of the car where I first considered mounting the lights, these areas actually made a nice "shelf" to mount the lights. The red dots are about 25 to 26 inches apart from each other. The lights actually sat on these "shelves" but only marginally so I opted to mount two brackets on the green dots and secure the lights to these brackets.

The following picture is a closeup of one of the mounting brackets which I had leftover from an under body neon kit I installed on my sons 1997 Ford Probe GTS. I used stainless steel screws so they wouldn't rust. Yes you see a tie wrap, that'* because the mounting brackets are for large tubes and these are somewhat smaller so I had no choice.

The following picture is of the finished install, yes another tie wrap holding the transformer in place, my friend Dana would kill me if he saw the tie wraps but he used to do this work professionally and I am just a hack who figures no one is going to see the tie wraps anyway.

Now the work you have just seen only took me a couple of hours, what I don't have pictures of was how I powered the lights. This was the part of the job that took the longest. I bought a waterproof fuse holder and using a crimp ring terminal I picked up power from the battery connection under the red cap above the fuse holder, the ground for the lights I ran into the passenger compartment by passing the wire through the large grommet of wires on the fire wall. This was the hardest part of the job, I had to untape the wires going into the grommet and pull the grommet out of the firewall and feed the ground lead for the lights through the same opening as the other wires, then I had to put the grommet back in the fire wall and tape it back up.
With the ground wire finally in the passenger compartment I had to decide on a place to put a switch, I don't like anything after market to be seen in the cab so I pulled out my ash tray (I don't smoke anyway) and saw that under the ash tray was the plastic molding that had two levels in it similar to the ash tray, I figured this would be a good spot for the switch but I needed a small one, so I went to the auto parts store and found the smallest toggle switch they had, I wanted a push on / push off but I had to settle for a toggle. I loosened the center console enough so I could drill the hole for my switch, installed the switch and made the final ground connection, come to find out the metal under the center console is not grounded so I had to use the cigarette lighter ground instead.
Anyway, with that being done my lights work great and actually give off a heck of a glow. The next picture does not give the glow of the grill justice but I am pretty pleased with the results.

So what do you think? Worth the effort?
I forgot to mention that I did measure the current draw of the lights before running all the wire and they only pull .8 amps, so everything is well overrated and I fused them at 2 amps.
I don't want to mod the hell out of my car because after all it is my daily driver and whenever I attempt to do something myself I will either %^&# it up or take the risk of getting stranded somewhere so I figured adding some color to my car couldn't hurt.
Ok, step one finding some lights. After seeing the prices in my local parts stores I figured I would compare them on Ebay and see what was out there. I came across an auction (7965863767) for a pair of purple cold cathode neon lights, each being 300 mm long. They looked promising so I bought 1 kit.
Come to find out this is actually a PC case neon kit, I wasn't to happy at first but after I got looking at the lights I worked out a plan, first was to make the lights and transformer water proof, so out comes the glue gun. In my experience a glue gun is good for nothing but making thin stringy strands of glue all over the place and burning the heck out of your fingers, but as you can see I started by gluing the ends of the neon tubes to each other.
These are the two ends where the leads enter the tubes. I wanted the leads near each other because the wires are not that long and would not have reached the transformer if they were apart from each other. As you can see in the previous picture the type of glue I was using in the glue gun actually did a fantastic job of bonding the two square end caps to each other, I also glued all the seams on the ends of the tubes and the leads going into the tubes. In this next picture you will see an example of making the transformer water proof as well.
I had to use a lot of glue on the transformer to make it water tight, each end had wires, one for the 12v power and the other end for the leads to the lights. Seams on the transformer case were sealed up as well.
Below is the burn-in test I gave the lights before I started on actually mounting them in the car. It would have really ticked me off if I got them mounted just to find out they didn't work.
I ran the lights for about 2 hours before I started on the install. Below is a picture of the possible locations in the grill area for mounting the lights. You will see Red dots on the frame of the car where I first considered mounting the lights, these areas actually made a nice "shelf" to mount the lights. The red dots are about 25 to 26 inches apart from each other. The lights actually sat on these "shelves" but only marginally so I opted to mount two brackets on the green dots and secure the lights to these brackets.
The following picture is a closeup of one of the mounting brackets which I had leftover from an under body neon kit I installed on my sons 1997 Ford Probe GTS. I used stainless steel screws so they wouldn't rust. Yes you see a tie wrap, that'* because the mounting brackets are for large tubes and these are somewhat smaller so I had no choice.
The following picture is of the finished install, yes another tie wrap holding the transformer in place, my friend Dana would kill me if he saw the tie wraps but he used to do this work professionally and I am just a hack who figures no one is going to see the tie wraps anyway.
Now the work you have just seen only took me a couple of hours, what I don't have pictures of was how I powered the lights. This was the part of the job that took the longest. I bought a waterproof fuse holder and using a crimp ring terminal I picked up power from the battery connection under the red cap above the fuse holder, the ground for the lights I ran into the passenger compartment by passing the wire through the large grommet of wires on the fire wall. This was the hardest part of the job, I had to untape the wires going into the grommet and pull the grommet out of the firewall and feed the ground lead for the lights through the same opening as the other wires, then I had to put the grommet back in the fire wall and tape it back up.
With the ground wire finally in the passenger compartment I had to decide on a place to put a switch, I don't like anything after market to be seen in the cab so I pulled out my ash tray (I don't smoke anyway) and saw that under the ash tray was the plastic molding that had two levels in it similar to the ash tray, I figured this would be a good spot for the switch but I needed a small one, so I went to the auto parts store and found the smallest toggle switch they had, I wanted a push on / push off but I had to settle for a toggle. I loosened the center console enough so I could drill the hole for my switch, installed the switch and made the final ground connection, come to find out the metal under the center console is not grounded so I had to use the cigarette lighter ground instead.
Anyway, with that being done my lights work great and actually give off a heck of a glow. The next picture does not give the glow of the grill justice but I am pretty pleased with the results.
So what do you think? Worth the effort?
I forgot to mention that I did measure the current draw of the lights before running all the wire and they only pull .8 amps, so everything is well overrated and I fused them at 2 amps.


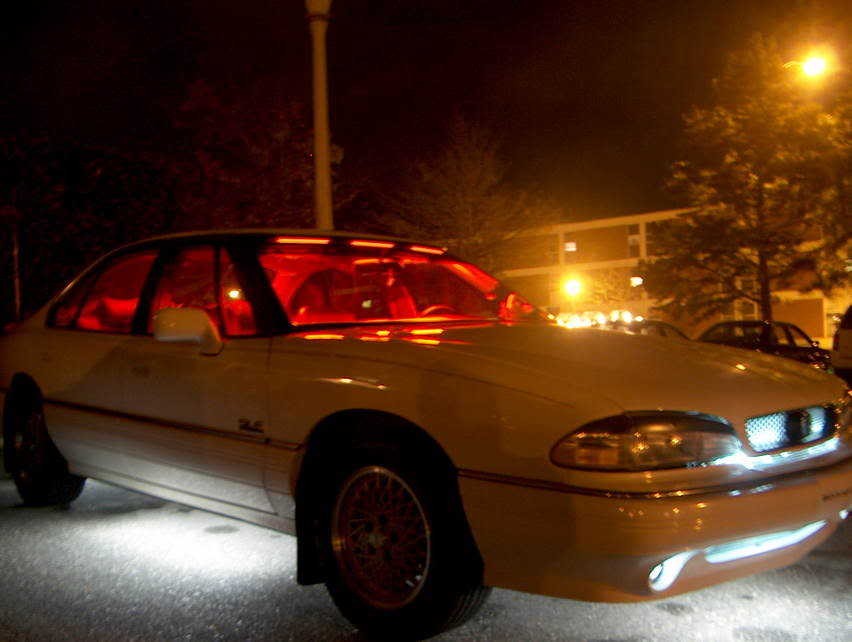
 me like! especially the effect on the bottom, under the grill.

Senior Member
True Car Nut
Joined: Jun 2003
Posts: 7,270
Likes: 465
From: Las Cruces, NM

Originally Posted by Chad Vollmer
That is hot. Wanna do mine :-p


Senior Member
True Car Nut
Joined: Sep 2004
Posts: 9,130
Likes: 0
From: Farmington, Minnesota =MWBF '05 SURVIVOR= =CEBF '06 SURVIVOR= =August '06 COTM=
Turned out pretty good man....I'm thinkin about doing something along them lines soon....still deciding on a colour though.


Thread Starter
Senior Member
Posts like a Northstar
Joined: Feb 2005
Posts: 757
Likes: 0
From: Southern Maine
Originally Posted by LakevilleSSEi
Turned out pretty good man....I'm thinkin about doing something along them lines soon....still deciding on a colour though.
Just for clarification I chose purple because my wife like the color, I thought I would make that perfectly clear before any of you came up with your own reasons for why I chose that color.
