
Frankenbonne Pt2 (Good luck 56K's)


Thread Starter
DINOSAURUS BOOSTUS


Expert Gearhead
Joined: Mar 2005
Posts: 41,391
Likes: 30
From: Enfield, CT


I worked really hard today snapping pics left and right...upside down and right side up.
Randy came over today and we (ok, he) hit the work in front of the project.
Since the engine compartment was painted, there were many wires and harnesses to put back in place. AC stuff needs to go back, and a drive train needs to go back in. Oh boy...there'* a lot of beer, I mean work in our future.
A stray wire was found and we believe it is a test point wire

The wire harness really stands out against that white...looks sooo nice


Beer break...the mug is mine... (MOS...you like?)

The fuel lines went in and got mounted to the frame

Oh...I'm upside down, but the pic is right side up

The lines are in...

This would be so much quicker with AIR TOOLS!

Of course my pressure switch was messing up and I had to stop takin pics to put a new one on. (ps..don't try and take one apart to work on it. )
)

Another BEER break... the neighbor came over to see how things were going and collect another beer. He was showing Randy the fine points of visiting...get a beer

And leave with the beer 2 seconds later

Since he mowed the lawn last week I'll let a beer or two slide
Heres Randy after the beer break


I wanted to put the engine cover on top of his head and call the project done...but .... lol

When working on a project you always need a reference vehicle

Or two

Maybe both at the same time

Here we came up against our first real problem

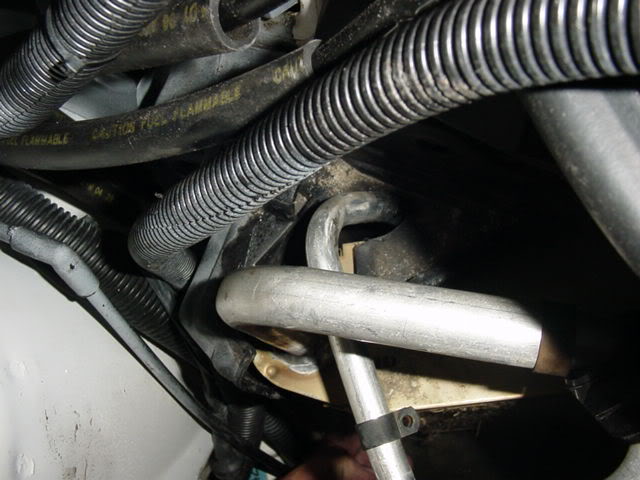
Here'* a close up of what Randy'* looking at

The R12 evaporator core have different threads than the R134a system that needs to go in. I'm working my way into convincing Randy to swap out the evap core.
FSM says disconnect power steering and move out of the way (Check!)
and to remove rear exhaust manifold shield (Check!)
then do this and do that to gain access (Check!)
cut the air box in half to get old one out (WHAT??? cut it in half?...) They even put a line on it that says "Cut here"
So the project hit it'* first real snag...I'm sure we'll overcome it quickly.
Randy came over today and we (ok, he) hit the work in front of the project.
Since the engine compartment was painted, there were many wires and harnesses to put back in place. AC stuff needs to go back, and a drive train needs to go back in. Oh boy...there'* a lot of beer, I mean work in our future.
A stray wire was found and we believe it is a test point wire
The wire harness really stands out against that white...looks sooo nice
Beer break...the mug is mine... (MOS...you like?)
The fuel lines went in and got mounted to the frame
Oh...I'm upside down, but the pic is right side up
The lines are in...
This would be so much quicker with AIR TOOLS!
Of course my pressure switch was messing up and I had to stop takin pics to put a new one on. (ps..don't try and take one apart to work on it.
)Another BEER break... the neighbor came over to see how things were going and collect another beer. He was showing Randy the fine points of visiting...get a beer
And leave with the beer 2 seconds later
Since he mowed the lawn last week I'll let a beer or two slide
Heres Randy after the beer break
I wanted to put the engine cover on top of his head and call the project done...but .... lol
When working on a project you always need a reference vehicle
Or two
Maybe both at the same time
Here we came up against our first real problem
Here'* a close up of what Randy'* looking at
The R12 evaporator core have different threads than the R134a system that needs to go in. I'm working my way into convincing Randy to swap out the evap core.
FSM says disconnect power steering and move out of the way (Check!)
and to remove rear exhaust manifold shield (Check!)
then do this and do that to gain access (Check!)
cut the air box in half to get old one out (WHAT??? cut it in half?...) They even put a line on it that says "Cut here"
So the project hit it'* first real snag...I'm sure we'll overcome it quickly.

Senior Member
True Car Nut
Joined: Sep 2004
Posts: 9,130
Likes: 0
From: Farmington, Minnesota =MWBF '05 SURVIVOR= =CEBF '06 SURVIVOR= =August '06 COTM=
Originally Posted by BillBost37
Bill you didn't tell me 50 Cent was your neighbor!
GGGGGGGGGGGGG G UNIT!!!
LOL
Senior Member
True Car Nut
Joined: Sep 2004
Posts: 9,130
Likes: 0
From: Farmington, Minnesota =MWBF '05 SURVIVOR= =CEBF '06 SURVIVOR= =August '06 COTM=
LOL
Looks like he'* drinking a samuel jackson.....I mean Adams.....LOL
Good to see that the project is on the way again.
Looks like he'* drinking a samuel jackson.....I mean Adams.....LOL
Good to see that the project is on the way again.


Senior Member
True Car Nut
Joined: Feb 2004
Posts: 2,708
Likes: 2
From: Western MA
We can cross one more problem off our list. The options we had were to install the 90 compressor on the 97 L67 and use all of the original 90 AC components, modify the 90 evap core to accept the 97 lines, or change the evap core and use all of the 97 AC components. When the cars are broken down as far as they are, replacing the evap core is a rather easy job. It wouldn't be a very fun job in a complete car.
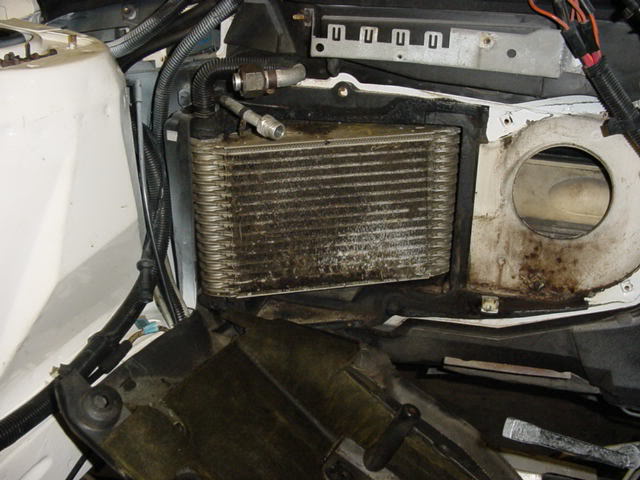
The evap core in the 97 ready to come out

Interesting shot of the heater core and how the air mix door when opened allows air to flow through it.
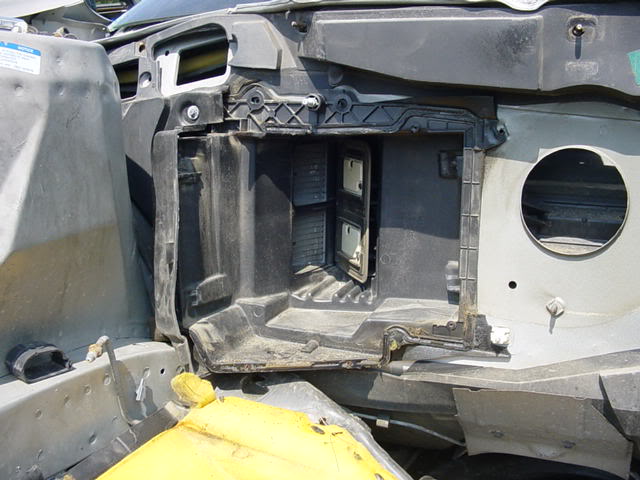
Exposing the 90 evap core.
Rodent slumber parties happening in my AC module cover

Some modifications were required in order for the 97 evap core to fit properly. This was easily done with a Dremel tool. The outlet tube was bent into a different shape so plastic was removed to accomidate the different shape.
Bottom corner before modifications

Bottom corner after modifications.

Top corner before modifications.

Top corner after modifications
Problem solved

Jim, as we get closer to completion, we can decide on a time to get together. As far as the place, we can decide that in advance. Perhaps in the other NE meet thread.
The evap core in the 97 ready to come out
Interesting shot of the heater core and how the air mix door when opened allows air to flow through it.
Exposing the 90 evap core.
Rodent slumber parties happening in my AC module cover
Some modifications were required in order for the 97 evap core to fit properly. This was easily done with a Dremel tool. The outlet tube was bent into a different shape so plastic was removed to accomidate the different shape.
Bottom corner before modifications
Bottom corner after modifications.
Top corner before modifications.
Top corner after modifications
Problem solved
Jim, as we get closer to completion, we can decide on a time to get together. As far as the place, we can decide that in advance. Perhaps in the other NE meet thread.