
Completed XM install...(56k warning)


Thread Starter
Senior Member
Certified GM nut
Joined: Sep 2003
Posts: 1,935
Likes: 0
From: Reutlingen, Baden-Wurttemburg, Germany

Allrighty then, got some time to finish it up today, and I must say I impressed even myself. :P I think it looks really clean and professional, and the best part is that I didn't have to permanently alter anything that affects the appearence of the interior. AND I've got the unit wired in so that it comes on automatically with the car or accessory power, and then shuts off with the rest of the electrical when I open my door after the car is off.
Step by step:
Step 1: Remove Dash and Deck

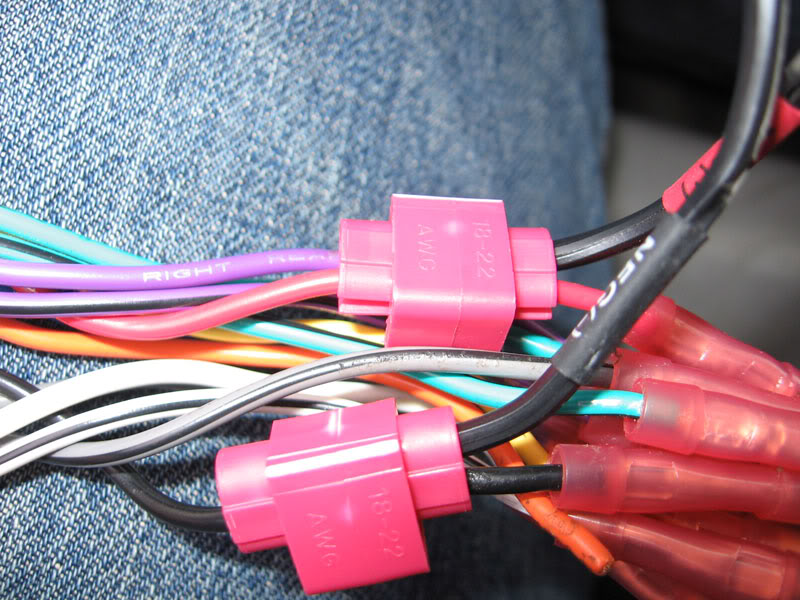
Step 2: Splice in the power. I used these nifty little things that allow you to splice into an existing wire without stripping, cutting, or soldering. They were news to me although I'm sure they are old news to most people. :P (and yes, those are my jeans)
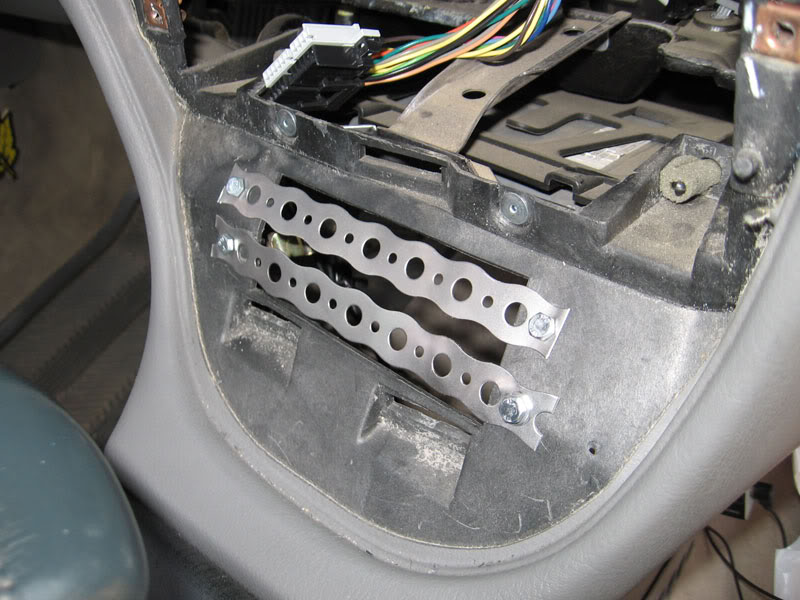
Step 3: Attach bracket to dash trim. I put strips of adhesive along the front (ie the portion that comes into contact with the trim piece) of this small bracket, and fed the "peg" through the hole which used to house the gain control.

Front view of the same thing, notice the peg the radio attaches to.

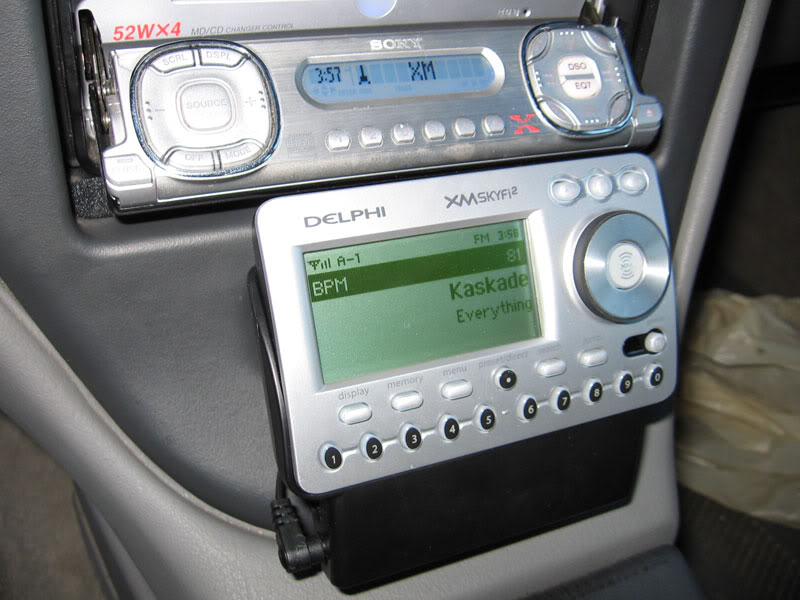
Step 4: Wire FM Direct adaptor. Antenna for XM goes in the side, FM antenna into one lead, and signal from the box to the deck'* antenna jack. This works great and gives CD quality sound.

Step 5: Reinforce area behind mounting bracket. The adhesive on the bracket seemed strong, but I wanted to make sure I had my bases covered. I just used some of that metal strip for electrical/plumbing, drilled a few holes, used a couple bolts and voila, reinforced. I also removed the backing on the adhesive pad that was stuck on the back of the bracket attached to the trim piece for added security, it'* really solid now.
Step 6: Mount antenna. Stuck it inside the car to the speaker grill to avoid any weather or vandalism issues. Thus far I have not had a single problem with reception, and even kept a strong signal among skyscrapers in downtown Calgary.

Step 7: Slide deck in and replace trim.

Step 8: ENJOY!


Step by step:
Step 1: Remove Dash and Deck
Step 2: Splice in the power. I used these nifty little things that allow you to splice into an existing wire without stripping, cutting, or soldering. They were news to me although I'm sure they are old news to most people. :P (and yes, those are my jeans)
Step 3: Attach bracket to dash trim. I put strips of adhesive along the front (ie the portion that comes into contact with the trim piece) of this small bracket, and fed the "peg" through the hole which used to house the gain control.
Front view of the same thing, notice the peg the radio attaches to.
Step 4: Wire FM Direct adaptor. Antenna for XM goes in the side, FM antenna into one lead, and signal from the box to the deck'* antenna jack. This works great and gives CD quality sound.
Step 5: Reinforce area behind mounting bracket. The adhesive on the bracket seemed strong, but I wanted to make sure I had my bases covered. I just used some of that metal strip for electrical/plumbing, drilled a few holes, used a couple bolts and voila, reinforced. I also removed the backing on the adhesive pad that was stuck on the back of the bracket attached to the trim piece for added security, it'* really solid now.
Step 6: Mount antenna. Stuck it inside the car to the speaker grill to avoid any weather or vandalism issues. Thus far I have not had a single problem with reception, and even kept a strong signal among skyscrapers in downtown Calgary.
Step 7: Slide deck in and replace trim.
Step 8: ENJOY!


Senior Member
True Car Nut
Joined: May 2003
Posts: 8,135
Likes: 1
From: Lethbridge, Alberta, _______Canada._______ West Coast Bonneville Fest ___05,06,07 Survivor___
damn nice install!
Good idea of the gain control, probably doesnt work with your new HU anyway lol
Good idea of the gain control, probably doesnt work with your new HU anyway lol
Thread Starter
Senior Member
Certified GM nut
Joined: Sep 2003
Posts: 1,935
Likes: 0
From: Reutlingen, Baden-Wurttemburg, Germany
Originally Posted by SSEimatt93
damn nice install!
Good idea of the gain control, probably doesnt work with your new HU anyway lol
Good idea of the gain control, probably doesnt work with your new HU anyway lol


