
Special sauce, please. Magic coating revealed.


Thread Starter
Junior Member
Posts like a Ricer Type-R
Joined: Aug 2002
Posts: 11
Likes: 13

*** The information below is not based on any conclusive science or backed up with any facts that are supported by data. To paint or not to paint any engine parts is primarily a matter of personal taste and should be done only to achieve a desired look, and not because there is any perceived or realized performance gains. ***
The fun part was comparing supercharger temperatures at WCBF. Even though mine was spinning faster than all attendees other than driverjohn (running a 2.2" to my 2.3"), mine was consistently the coolest SC after each run. In fact, SSEiMatt93 and I did a 'hands on' test between his M90 and my M62 after a couple runs. Immediately after the run, both were uncomfortably hot. Within 5 minutes, you could hold your hand to mine, but not his. This real-world test went right along with the 'lab test' I ran back in March.
The problem was that I didn't know how well it would perform, and I didn't want to advertise something that wouldn't last long. Heat cycles, icing, weather, severe heat, severe cold, engine washing, and other environmental factors all needed a chance to attack this crap.
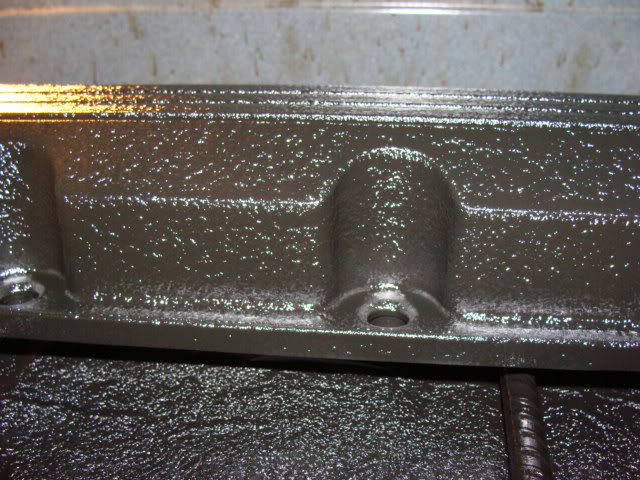
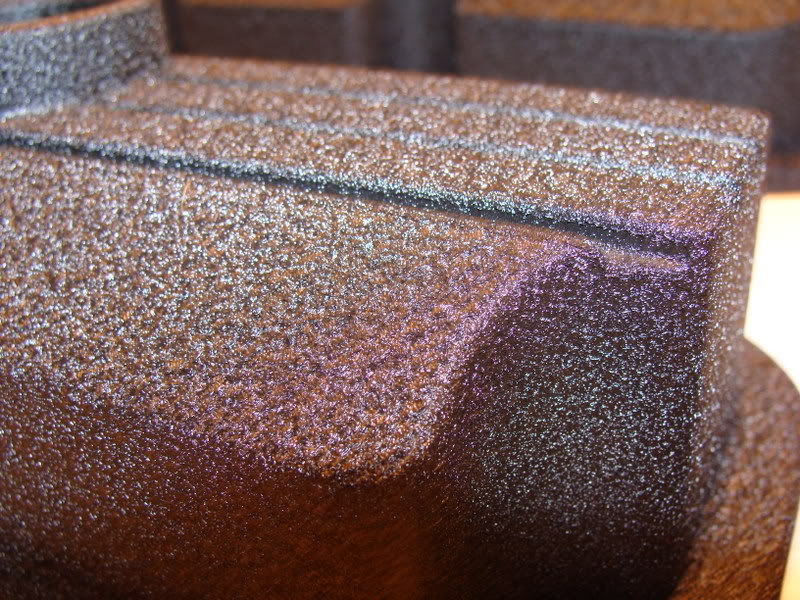
The jury is no longer out. The supercharger still looks as good as the day I applied it. Here'* tonight'* pic:

So what is this stuff? Anyone ever seen a Kennedy toolbox? I've seen several over 50 years old. And they still haven't chipped or scratched. Back in the 'day', they were a dark brown wrinkle finish. These days, they powder coat.
But anyone familiar with old tube electronics and amplifiers has also seen the same kind of paint. Why? Because it increases the surface area by wrinkling:
http://www.bikernet.com/bikebarn/Pag...asp?PageID=976

Look closely at the engine.
There are numerous other articles that I won't bore you with. The special sauce has been proven by others before me, I just decided to put it on something else. This is what I used:

There is a problem. It'* very sensitive to environmental conditions. Thickness of coats, number of coats, material temperature, rate of drying, etc. You can get (on purpose or accidentally) many different textures. Not good if you want parts to match, or do different parts at different times. That was my problem today, and I had to remember EXACTLY how I did that supercharger back in March (granted, that supercharger will go to the SLE in the early spring anyway, and I'll be doing yet a more-improved freshly painted with this recipe charger for the new season on the Zilla).
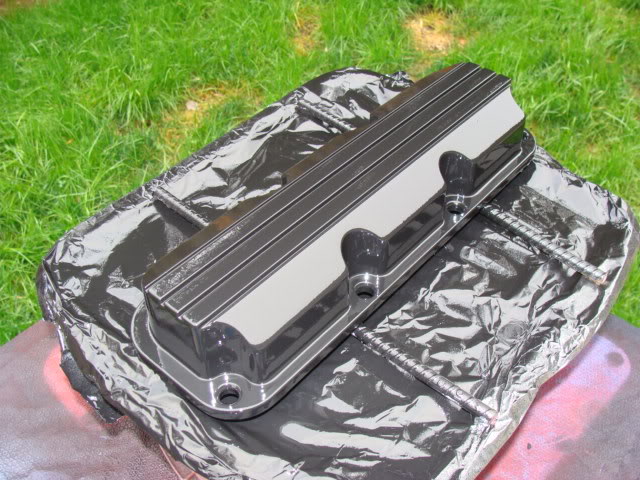
On to the most recent chapter. I got a good deal on some F-body aluminum valvecovers, and cleaned 'em up good with the intent of having them black anodized to be durable, and match the supercharger somewhat. Problem: too much Magnesium content in the alloy, and it isn't a good candidate for anodizing. So I did a uniform fine glass beadblast to give a good binding surface for the wrinkle paint and went for it.
The advantage is that the stock covers are fiberglass (insulator, trapping heat) and aluminum is a great heat transfer material, especially if you can improve it'* ability to transfer heat like I learned how to do.
So I went for it:


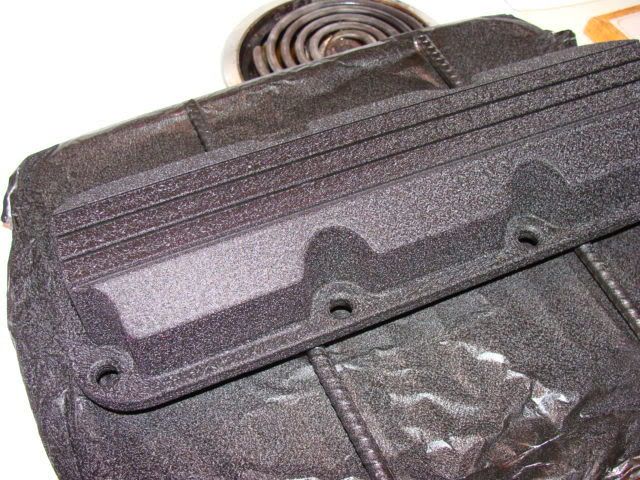

Yes, I did test this previously on spare stock covers (which I probably won't use), and even played around with some laser engraving to see what wavelength of light (laser) the paint would absorb the best for etching (on the right):


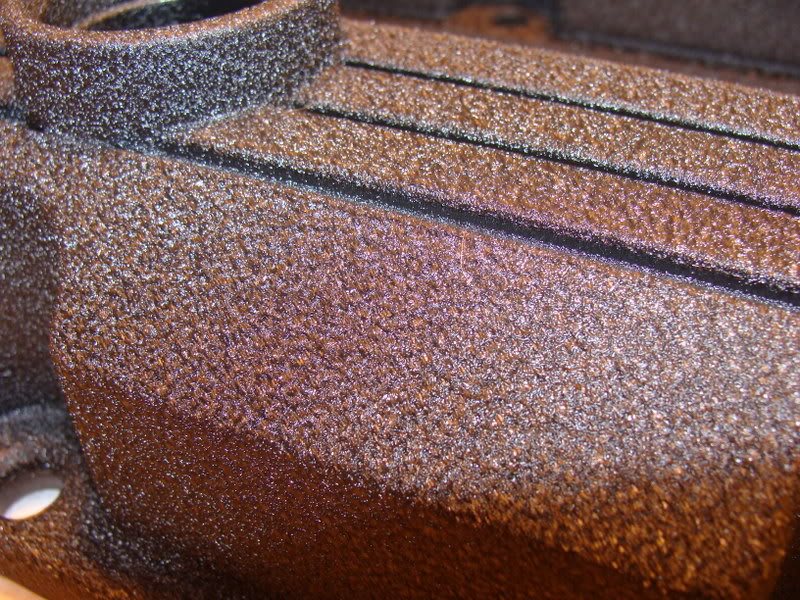
What'* the recipe? I hope you have an oven. In order to get the finest (most dense distribution) wrinkles for the best heat dissipation effect (finer wrinkles mean more of them, and more 'surface area' and edges to help remove heat from the surface below as they are exposed to cooler air), you have to control the process carefully, and force rapid curing. This stuff works by adding Naptha to normal paint, and having the naptha evaporate (turn from liquid to gas actually) faster than the other solvents, causing the surface to wrinkle quickly, and then cure.
Here'* what I did:
1. Preheat parts in the oven on WARM. For my oven, this put the parts at about 150F. I let them cool to 100F before I shot the first coat (it'* 40 F outside).
2. After shaking and swirling the can (follow the instructions on the can to the letter), I applied the first semi-heavy coat at 100F.
3. After 5 minutes, apply another semi-heavy coat (you may already see some wrinkling from the heat of the part).
4. After 5 more minutes, apply the last coat, and let it sit for 5 minutes to tack up. Put the part back into the oven on WARM for 30 minutes.
The part should be fully wrinkled and near full-strength cure. Let it cool to room temperature with the oven off, and the door cracked open (the smell isn't really that bad).
That'* about it. It'* very sensitve to small changes in the above 'recipe', so figure your best recipe out and follow it to the letter. Outside temps may dictate changes to it. This stuff is tough, good-looking, and is proven to help dissipate heat quicker.
Have at it. It'* the off-season.
These valve covers will be going on Zilla'* replacement motor this winter. Hopefully resulting in lower valvetrain temps, lower engine temps, and longer oil life. How much? Probably not much, but every little bit will help the mutant.
The fun part was comparing supercharger temperatures at WCBF. Even though mine was spinning faster than all attendees other than driverjohn (running a 2.2" to my 2.3"), mine was consistently the coolest SC after each run. In fact, SSEiMatt93 and I did a 'hands on' test between his M90 and my M62 after a couple runs. Immediately after the run, both were uncomfortably hot. Within 5 minutes, you could hold your hand to mine, but not his. This real-world test went right along with the 'lab test' I ran back in March.
The problem was that I didn't know how well it would perform, and I didn't want to advertise something that wouldn't last long. Heat cycles, icing, weather, severe heat, severe cold, engine washing, and other environmental factors all needed a chance to attack this crap.
The jury is no longer out. The supercharger still looks as good as the day I applied it. Here'* tonight'* pic:
So what is this stuff? Anyone ever seen a Kennedy toolbox? I've seen several over 50 years old. And they still haven't chipped or scratched. Back in the 'day', they were a dark brown wrinkle finish. These days, they powder coat.
But anyone familiar with old tube electronics and amplifiers has also seen the same kind of paint. Why? Because it increases the surface area by wrinkling:
http://www.bikernet.com/bikebarn/Pag...asp?PageID=976
Look closely at the engine.
“We didn’t even mask off the fins. Wrinkle is the best because every edge of the paint reaches out to dissipate heat.”
There is a problem. It'* very sensitive to environmental conditions. Thickness of coats, number of coats, material temperature, rate of drying, etc. You can get (on purpose or accidentally) many different textures. Not good if you want parts to match, or do different parts at different times. That was my problem today, and I had to remember EXACTLY how I did that supercharger back in March (granted, that supercharger will go to the SLE in the early spring anyway, and I'll be doing yet a more-improved freshly painted with this recipe charger for the new season on the Zilla).
On to the most recent chapter. I got a good deal on some F-body aluminum valvecovers, and cleaned 'em up good with the intent of having them black anodized to be durable, and match the supercharger somewhat. Problem: too much Magnesium content in the alloy, and it isn't a good candidate for anodizing. So I did a uniform fine glass beadblast to give a good binding surface for the wrinkle paint and went for it.
The advantage is that the stock covers are fiberglass (insulator, trapping heat) and aluminum is a great heat transfer material, especially if you can improve it'* ability to transfer heat like I learned how to do.
So I went for it:
Yes, I did test this previously on spare stock covers (which I probably won't use), and even played around with some laser engraving to see what wavelength of light (laser) the paint would absorb the best for etching (on the right):
What'* the recipe? I hope you have an oven. In order to get the finest (most dense distribution) wrinkles for the best heat dissipation effect (finer wrinkles mean more of them, and more 'surface area' and edges to help remove heat from the surface below as they are exposed to cooler air), you have to control the process carefully, and force rapid curing. This stuff works by adding Naptha to normal paint, and having the naptha evaporate (turn from liquid to gas actually) faster than the other solvents, causing the surface to wrinkle quickly, and then cure.
Here'* what I did:
1. Preheat parts in the oven on WARM. For my oven, this put the parts at about 150F. I let them cool to 100F before I shot the first coat (it'* 40 F outside).
2. After shaking and swirling the can (follow the instructions on the can to the letter), I applied the first semi-heavy coat at 100F.
3. After 5 minutes, apply another semi-heavy coat (you may already see some wrinkling from the heat of the part).
4. After 5 more minutes, apply the last coat, and let it sit for 5 minutes to tack up. Put the part back into the oven on WARM for 30 minutes.
The part should be fully wrinkled and near full-strength cure. Let it cool to room temperature with the oven off, and the door cracked open (the smell isn't really that bad).
That'* about it. It'* very sensitve to small changes in the above 'recipe', so figure your best recipe out and follow it to the letter. Outside temps may dictate changes to it. This stuff is tough, good-looking, and is proven to help dissipate heat quicker.
Have at it. It'* the off-season.
These valve covers will be going on Zilla'* replacement motor this winter. Hopefully resulting in lower valvetrain temps, lower engine temps, and longer oil life. How much? Probably not much, but every little bit will help the mutant.


Thread Starter
Junior Member
Posts like a Ricer Type-R
Joined: Aug 2002
Posts: 11
Likes: 13
The laser engraving is on the old stock fiberglass covers off my donor motor. Just testing for the aluminum covers. Not sure what/how they will have on them or what they'll look like.
BTW, notice the lack of front wire retainers on the aluminum covers? I haven't used stock retainers for a couple years anyway, so it doesn't matter to me.
BTW, notice the lack of front wire retainers on the aluminum covers? I haven't used stock retainers for a couple years anyway, so it doesn't matter to me.


Senior Member
Posts like a Camaro
Joined: Jan 2004
Posts: 922
Likes: 0
From: Aurora, Illinois
GAHHHHHHHH! this has been driving me nuts since you originally posted it. Good to know it holds up though. Was going to paint my SC black anyways so I'll have to give this a try.
Thanks.
Thanks.


