
my projector retro "how to"

Thread Starter
Senior Member
Posts like a Camaro
Joined: Dec 2002
Posts: 1,181
Likes: 0
From: Holly, Michigan

I noticed a few people asking about retrofits so I thought I'd post my how to on this thread.
I bought an extra set of housings and took them apart as it you were clearing the corners.
The projectors are off a 05 Cadillac sts like so..
2005 OEM Cadillac STS HID Xenon Headlight :eBay Motors (item 270359091246 end time Mar-25-09 15:02:19 PDT)
I got 2 of these housings with one ballast and HID bulb (one was missing) for $80 after shipping.
There is a low beam and high beam projector in each, and yes they are different. The high has a long narrow beam, the lows have a very wide beam.
If you take the same route I have, make sure the high is in the high spot with the cutoff shield on top, and the low is in the low spot with the cutoff shield on bottom. (backwards because it is a reflector)
One projector was HID and one that is halogen but I couldn't tell a huge difference between the two.
It seemed the lense itself was clearer on the HID one, and the reflector was shaped a little different.
When I did research I heard that halogen projectors would look very bad with HID'* but I can hardly tell a difference. I was just going to get some halogen ones until I came across these. I did notice that the cutoff is slightly more blurry and slightly more glare (not nearly as much a stock bonneville housings), but overall either type of projector should work if you wan't to save some money and get halogen projectors.
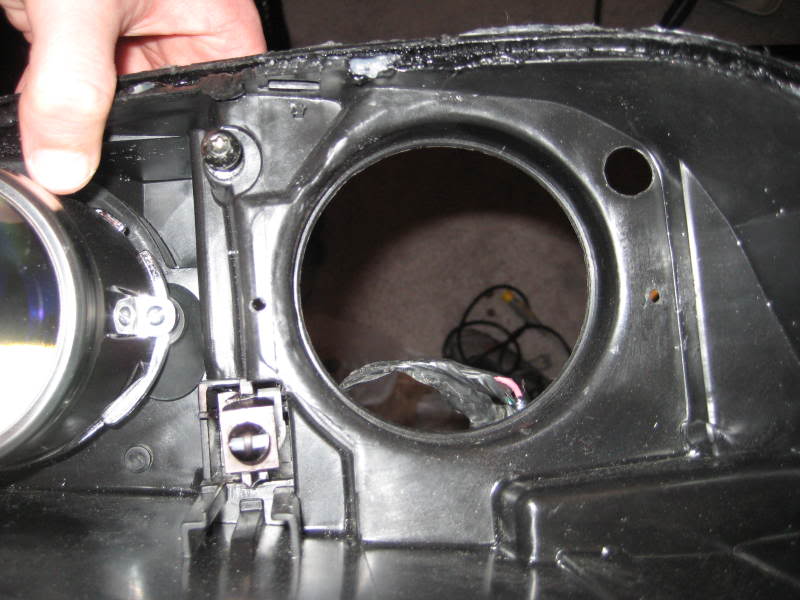
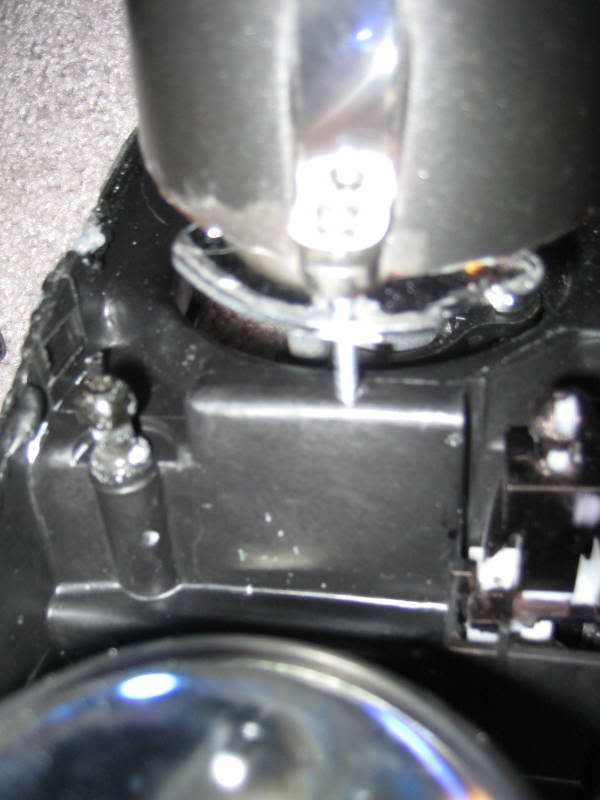
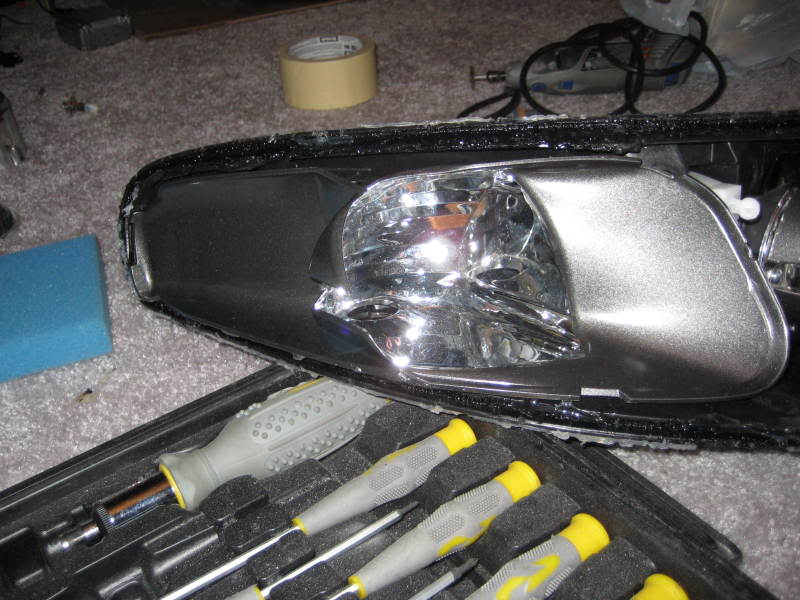
There is ALOT of cutting required. The projector shrouds in the sts were connected in a metal bracket so if you wanted to aim one you could aim both. So each housing had to be cut to make it look presentable and then I painted them after.
Overall it was somewhat easy aiming them and such but the only thing that sucked was cutting the sts housing apart.
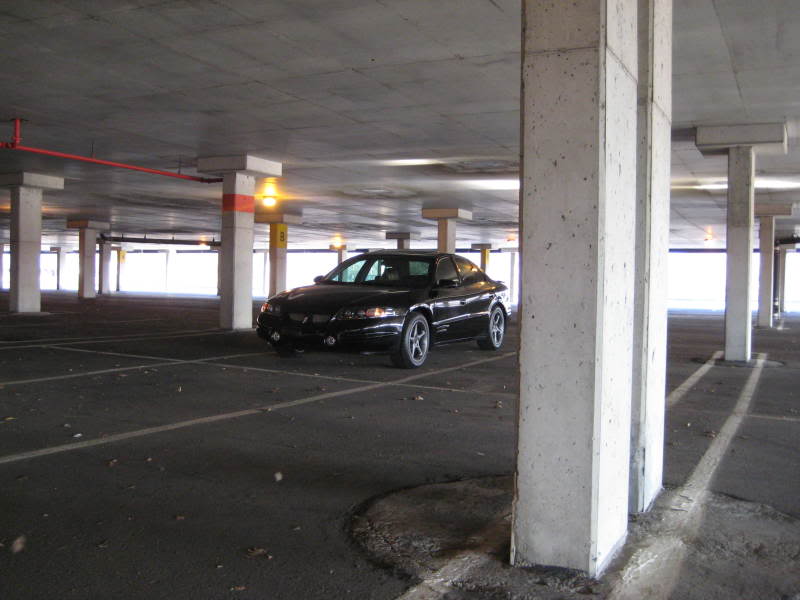
But worth it I love the look.
Started with this

Inside you will find this
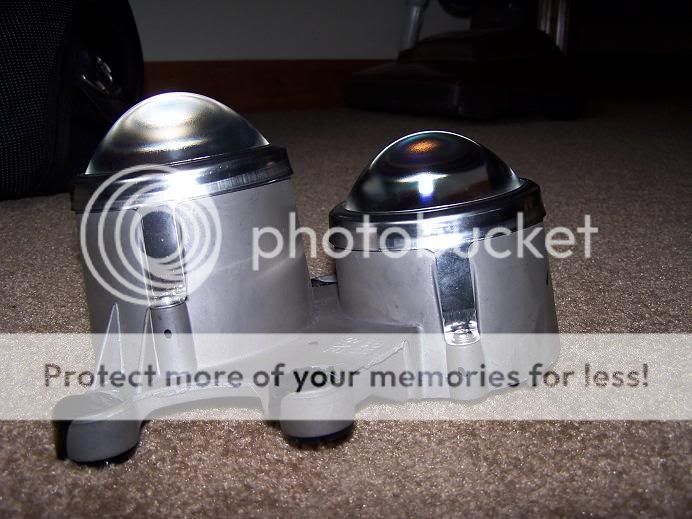
Most projectors come separately but if you choose to use these projectors, (I did because of cost and not wanting to buy shrouds), you will obviously need to cut the two housings apart, giving you this

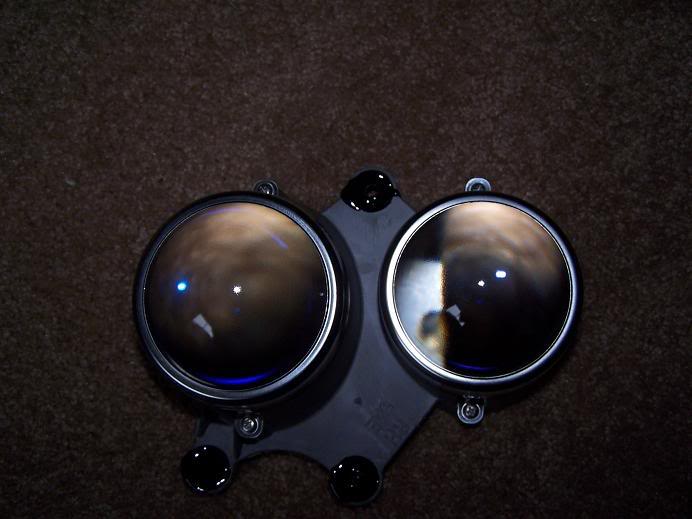
I noticed that the HID lenses (low beam) are perfectly clear and the halogen (high beam) are slightly blurry. Hard to notice in pics.
Did some research and apparently the clearer the lens the sharper the cutoff.
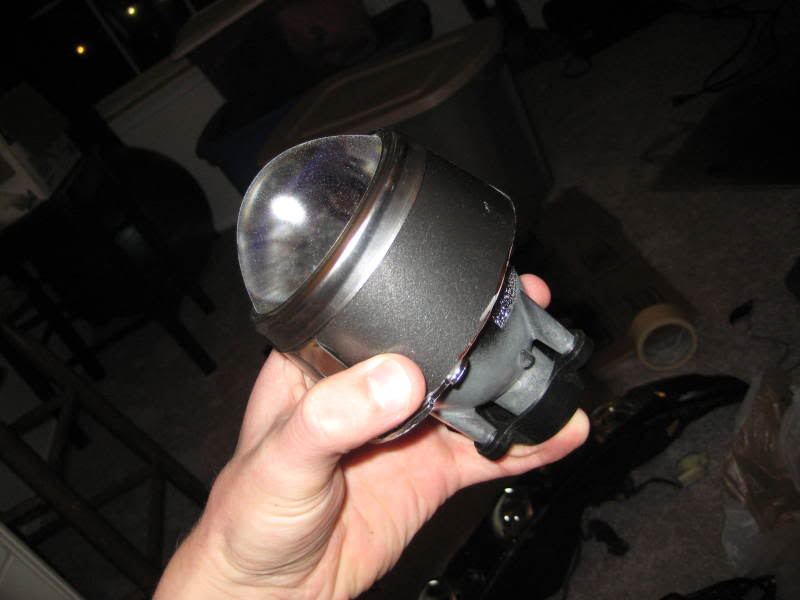
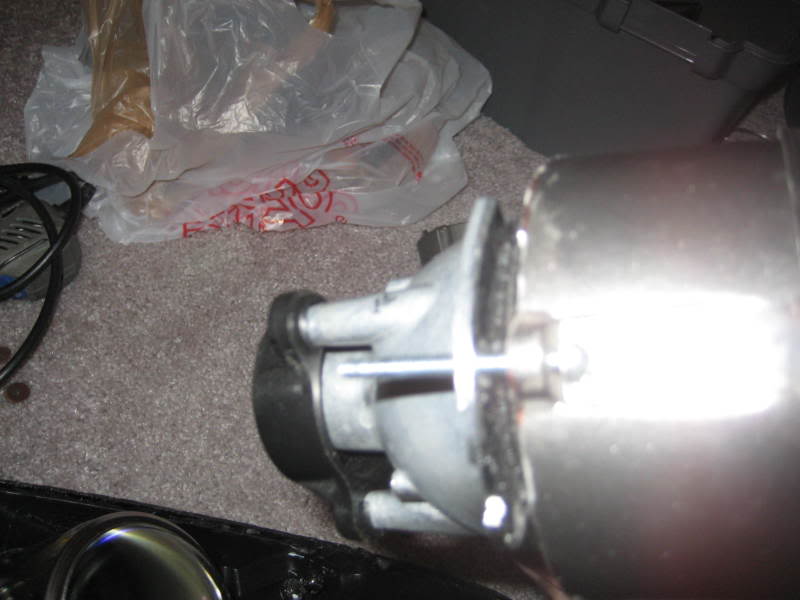
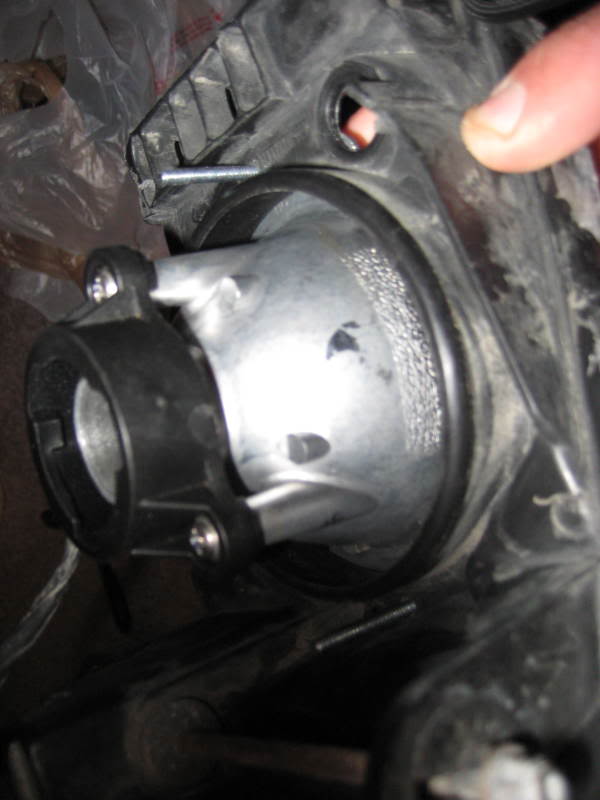
The stock reflector just pops out with a little force and I mounted the projector directly to the back of housing
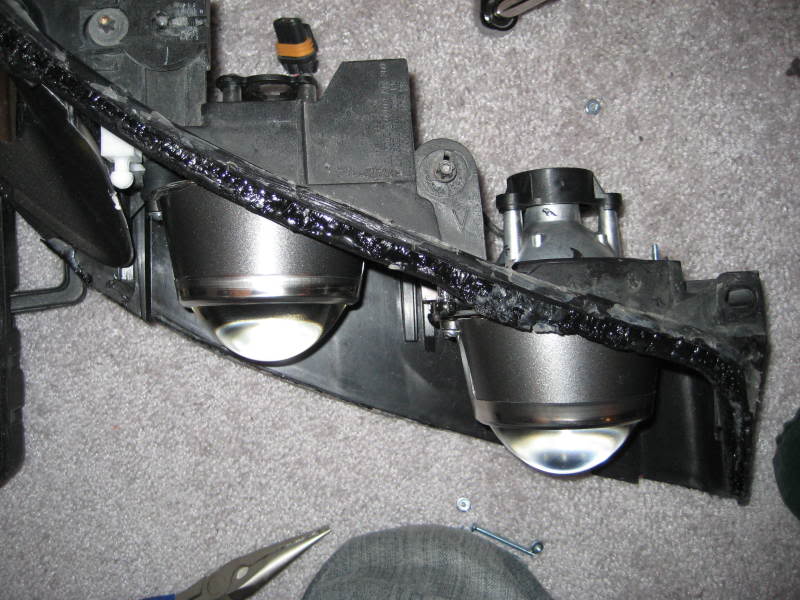
Here are both in, keep in mind all the space around the projector it hidden by the stock housing lens and black shroud inside it.
Painted part of turn signal reflector to match wheels and make it not so shiny.
My circuit, the Caddy lights came with HID bulb and Phillips HID ballast for lows and H11 halogen high beam bulb.

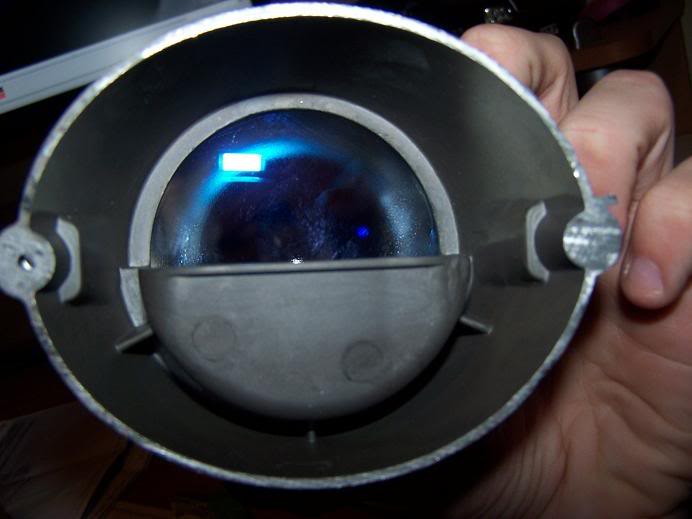
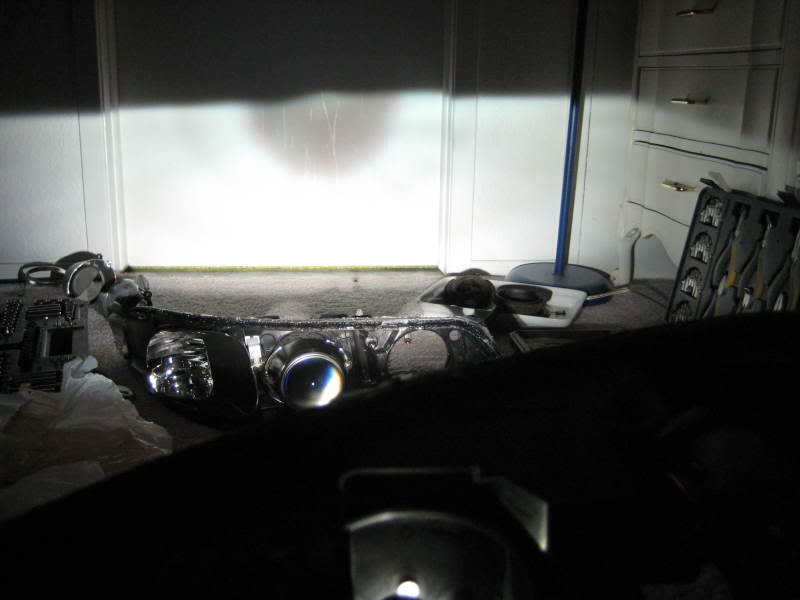
Low beam cutoff
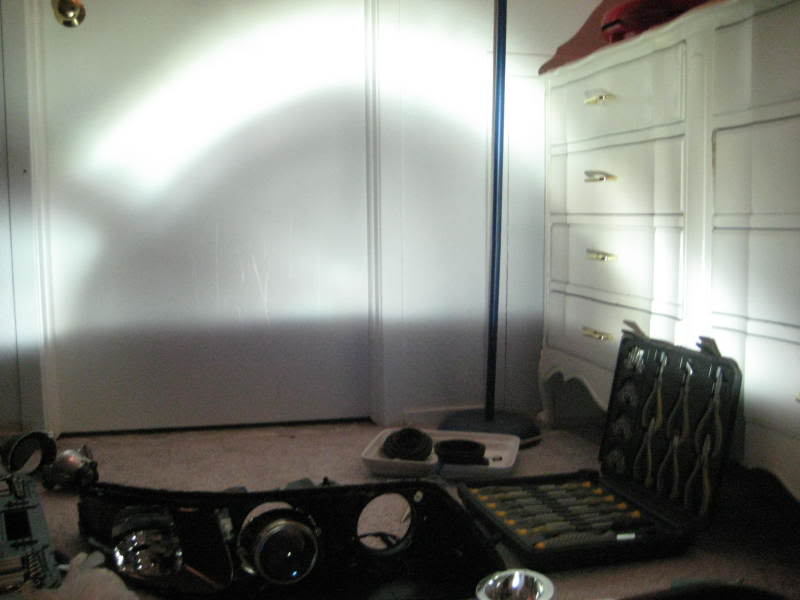
High beam cutoff
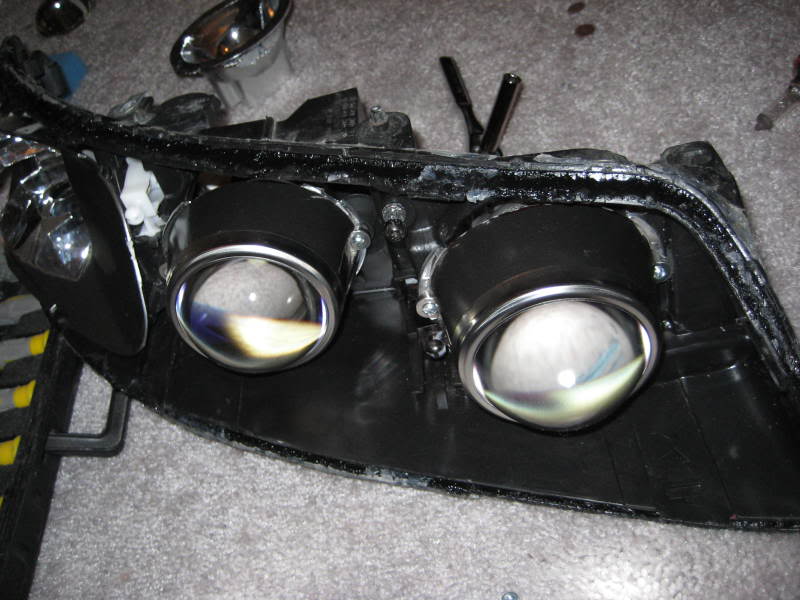
Finished
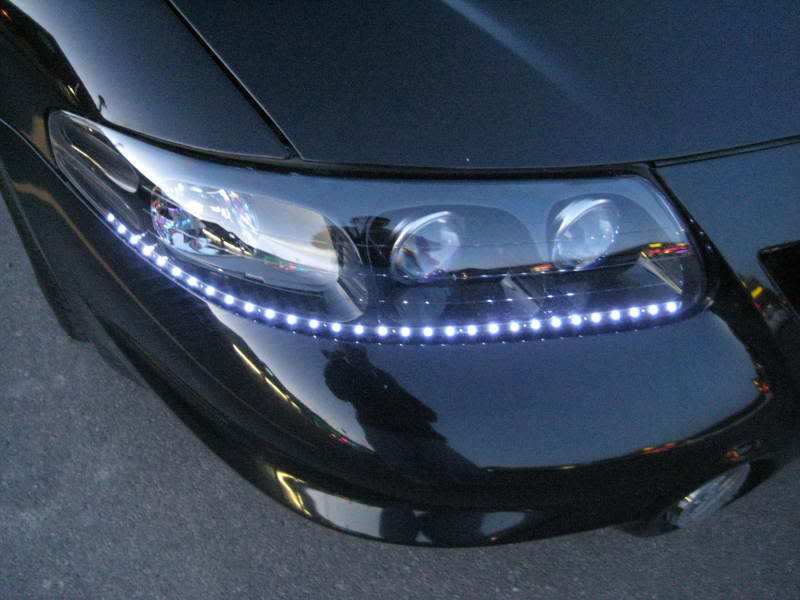
I also put some LED strips in there. I tried angle eyes but they ended up being too deep and the stock housing wouldn't fit back together.
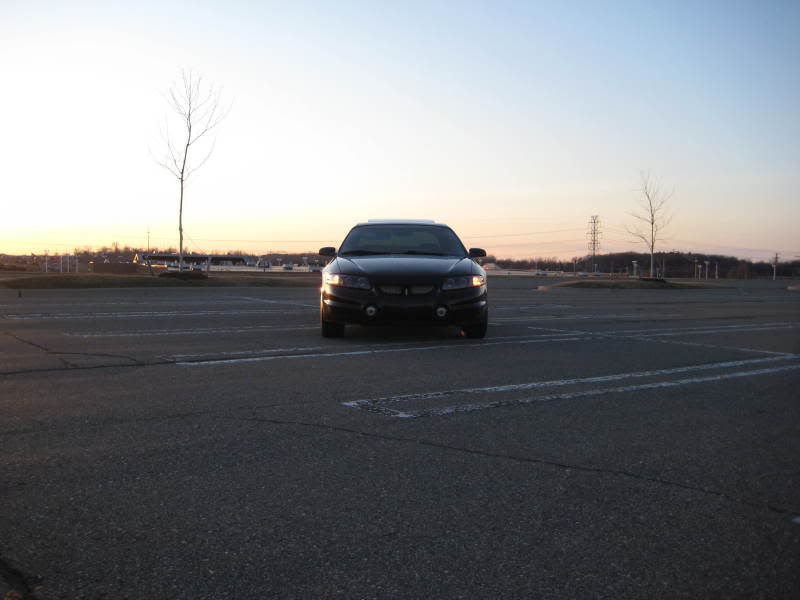
Pics on car.


I bought an extra set of housings and took them apart as it you were clearing the corners.
The projectors are off a 05 Cadillac sts like so..
2005 OEM Cadillac STS HID Xenon Headlight :eBay Motors (item 270359091246 end time Mar-25-09 15:02:19 PDT)
I got 2 of these housings with one ballast and HID bulb (one was missing) for $80 after shipping.
There is a low beam and high beam projector in each, and yes they are different. The high has a long narrow beam, the lows have a very wide beam.
If you take the same route I have, make sure the high is in the high spot with the cutoff shield on top, and the low is in the low spot with the cutoff shield on bottom. (backwards because it is a reflector)
One projector was HID and one that is halogen but I couldn't tell a huge difference between the two.
It seemed the lense itself was clearer on the HID one, and the reflector was shaped a little different.
When I did research I heard that halogen projectors would look very bad with HID'* but I can hardly tell a difference. I was just going to get some halogen ones until I came across these. I did notice that the cutoff is slightly more blurry and slightly more glare (not nearly as much a stock bonneville housings), but overall either type of projector should work if you wan't to save some money and get halogen projectors.
There is ALOT of cutting required. The projector shrouds in the sts were connected in a metal bracket so if you wanted to aim one you could aim both. So each housing had to be cut to make it look presentable and then I painted them after.
Overall it was somewhat easy aiming them and such but the only thing that sucked was cutting the sts housing apart.
But worth it I love the look.
Started with this
Inside you will find this
Most projectors come separately but if you choose to use these projectors, (I did because of cost and not wanting to buy shrouds), you will obviously need to cut the two housings apart, giving you this
I noticed that the HID lenses (low beam) are perfectly clear and the halogen (high beam) are slightly blurry. Hard to notice in pics.
Did some research and apparently the clearer the lens the sharper the cutoff.
The stock reflector just pops out with a little force and I mounted the projector directly to the back of housing
Here are both in, keep in mind all the space around the projector it hidden by the stock housing lens and black shroud inside it.
Painted part of turn signal reflector to match wheels and make it not so shiny.
My circuit, the Caddy lights came with HID bulb and Phillips HID ballast for lows and H11 halogen high beam bulb.
Low beam cutoff
High beam cutoff
Finished
I also put some LED strips in there. I tried angle eyes but they ended up being too deep and the stock housing wouldn't fit back together.
Pics on car.


Thread Starter
Senior Member
Posts like a Camaro
Joined: Dec 2002
Posts: 1,181
Likes: 0
From: Holly, Michigan
You should be able to hook the leds to parking lights or obviously to a seperate switch, you just need to run a wire.
The are 60mm and are off ebay.
On the 00+ housings they fit right in, they are very thin, but are also flimsy as well.
The are 60mm and are off ebay.
On the 00+ housings they fit right in, they are very thin, but are also flimsy as well.
Senior Member
Posts like a Northstar
Joined: Apr 2009
Posts: 699
Likes: 0
From: Indianapolis, Indiana
when u say flimsy, im assuming u used the ribbon strips, and not the regular LED strip that comes in the clear plastic housing right?
Thread Starter
Senior Member
Posts like a Camaro
Joined: Dec 2002
Posts: 1,181
Likes: 0
From: Holly, Michigan
yes the ribbon kind, I actually had one break because it was cold and snapped in half when I tried to bend it. They look good but 2 of the 4 I got were broke.