
2002 Jeep Grand Cherokee Bosch E46 Projector Retro


Thread Starter
Senior Member
Posts like a Turbo
Joined: Feb 2006
Posts: 320
Likes: 0
From: Phelps, NY

Well guys, it took me hours and hours and hours to finally finish the retro.
No, not really.
I think I spent about and hour and a half on it. That'* all. It went really smooth, and the results are pretty good. The're not perfectly centered in the halos, but, it'* what I had to work with, being that the mounting holes were right near a 90 degree bend in the metal. Came out pretty good, though. Didn't cost an arm and a leg, either.
On with the pics.
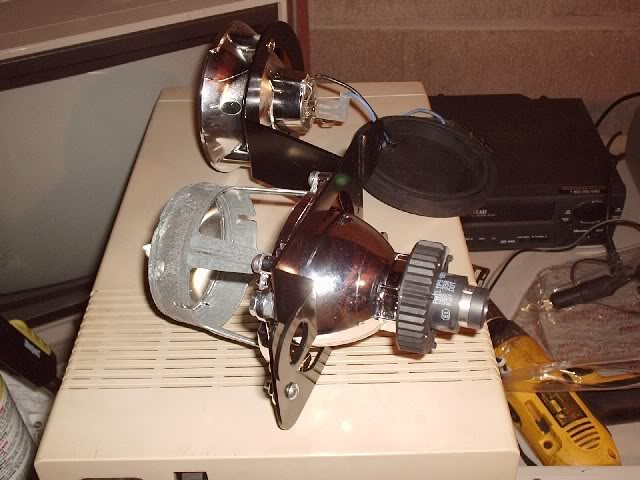
This is how I mounted the projector to the internal metal frame. Drilled 3 holes, 3 screws, 3 nuts. Had to use 1 nut as a spacer between the projector and the bracket to lower the beam to line up with the high beam on the driver'* side. This is the passenger'* side, it lined up fine.
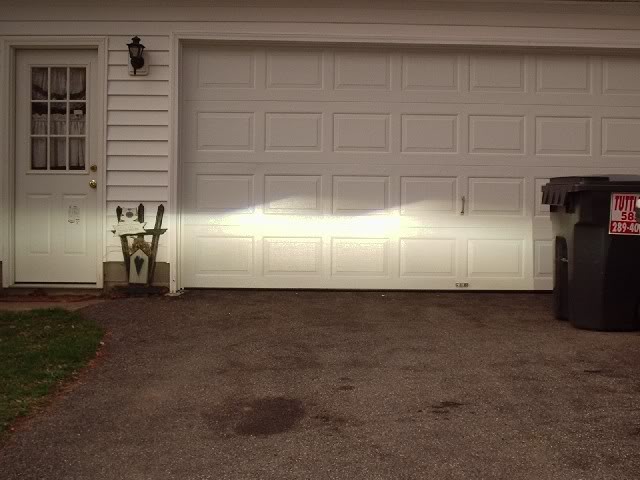
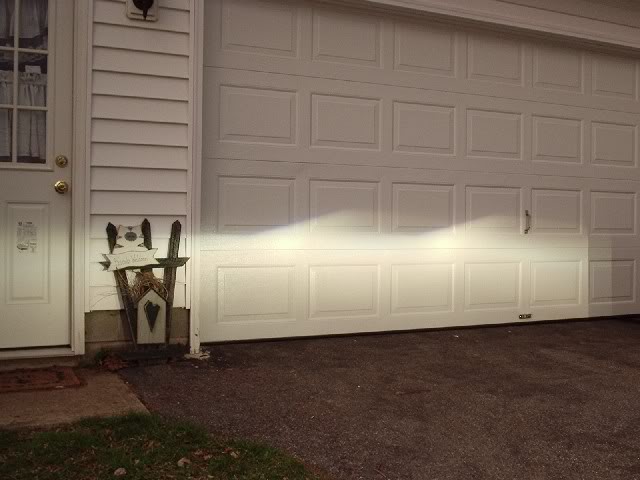
Here'* a couple beam shots. Taken at about 7:30'ish, so it'* still kinda light out, even though it'* getting cloudy.
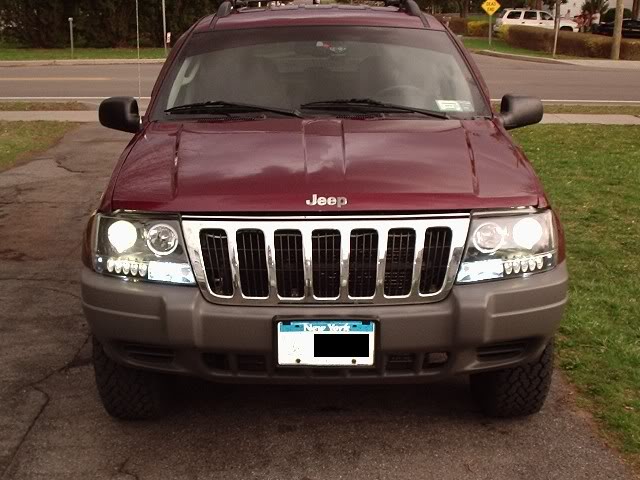
Lights on, standing in front.
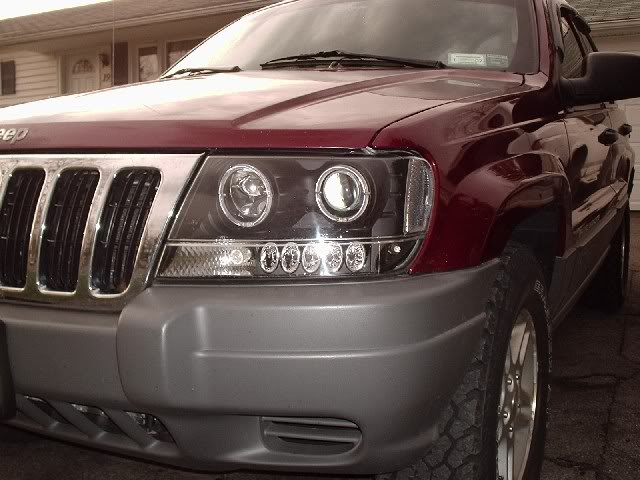
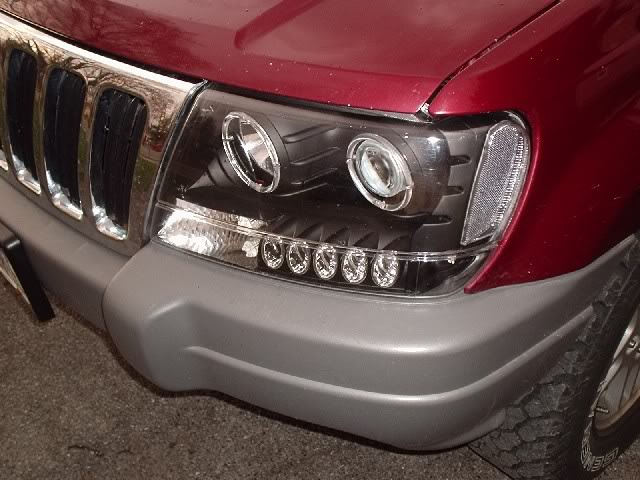
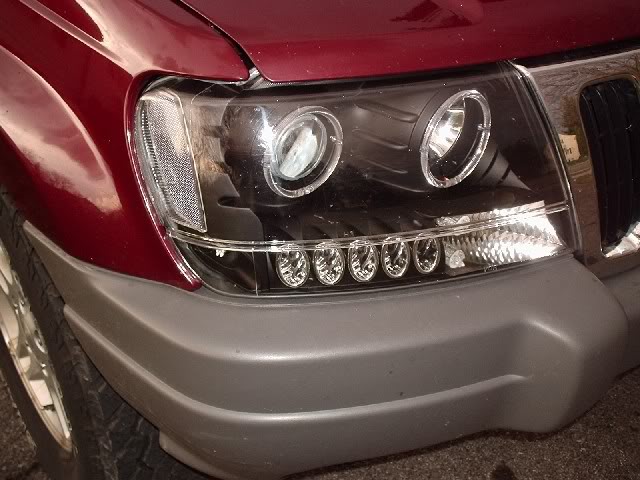
Closeups of the housings.
I didn't take a picture of it, but I just used the rubber weather boots that came with the headlight housings on the back. I also used a set of Amp to D2S adapters to connect to the McCulloch ballasts. They're still working, so I'll keep them.
No, not really.
I think I spent about and hour and a half on it. That'* all. It went really smooth, and the results are pretty good. The're not perfectly centered in the halos, but, it'* what I had to work with, being that the mounting holes were right near a 90 degree bend in the metal. Came out pretty good, though. Didn't cost an arm and a leg, either.
On with the pics.
This is how I mounted the projector to the internal metal frame. Drilled 3 holes, 3 screws, 3 nuts. Had to use 1 nut as a spacer between the projector and the bracket to lower the beam to line up with the high beam on the driver'* side. This is the passenger'* side, it lined up fine.
Here'* a couple beam shots. Taken at about 7:30'ish, so it'* still kinda light out, even though it'* getting cloudy.
Lights on, standing in front.
Closeups of the housings.
I didn't take a picture of it, but I just used the rubber weather boots that came with the headlight housings on the back. I also used a set of Amp to D2S adapters to connect to the McCulloch ballasts. They're still working, so I'll keep them.

Thread Starter
Senior Member
Posts like a Turbo
Joined: Feb 2006
Posts: 320
Likes: 0
From: Phelps, NY
Heh... I lucked out and had a nice flat bracket to mount my projectors to... there were already projectors in those housings. 
You should see some of the work that these guys do on www.hidplanet.com to get projectors into their reflector housings. Lots of dremel and JB weld work. Most of it is very impressive looking. Most looks factory.
You should see some of the work that these guys do on www.hidplanet.com to get projectors into their reflector housings. Lots of dremel and JB weld work. Most of it is very impressive looking. Most looks factory.

Thread
Thread Starter
Forum
Replies
Last Post