97SE Rattling Parcel Shelf ----SOLVED!


Thread Starter
Senior Member
Posts like a Camaro
Joined: Nov 2002
Posts: 857
Likes: 0

I had to bolt the rear seatbelts back in, and clipped the seat cushions back in place in order to be able to take my 8-month old son to daycare, but I didn't put the rear deck trim back in yet, and the seat back isn't bolted in yet, so I can get it all out quickly. In the meantime, my third brake light has no tar paper over it, and no rear deck trim, so it'* shining in the car at night when I hit the brakes. I'll replace the tar paper with a similar sized sheet of Dynamat when I put it all back together.


Thread Starter
Senior Member
Posts like a Camaro
Joined: Nov 2002
Posts: 857
Likes: 0
The lower cushion has no bolts, but the backrest has metal loops at the bottom that slip over the same bolt the seatbelts are on, so you have to remove the locknut to take out the backrest. I put the nut back on over the seatbelts, then slid the backrest metal loops over the bolt, so they rest on top of the locknut. This is just temporary, so I can get the seat back out quickly as I work on the rear deck this week. I'll put it back together correctly when I'm done. 
Thread Starter
Senior Member
Posts like a Camaro
Joined: Nov 2002
Posts: 857
Likes: 0
This just in: The buzzing/rattling sound that was annoying is most definitely coming from the rear shoulderbelt retractors on either side of the parcel shelf. I can sit in the back while a friend drives, and when they rattle I can press on them to silence them. This is a real pain, I don't know what I can do that will quiet them without possibly comprimising their function. Anyone else ever experience this? Ugh. I may never be rid of this problem!!!
Thread Starter
Senior Member
Posts like a Camaro
Joined: Nov 2002
Posts: 857
Likes: 0
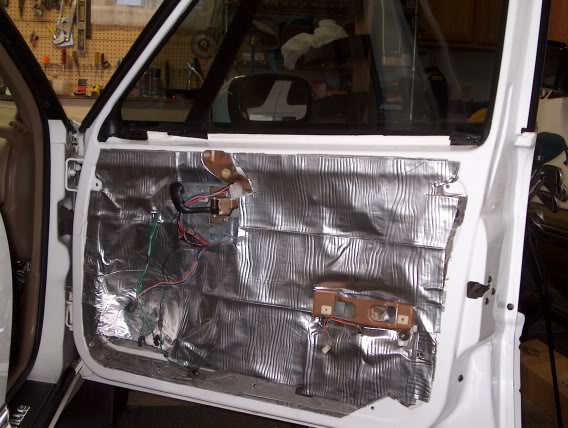
Okay, PROBLEM SOLVED. Near as I could tell, it might have been the seatbelt shoulderbelt retractors vibrating, or maybe the third brake light vibrating, or maybe the thin sheetmetal of the rear deck vibrating, or maybe the speakers vibrating from being mounted sloppily by being drywall-screwed into the underside of the rear deck. (In short, I don't know exactly what the $#%@ was vibrating, but I fixed it. Here'* how:
(1) Removed everything. Rear seats, rear decklid trim, seatbelts, 3rd brake light, tarpaper seals, speakers,
(2) Cleaned the rear decklid of tarpaper residue with mineral spirits.
(3) Made new seals using Peel-and-Seal to replace the factory tarpaper, not including the sheet over the 3rd brake light.
(4) Ran a strip of foam rubber around the 3rd brake light where it meets the rear window.
(5) Bought a pair of factory 6 x 9 speakers and mounting brackets from a junkyard. Tossed the facotry 6 x 9 speakers, cleaned up the brackets, installed new foam rubber gasket on the bottom of the brackets, traced larger elliptical opening on face of the brackets and used a Dremel tool to widen the brackets to fit my Boston Acoustics CX93 6x9 speakers. Fastened the plastic retaining ring on the face of the 6x9 speakers with polyurethane glue. Installed the speakers into the brackets with factory screws.
(6) Sealed the entire rear deck with Dynamat Extreme. Yeah baby!
(7) Installed the 6x9 speaker and bracket assemblies using stock factory clips.
( Encased all rear-deck wiring in split-loom tubing.
(9) Installed 3rd brake light assembly.
(10) replaced my 97 "back of the trunk" fiberboard piece with the nice plastic one that I snagged of the 94 in the junk yard. MUCH nicer!
(11) Cased all of the wires to the Alpine 4 channed amp in my trunk in split-loom tubing.
(12) Reassembled the seatbelts, rear deck trim, and rear seat.
Test drove: ZERO vibration, and much tighter, more precisely imaged sound from the rear 6x9 speakers.
STILL TO DO: I'm not going to put new tarpaper over the 3rd brake light. With Dynamat Extreme covering the rear deck, I just don't feel the need for more tarpaper. Tarpaper is just messy stuff. Instead, I'm going to blanket the 3rd brake light with a sheet of aluminized insulated sheeting. I'll tape it down or something. I just know I'm not going to use tarpaper.
When I do that, I'll take some pictures of it. I was just so busy today I didn't have time to snap any pictures.
I'm also going to get an active crossover to go in front of the amplifier to roll off the deep bass to the front speakers so they won't distort, and I may work out a way to add another amp and a sub somewhere in the trunk.
(1) Removed everything. Rear seats, rear decklid trim, seatbelts, 3rd brake light, tarpaper seals, speakers,
(2) Cleaned the rear decklid of tarpaper residue with mineral spirits.
(3) Made new seals using Peel-and-Seal to replace the factory tarpaper, not including the sheet over the 3rd brake light.
(4) Ran a strip of foam rubber around the 3rd brake light where it meets the rear window.
(5) Bought a pair of factory 6 x 9 speakers and mounting brackets from a junkyard. Tossed the facotry 6 x 9 speakers, cleaned up the brackets, installed new foam rubber gasket on the bottom of the brackets, traced larger elliptical opening on face of the brackets and used a Dremel tool to widen the brackets to fit my Boston Acoustics CX93 6x9 speakers. Fastened the plastic retaining ring on the face of the 6x9 speakers with polyurethane glue. Installed the speakers into the brackets with factory screws.
(6) Sealed the entire rear deck with Dynamat Extreme. Yeah baby!
(7) Installed the 6x9 speaker and bracket assemblies using stock factory clips.
(
(9) Installed 3rd brake light assembly.
(10) replaced my 97 "back of the trunk" fiberboard piece with the nice plastic one that I snagged of the 94 in the junk yard. MUCH nicer!
(11) Cased all of the wires to the Alpine 4 channed amp in my trunk in split-loom tubing.
(12) Reassembled the seatbelts, rear deck trim, and rear seat.
Test drove: ZERO vibration, and much tighter, more precisely imaged sound from the rear 6x9 speakers.
STILL TO DO: I'm not going to put new tarpaper over the 3rd brake light. With Dynamat Extreme covering the rear deck, I just don't feel the need for more tarpaper. Tarpaper is just messy stuff. Instead, I'm going to blanket the 3rd brake light with a sheet of aluminized insulated sheeting. I'll tape it down or something. I just know I'm not going to use tarpaper.
When I do that, I'll take some pictures of it. I was just so busy today I didn't have time to snap any pictures.
I'm also going to get an active crossover to go in front of the amplifier to roll off the deep bass to the front speakers so they won't distort, and I may work out a way to add another amp and a sub somewhere in the trunk.


Senior Member
True Car Nut
Joined: Mar 2004
Posts: 3,066
Likes: 10
From: Ames, Iowa
Originally Posted by Bugsi
Okay, PROBLEM SOLVED.
using Peel-and-Seal to replace the factory tarpaper,
Fastened the plastic retaining ring on the face of the 6x9 speakers with polyurethane glue.
using Peel-and-Seal to replace the factory tarpaper,
Fastened the plastic retaining ring on the face of the 6x9 speakers with polyurethane glue.
Can you elaborate on these two products - Peel-and Seal, and polyurethane glue? Sounds like it would be useful to have them in my arsenal of car stuff. Who makes it? Where do you get it? How much does it cost?
Thanks.

Senior Member
True Car Nut
Joined: Jun 2004
Posts: 6,182
Likes: 0
From: Rochester, NY (college)
Peel-and Seal: basicly a household insulation with a thin metal backing which is a cheap substite to actual sound deadening priducts. Many rave about good results, in the lower end audio forums. Home depot and lowes should carry it. FrostKing I belive is another of the same basic stuff.
and polyurethane glue, should be in the home depot glue section (normally near paints)
and polyurethane glue, should be in the home depot glue section (normally near paints)
Senior Member
True Car Nut
Joined: Mar 2004
Posts: 3,066
Likes: 10
From: Ames, Iowa
Originally Posted by corvettecrazy
Peel-and Seal: basicly a household insulation with a thin metal backing which is a cheap substite to actual sound deadening priducts. Many rave about good results, in the lower end audio forums. Home depot and lowes should carry it. FrostKing I belive is another of the same basic stuff.
and polyurethane glue, should be in the home depot glue section (normally near paints)
and polyurethane glue, should be in the home depot glue section (normally near paints)