
Frankenbonne Returns! - Pics for Kennginn


Senior Member
True Car Nut
Joined: Feb 2004
Posts: 2,708
Likes: 2
From: Western MA

Bud Light =  . And if you drink enough of 'em, they do the trick.
The good news about the added wiring is you really can't see it. That'* the whole idea. I haven't been posting many new pics as this is kinda the boring (but very necessary) part of the swap.
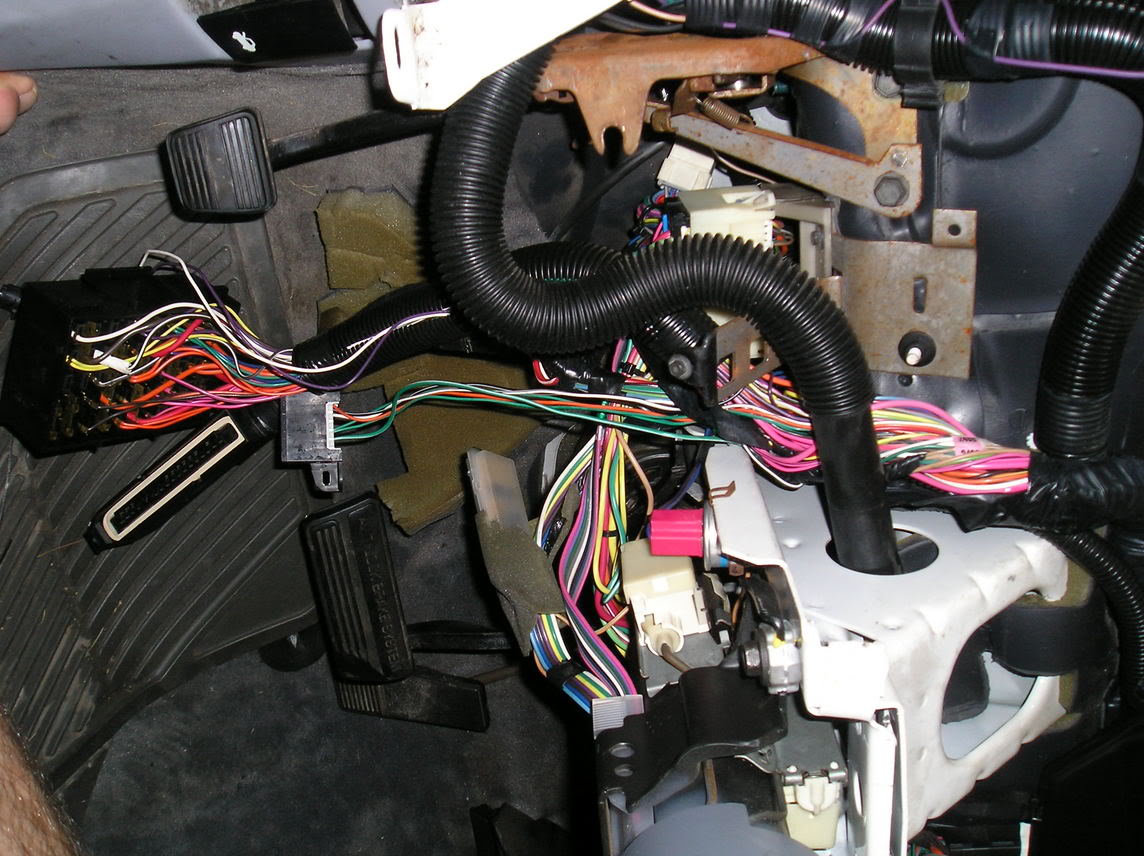
In this pic (driver'* underdash area), behind the *-shaped accordion tube, you can see the white connector. This is where the column wires go. Directly above that connector (appears above and to the right in the pic) is the former spot for the cruise module. The module was removed and the harness re-directed towards the firewall where it connects to several of the wires from the 97 cruise harness.
The remaining wires along with the AC compressor control relay wires and the crank wire travel to the passenger'* side encased in wire loom. This harness can be seen at the far left, above the steering column support in the above pic. It travels beside the factory wiring that is behind the defroster ducts.

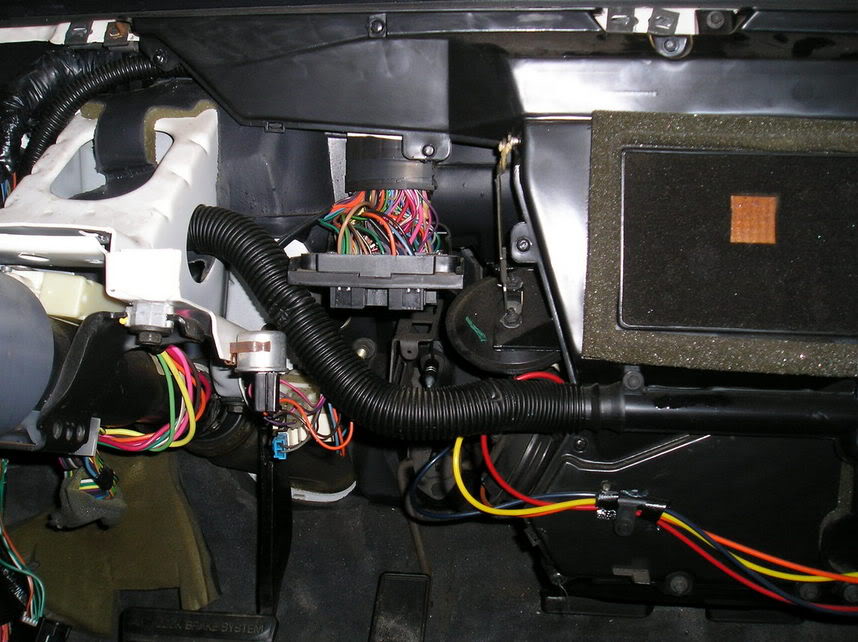
This pic reminds me of a big bowl of spaghetti just like Mama used to make. The black plastic thing on the floor directly under the drop light is the 97 engine harness connector/grommet. You might be able to make out a couple different groups of wires. Actually, there are 4 groups: 90 engine harness group, 90 ECM harness group, custom wired group and an unused group. You'll also notice that the 90 ECM connectors are still there. I did this to make connecting and troubleshooting (if necessary) much easier by still having a connector cavity reference. GM really likes GRN and GRN/WHI wires as there are a few of each. Since I removed the original ECM and mounting bracket, there is plenty of space for all of the stuff. You can also see the starter enable relay. It'* the gray one that'* leaning against the other relays in the relay center. This was necessary because of the different methods the two drivetrains use for park/neutral safety.
Only a few more to go. OBDII connector, fuel pump module, VATS interface and shift select switch. I plan on installing the motor this Saturday and at least fired up some time on Sunday. I still need a radiator, exhaust and charcoal canister though so hopefully I can round up those parts.
. And if you drink enough of 'em, they do the trick. The good news about the added wiring is you really can't see it. That'* the whole idea. I haven't been posting many new pics as this is kinda the boring (but very necessary) part of the swap.
In this pic (driver'* underdash area), behind the *-shaped accordion tube, you can see the white connector. This is where the column wires go. Directly above that connector (appears above and to the right in the pic) is the former spot for the cruise module. The module was removed and the harness re-directed towards the firewall where it connects to several of the wires from the 97 cruise harness.
The remaining wires along with the AC compressor control relay wires and the crank wire travel to the passenger'* side encased in wire loom. This harness can be seen at the far left, above the steering column support in the above pic. It travels beside the factory wiring that is behind the defroster ducts.
This pic reminds me of a big bowl of spaghetti just like Mama used to make. The black plastic thing on the floor directly under the drop light is the 97 engine harness connector/grommet. You might be able to make out a couple different groups of wires. Actually, there are 4 groups: 90 engine harness group, 90 ECM harness group, custom wired group and an unused group. You'll also notice that the 90 ECM connectors are still there. I did this to make connecting and troubleshooting (if necessary) much easier by still having a connector cavity reference. GM really likes GRN and GRN/WHI wires as there are a few of each. Since I removed the original ECM and mounting bracket, there is plenty of space for all of the stuff. You can also see the starter enable relay. It'* the gray one that'* leaning against the other relays in the relay center. This was necessary because of the different methods the two drivetrains use for park/neutral safety.
Only a few more to go. OBDII connector, fuel pump module, VATS interface and shift select switch. I plan on installing the motor this Saturday and at least fired up some time on Sunday. I still need a radiator, exhaust and charcoal canister though so hopefully I can round up those parts.

Thread Starter
DINOSAURUS BOOSTUS


Expert Gearhead
Joined: Mar 2005
Posts: 41,391
Likes: 30
From: Enfield, CT

G'morning all. While the night worker sleeps I've been busy. The valve cover gaskets needed doing so I headed out to the store.
Here'* the view from the stoplight at the end of my road. See the 2nd closest parts store?

Tried to get a coolant elbow at Napa, knowing Advance didn't have one. Here'* the view from Napa.

And the view in my mirror from Advance

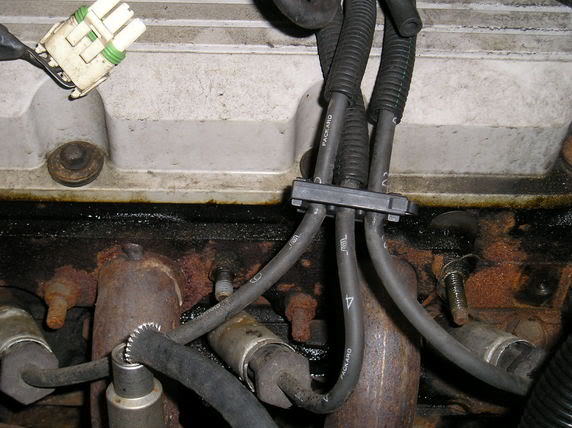
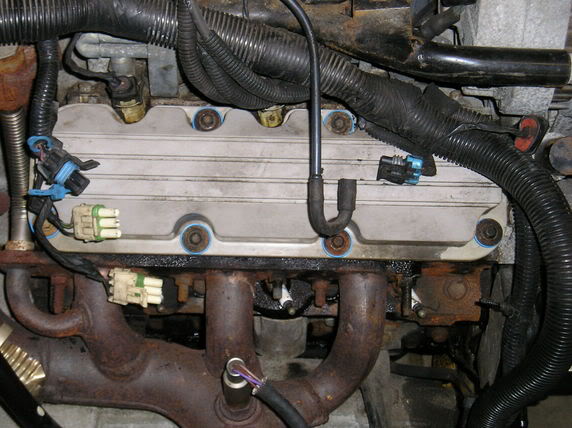
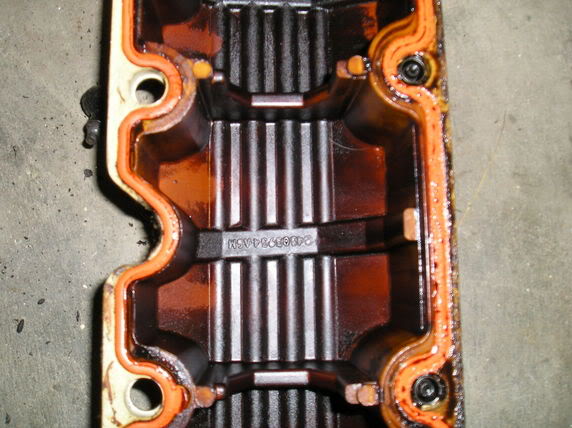
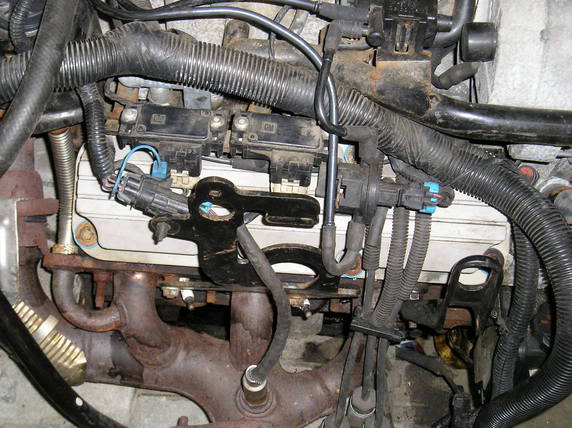
The back valve cover
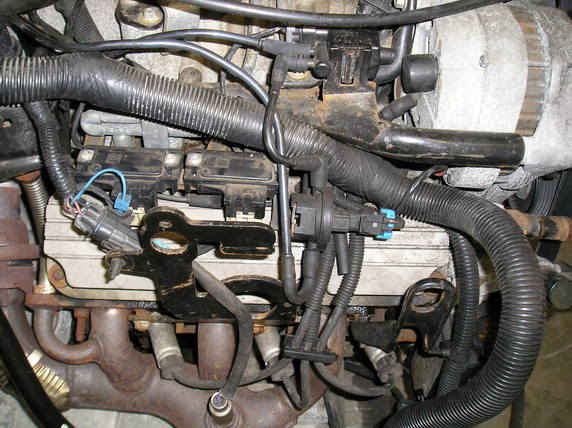
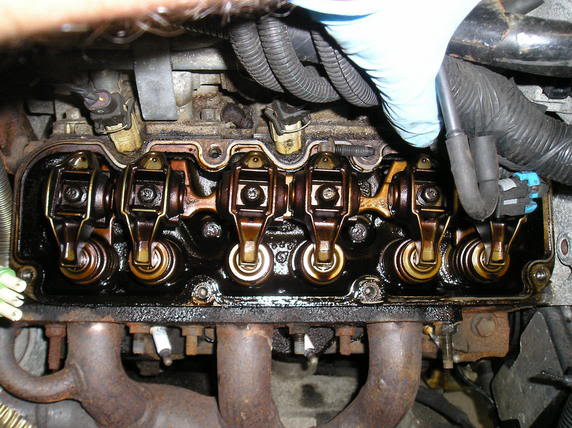
Here'* a good pic of the leak and the original spark plug wires
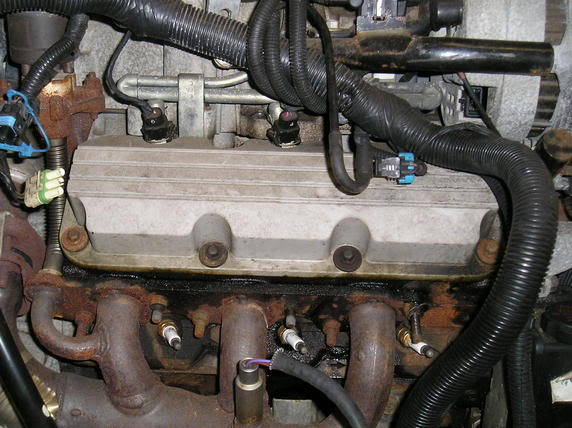
Back w/o map sensor
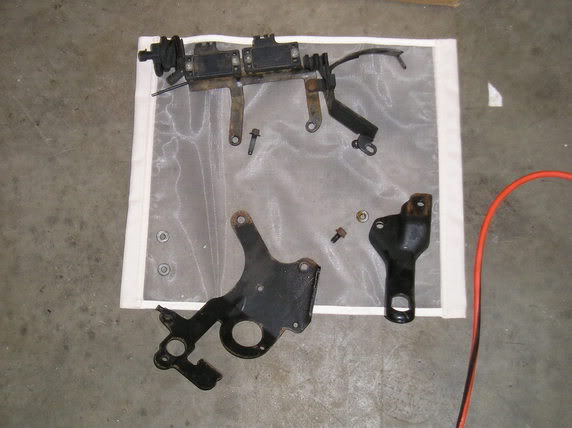
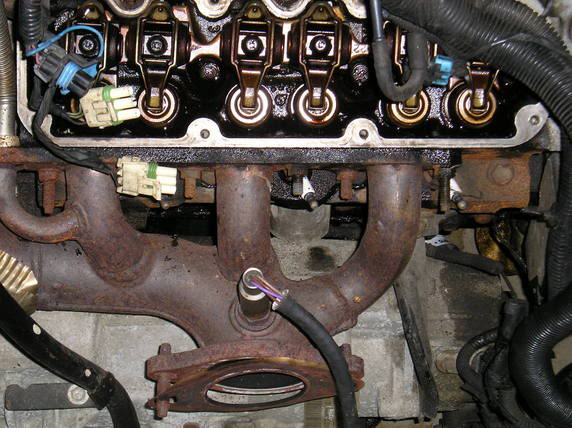
The parts that come off the back to get to the valve cover
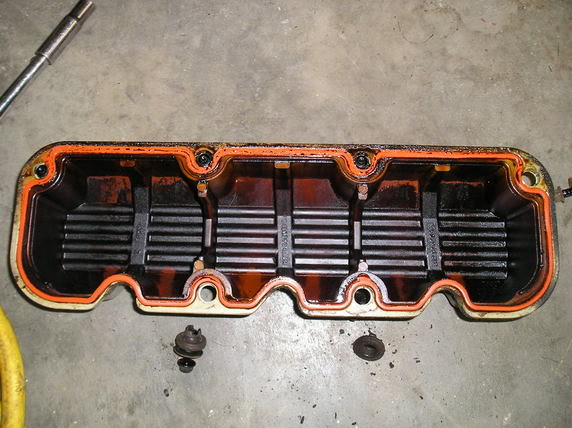
You can see the bottom edge of the gasket (top of first pic) was mashed flat
Back head..nice and clean inside
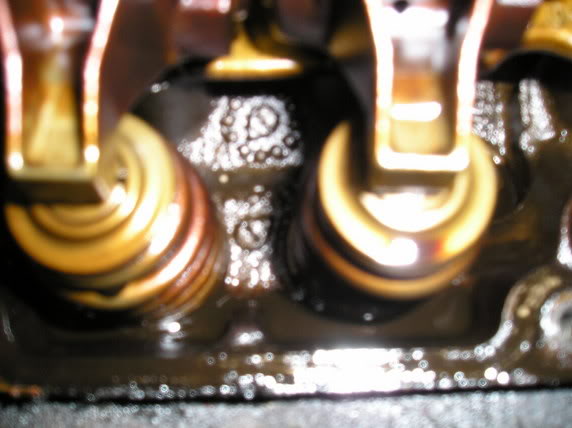
Cleaned head edge for seal
Rear complete
On to the front...
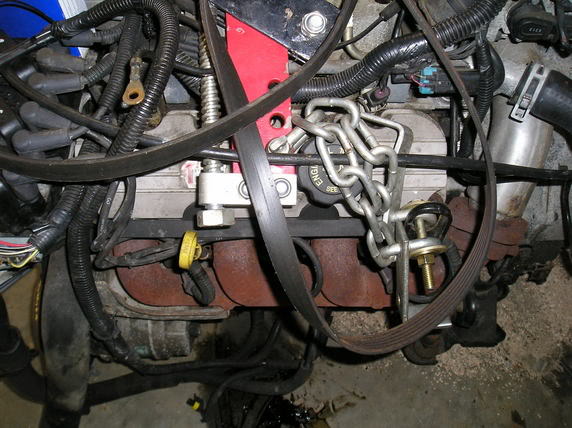
A nice surprise on the front cover...A different bolt

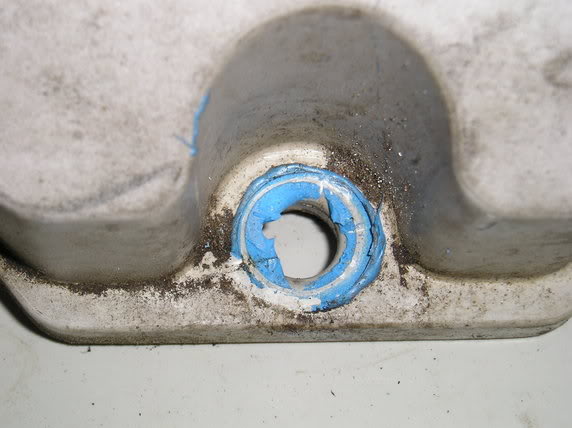
Same bolt hole...this is not the insert..it'* an RTV'd washer
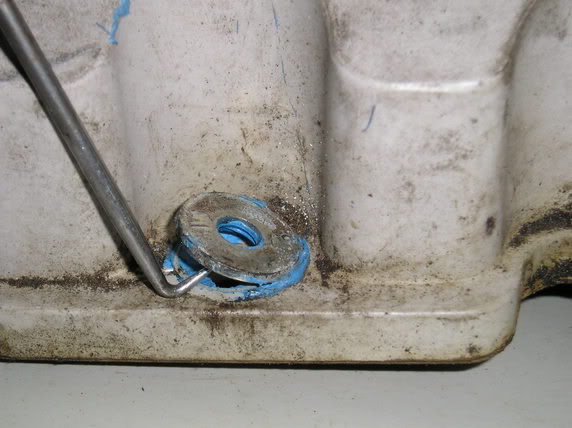
Oh...boy...I'm done

Now if Randy will just get outta bed, we'll have this in and running. Oh.. look close at the rear pic with the plug wires. I'm going to suggest to Randy we take the numbered wires off the motor. And maybe even the really old looking plugs that say ac delco.
Here'* the view from the stoplight at the end of my road. See the 2nd closest parts store?
Tried to get a coolant elbow at Napa, knowing Advance didn't have one. Here'* the view from Napa.
And the view in my mirror from Advance
The back valve cover
Here'* a good pic of the leak and the original spark plug wires
Back w/o map sensor
The parts that come off the back to get to the valve cover
You can see the bottom edge of the gasket (top of first pic) was mashed flat
Back head..nice and clean inside
Cleaned head edge for seal
Rear complete
On to the front...
A nice surprise on the front cover...A different bolt
Same bolt hole...this is not the insert..it'* an RTV'd washer
Oh...boy...I'm done
Now if Randy will just get outta bed, we'll have this in and running. Oh.. look close at the rear pic with the plug wires. I'm going to suggest to Randy we take the numbered wires off the motor. And maybe even the really old looking plugs that say ac delco.

Senior Member
True Car Nut
Joined: Feb 2004
Posts: 2,708
Likes: 2
From: Western MA
You are the BEST! I'm out of bed but certainly not awake yet. Does NAPA have the Belden wires and Autolite copper core plugs? If I'm not mistaken, wires for a 94ish are of the 8mm flavor but the application for 97 is 7mm. In America, bigger is better.
I'm jumpin' in the rain locker right now and going to have a couple of breakfast beers so I'll see ya in a little while.
Thanks a bunch,
Sleeping Beauty
I'm jumpin' in the rain locker right now and going to have a couple of breakfast beers so I'll see ya in a little while.
Thanks a bunch,
Sleeping Beauty
Thread Starter
DINOSAURUS BOOSTUS
Expert Gearhead
Joined: Mar 2005
Posts: 41,391
Likes: 30
From: Enfield, CT
Better yet...they have the AC Delco wires. AC took care of you for over 100K ... they are built well 
Now stop stalling and get your lazy butt down here. I'm heading out to lunch..
Now stop stalling and get your lazy butt down here. I'm heading out to lunch..

