
Porting LIM on L27

Thread Starter
Senior Member
True Car Nut
Joined: Jun 2007
Posts: 2,478
Likes: 0
From: New Lenox, IL

I'm missing something here...
And what could I even do about my exhaust manifolds? Can those even be taken off without pulling the engine? I've seen people porting those as well, but I'm really not sure...
Retired Senior Admin


Expert Gearhead
Joined: May 2006
Posts: 29,661
Likes: 43
From: Sheboygan Wisconsin

Ya, I've pulled mine 3 times. You can port them, but you would need to do some welding. Your best bet is powerlogs ZZ Performance You really only need the front. The back is a good manifold.
Thread Starter
Senior Member
True Car Nut
Joined: Jun 2007
Posts: 2,478
Likes: 0
From: New Lenox, IL
Ya, I've pulled mine 3 times. You can port them, but you would need to do some welding. Your best bet is powerlogs ZZ Performance You really only need the front. The back is a good manifold.
How far can I port it before i run into issues? At the least, I can smooth the lip.
Crap, now I need exhaust manifold gaskets too don't I? And that means I need to spend the time to get the old ones off.
Last edited by xtremerevolution; Oct 29, 2008 at 06:58 PM.
Thread Starter
Senior Member
True Car Nut
Joined: Jun 2007
Posts: 2,478
Likes: 0
From: New Lenox, IL
Thread Starter
Senior Member
True Car Nut
Joined: Jun 2007
Posts: 2,478
Likes: 0
From: New Lenox, IL
Thread Starter
Senior Member
True Car Nut
Joined: Jun 2007
Posts: 2,478
Likes: 0
From: New Lenox, IL
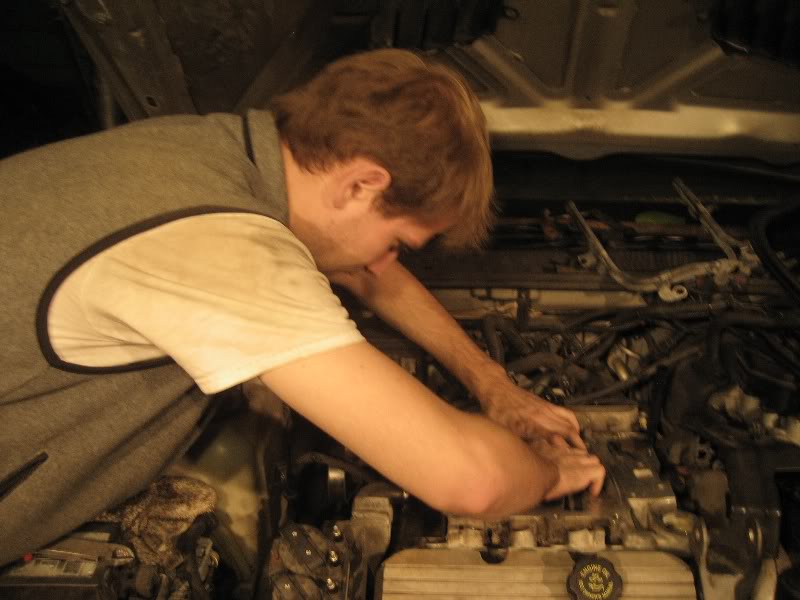
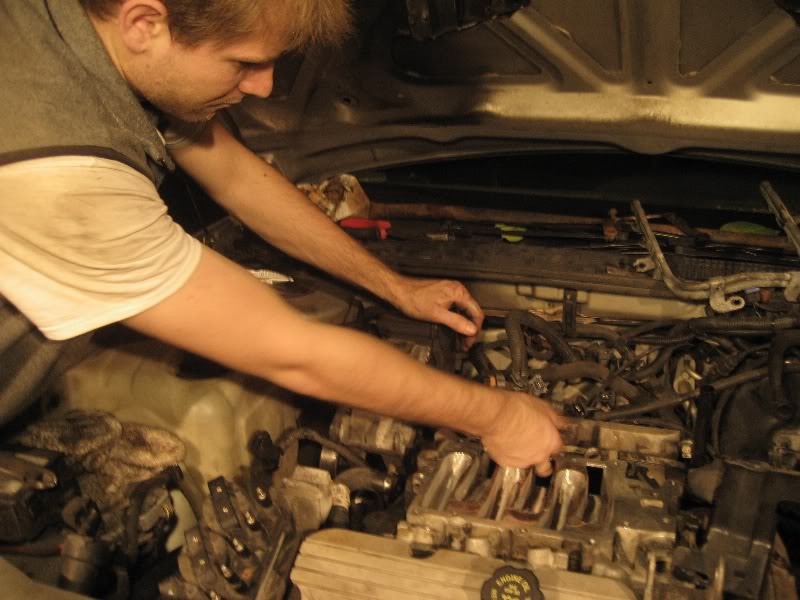
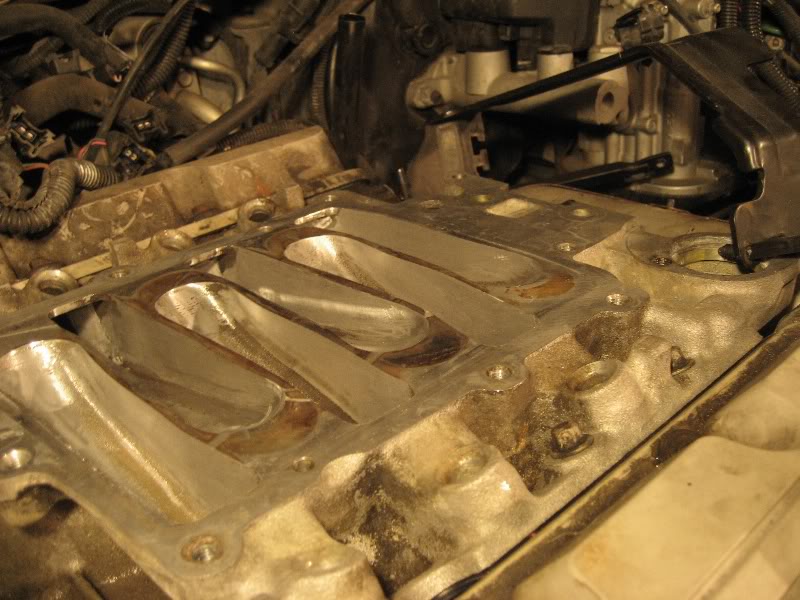
Alright, the job is done! When I finished I must have had a good 3-4 cups of aluminum shavings left over.
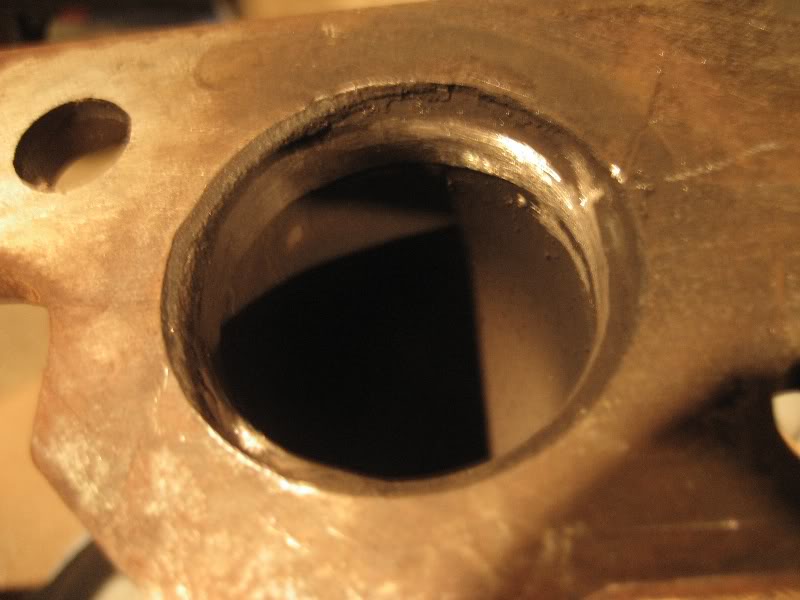
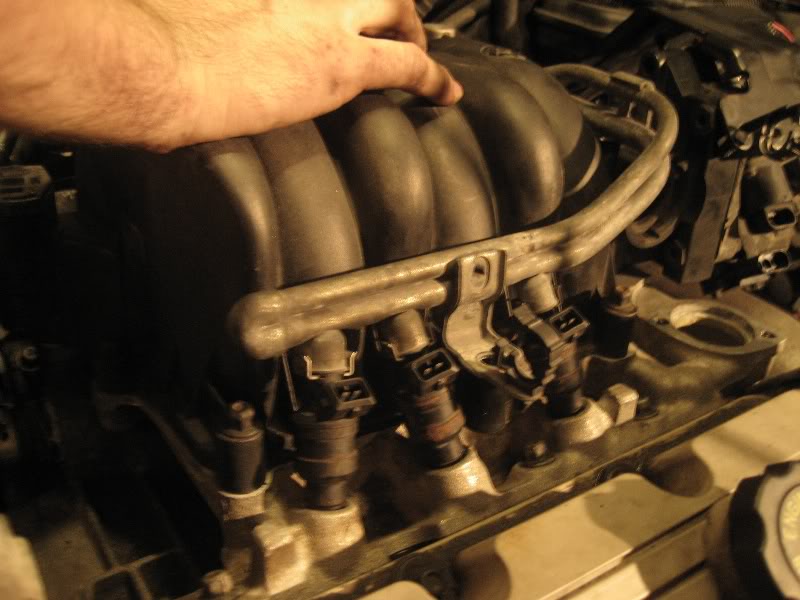
This job was especially easy, as I was able to put the manifold back on the car continuously to check if the holes line up. Not only can you see right through the head ports when the manifold is on, but you can feel the edges with your finger so you know where you still have some room for porting. This allowed me to get extremely close to the size of the head ports. All in all I measured just a hair smaller in length and width than the heads.
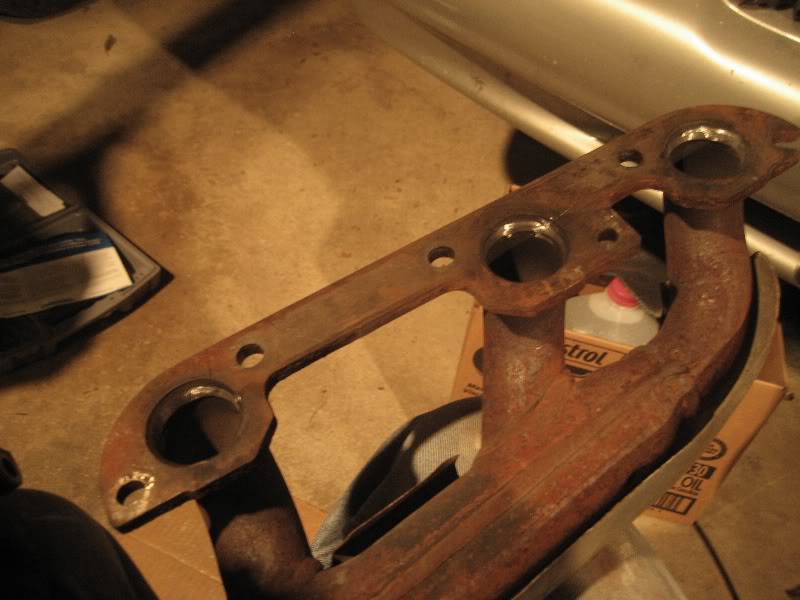
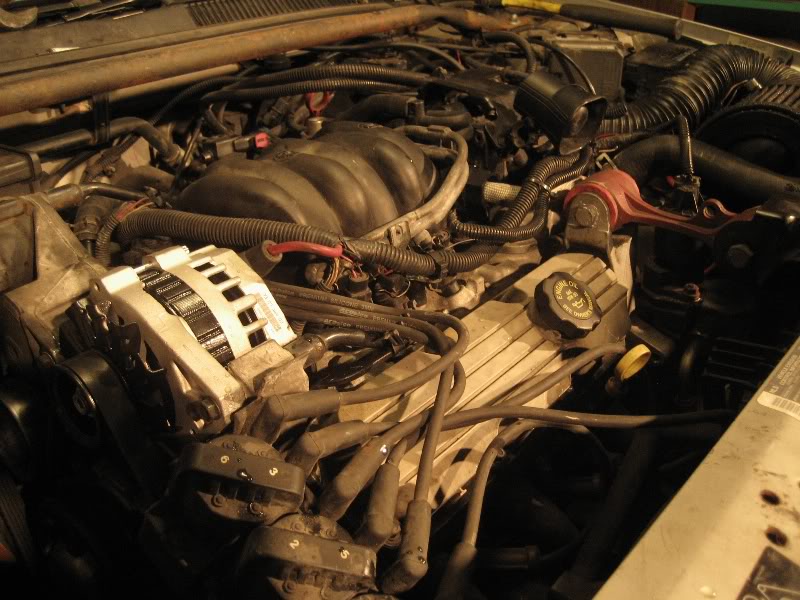
I also pulled the front exhaust manifold, and took off about 1/8" from each of the holes using a grinding stone on a dremel. Once I put the car back together completely, it fired right up and sounded perfect. No leaks, knocks, or any unusual behavior. It was quite satisfying having everything perfect when you put it back together. I also used anti-seize lubricant on all of the bolts I put back on except for the LIM bolts when putting it back together.
The first thing I noticed is that it revved a lot more freely than before, which was a pretty good sign. My first few WOT runs showed much better mid and top end performance, which counts a lot because the L27 doesn't have much of a top end. I suppose I still need to wait for the computer to get used to the new airflow, but so far its been a pretty good improvement in performance.
One thing to note is that the car has 188,200 miles on it now. Given that, the LIM gaskets were in amazing condition. Definitely a LOT better than the ones on my girlfriend'* sister'* L36-powered Regal at 110,000 miles. By that wear rate, it looked as though I could easily have gotten another 50,000 miles out of them (if not even more) before running into any issues at all.
One strange thing I noticed is that I ended up with one extra bolt that looks completely different from all of the others, and that the front exhaust manifold didn't have a gasket when I took it off. It was just bare metal on metal straight to the heads. Pretty weird if you ask me, but I did put a gasket there when I put it back together.
However, this job wasn't without failures. First off, I dropped two of my injectors on the ground and the plastic tips broke. Oops? So far as i can tell, their only purpose was to keep the o-rings from falling into the manifold. So I bought some solid retaining rings that fit very well along the same groove that the plastic tips were held onto and snapped those on, and they just BARELY cleared the injector ports on the manifold. No problems yet **crosses fingers**. Also, the metal pipe that runs the coolant to the heater core had a small o-ring on the manifold side, and i had taken that piece off when I soaked the manifold in gasoline and left it in the gasoline on accident. Well, that o-ring expanded to all hell and I couldn't use it anymore. Yeah...good luck finding another. After some doing, I found a similar sized o-ring that was a lot thicker, and used my dremel with a sanding piece to file it down to where it would fit. Another thing that went wrong was the alternator. I somehow managed to unscrew the bolt right out of the alternator, and the nut on the other side got loose. So i figured what the hell, I'll just take apart the alternator an it will be just fine. Stupid me, right? Long story short, all 3 bolts that hold the alternator together broke off, and when I tried to pry it apart, the alternator seized up. $100 "uh oh." Luckily, it was my birthday on the 28th and my mom told me to charge the new alternator on her card. I figure it was bound to go sooner or later though, since I replaced it at 80k the first time, and have used it for 100,000 miles. I also ripped the terminal for the alternator in the process, so I bought a couple of 2 AWG copper terminals and crimped one to all hell to replace it. The last idiotic thing was that I burned out my dremel while sanding the LIM vanes with a flapwheel. It basically started sparking up blue-green bright as hell inside, followed by a ton of smoke. There'* another $50. Luckily, its under the 5 year warranty so I can get it replaced. It was giving me issues before that though.
This is what I replaced:
LIM gaskets
UIM gasket
Thermostat housing gasket
Thermostat seal
Injector o-rings (all 12 of them)
Front exhaust manifold gasket
The last thing that needs to be done is to have the MAF sensor cleaned. Same old story; cotton swabs, alcohol, and a steady hand.
I'll upload pictures when I get home from work tonight.
Things to note for anyone planning to do this job in the future:
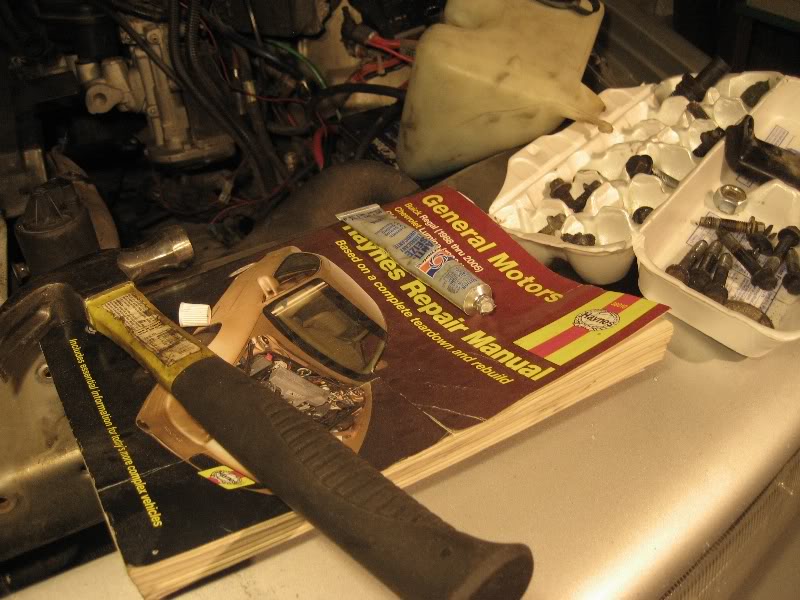
Make sure you have tools, and I mean good ones, with adapters and extensions to all hell. You'll need a good torque wrench and plenty of standard wrenches of all sizes. Most common you'll need is a 10, 13, 14, and 15 size wrench. Make sure you also have deep sockets, as you'll need some of those too. I didn't have deep a 14mm socket for the exhaust manifold bolts, and had to unscrew them with a standard wrench, which took forever, and it hurt. I cut them down to size before putting them back in so I could use a socket instead. Also, make sure to put back the LIM-TB bracket before putting the UIM back on, because its a bitch to do it afterward. Grab some egg cartons to arrange your bolts. Also, you'll need some GM quick-release tools for getting the fuel rails off. I didn't have them and it made the job a bit annoying, so I just set the rails aside without removing them, but those tools would have made the job a bit easier. Note that the LIM bolts are tightened to 11 ft-lbs, and the UIM bolts are tightened to 7 ft-lbs (correct me if I'm wrong on that one). Buy a tube of anti-seize lubricant. It will make putting the engine back together a lot easier. Lastly, if you haven't yet replaced the pot metal fitting screwed into the LIM that the hose from the water pump goes into, do that during this job, because trust me, it will crack eventually and when it does you'll need to be towed home. The replacement is a steel fitting.
I'll post all the pictures from the project later tonight.
This job was especially easy, as I was able to put the manifold back on the car continuously to check if the holes line up. Not only can you see right through the head ports when the manifold is on, but you can feel the edges with your finger so you know where you still have some room for porting. This allowed me to get extremely close to the size of the head ports. All in all I measured just a hair smaller in length and width than the heads.
I also pulled the front exhaust manifold, and took off about 1/8" from each of the holes using a grinding stone on a dremel. Once I put the car back together completely, it fired right up and sounded perfect. No leaks, knocks, or any unusual behavior. It was quite satisfying having everything perfect when you put it back together. I also used anti-seize lubricant on all of the bolts I put back on except for the LIM bolts when putting it back together.
The first thing I noticed is that it revved a lot more freely than before, which was a pretty good sign. My first few WOT runs showed much better mid and top end performance, which counts a lot because the L27 doesn't have much of a top end. I suppose I still need to wait for the computer to get used to the new airflow, but so far its been a pretty good improvement in performance.
One thing to note is that the car has 188,200 miles on it now. Given that, the LIM gaskets were in amazing condition. Definitely a LOT better than the ones on my girlfriend'* sister'* L36-powered Regal at 110,000 miles. By that wear rate, it looked as though I could easily have gotten another 50,000 miles out of them (if not even more) before running into any issues at all.
One strange thing I noticed is that I ended up with one extra bolt that looks completely different from all of the others, and that the front exhaust manifold didn't have a gasket when I took it off. It was just bare metal on metal straight to the heads. Pretty weird if you ask me, but I did put a gasket there when I put it back together.
However, this job wasn't without failures. First off, I dropped two of my injectors on the ground and the plastic tips broke. Oops? So far as i can tell, their only purpose was to keep the o-rings from falling into the manifold. So I bought some solid retaining rings that fit very well along the same groove that the plastic tips were held onto and snapped those on, and they just BARELY cleared the injector ports on the manifold. No problems yet **crosses fingers**. Also, the metal pipe that runs the coolant to the heater core had a small o-ring on the manifold side, and i had taken that piece off when I soaked the manifold in gasoline and left it in the gasoline on accident. Well, that o-ring expanded to all hell and I couldn't use it anymore. Yeah...good luck finding another. After some doing, I found a similar sized o-ring that was a lot thicker, and used my dremel with a sanding piece to file it down to where it would fit. Another thing that went wrong was the alternator. I somehow managed to unscrew the bolt right out of the alternator, and the nut on the other side got loose. So i figured what the hell, I'll just take apart the alternator an it will be just fine. Stupid me, right? Long story short, all 3 bolts that hold the alternator together broke off, and when I tried to pry it apart, the alternator seized up. $100 "uh oh." Luckily, it was my birthday on the 28th and my mom told me to charge the new alternator on her card. I figure it was bound to go sooner or later though, since I replaced it at 80k the first time, and have used it for 100,000 miles. I also ripped the terminal for the alternator in the process, so I bought a couple of 2 AWG copper terminals and crimped one to all hell to replace it. The last idiotic thing was that I burned out my dremel while sanding the LIM vanes with a flapwheel. It basically started sparking up blue-green bright as hell inside, followed by a ton of smoke. There'* another $50. Luckily, its under the 5 year warranty so I can get it replaced. It was giving me issues before that though.
This is what I replaced:
LIM gaskets
UIM gasket
Thermostat housing gasket
Thermostat seal
Injector o-rings (all 12 of them)
Front exhaust manifold gasket
The last thing that needs to be done is to have the MAF sensor cleaned. Same old story; cotton swabs, alcohol, and a steady hand.
I'll upload pictures when I get home from work tonight.
Things to note for anyone planning to do this job in the future:
Make sure you have tools, and I mean good ones, with adapters and extensions to all hell. You'll need a good torque wrench and plenty of standard wrenches of all sizes. Most common you'll need is a 10, 13, 14, and 15 size wrench. Make sure you also have deep sockets, as you'll need some of those too. I didn't have deep a 14mm socket for the exhaust manifold bolts, and had to unscrew them with a standard wrench, which took forever, and it hurt. I cut them down to size before putting them back in so I could use a socket instead. Also, make sure to put back the LIM-TB bracket before putting the UIM back on, because its a bitch to do it afterward. Grab some egg cartons to arrange your bolts. Also, you'll need some GM quick-release tools for getting the fuel rails off. I didn't have them and it made the job a bit annoying, so I just set the rails aside without removing them, but those tools would have made the job a bit easier. Note that the LIM bolts are tightened to 11 ft-lbs, and the UIM bolts are tightened to 7 ft-lbs (correct me if I'm wrong on that one). Buy a tube of anti-seize lubricant. It will make putting the engine back together a lot easier. Lastly, if you haven't yet replaced the pot metal fitting screwed into the LIM that the hose from the water pump goes into, do that during this job, because trust me, it will crack eventually and when it does you'll need to be towed home. The replacement is a steel fitting.
I'll post all the pictures from the project later tonight.
Last edited by xtremerevolution; Nov 3, 2008 at 10:24 AM.
Thread Starter
Senior Member
True Car Nut
Joined: Jun 2007
Posts: 2,478
Likes: 0
From: New Lenox, IL
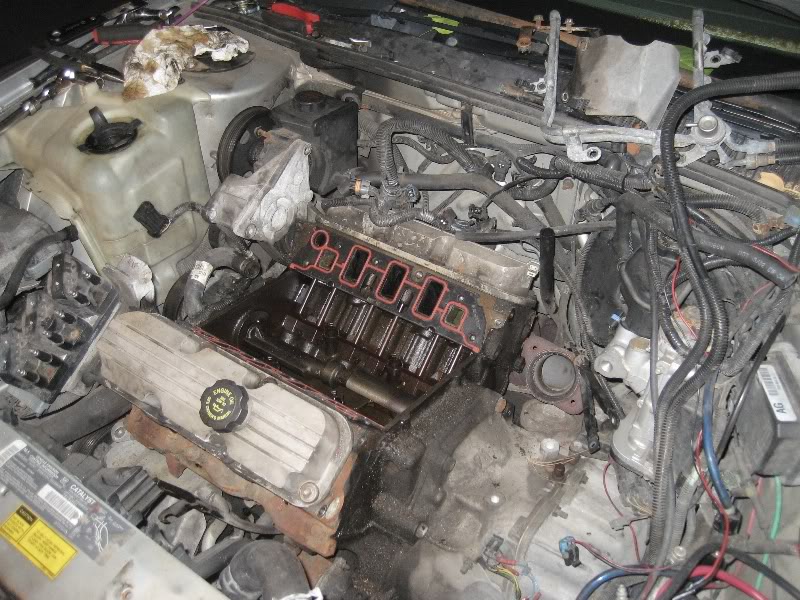
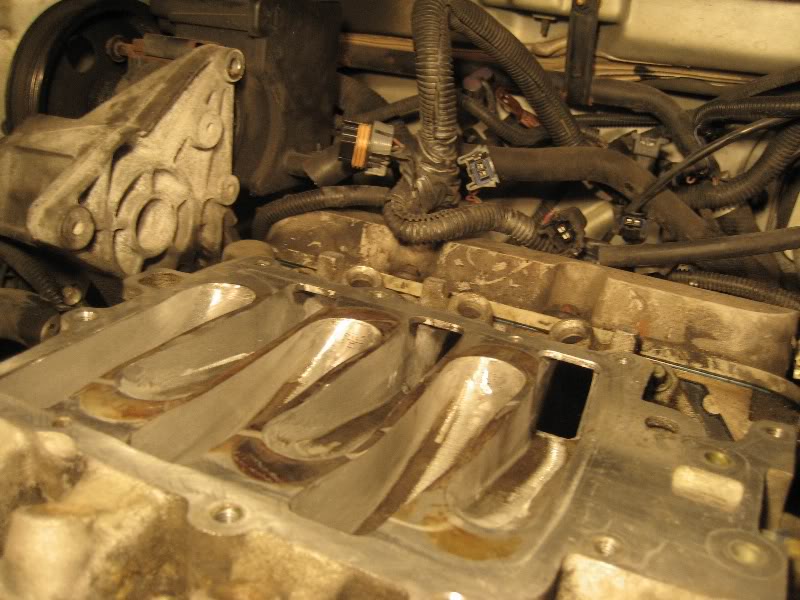
Alright people, I finally have some photos!!!
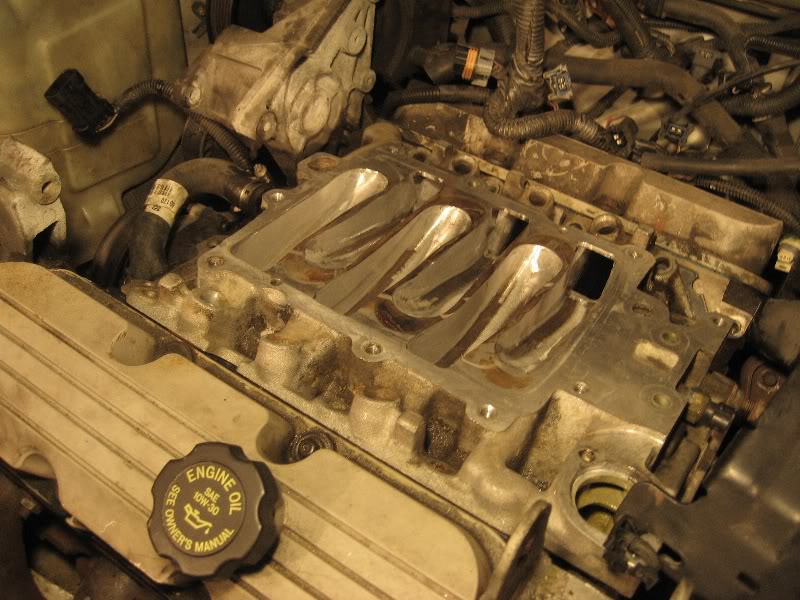
Unfortunately, I was too lazy to take before shots of the LIM, but as you can see there was a very extensive amount of porting to do. I definitely took off at least 1/8" length and width off of each port and they were *still* slightly smaller than the head ports. I also took about 1/8" off the exhaust manifold ports.
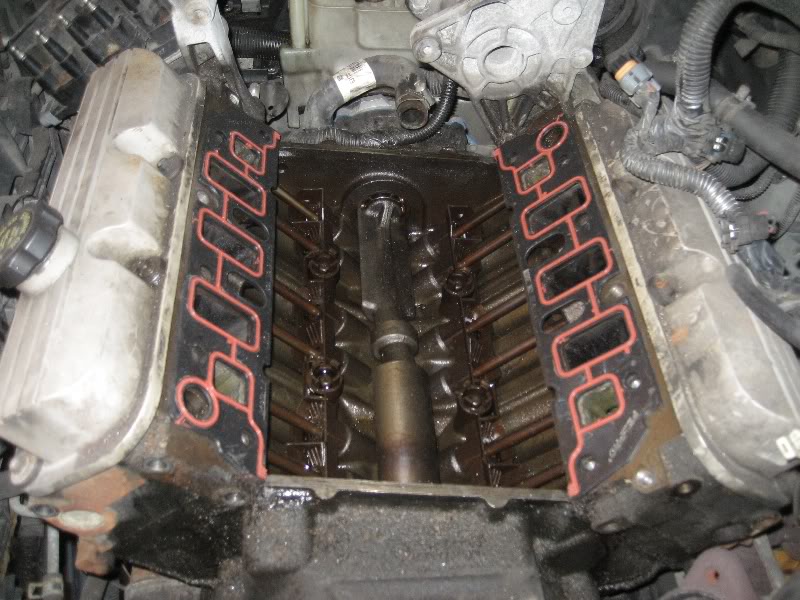
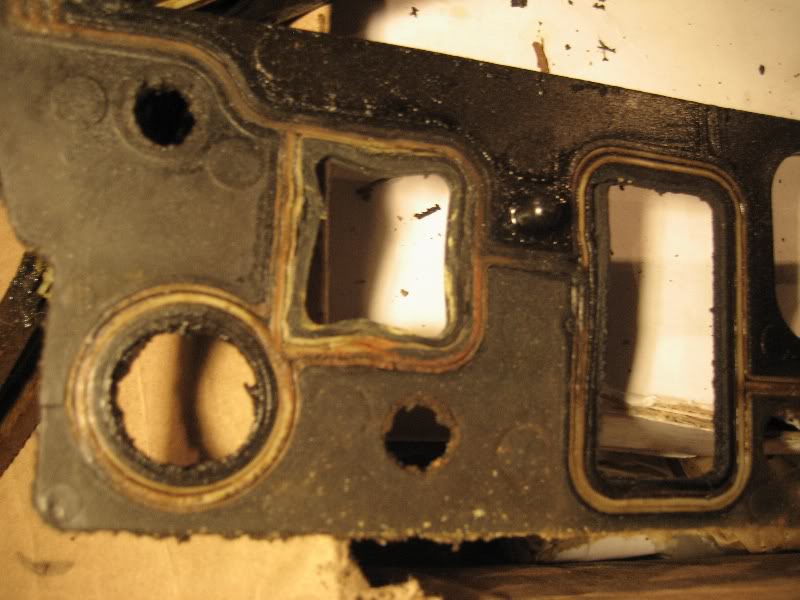
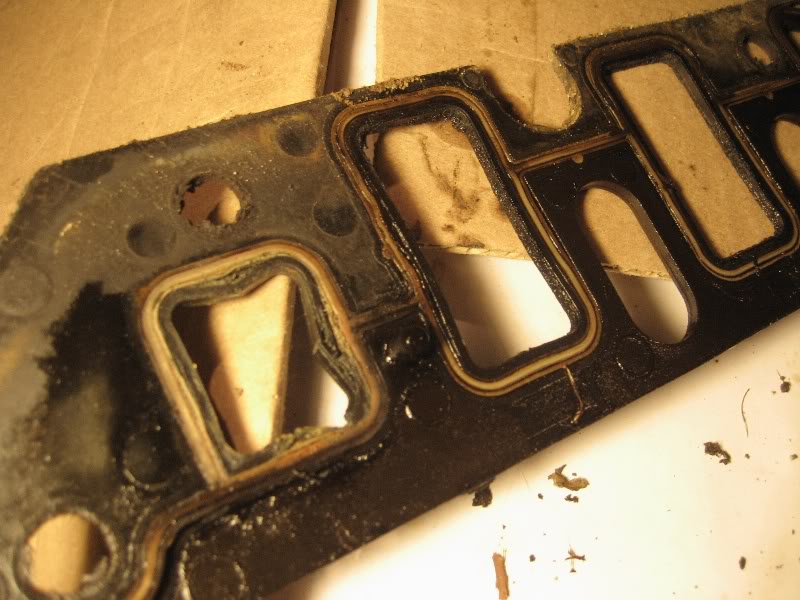
Old gaskets: not bad for 188,000 miles eh?


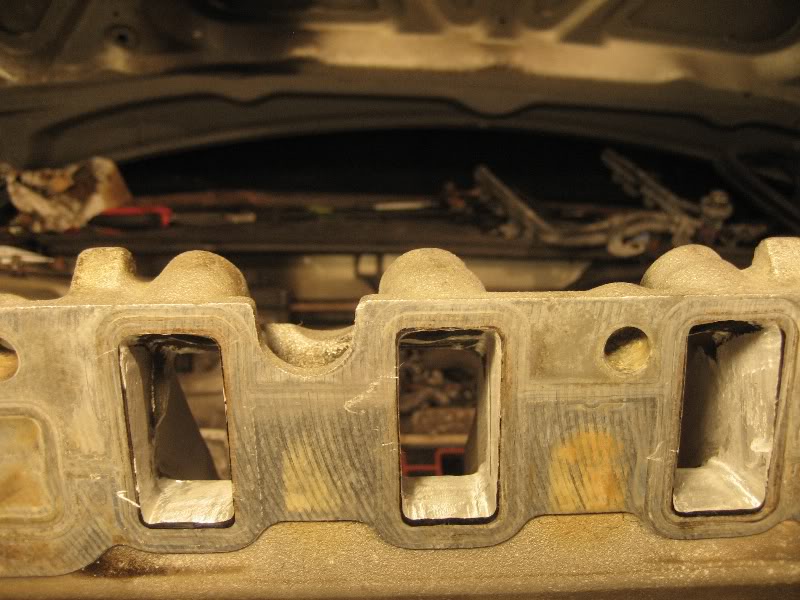
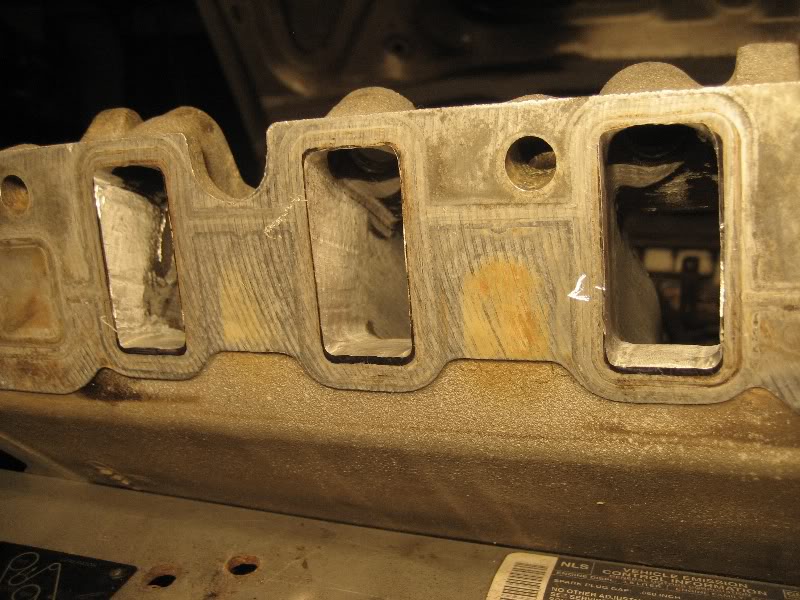


Unfortunately, I was too lazy to take before shots of the LIM, but as you can see there was a very extensive amount of porting to do. I definitely took off at least 1/8" length and width off of each port and they were *still* slightly smaller than the head ports. I also took about 1/8" off the exhaust manifold ports.
Old gaskets: not bad for 188,000 miles eh?

Thread
Thread Starter
Forum
Replies
Last Post
xtremerevolution
Performance, Brainstorming & Tuning
4
Nov 6, 2008 01:23 PM
Speedster400
Performance, Brainstorming & Tuning
6
Nov 7, 2007 09:51 AM
Marik_bathory
Performance, Brainstorming & Tuning
6
Mar 28, 2007 07:59 PM
agrazela
Performance, Brainstorming & Tuning
20
Feb 2, 2007 01:04 PM
BillBoost37
General GM Chat
27
Sep 18, 2006 08:06 PM