
Changing LIM gasket

Thread Starter
Retired Senior Admin


Expert Gearhead
Joined: May 2006
Posts: 29,661
Likes: 43
From: Sheboygan Wisconsin


Time to replace your LIM gaskets? Things that tell you it'* time is coolant pooling up on to of the engine, or coolant in the oil. You need to get this taken care of right away. This can damage the engine.
Tools to have on hand. 13mm socket, 10mm socket, 3/8" socket, 13mm wrench, 10mm wrench, 8mm wrench, scraper to clean gasket surfaces.
Make sure you pull your negative battery cable with a 8mm wrench. Also, cover your fenders to protect them from scratches.
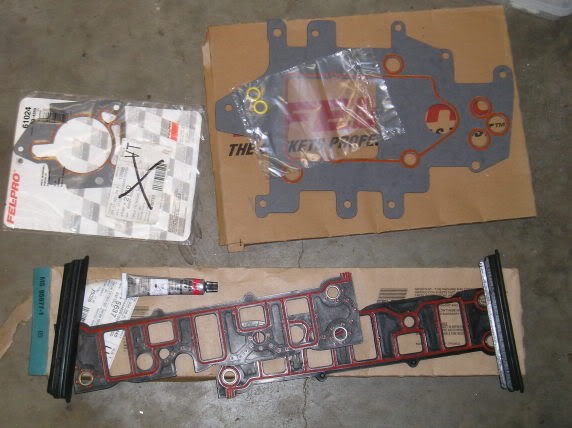
Here is a picture of the common gaskets for the job on the SC'd motor. The LIM gaskets shown are black, the latest version by GM are aluminum in color.
Drain the coolant from the system.
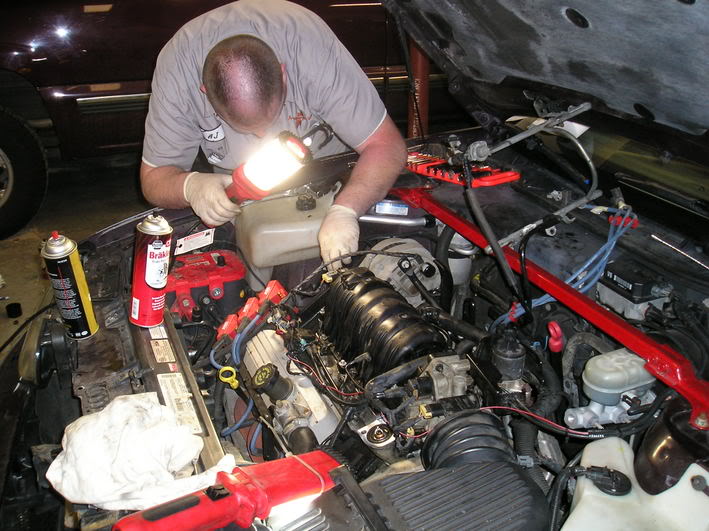
With a 13mm socket you will want to remove the 2 nuts on each side holding this strut tower bar in place. Then remove it and set off to the side out of your way. This will help give you some more room to work.

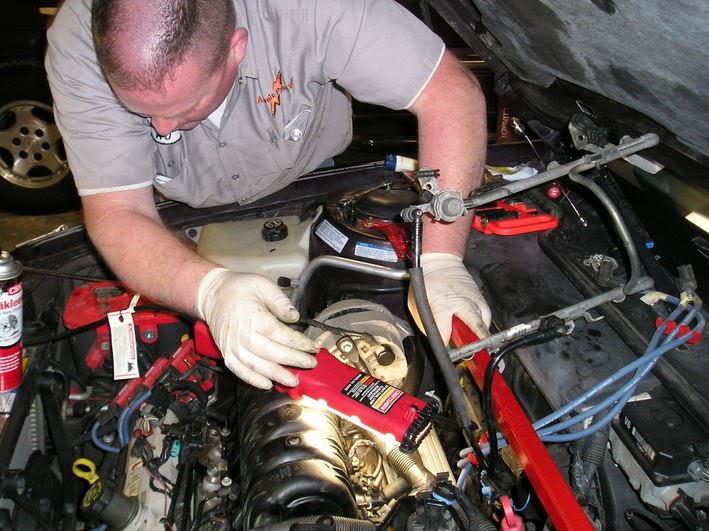
Now remove the 10mm nuts holding the fuel rail in place and move that off to the side. The injectors will usually stay attached to the rail.
Then disconnect all vac lines, wires, and cables on your supercharger or UIM.
After you have disconnected all sensor wires and throttle cables, remove the 8mm bolt holding the bracket on the front side of the throttle body. Gently pry that bracket forward as you will probably not be able to loosen the other 8mm bolt on the LIM to remove the bracket. Then remove the three 10mm nuts holding the throttle body and remove the TB from the engine bay.
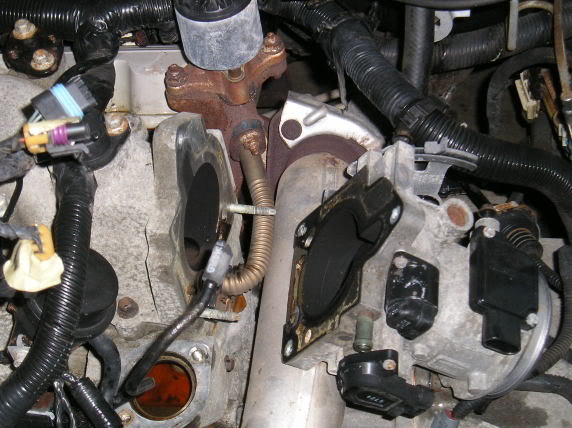
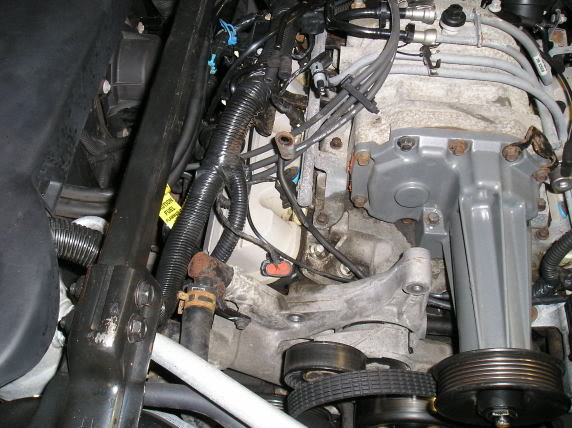
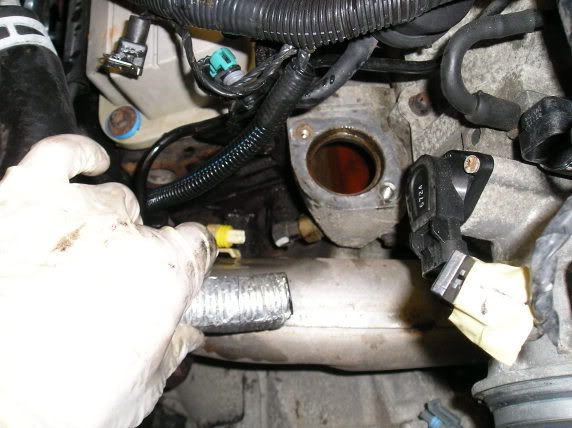
Then disconnect your EGR tube shown here with the throttle body out of the way. The suggested method is to remove the 13mm bolt at the lower intake manifold and the 13mm nut at the EGR to remove the entire tube. Bending the tube frequently leads to a crack in it.

You will need to move the supercharger belt out of the way if you have a supercharger. Removing the alternator is suggested (13mm and 10mm)
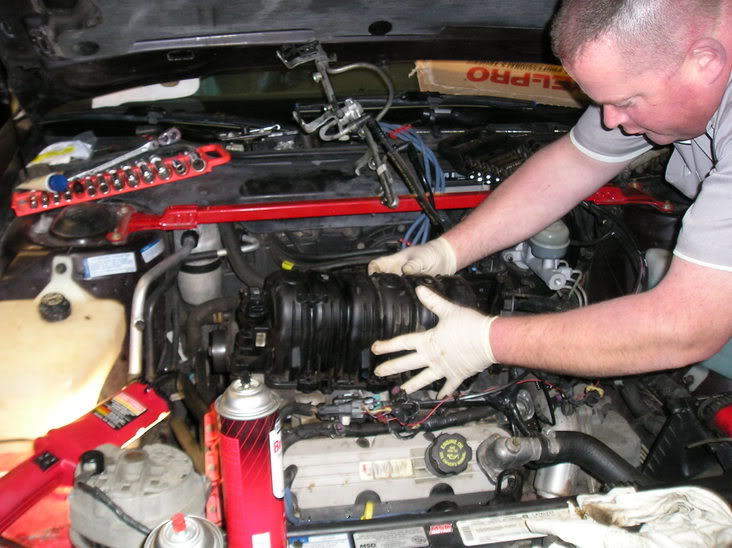
Remove all bolts holding down the supercharger or UIM (10mm)
And then remove.
Disconnect your thermostat housing and move off to the side. This is optional and can be done on or off the engine. Thermostat is not always needed.
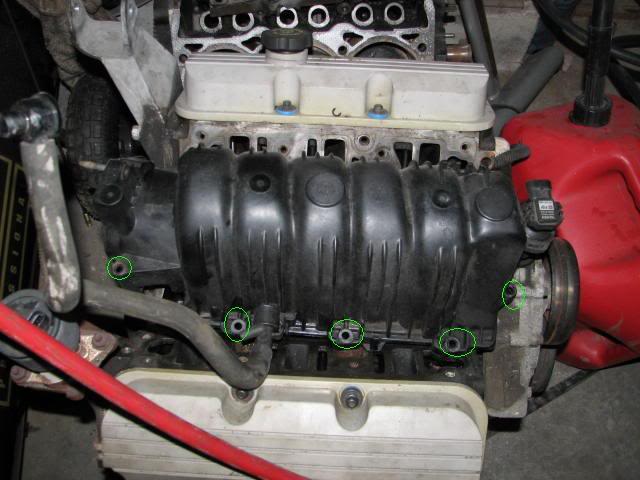
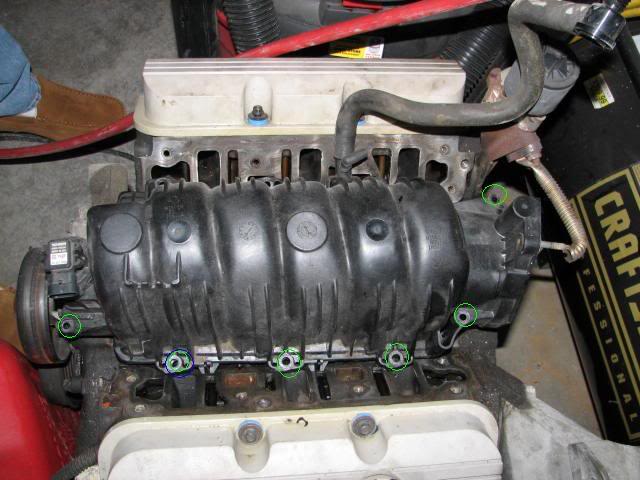
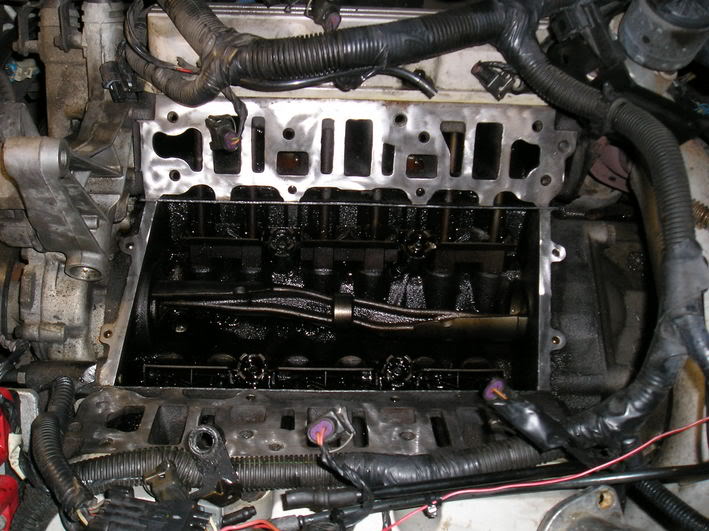
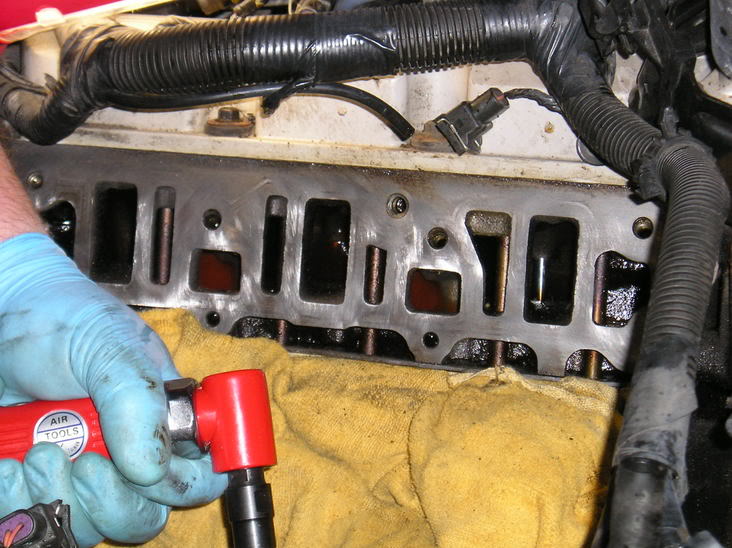
Then remove the 12 3/8" bolts holding the LIM to the engine. The LIM is shown here with the UIM removed. Make sure you have all the bolts. On the NA or L36 motor two of them are down inside the LIM manifold and hard to find as they are frequently under a little pool of oil. Note the socket placement in the second picture, this is the location of the front bolt, the rear is passenger side rear inside the manifold.


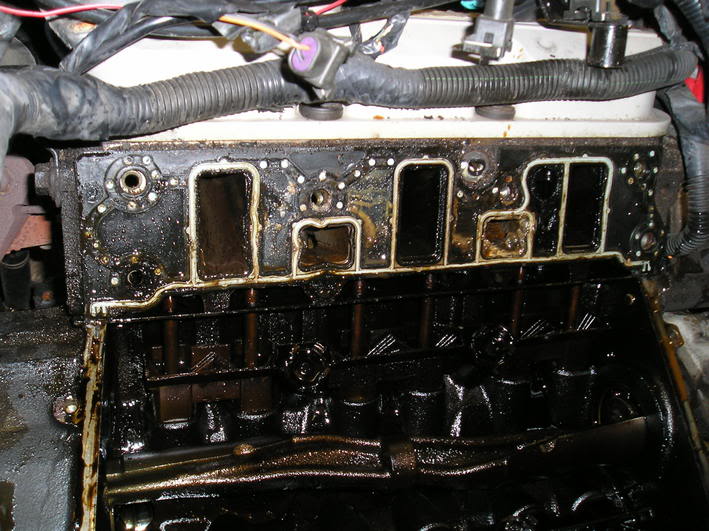
Finally, remove the LIM. Make sure you remove all of the old gasket and clean the surface well. Ensure you remove any pieces of the coolant elbow that may be in the tensioner bracket assembly or LIM. A piece of steel wool is good for cleaning the holes.
Here is a look at the old gaskets.
Even if your only going to have this open for a short time, it'* a good idea to cover the internals with a clean rag.
Here we are cleaning up the gasket surface on the heads. Note the internals are covered. You do not want anything to fall in here, no mater how small.
Wipe all gasket surfaces well, brake cleaner is a good cleaning tool for this when sprayed on a rag. It does not leave residue. Inspect the balance shaft area for any debris.

Now clean up your LIM gasket surfaces.

Clean your LIM bolt threads.
Put a small bead of RTV in the corners where the head meets the block and place your new gaskets on the heads.

You will also have 2 short rubber like gaskets that run along the edge of the engine front to back. Add another small bead of RTV on top in the corners where you added in the last step.


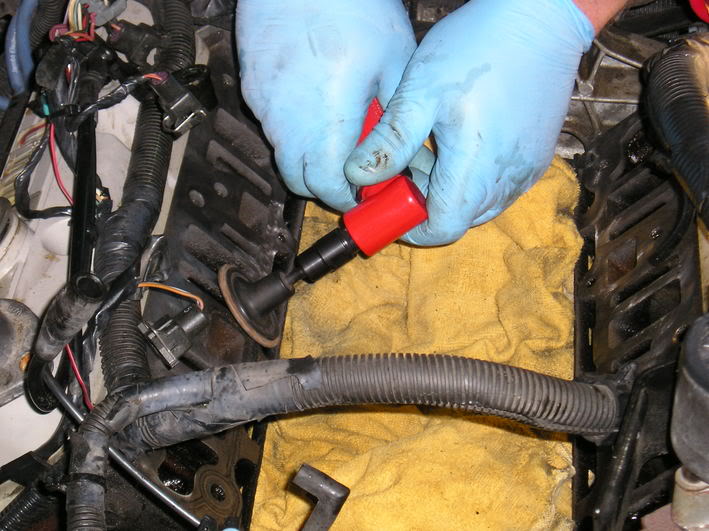
Lubricate the o-rings on the coolant elbow and insert into the tensioner assembly. Then, carefully slide the LIM onto the other end of the elbow and place the LIM back in place. Using either RTV or GM Pipe Sealant with PTFE put a dab on the lower threads of each LIM bolt as you put them in and start threading them.
Then make sure you torque to the proper setting.
https://www.gmforum.com/t278801/
https://www.gmforum.com/t278799/
Here is the torque pattern.

Ensure you clean the old gasket off your SC (if applicable) or clean the gasket from your UIM. Replace your supercharger or UIM with proper gaskets and torque to the proper settings.
Reinstall the EGR tube.
Clean the throttle body gasket and throttle body. TB cleaner is recommended.
Look over the fuel injector o-rings. Replace if needed. Bring the fuel rail and injectors back in place and snug the nuts.
Put all vac lines, wires, and cables back in place. Inspect your work.
[/color]
Tools to have on hand. 13mm socket, 10mm socket, 3/8" socket, 13mm wrench, 10mm wrench, 8mm wrench, scraper to clean gasket surfaces.
Make sure you pull your negative battery cable with a 8mm wrench. Also, cover your fenders to protect them from scratches.
Here is a picture of the common gaskets for the job on the SC'd motor. The LIM gaskets shown are black, the latest version by GM are aluminum in color.
Drain the coolant from the system.
With a 13mm socket you will want to remove the 2 nuts on each side holding this strut tower bar in place. Then remove it and set off to the side out of your way. This will help give you some more room to work.
Now remove the 10mm nuts holding the fuel rail in place and move that off to the side. The injectors will usually stay attached to the rail.
Then disconnect all vac lines, wires, and cables on your supercharger or UIM.
After you have disconnected all sensor wires and throttle cables, remove the 8mm bolt holding the bracket on the front side of the throttle body. Gently pry that bracket forward as you will probably not be able to loosen the other 8mm bolt on the LIM to remove the bracket. Then remove the three 10mm nuts holding the throttle body and remove the TB from the engine bay.
Then disconnect your EGR tube shown here with the throttle body out of the way. The suggested method is to remove the 13mm bolt at the lower intake manifold and the 13mm nut at the EGR to remove the entire tube. Bending the tube frequently leads to a crack in it.
You will need to move the supercharger belt out of the way if you have a supercharger. Removing the alternator is suggested (13mm and 10mm)
Remove all bolts holding down the supercharger or UIM (10mm)
And then remove.
Disconnect your thermostat housing and move off to the side. This is optional and can be done on or off the engine. Thermostat is not always needed.
Then remove the 12 3/8" bolts holding the LIM to the engine. The LIM is shown here with the UIM removed. Make sure you have all the bolts. On the NA or L36 motor two of them are down inside the LIM manifold and hard to find as they are frequently under a little pool of oil. Note the socket placement in the second picture, this is the location of the front bolt, the rear is passenger side rear inside the manifold.
Finally, remove the LIM. Make sure you remove all of the old gasket and clean the surface well. Ensure you remove any pieces of the coolant elbow that may be in the tensioner bracket assembly or LIM. A piece of steel wool is good for cleaning the holes.
Here is a look at the old gaskets.
Even if your only going to have this open for a short time, it'* a good idea to cover the internals with a clean rag.
Here we are cleaning up the gasket surface on the heads. Note the internals are covered. You do not want anything to fall in here, no mater how small.
Wipe all gasket surfaces well, brake cleaner is a good cleaning tool for this when sprayed on a rag. It does not leave residue. Inspect the balance shaft area for any debris.
Now clean up your LIM gasket surfaces.
Clean your LIM bolt threads.
Put a small bead of RTV in the corners where the head meets the block and place your new gaskets on the heads.
You will also have 2 short rubber like gaskets that run along the edge of the engine front to back. Add another small bead of RTV on top in the corners where you added in the last step.
Lubricate the o-rings on the coolant elbow and insert into the tensioner assembly. Then, carefully slide the LIM onto the other end of the elbow and place the LIM back in place. Using either RTV or GM Pipe Sealant with PTFE put a dab on the lower threads of each LIM bolt as you put them in and start threading them.
Then make sure you torque to the proper setting.
https://www.gmforum.com/t278801/
https://www.gmforum.com/t278799/
Here is the torque pattern.
Ensure you clean the old gasket off your SC (if applicable) or clean the gasket from your UIM. Replace your supercharger or UIM with proper gaskets and torque to the proper settings.
Reinstall the EGR tube.
Clean the throttle body gasket and throttle body. TB cleaner is recommended.
Look over the fuel injector o-rings. Replace if needed. Bring the fuel rail and injectors back in place and snug the nuts.
Put all vac lines, wires, and cables back in place. Inspect your work.
[/color]

Thread
Thread Starter
Forum
Replies
Last Post