Taillight blackout pics in progress
 08-11-2005, 12:22 AM
#1
Junior Member
Posts like a Ricer Type-R
Thread Starter

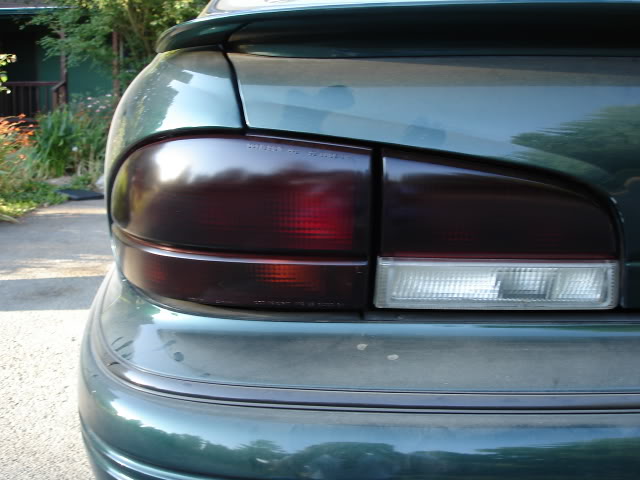
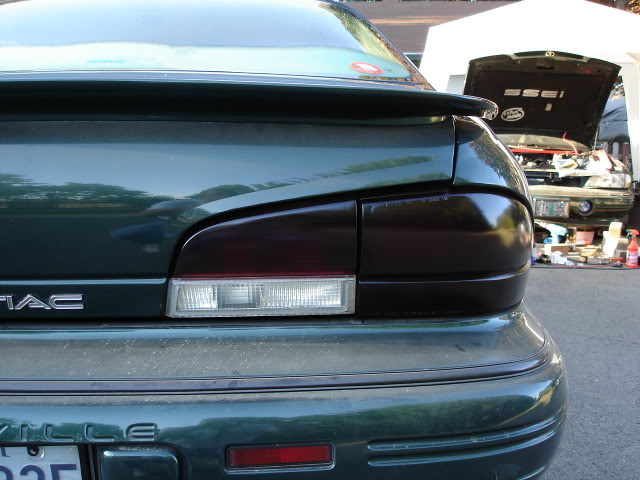
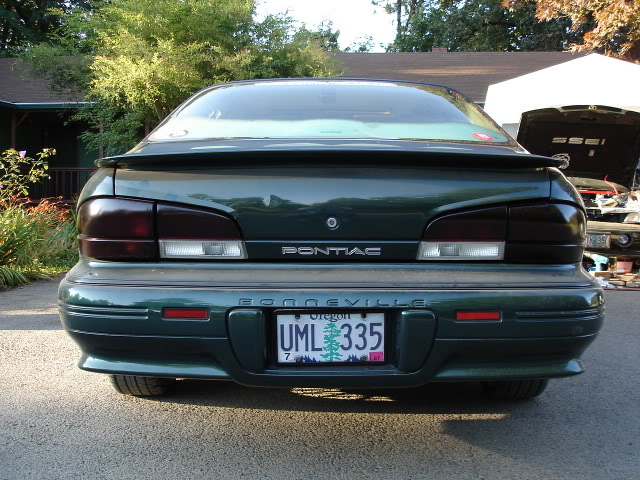
Decided to start a new topic with all the details. Read the Techinfo article and click on my sig pic to see the taillight blackout procedures and before and after pics of my 93 SSEi last year.
Since then, I've done Jseabert'* 93 SSE, and today I did my 95 SLE/SC. These pics are it, in progress. I did them exactly as before, but not as dark. The 93 SSEi was done to hide delamination. The 95 was done today to make the cars look a bit more uniform, and provide more of a 'stealth' look.
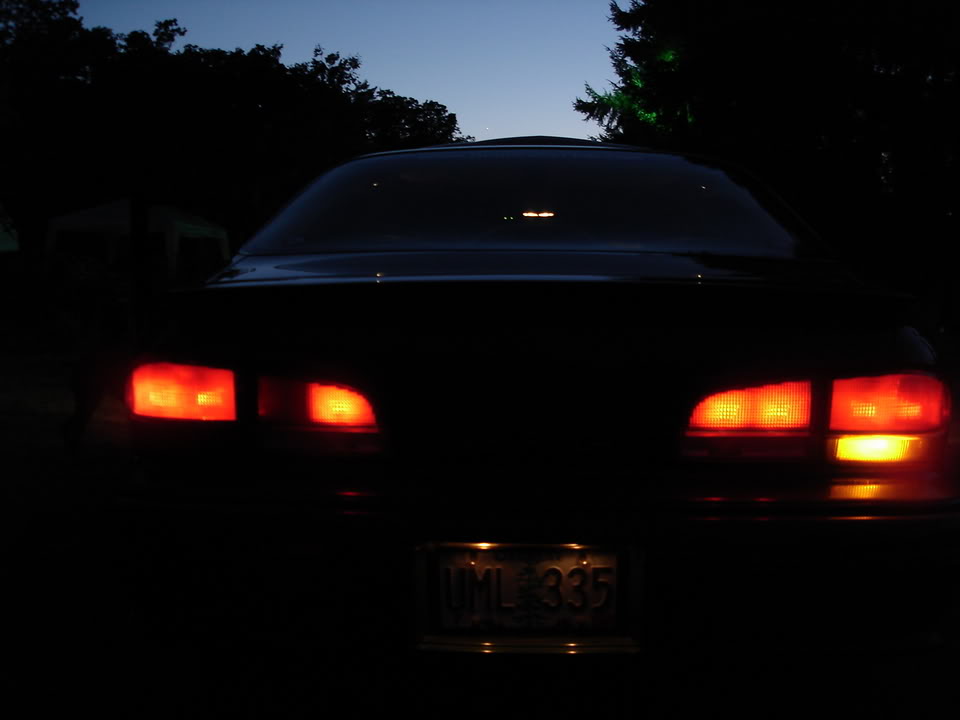
Yes, I know NOW that I have a taillight 194 bulb out on the driver'* side. I'll deal with that tomorrow. Enjoy the pics:
Freshly cleaned and de-greased:
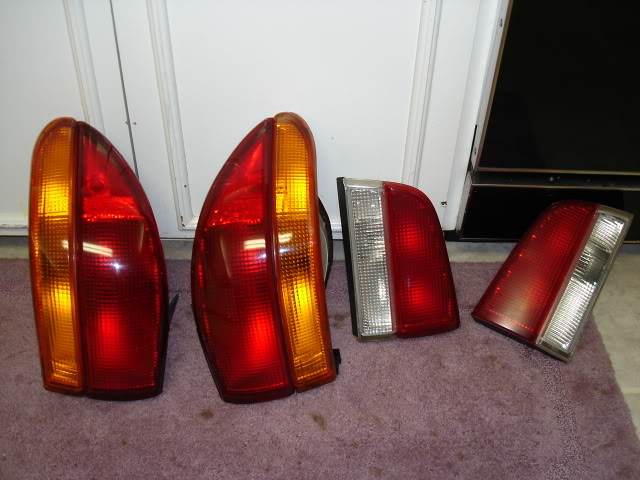
Dried and masked:
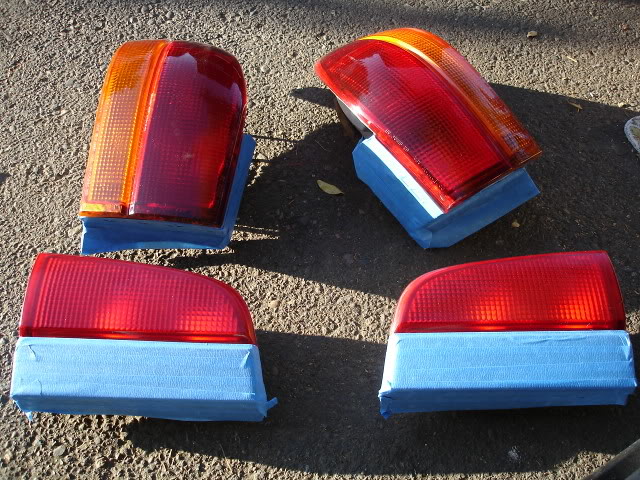
The magic can, lights dusted carefully in the background:

First coat, barely visible. I did 3 VERY light coats:
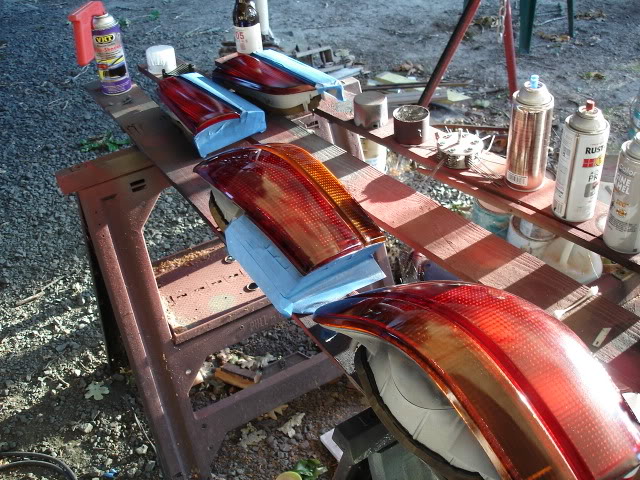
Second coat, a little more visible:
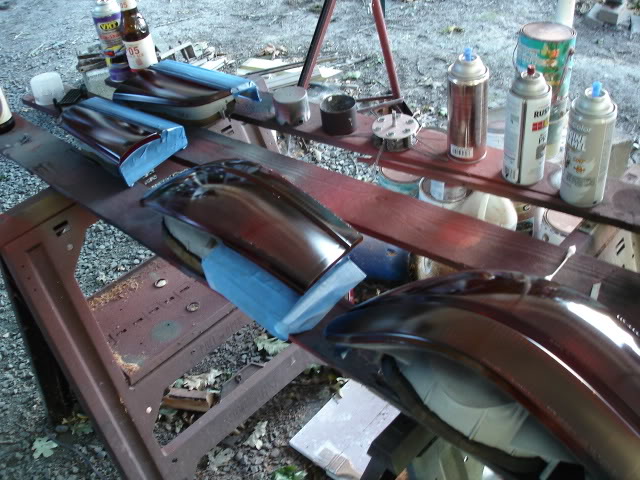
Third coat, lighting is different, but these are slightly darker:
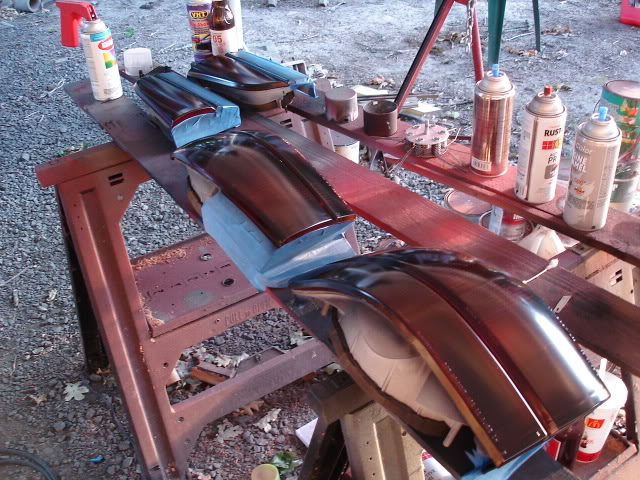
After 2 coats of Clear Satin (not gloss), and de-masked (I'll seal them with liquid glass in a couple days after full curing):
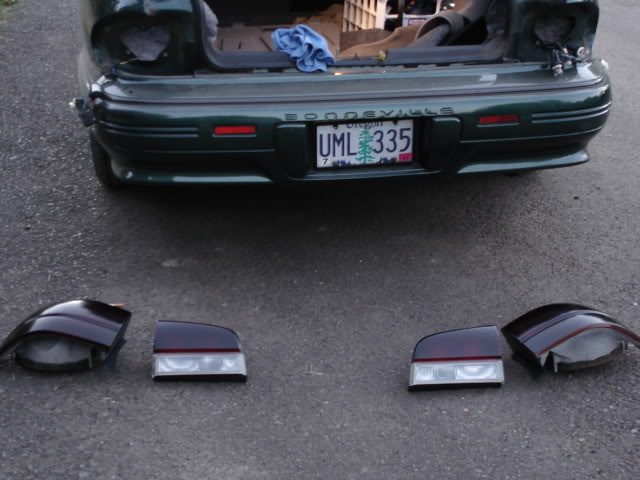
Installed (sun left me):
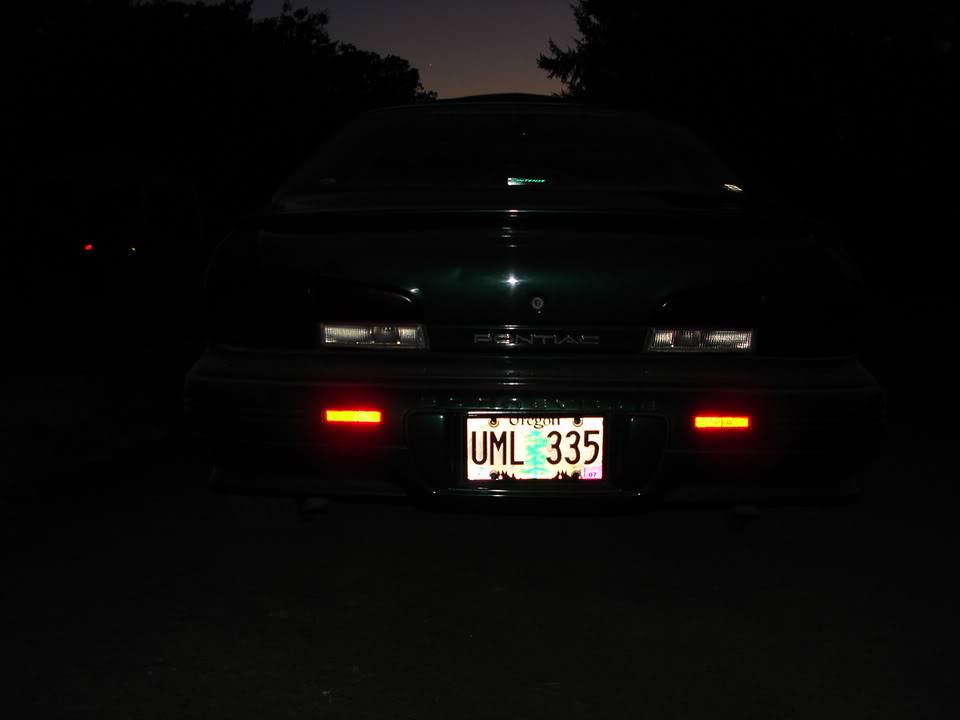
With taillights on (I know I need to replace a bulb):
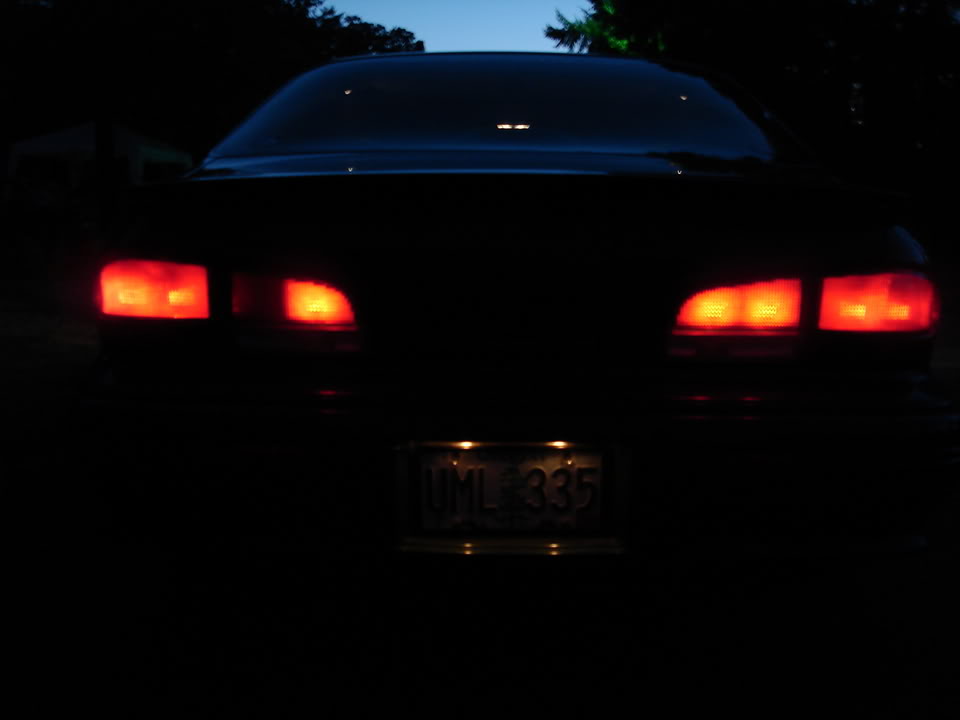
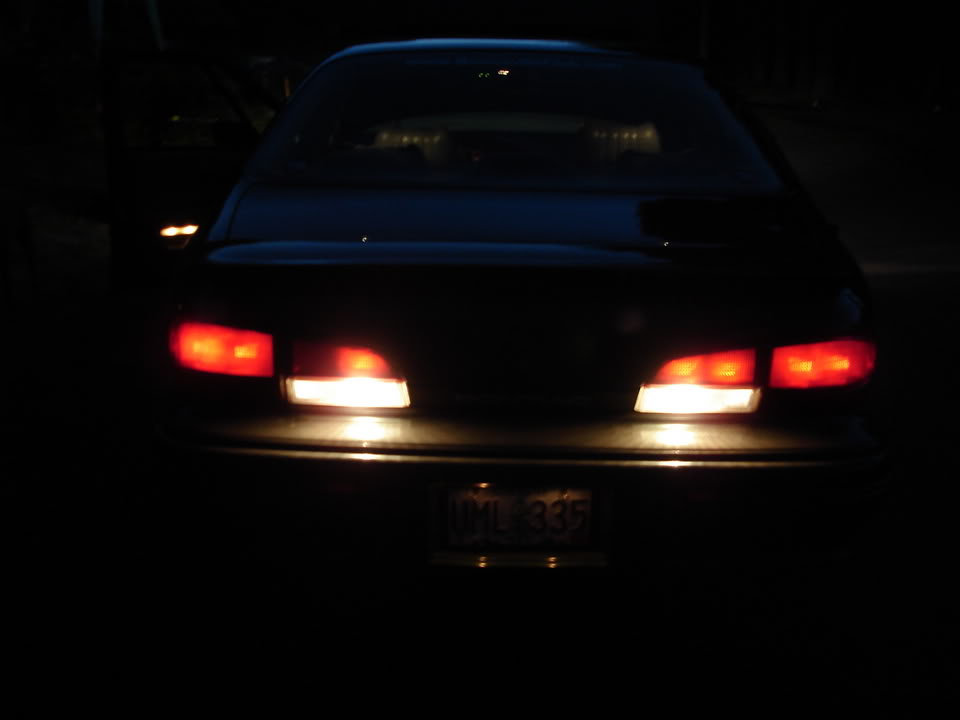
Right turn signal on:
Reverse lights on (note earlier pics where I masked these off. No tint):
Any questions?
Since then, I've done Jseabert'* 93 SSE, and today I did my 95 SLE/SC. These pics are it, in progress. I did them exactly as before, but not as dark. The 93 SSEi was done to hide delamination. The 95 was done today to make the cars look a bit more uniform, and provide more of a 'stealth' look.
Yes, I know NOW that I have a taillight 194 bulb out on the driver'* side. I'll deal with that tomorrow. Enjoy the pics:
Freshly cleaned and de-greased:
Dried and masked:
The magic can, lights dusted carefully in the background:
First coat, barely visible. I did 3 VERY light coats:
Second coat, a little more visible:
Third coat, lighting is different, but these are slightly darker:
After 2 coats of Clear Satin (not gloss), and de-masked (I'll seal them with liquid glass in a couple days after full curing):
Installed (sun left me):
With taillights on (I know I need to replace a bulb):
Right turn signal on:
Reverse lights on (note earlier pics where I masked these off. No tint):
Any questions?
 08-11-2005, 12:44 AM
#2
Junior Member
Posts like a Ricer Type-R
Thread Starter
Per request via PM:
VHT Nightshades http://www.afterthoughtsauto.com/vhtnigpain.html
Clearcoat sealer (Satin) is Krylon Acrylic SATIN FINISH. Barcode 24504 01313
VHT Nightshades http://www.afterthoughtsauto.com/vhtnigpain.html
Clearcoat sealer (Satin) is Krylon Acrylic SATIN FINISH. Barcode 24504 01313
 08-11-2005, 01:31 AM
#4
Senior Member
True Car Nut

Join Date: May 2003
Location: Lethbridge, Alberta, _______Canada._______ West Coast Bonneville Fest ___05,06,07 Survivor___
Posts: 8,135
Likes: 0
Received 0 Likes
on
0 Posts

I bet that looks ALOT better now Bill, It seems like all of us that attended WCBF were plauged with a burnt out tail..or damned near anyways lol.

 08-11-2005, 01:34 AM
#7
Senior Member
True Car Nut
Join Date: May 2003
Location: Lethbridge, Alberta, _______Canada._______ West Coast Bonneville Fest ___05,06,07 Survivor___
Posts: 8,135
Likes: 0
Received 0 Likes
on
0 Posts
yeah, i was gunna say something about that burnt out bulb, did u notice it Bill, huh did you? 
Im sure the daytime pics will come when the sun comes out again
whats the drying time on that VHT?
Im sure the daytime pics will come when the sun comes out again
whats the drying time on that VHT?
08-11-2005, 09:36 AM
#8
Junior Member
Posts like a Ricer Type-R
Thread Starter
Originally Posted by tripscarcare95
looks good, how about daytime pics?
bill, i didnt know if you noticed...but you have a 194 bulb out in your driver side trunk light
Drying time on the VHT is very quick. I do coats 10 minutes apart, then wait 30 minutes, apply the first clear, 10 more minutes, apply the second clear. When it'* dry, install them carefully.
08-11-2005, 11:59 AM
#9
Junior Member
Posts like a Ricer Type-R
Thread Starter
In the following pics, note how the sunlight makes it look totally different (BonneMeMn showed an example of this in another topic). This is why it'* important to tint them in the sun, but have a shade.....a large piece of cardboard or something, in order to see how they look in shade and sun WHILE tinting.
First pic, sun to the left (early morning):
10 seconds later, the taillight in the shade:
10 seconds later, the whole effect in semi-shade (say hello to the Zilla in the background):
SLEeper and Greyhare'* 96 Jetta 2.0 liter Eaton M45 Supercharged Jetta in the parking lot at work, almost direct sunlight on the tails. Look at that Liquid Glass on the Hare :
:

First pic, sun to the left (early morning):
10 seconds later, the taillight in the shade:
10 seconds later, the whole effect in semi-shade (say hello to the Zilla in the background):
SLEeper and Greyhare'* 96 Jetta 2.0 liter Eaton M45 Supercharged Jetta in the parking lot at work, almost direct sunlight on the tails. Look at that Liquid Glass on the Hare
:
08-11-2005, 12:15 PM
#10
DINOSAURUS BOOSTUS


Expert Gearhead

How can you see Zilla behind that pile of stuff?
Does the boss always shake his head when you guys walk by with the camera on the way to the parking lot?
Does the boss always shake his head when you guys walk by with the camera on the way to the parking lot?