
Im making my own gauge pod (mold is done)


Thread Starter
Senior Member
Posts like a Turbo
Joined: Sep 2005
Posts: 409
Likes: 0
From: Puerto Rico

this pice was $25 at the junker
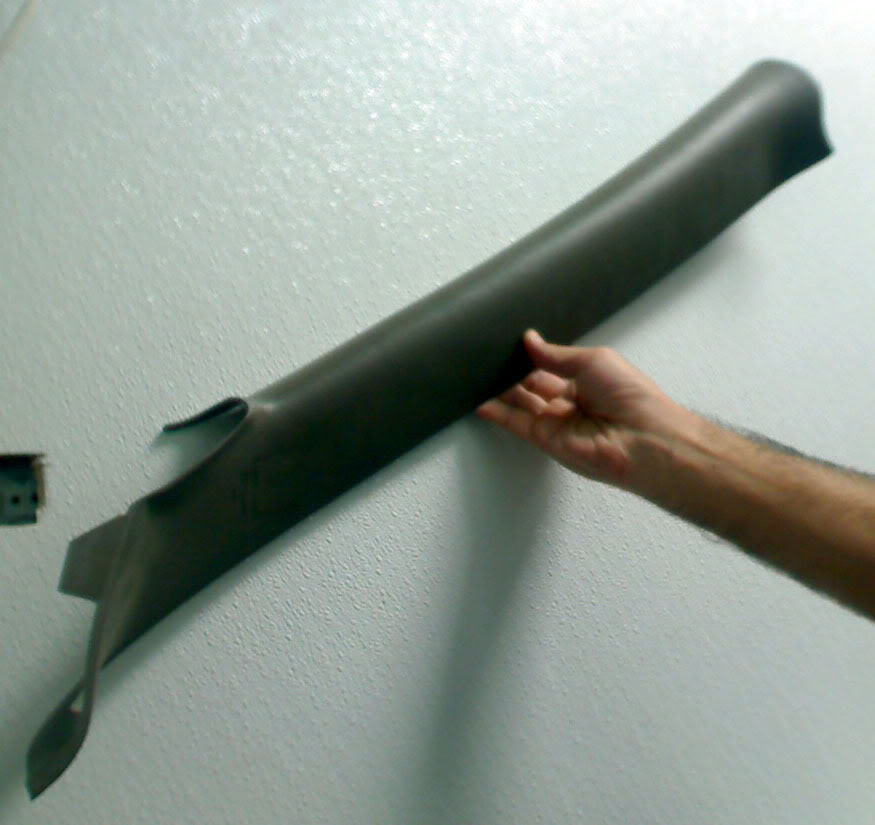
& this is for a mitsu. eclipse. $25

well see what comes out of this. if it looks good when Im done. It might be a good time to lern how to make molds. Ill keep you guys posted on this one.
& this is for a mitsu. eclipse. $25
well see what comes out of this. if it looks good when Im done. It might be a good time to lern how to make molds. Ill keep you guys posted on this one.


Junior Member
Posts like a Ricer Type-R
Joined: Aug 2002
Posts: 11
Likes: 13
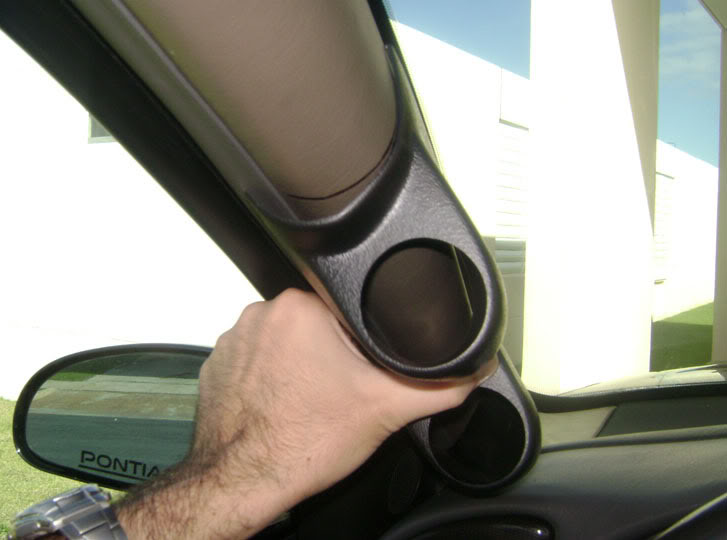
That pod isn't for a mitsu eclipse. It'* a universal. That'* what 1993 SLE and I have both used (tripscarcare also) on our pods.
Take my advice and hide some pop rivets or small screws in there under the resin to make sure it holds. Run your glass and resin well past the joint for strength, and consider popping holes in the OEM pillar and coming from the INSIDE with the pods.
Take my advice and hide some pop rivets or small screws in there under the resin to make sure it holds. Run your glass and resin well past the joint for strength, and consider popping holes in the OEM pillar and coming from the INSIDE with the pods.

Senior Member
Posts like a Camaro
Joined: Jul 2004
Posts: 1,090
Likes: 0
From: Canada, Ontario
I was just thinking, you made all that other fibreglass stuff for your car this should be pretty simple,
If I was going to make another one I wold recomend heating it to shape, then riveting, and then get some fibreglass sheet and put it over top of the entire pillar and pod
Please post up pics of the process I cant wait to see the results
If I was going to make another one I wold recomend heating it to shape, then riveting, and then get some fibreglass sheet and put it over top of the entire pillar and pod
Please post up pics of the process I cant wait to see the results

Thread Starter
Senior Member
Posts like a Turbo
Joined: Sep 2005
Posts: 409
Likes: 0
From: Puerto Rico
I will post pics of the process. Its not a universal, & it almost fits perfect. the store where I got it had a wall full of them, & each box had the make, model, & year in the box. Funny thing is that I tried all of the sedans & pickups, before I started looking at the sports car pods. & the one that fit best was for the eclipse, (I dont remember the year.)
Thread Starter
Senior Member
Posts like a Turbo
Joined: Sep 2005
Posts: 409
Likes: 0
From: Puerto Rico
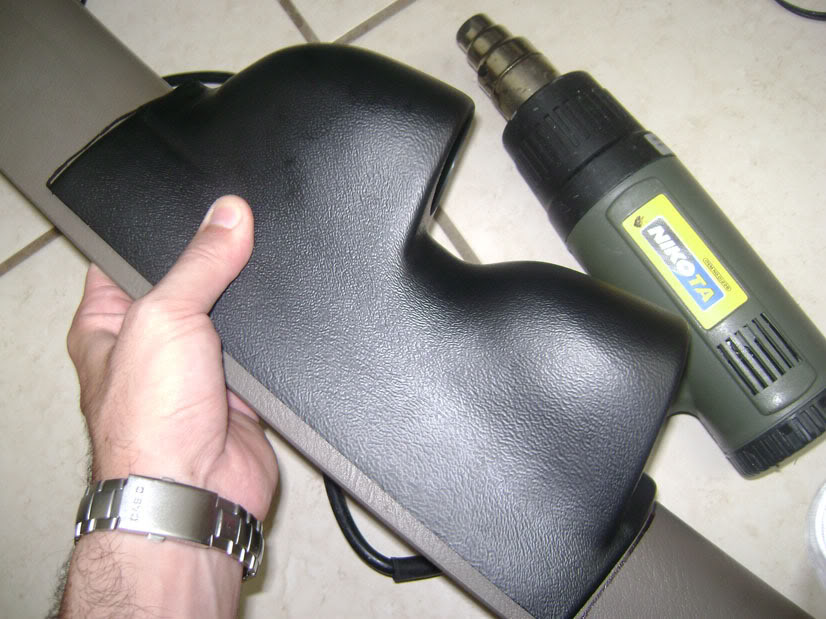
I went all the way up to ataching both pieces together. Afther this I have to add some fiberglass or bondo to it & then smoth it out. Im still not shure on what material to use. I will be going to my friends shop tomorow to get more info on the correct material to do the job, so for now here is what I did.
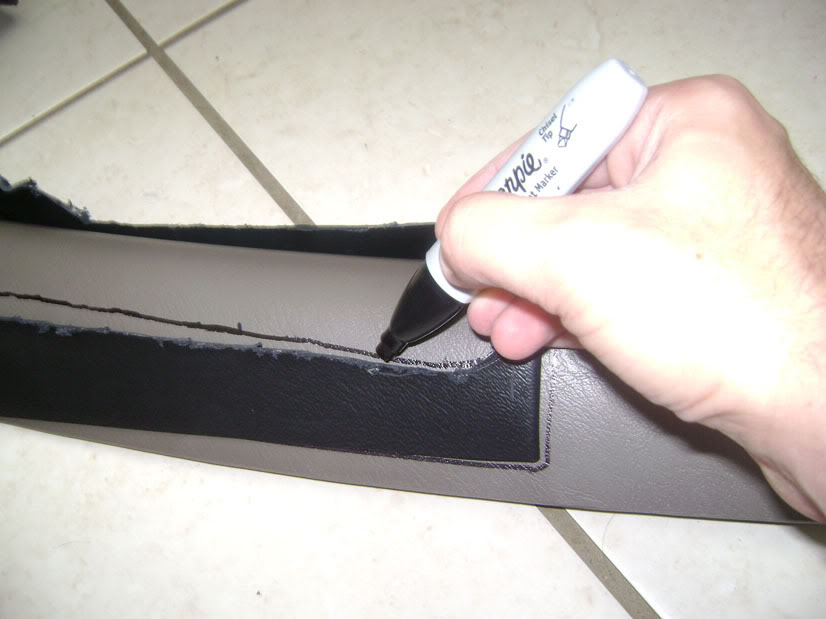
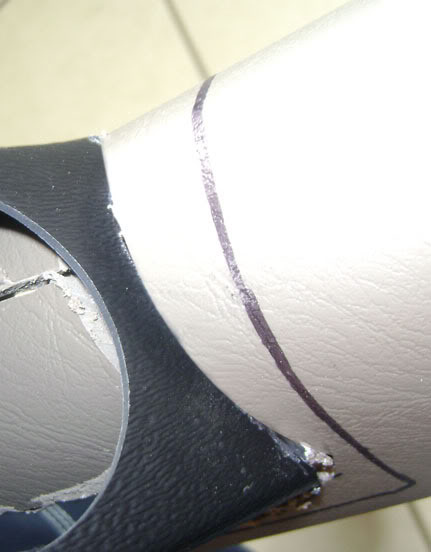
First step is to find the exact location. I picked the spot where it would affect my visibility the least. Another thing to take into consideration is the dash (it looks bad if it touches the dash, I think). Notice that I marked the spot with a sharpy.
Next thing I did was to heat the black piece & press it against the other to mold it better. (this things distort real fast so be careful)
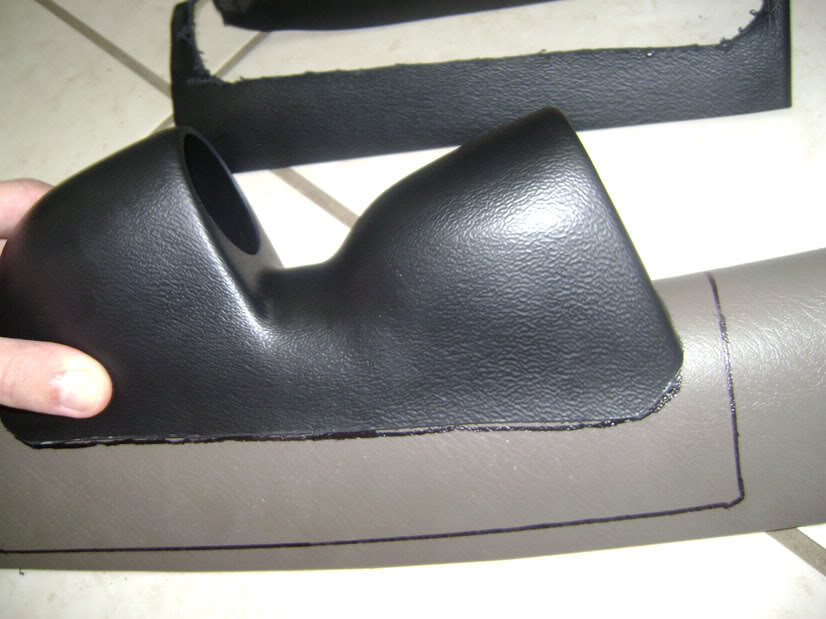
Cut the excess material out. ( the better it fits the less bondo to add & less sanding to do)
I used the same piece I trimed out to mark the spot where the gauges go.
This is a good time to check for placement againg, I went back to the car to check that every thing was how I wanted it, before I cut the other piece.
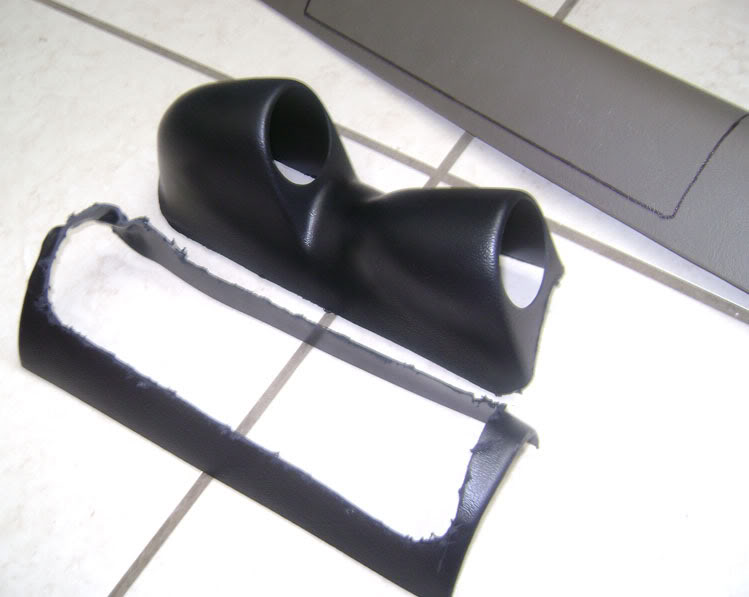
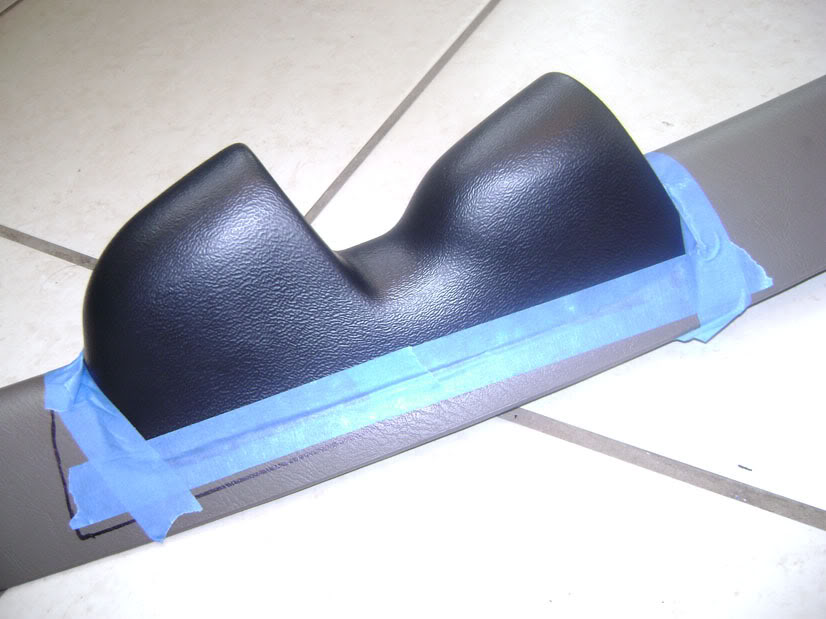
This is what youll get after cutting both pieces.
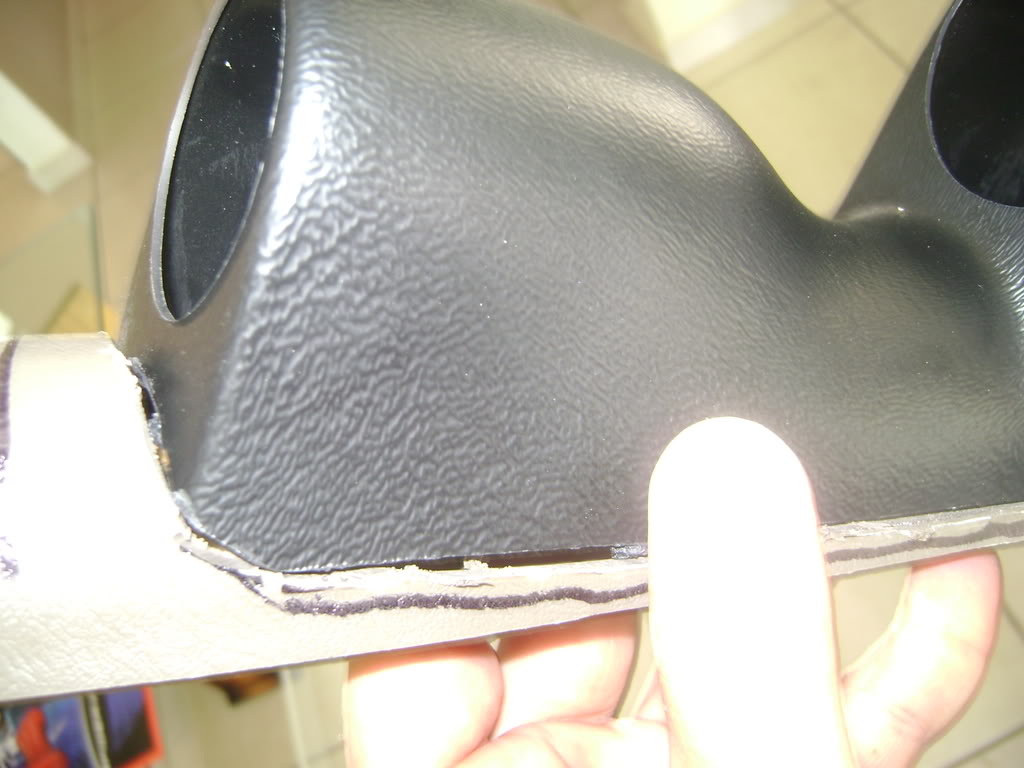
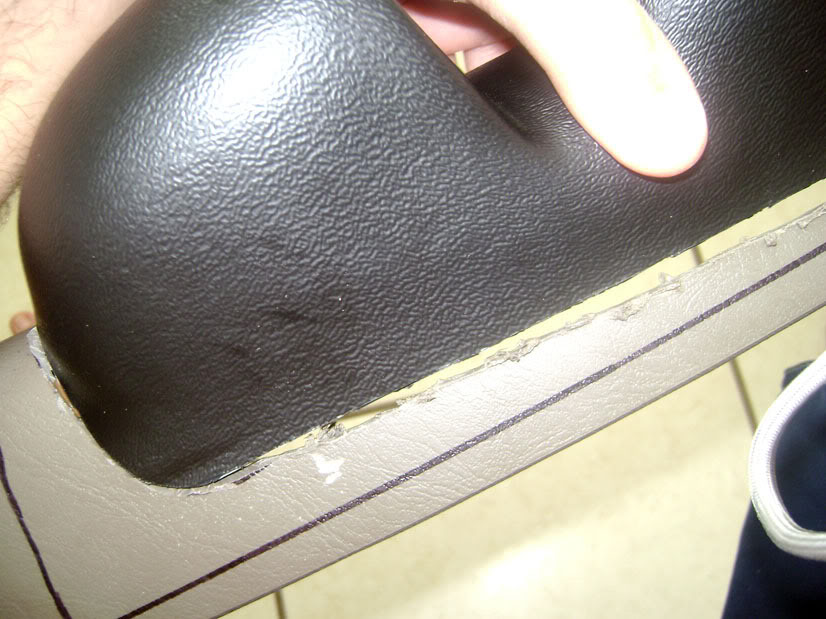
Some more triming had to be done to get the best fitment. & then I was ready for the epoxy.
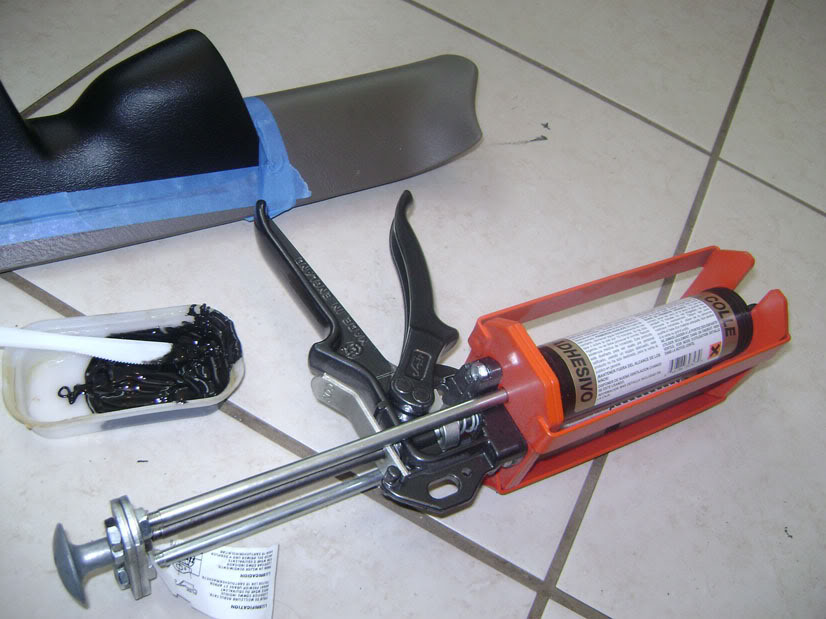
I taped both parts together to hold them in place & so that the epoxy would stay where I wanted it.
This is the epoxy I used. Not cheap, but there is nothing like it.
applied the epoxy from the back. making shure its thick everywhere.
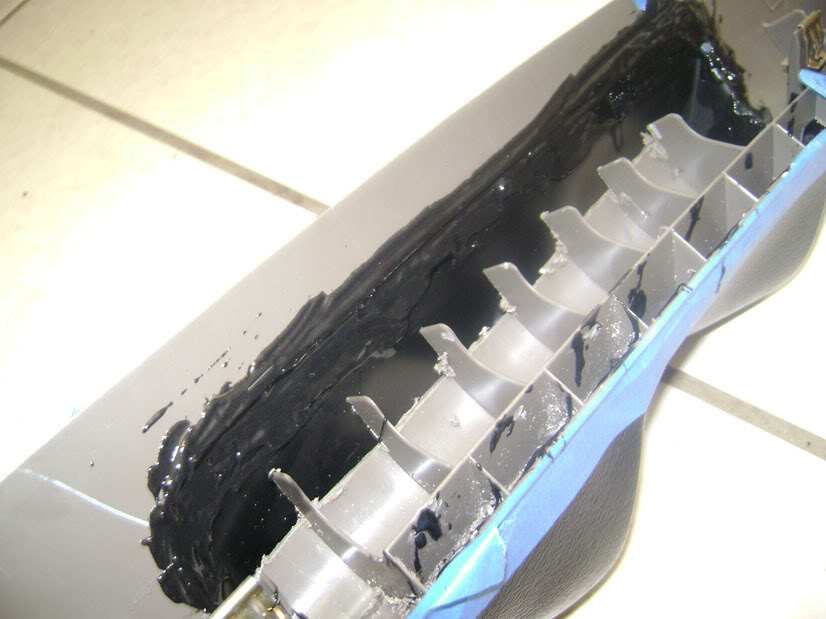
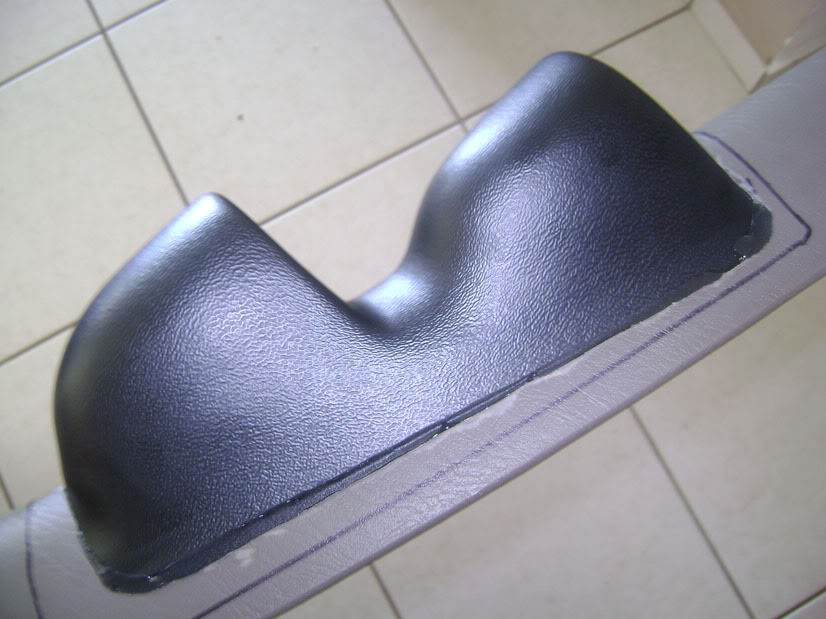
& here is the result. It looks so good like this that it could almost be painted & used without more work.
First step is to find the exact location. I picked the spot where it would affect my visibility the least. Another thing to take into consideration is the dash (it looks bad if it touches the dash, I think). Notice that I marked the spot with a sharpy.
Next thing I did was to heat the black piece & press it against the other to mold it better. (this things distort real fast so be careful)
Cut the excess material out. ( the better it fits the less bondo to add & less sanding to do)
I used the same piece I trimed out to mark the spot where the gauges go.
This is a good time to check for placement againg, I went back to the car to check that every thing was how I wanted it, before I cut the other piece.
This is what youll get after cutting both pieces.
Some more triming had to be done to get the best fitment. & then I was ready for the epoxy.
I taped both parts together to hold them in place & so that the epoxy would stay where I wanted it.
This is the epoxy I used. Not cheap, but there is nothing like it.
applied the epoxy from the back. making shure its thick everywhere.
& here is the result. It looks so good like this that it could almost be painted & used without more work.


Thread Starter
Senior Member
Posts like a Turbo
Joined: Sep 2005
Posts: 409
Likes: 0
From: Puerto Rico
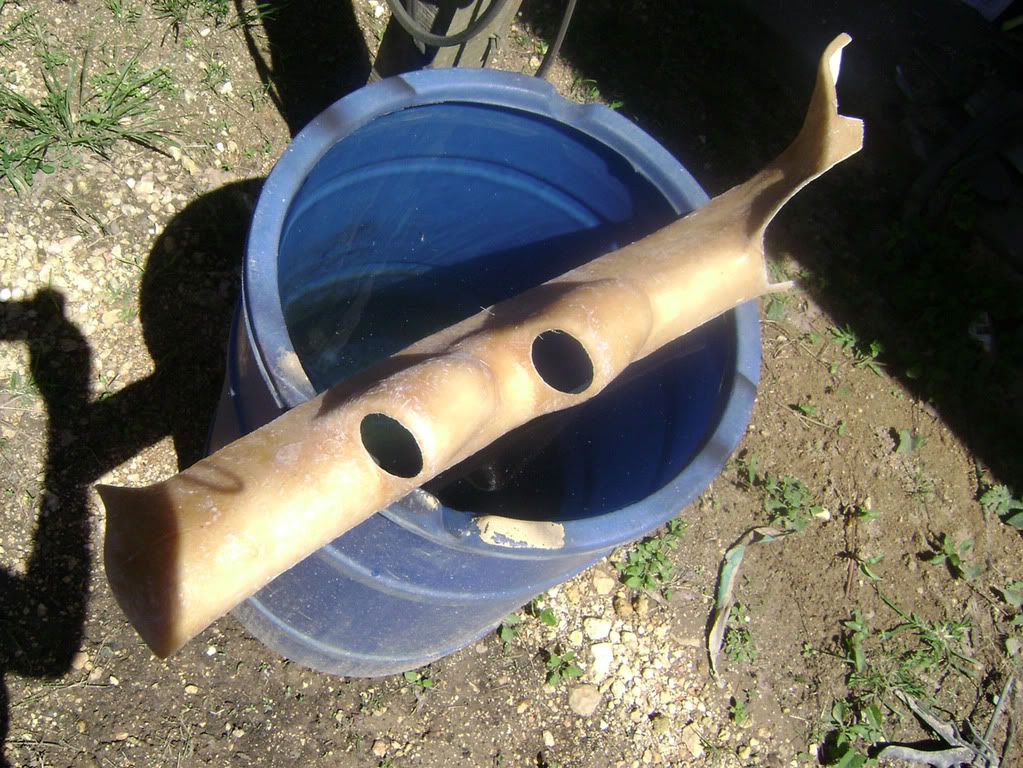
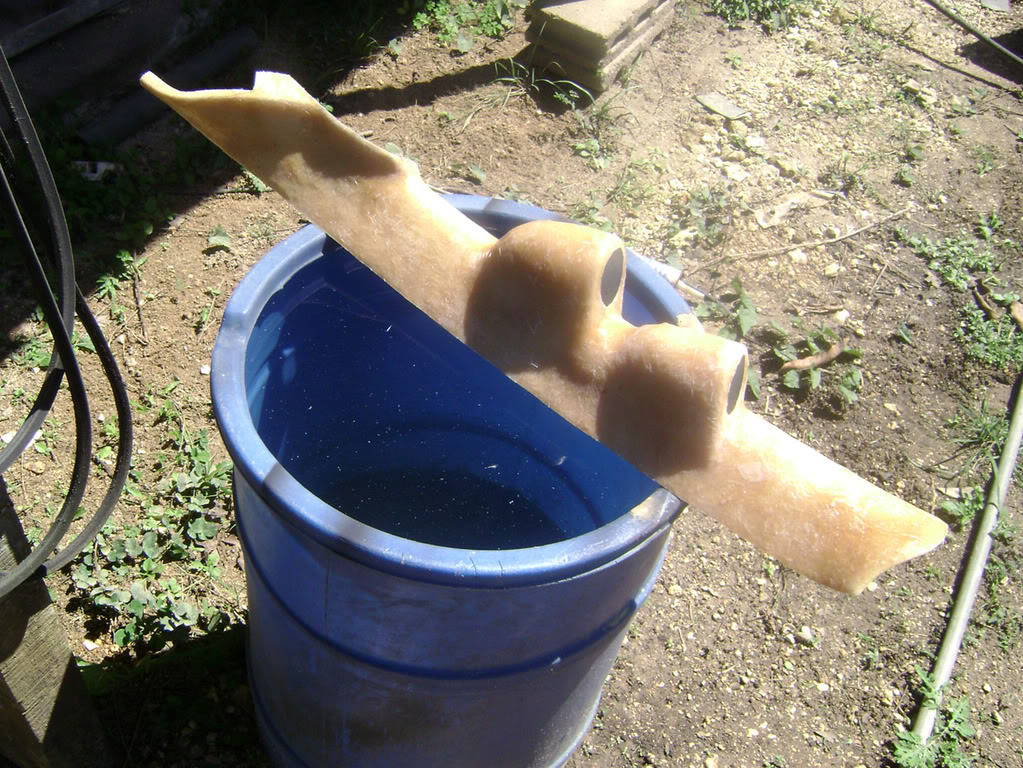
The mold is done, & is geting sanded right now so that I we can star making pods.
I didnt get to see the final product before the mold was done, so I have my fingers crossed. When I get the first pod ready & painted Ill post pics.
here is the mold.
I didnt get to see the final product before the mold was done, so I have my fingers crossed. When I get the first pod ready & painted Ill post pics.
here is the mold.
