
How to fix rust holes. (step by step)


Thread Starter
Senior Member
Posts like a Turbo
Joined: Sep 2005
Posts: 409
Likes: 0
From: Puerto Rico

On the proces of geting my project 95 ready for paint, I found some rust as most of us have. Ive seen a bunch of people asking how to fix rust, so I will be taking pics as I go & show you guys how I fix the problem. If you have tools to bend & reshape metal, & a welder, that would be the way to go. But since I dont have the equipment I will be fixing the holes with fiberglas.
The stuff that is needed for this is:
fiberglass resin & the fiberglass cloth
bondo
primer
rust neutralizer (POR-15)
sand paper
a dremel
& multipurpose panel adjesive by SEM (abvailable at the paint suply store & if you do any kind of custm work to your car then is a must on your toolbox)

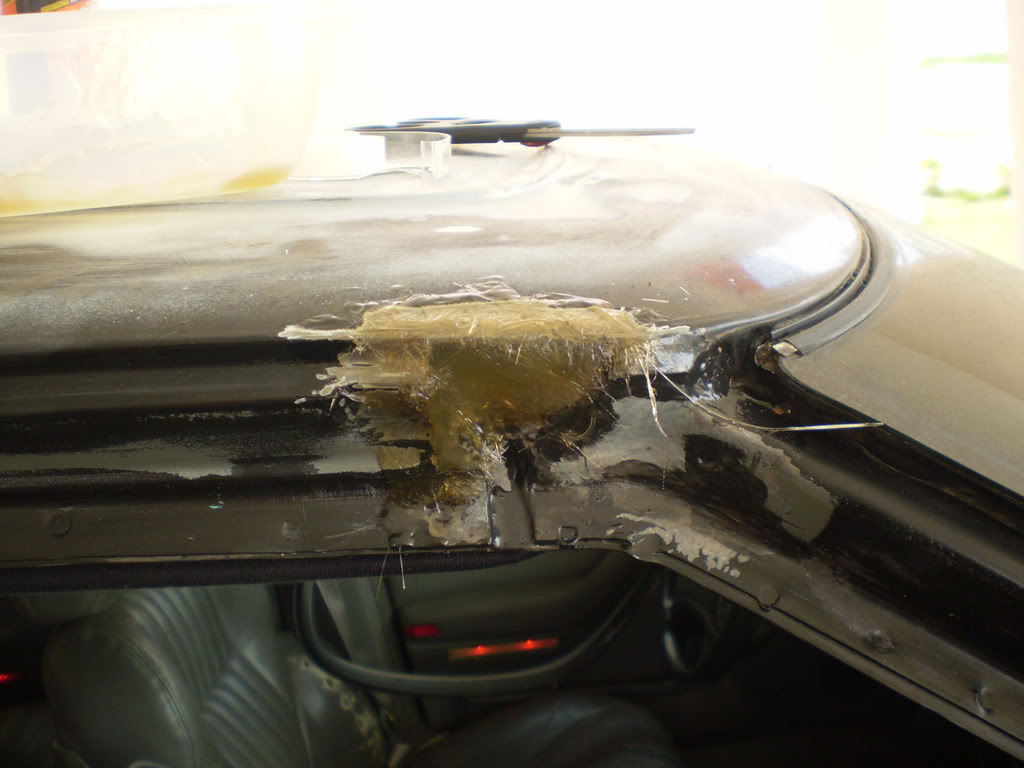
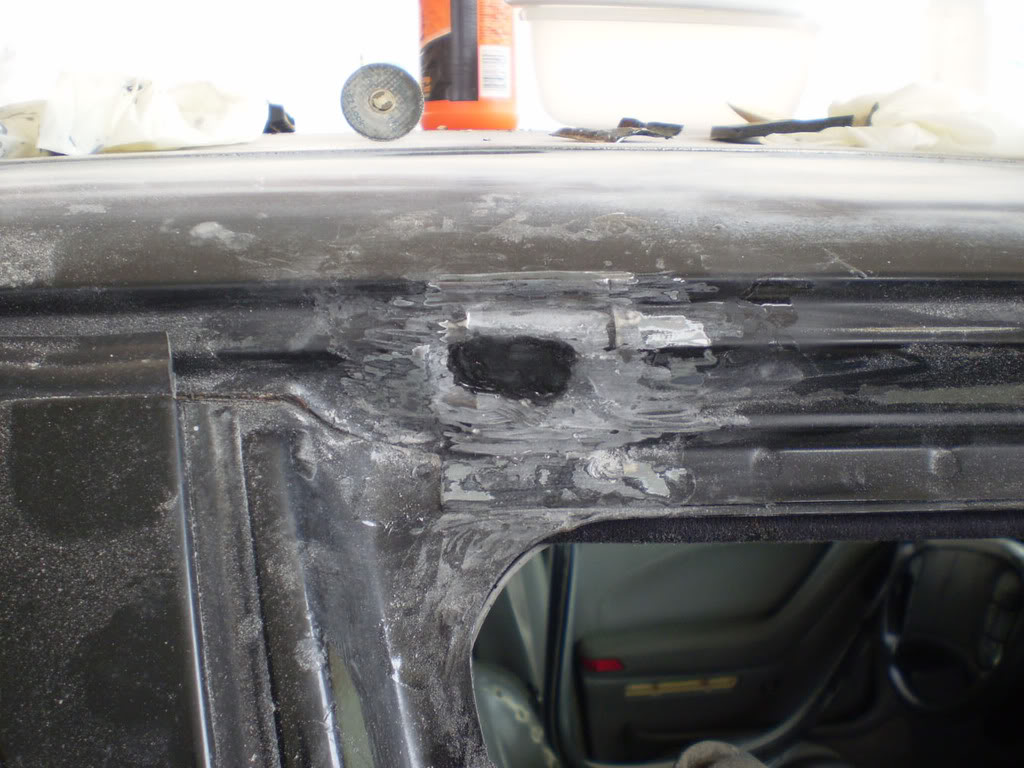
This is the rust that I have. It wasnt visible with the trim on, but when I removed it & started poking at it, this came out:

first step is to deside how much needs to come out. I took about 1/2 inch extra around the rotted part.
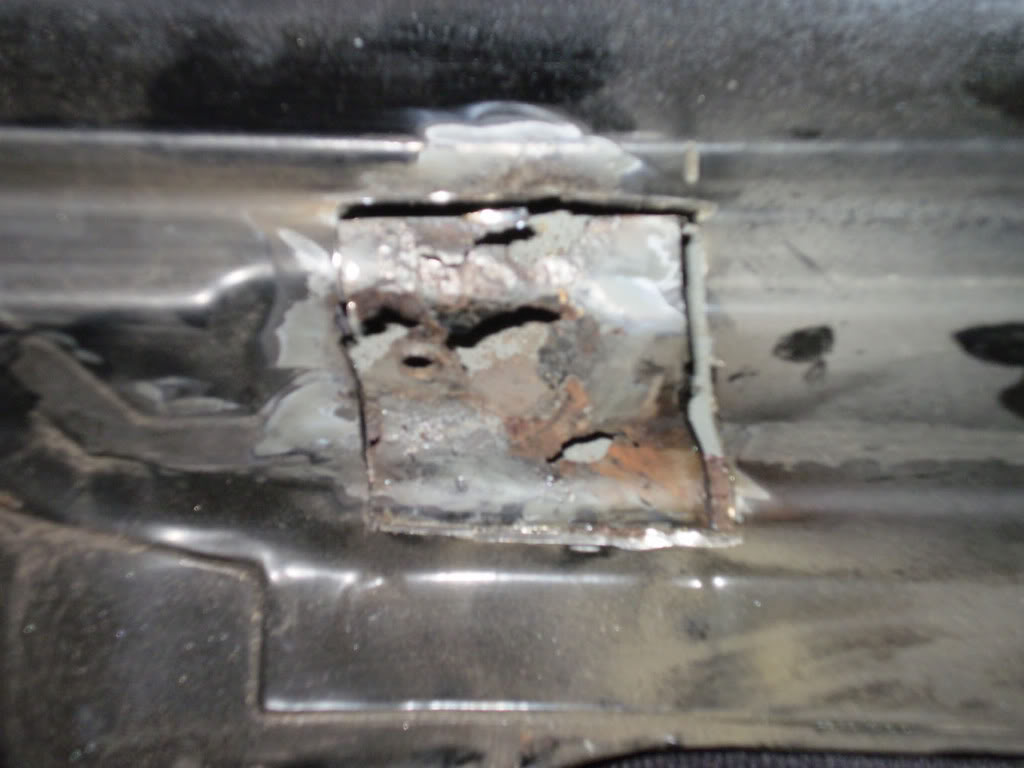
look at all the rusted crap that is acumulated there. I cleaned it out with a clothe hanger & a vacume.
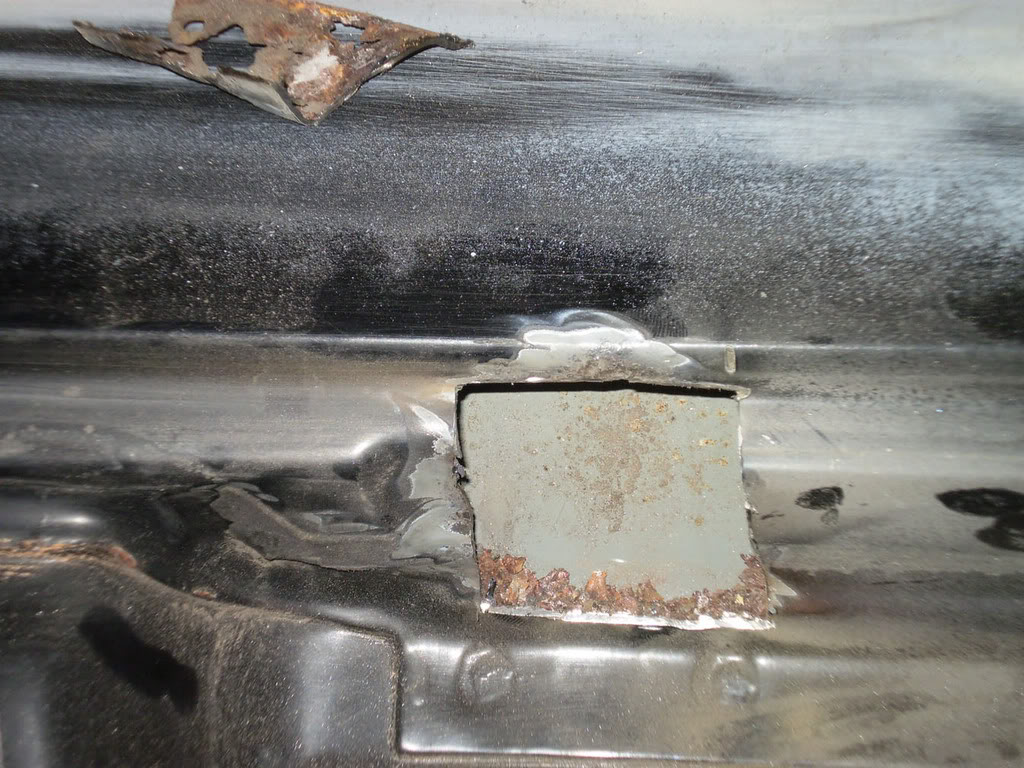
Then grind out to rust with the dremel. Keep on going a little bit further untill you are 100% shure there is no more rust.
& then spray some rust neutralizer, inside & out.

After a couple of hours I cleaned the area, dryed it, & primed it.
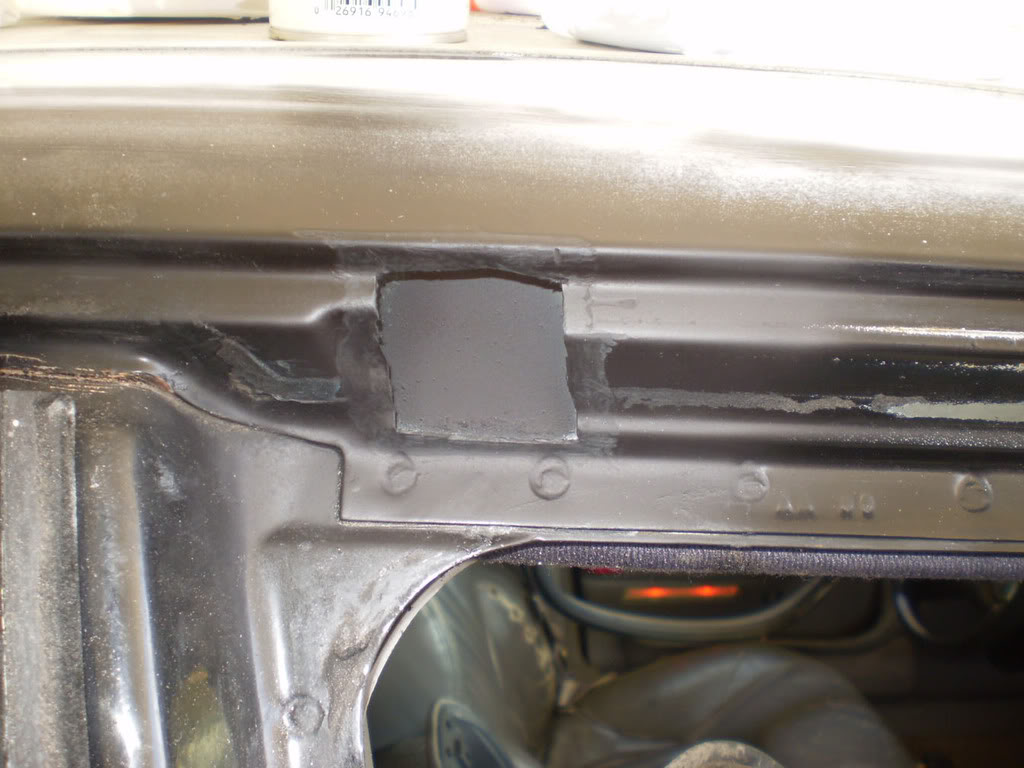
Dont leave metal exposed overnight, cause it will rust againg. Tomorow Ill post the progress.
The stuff that is needed for this is:
fiberglass resin & the fiberglass cloth
bondo
primer
rust neutralizer (POR-15)
sand paper
a dremel
& multipurpose panel adjesive by SEM (abvailable at the paint suply store & if you do any kind of custm work to your car then is a must on your toolbox)
This is the rust that I have. It wasnt visible with the trim on, but when I removed it & started poking at it, this came out:
first step is to deside how much needs to come out. I took about 1/2 inch extra around the rotted part.
look at all the rusted crap that is acumulated there. I cleaned it out with a clothe hanger & a vacume.
Then grind out to rust with the dremel. Keep on going a little bit further untill you are 100% shure there is no more rust.
& then spray some rust neutralizer, inside & out.
After a couple of hours I cleaned the area, dryed it, & primed it.
Dont leave metal exposed overnight, cause it will rust againg. Tomorow Ill post the progress.

Thread Starter
Senior Member
Posts like a Turbo
Joined: Sep 2005
Posts: 409
Likes: 0
From: Puerto Rico
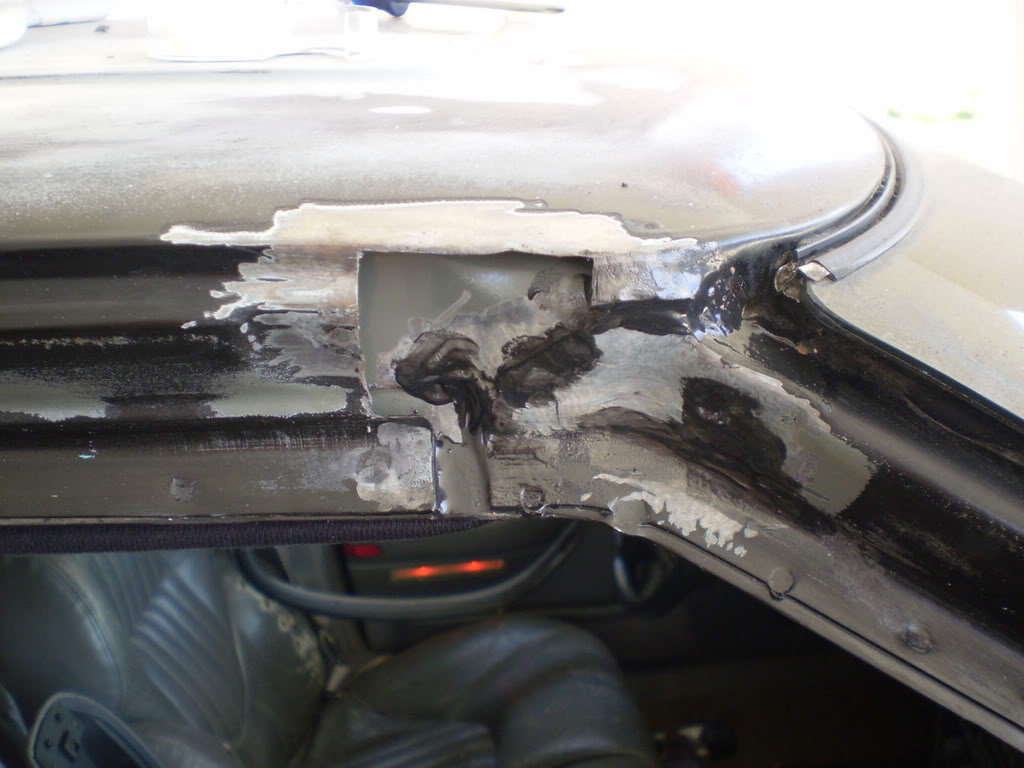
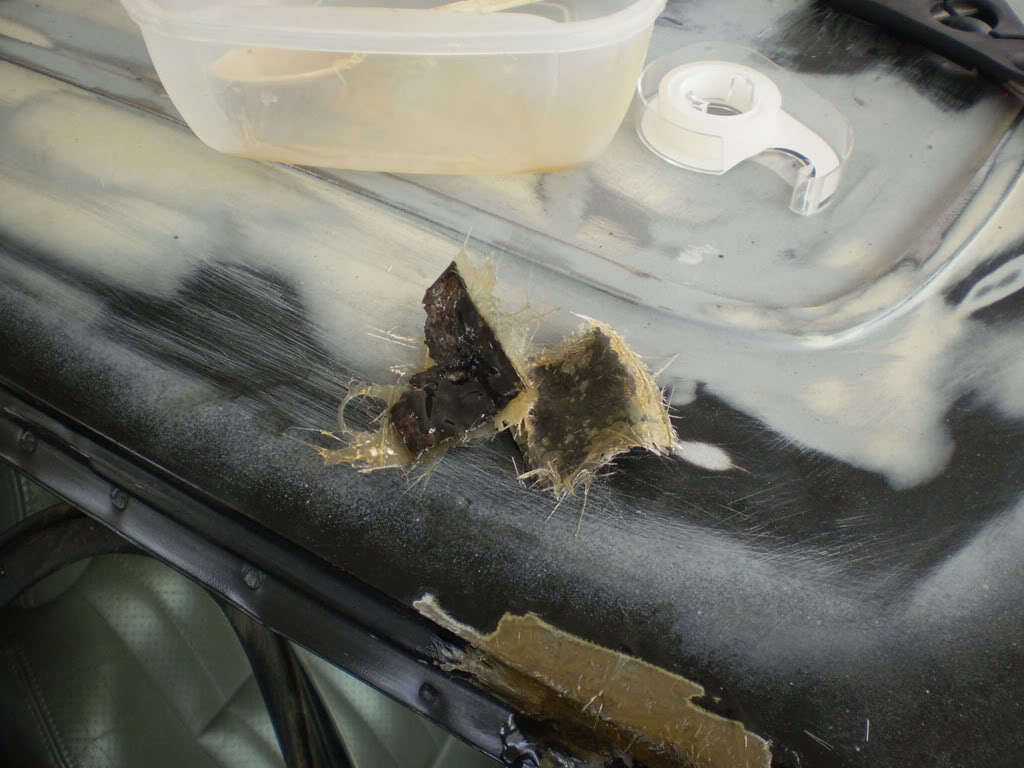
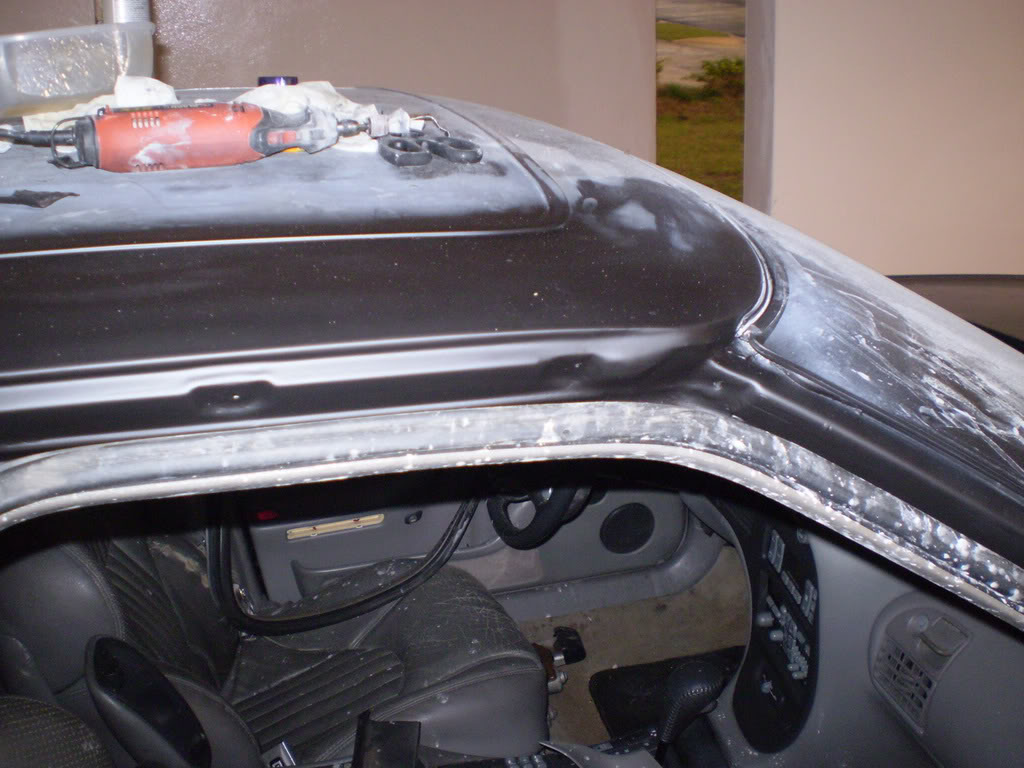
all the seams where filled with a orange material that was deteriorated & letting water rust the metal. I got it all out with a metal brush tip on the dremel. Then filled the gaps with the black panel adhesive.
Ok, here comes the fiberglass. I made a mold of both areas with the fiberglass. After it dries & gets hard Ill brake it loose, & will have a exact copy of the area Im working with. (youll see what they are for later)

& I did the same with the metal I took out.
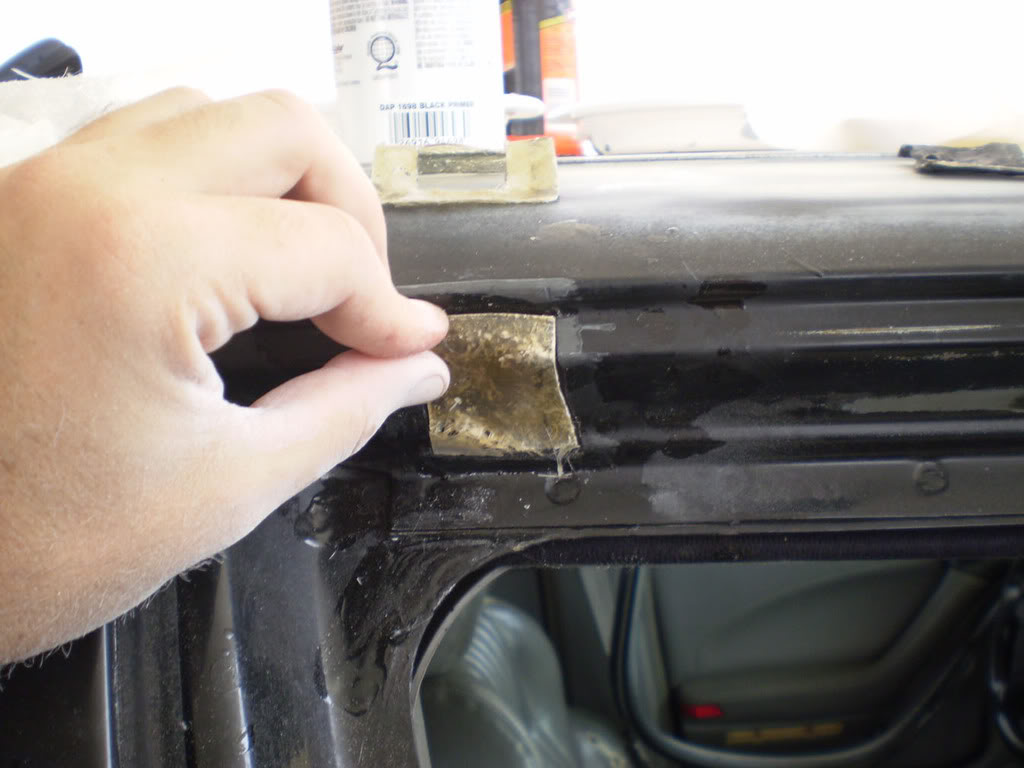
This is the mold I did of the area. I trimed about 1/2 inches over the metal & the same over the hole. This will be cut in to 4 sides & bonded on the inside. It will give me a good strong surface to atach the other pice.

This mold made from the piece of rusted metal will fill the hole & wont rust again.
Ok, here comes the fiberglass. I made a mold of both areas with the fiberglass. After it dries & gets hard Ill brake it loose, & will have a exact copy of the area Im working with. (youll see what they are for later)
& I did the same with the metal I took out.
This is the mold I did of the area. I trimed about 1/2 inches over the metal & the same over the hole. This will be cut in to 4 sides & bonded on the inside. It will give me a good strong surface to atach the other pice.
This mold made from the piece of rusted metal will fill the hole & wont rust again.


Senior Member
Posts like a Northstar
Joined: Mar 2007
Posts: 691
Likes: 1
From: Illinois
Isn't metal the correct way to do body work?

Thread Starter
Senior Member
Posts like a Turbo
Joined: Sep 2005
Posts: 409
Likes: 0
From: Puerto Rico
If you read from the begeaning, that is the first thing I stated. Metal is the correct way to go, but if you dont have the money to pay, or the tools to doit. Then this would be the 2nd best, & the only other way to permanently remove rust.
Ok, back to topic.
Using the panel adhesive, I glued the fiberglass piece from the back.
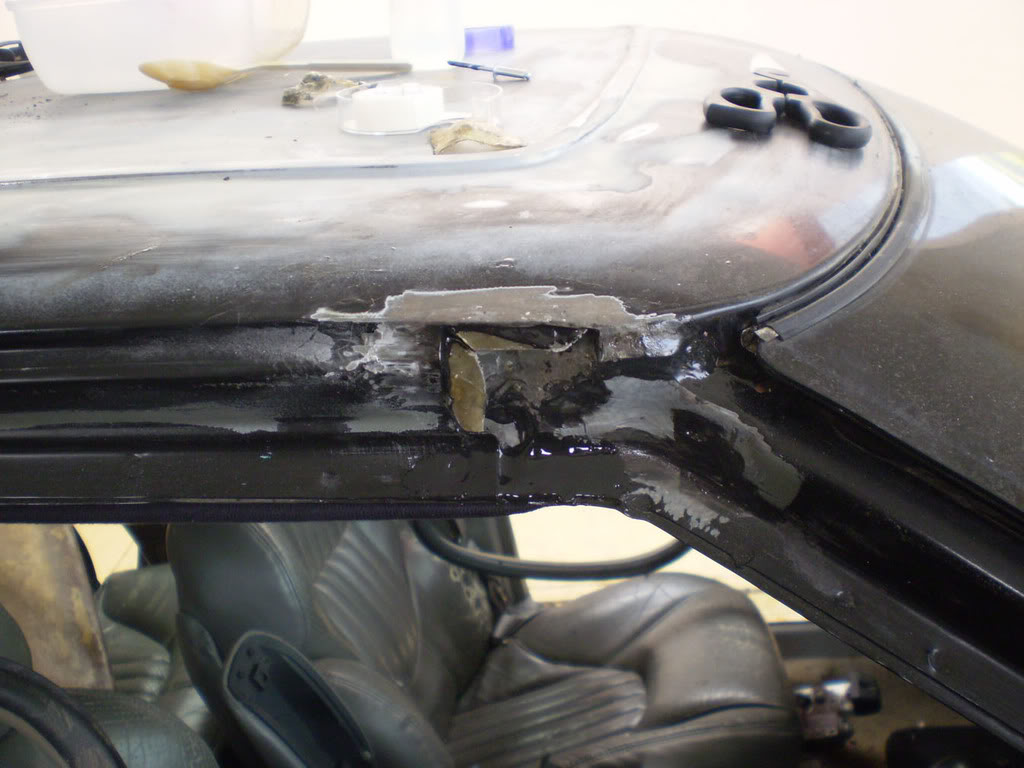

Then when it dried, I glued the top piece. then covered the area with the panel adhesive.

After it dries, I sanded it with the dremell. Its hard to sand with a sand paper so the cosmetic sanding will be done after bondo is aplied. This is just to cover the hole & to make shure is strong as the metal.
I added more adhesive to the center where I found some bubble holes.
Ok, back to topic.
Using the panel adhesive, I glued the fiberglass piece from the back.
Then when it dried, I glued the top piece. then covered the area with the panel adhesive.
After it dries, I sanded it with the dremell. Its hard to sand with a sand paper so the cosmetic sanding will be done after bondo is aplied. This is just to cover the hole & to make shure is strong as the metal.
I added more adhesive to the center where I found some bubble holes.


Thread
Thread Starter
Forum
Replies
Last Post
wjcollier07
Detailing & Appearance
19
Oct 14, 2006 12:06 AM