
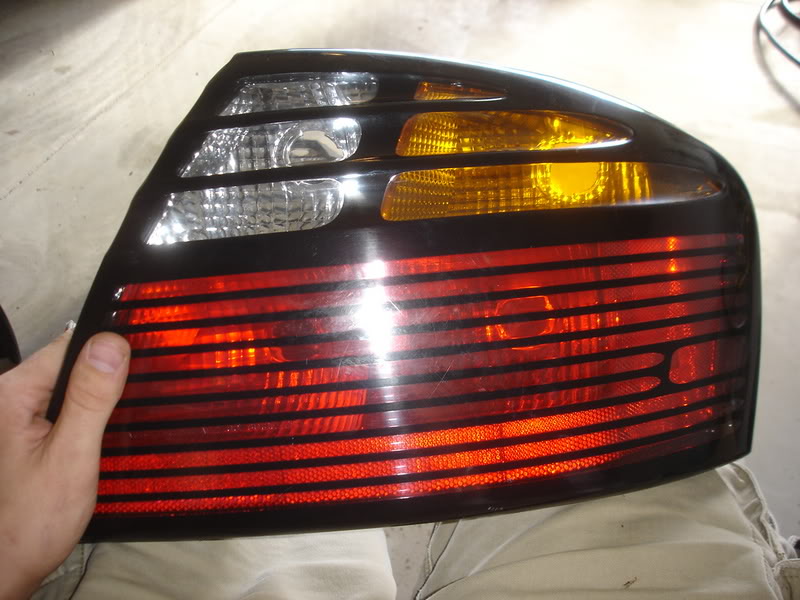
How-To: Clearing the Taillights on 00+


Thread Starter
BANNED
Joined: Mar 2004
Posts: 0
Likes: 5
From: Purgatory

I had the opportunity to clear EWC88'* taillights for him since he was getting frustrated with how they were going. I took some step-by-step pics of how I did them on my car. If anyone does if different than me, or has a better technique, let me know!
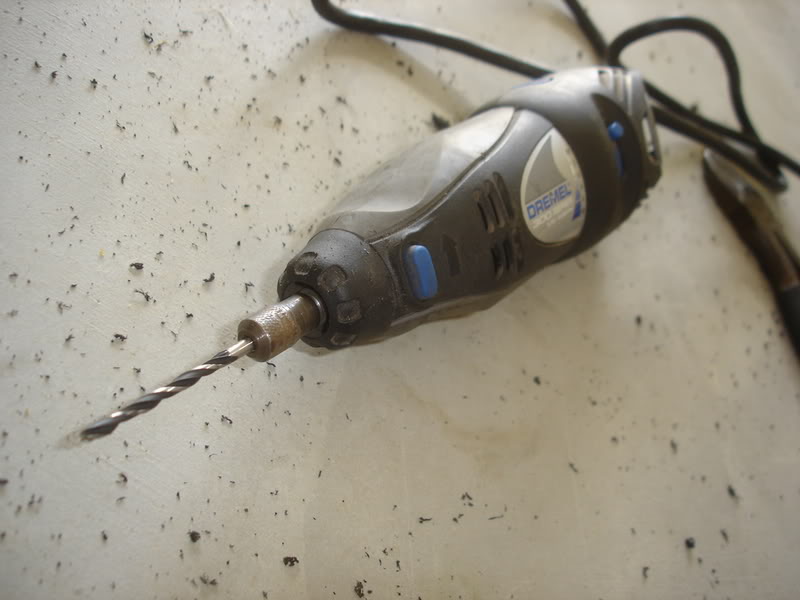
Tools/Items needed:
Taillight housing
Dremel with 1/8" drill bit
Compressed air
Masking tape
Clear silicon adhesive
Flat head screwdriver
Small pliers
Safety glasses
First of all, put on your safety glasses, this is a messy job. You are going to want to do it in your garage or outside since there will be black specs of plastic in a 20 ft diameter.

Now grab your taillight and sit down in a chair. I found it does work best to sit and have the light in your lap as you cut into it.
Use some sort of masking tape to cover the holes you are not working on. Granted the plastic debris will get into the other area, but not as bad.

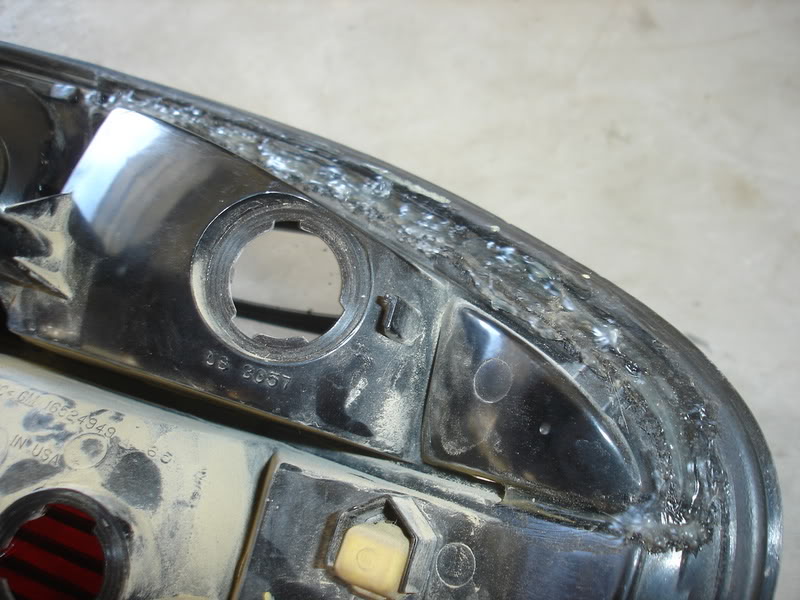
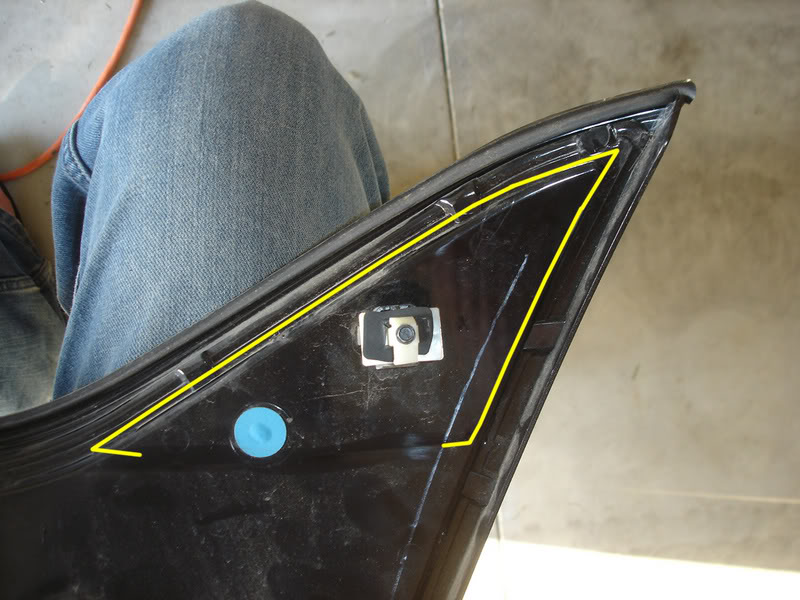
On the back side, you will see where you need to cut

Using a dremel with a 1/8" bit, cut into the plastic using 2 steady hands. I used a wood boring bit this time because I found it cuts sideways really good.
You want to cut the plastic at a small angle in towards the light.

You will be able to see light through the backside when you have completed the cut.
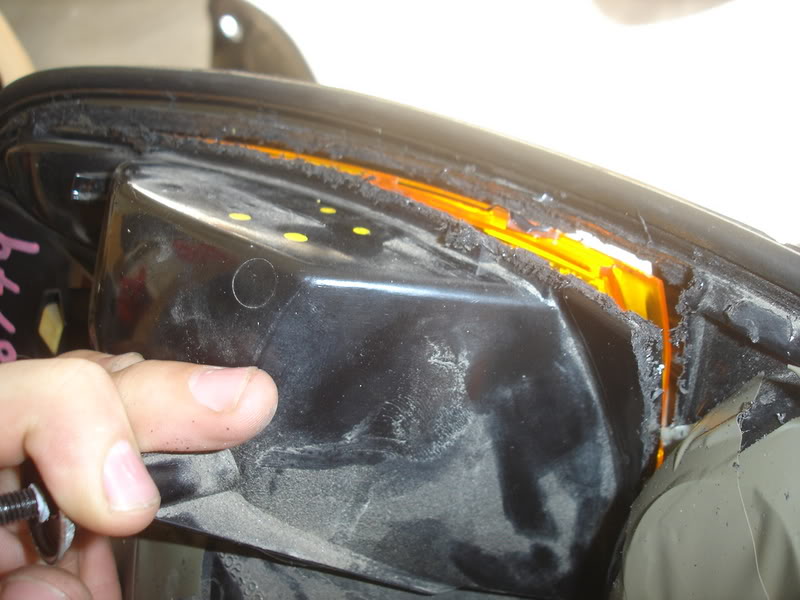

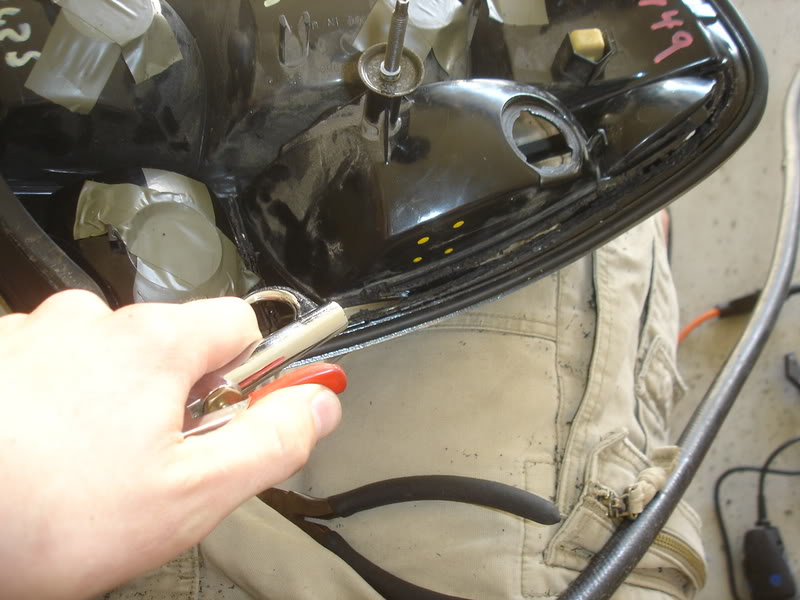
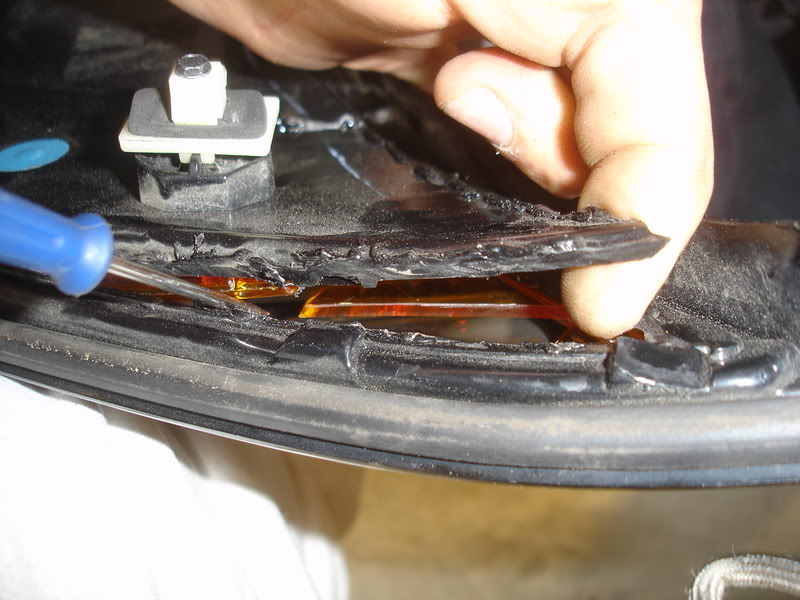
Grab the piece you just cut and fold it back on the "hinge" to get access to the orange piece. Using a small pliers, reach in the slot and grab the orange piece. It does not want to come out, you have to force it. There is a chance you will scratch the inside of the lense but it will not be that bad or noticeable.
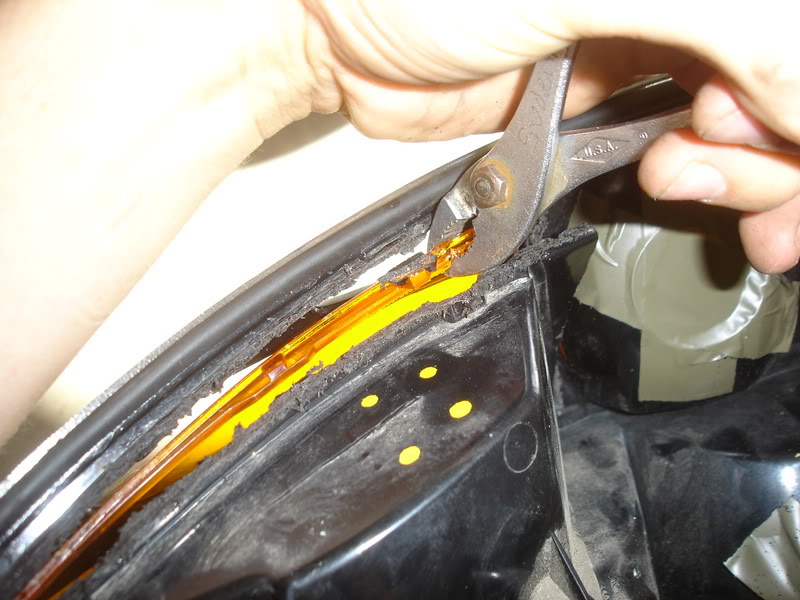
Pull the orange piece the rest of the way

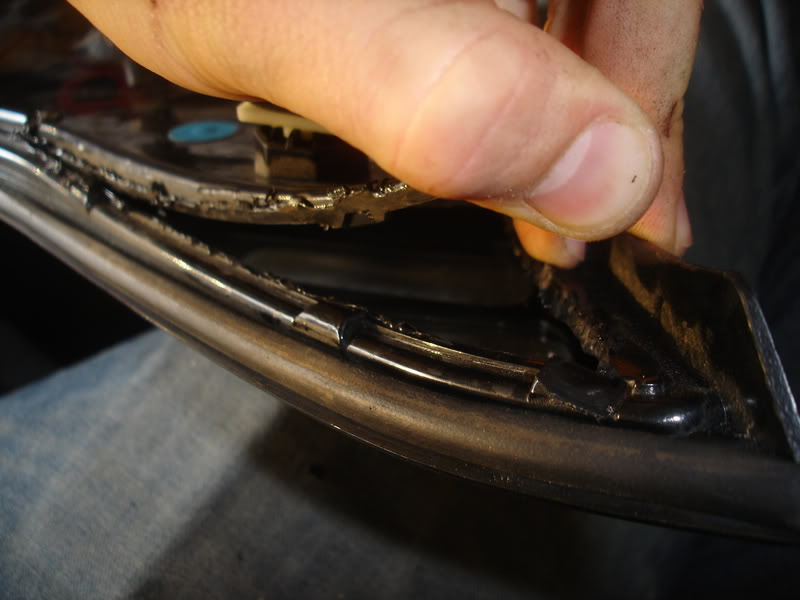
Blow the housing out with compressed air to get all the black plastic pieces out of the housing.
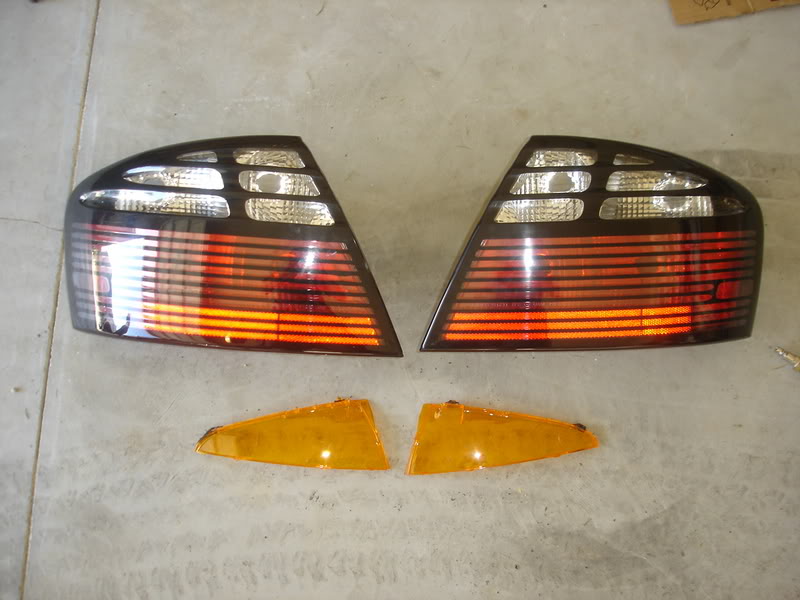
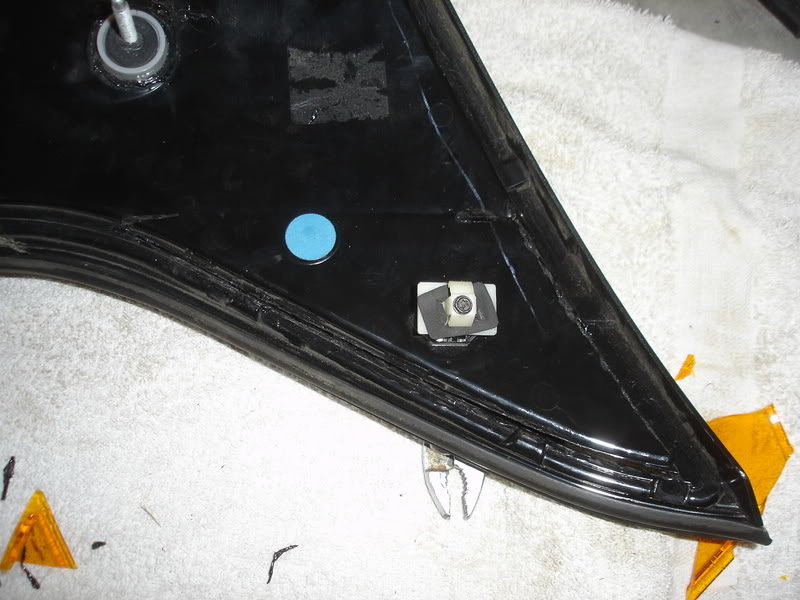
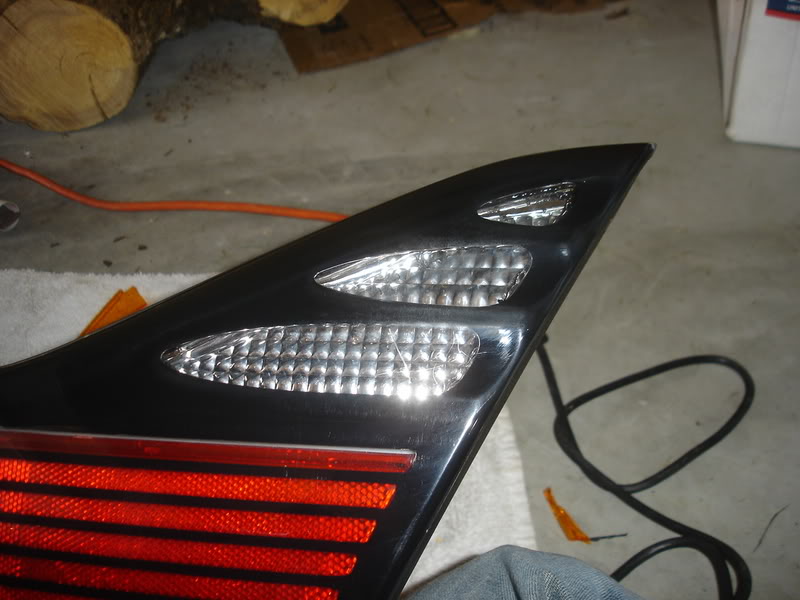
Here are the cleared taillights.
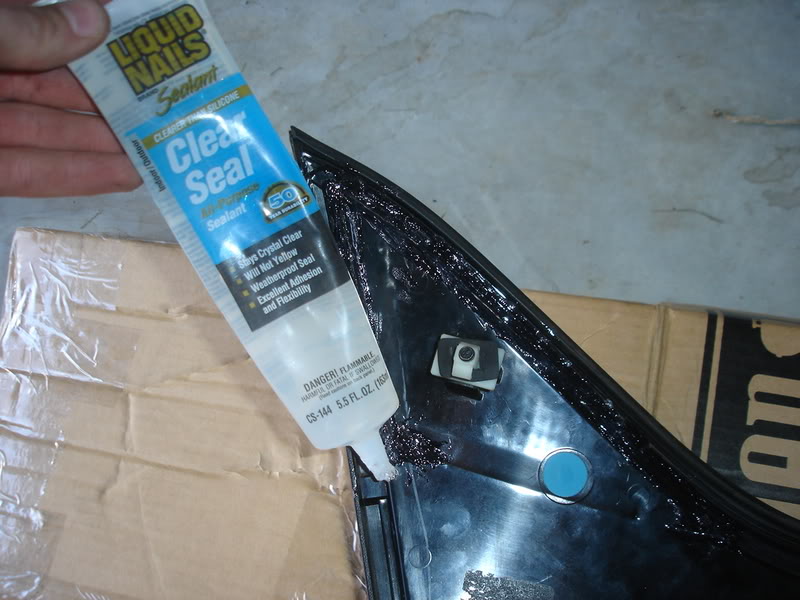
At this point, you would want to apply several coats of clear silicon adhesive to seal up the light. Let it dry AT LEAST overnight before you put it back on the car. I would wait at least 2 days if it was me.
UPDATE:
Here is how do to the center reflector tailpiece
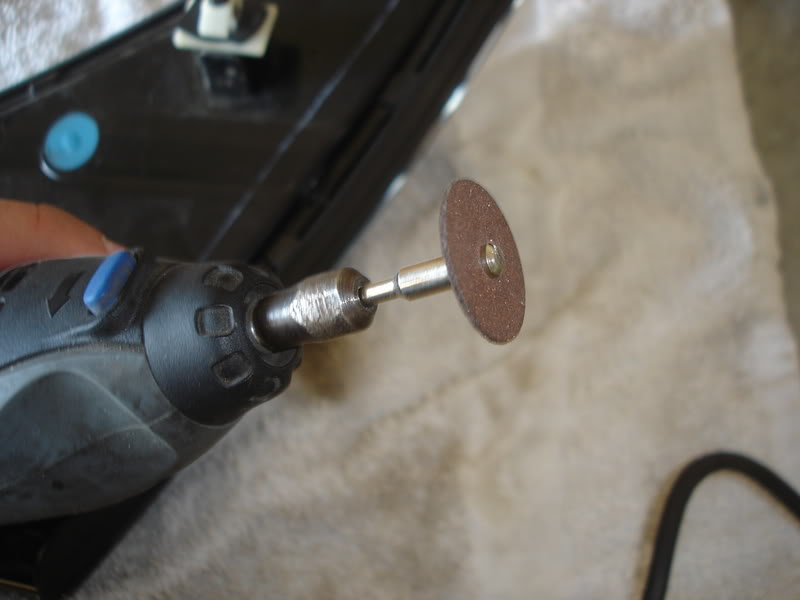
For this part, you will want to use this type of cutter on your dremel.
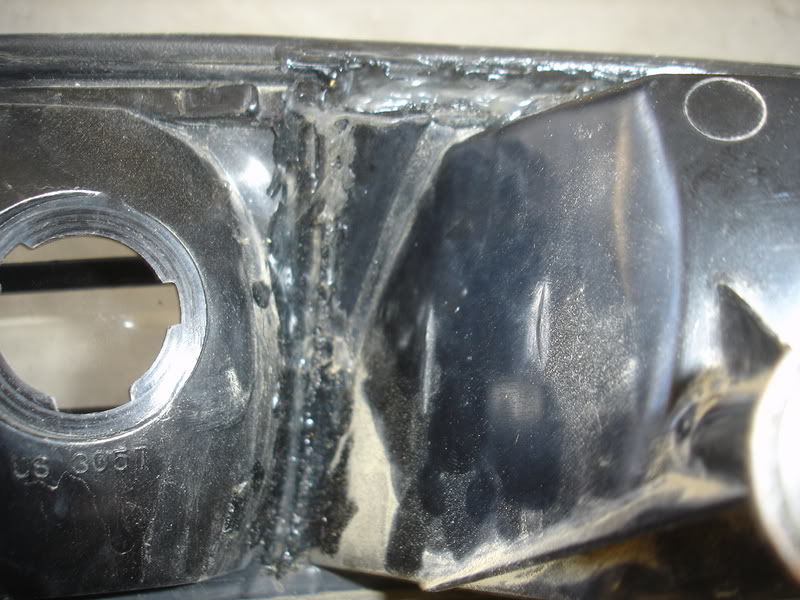
Here is the cut line you want to make
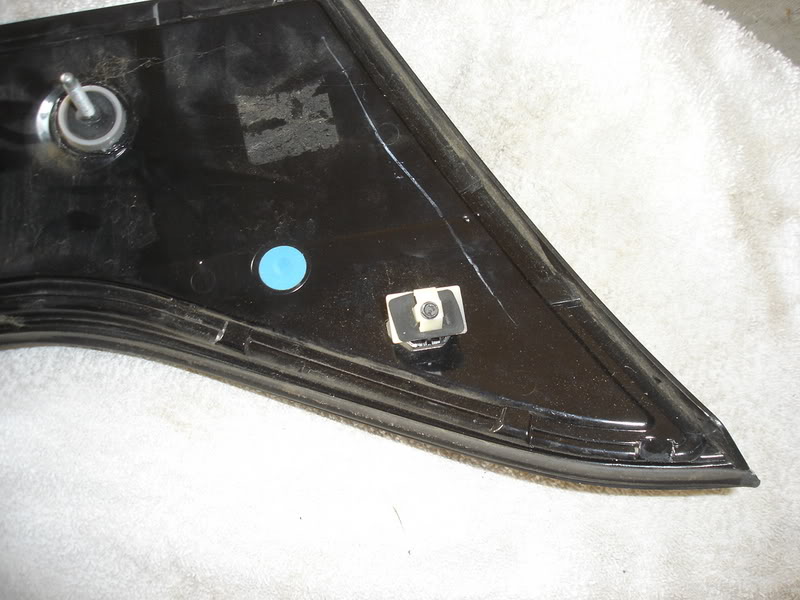
before the cut:
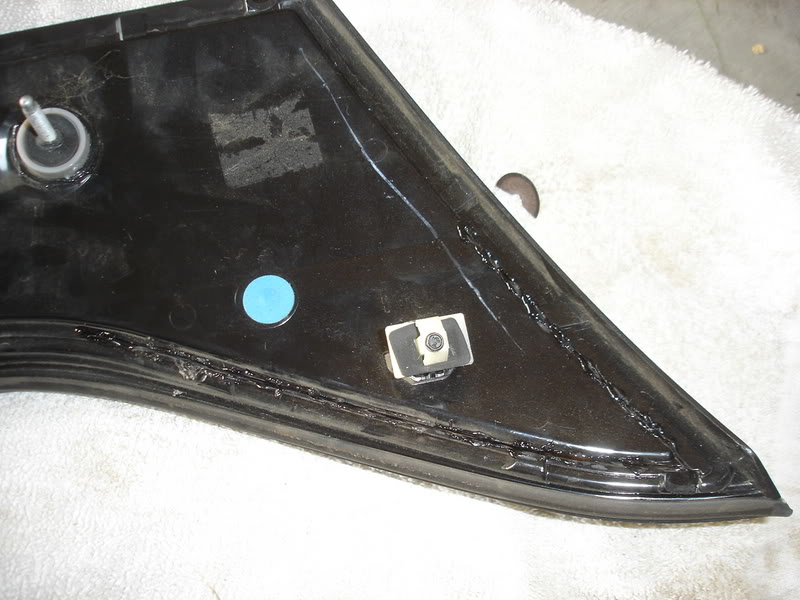
after the cut:
pry open the cut piece, and use any means to get the orange plastic out. I used a small screw driver to break it up inside there, and then the small piece fall out. You can use a small pliers to pull out the pieces to.
here it is, all clear
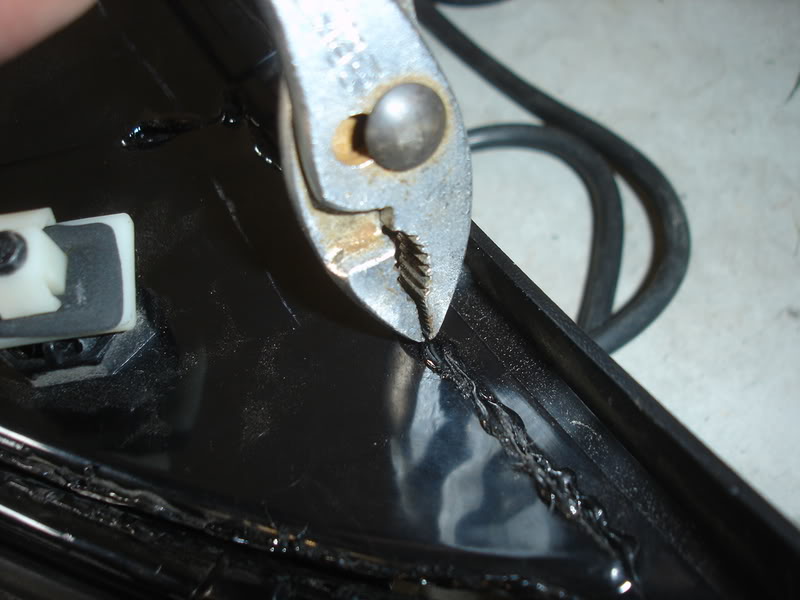
then, use a pliers to pull of all the molten plastic
it should be nice and clean at this point
then, use more of that clear silicon adhesive to seal it all up. Be generous, nobody is going to see this except rain, so don't worry about overdoing it.
then find a way to keep it compressed until it dries. I used electrical tape.

Tools/Items needed:
Taillight housing
Dremel with 1/8" drill bit
Compressed air
Masking tape
Clear silicon adhesive
Flat head screwdriver
Small pliers
Safety glasses
First of all, put on your safety glasses, this is a messy job. You are going to want to do it in your garage or outside since there will be black specs of plastic in a 20 ft diameter.
Now grab your taillight and sit down in a chair. I found it does work best to sit and have the light in your lap as you cut into it.
Use some sort of masking tape to cover the holes you are not working on. Granted the plastic debris will get into the other area, but not as bad.
On the back side, you will see where you need to cut
Using a dremel with a 1/8" bit, cut into the plastic using 2 steady hands. I used a wood boring bit this time because I found it cuts sideways really good.
You want to cut the plastic at a small angle in towards the light.
You will be able to see light through the backside when you have completed the cut.
Grab the piece you just cut and fold it back on the "hinge" to get access to the orange piece. Using a small pliers, reach in the slot and grab the orange piece. It does not want to come out, you have to force it. There is a chance you will scratch the inside of the lense but it will not be that bad or noticeable.
Pull the orange piece the rest of the way
Blow the housing out with compressed air to get all the black plastic pieces out of the housing.
Here are the cleared taillights.
At this point, you would want to apply several coats of clear silicon adhesive to seal up the light. Let it dry AT LEAST overnight before you put it back on the car. I would wait at least 2 days if it was me.
UPDATE:
Here is how do to the center reflector tailpiece
For this part, you will want to use this type of cutter on your dremel.
Here is the cut line you want to make
before the cut:
after the cut:
pry open the cut piece, and use any means to get the orange plastic out. I used a small screw driver to break it up inside there, and then the small piece fall out. You can use a small pliers to pull out the pieces to.
here it is, all clear
then, use a pliers to pull of all the molten plastic
it should be nice and clean at this point
then, use more of that clear silicon adhesive to seal it all up. Be generous, nobody is going to see this except rain, so don't worry about overdoing it.
then find a way to keep it compressed until it dries. I used electrical tape.


Senior Member
Posts like a Northstar
Joined: Dec 2005
Posts: 740
Likes: 0
From: jersey
They look great!! Thanks so much Harofreak00 for doing them!
I was getting really frustrated with those, and now with this great step-by-step on showing how to do it, people won't get as frustrated as I did
Thank you once again!
Oh and I can send you the center peice Unless you think I could do it
I was getting really frustrated with those, and now with this great step-by-step on showing how to do it, people won't get as frustrated as I did
Thank you once again!
Oh and I can send you the center peice
Unless you think I could do it
