04MonteLS's "Project SQ Monte"
 12-06-2010, 09:46 PM
#11
Senior Member
Posts like a Turbo
Thread Starter
Join Date: Jul 2010
Location: Sacramento, CA.
Posts: 326
Likes: 0
Received 0 Likes
on
0 Posts


 12-06-2010, 10:13 PM
#12
Senior Member
Posts like a Turbo
Thread Starter
Join Date: Jul 2010
Location: Sacramento, CA.
Posts: 326
Likes: 0
Received 0 Likes
on
0 Posts
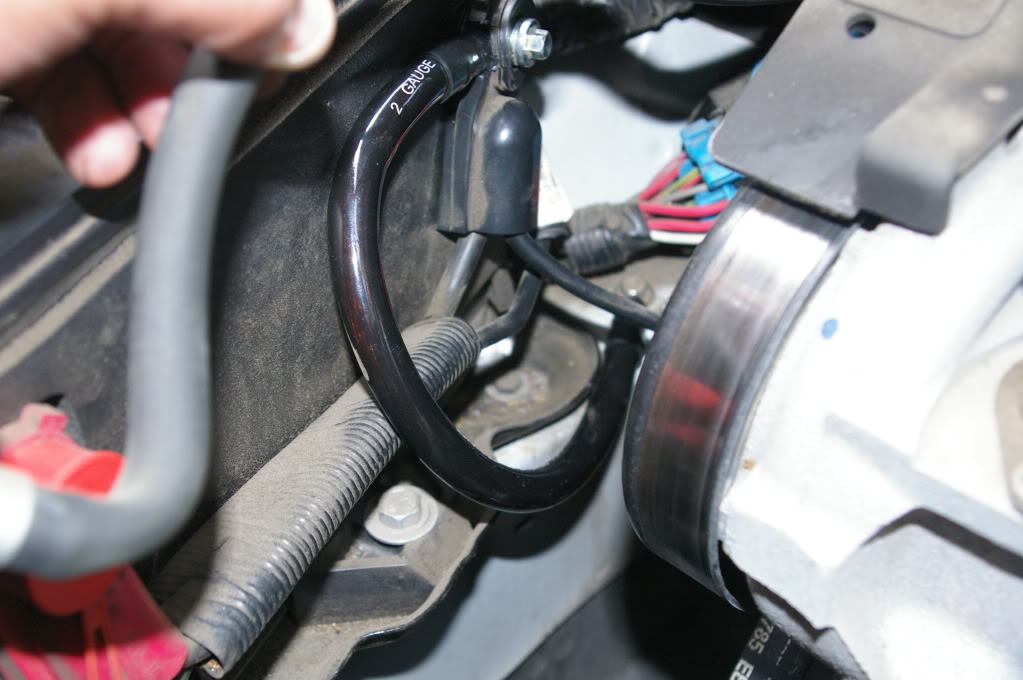
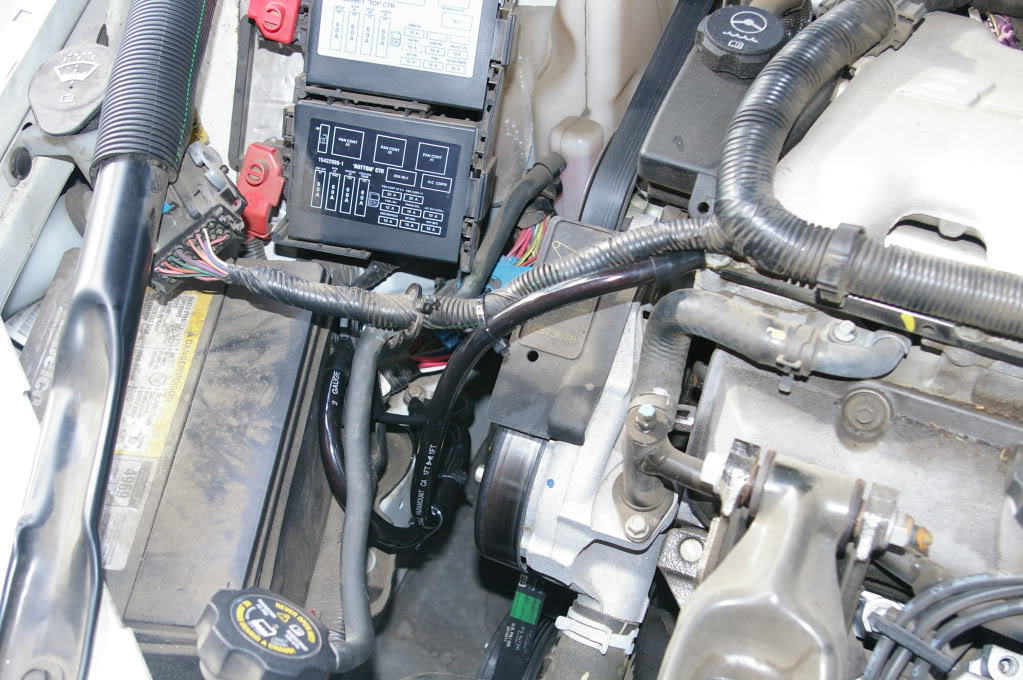
This upgrade calls for using bigger diameter wiring for the following wires:
battery to chassis ground
engine to chassis ground
alternator power lead (to battery)
This is supposed to allow your charging system to be more efficient by getting rid of the bottleneck due to the small guage wiring the factory used. Whenever I do this upgrade I simply add the wiring and leave the factory stuff in place, you can replace the wires if you want but it'* at your own risk.
The first wire I went to upgrade was the battery to chassis ground but as you can see in the picture, the ring terminal hole wasn't big enough so I had to drill it out.
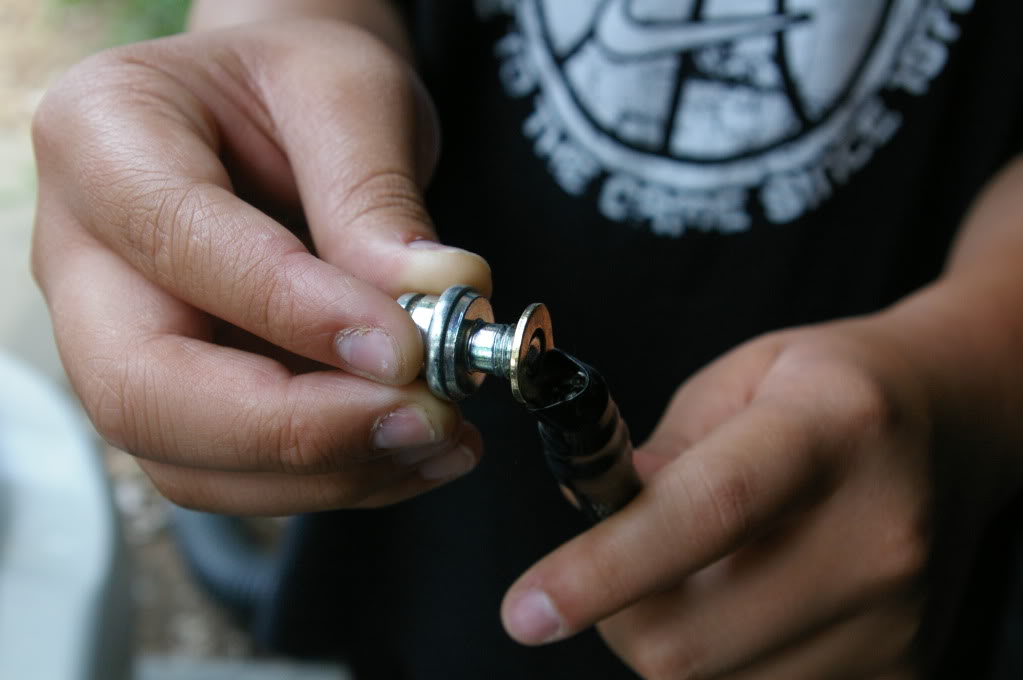
Then after I made the hole big enough, the terminal wouldn't fit onto the factory lug due to the huge boot they use on the negative battery terminal.
So I had to notch the boot to allow the terminal enough clearance

This is the first ground done, battery to chassis (BTW, I soldered on the ring terminals, no whimpy crimps here!)
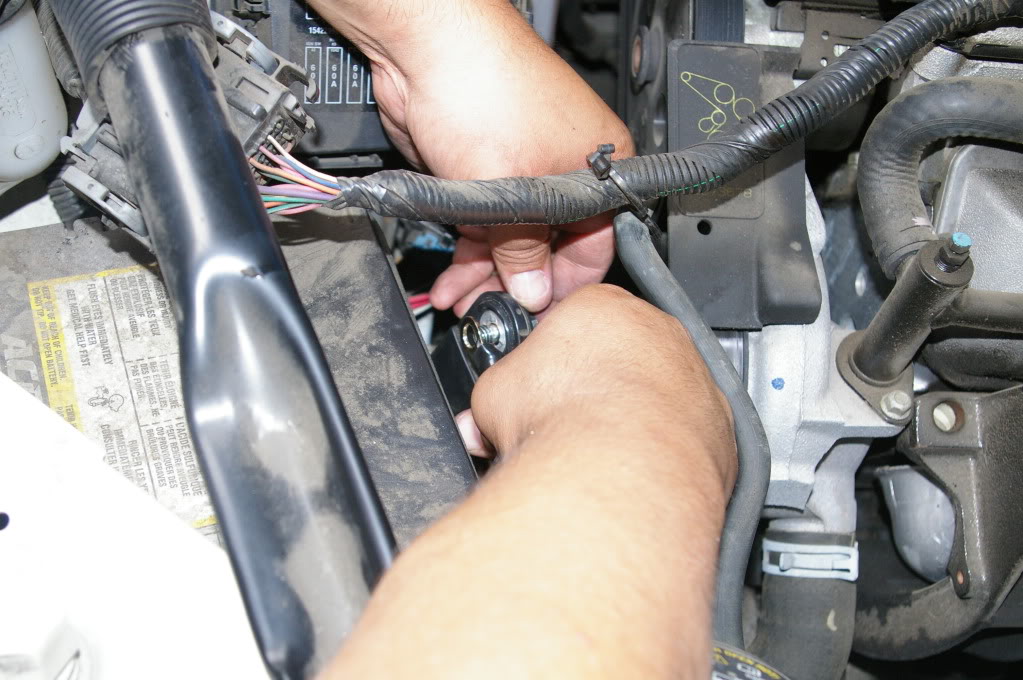
Then it was on to the engine to chassis ground, I used the same location on the chassis for this ground as I did for the battery to chassis ground, no problem getting anything to fit here.
So you're probably wondering where the last wire is. Well, when I did this I didn't have enough 2ga. power wire to get the alternator lead done so it got done at a later time and I never took pics of it. But all I did was add the wire to the power lug on the alt. and ran it over to the battery. Piece of cake!
battery to chassis ground
engine to chassis ground
alternator power lead (to battery)
This is supposed to allow your charging system to be more efficient by getting rid of the bottleneck due to the small guage wiring the factory used. Whenever I do this upgrade I simply add the wiring and leave the factory stuff in place, you can replace the wires if you want but it'* at your own risk.
The first wire I went to upgrade was the battery to chassis ground but as you can see in the picture, the ring terminal hole wasn't big enough so I had to drill it out.
Then after I made the hole big enough, the terminal wouldn't fit onto the factory lug due to the huge boot they use on the negative battery terminal.
So I had to notch the boot to allow the terminal enough clearance
This is the first ground done, battery to chassis (BTW, I soldered on the ring terminals, no whimpy crimps here!)
Then it was on to the engine to chassis ground, I used the same location on the chassis for this ground as I did for the battery to chassis ground, no problem getting anything to fit here.
So you're probably wondering where the last wire is. Well, when I did this I didn't have enough 2ga. power wire to get the alternator lead done so it got done at a later time and I never took pics of it. But all I did was add the wire to the power lug on the alt. and ran it over to the battery. Piece of cake!
12-06-2010, 11:21 PM
#13
Senior Member
Posts like a Turbo
Thread Starter
Join Date: Jul 2010
Location: Sacramento, CA.
Posts: 326
Likes: 0
Received 0 Likes
on
0 Posts
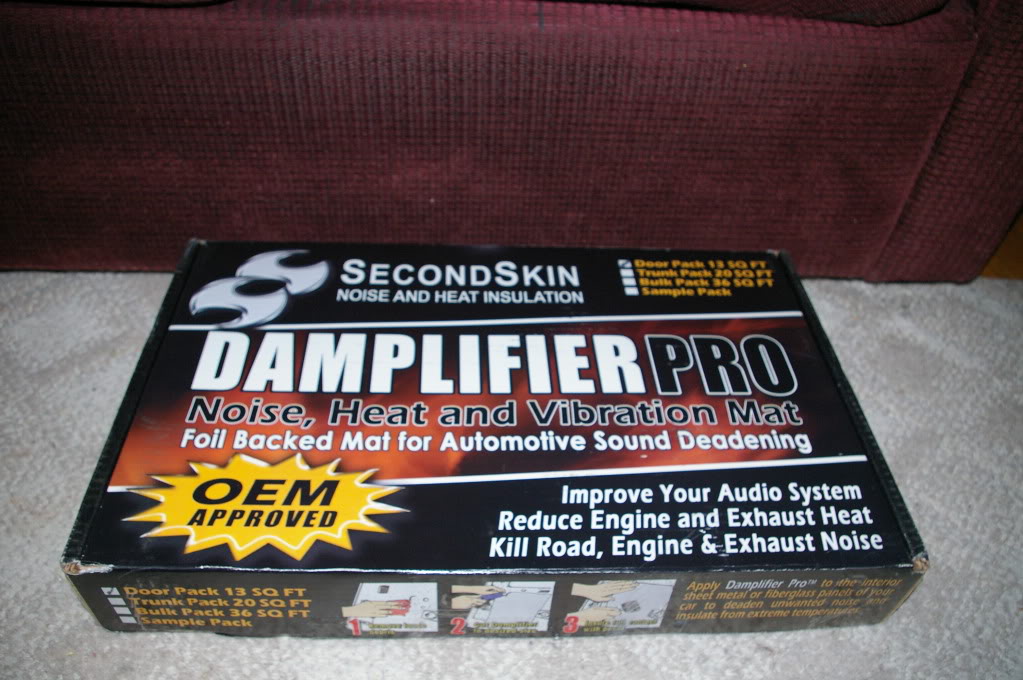
Any good stereo installation will utilize some sound deadening material to help keep unwanted noise out of the car as well as to help get rid of resonant noise produced by vibration of metal panels in the car. I'm a member of another forum owned by a local guy who is a hardcore stereo guy and an internet star of sorts for his insane system builds, one of which is his own 99 Tahoe sitting on 26'*, sporting 30,000 watts of power supplied by Rockford Fosgate amps, 4 18" AA SMD subs in a 20 cubic foot ported box tuned to 30Hz. He still can seat 5 comfortably and his truck is hitting high 150'* on a TL.
He has alot of connections in the car audio world and some manufacturers who have partnered up with him and his forum, one of which is SecondSkin Automotive Insulation. The owner, Anthony Collova, had a giveaway to kickoff this new partnership in which he put up 10 door packs of SecondSkin Damplifier Pro. Members had to post in his thread and agree to the terms of the promotion and after 2 weeks he was going to randomly pick the 10 winners out of all who entered. 68 members entered in that time and he ended up giving all 68 of us a door pack, free wooden roller and a free folding blade to assist in installation of the product. These door packs retail for $60 on the SecondSkin site, plus $8 for the blade and $8 for the roller, that'* a total of $76 retail per pack given away, for a grand total of $5168 worth of product GIVEN AWAY FOR FREE!
Here'* my pics of the product and install
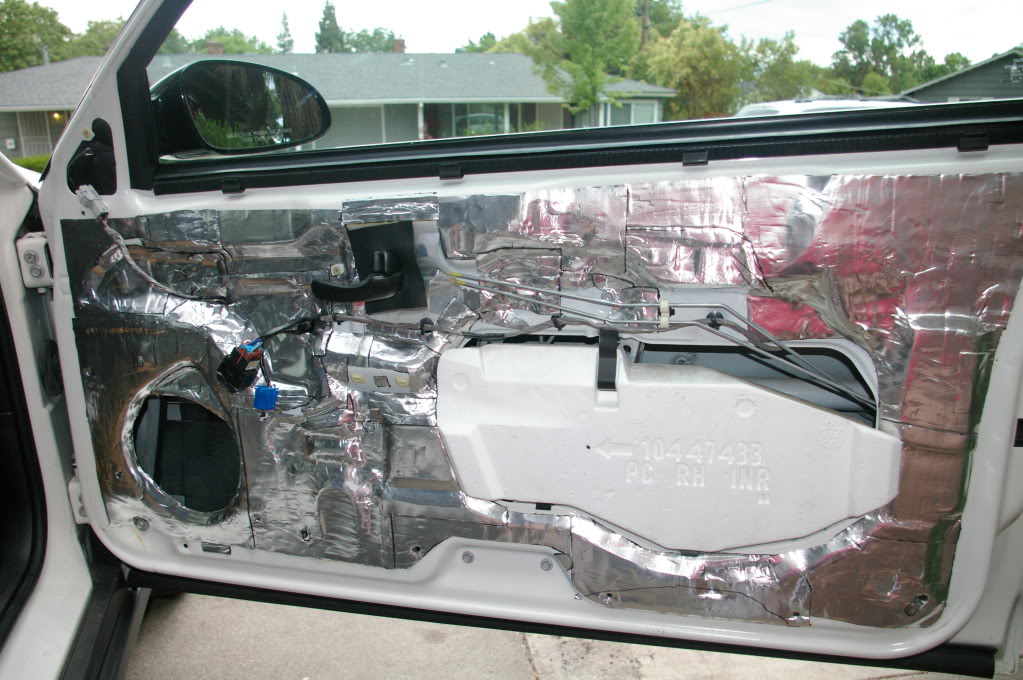
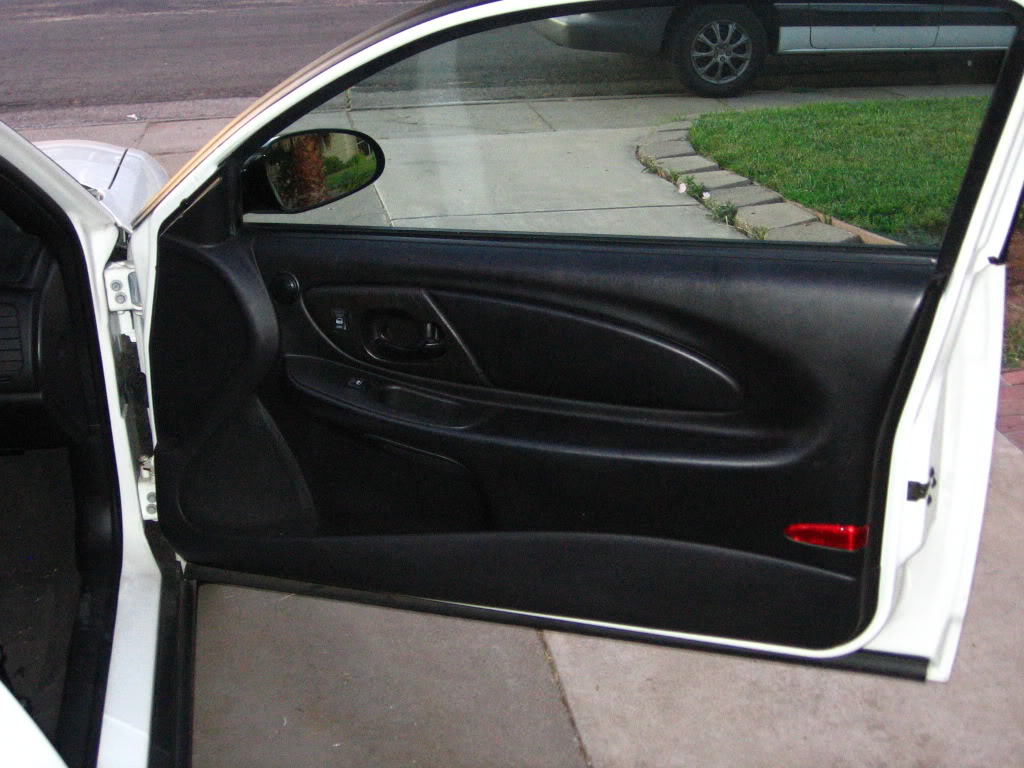
The first thing to do, of course, was remove the door panels and check out the door to see how much of a pain this was going to be. It was already going to be kind of a pain cause I had never before used or applied sound deadening so today was a very special day for me as I got my deadening material virginity popped In the process of removing the panels I ran into a slight issue, the geniuses at Chevy decided to put the plugs in with the release mechanism in the worst possible spot so when I was removing the passenger side panel the window switch broke apart while I was trying to flip the panel upside down so I could gain access to the release mechanism. When I say split apart, I mean just that, the internal pins were exposed and all. I just knew I'd have to pony up for a new switch but I was able to get it back together securely with no issues. Whew, dodged one there.
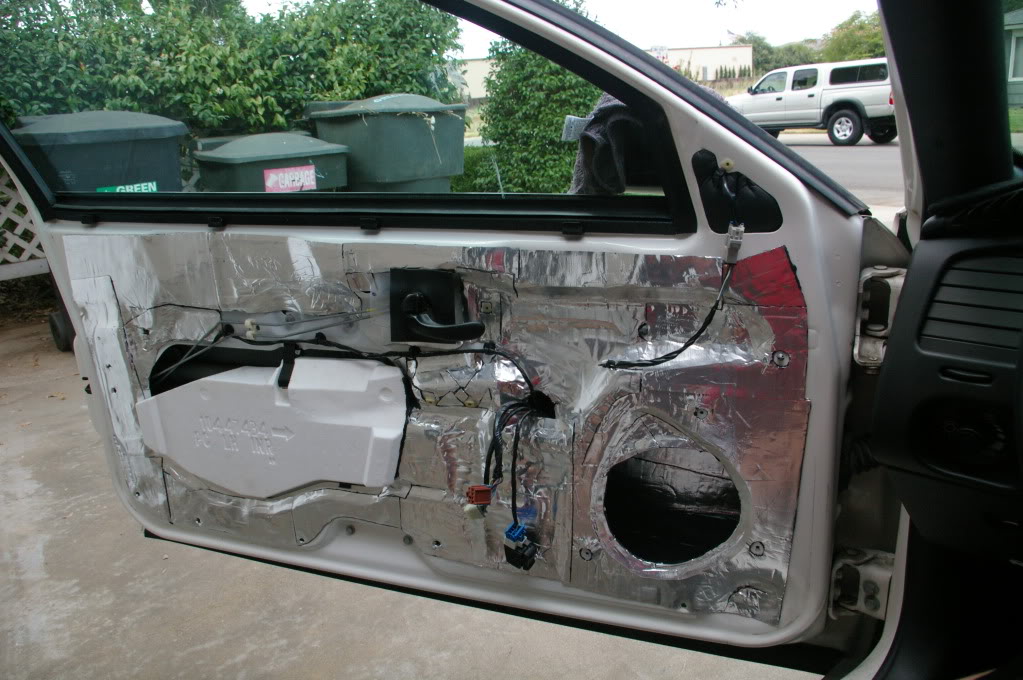
So I get the panels off and this is what is staring at me
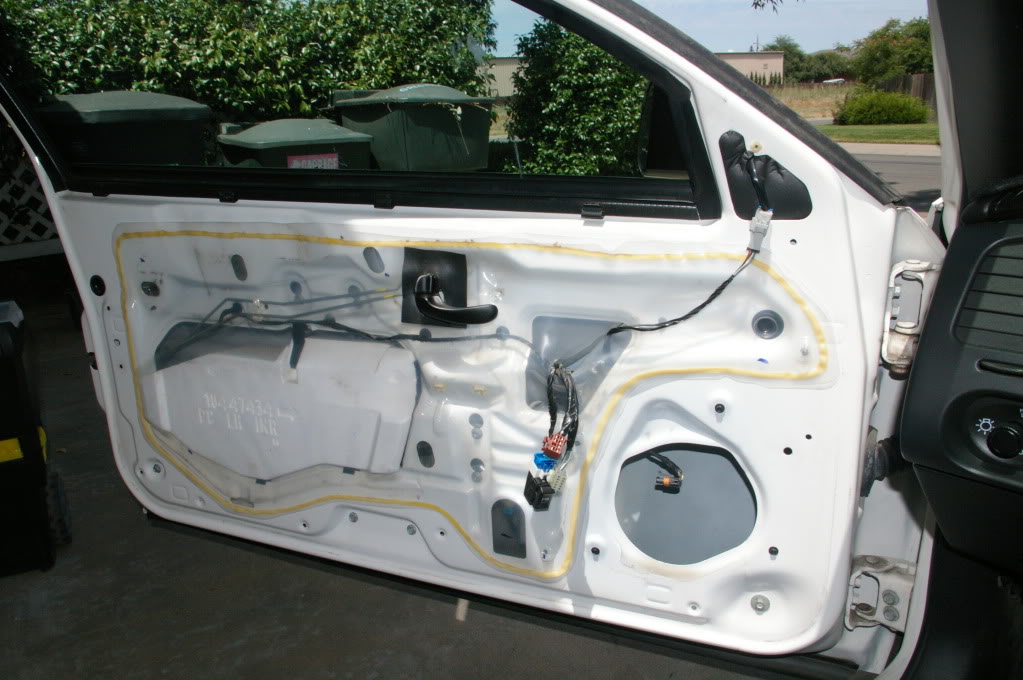
Not too bad, I suppose. Before I go any further I decide to look for the culprit of this nasty, sticky stuff thats on the inside of my window. It'* horrible stuff. I detail cars and have lots of products in my garage but none of them could do any damage to this stuff so I had to resort to using a brillo pad. It got the stuff off but if you look hard enough you can see some fine scratches. Not a big deal, but a deal none the less. So this is the nastiness that'* on my inner window, again.
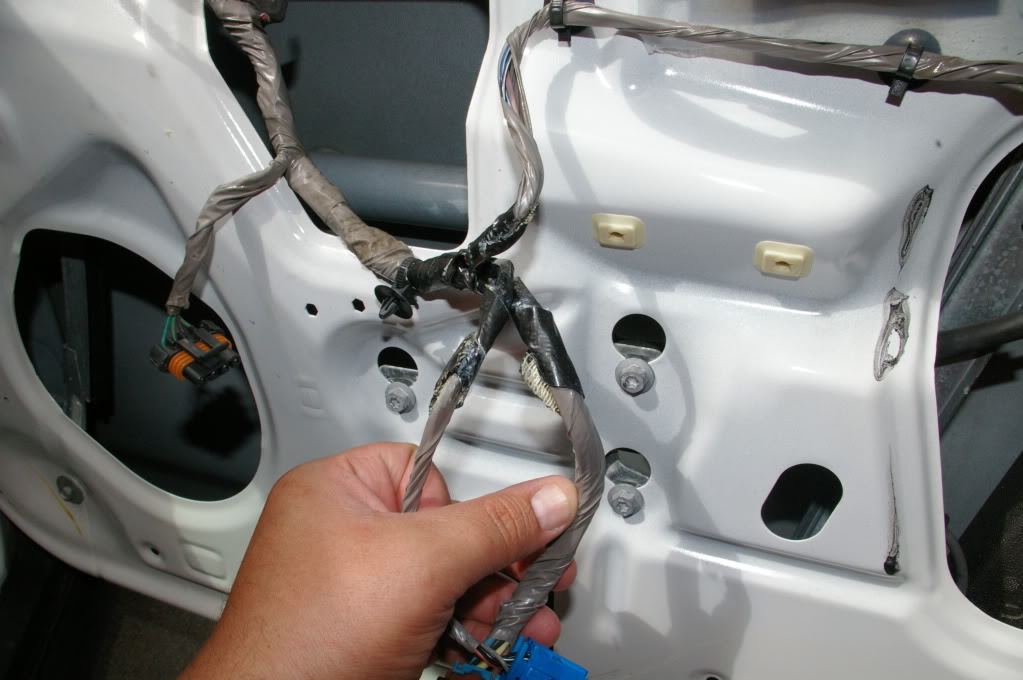
Close inspection of the door panel and wiring revealed the cause
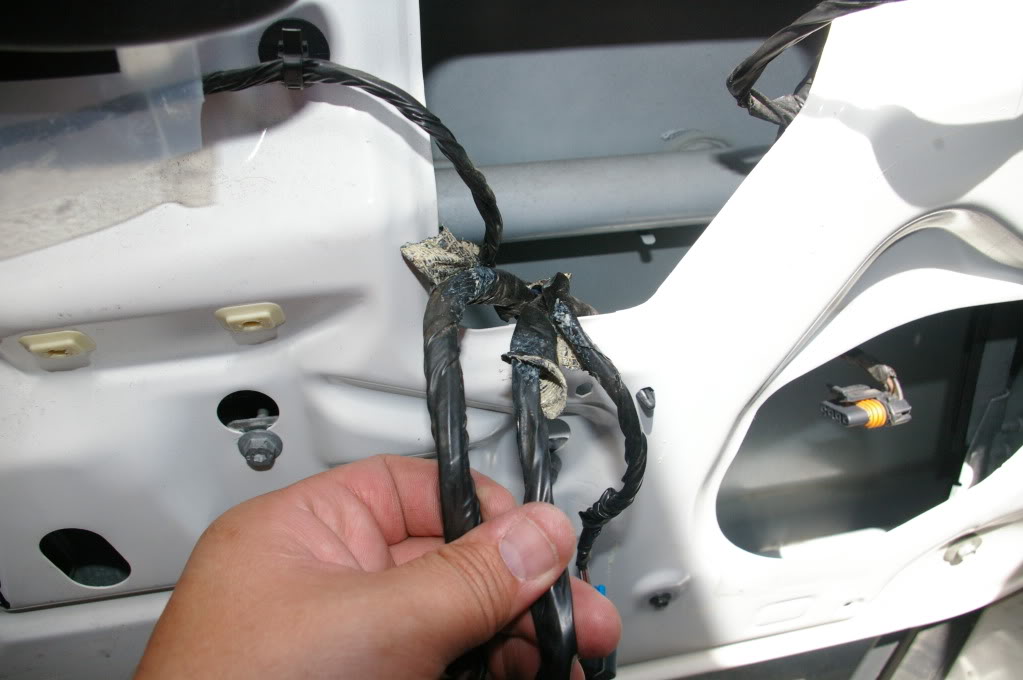
Again, the geniuses at Chevy came up with a great idea and decided using duct tape on the inner door wiring was the thing to do. The adhesive melted and the tape unraveled, getting that sticky mess on my window
So the first order of the day was to remove the plastic lining from the door panel and handle that issue with the tape. You see what the wiring looked like before, this is what it looks like now
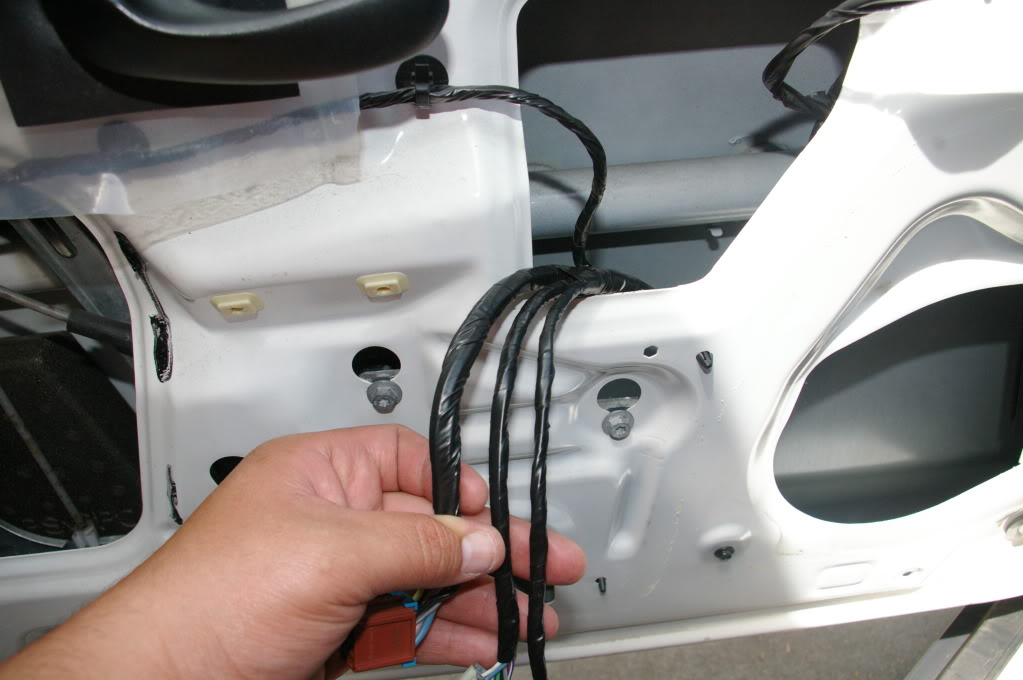
Now I can rest assured that I'll no longer have to worry about the sticky stuff getting on my window and can move on to the real job, should be fun.
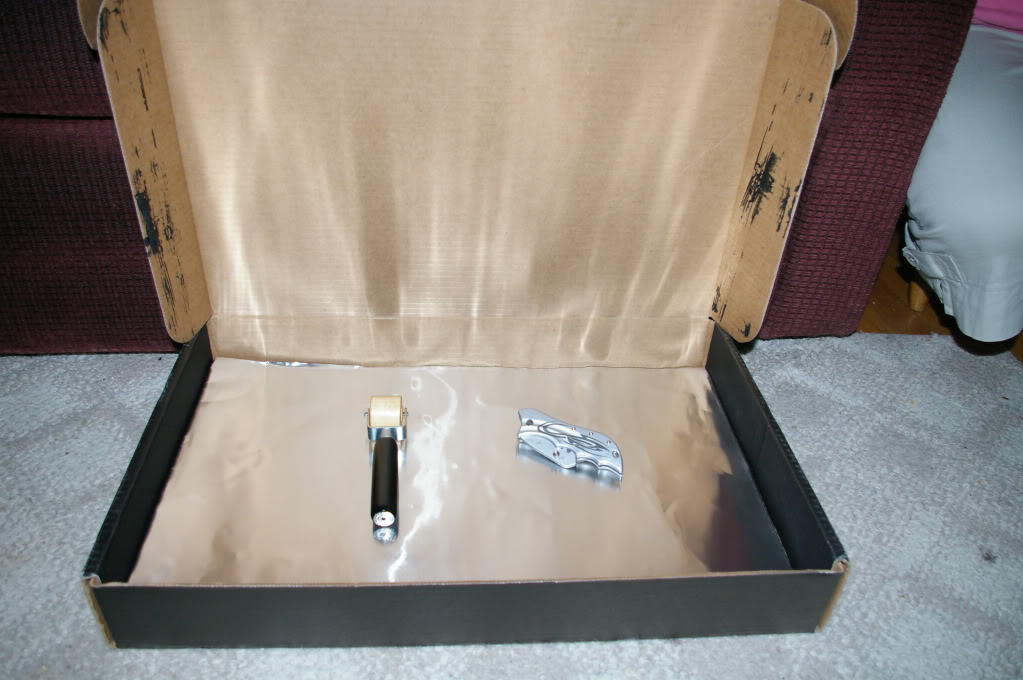
I pop open the box of Damplifier Pro and notice the deadener is sticking to the sides, not a big deal, rather an observation. I pulled a little harder and it opened right up. It was a little warm out today so I set a sheet of deadener on my dash board so it can warm up a little and hopefully be a little easier to work with and stick a little better. Worked like a charm! I pulled up a milk crate and proceeded.
Like everybody else who won this via the promotion, I got the Fury blade, but I found myself using a pair of scissors to cut the sheets of material and the knife for cutting the more intricate cuts when the material was on the door; for things like holes for bolts, clips, etc. Worked out well. The Fury blade looks pretty sick but when I first picked it up it didn't scream "high quality" or "heavy duty", my first impression was "Wow, this thing is pretty lightweight, I hope it holds up." At the end of the day, it did what I needed it to do and with no issues at all.
My goal was to use as many large, solid pieces as possible, but that didn't work out too well. Far too many ridges, angles, and curves for me to do so. Either that, or I just don't have the technique to do it. I'm thinking a combo of both. In any case, I was able to get the driver side door done with no major issues. It took me about 2-3 hrs to get it done, including a 30 minute lunch break, and about 30 minutes to clean/organize my garage/tools and to reinstall my subs and box which I had removed last weekend after a little technical issue. It felt like it took longer than it really did and i'm sure it should have been done faster but I was taking my sweet time since it was all new to me. The product was easy to work with, although cutting with scissors probably wasn't the best way to go even though it did prevent me from having to get up and go to my work bench every time I needed to cut a sheet. I think i'm going to have to devise a better way to locate screw holes and the like because this stuff is pretty thick so it makes locating the holes beneath a bit of a task if the holes are small. It was very pliable and conformed to the angles and curves of the panel with ease (I think setting it on the dash to get warm prior to using was a good idea). So this is how the first door came out (notice the deadener inside the speaker opening, I covered as much area in there as I could)
I think it came out alright, could be better, but not bad for a deadening material noob.
So I moved on to the passenger side, and aside from the issue I had with the window switch as stated above, it went rather smooth. I got this one done in about an hour to hour and a half. I hadn't had any issues with the wiring getting adhesive on the window but I noticed this side also had duct tape on it which was loose and sloppy so I handled that before I started the deadening.
Before:
After:

Finished door
Once I was done and had removed all tools and what not from inside my car, I closed the door and heard a solid "thud", it put a smile on my face. It sounded far less hollow and more solid than before...the sound was so impressive that after cleaning up my mess and locking everything up, I watered my lawn and once I was done with that I went over to my car and opened and closed the doors again just to hear it. LOL.
Once again, big ups to Ant for the promotion, the product is easy to work with and even though I haven't been able to confirm yet how much of a difference it made when playing music, the sound of my doors closing has me feeling very optimistic about it. The freebie folding knife looks cool as hell and came in handy during the install. So far, I give it two thumbs up, I'll report back once I get my speakers in and powered up.
After deadening the doors up nicely I had about 3 or 4 sheets of deadener left and ended up using that to deaden the rear deck. Talk about pain in the *ss! Cramped working space, lots of curves and ridges as well as lots of hurdles to clear like seat belt anchors, just generally not fun or easy.
With that I was done deadening. What about the trunk, you ask? Well, I had no more SSDP and didn't want to half *ss it so I had some patience, was planning on buying a couple door packs from SS but man, that'* $120! I ended up finishing up my build w/o deadening the trunk at all. But my patience/procrastination paid off cause Ant at SS hooked me up with another door pack for free in another giveaway. I used it on my trunk lid (2 layers) and the trunk sides (including the quarter panels, as far as I could reach) and the "hump" that spans the width of the trunk right behind the rear bumper. My floor was still bare after this but my buddy told me about this stuff at Home Depot called Peel n' Seal. It'* basically an asphalt roof repair material that looks identical to sound deadener but a bit thinner. It'* like $8 a roll so I bought about 4 rolls of it and laid down 3 layers on my trunk floor. Since the stuff is on the floor and out of sight, I had no problems using it for this application. But would never use it anywhere it would be visible or on a vertical or upside down surface since it doesn't have the best adhesion.
For the record, any time I don't have pictures of what I did it'* because I had friends over giving me a hand and we spend so much time talking sh*t that the last thing on my mind is taking pictures.
He has alot of connections in the car audio world and some manufacturers who have partnered up with him and his forum, one of which is SecondSkin Automotive Insulation. The owner, Anthony Collova, had a giveaway to kickoff this new partnership in which he put up 10 door packs of SecondSkin Damplifier Pro. Members had to post in his thread and agree to the terms of the promotion and after 2 weeks he was going to randomly pick the 10 winners out of all who entered. 68 members entered in that time and he ended up giving all 68 of us a door pack, free wooden roller and a free folding blade to assist in installation of the product. These door packs retail for $60 on the SecondSkin site, plus $8 for the blade and $8 for the roller, that'* a total of $76 retail per pack given away, for a grand total of $5168 worth of product GIVEN AWAY FOR FREE!
Here'* my pics of the product and install
The first thing to do, of course, was remove the door panels and check out the door to see how much of a pain this was going to be. It was already going to be kind of a pain cause I had never before used or applied sound deadening so today was a very special day for me as I got my deadening material virginity popped In the process of removing the panels I ran into a slight issue, the geniuses at Chevy decided to put the plugs in with the release mechanism in the worst possible spot so when I was removing the passenger side panel the window switch broke apart while I was trying to flip the panel upside down so I could gain access to the release mechanism. When I say split apart, I mean just that, the internal pins were exposed and all. I just knew I'd have to pony up for a new switch but I was able to get it back together securely with no issues. Whew, dodged one there.
So I get the panels off and this is what is staring at me
Not too bad, I suppose. Before I go any further I decide to look for the culprit of this nasty, sticky stuff thats on the inside of my window. It'* horrible stuff. I detail cars and have lots of products in my garage but none of them could do any damage to this stuff so I had to resort to using a brillo pad. It got the stuff off but if you look hard enough you can see some fine scratches. Not a big deal, but a deal none the less. So this is the nastiness that'* on my inner window, again.
Close inspection of the door panel and wiring revealed the cause
Again, the geniuses at Chevy came up with a great idea and decided using duct tape on the inner door wiring was the thing to do. The adhesive melted and the tape unraveled, getting that sticky mess on my window
So the first order of the day was to remove the plastic lining from the door panel and handle that issue with the tape. You see what the wiring looked like before, this is what it looks like now
Now I can rest assured that I'll no longer have to worry about the sticky stuff getting on my window and can move on to the real job, should be fun.
I pop open the box of Damplifier Pro and notice the deadener is sticking to the sides, not a big deal, rather an observation. I pulled a little harder and it opened right up. It was a little warm out today so I set a sheet of deadener on my dash board so it can warm up a little and hopefully be a little easier to work with and stick a little better. Worked like a charm! I pulled up a milk crate and proceeded.
Like everybody else who won this via the promotion, I got the Fury blade, but I found myself using a pair of scissors to cut the sheets of material and the knife for cutting the more intricate cuts when the material was on the door; for things like holes for bolts, clips, etc. Worked out well. The Fury blade looks pretty sick but when I first picked it up it didn't scream "high quality" or "heavy duty", my first impression was "Wow, this thing is pretty lightweight, I hope it holds up." At the end of the day, it did what I needed it to do and with no issues at all.
My goal was to use as many large, solid pieces as possible, but that didn't work out too well. Far too many ridges, angles, and curves for me to do so. Either that, or I just don't have the technique to do it. I'm thinking a combo of both. In any case, I was able to get the driver side door done with no major issues. It took me about 2-3 hrs to get it done, including a 30 minute lunch break, and about 30 minutes to clean/organize my garage/tools and to reinstall my subs and box which I had removed last weekend after a little technical issue. It felt like it took longer than it really did and i'm sure it should have been done faster but I was taking my sweet time since it was all new to me. The product was easy to work with, although cutting with scissors probably wasn't the best way to go even though it did prevent me from having to get up and go to my work bench every time I needed to cut a sheet. I think i'm going to have to devise a better way to locate screw holes and the like because this stuff is pretty thick so it makes locating the holes beneath a bit of a task if the holes are small. It was very pliable and conformed to the angles and curves of the panel with ease (I think setting it on the dash to get warm prior to using was a good idea). So this is how the first door came out (notice the deadener inside the speaker opening, I covered as much area in there as I could)
I think it came out alright, could be better, but not bad for a deadening material noob.
So I moved on to the passenger side, and aside from the issue I had with the window switch as stated above, it went rather smooth. I got this one done in about an hour to hour and a half. I hadn't had any issues with the wiring getting adhesive on the window but I noticed this side also had duct tape on it which was loose and sloppy so I handled that before I started the deadening.
Before:
After:
Finished door
Once I was done and had removed all tools and what not from inside my car, I closed the door and heard a solid "thud", it put a smile on my face. It sounded far less hollow and more solid than before...the sound was so impressive that after cleaning up my mess and locking everything up, I watered my lawn and once I was done with that I went over to my car and opened and closed the doors again just to hear it. LOL.
Once again, big ups to Ant for the promotion, the product is easy to work with and even though I haven't been able to confirm yet how much of a difference it made when playing music, the sound of my doors closing has me feeling very optimistic about it. The freebie folding knife looks cool as hell and came in handy during the install. So far, I give it two thumbs up, I'll report back once I get my speakers in and powered up.
After deadening the doors up nicely I had about 3 or 4 sheets of deadener left and ended up using that to deaden the rear deck. Talk about pain in the *ss! Cramped working space, lots of curves and ridges as well as lots of hurdles to clear like seat belt anchors, just generally not fun or easy.
With that I was done deadening. What about the trunk, you ask? Well, I had no more SSDP and didn't want to half *ss it so I had some patience, was planning on buying a couple door packs from SS but man, that'* $120! I ended up finishing up my build w/o deadening the trunk at all. But my patience/procrastination paid off cause Ant at SS hooked me up with another door pack for free in another giveaway. I used it on my trunk lid (2 layers) and the trunk sides (including the quarter panels, as far as I could reach) and the "hump" that spans the width of the trunk right behind the rear bumper. My floor was still bare after this but my buddy told me about this stuff at Home Depot called Peel n' Seal. It'* basically an asphalt roof repair material that looks identical to sound deadener but a bit thinner. It'* like $8 a roll so I bought about 4 rolls of it and laid down 3 layers on my trunk floor. Since the stuff is on the floor and out of sight, I had no problems using it for this application. But would never use it anywhere it would be visible or on a vertical or upside down surface since it doesn't have the best adhesion.
For the record, any time I don't have pictures of what I did it'* because I had friends over giving me a hand and we spend so much time talking sh*t that the last thing on my mind is taking pictures.
12-07-2010, 12:40 AM
#15
Senior Member
Posts like a Turbo
Thread Starter
Join Date: Jul 2010
Location: Sacramento, CA.
Posts: 326
Likes: 0
Received 0 Likes
on
0 Posts
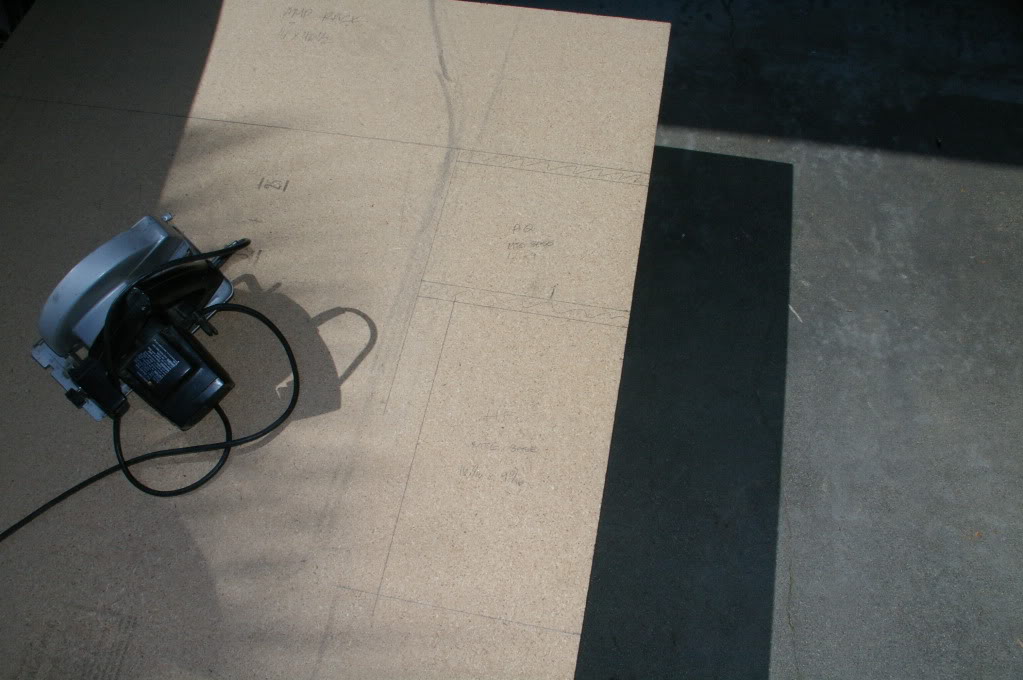
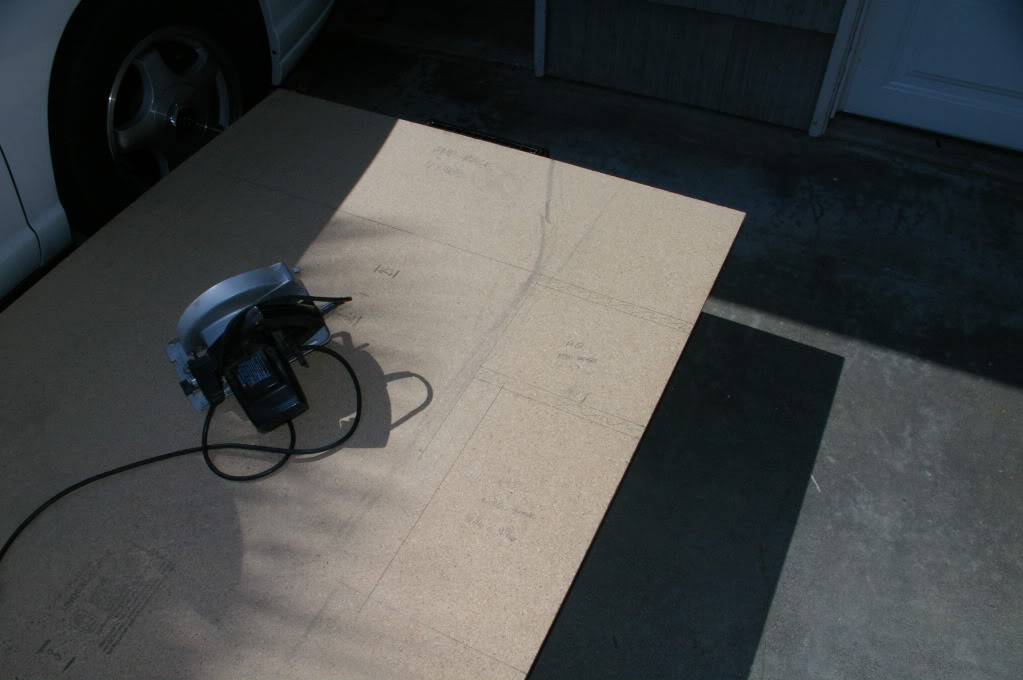
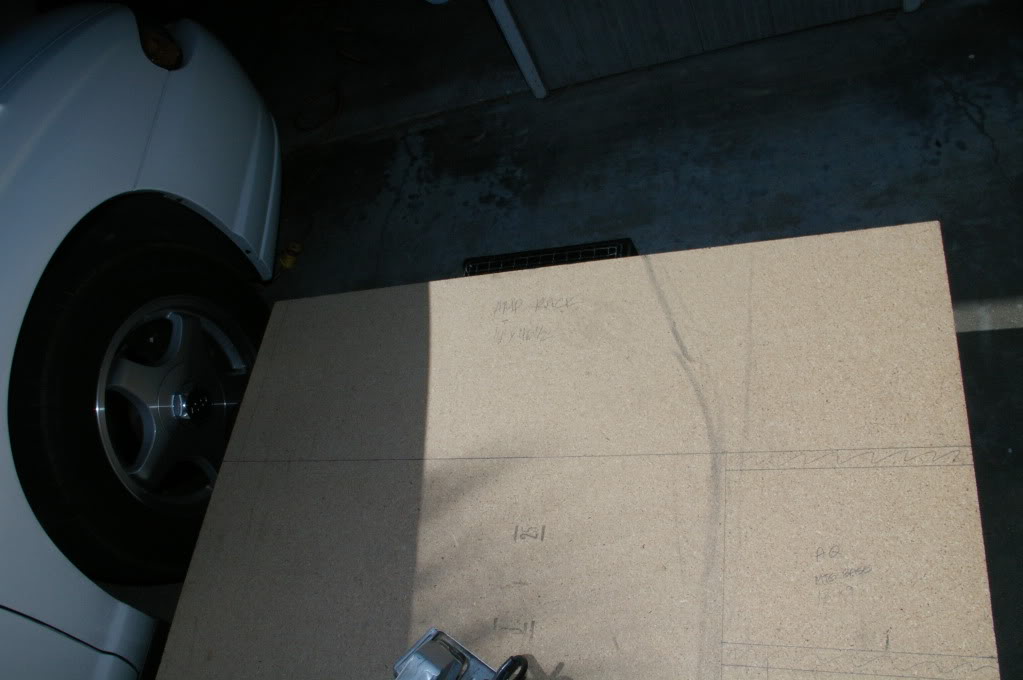
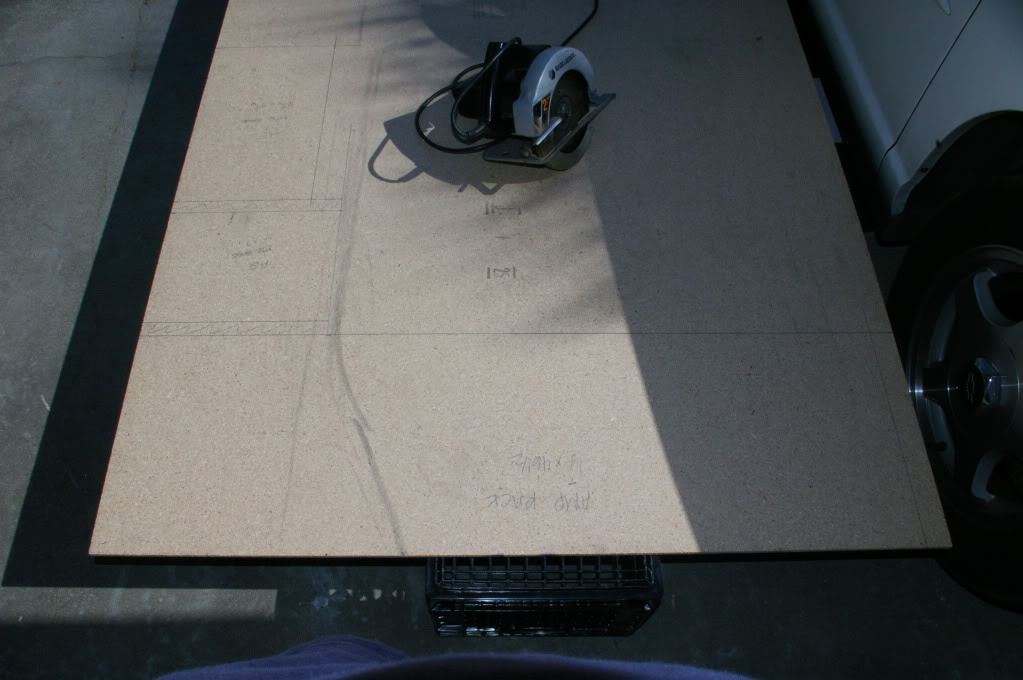
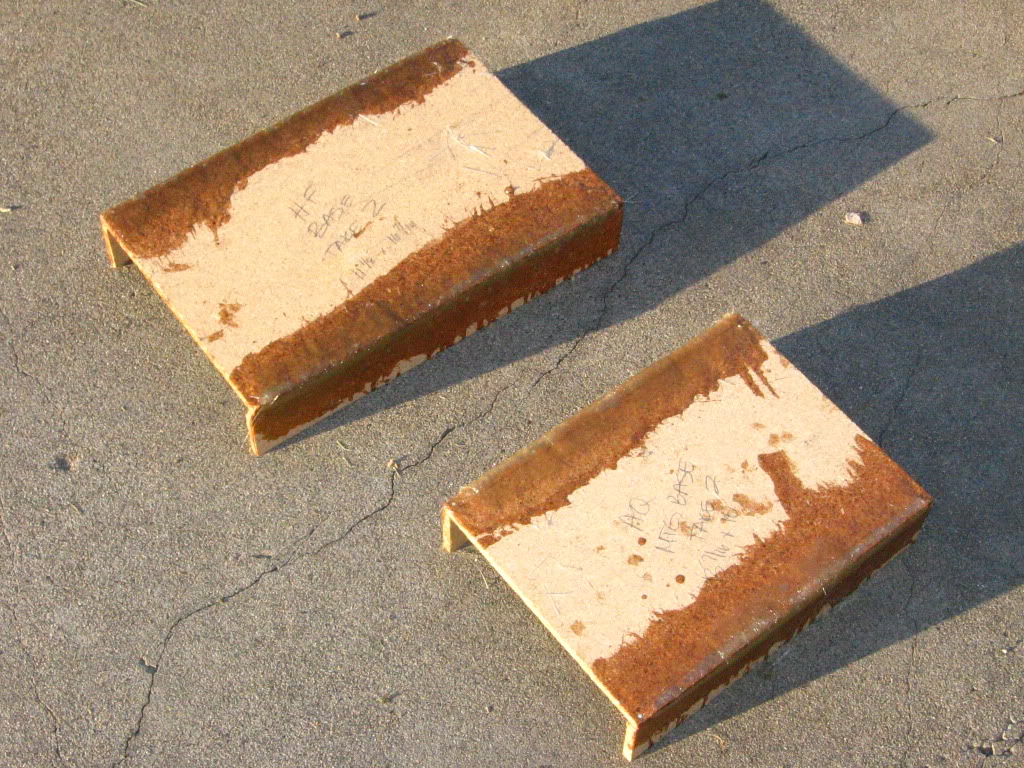
This was easily the most challenging part of this build for me since it is my first woodworking project since high school wood shop class over 15 years ago. But I was up for the challenge. I had a great idea about how I wanted it to be, in my head it was perfect, but in reality, not so much. I have to give myself a little credit though, it did come out how I wanted it to for the most part but I didn't put enough thought into it to achieve perfection like I strive for. I made some mistakes here that I was disappointed that I hadn't accounted for them in the planning stage but it was a good learning experience for sure. But enough talking, on to the construction!
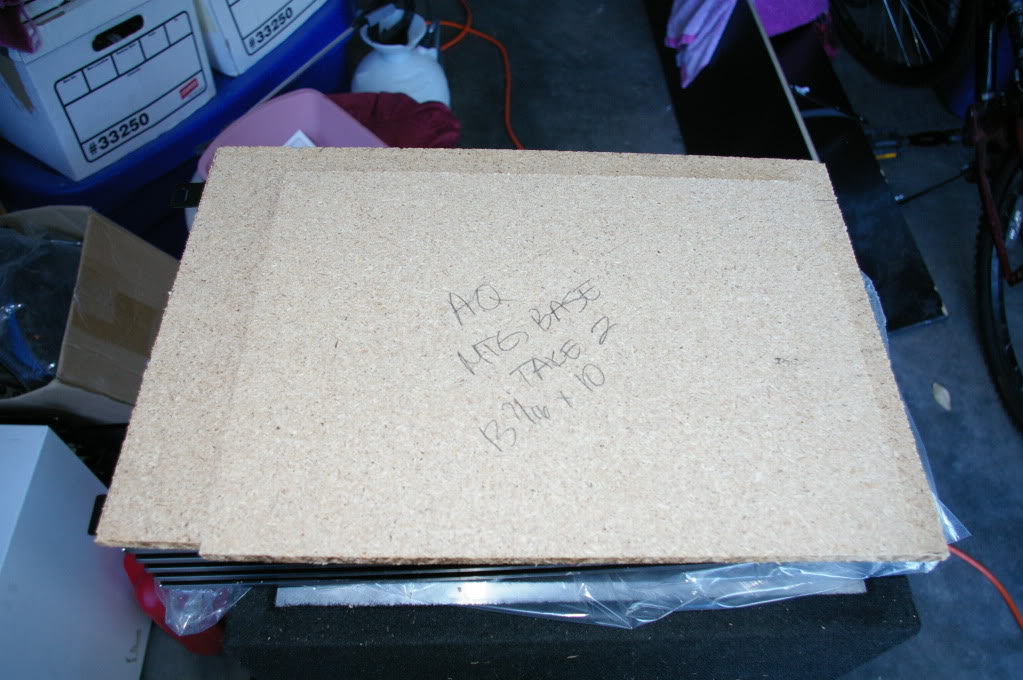
Amp rack housings
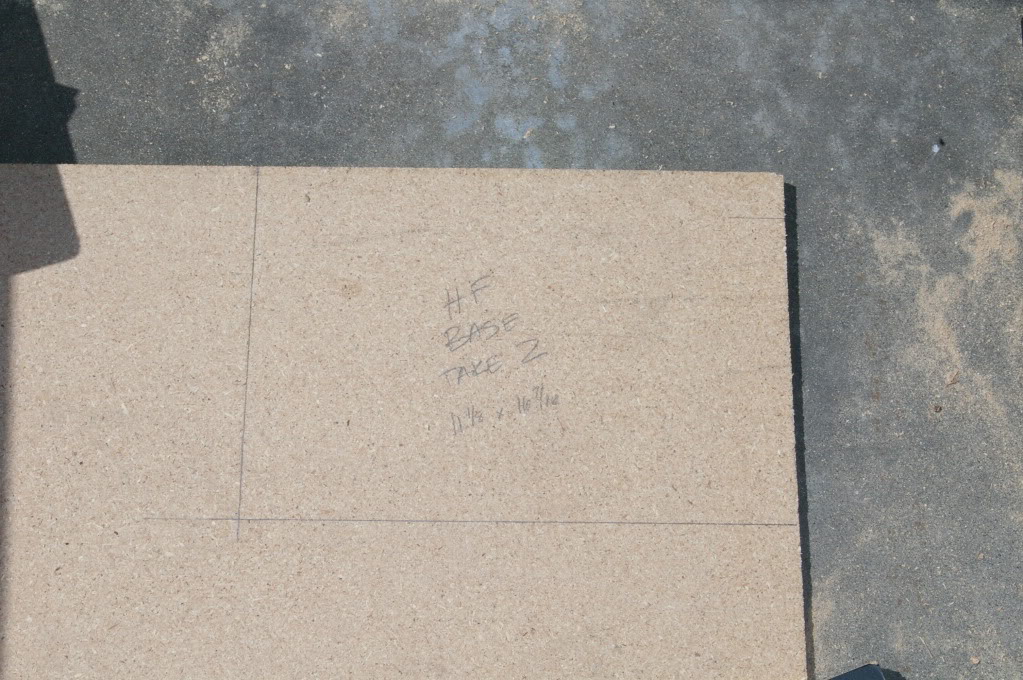
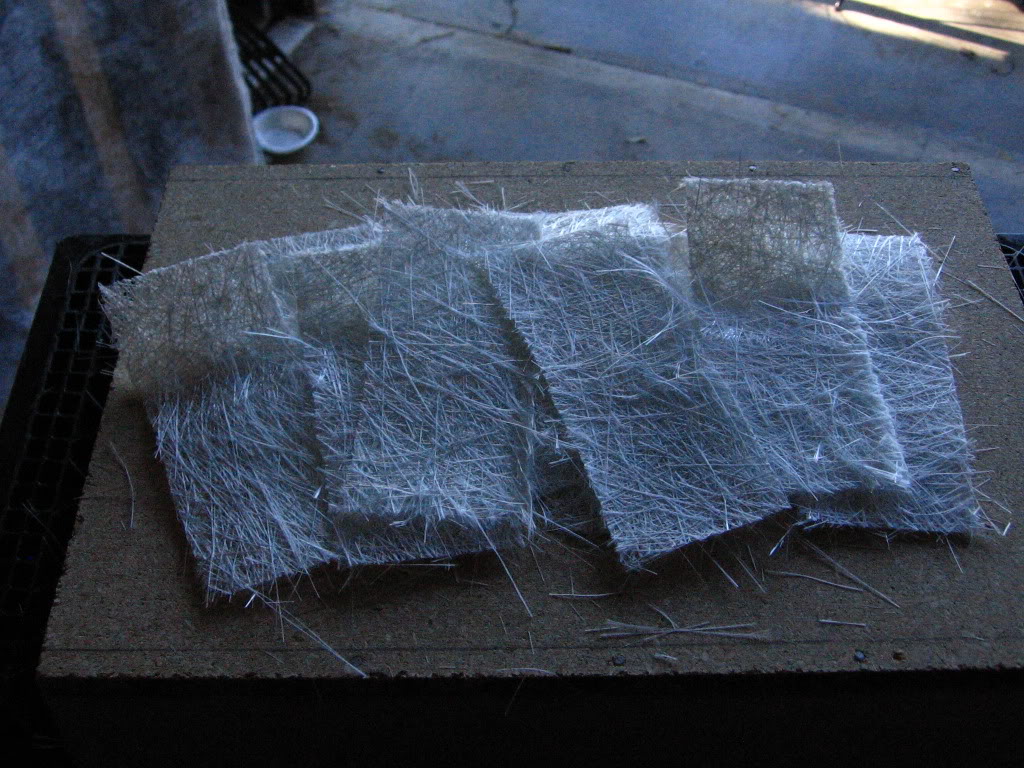
Cuts laid out on some scrap 1/2" particle board I had in the garage. I only used this cause I had it handy and wanted to get it out of my garage. But using this forced me to find a way to reinforce it, I chose fiberglass.
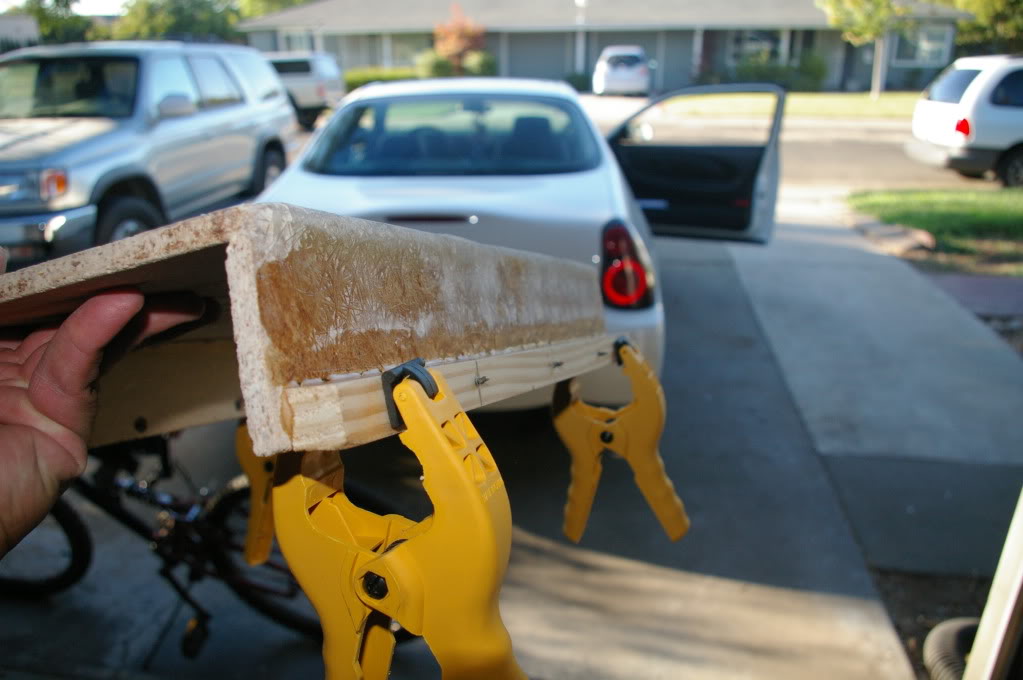
Assembly
I put the wood in, clamped it up and aligned it and then raised up the side piece so I could lay a bead of Titebond and then put it in place and clamped it down
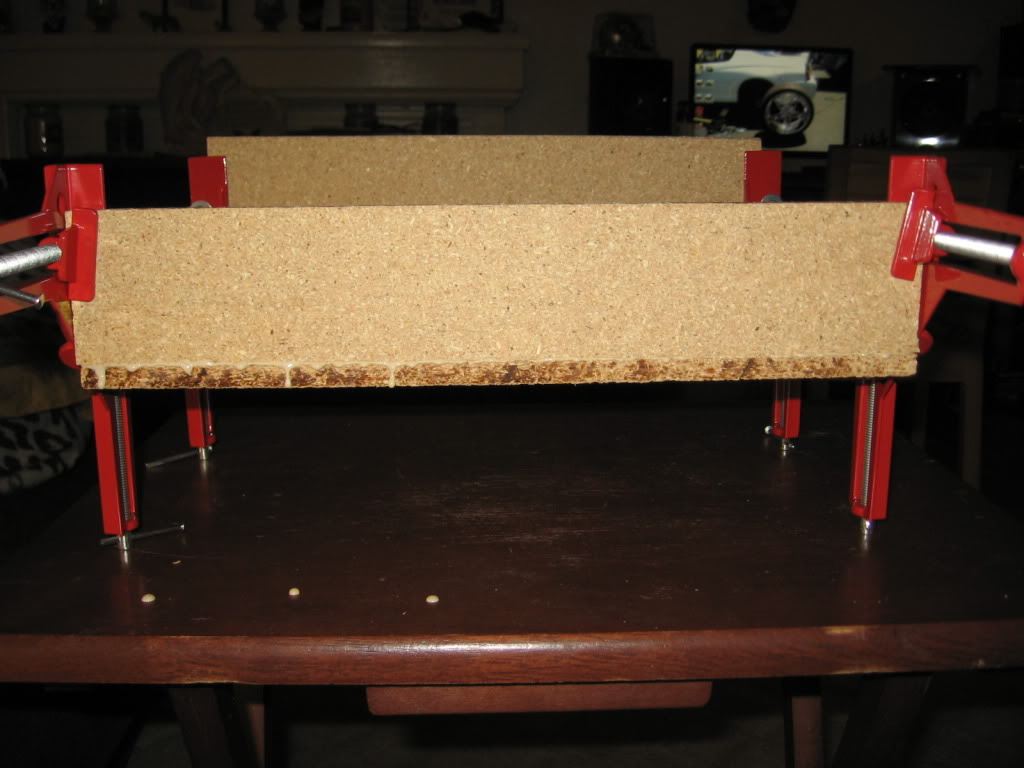
I forgot to put something down to catch the drips, whoops, sorry babe!
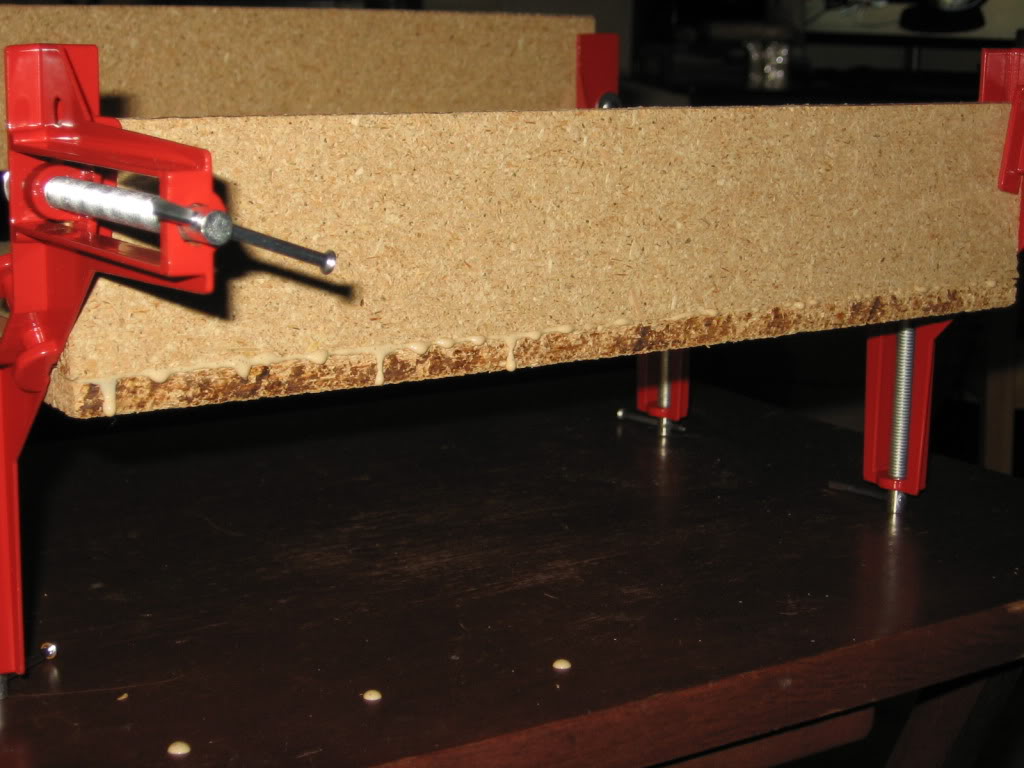
After the glue dried I used a few nails on each side to secure and strengthen the joint even more. Can't really tell but the screws are ribbed, which I figured would grip better
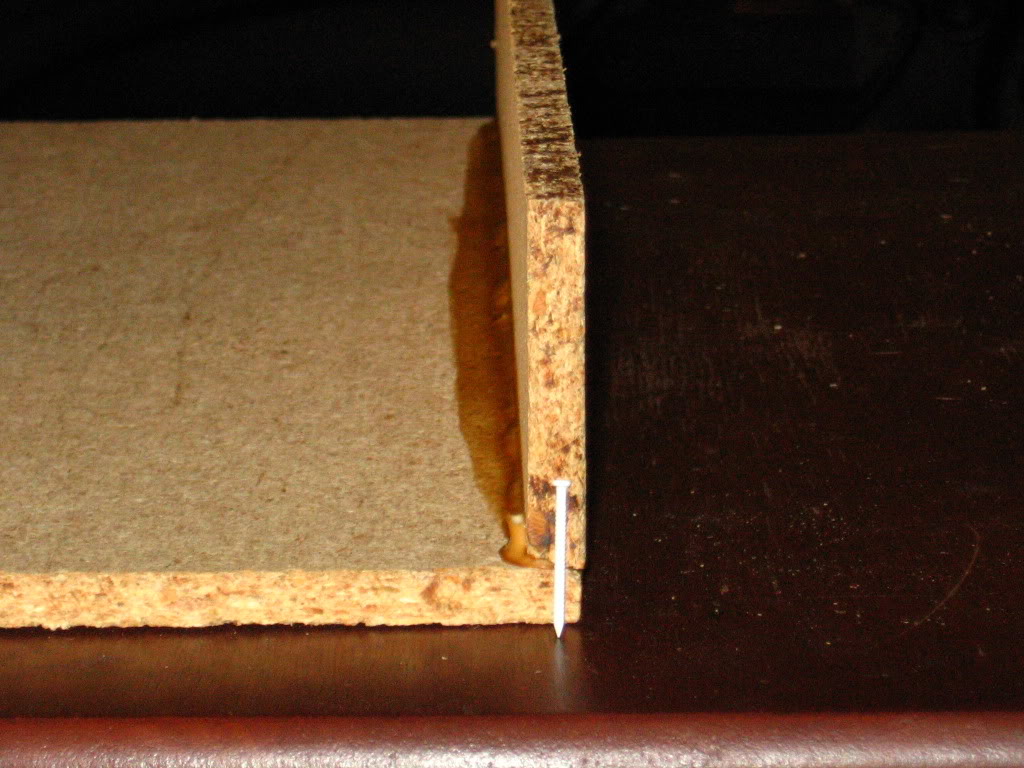
See where I didn't drive the nail in straight?
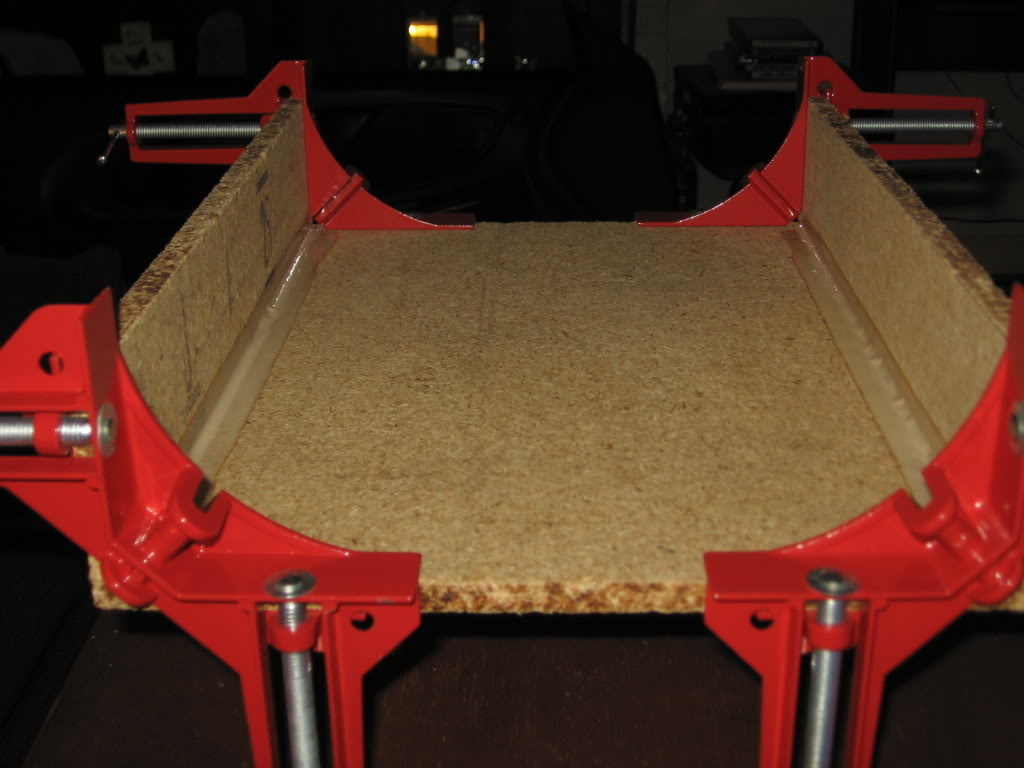
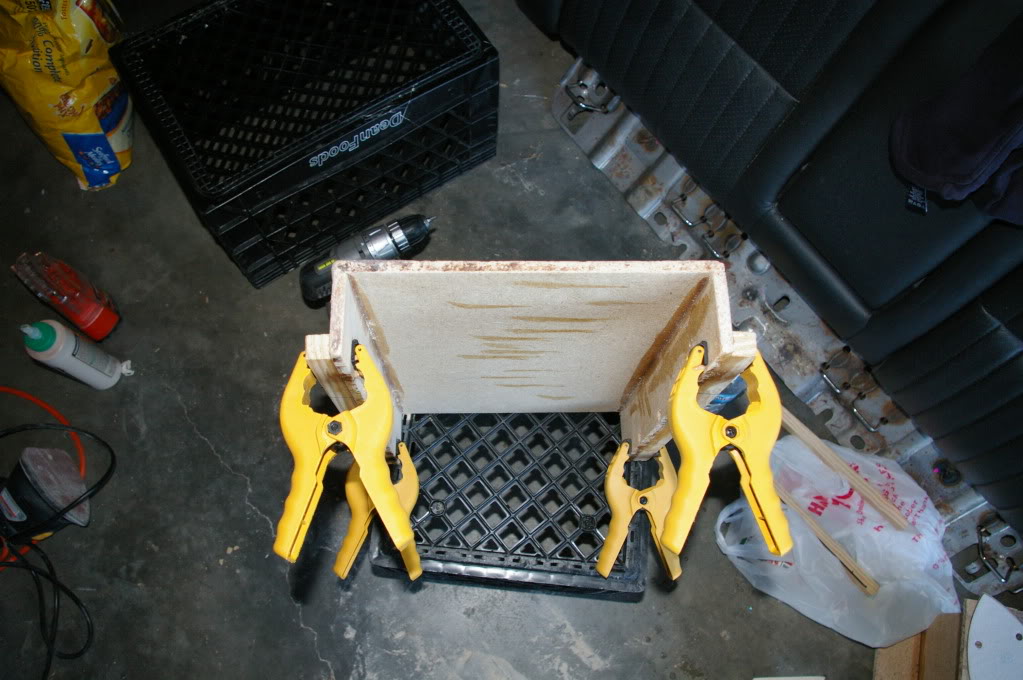
Both enclosures assembled and ready for fiberglass reinforcement on the back side

Then I moved on the the fiberglass part of the project. I cut up the glass mat to the size I needed for the job, 24 pieces here, all for this enclosure. 3 pieces = 1 layer, doing 4 layers on each joint. I did the same for both enclosures.
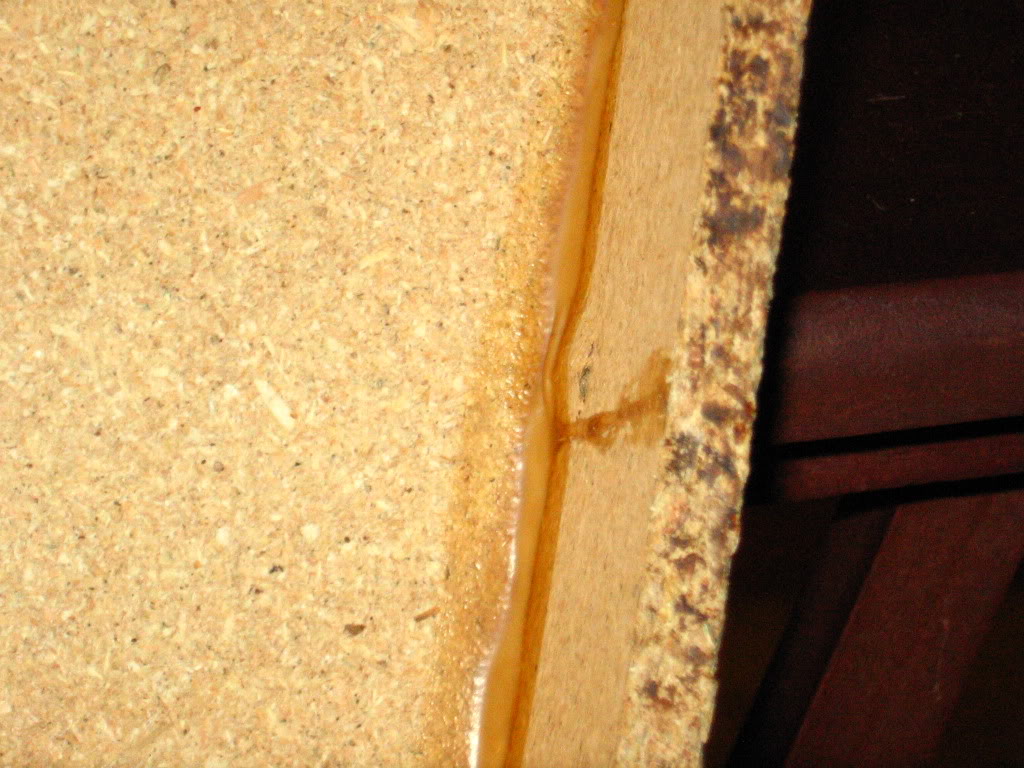
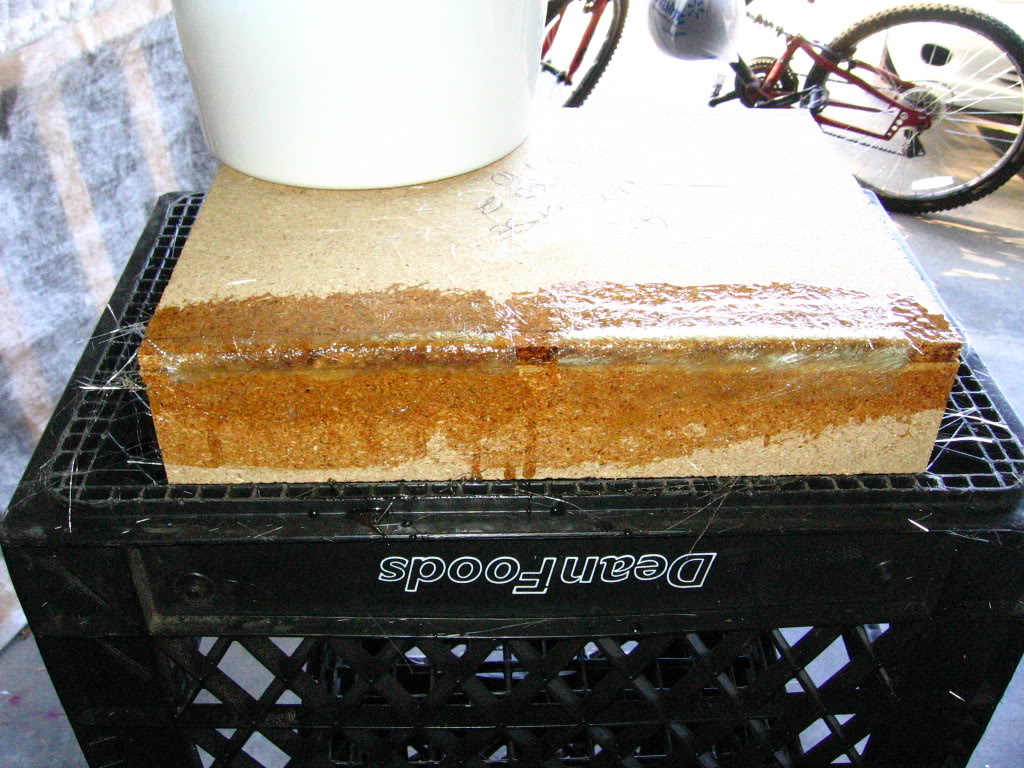
The mat I used was too thick, didn't lay down over the corner very well. See the bubble along the corner? Not how it'* supposed to be but it'* good enough for this application since it won't be seen and won't be finished down. This was purely for added strength.
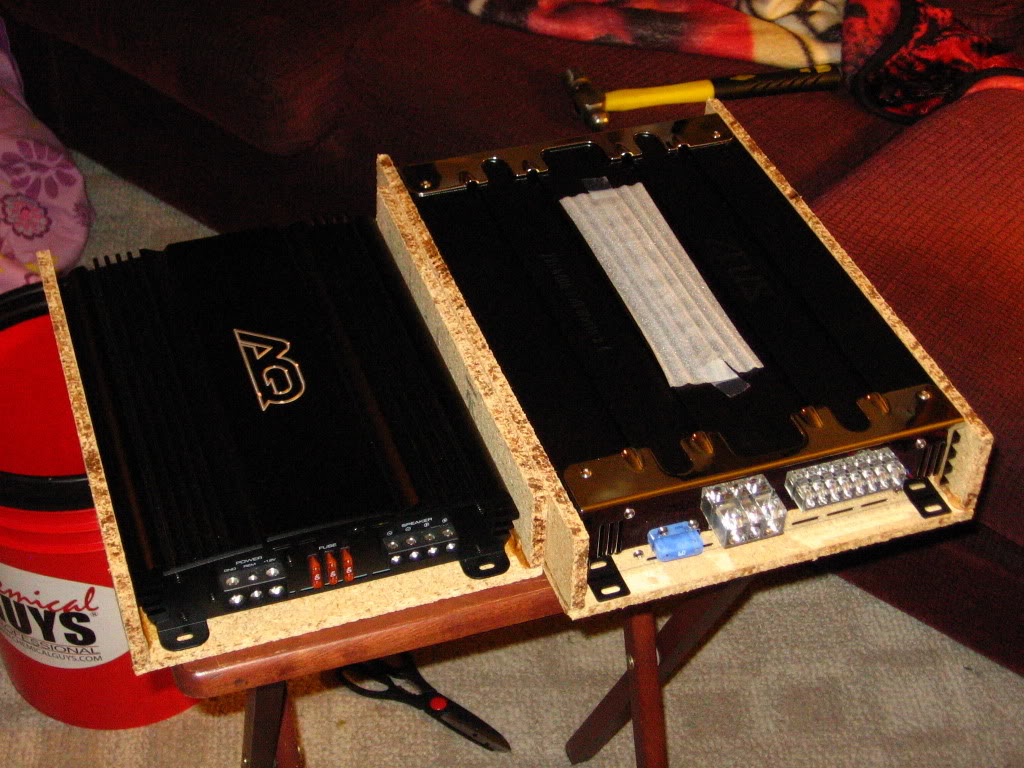
This is how they came out
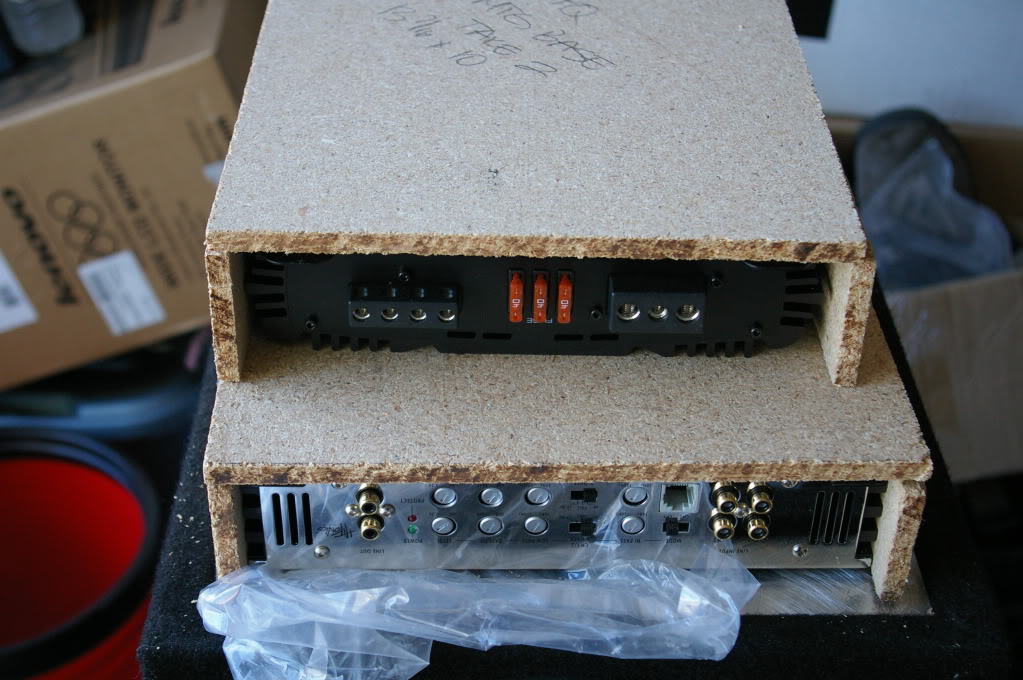
After the fiberglass cured it was time to move on. I sanded as much of the resin drips as I could and glued and screwed into place a 1x1 block which serves a couple purposes...first it will add another layer of lateral support for the housing and it'll give me a solid foundation to screw into when I glue and screw them into the face of the amp rack.
I countersunk the screws so they didn't scratch up my amps when I put them in the enclosures

I filled in the holes above with wood filler after putting the screws in, and then grinded down the part of the screw that stuck out the other side.
After that it was time to focus on the face of the amp rack. The 3 swatches of material you see are the free samples I got from Distinctivefabric.com. They have a wide variety of materials to choose from and pretty good prices too. The choices were, from top to bottom, grey ostrich, grey suede, black ostrich. I got the face of the rack cut to size, cut out the openings for the amps and test fit. Now I just have to decide which fabric I want to wrap it in
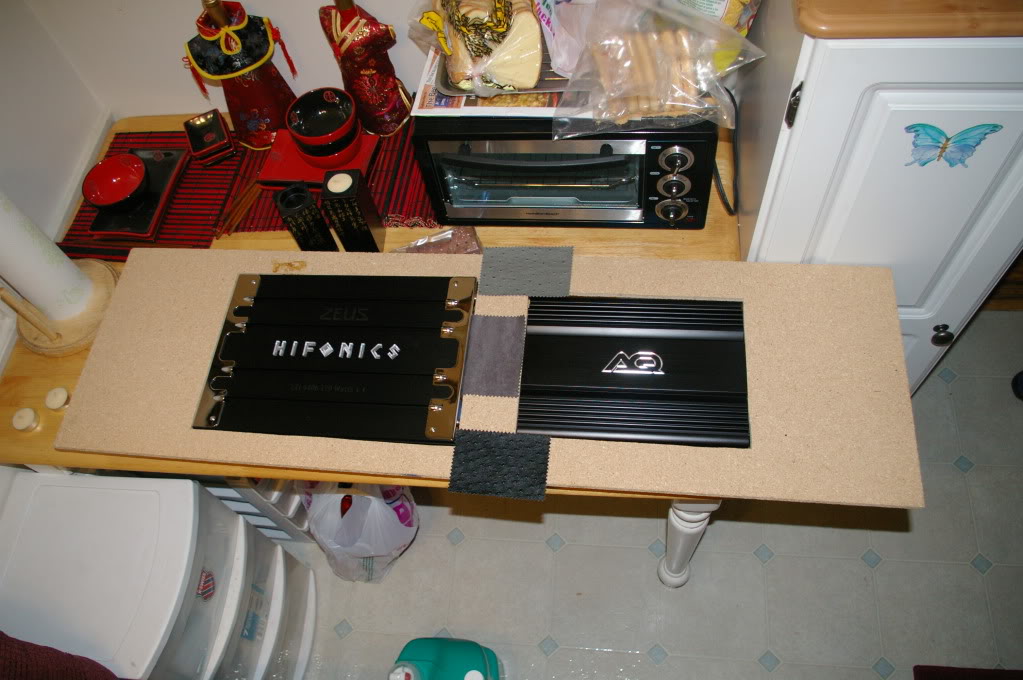
I ended up going with black Ostrich

The only thing I don't like about it is due to my design...when I started planning this I was going to paint it so the plan was to fill in the screw holes, sand down and paint. But since I changed it up and decided to wrap it, can't fill in the screw holes. So I think i'm going to punch out some circles of black ostrich and glue them over the screw heads to blend it in better than it is now.....After running it this way for a few months I found another flaw in this design, I didn't reinforce the face of the rack! So what happened was it started sagging in the middle That, along with the visible screws and the fact that this "wall" effectively blocked alot of the bass from getting into the cabin, made me decide pretty quickly that I needed to come up with a better amp rack design.
Amp rack housings
Cuts laid out on some scrap 1/2" particle board I had in the garage. I only used this cause I had it handy and wanted to get it out of my garage. But using this forced me to find a way to reinforce it, I chose fiberglass.
Assembly
I put the wood in, clamped it up and aligned it and then raised up the side piece so I could lay a bead of Titebond and then put it in place and clamped it down
I forgot to put something down to catch the drips, whoops, sorry babe!
After the glue dried I used a few nails on each side to secure and strengthen the joint even more. Can't really tell but the screws are ribbed, which I figured would grip better
See where I didn't drive the nail in straight?
Both enclosures assembled and ready for fiberglass reinforcement on the back side
Then I moved on the the fiberglass part of the project. I cut up the glass mat to the size I needed for the job, 24 pieces here, all for this enclosure. 3 pieces = 1 layer, doing 4 layers on each joint. I did the same for both enclosures.
The mat I used was too thick, didn't lay down over the corner very well. See the bubble along the corner? Not how it'* supposed to be but it'* good enough for this application since it won't be seen and won't be finished down. This was purely for added strength.
This is how they came out
After the fiberglass cured it was time to move on. I sanded as much of the resin drips as I could and glued and screwed into place a 1x1 block which serves a couple purposes...first it will add another layer of lateral support for the housing and it'll give me a solid foundation to screw into when I glue and screw them into the face of the amp rack.
I countersunk the screws so they didn't scratch up my amps when I put them in the enclosures
I filled in the holes above with wood filler after putting the screws in, and then grinded down the part of the screw that stuck out the other side.
After that it was time to focus on the face of the amp rack. The 3 swatches of material you see are the free samples I got from Distinctivefabric.com. They have a wide variety of materials to choose from and pretty good prices too. The choices were, from top to bottom, grey ostrich, grey suede, black ostrich. I got the face of the rack cut to size, cut out the openings for the amps and test fit. Now I just have to decide which fabric I want to wrap it in
I ended up going with black Ostrich
The only thing I don't like about it is due to my design...when I started planning this I was going to paint it so the plan was to fill in the screw holes, sand down and paint. But since I changed it up and decided to wrap it, can't fill in the screw holes. So I think i'm going to punch out some circles of black ostrich and glue them over the screw heads to blend it in better than it is now.....After running it this way for a few months I found another flaw in this design, I didn't reinforce the face of the rack! So what happened was it started sagging in the middle
12-07-2010, 12:46 AM
#16
Senior Member
Posts like a Turbo
Thread Starter
Join Date: Jul 2010
Location: Sacramento, CA.
Posts: 326
Likes: 0
Received 0 Likes
on
0 Posts
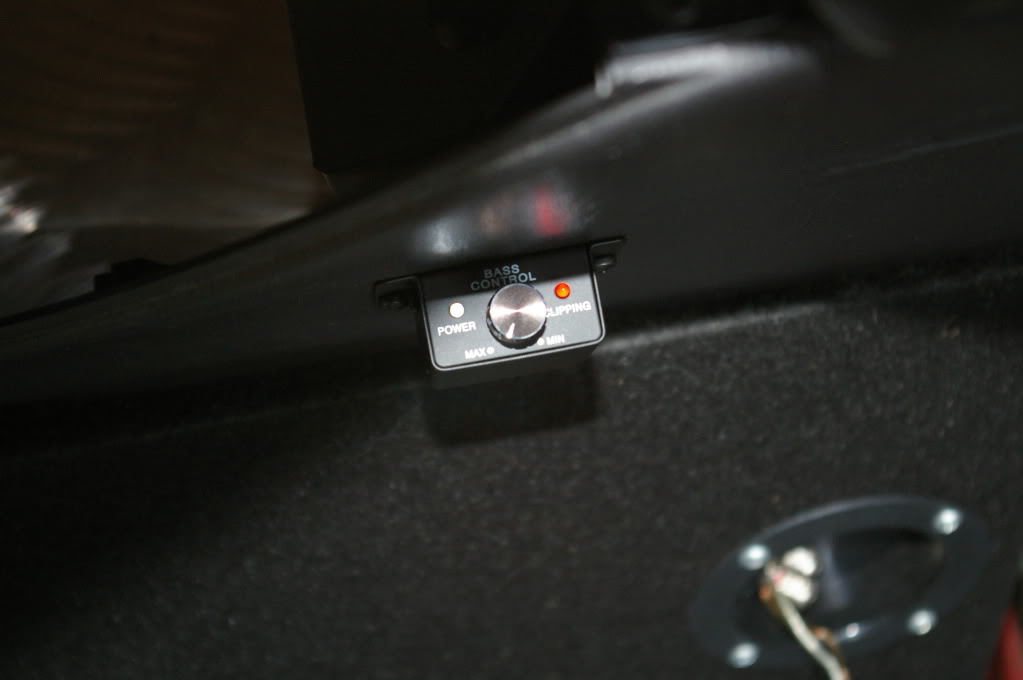
The stuff I used was $60 for the box shown. Absolutely worth every penny! It significantly lessens rattling and resonating of metal panels. As a side effect of that, more of the soundwaves make it to your ears instead of being absorbed by the reverberating panels.
12-07-2010, 02:58 PM
#17
Senior Member
Certified GM nut
Join Date: Dec 2005
Location: dekalb illinois
Posts: 1,916
Likes: 0
Received 0 Likes
on
0 Posts
12-10-2010, 07:24 PM
#18
Senior Member
Posts like a Turbo
Thread Starter
Join Date: Jul 2010
Location: Sacramento, CA.
Posts: 326
Likes: 0
Received 0 Likes
on
0 Posts
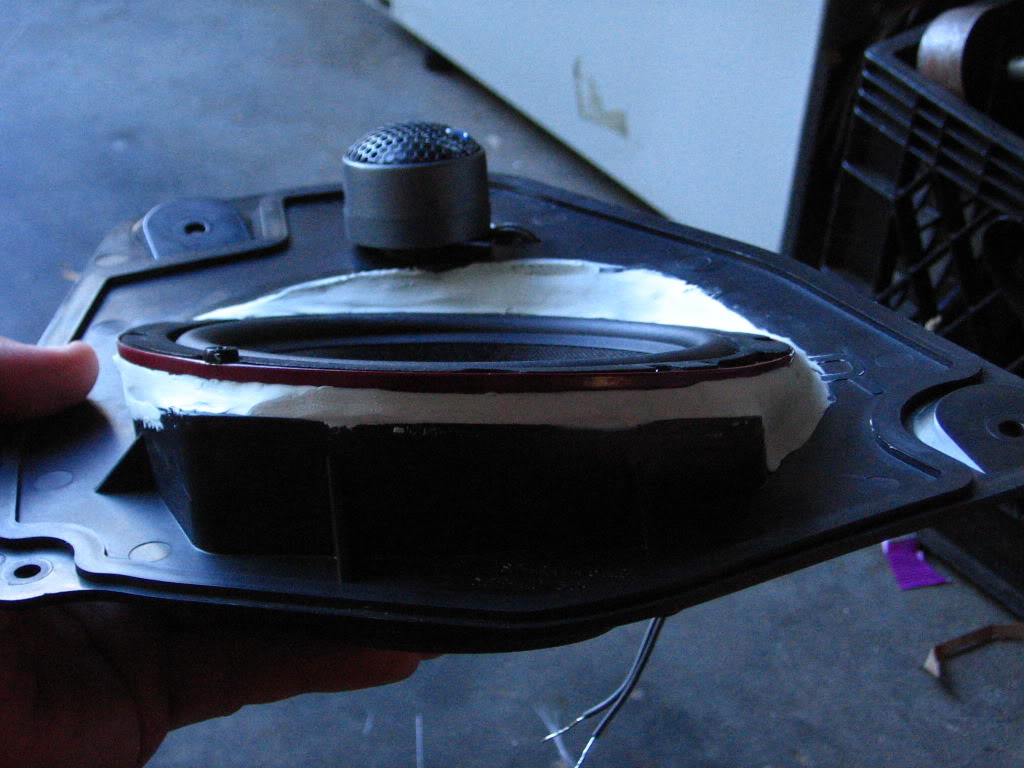
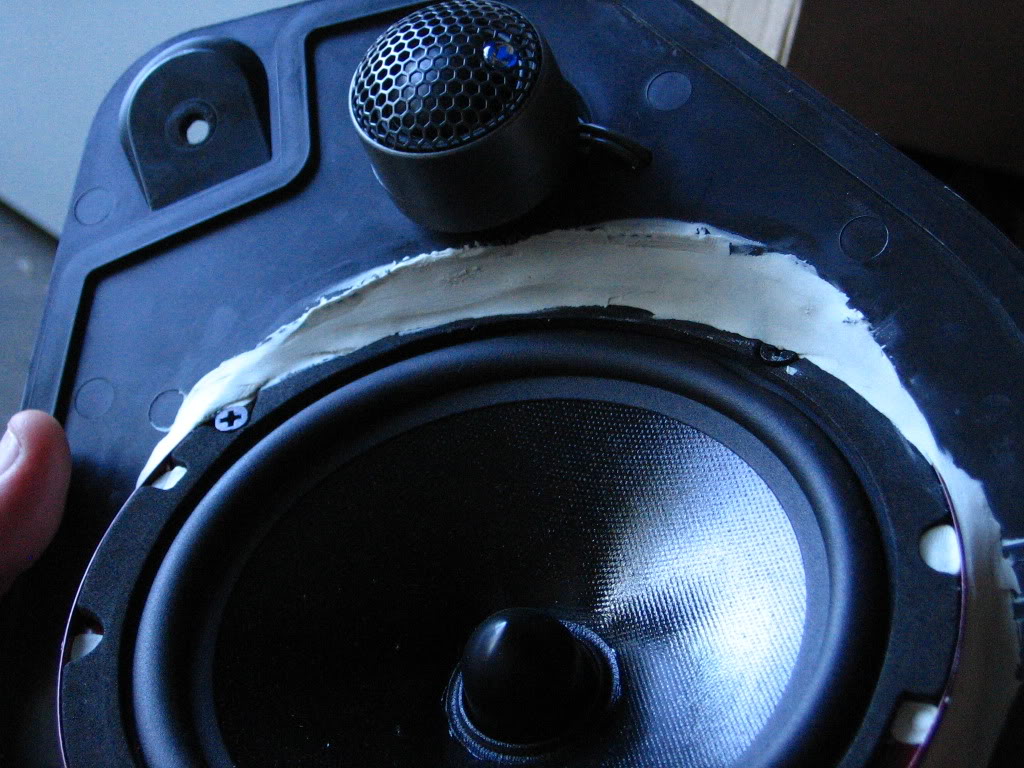
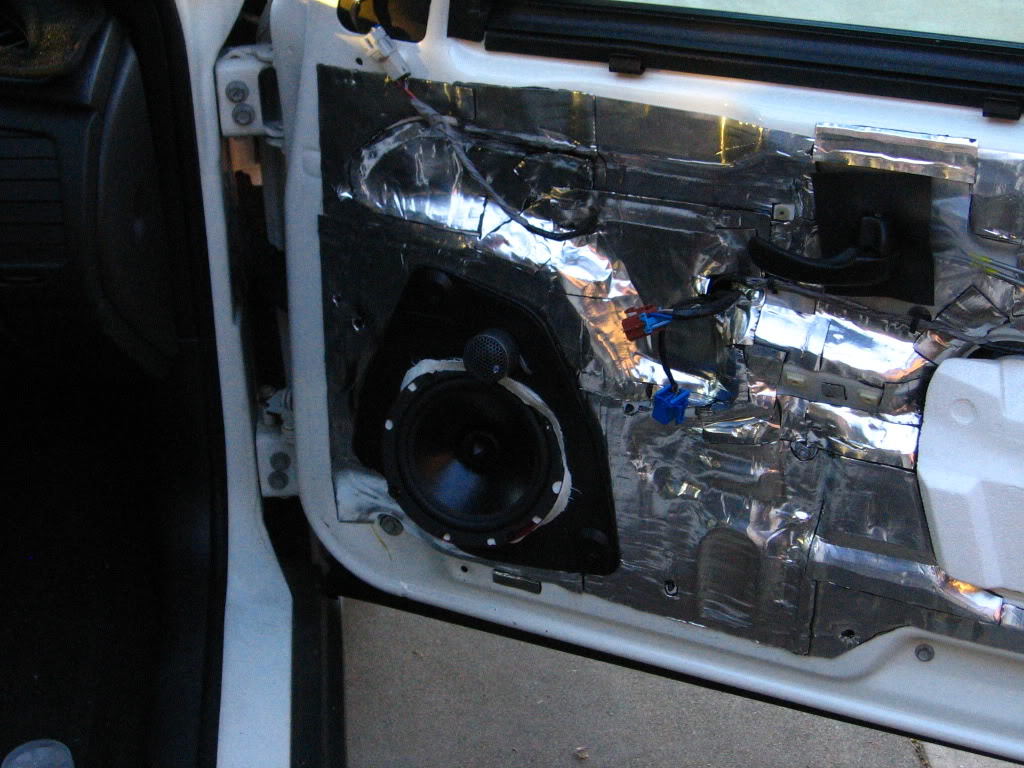
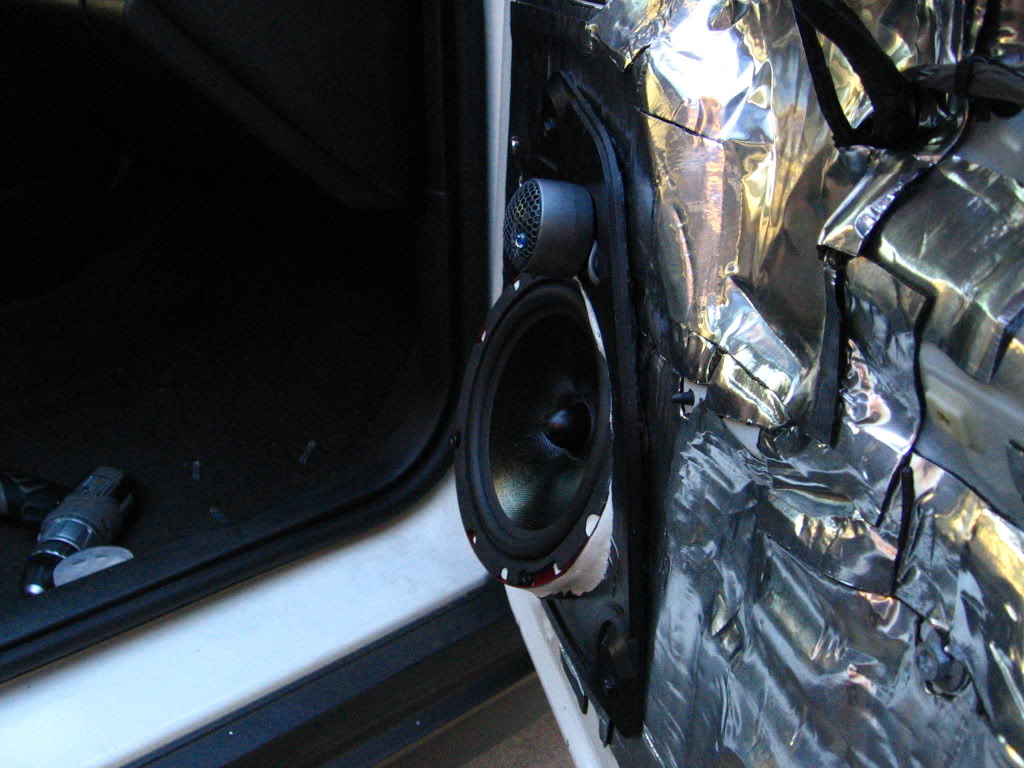
I installed the components into the factory speaker pod. I had to modify the door panel a bit on the backside, just had to open up the tweeter opening a bit more so my tweets would fit. Nothing the Fury folding blade couldn't handle! After mounting the components in the pod I went out and installed the pod into the door and then test fit the door panel. It'* all good! As you can see in the pic below I had to modify the pod so the speaker would fit, and even still it didn't fit all the way flush like I wanted but I'll fix that later
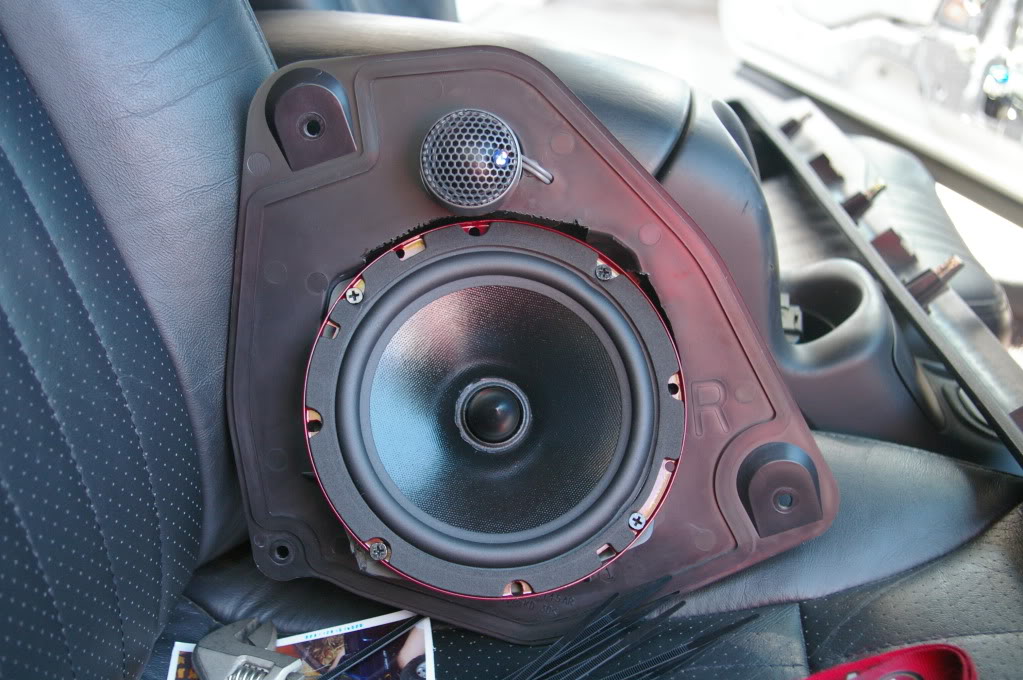
I decided to mount my components like this for a few reasons...
#1 It'* ideal to keep your tweeter mounted as close to the mid as possible to ensure ideal soundstage imaging.
#2 I have Rainbow DreamLine tweets installed in my door panels and it'* already a tight fit, my CDT tweets are a little bigger so they wouldn't fit there even if I wanted to put them there.
#3 My door panels are black, my CDT tweets are grey, I didn't want them to stand out like that.
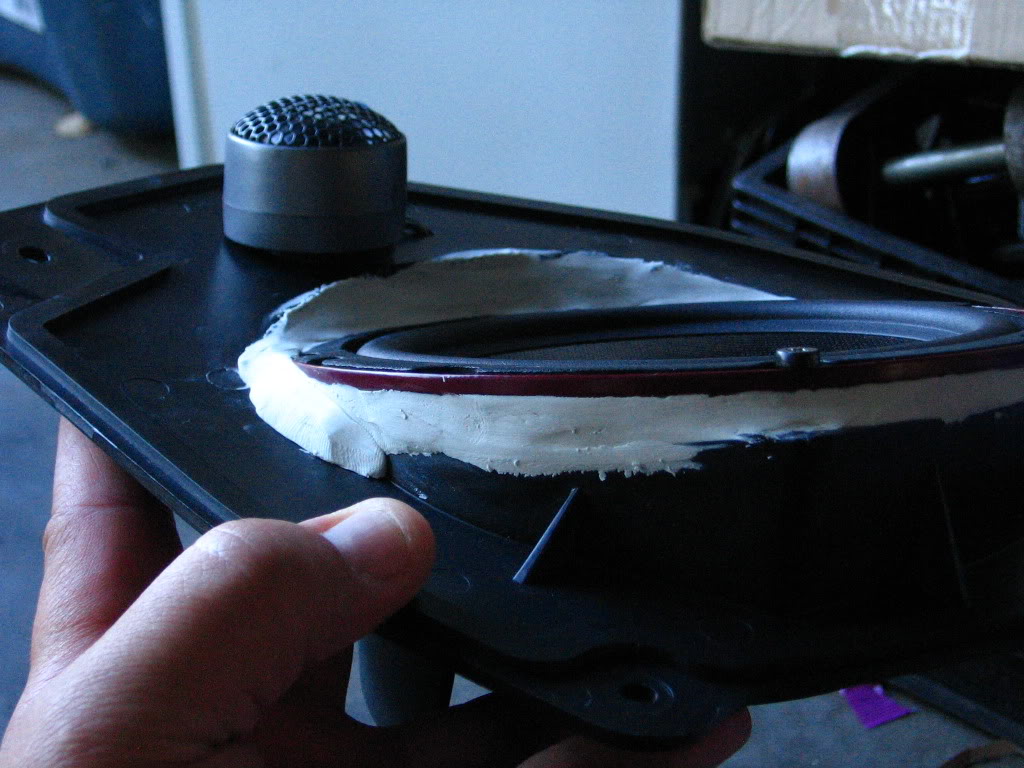
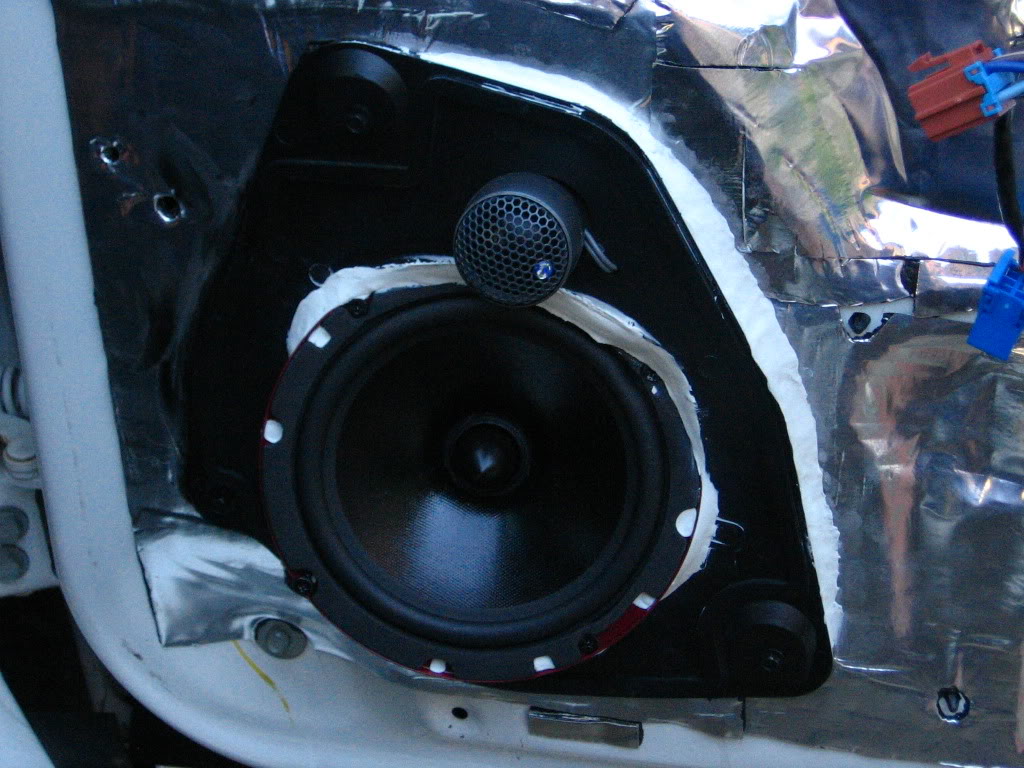
So once I got the components mounted in the pods I had a pretty noticeable gap between the basket ring and the pod itself
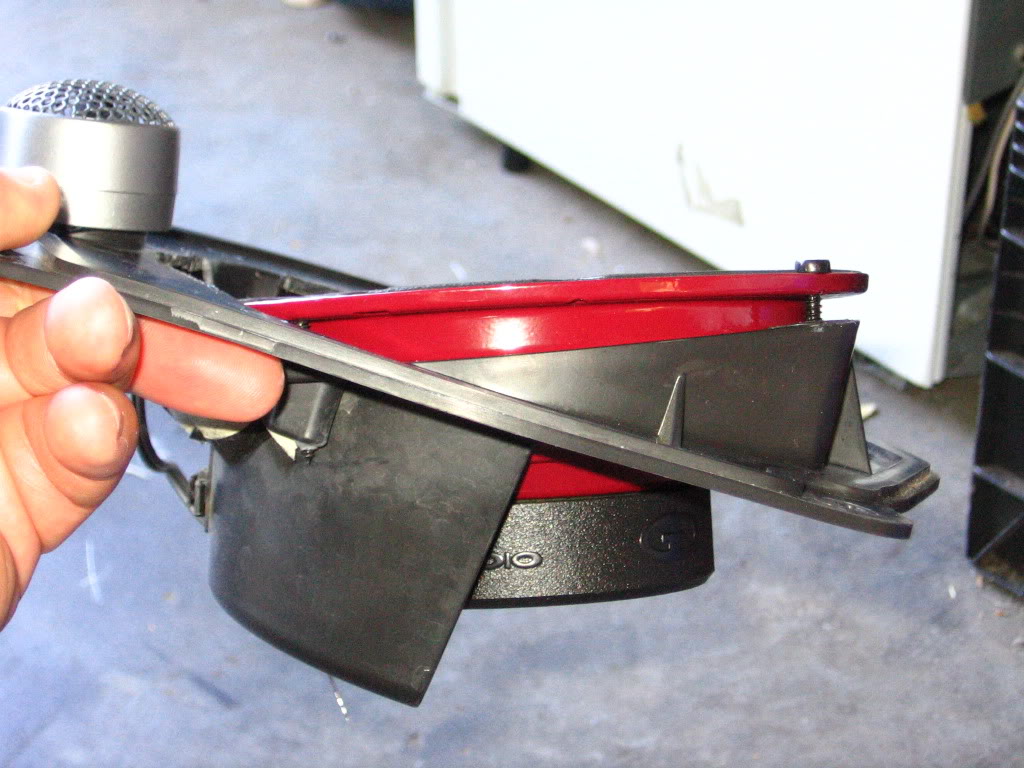
I decided the best way to fix this would be to seal the speaker in with non-hardening modeling clay. I sealed it up all the way around to prevent the possibility of any leaks. Since i'm gonna be running fronts only (no rear fill) I figured this is necessary to make the front stage as strong as possible.
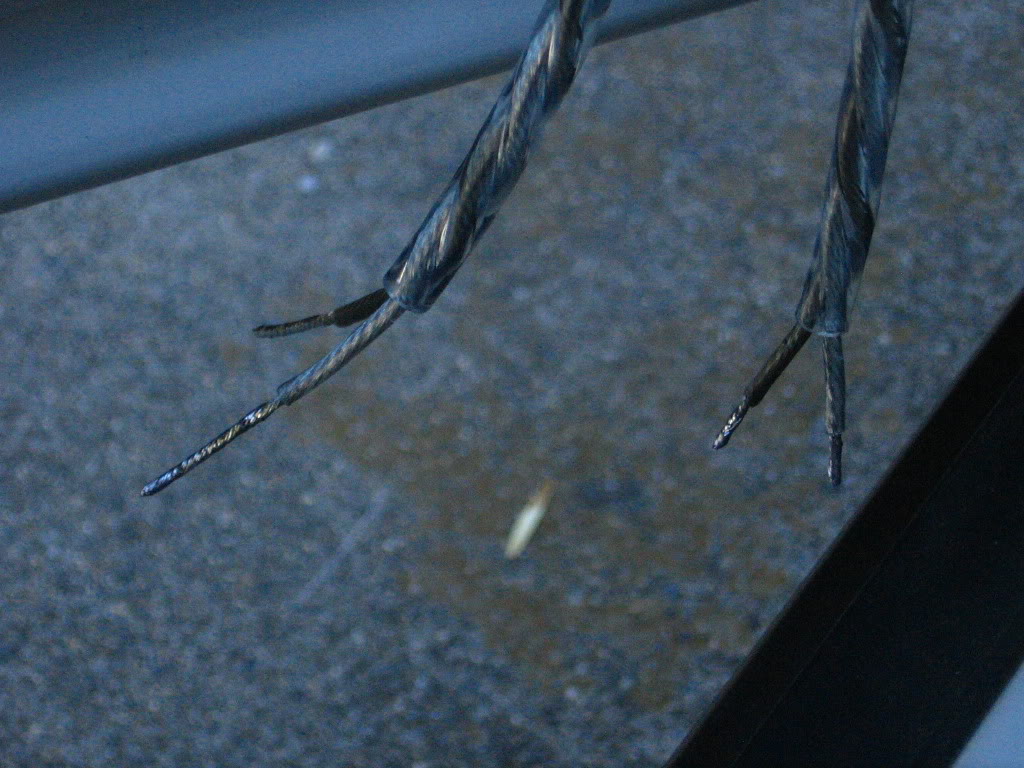
Then I needed to run speaker wire for them, I used KnuKonceptz 16ga. run through the factory door loom
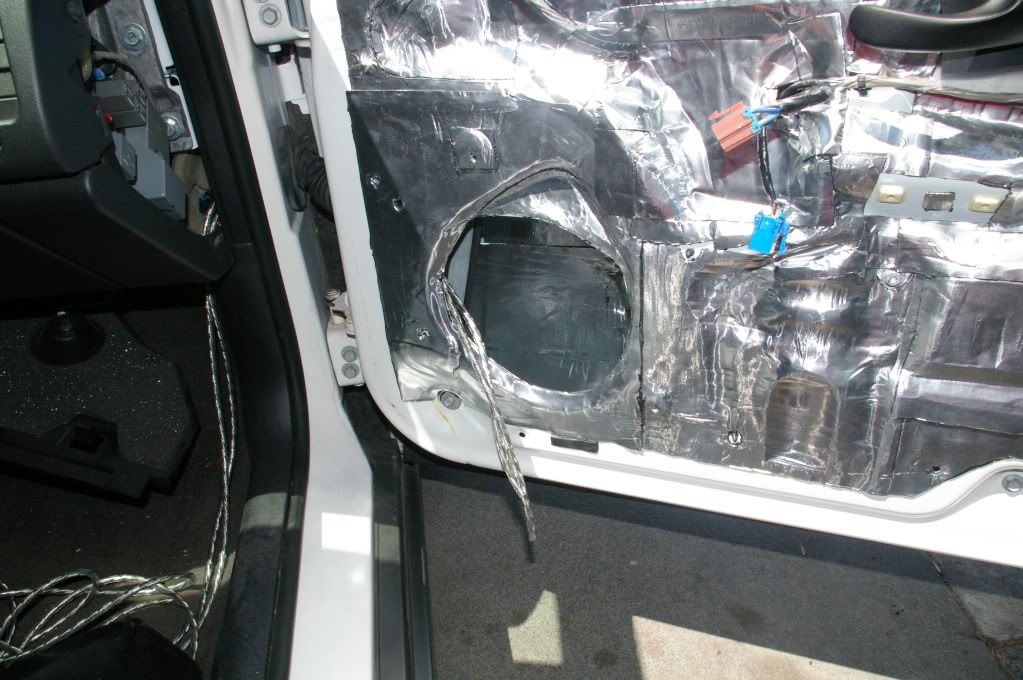
The drivers side was more challenging because again, my ham-hock of a hand proved to be an issue with the lack of space in the lower dash for me to reach up to where the loom enters the cabin so I could pull the wire through. I forced my hand in there and got it done but i've got small cuts all over, showering should be lovely. But again, once I got it through it was all good. Then I tagged the wires so I know which one is for the mid and which one is for the tweeter.

After that it was time to solder up the speaker wires and install the pods to the doors.
As you can see there was a little gap between the pod and the door panel, but nothing a little modeling clay couldn't handle
I decided to mount my components like this for a few reasons...
#1 It'* ideal to keep your tweeter mounted as close to the mid as possible to ensure ideal soundstage imaging.
#2 I have Rainbow DreamLine tweets installed in my door panels and it'* already a tight fit, my CDT tweets are a little bigger so they wouldn't fit there even if I wanted to put them there.
#3 My door panels are black, my CDT tweets are grey, I didn't want them to stand out like that.
So once I got the components mounted in the pods I had a pretty noticeable gap between the basket ring and the pod itself
I decided the best way to fix this would be to seal the speaker in with non-hardening modeling clay. I sealed it up all the way around to prevent the possibility of any leaks. Since i'm gonna be running fronts only (no rear fill) I figured this is necessary to make the front stage as strong as possible.
Then I needed to run speaker wire for them, I used KnuKonceptz 16ga. run through the factory door loom
The drivers side was more challenging because again, my ham-hock of a hand proved to be an issue with the lack of space in the lower dash for me to reach up to where the loom enters the cabin so I could pull the wire through. I forced my hand in there and got it done but i've got small cuts all over, showering should be lovely. But again, once I got it through it was all good. Then I tagged the wires so I know which one is for the mid and which one is for the tweeter.
After that it was time to solder up the speaker wires and install the pods to the doors.
As you can see there was a little gap between the pod and the door panel, but nothing a little modeling clay couldn't handle
12-10-2010, 07:34 PM
#19
Senior Member
Posts like a Turbo
Thread Starter
Join Date: Jul 2010
Location: Sacramento, CA.
Posts: 326
Likes: 0
Received 0 Likes
on
0 Posts
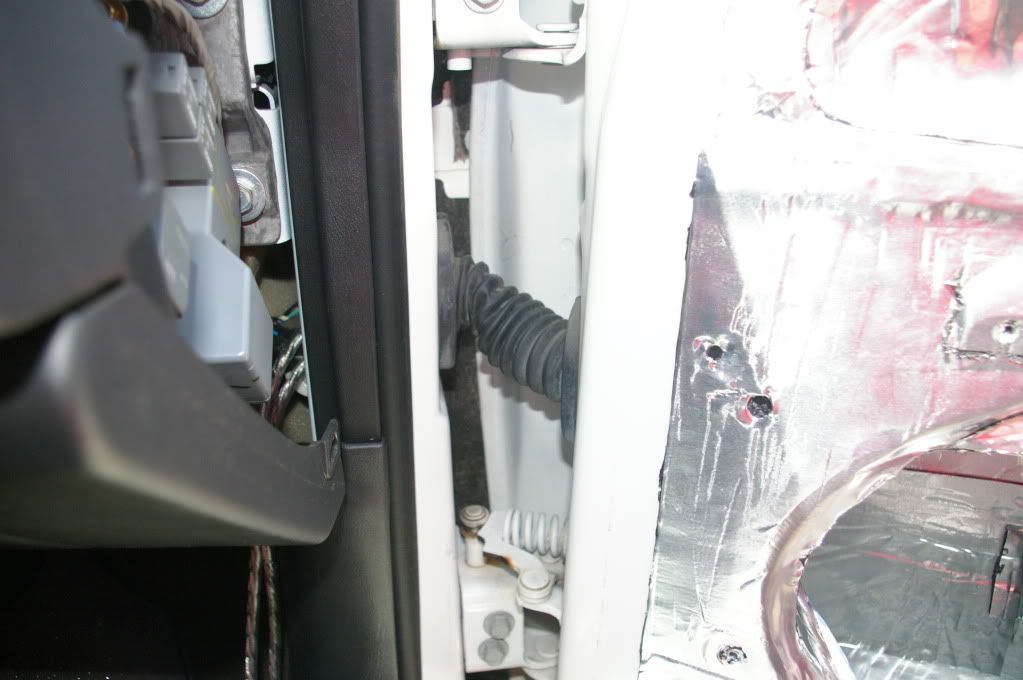
Running the power lead was a huge pain in the a**. The only way I could see to get it into the engine bay from the cabin was through a super thick factory grommet on the passenger side. Judging from the way the wires were routed from the inside and from what I could tell in the engine bay, it looked like the lower right side of the grommet was free and clear so that'* where I decided to go for it. About 45 minutes later and having used lots of lube, I finally got my 2ga through the hole. Bad choice of words

Then came the task of routing it under the carpet into the trunk, no big deal right? Ha! Chevy used a thick, dense foam on the underside of the carpet so not only was it pretty much stuck to the floor, but once I got it separated it was so damn sticky that it made not only getting my arm in there a task, but pulling the wire under it was pretty damn difficult too. This was easily the hardest part of the build so far, but I got it done.
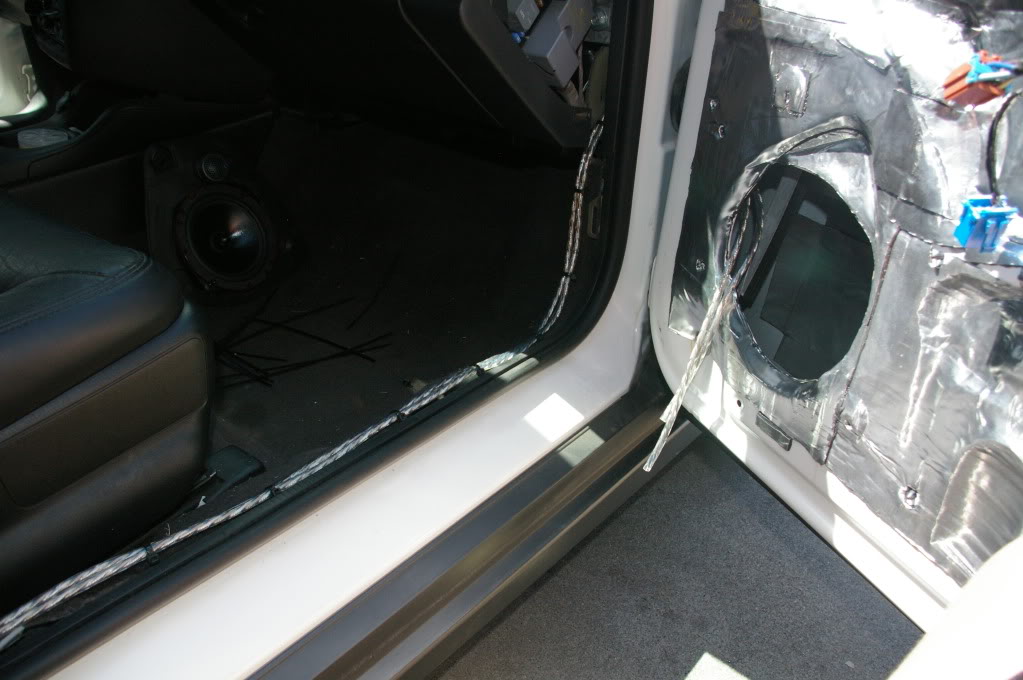
I wrapped a section of the lead w/loom to protect it from the metal it runs next to up by the gear shifter
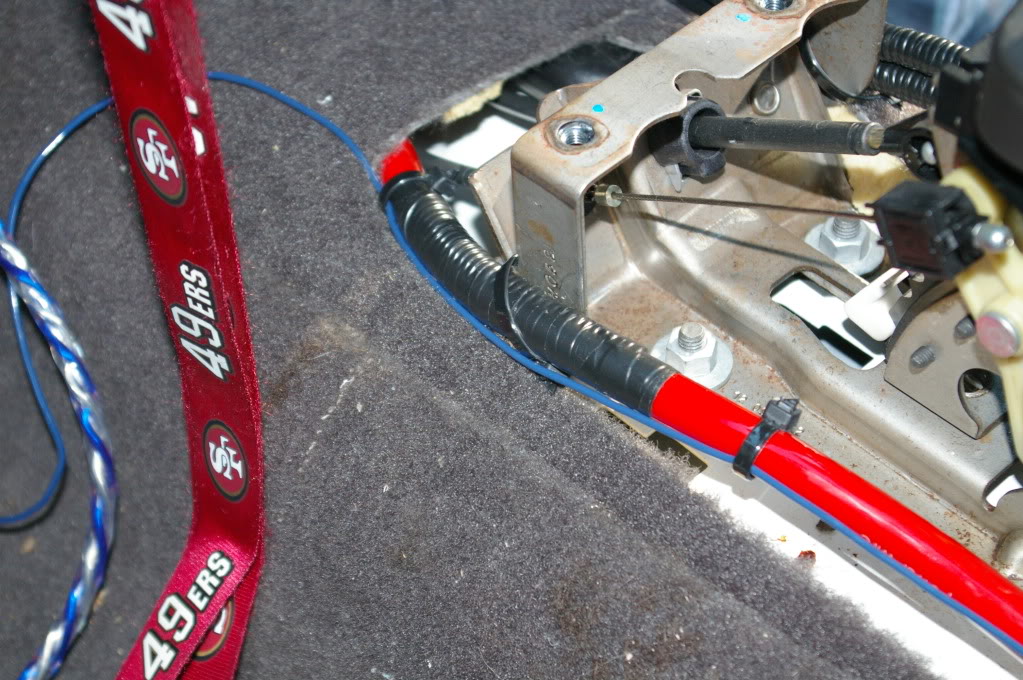
The little blue wire is the remote lead
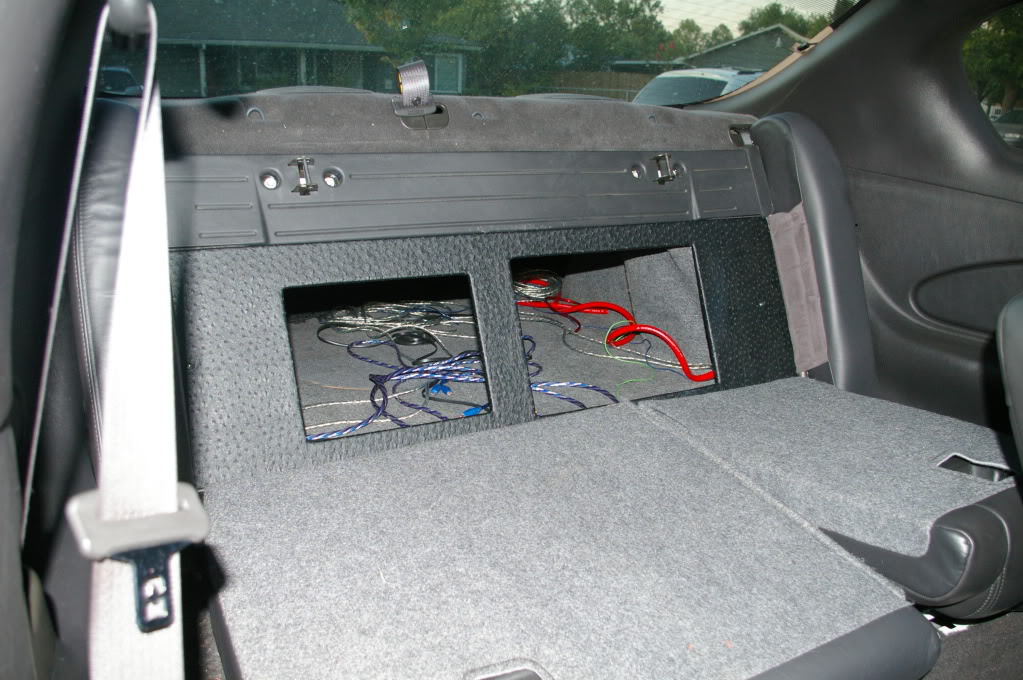
So the power/remote leads are run on the left side, rca'* and bass **** wires run on the left
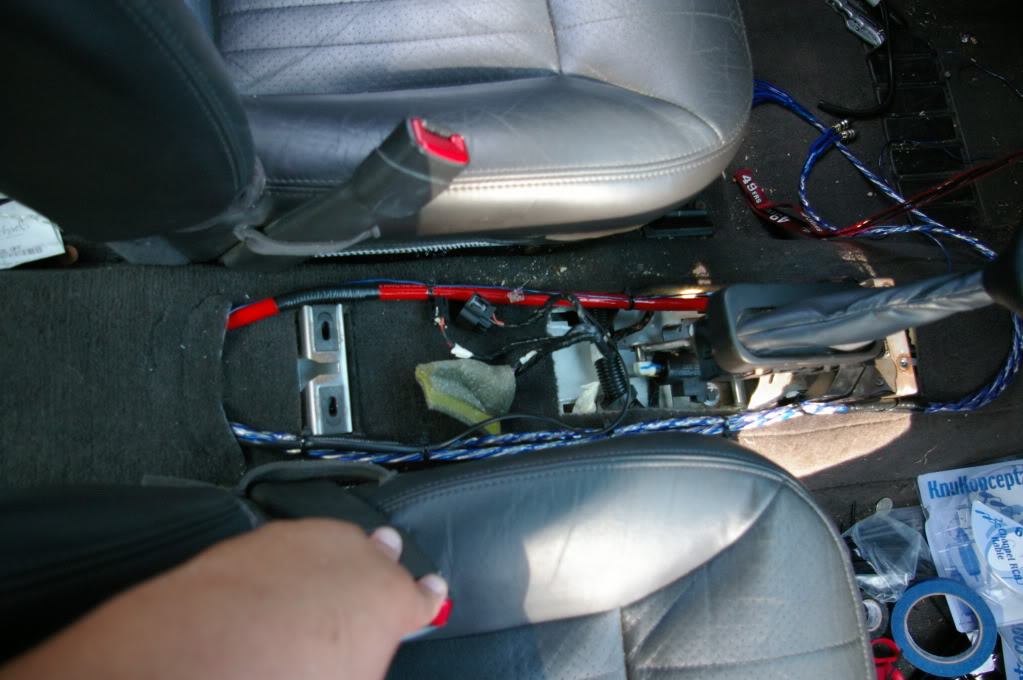
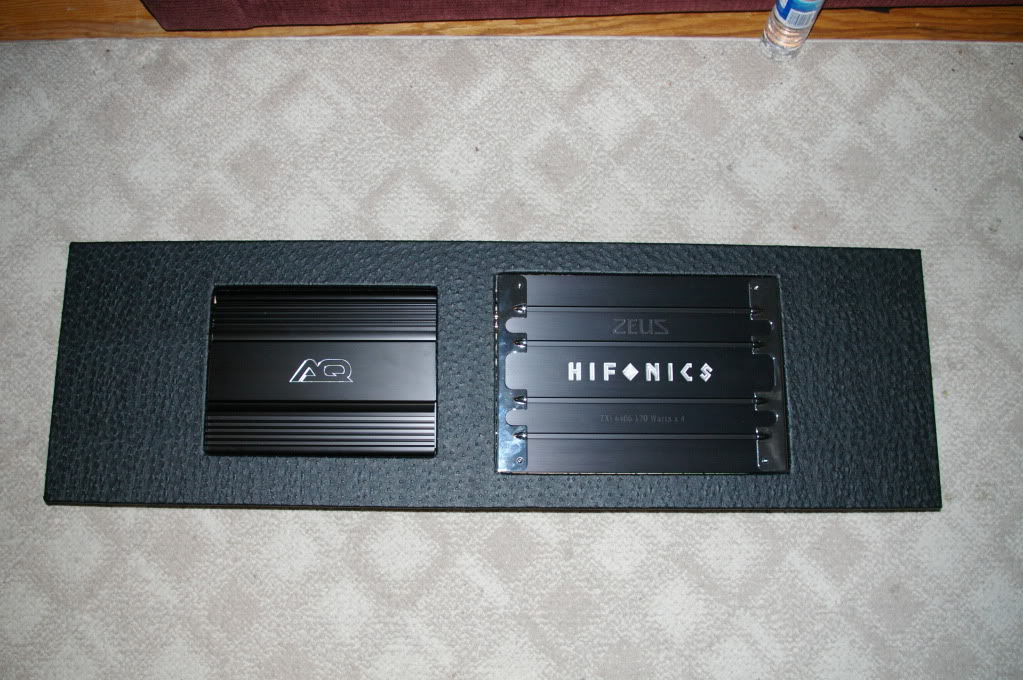
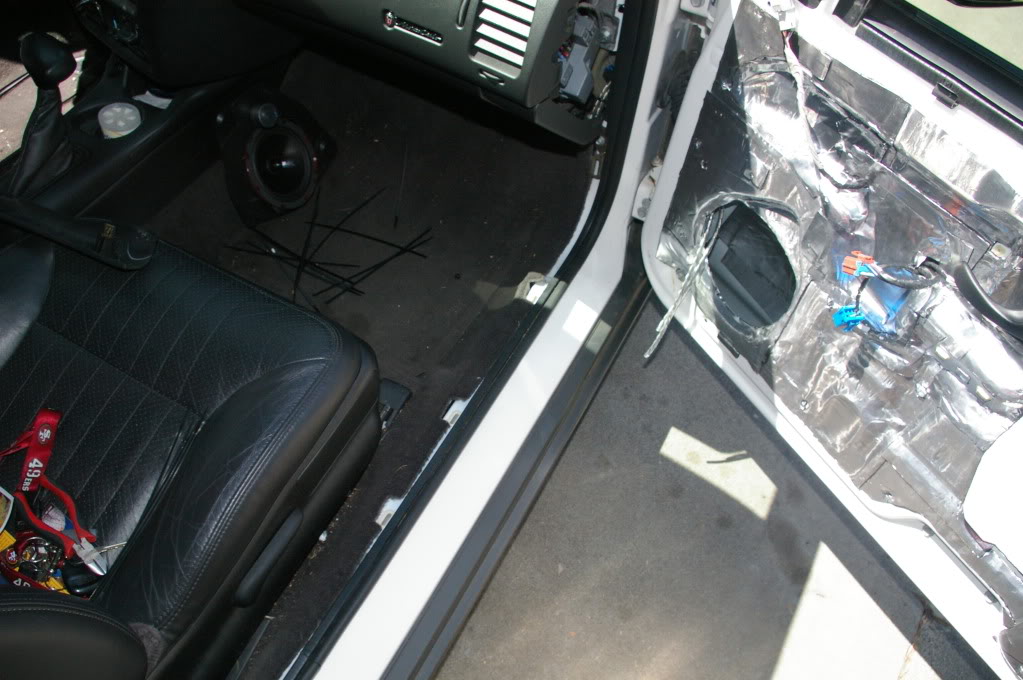
Once I got the wires into the back of the car it was smooth sailing (don't hate on my bargain basement setup you see there). Gotta love the Phoenix Gold Ryval line of amps")
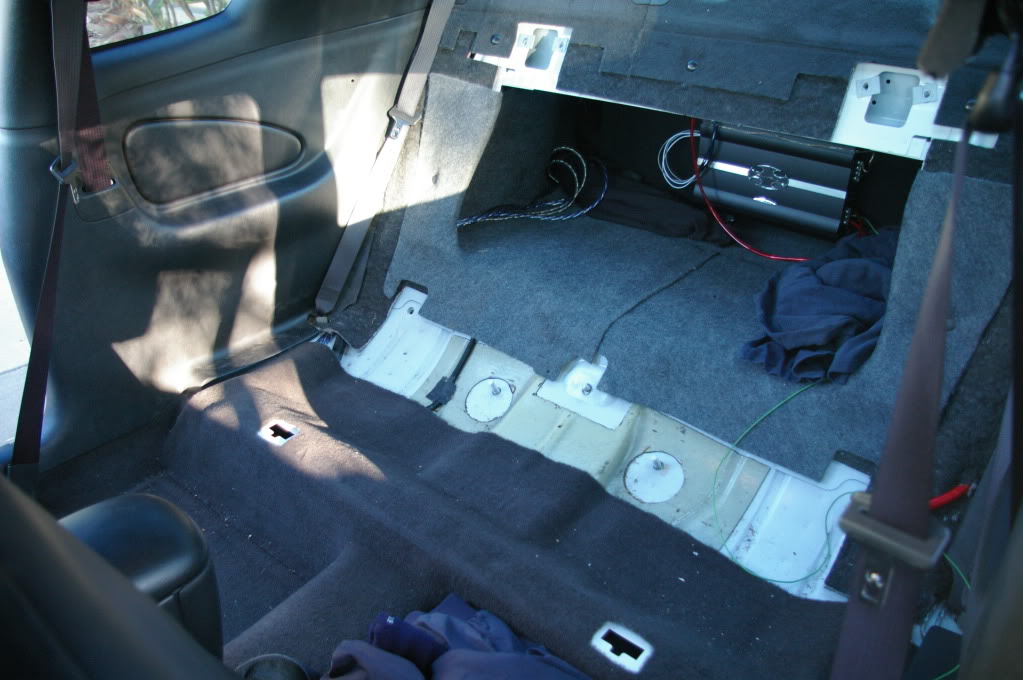
The green wire is the current remote wire, the new remote wire is blue and zip tied to the power lead. The power lead was too big to go under the side trim panel so that'* why that little bit of it is exposed. I just ran it right through the backseat insulation material and into the trunk. Obviously my foam seat will be covering it so no worries.
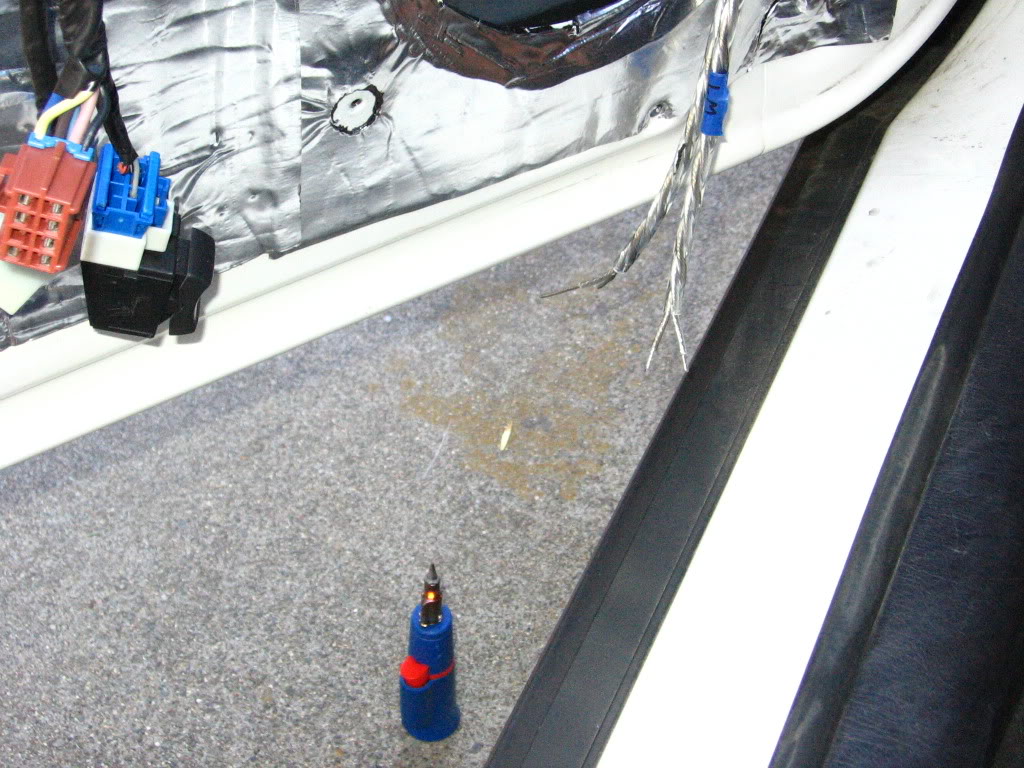
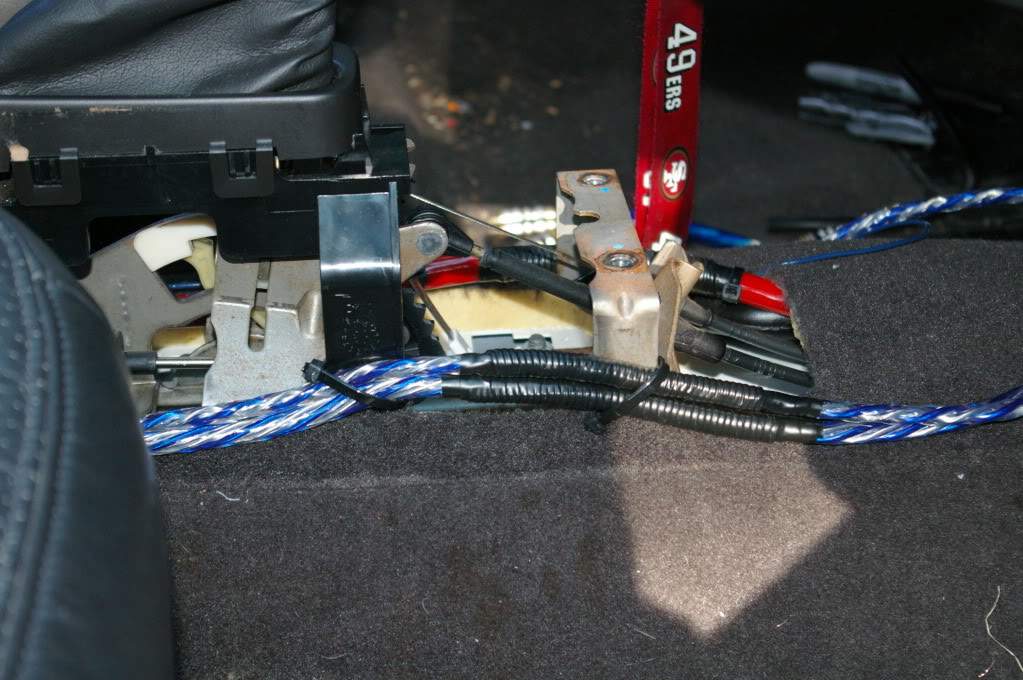
Once that was done it was on to the bass **** installation. I sat in the driver seat and figured where I wanted it, laid some tape down to mark the area I wanted it to be, drilled a few holes, installed a grommet, bolted it up, connected the wire and it was done.
Can't even see it from outside the car
Then came the task of routing it under the carpet into the trunk, no big deal right? Ha! Chevy used a thick, dense foam on the underside of the carpet so not only was it pretty much stuck to the floor, but once I got it separated it was so damn sticky that it made not only getting my arm in there a task, but pulling the wire under it was pretty damn difficult too. This was easily the hardest part of the build so far, but I got it done.
I wrapped a section of the lead w/loom to protect it from the metal it runs next to up by the gear shifter
The little blue wire is the remote lead
So the power/remote leads are run on the left side, rca'* and bass **** wires run on the left
Once I got the wires into the back of the car it was smooth sailing (don't hate on my bargain basement setup you see there). Gotta love the Phoenix Gold Ryval line of amps
The green wire is the current remote wire, the new remote wire is blue and zip tied to the power lead. The power lead was too big to go under the side trim panel so that'* why that little bit of it is exposed. I just ran it right through the backseat insulation material and into the trunk. Obviously my foam seat will be covering it so no worries.
Once that was done it was on to the bass **** installation. I sat in the driver seat and figured where I wanted it, laid some tape down to mark the area I wanted it to be, drilled a few holes, installed a grommet, bolted it up, connected the wire and it was done.
Can't even see it from outside the car
12-10-2010, 07:49 PM
#20
Senior Member
Posts like a Turbo
Thread Starter
Join Date: Jul 2010
Location: Sacramento, CA.
Posts: 326
Likes: 0
Received 0 Likes
on
0 Posts
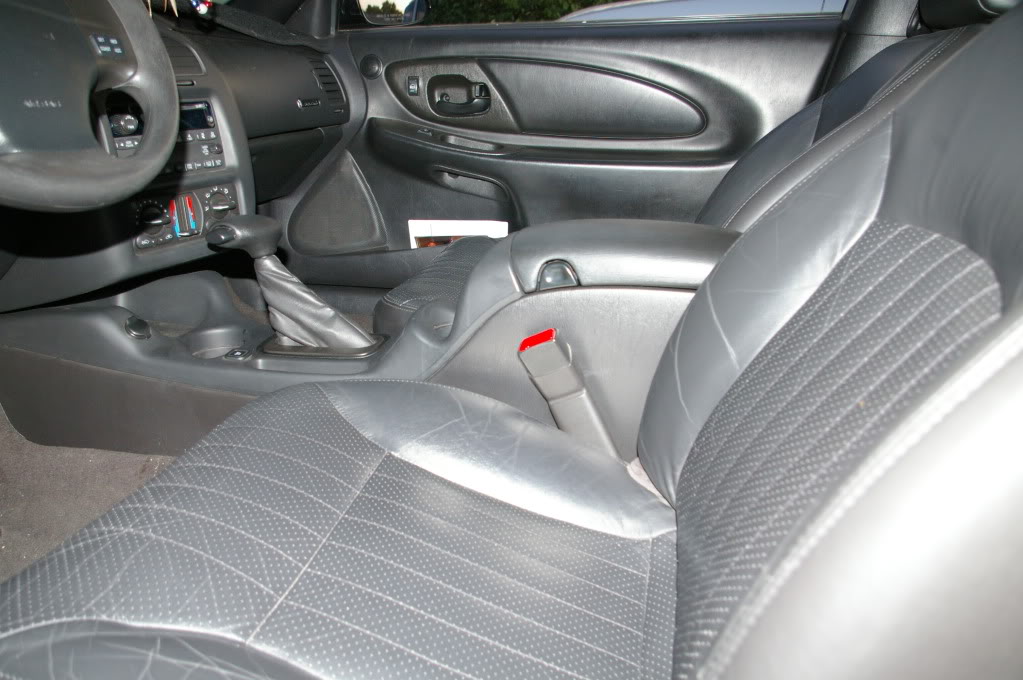
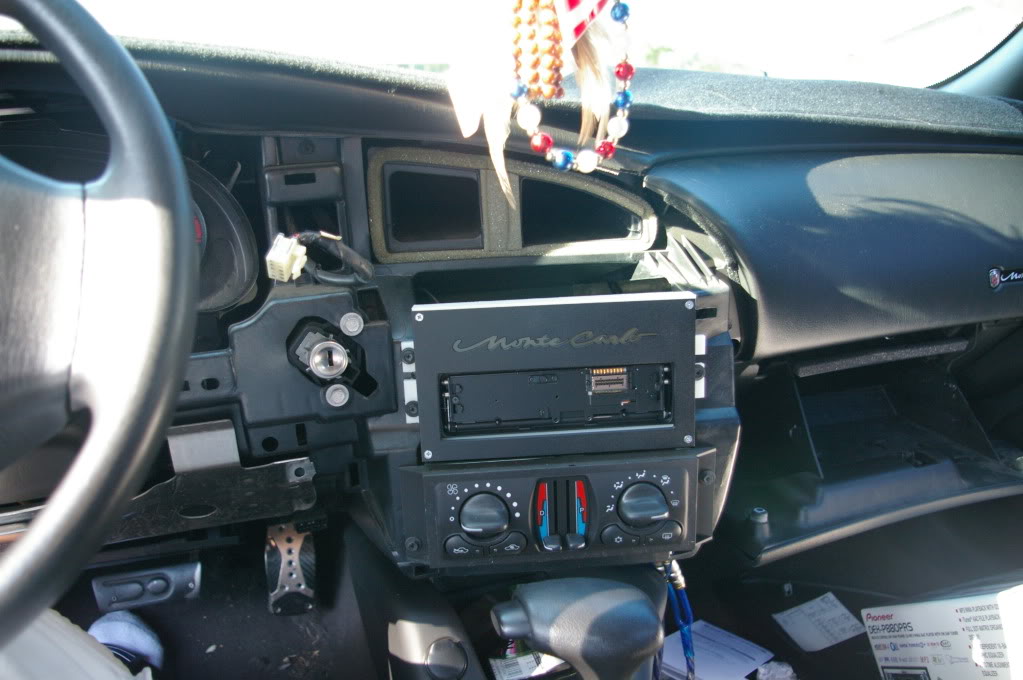
My first time taking this dash apart, kinda reluctant to do so for rear of breaking something, but here goes
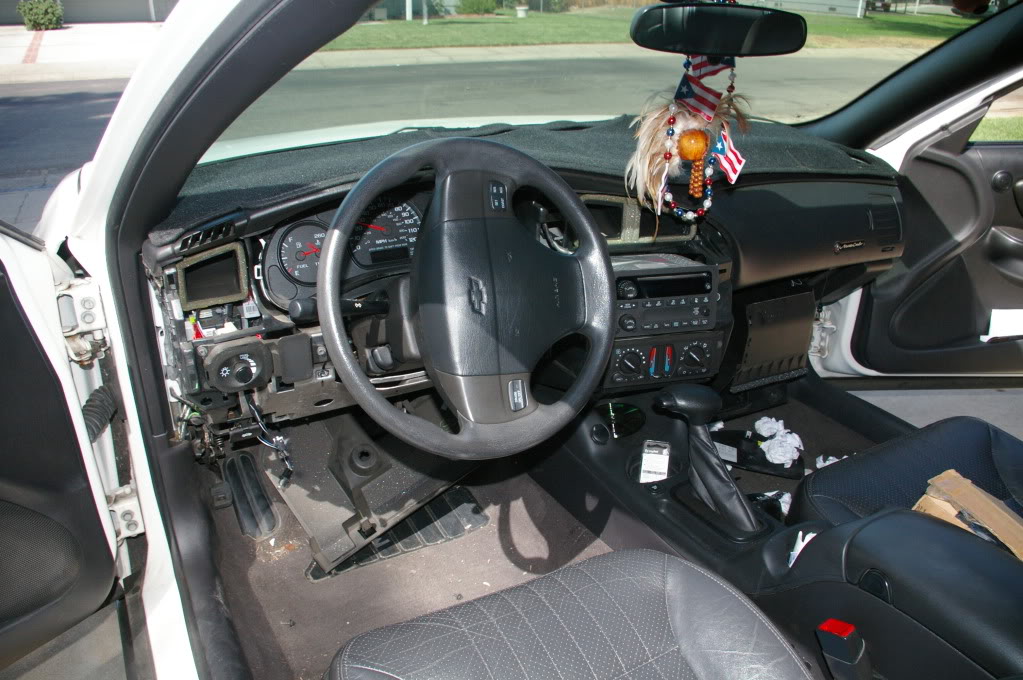
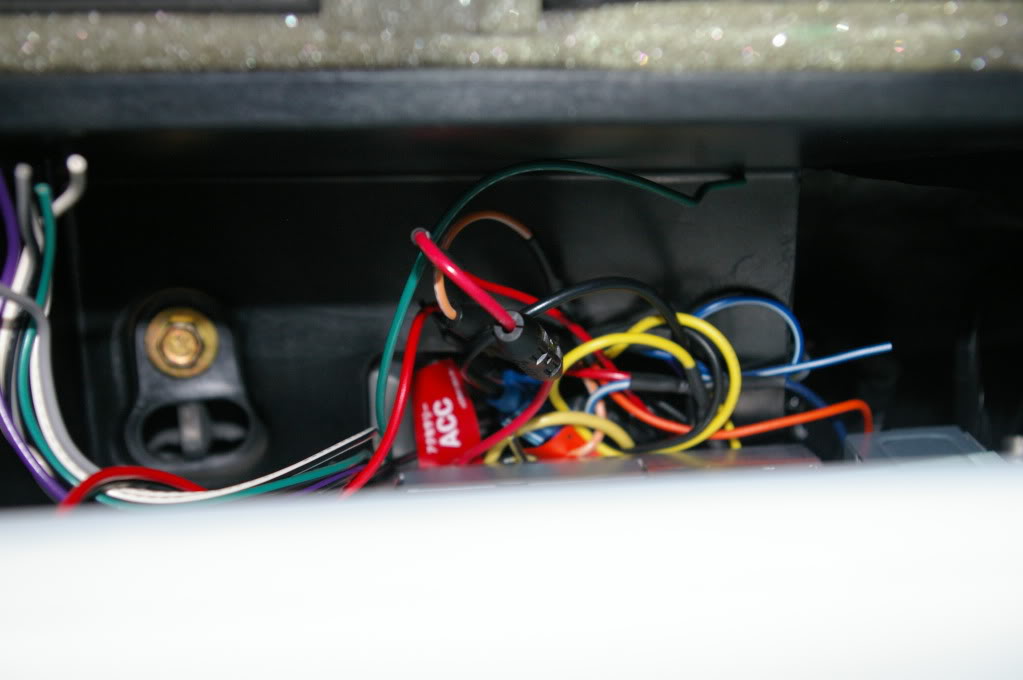
Then I unscrewed the deck and pulled it out to disconnect the factory harness and was met with an unexpected surprise
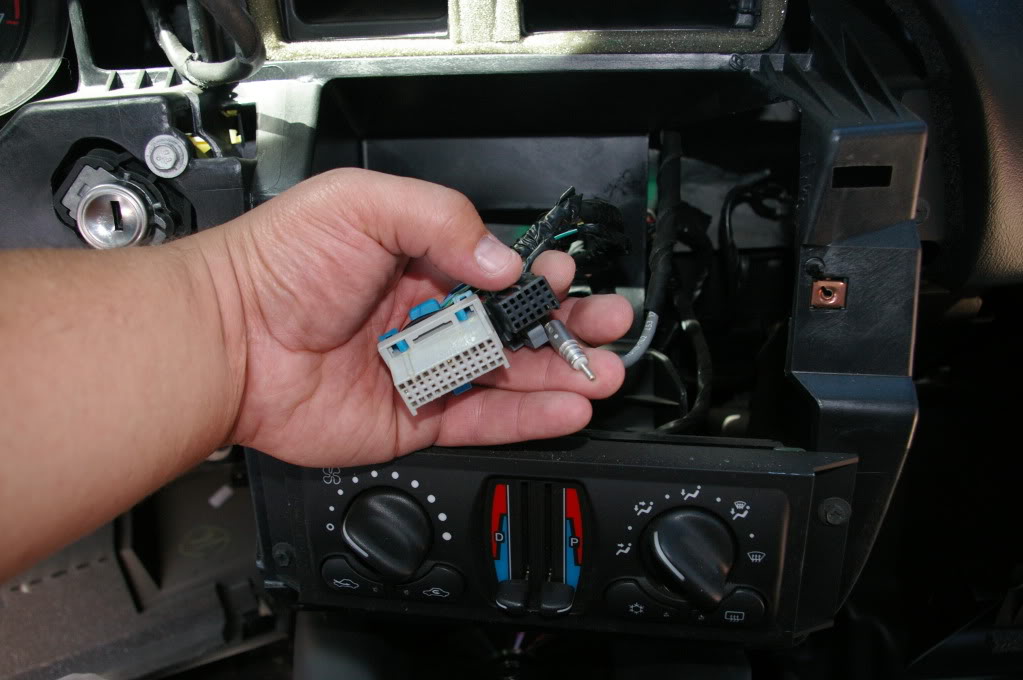
That black plug had me worried, wasn't sure what it was for and my harness didn't have a plug for it. With a little research I was able to find out it was for the factory amp so I just left it unplugged.
Mounted the module for my Scosche GM09SR harness which allows me to keep all my chimes and message center warnings
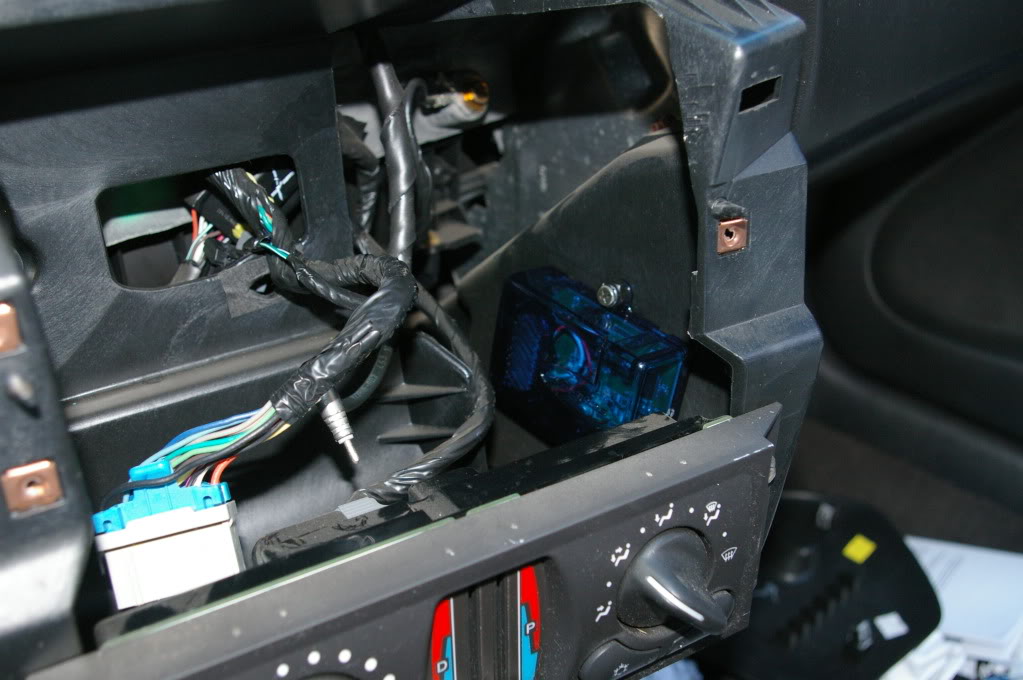
Soldered the led'* for my flush mount deck bezel to the remote lead off my deck and plugged in the antenna adapter (ignore my paint tape wrapped rca'*, I just didn't want them to get scratched up during this process since the ends are anodized). I grounded the rca'* to the same ground spot as the deck, a lug behind the dash between the stereo opening and the glove box.
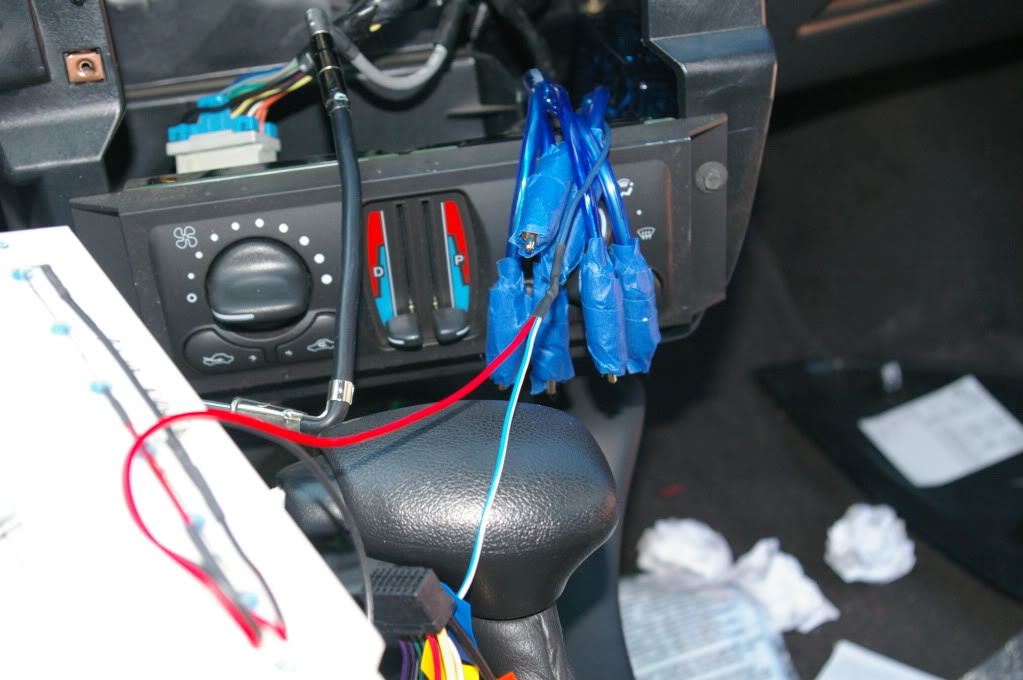
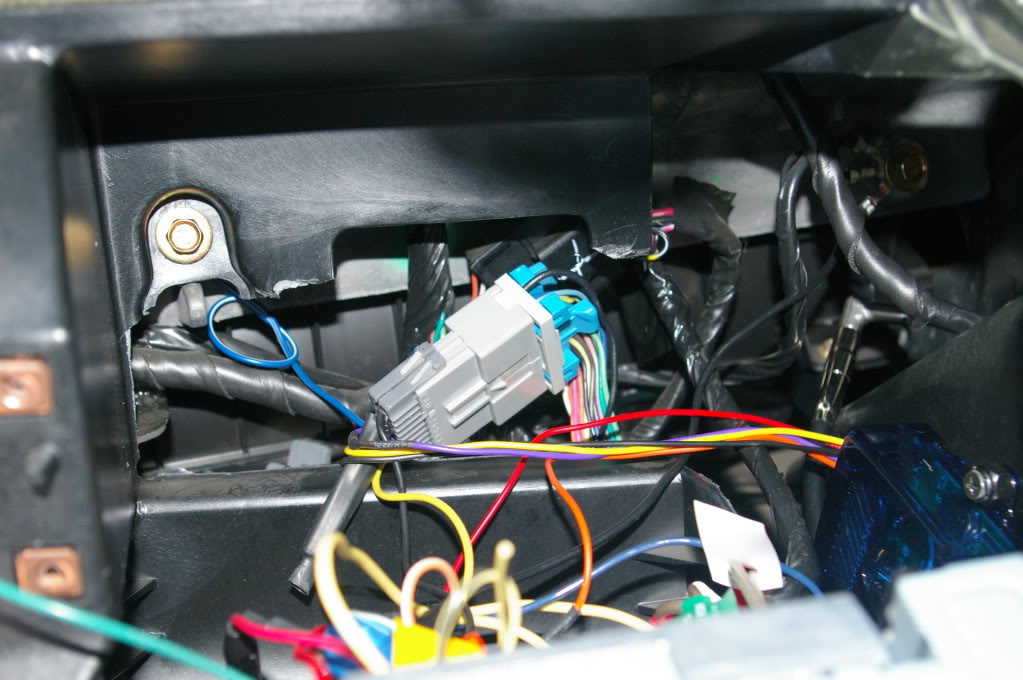
Kinda hard to tell, but the deck is butting up against the back wall inside the opening, I guess that'* what happens when you recess it 3/4" more than it should be. But I'd rather deal with this and have a flush mounted deck than not have this issue and have it surface mounted
No more clearance issue!
Deck in, kit bolted up
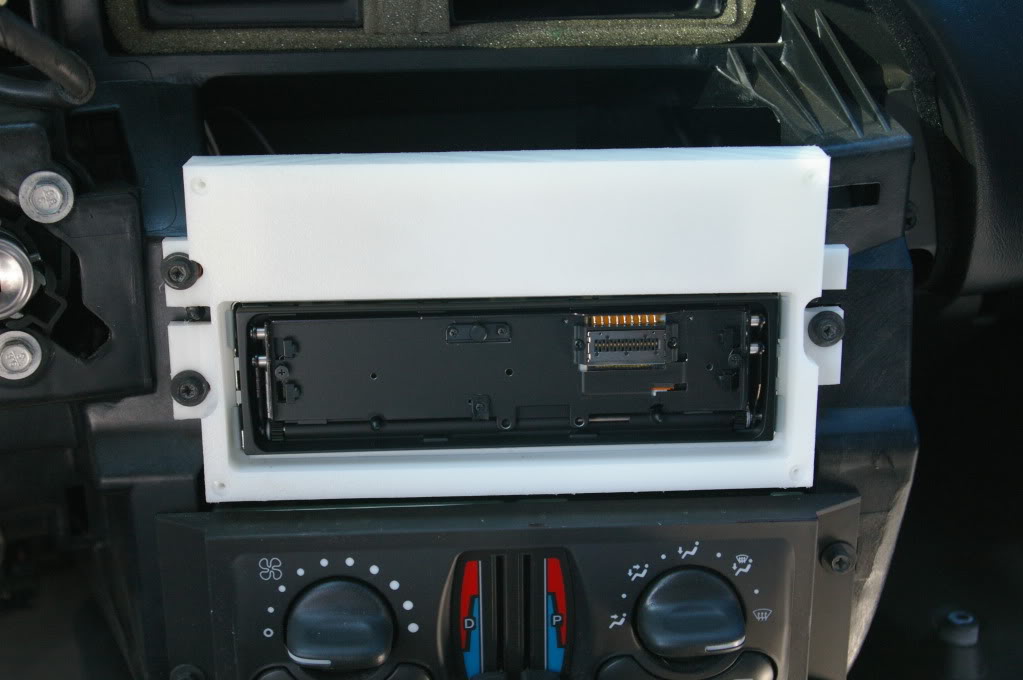
Face plate of deck bezel kit bolted up
Disregard the rca'* hanging, they were appropriately tucked away and hidden when it was all said and done.
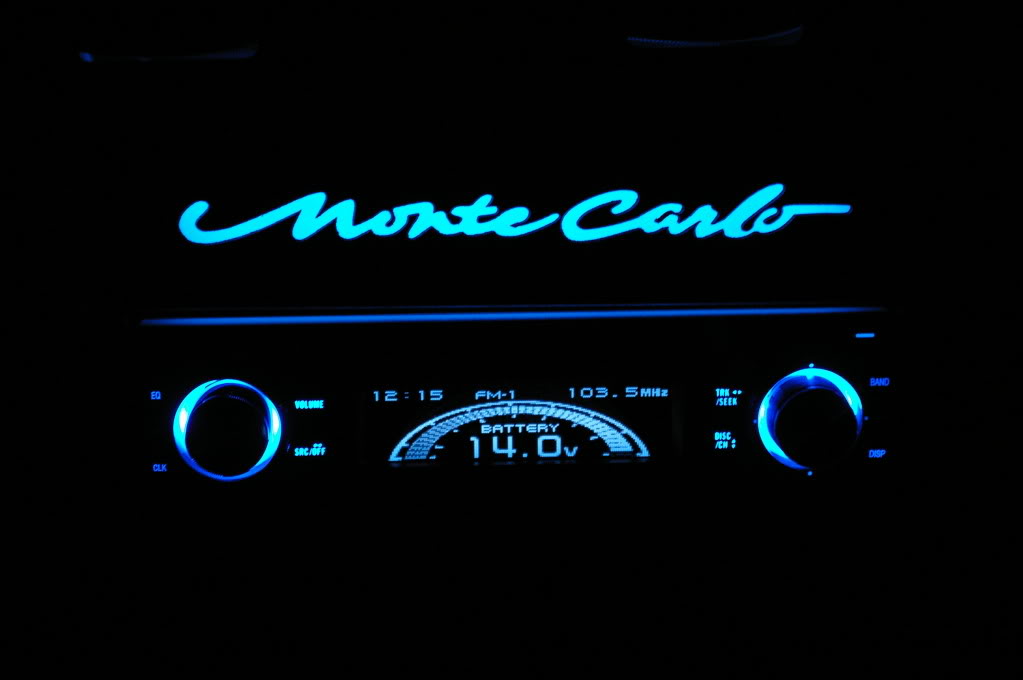
Finished product

And this is what it looks like lit up at night
Then I unscrewed the deck and pulled it out to disconnect the factory harness and was met with an unexpected surprise
That black plug had me worried, wasn't sure what it was for and my harness didn't have a plug for it. With a little research I was able to find out it was for the factory amp so I just left it unplugged.
Mounted the module for my Scosche GM09SR harness which allows me to keep all my chimes and message center warnings
Soldered the led'* for my flush mount deck bezel to the remote lead off my deck and plugged in the antenna adapter (ignore my paint tape wrapped rca'*, I just didn't want them to get scratched up during this process since the ends are anodized). I grounded the rca'* to the same ground spot as the deck, a lug behind the dash between the stereo opening and the glove box.
Kinda hard to tell, but the deck is butting up against the back wall inside the opening, I guess that'* what happens when you recess it 3/4" more than it should be. But I'd rather deal with this and have a flush mounted deck than not have this issue and have it surface mounted
No more clearance issue!
Deck in, kit bolted up
Face plate of deck bezel kit bolted up
Disregard the rca'* hanging, they were appropriately tucked away and hidden when it was all said and done.
Finished product
And this is what it looks like lit up at night