2001 Buick Regal climate control display
 11-09-2010, 03:55 PM
#11
Junior Member

Join Date: Nov 2010
Posts: 2
Likes: 0
Received 0 Likes
on
0 Posts

I have a 2001 Buick Regal LS, and the climate control display panel suddenly went out...but the controls still work. I can't see the outside temp, the inside set temp, or the positions of the vents or fan velocity.
I can't find any fuses that are blown, either in the dash or in the engine compartment.
Any clues/ideas/suggestions?
Kevin
I can't find any fuses that are blown, either in the dash or in the engine compartment.
Any clues/ideas/suggestions?
Kevin
 11-10-2010, 06:59 AM
#12
DINOSAURUS BOOSTUS


Expert Gearhead

Kevin,
This should fix you up.
Most HVAC control units suffer a dim or not visible display. This problem is caused by some surface mount resistors in the back of the unit. A few minutes with a soldering iron and this can be fixed for free.
Need procedure for dash panel/console removal added here.
Here is the backside of the HVAC unit. Remove the four screws.
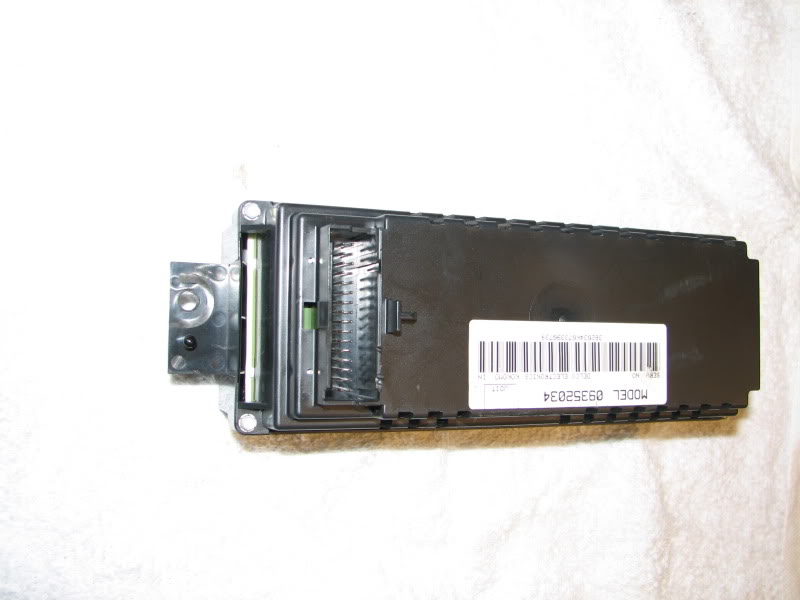
Leaving the unit face down lift the back off the face. The face contains many buttons and parts that will fall on the floor if you seperate it or invert the face while it is off the back.
Looking at the back now, remove these four screws.
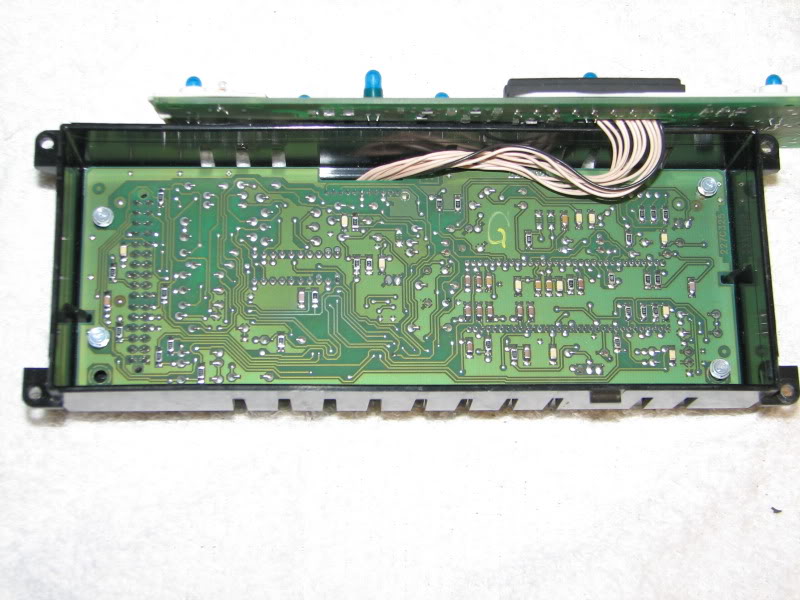
Wiggle the back circuit board out of the plastic housing. Set it down with the pins facing up.
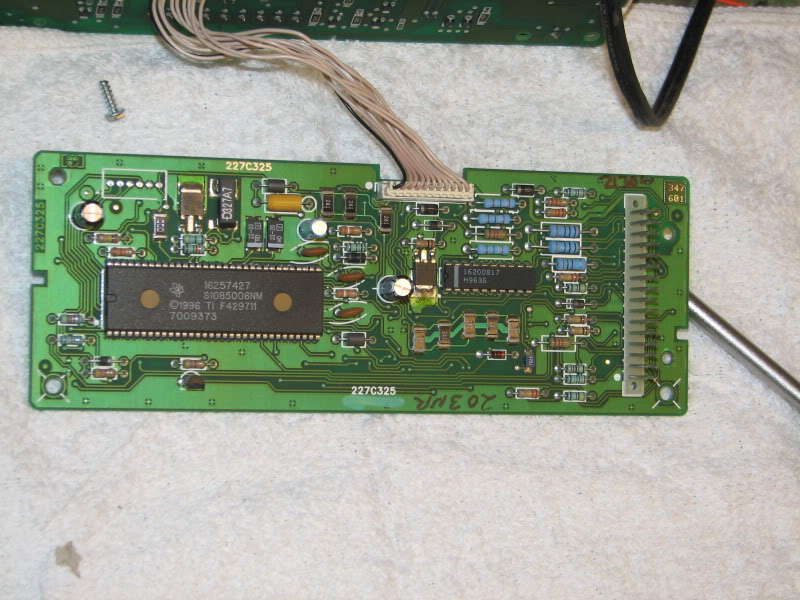
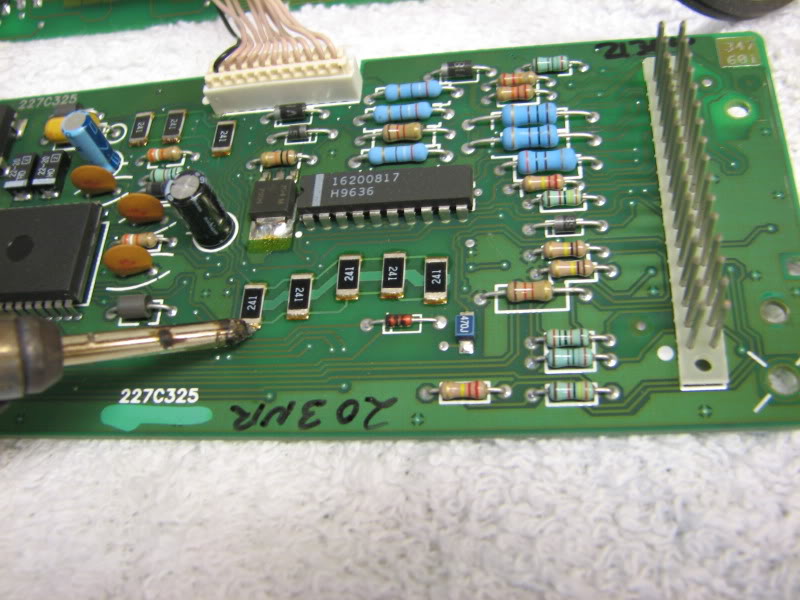
These five surface mounted resistors are the issue. They need to have the solder reheated to reflow it.
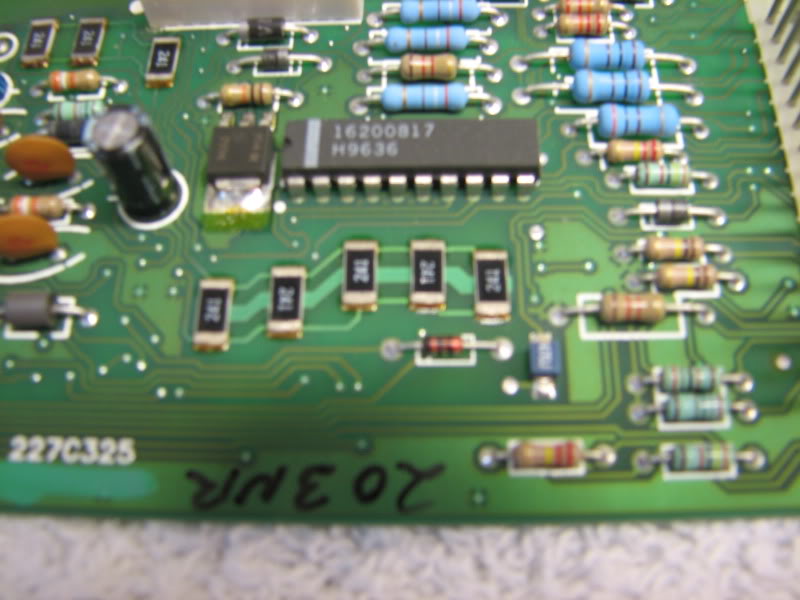
This is done by touching a soldering iron to the metal ends of the resistors
Reassemble the unit and go try it out. It should work again.
This should fix you up.
Most HVAC control units suffer a dim or not visible display. This problem is caused by some surface mount resistors in the back of the unit. A few minutes with a soldering iron and this can be fixed for free.
Need procedure for dash panel/console removal added here.
Here is the backside of the HVAC unit. Remove the four screws.
Leaving the unit face down lift the back off the face. The face contains many buttons and parts that will fall on the floor if you seperate it or invert the face while it is off the back.
Looking at the back now, remove these four screws.
Wiggle the back circuit board out of the plastic housing. Set it down with the pins facing up.
These five surface mounted resistors are the issue. They need to have the solder reheated to reflow it.
This is done by touching a soldering iron to the metal ends of the resistors
Reassemble the unit and go try it out. It should work again.
11-11-2010, 11:22 AM
#14
DINOSAURUS BOOSTUS
Expert Gearhead
Sure.. I just hadn't written it up yet.
Open the center console and remove all the stuff in it.
Remove the rubber piece at the bottom of it and you will see two 10mm bolts, remove them
Lift up on the trim panel that sits between the cubby hole door and the console door. Unhook the traction control (and heated seat) connectors and set the piece aside. Looking in you will see an inline connector (white IIRC) disconnect it. That'* the power and such for the center console.
Looking straight down behind the shifter are two more 10mm bolts, remove them.
Looking in at where the dash meets the lower dash, you will see a 10mm bolt on each side. Remove both of them.(looking straight at side of console from driver or passenger door.)
Now the tough part. The passenger side of the console contains a cigarette lighter socket. The FSM says to use special J tool to try and get it out, then when you break it to replace with part XXXXXXX. The socket hits on the shifter assembly as you pull the console back. I find that two small screwdrivers can sometimes do the trick. BTW it still has pwoer, be careful putting metal into it. Expect that the socket will get bent and won't work properly afterwards or slide the console back as far as the socket allows and work your way in with the 7mm driver to get the four screws holding the HVAC to the dash. Then pull the HVAC up and out and disconnect the connector for the wiring.
11-11-2010, 11:22 AM
#15
DINOSAURUS BOOSTUS
Expert Gearhead
Sure.. I just hadn't written it up yet.
Open the center console and remove all the stuff in it.
Remove the rubber piece at the bottom of it and you will see two 10mm bolts, remove them
Lift up on the trim panel that sits between the cubby hole door and the console door. Unhook the traction control (and heated seat) connectors and set the piece aside. Looking in you will see an inline connector (white IIRC) disconnect it. That'* the power and such for the center console.
Looking straight down behind the shifter are two more 10mm bolts, remove them.
Looking in at where the dash meets the lower dash, you will see a 10mm bolt on each side. Remove both of them.(looking straight at side of console from driver or passenger door.)
Now the tough part. The passenger side of the console contains a cigarette lighter socket. The FSM says to use special J tool to try and get it out, then when you break it to replace with part XXXXXXX. The socket hits on the shifter assembly as you pull the console back. I find that two small screwdrivers can sometimes do the trick. BTW it still has pwoer, be careful putting metal into it. Expect that the socket will get bent and won't work properly afterwards or slide the console back as far as the socket allows and work your way in with the 7mm driver to get the four screws holding the HVAC to the dash. Then pull the HVAC up and out and disconnect the connector for the wiring.
Open the center console and remove all the stuff in it.
Remove the rubber piece at the bottom of it and you will see two 10mm bolts, remove them
Lift up on the trim panel that sits between the cubby hole door and the console door. Unhook the traction control (and heated seat) connectors and set the piece aside. Looking in you will see an inline connector (white IIRC) disconnect it. That'* the power and such for the center console.
Looking straight down behind the shifter are two more 10mm bolts, remove them.
Looking in at where the dash meets the lower dash, you will see a 10mm bolt on each side. Remove both of them.(looking straight at side of console from driver or passenger door.)
Now the tough part. The passenger side of the console contains a cigarette lighter socket. The FSM says to use special J tool to try and get it out, then when you break it to replace with part XXXXXXX. The socket hits on the shifter assembly as you pull the console back. I find that two small screwdrivers can sometimes do the trick. BTW it still has pwoer, be careful putting metal into it. Expect that the socket will get bent and won't work properly afterwards or slide the console back as far as the socket allows and work your way in with the 7mm driver to get the four screws holding the HVAC to the dash. Then pull the HVAC up and out and disconnect the connector for the wiring.

Thread
Thread Starter
Forum
Replies
Last Post
andereck
2000-2005
3
08-10-2006 10:58 PM
fuddyduddy121
1992-1999
21
03-21-2003 04:11 PM