BIG score = lots of work **Complete** with More pics


 11-13-2004, 07:09 AM
#12
Senior Member
True Car Nut

Join Date: Apr 2004
Location: Three Oaks, Michigan
Posts: 4,879
Likes: 0
Received 0 Likes
on
0 Posts

Originally Posted by randman1
It has two aux video inputs: Navi in and Aux for rear view camera or other video source. It even has a split screen so two sources can be seen at the same time.
Straitor: This would work perfectly. We'd need a bigger one, of course. However, get something like a 10" flip up, touch screen with RCA in, then on the other end, have a ****** card that has an RCA out.
-justin
11-14-2004, 01:49 PM
#13
Senior Member
True Car Nut
Thread Starter

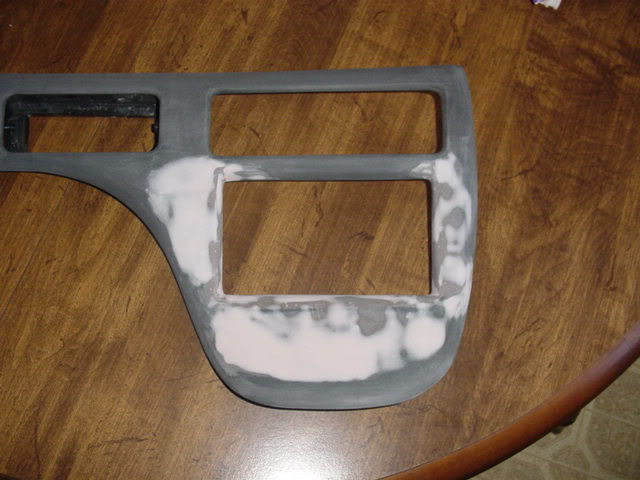
The trim panel is now in primer. I will have to wait until Monday to find some texture and color matched paint. Heres a couple more pics:
After the Bondo step:
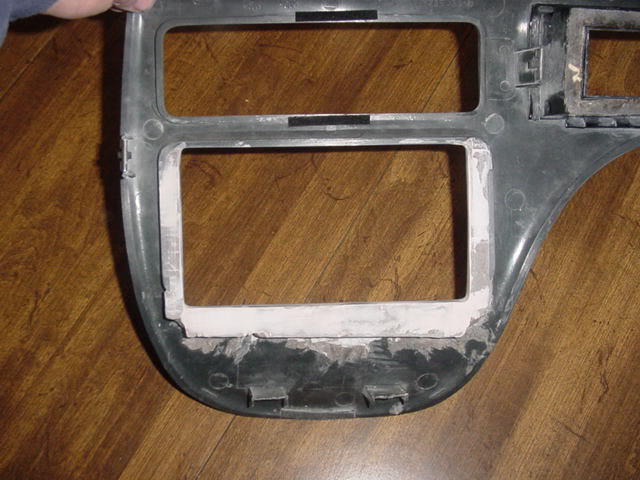
The back cleaned up a bit:
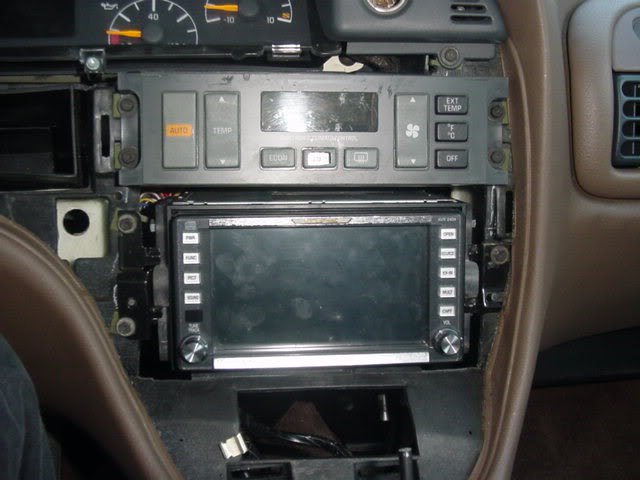
Unit installed after dash modifications:
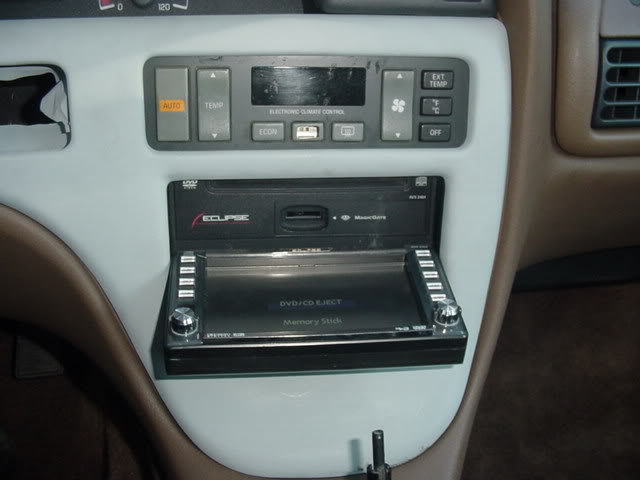
Trim installed and all wired up:

Faceplate tilted to allow access to CD and memory stick slots:
The unit really sucks as a DVD player. The resolution of the screen is only 400 x 234. There is so much compression going on that the images are rather distorted. No big deal though. I like the ability to customize the wallpaper, it has navigation inputs and plays MP3'*. These were the most important features for me.
Don't let anyone tell you that a double DIN headunit will not fit in a Bonneville
After the Bondo step:
The back cleaned up a bit:
Unit installed after dash modifications:
Trim installed and all wired up:
Faceplate tilted to allow access to CD and memory stick slots:
The unit really sucks as a DVD player. The resolution of the screen is only 400 x 234. There is so much compression going on that the images are rather distorted. No big deal though. I like the ability to customize the wallpaper, it has navigation inputs and plays MP3'*. These were the most important features for me.
Don't let anyone tell you that a double DIN headunit will not fit in a Bonneville
 11-14-2004, 01:59 PM
#15
Senior Member
True Car Nut
Thread Starter
No. It opens with about an inch to spare. I was more concerned with it scraping the sides or bottom while opening after the fiberglass. No problems at all. A little bit of luck always helps.
11-14-2004, 02:03 PM
#16
Senior Member
True Car Nut

Join Date: Sep 2004
Location: Farmington, Minnesota =MWBF '05 SURVIVOR= =CEBF '06 SURVIVOR= =August '06 COTM=
Posts: 9,130
Likes: 0
Received 0 Likes
on
0 Posts
hahaha unless he'* got a column shift ( i dunno I didn't pay any attention the the car Trim level) he will....I think he would have to put it in at least reverse to get the screen to open all the way.
11-14-2004, 04:02 PM
#17
Senior Member
Certified GM nut

Join Date: Jun 2004
Location: Grand Haven, Michigan
Posts: 1,719
Likes: 0
Received 0 Likes
on
0 Posts
Gorgeous! That is really sweet looking. How long did it take you for the whole installation proccess? That is an awesoem modification.
11-14-2004, 06:29 PM
#18
Senior Member
True Car Nut
Thread Starter
Originally Posted by beckstyle
Gorgeous! That is really sweet looking. How long did it take you for the whole installation proccess? That is an awesoem modification.
I can pick up the texture and paint tomorrow but the trim panel still needs work. It came from the SE parts car I had. I was so focused on the radio opening that I didn't realize that it didn't have the opening for the HUD controls.
 I nearly broke the switch trying to get it on. So it might be a couple more days until it'* totally complete due to the bonehead mistake.
11-15-2004, 08:41 PM
I nearly broke the switch trying to get it on. So it might be a couple more days until it'* totally complete due to the bonehead mistake.
11-15-2004, 08:41 PM
#20
Senior Member
True Car Nut
Thread Starter
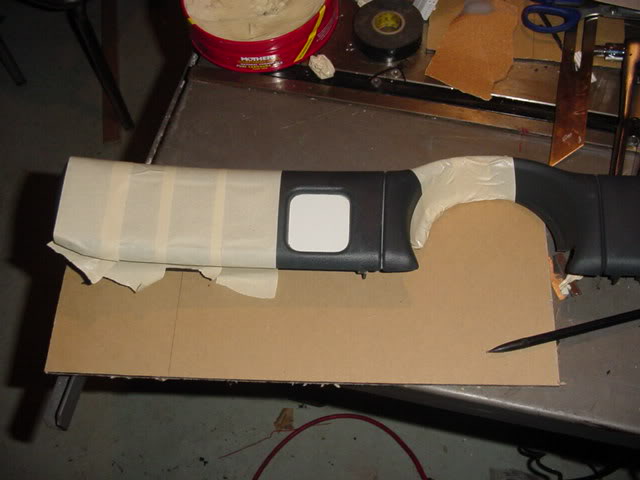
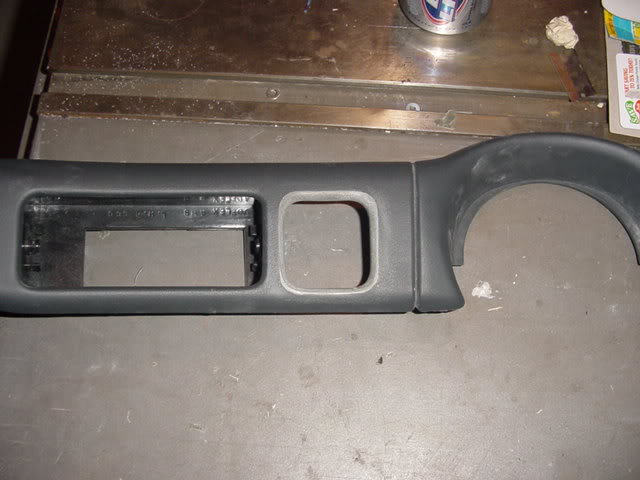
The HUD switch opening proved to be more difficult than the radio opening but I think I'm getting the hang of this. I tried to measure the original trim panel and cut the new one but I ended up being off the mark. Plus, the switch is recessed and the trim is noe flat. The best way to get it exactly right was to make a reverse mold of the original with an unmistakable reference point. The reference point is the vertical line in the trim piece. The piece was prepped with some masking tape and a lot of wax
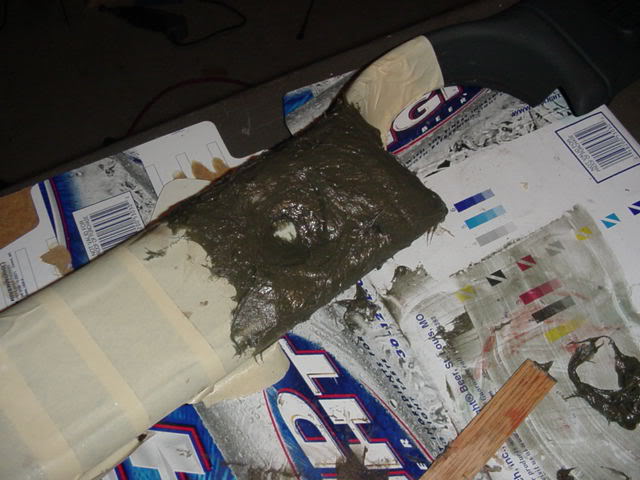
Next, the fiberglass was glopped over the area paying attention to the vertical line and the curves of the opening. The following pic is the second attempt at the mold. the first one was nearly a disaster. The white thing in the opening of the first pic is a piece of steel that formerly was a scrap of baseboard heater. I tried to adhere it to the back of the trim with an adhesive that I could remove afterwards. I decided on some acrylic window caulk. Bad choice. It let go during the glopping process and the stuff was EVERYWHERE!. Fortunately, I used enough wax all around and the glass was able to be removed. In the end, it was duct tape to the rescue.
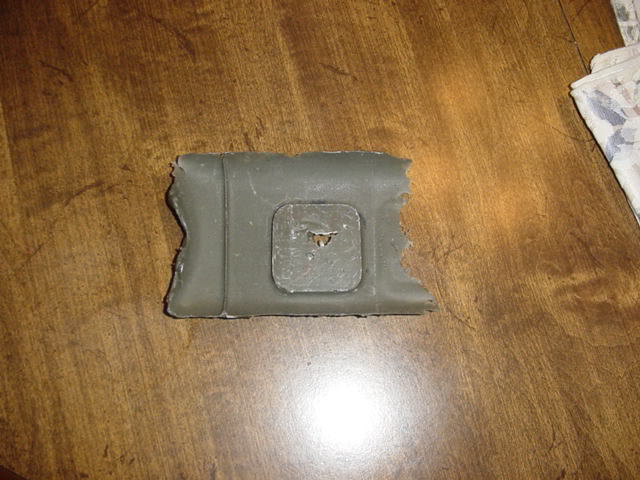
Once the mold hardened, it was released from the trim. I sprayed it with sheliac to seal the surface and waxed the snot out of it. This is how it looked fresh off of the original trim piece:
The new trim piece was cut oversized of the mold. This insured enough surface for the glass to bond. Once the opening was large enough, the mold was clamped in place.
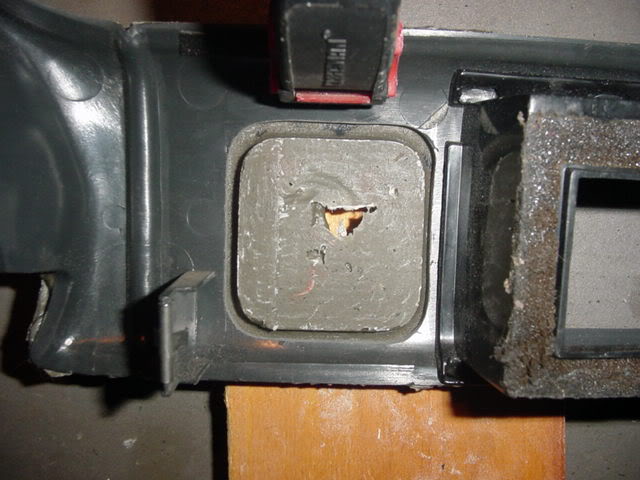
More glopping:

Fresh out of the mold:

After some sanding:
I still need to Bondo the new orifice but tomorrow in another day. I bought a color matched paint today but will have to wait until Wed for the texture.
Next, the fiberglass was glopped over the area paying attention to the vertical line and the curves of the opening. The following pic is the second attempt at the mold. the first one was nearly a disaster. The white thing in the opening of the first pic is a piece of steel that formerly was a scrap of baseboard heater. I tried to adhere it to the back of the trim with an adhesive that I could remove afterwards. I decided on some acrylic window caulk. Bad choice. It let go during the glopping process and the stuff was EVERYWHERE!. Fortunately, I used enough wax all around and the glass was able to be removed. In the end, it was duct tape to the rescue.
Once the mold hardened, it was released from the trim. I sprayed it with sheliac to seal the surface and waxed the snot out of it. This is how it looked fresh off of the original trim piece:
The new trim piece was cut oversized of the mold. This insured enough surface for the glass to bond. Once the opening was large enough, the mold was clamped in place.
More glopping:
Fresh out of the mold:
After some sanding:
I still need to Bondo the new orifice but tomorrow in another day. I bought a color matched paint today but will have to wait until Wed for the texture.