Puddle lights
 10-12-2010, 09:15 PM
#1
Senior Member
True Car Nut
Thread Starter
Join Date: Feb 2003
Location: Philly
Posts: 4,508
Likes: 0
Received 0 Likes
on
0 Posts

I got these done today after work. I have them wired in to come on with the interior lights. So, lock/unlock/dash switch, they come on.
Sorry for the crappy pics. I need a tripod in a bad bad way..
The second pic is a bit deceiving light output wise. Driver/Passenger sides are the same.
The car is super dirty too. :???:
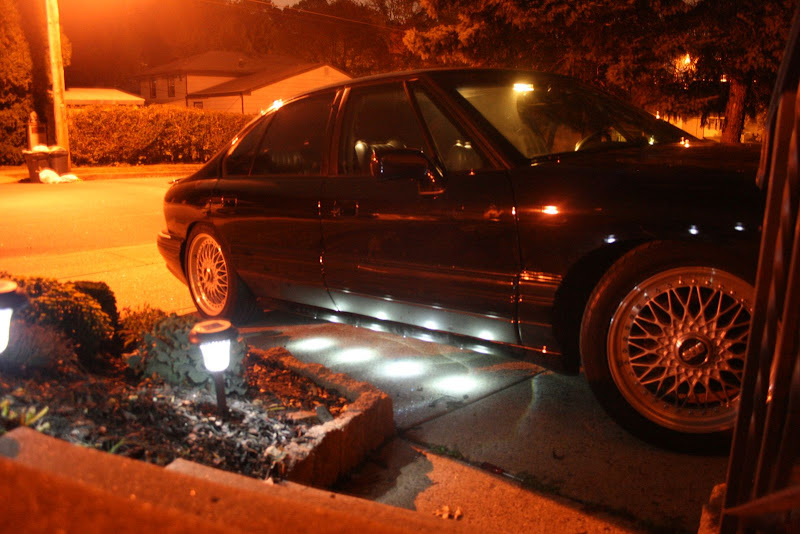
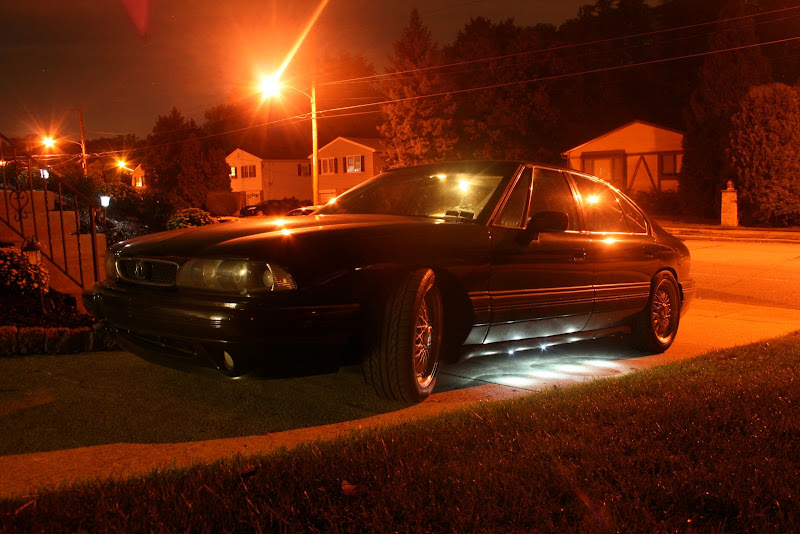
I'm thinking about adding two more per side which would be very easy at this point.
Sorry for the crappy pics. I need a tripod in a bad bad way..
The second pic is a bit deceiving light output wise. Driver/Passenger sides are the same.
The car is super dirty too. :???:
I'm thinking about adding two more per side which would be very easy at this point.


 10-13-2010, 12:15 AM
#10
Senior Member
True Car Nut
Thread Starter
Join Date: Feb 2003
Location: Philly
Posts: 4,508
Likes: 0
Received 0 Likes
on
0 Posts
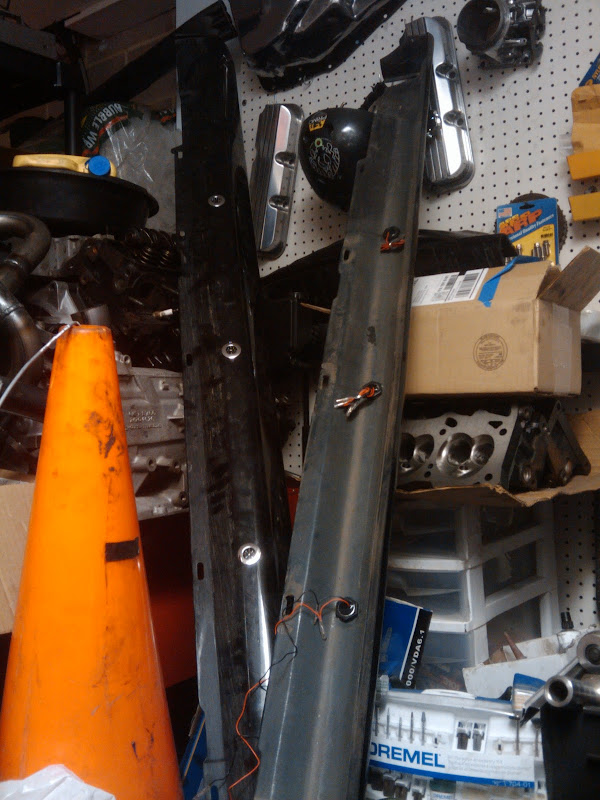
Lol. Here'* a pic of the skirts.
For a write up,
Search for VIP Puddle Kit on ebay. You'll find kits just like the one in the pic above.
They come all ready to wire up in parallel with connectors that have rubber shields.. This didn't really do it for me though. I cut, soldered, and adhesive lined shrink tubed almost everything.
Drill, mount, and wire up each rocker so that the LEDs are in parallel and the positive and negative are pointing to the front of the car. Leave two connectors so that I can remove the rocker.
For the ground, drill one hole per side, use a self tapping screw, eyelet electrical connector, and a section of wire with the corresponding connector to plug into the negative side of the rocker. In addition to the supplied rubber shielding, use dielectric grease to seal the connector. It'* also a good idea to remove the paint where the eyelet connector makes contact with the body and use dielectric grease there as well.
For the positive, run lines up through the front fender, and into the cabin to where the interior light relay is located. For my 95, I ran the lines up into the bay and through the firewall hole located behind the drivers shock tower. Make sure to protect the wires with loom. Using a relay (not supplied), take power post interior light fuse, and use an interior light to trigger it. I just used the floor light right near the fuse panel. I didn't bother upping the amp of the fuse since the LEDs don't really draw much current. (had the interior light ground bus been easy to get to I wouldn't have used a relay)
Going back to the rocker, use the corresponding connector at the end of the positive lead, rocker side, and connect with rubber and dielectric grease, same as the ground.