
everything came together (56k call your dsl provider today)


Thread Starter
BANNED
Joined: Mar 2004
Posts: 0
Likes: 2
From: Purgatory

OK....about two months ago, i promised i would be done with my blue dash. well it just happen last night. i have been realy busy last night, and a lot of dead ends caused me to lose interest in this project. i drove about 2500 miles with out a dash, without a gas gauge, without traction control, etc....
what it worth it? NO
would i do it again? NO
did it turn out perfectlly the way i wanted it? NO
so whats the point? i am the only pontiac driver that i know of with a blue cluster
ready for pics?? lets see...i have taken so many throughout this whole ordeal, you are gonna get a small percentage, here goes
randman was nice enough to give me his old cluster because he got a new one...this was my snoop around model.
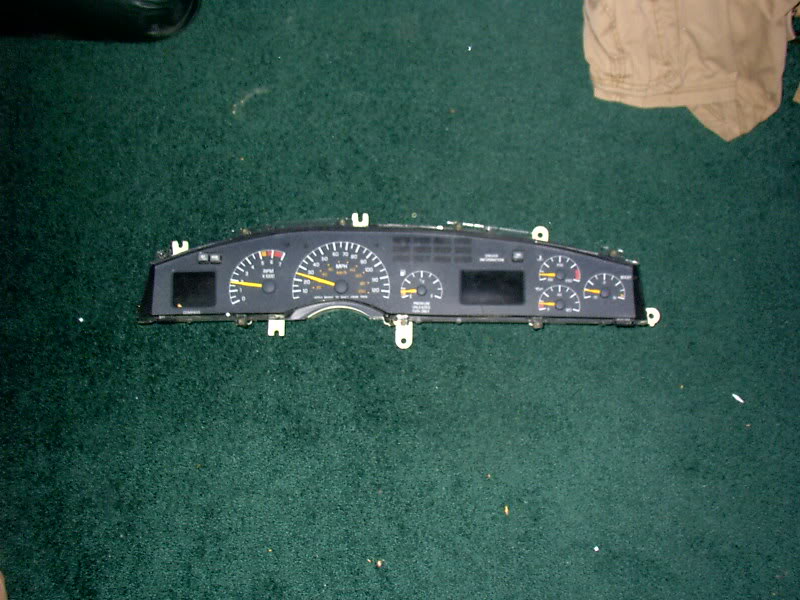

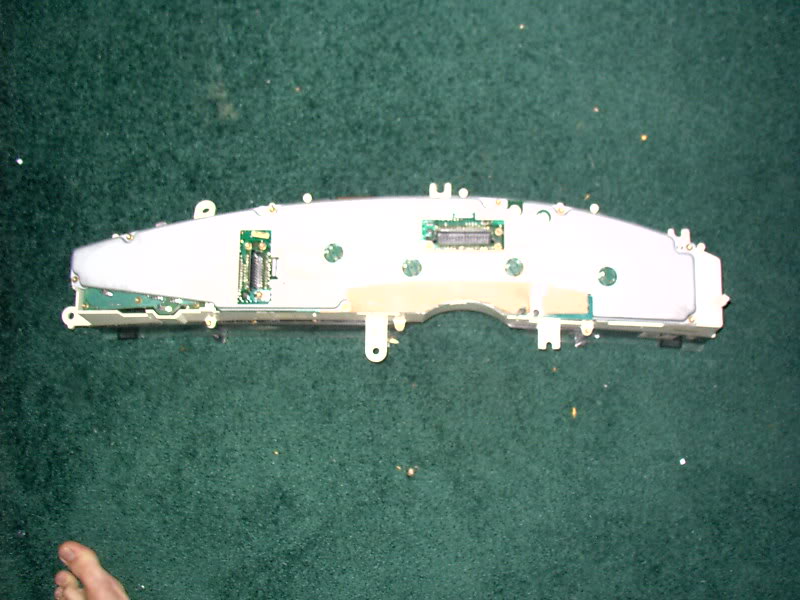
after ripping apart the cluster, taking off all the dials and such, the overlay just peels right off. this is what you are working with.

now this glue doesnt exactly come off easily...tried googone, rubbing alcohol, paint thinner, and gasoline...nope, good old scraping is the only way. i scraped with a small utlility knife, a big one doesnt work, smaller the blade the easier. it took me about 15 min to do a 1 inch square, YES so the whole scraping part took over 6 hours at least. this is what the glue looks like when its scraped off.

after all the scraping of the glue, you scrap off the red part of the overlay, well only if you want something other than red
you get this


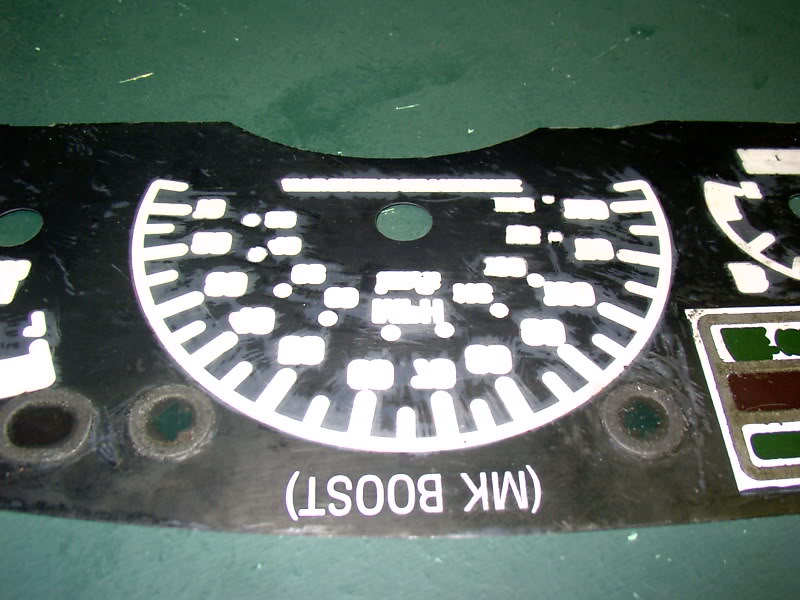


this is the original from my dash

and this is after i scraped off the glue and red in the test cluster

NOW FOR BLUE
i taped it all off with masking tape


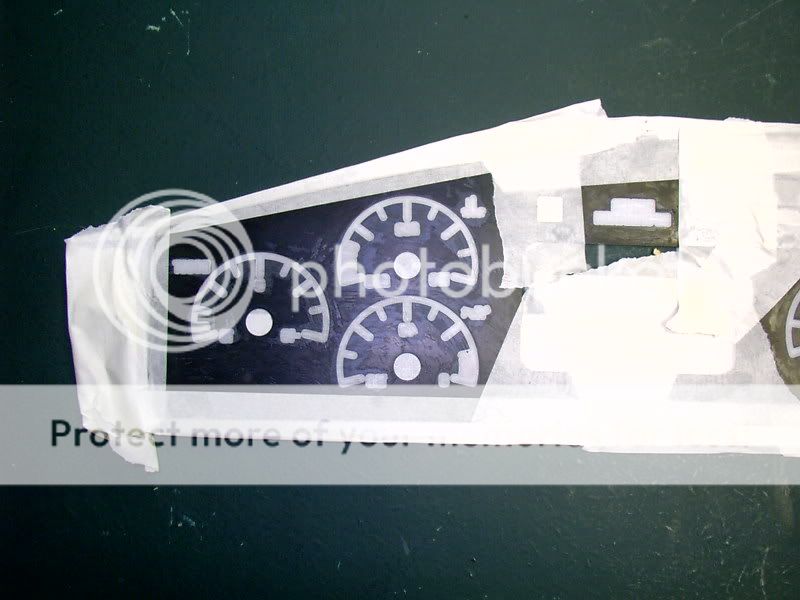
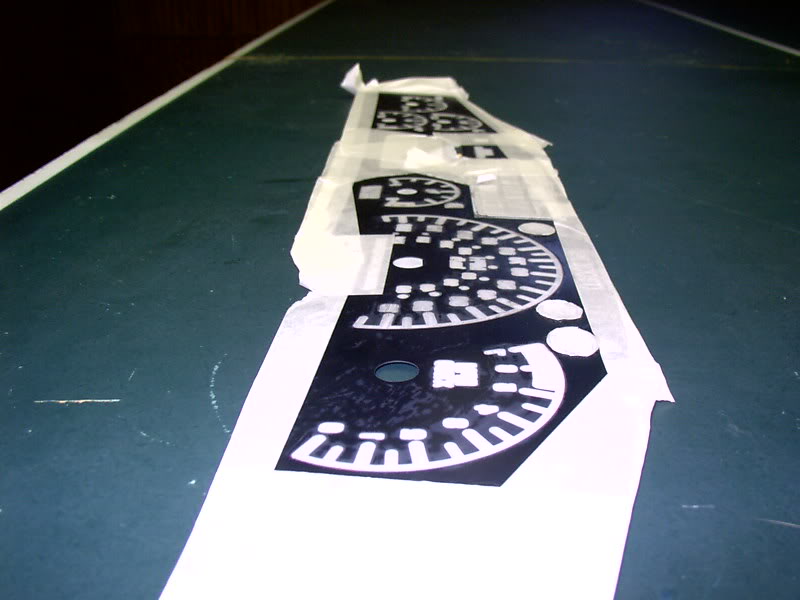
and then painted it with this TRANSLUCENT blue stained glass paint
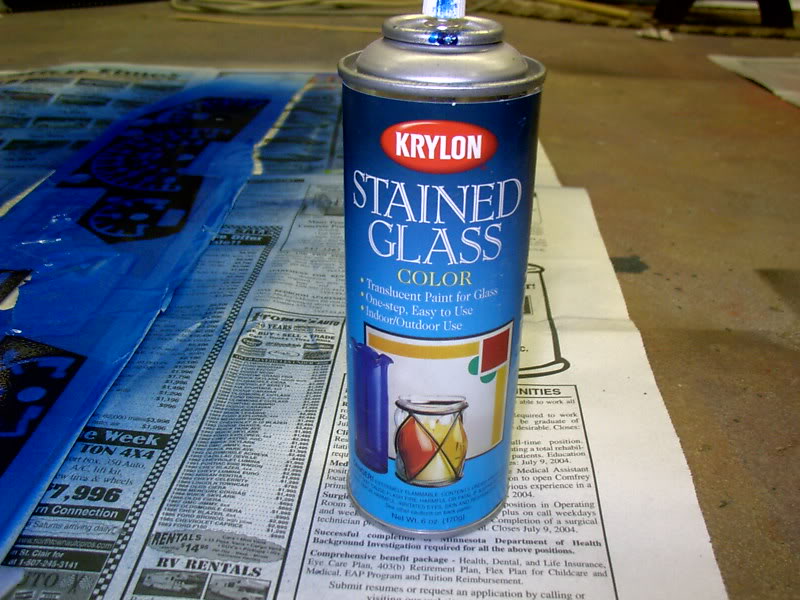


now at this point, when i hold it up against my desk lamp, it appears VERY BLUE!! exactly how i wanted
so this is how i pictured it would go
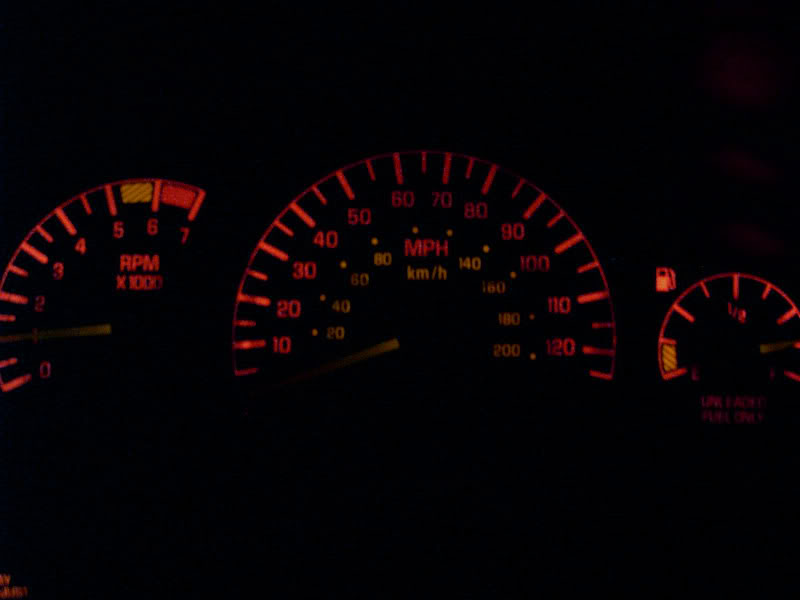
ORIGINAL
ATTN: this is just a photoshoped image of how i wanted it
HOW I WANTED IT

so i say hey, lets put this thing together.
i go grab some super 77 3m spray adhesive, and spray the whole back. then put it all together, including the entire dash, run out to the car and plug it in. I SEE NOTHING!!??!
i was very pissed by this point
i take the dash off to go for a drive to see the lady. then it hits me!!!!!! the adhesive is not like the GM stuff, its OPAGUE, not TRANSLUCENT! so i run home to see if it had dried yet
IT HAD
at this point, i am right were i started. i had to rescrape it all over, remask it, repaint it, and this time i didnt glue it. i just used double stick tape on the parts with no light going through.
so it goes back together again...
install it, and OH NO...the lights are GREEN!!!!!!!!!
so i give up...throw it all in the corner of my room...for 2 weeks...
then i get the idea of using blue LED'*, so i order 100 3mm blue 45* led'* off ebay. the seller F*cks up and sends me 5mm bulbs, another setback!! they were from CHINA so i had to wait anothter 1.5 weeks to get em. When i get them i try to make it so there are 3 leds in each bulb socket, along with a resistor. this works fine, but takes a long time to make just one. i installed it in the dash and the 45* bulbs, werent spread out enough, they were like spot lights on certain areas...
SO I GAVE UP AGAIN
sat in the corner for weeks until i moved up at college again. it was taking up space on the floor, so i decided to put the stock bulbs back in and just go with it. sick of not having a boost and gas gauge.
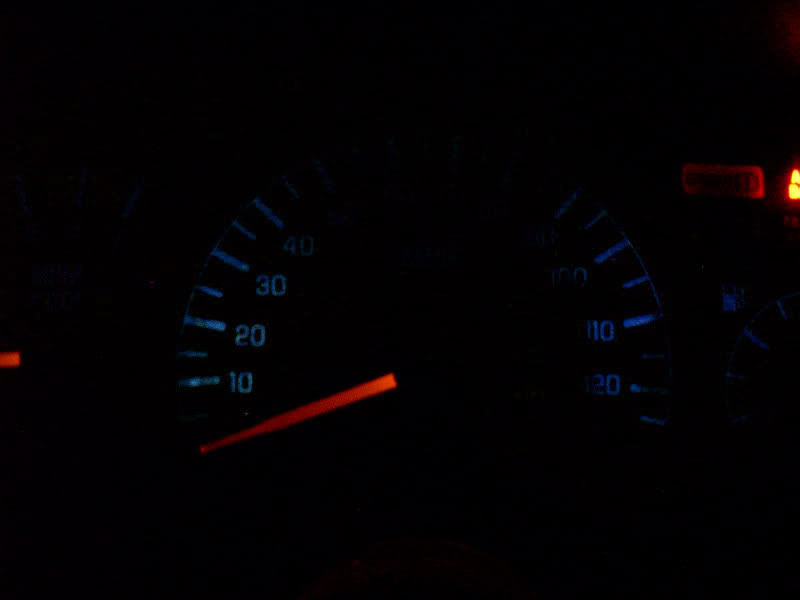
INSTALLED YESTERDAY
what ive got to say:
the red film that i scraped off the original dash must have had some sort of light dispersing technology to is, cuz its not near as bright anymore. but the pictures do dim it quite a bit.
here are some NON PHOTOSHOPED images of the final project


here are the blue led'* that are in the doors now, the light up WAY more than the stockers


center console with blue leds in the buttons

LASTLY, may as well throw in the carbon fiber dash overlay from decalgirl.com, if not not up to date on this, here ya go
http://www.bonnevilleclub.com/forum/...2275&highlight


WHEW!!!! what a finger workout...im done
what it worth it? NO
would i do it again? NO
did it turn out perfectlly the way i wanted it? NO
so whats the point? i am the only pontiac driver that i know of with a blue cluster
ready for pics?? lets see...i have taken so many throughout this whole ordeal, you are gonna get a small percentage, here goes
randman was nice enough to give me his old cluster because he got a new one...this was my snoop around model.
after ripping apart the cluster, taking off all the dials and such, the overlay just peels right off. this is what you are working with.
now this glue doesnt exactly come off easily...tried googone, rubbing alcohol, paint thinner, and gasoline...nope, good old scraping is the only way. i scraped with a small utlility knife, a big one doesnt work, smaller the blade the easier. it took me about 15 min to do a 1 inch square, YES
after all the scraping of the glue, you scrap off the red part of the overlay, well only if you want something other than red
you get this
this is the original from my dash
and this is after i scraped off the glue and red in the test cluster
NOW FOR BLUE
i taped it all off with masking tape
and then painted it with this TRANSLUCENT blue stained glass paint
now at this point, when i hold it up against my desk lamp, it appears VERY BLUE!! exactly how i wanted
so this is how i pictured it would go
ORIGINAL
ATTN: this is just a photoshoped image of how i wanted it
HOW I WANTED IT
so i say hey, lets put this thing together.
i go grab some super 77 3m spray adhesive, and spray the whole back. then put it all together, including the entire dash, run out to the car and plug it in. I SEE NOTHING!!??!
i was very pissed by this point
i take the dash off to go for a drive to see the lady. then it hits me!!!!!! the adhesive is not like the GM stuff, its OPAGUE, not TRANSLUCENT! so i run home to see if it had dried yet
IT HAD
at this point, i am right were i started. i had to rescrape it all over, remask it, repaint it, and this time i didnt glue it. i just used double stick tape on the parts with no light going through.
so it goes back together again...
install it, and OH NO...the lights are GREEN!!!!!!!!!
so i give up...throw it all in the corner of my room...for 2 weeks...
then i get the idea of using blue LED'*, so i order 100 3mm blue 45* led'* off ebay. the seller F*cks up and sends me 5mm bulbs, another setback!! they were from CHINA so i had to wait anothter 1.5 weeks to get em. When i get them i try to make it so there are 3 leds in each bulb socket, along with a resistor. this works fine, but takes a long time to make just one. i installed it in the dash and the 45* bulbs, werent spread out enough, they were like spot lights on certain areas...
SO I GAVE UP AGAIN
sat in the corner for weeks until i moved up at college again. it was taking up space on the floor, so i decided to put the stock bulbs back in and just go with it. sick of not having a boost and gas gauge.
INSTALLED YESTERDAY
what ive got to say:
the red film that i scraped off the original dash must have had some sort of light dispersing technology to is, cuz its not near as bright anymore. but the pictures do dim it quite a bit.
here are some NON PHOTOSHOPED images of the final project
here are the blue led'* that are in the doors now, the light up WAY more than the stockers
center console with blue leds in the buttons
LASTLY, may as well throw in the carbon fiber dash overlay from decalgirl.com, if not not up to date on this, here ya go
http://www.bonnevilleclub.com/forum/...2275&highlight
WHEW!!!! what a finger workout...im done

Senior Member
Certified Car Nut
Joined: Jun 2003
Posts: 15,928
Likes: 1
Hey those Blue Spotlights were cool in the doors, when i saw them a couple times last few weeks, even if it was the only light in your car.... I may go blue just cause i like it :p Got any leftovers? 
Damn fine work bro. Ever considered getting some brighter bulbs, or cranking up the juice a little? I'm wanting to open up my fried TC Button pod, so maybe you can help me out
Damn fine work bro. Ever considered getting some brighter bulbs, or cranking up the juice a little? I'm wanting to open up my fried TC Button pod, so maybe you can help me out


Senior Member
True Car Nut
Joined: Feb 2004
Posts: 2,708
Likes: 2
From: Western MA
I have to admire your dedication. I would have had that thing in the garbage can after about 1 hour in the first scraping session.
Did you consider blue tinted film at all? Similar to how another member changed a Pioneer faceplate to red? I think it'* for sale so check out that section for details.
Did you consider blue tinted film at all? Similar to how another member changed a Pioneer faceplate to red? I think it'* for sale so check out that section for details.

Senior Member
Posts like a Camaro
Joined: Feb 2003
Posts: 1,004
Likes: 0
From: Indianapolis, IN / West Lafayette
Absolutely amazing I am simply amazed how much dedication you had to that project and it turned out nicely. I love how you changed the whole color scheme and the door leds look awesome that bright. I also like the carbon fiber dash. Nice work!

Senior Member
Certified Car Nut
Joined: Oct 2003
Posts: 19,756
Likes: 1
Originally Posted by randman1
I have to admire your dedication. I would have had that thing in the garbage can after about 1 hour in the first scraping session.
Did you consider blue tinted film at all? Similar to how another member changed a Pioneer faceplate to red? I think it'* for sale so check out that section for details.
Did you consider blue tinted film at all? Similar to how another member changed a Pioneer faceplate to red? I think it'* for sale so check out that section for details.

Senior Member
True Car Nut
Joined: Dec 2002
Posts: 5,857
Likes: 0
From: Halifax, Canada 91SSE / 97SSEi
Wow.... it would have been nice if it was brighter.... but I've gotta give you props for doing something so different.
Myself... I took the easy route and just did the RLD mod to my Bonnies (seeing how red was already a Pontiac color)..... but to change everything to blue took a lot of work.
Good job and very interesting write up... esp for anyone who wants to tackle such a project.
Myself... I took the easy route and just did the RLD mod to my Bonnies (seeing how red was already a Pontiac color)..... but to change everything to blue took a lot of work.
Good job and very interesting write up... esp for anyone who wants to tackle such a project.

Thread Starter
BANNED
Joined: Mar 2004
Posts: 0
Likes: 2
From: Purgatory
Originally Posted by SSEi_MN
how hard is it to change the the lights (LEDs?) in the driver column .. P R N O D 2 1???
i had it all apart, but didnt think to do that...it should be faily easy, but the bulb is a weird one, and leds would prolly be the best