1963 Pontiac Catalina massive project build thread


 03-24-2013, 11:08 PM
#142
Senior Member
Posts like a Turbo
Thread Starter
Thank you Dave. Lots of stuff done, lots to do. But it'* the kind of car build I've dreamed of doing all my life but could never get the time or the place or? or?. There was always something in the way. Now I'm retired and have the time. The money is not as good as when I was still working, but again, there wasn't the time. I'm closing in on getting many things completed which is a great feeling. Living here in Phoenix now gives me much more working weather than I ever had up in Wisconsin. Until the real hot summer hits. Then things go real slow. MArk L
04-03-2013, 12:37 AM
#143
Senior Member
Posts like a Turbo
Thread Starter
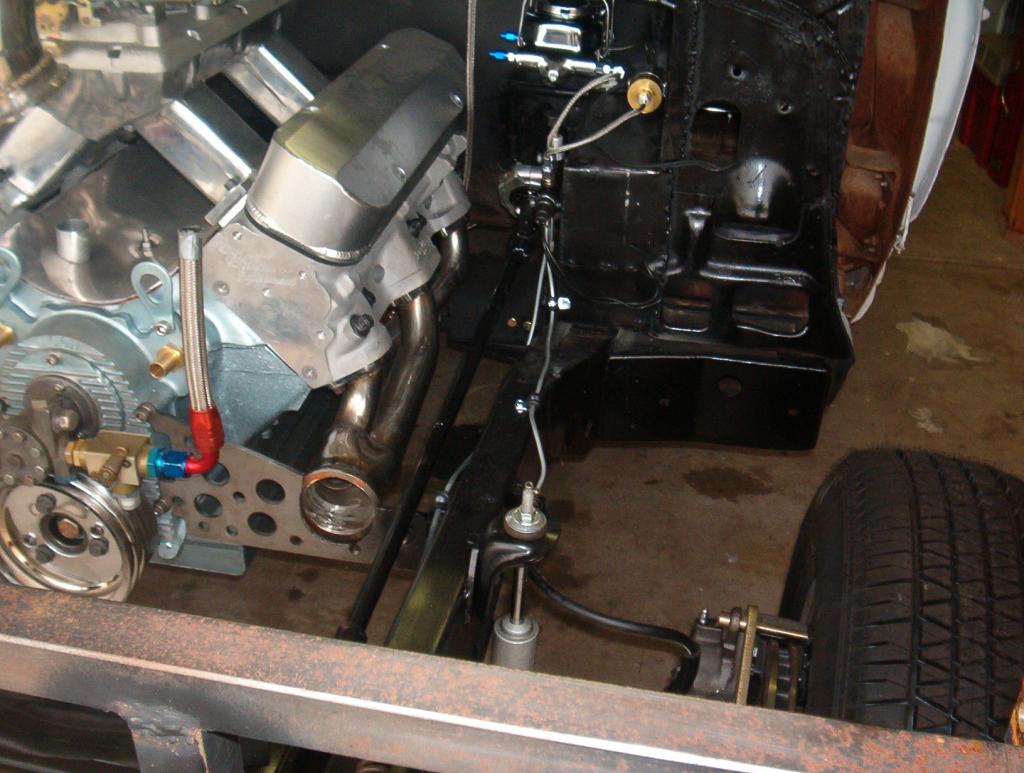
Got my brake lines all run and everything put together today. All that'* left is drilling and installing all the frame/line clamps to tie them off. This is the rear lines. Again they have to be clamped.

Front shocks and mounts.


This is a rear brake lockout that I'm using for a temporary parking brake. It'* a valve inline that you press while holding the brakes on and it locks them tight. Then when you push the brakes again they unlock. It'* only for times that I need the car to stay in place while the engine is running and in nuetral.

Now it'* put in the frame clamps and then move on to installing the clutch pedal/master assembly and running the hydraulic throwout lines to the master. I want to reinforce the floor where the clutch pedal assembly sits. To keep the floor from flexing.
Mark L
Front shocks and mounts.
This is a rear brake lockout that I'm using for a temporary parking brake. It'* a valve inline that you press while holding the brakes on and it locks them tight. Then when you push the brakes again they unlock. It'* only for times that I need the car to stay in place while the engine is running and in nuetral.
Now it'* put in the frame clamps and then move on to installing the clutch pedal/master assembly and running the hydraulic throwout lines to the master. I want to reinforce the floor where the clutch pedal assembly sits. To keep the floor from flexing.
Mark L
04-06-2013, 09:23 PM
#144
Senior Member
Posts like a Turbo
Thread Starter
Well, didn't get the frame clamps for the brake lines in yet. But I did get the rest of the hydraulic throwout bearing system in, installed, and working fine. I used a Wilwood floor mount clutch pedal and master cylinder. The unit placed the pad centerline on the pedal a little bit higher than the center of the brake pedal. But I wanted to reinforce the floor under the pedal assembly so I added a plate of aluminum under the floor to out the mount pressure. But the floor there is double thick so I cut out the floor so the clutch pedal base could set down into the floor on top of the plate underneath. This lowered the clutch pedal pad centerline over a half of an inch which makes it much closer to even with the brake. Works great and feels much better than the 1 inch mismatch in heights.
I also bought a cheap little brake sucking bleeder kit that, once all the little plastic hose adaptors peices all broke, I was still able to work it well enough to get the brakes all bled and working. I have to let it set for a day or two and do another bleed. Lots of things getting done and it really feels great.
Front suspension complete.
Rear suspension complete.
Brakes all in and working.
Hydraulic clutch system all in and working.
Waiting for the driveshaft to get done. Ordered it from a local shop on Wednesday and was supposed to see it Friday. Not here yet. Will call Monday.
I really need to attack the turbo mounting so I guess I can't put it off any longer.
Mark L
04-08-2013, 08:21 PM
#145
Senior Member
Posts like a Turbo
Thread Starter
Took some pics of my progress. COMPLETED rear suspension and brakes.

Completed front suspension, shocks, brakes, brake lines, and all the line lock and proportioning valve.

And the clutch pedal assembly is all in, bled and working.

And now my weakness. I just can't give up on the rear mounted radiator. Getting all of that weight off the front and losing all that room to the radiator just keeps me going back to figuring it all out. So I spent some time finishing the trunk floor cutout to fit the dual fan shroud to the floor so it can be sealed.

And mocked up where everyting has to set to make it fit.

I'm going to push it to the very end. I'm going to make a full square tube framework radiator support that will eventually be completely incased in sheet metal. With only the core open to air moving thru. This will get insulated to keep all the heat generated from the end tanks out of the trunk. I have a single radiator fan that I can mount up over th erear axle that will draw air form under the car to help the flow into the trunk. Theres a guy here that louvers trunks etc. I might stamp in a bunch of louvers facing towards the front of the trunk lid. Then hope I've done enough. Still, the big thing will be running the water all the way to the front and back. I'll get that figured out as well. Mark L
Completed front suspension, shocks, brakes, brake lines, and all the line lock and proportioning valve.
And the clutch pedal assembly is all in, bled and working.
And now my weakness. I just can't give up on the rear mounted radiator. Getting all of that weight off the front and losing all that room to the radiator just keeps me going back to figuring it all out. So I spent some time finishing the trunk floor cutout to fit the dual fan shroud to the floor so it can be sealed.
And mocked up where everyting has to set to make it fit.
I'm going to push it to the very end. I'm going to make a full square tube framework radiator support that will eventually be completely incased in sheet metal. With only the core open to air moving thru. This will get insulated to keep all the heat generated from the end tanks out of the trunk. I have a single radiator fan that I can mount up over th erear axle that will draw air form under the car to help the flow into the trunk. Theres a guy here that louvers trunks etc. I might stamp in a bunch of louvers facing towards the front of the trunk lid. Then hope I've done enough. Still, the big thing will be running the water all the way to the front and back. I'll get that figured out as well. Mark L
04-12-2013, 02:09 AM
#146
Senior Member
Posts like a Turbo
Thread Starter
Put the front end back on for the cruise show. I blacked out the inside fender behind the headlight buckets to see what it would look like without the headlights. I was thinking of closing them off for looks and using small HID headlights down on the frame horns.


A look into the front end where you can see all of the front suspension.
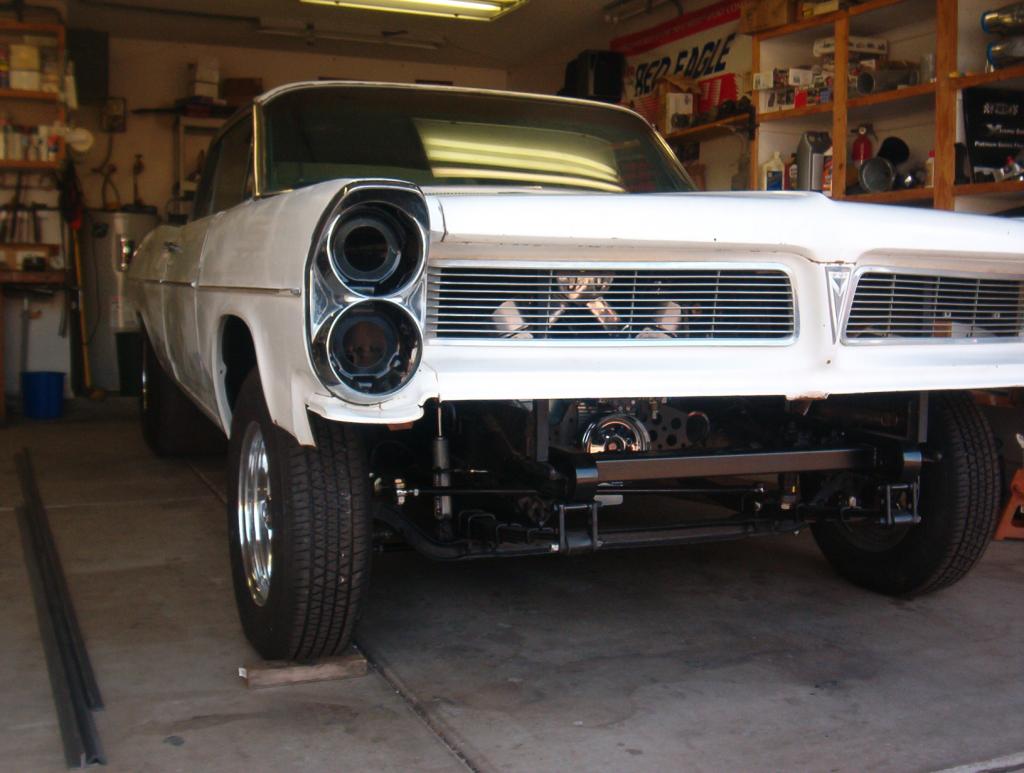
Just a low shot of the ladder bars and wide tires.
I have to cut out the hood to fit around the scoop but I want to try to do it using a flange around the opening. I also have to wait until I know the final configuration for the pipes into the scoop.
Mark L
A look into the front end where you can see all of the front suspension.
Just a low shot of the ladder bars and wide tires.
I have to cut out the hood to fit around the scoop but I want to try to do it using a flange around the opening. I also have to wait until I know the final configuration for the pipes into the scoop.
Mark L
04-12-2013, 11:15 PM
#147
Senior Member
Posts like a Turbo
Thread Starter
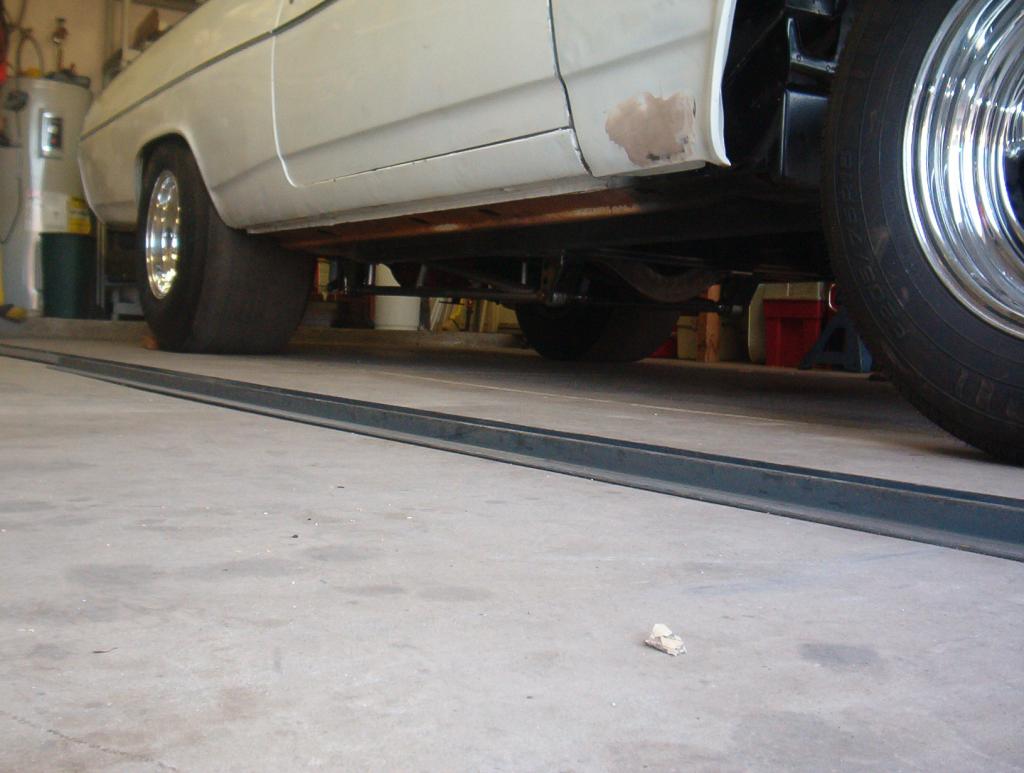
Couple of shots on the trailer.


I'll get more pics at the cruise. I actually put the darn camera in the truck so I didn't forget it. That'* a first for me. Mark L
I'll get more pics at the cruise. I actually put the darn camera in the truck so I didn't forget it. That'* a first for me. Mark L
04-23-2013, 01:54 AM
#148
Senior Member
Posts like a Turbo
Thread Starter
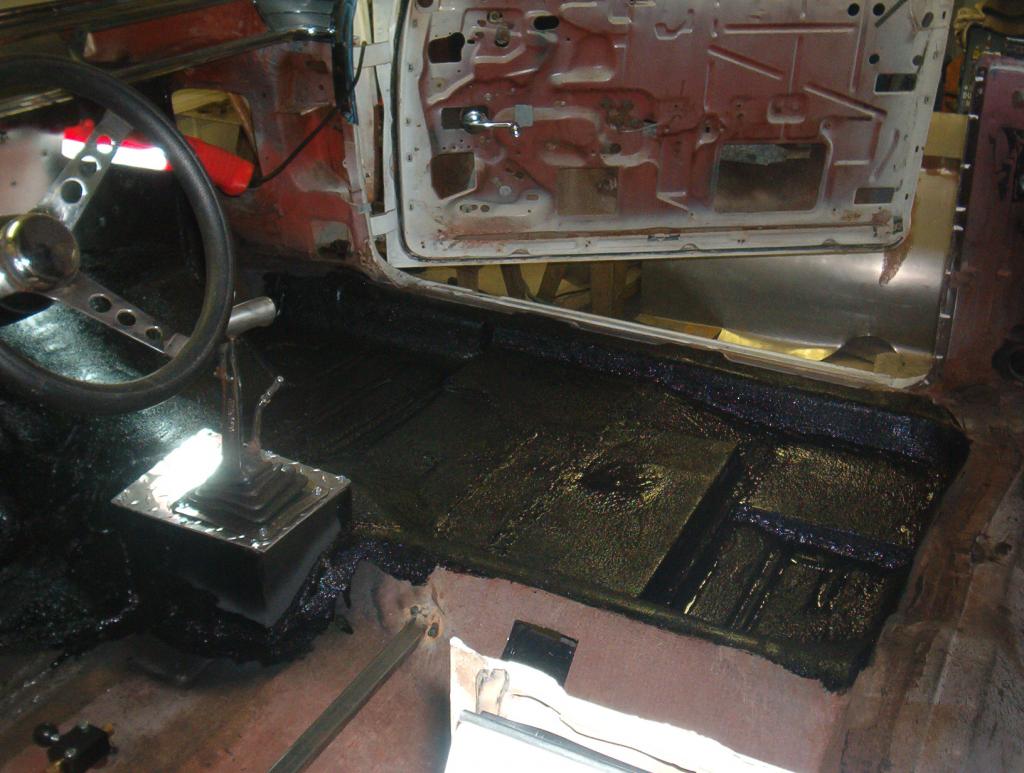
I had to build a shifter porch. Not pretty but it works. I'll grind down/clean up the welds and paint it. It'll get covered with carpeting along with the floor when the time comes. The top is a piece of aluminum diamond plate that has enough room ahead of the shifter to allow switches to be installed.


Originally I opened up the floor all around the frame rails and the cross member so I'm going to cut away the floor on a level with the cross bars that mount the seat in. Then close it back up with flat pieces of sheet. That will close up the floor.

I've already made the rear bulkhead but I made it all the way to the floor. But never really finished it. So I'm going to run a square tubing brace across from side to side about 1 foot off of the floor and build a box where the back seat was. It'll give me a shelf to put things on and a box with a lift up lid to hide things too. The I'll finish the rear bulk head down to the brace. It'll clean up that bottom area too. This how it looks now.

I have a remote 50 GPM water pump coming so I'll be able to do all of the coolant runs from the trunk to the front and back now. That'll be a big job too. Lots to do yet.
Mark L
Originally I opened up the floor all around the frame rails and the cross member so I'm going to cut away the floor on a level with the cross bars that mount the seat in. Then close it back up with flat pieces of sheet. That will close up the floor.
I've already made the rear bulkhead but I made it all the way to the floor. But never really finished it. So I'm going to run a square tubing brace across from side to side about 1 foot off of the floor and build a box where the back seat was. It'll give me a shelf to put things on and a box with a lift up lid to hide things too. The I'll finish the rear bulk head down to the brace. It'll clean up that bottom area too. This how it looks now.
I have a remote 50 GPM water pump coming so I'll be able to do all of the coolant runs from the trunk to the front and back now. That'll be a big job too. Lots to do yet.
Mark L
04-30-2013, 02:27 AM
#149
Senior Member
Posts like a Turbo
Thread Starter
I went to work closing in the passenger side floor. Had to work it around the steel 1X1 tubes that the seat bolts to. You can see where I also had to jump the floor up so I can run the coolant from the radiator in back up to the front. The seat rear mounting tube was so low it was too tight above the ladder bar crossmember and would have forced me to run the cooling tubes into the trans tunnel, which bothered me in case I should snap a U joint. If if did it would have hit the water tubes and dropped water all over the place. With the floor popping up there I can run the water supply up and over the crossmember but under the floor away from the driveshaft. Then I used automotive chaulking to seal the weld joints and I used a brush on bed liner on top of that.

This is what it looked like before the metal was put in.

I'll get some sound deadener and custom cut and fit some carpeting. I just have to do the same to the other side now.
I'm also making a raised box where the back seat was. This will have an angle iron frame and a hinged wood top so I can store stuff under it and lock it up. It'll get carpeted to look like the floor and it will finish off the rear area much nicer.
Mark L
This is what it looked like before the metal was put in.
I'll get some sound deadener and custom cut and fit some carpeting. I just have to do the same to the other side now.
I'm also making a raised box where the back seat was. This will have an angle iron frame and a hinged wood top so I can store stuff under it and lock it up. It'll get carpeted to look like the floor and it will finish off the rear area much nicer.
Mark L