Holy exhaust manifold, cracks, Batman! (FINISHED!)
 06-18-2005, 04:10 PM
#1
Junior Member
Posts like a Ricer Type-R
Thread Starter

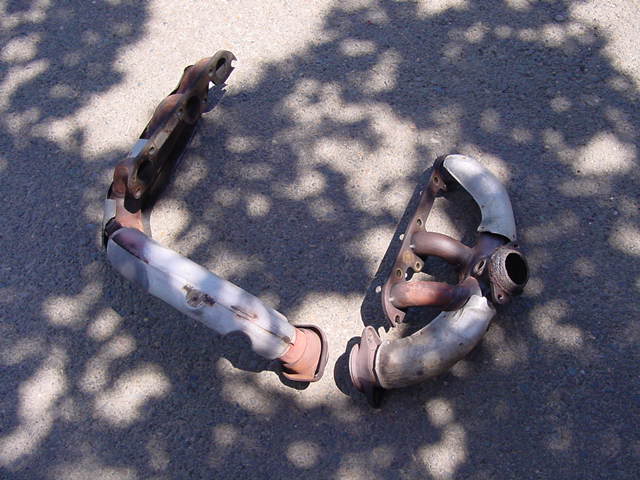
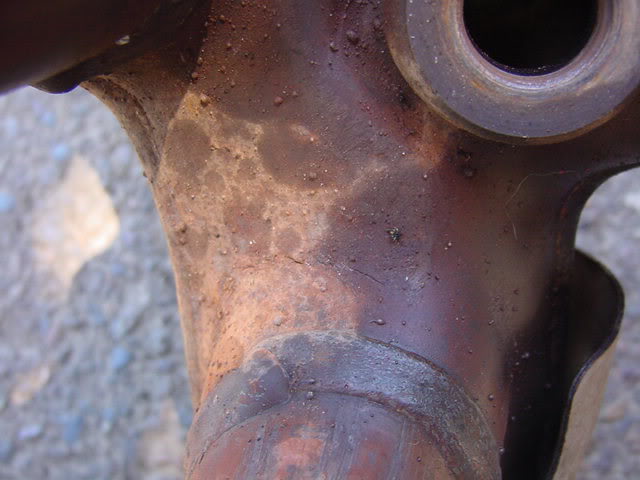
Sitting pretty, cracks lurking.
South end shot of a manifold removal. Thanks Katie.

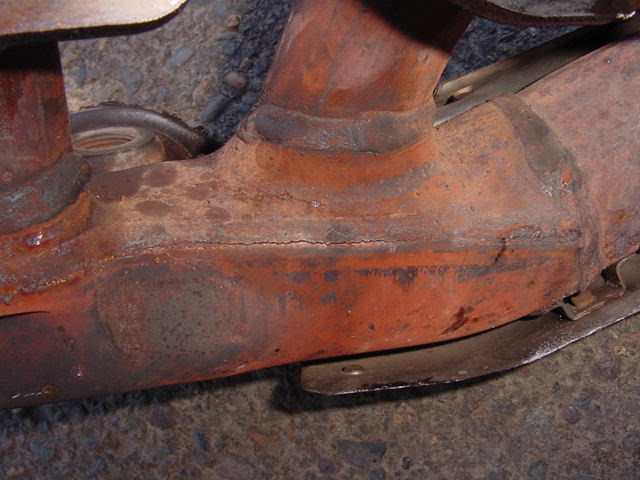
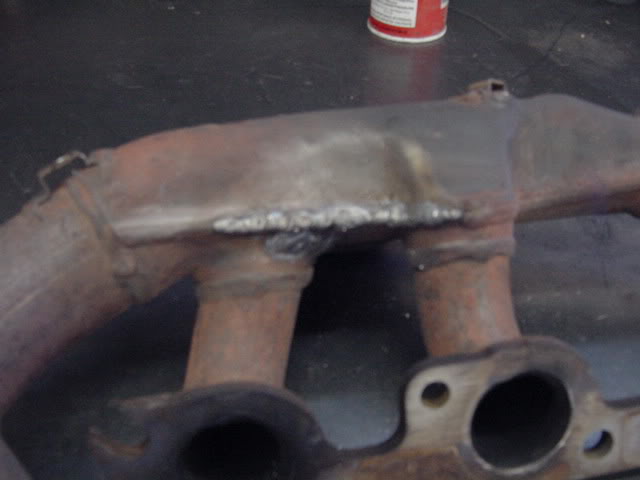
Cracked weld running horizontal to the right of the #4 outlet (center outlet, rear manifold)
Another shot of the same cracked weld.
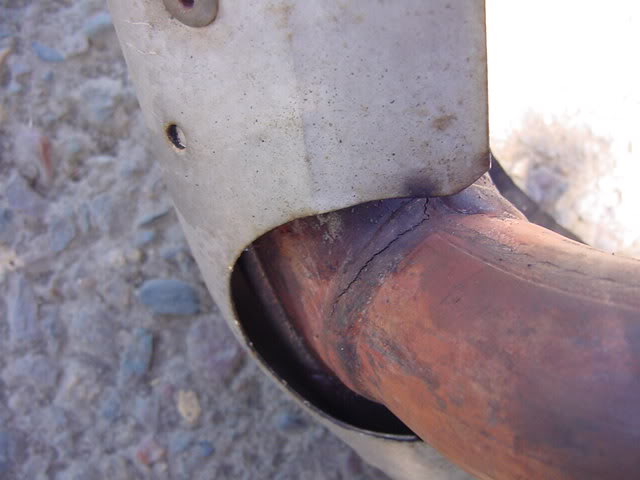
Look closely. Can you see this one?
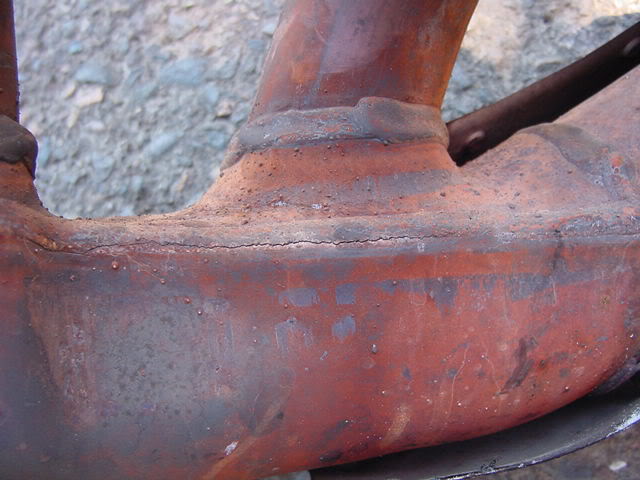
And more......This pic and the following pic are the front.

Front manifold.
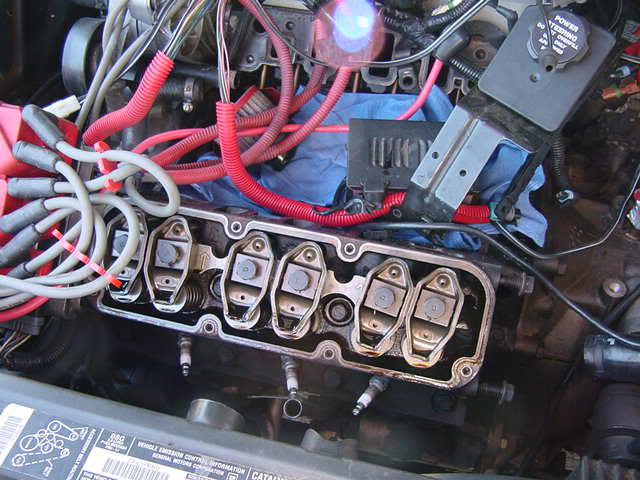
Current state of affairs:
So it'* off to weld. Going to re-weld each outlet to the OUTSIDE of the flange, so I can port the insides of each outlet.
 06-18-2005, 04:34 PM
#2
Senior Member
Posts like a Turbo

Join Date: Aug 2003
Location: Ashland, Ohio
Posts: 423
Likes: 0
Received 0 Likes
on
0 Posts

your beatin me to the job will  im gonna do mine either this week or next. i hope i dont have cracks. are you gonna heat wrap them after you get done porting them? by the way how did you take the rear manifold out?
06-18-2005, 04:56 PM
#3
Junior Member
Posts like a Ricer Type-R
Thread Starter
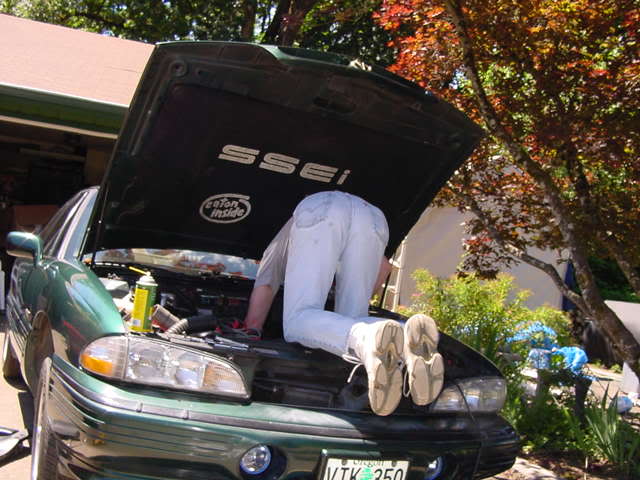
I'm betting you'll have cracks. Most of us have them by now. The rear comes out fine after you remove the engine bracket and alternator brace (the black rod). Take the front out first, then the rear just turns and comes up. Drags a bit, but still plenty of room.
I'm not heat-wrapping These. I don't want more cracks. I'm painting them with ceramic header paint. It'll help some, but won't be as good as ceramic coating.
I'm not heat-wrapping These. I don't want more cracks. I'm painting them with ceramic header paint. It'll help some, but won't be as good as ceramic coating.


 06-18-2005, 08:01 PM
#6
Senior Member
True Car Nut

Join Date: Jan 2003
Location: Bloomington-Normal, IL 1997 SE
Posts: 3,734
Likes: 0
Received 0 Likes
on
0 Posts
if you paint them and then wrap them it shouldnt hurt it too much, dont you think? Come on Bill, I thought you like to be cool . Whats the worst that can happen, cracks in your manifold?
06-18-2005, 08:49 PM
#7
Senior Member
True Car Nut

Join Date: Apr 2004
Location: Three Oaks, Michigan
Posts: 4,879
Likes: 0
Received 0 Likes
on
0 Posts
Hot damn son.. that really sucks.
My rear header came out super easily when I dropped my exhaust [just the two rubber hangers, not the rear.. so it isn't laying on the ground, just sitting on the steering rack [like in my sig pic]
Bill: you need to organize your engine a little better. You can drop some small *** **** in your lifter valley, then it'* all gone. Just warning you .
.
-justin
My rear header came out super easily when I dropped my exhaust [just the two rubber hangers, not the rear.. so it isn't laying on the ground, just sitting on the steering rack [like in my sig pic]
Bill: you need to organize your engine a little better. You can drop some small *** **** in your lifter valley, then it'* all gone. Just warning you
.-justin
 06-18-2005, 10:55 PM
#9
Junior Member
Posts like a Ricer Type-R
Thread Starter
Ok, smartasses. OSG, I have a rag in the lifter valley for that very reason, and a rubber plug in the oil hole. I moved that stuff to the valley strictly to allow me to crawl over to remove the rear manifold studs. (I've done this type of thing a few times, you know).
Hector.....you like that ***, don't you? Want me to shake it for you, big guy?
I'm back. Header paint is going on, then I'll rivet the heat shields back in place, finish the porting and polishing (yes, I did that, too), and take some pics. Sometime tomorrow. I probably increased flow by close to 5% by welding the outside of the flange, and porting the factory weld on the inside of each port.
And fixing the cracks will be yet another KR reduction.
06-18-2005, 11:50 PM
#10
Junior Member
Posts like a Ricer Type-R
Thread Starter
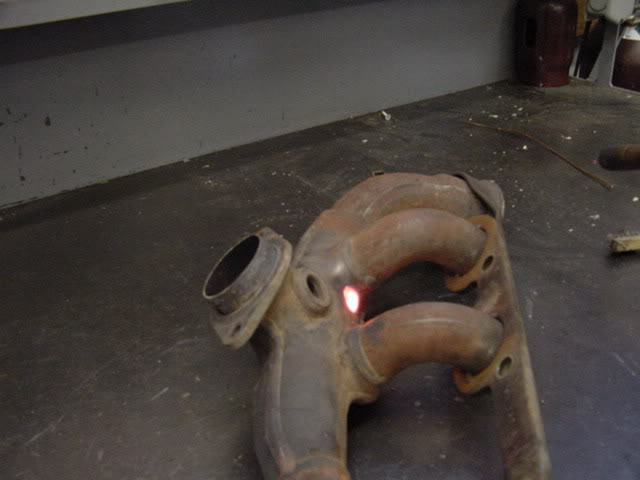
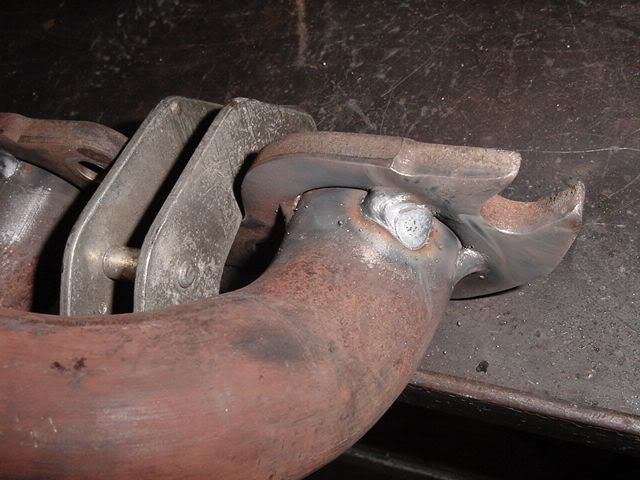
I wasn't going to do this until tomorrow, but there'* too much work to do then. So here it all is. Went over to Andy'* place, you'll see pics of his shop in the rest of the post. He welded up my cracks, and on further inspection, we found them to be worse than I thought. Very hard to see how far some of them went. He was very careful not to overheat anything.
After the cracks were welded up, he added a few tack welds to the OUTSIDE of the pipes to the flange, so I could do some porting. After that was done, I headed over to Rodney'* place, as he has a much better compressor and die-grinder than I do.
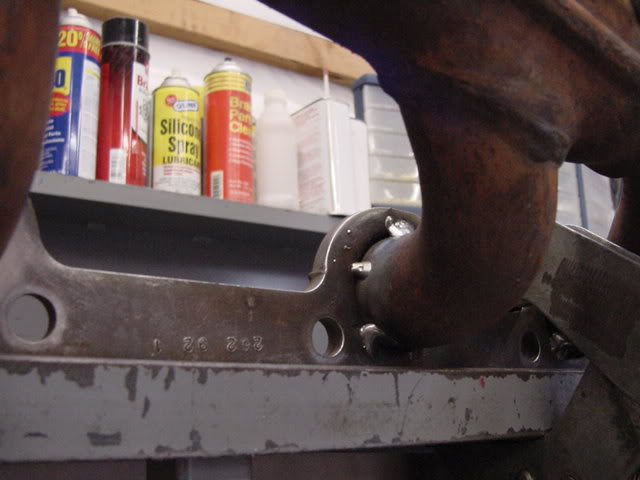
At Rod'*, I ground out the welds on the inside of the flange/outlet locations, since we beefed up the outsides at Andy'*. This is about a 5% restriction from the factory, simply because they welded the inside instead of the outside. The front was far worse than the rear, but I did both.
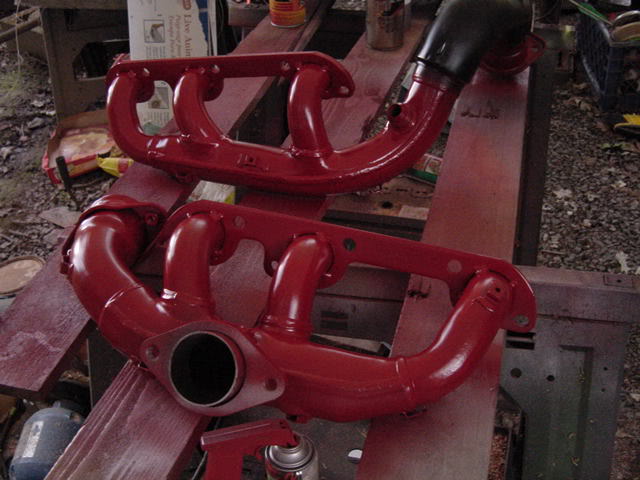
When I got home, I did a little cleanup on the grinding from Rod'*, and used some acetone to clean up the manifolds. Painting commenced then, finish painting tomorrow, and I'll finish up the porting then, too. Enjoy the pics.


After the cracks were welded up, he added a few tack welds to the OUTSIDE of the pipes to the flange, so I could do some porting. After that was done, I headed over to Rodney'* place, as he has a much better compressor and die-grinder than I do.
At Rod'*, I ground out the welds on the inside of the flange/outlet locations, since we beefed up the outsides at Andy'*. This is about a 5% restriction from the factory, simply because they welded the inside instead of the outside. The front was far worse than the rear, but I did both.
When I got home, I did a little cleanup on the grinding from Rod'*, and used some acetone to clean up the manifolds. Painting commenced then, finish painting tomorrow, and I'll finish up the porting then, too. Enjoy the pics.