
My UIM/(porting)LIM replacement thread 56k beware
 12-16-2007, 04:15 PM
#1
Senior Member
Posts like a Camaro
Thread Starter

Join Date: Jun 2007
Location: Chambersburg, Pennsylvania
Posts: 882
Likes: 0
Received 0 Likes
on
0 Posts

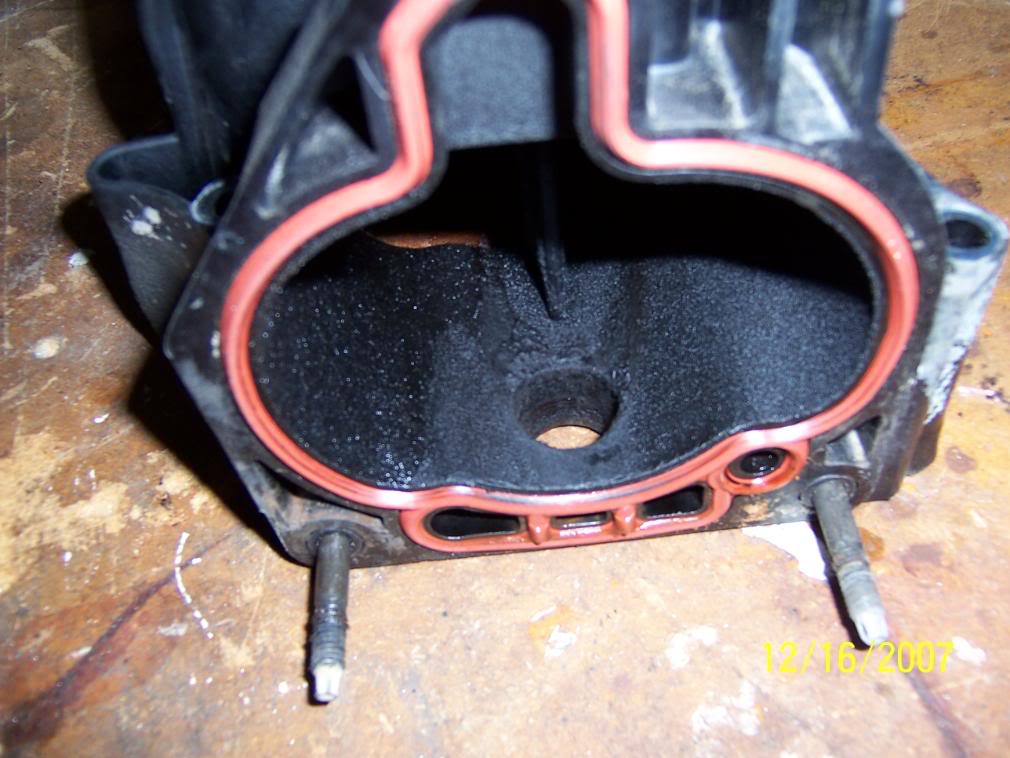
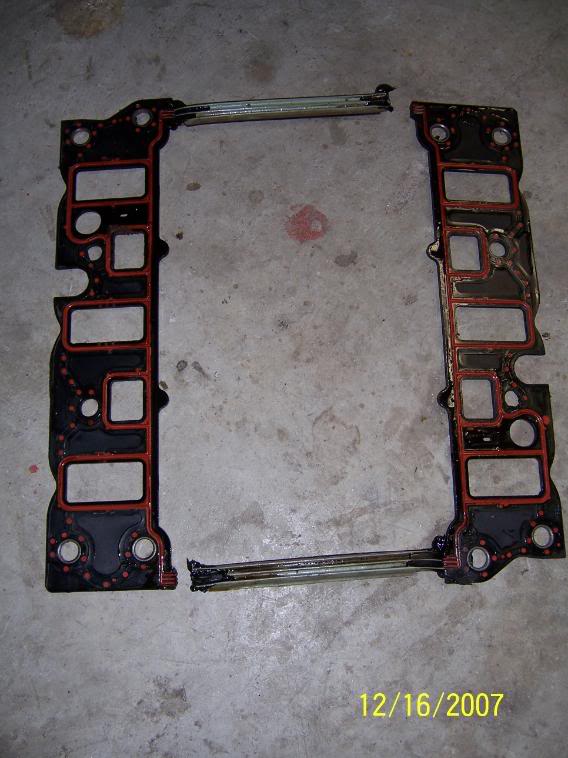
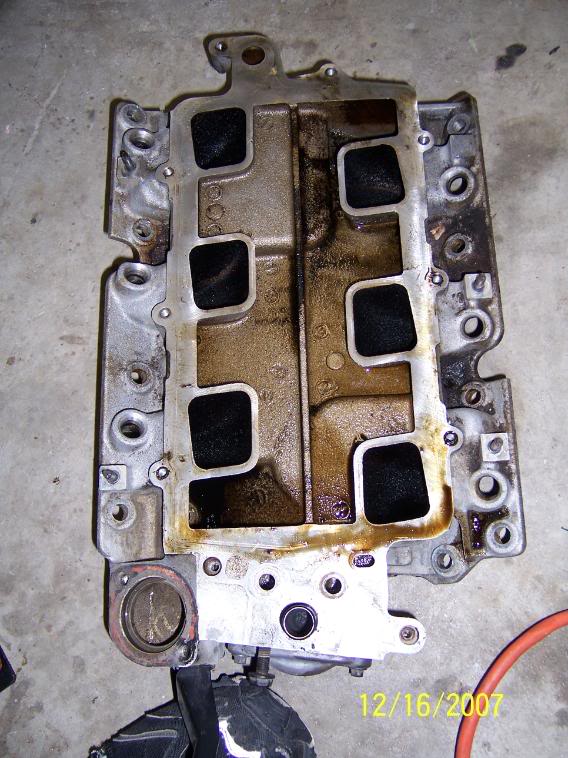
I started it at about 2:00PM this Sunday afternoon, and had it all apart by about 3:30. Much quicker than my Grand Marquis was when the crossover blew. I think I caught it just in time, and to my knowledge, it'* the original UIM, but the gaskets look decently newer.
I flushed the coolant again today after letting the Prestone Super Radiator Flush (whatever the 5.99 stuff is) cycle in the system for the past week, or 250 mi. The stuff that came out wasn't rusty like the other stuff, but more of a dark brown/blackish color. I flushed it with about 60 qts of water til the water started coming out clear again.
Here'* what I've done thus far:
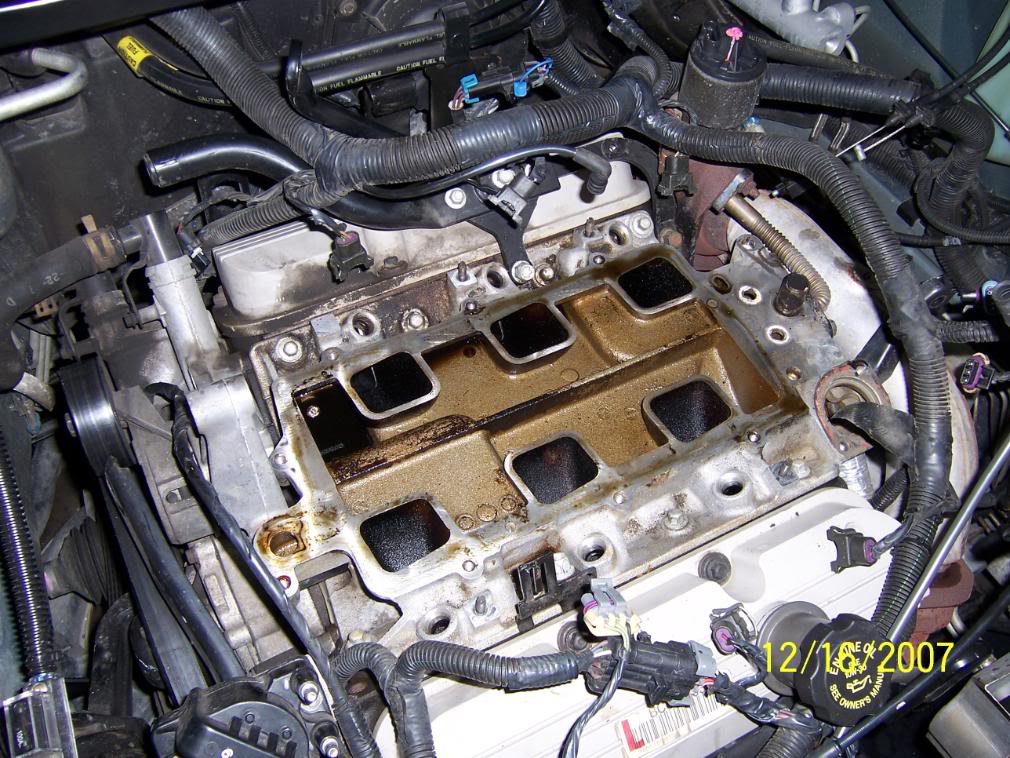
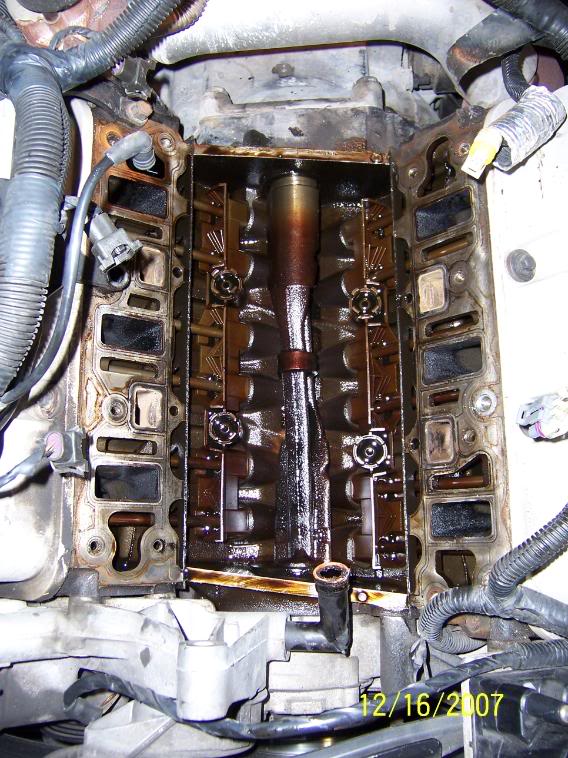
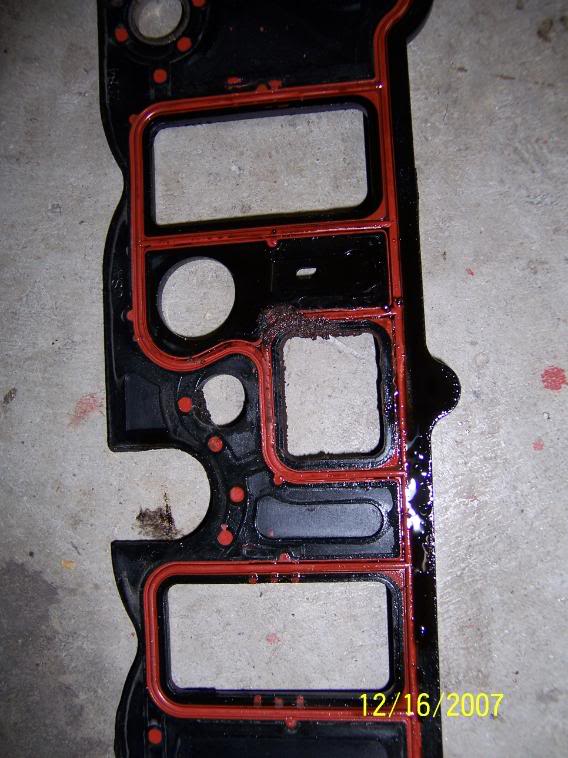
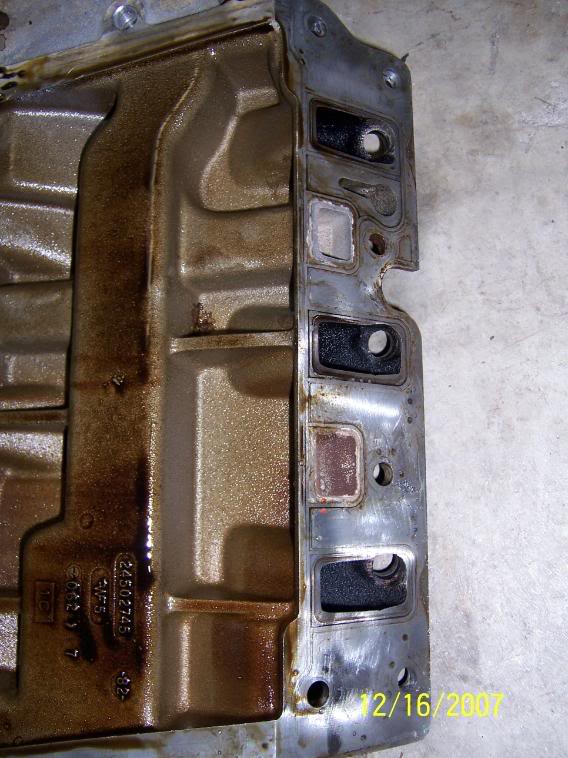
Should there be that much oil sitting in there?

Looks slightly cooked to me...

*insert ten minute break here*
*start again*
FINISHED! Ripping it apart anywho...
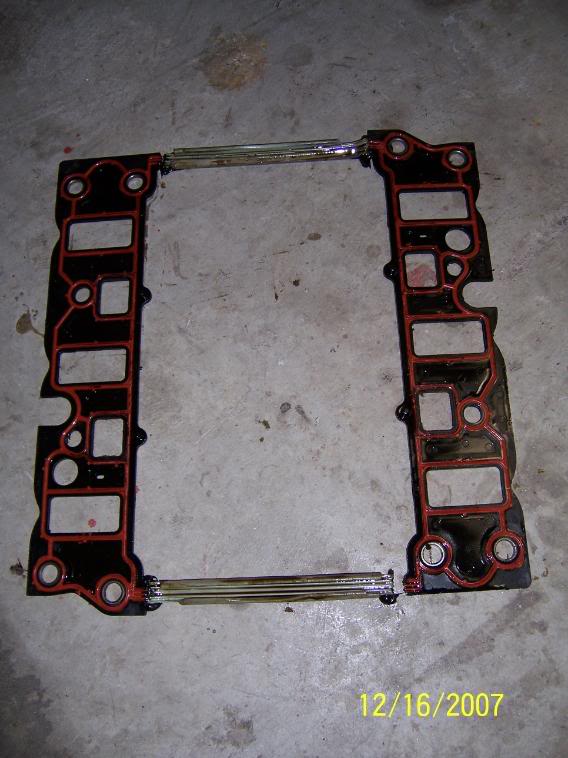
I think I caught it just in time...
I'm taking an hour break... then going back down to figure out how I want to port this now that I actually know what I'm doing, and what needs to be done.
Anything anybody sees that I should be made aware of?
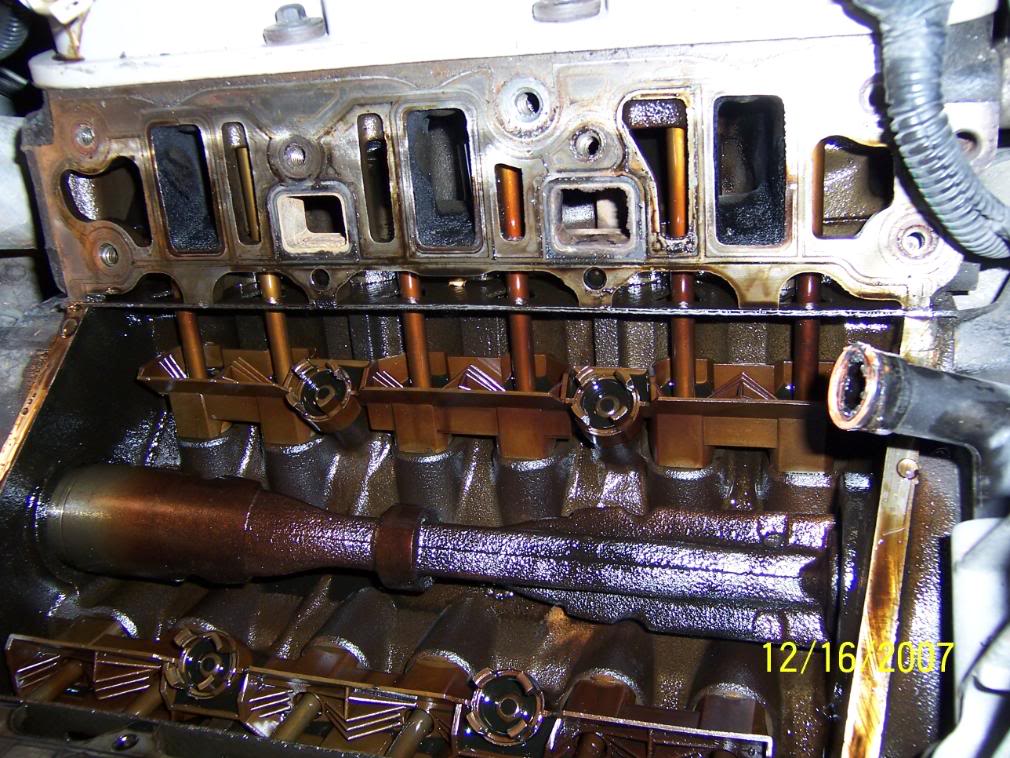
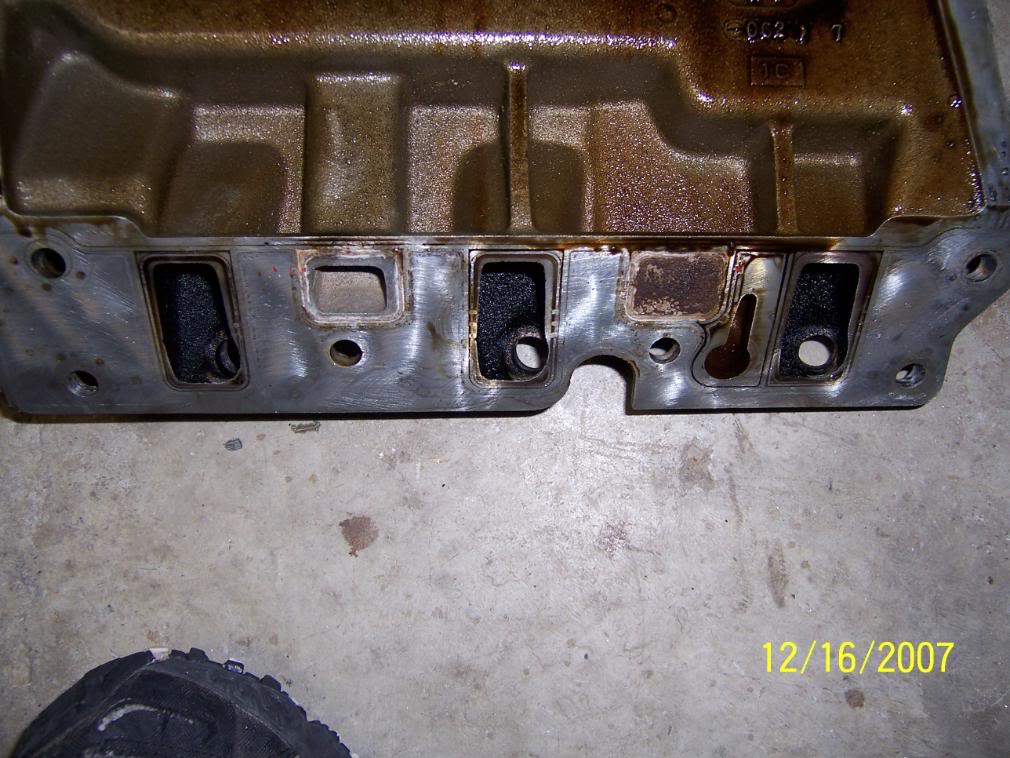
EDIT: I think I'm going to use this LIM to port. The cuts are much smoother, and it doesn't seem to be past willwren'* measurements anywhere (by eye comparison anyway)
I flushed the coolant again today after letting the Prestone Super Radiator Flush (whatever the 5.99 stuff is) cycle in the system for the past week, or 250 mi. The stuff that came out wasn't rusty like the other stuff, but more of a dark brown/blackish color. I flushed it with about 60 qts of water til the water started coming out clear again.
Here'* what I've done thus far:
Should there be that much oil sitting in there?
Looks slightly cooked to me...
*insert ten minute break here*
*start again*
FINISHED! Ripping it apart anywho...
I think I caught it just in time...
I'm taking an hour break... then going back down to figure out how I want to port this now that I actually know what I'm doing, and what needs to be done.
Anything anybody sees that I should be made aware of?
EDIT: I think I'm going to use this LIM to port. The cuts are much smoother, and it doesn't seem to be past willwren'* measurements anywhere (by eye comparison anyway)
 12-16-2007, 04:43 PM
#2
Senior Member
Posts like a Camaro
Thread Starter
Join Date: Jun 2007
Location: Chambersburg, Pennsylvania
Posts: 882
Likes: 0
Received 0 Likes
on
0 Posts
Alright why in the hell can't I find anybody that carries this coolant elbow? I've called autozone and advance auto parts since its a sunday. I gave them year and model, and said I need a coolant elbow that goes into the LIM. I said it was pretty much a generic GM part and have read that you can get it at about any auto parts store.

 12-16-2007, 04:55 PM
#5
Senior Member
Posts like a Camaro
Thread Starter
Join Date: Jun 2007
Location: Chambersburg, Pennsylvania
Posts: 882
Likes: 0
Received 0 Likes
on
0 Posts
Yeah... that'* kinda of what I said. It looks like somebody'* done it before, but the LIM atleast looks like it needs done again.
By the way, for the part number. At least they recognized it was part of their inventory, but neither have it in stock it looks like.
EDIT: Looks like the autozone down town has it... I'm on the phone with the guy now and he'* checking. Just have to get there by six. I'll be back....
By the way,
for the part number. At least they recognized it was part of their inventory, but neither have it in stock it looks like.EDIT: Looks like the autozone down town has it... I'm on the phone with the guy now and he'* checking. Just have to get there by six. I'll be back....
12-16-2007, 05:32 PM
#7
Guest
Posts: n/a
Originally Posted by J Wikoff
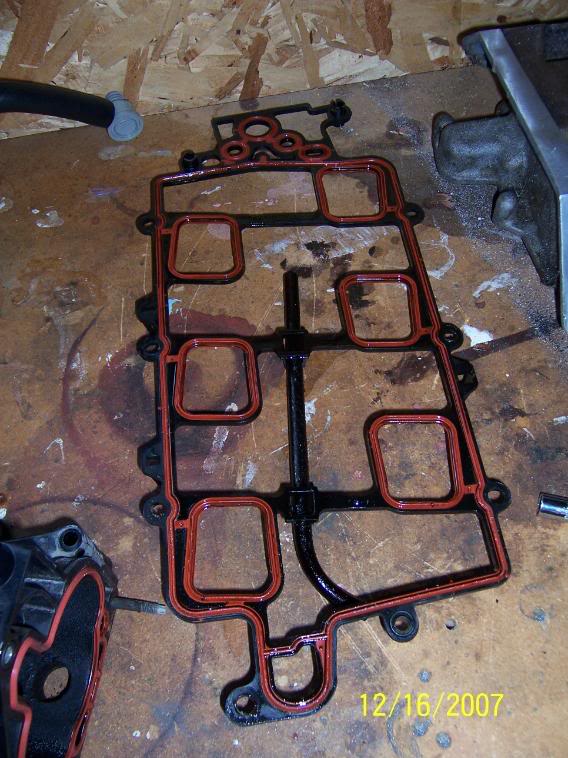
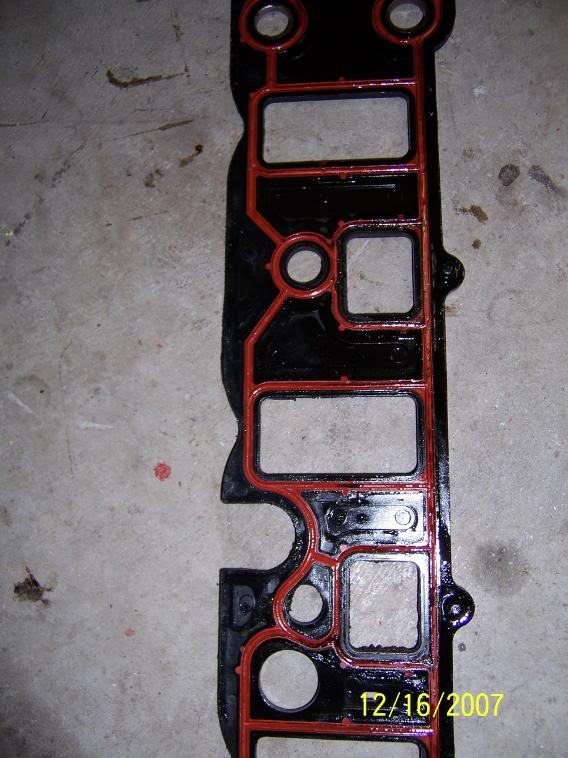
Those don't look like OEM gaskets to me. I thought the OEM ones had blue sealing material.
__________________
Best Car Insurance | Auto Protection Today | FREE Trade-In Quote
 12-16-2007, 08:48 PM
#9
Senior Member
Posts like a Camaro
Thread Starter
Join Date: Jun 2007
Location: Chambersburg, Pennsylvania
Posts: 882
Likes: 0
Received 0 Likes
on
0 Posts
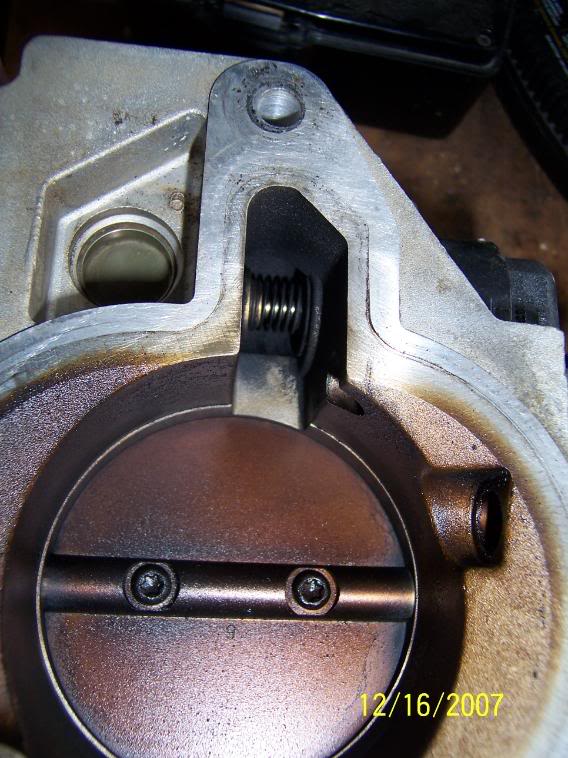
Alright. Went to Ruby Tuesdays for dinner, I'm set to finish this project  TB has gotten the crap sprayed out of it with throttle body cleaner. Cleaned the MAF with alcohol and a cotton swab, took off the TPS, and realized it'* the TPS, nothing to clean lol. Scraped the carbon off of the IAC, followed by submersion in throttle body cleaner, followed by steel wool to eat the rest of the carbon up and hopefully (but doubtfully) quiet it down a bit.
I also stuffed the ports in the heads with rags, covered the lifter valley with a rag as well. Sprayed a rag with throttle body cleaner, wiped down the mating surface on the heads, and took some 800 grit sandpaper to it. Not a whole lot to clean up...
My next project is porting the LIM. I think I have a method, tell me if it sucks or not.
I was planning on taking two pieces of paper (Assuming they'll fit the three ports in the head on one piece), and taking some bright red lipstick (without the GF knowing) and surrounding the inlets on the heads with lipstick. Also, the bolt holes, for reference points. Push it down hard so I get a nice, dark stencil. From there, I'll take the paper off and cut out the ports with an exacto blade. Put the paper on the LIM, and maybe wet it, or find another way to make it stick to the LIM. Now I know exactly how much to cut off, and where at.
Bad idea, good idea?
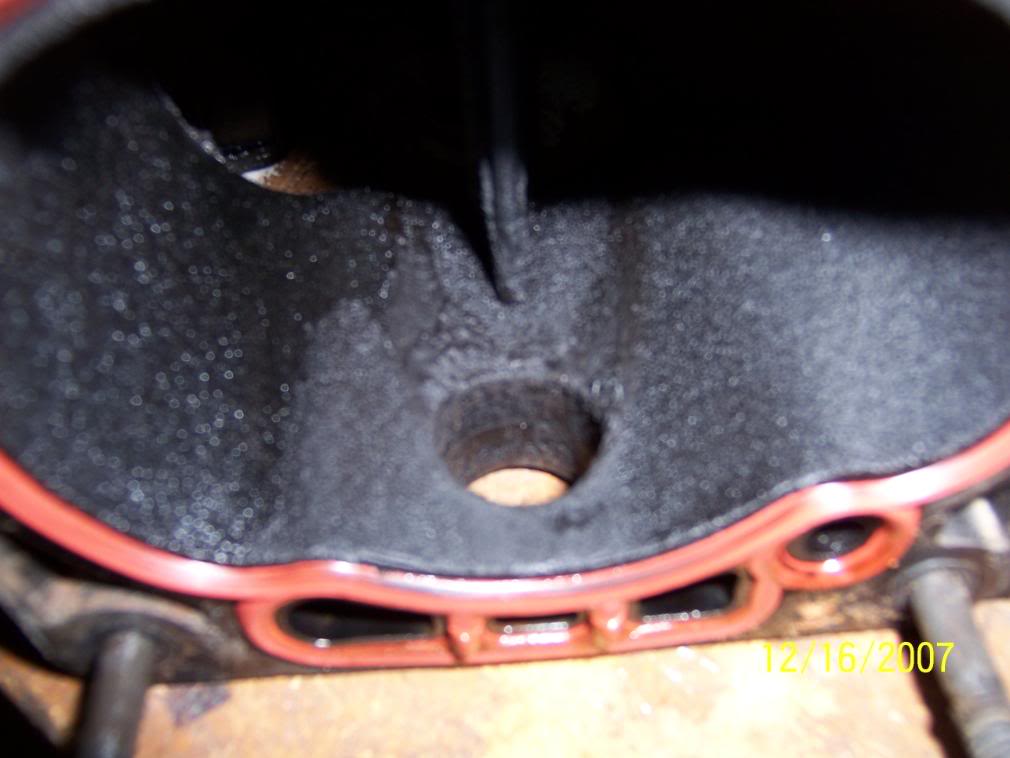
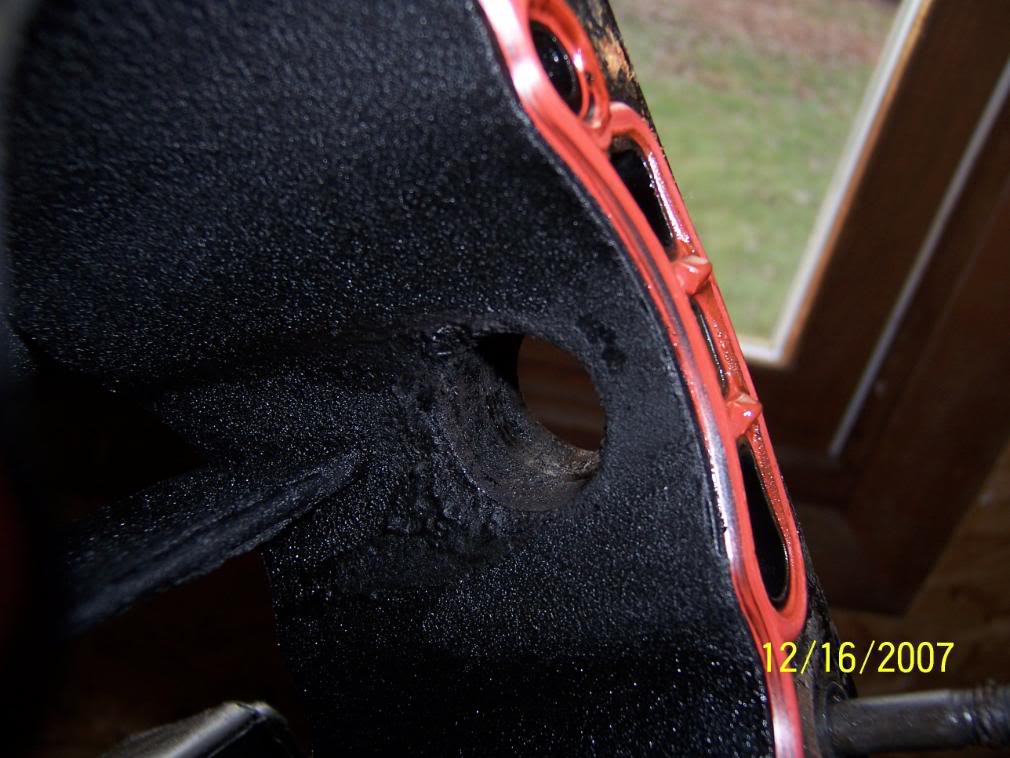
And... should there be that much oil in the LIM? Or is that normal?
P.*. Only thing I could get ahold of, after remembering my buddy borrowed me in-lb torque wrench and I can't get aahold of him now, is a ft-lb torque wrench. So I'm going to have to convert everything from in-lbs to ft-lbs. The wrench goes down to 10 ft-lbs... hope I can suffice with that.
I also stuffed the ports in the heads with rags, covered the lifter valley with a rag as well. Sprayed a rag with throttle body cleaner, wiped down the mating surface on the heads, and took some 800 grit sandpaper to it. Not a whole lot to clean up...
My next project is porting the LIM. I think I have a method, tell me if it sucks or not.
I was planning on taking two pieces of paper (Assuming they'll fit the three ports in the head on one piece), and taking some bright red lipstick (without the GF knowing) and surrounding the inlets on the heads with lipstick. Also, the bolt holes, for reference points. Push it down hard so I get a nice, dark stencil. From there, I'll take the paper off and cut out the ports with an exacto blade. Put the paper on the LIM, and maybe wet it, or find another way to make it stick to the LIM. Now I know exactly how much to cut off, and where at.
Bad idea, good idea?
And... should there be that much oil in the LIM? Or is that normal?
P.*. Only thing I could get ahold of, after remembering my buddy borrowed me in-lb torque wrench and I can't get aahold of him now, is a ft-lb torque wrench. So I'm going to have to convert everything from in-lbs to ft-lbs. The wrench goes down to 10 ft-lbs... hope I can suffice with that.
12-16-2007, 08:53 PM
#10
Guest
Posts: n/a
The oil in the intake is normal... Too many valleys for it to accumulate in...
As for the torquing.... You can exceed 10ft lbs by a bit and be ok for the lower bolts... Don't worry if you get it a little too tight, But be sure to go in steps and in sequence...
On the upper, be careful... These bolts will literally be hand tight( roughly 7 ft lbs )... I tighten all of these with a driver... Nice and snug with your hand... Get them too tight and you can crack the upper..
Good luck, keep us informed
__________________
Best Car Insurance | Auto Protection Today | FREE Trade-In Quote