
Water water everywhere.....
 01-09-2008, 12:15 AM
#1
Junior Member
Posts like a Ricer Type-R
Thread Starter

So what'* holding up the Zilla'* motor swap? Drying out the SLE. :(
Been battling some water leaks. I did last winter, but licked 'em real quick. This year I got hit HARD with back seat and trunk leaks. Since Don covered the front-end leaks so well, I thought I'd concentrate this topic on the B-pillar to the rear.
I've pulled over 6 gallons of water out of here in the last 3 days:
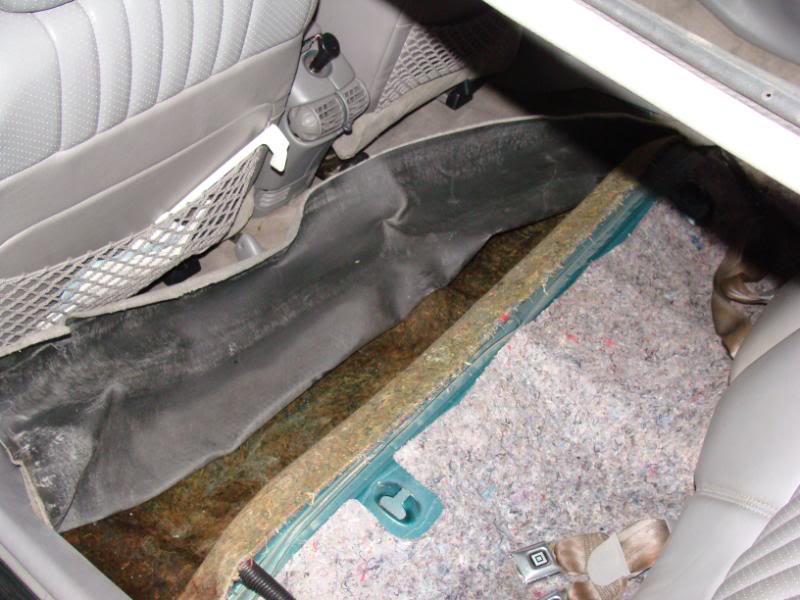
Why? The old seals on the gutter have broken down, allowing water to enter the door weatherstripping, and wick down into the car, soaking under the rear seat and carpet in the rear. ZERO water in the front footwells:
After cleaning and drying, these will get a good thin bead of 3M weatherstripping adhesive (black stuff), and put back.
Trunk leaks? 3 major areas of concern:
Antenna. Make sure your drain tube is connected at both ends and clear of obstructions. Make sure the water doesn't wick in between the rubber seal and fender, or the rubber seal and antenna.
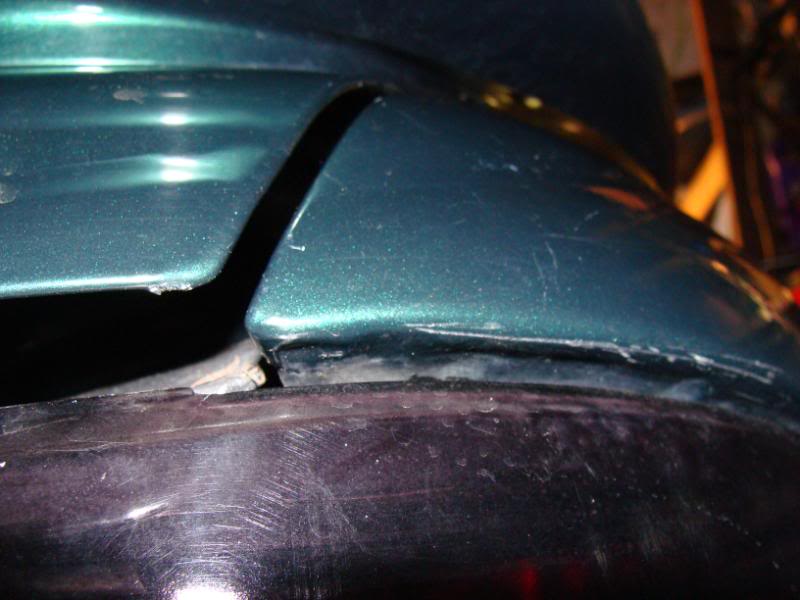
Taillight. When you install it, run a bead of the same sealant across the top and halfway down the sides of the foam rubber seal of the tail. Kinda like an eybrow, so the water that comes out of the trunk lid channels can't get in the light.. Carefully inspect the epoxied body seams in the light pocket. I found two of mine leaking.
Spoiler. Remove it, clean and wax the trunk where it was and the underside of the spoiler, then apply a thin bead around where each stud sticks thru, then reinstall. It'* worth it just for the cleaning.
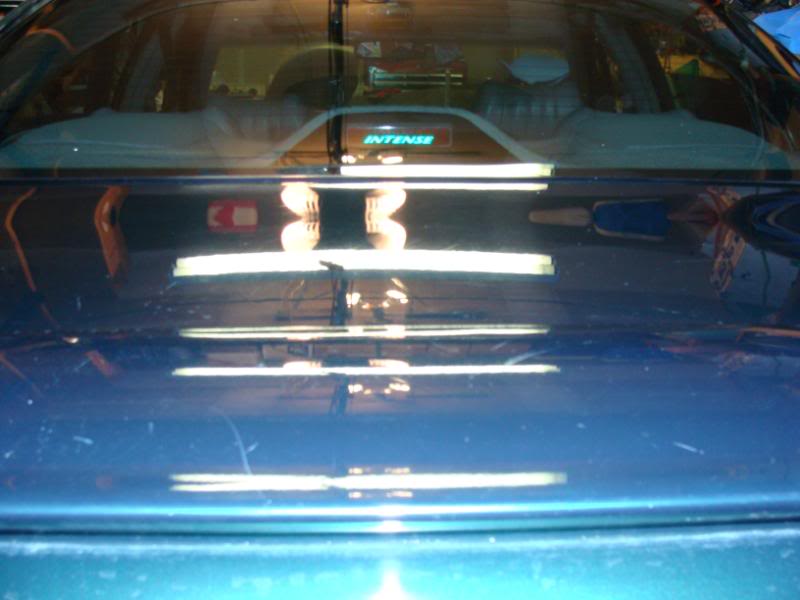
In addition, a few cars (my SSEi included) have had a leaking rear window seal. Only the bottom edge where the glass meets the rubber. Seal this with black or clear silicone sealant (a very small bead) just between the glass and rubber along the bottom edge, and extending up the sides about 6".
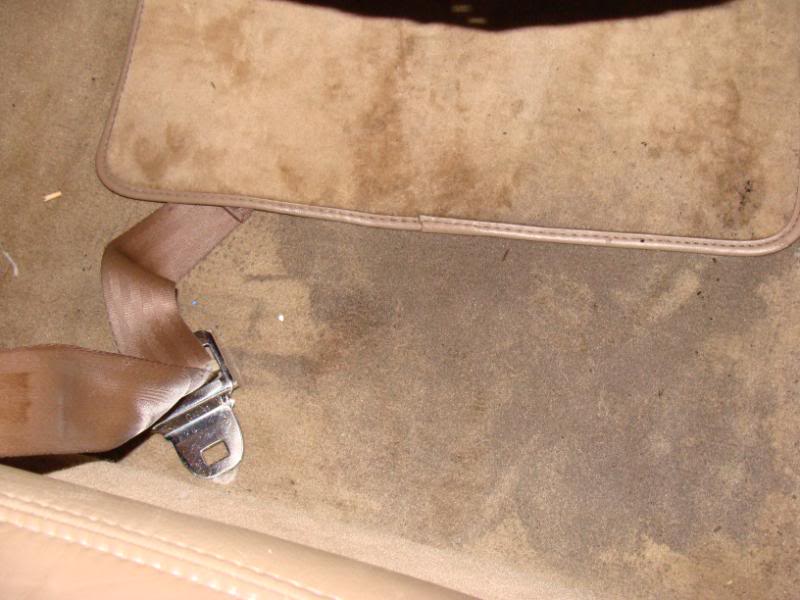
Dry out the carpet and seat:

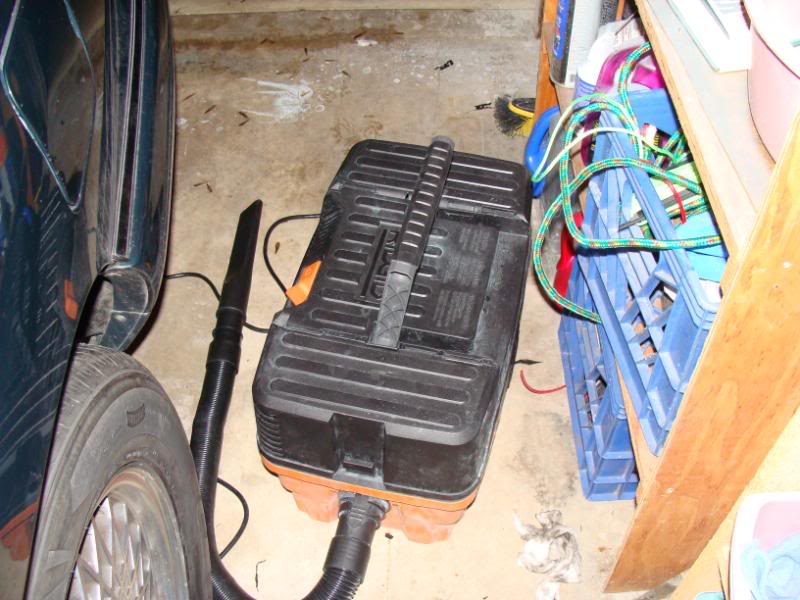
And empty your shopvac:
Then move on to the car that you should be pulling the engine from so you can drive your leaking winter beater, and get to the door seals:
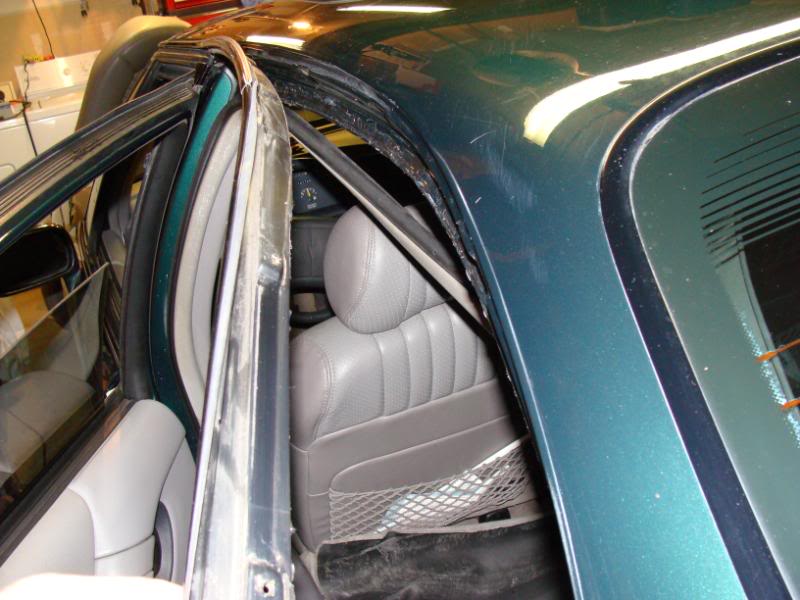
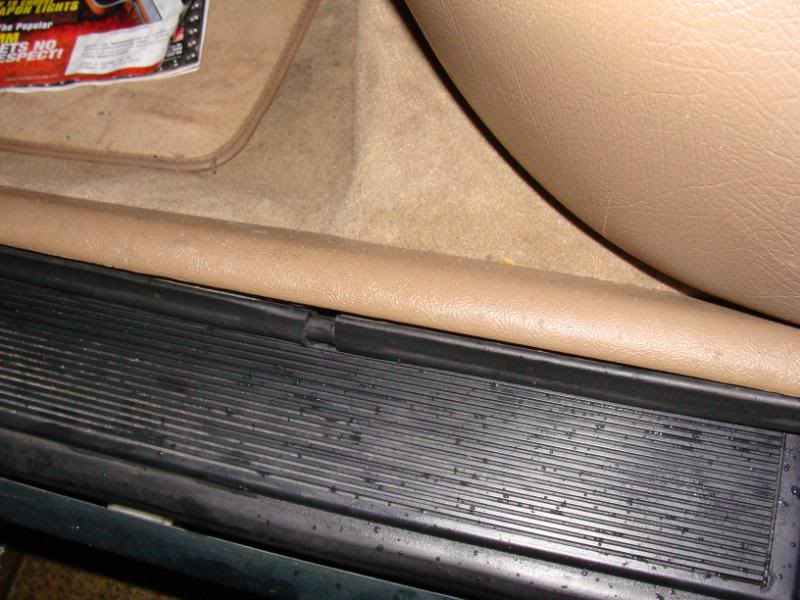
Last winter, I found the door seals ONLY on the driver'* side to be leaking. I fixed them. It'* easy. Just pull 'em out, and warm them up so they're flexible, then start at the top and work down, pulling tight in the corners, which will leave a gap at the bottom (due to shrinking over time), and close the door. They'll 'learn' their new position and be fine. Do NOT use sealant in there to hold them together in the corners. I've learned that the sealant in the corners creates 'dams' so the water has to leak to the INSIDE since it'* blocked at the corners. Use NO sealant or adhesive when re-installing these. Here'* what they look like when pulled in tight:
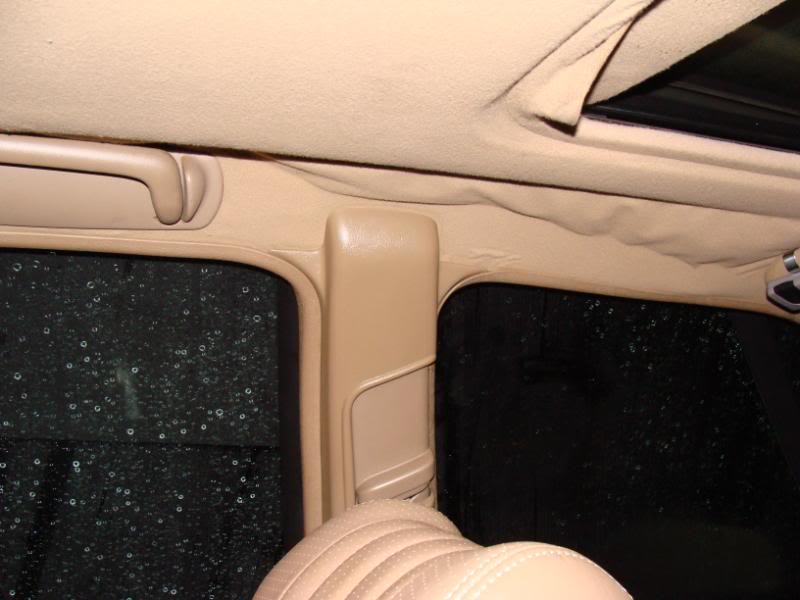
(ignore the headliner issues, that'* next on the list)
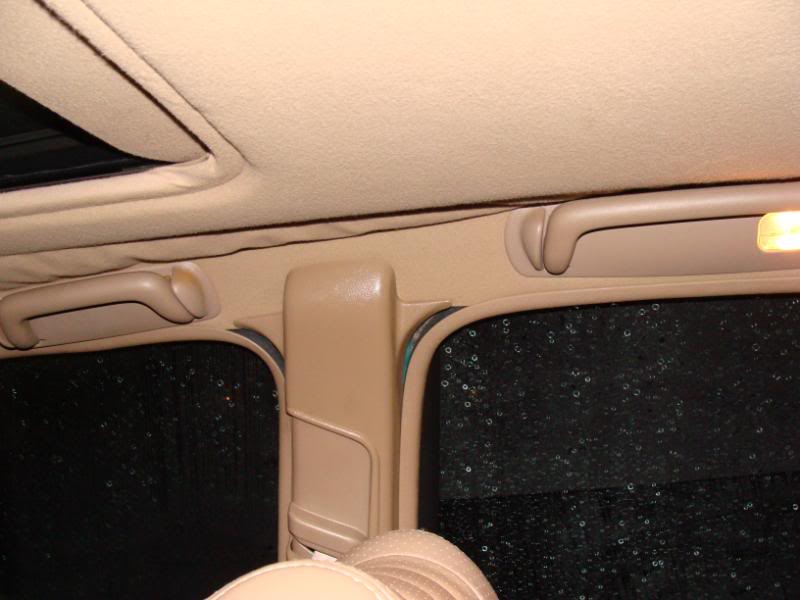
Here'* what the other side looks like:
See the issue from shrinking with age?
Here'* the result:
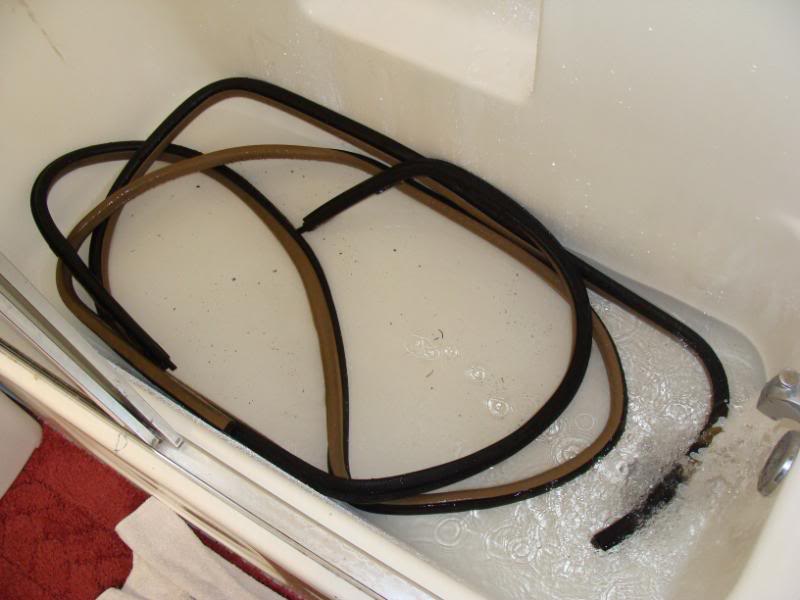
Here'* what to do. Put 'em in a tub of warm water to make them more flexible. This allows you to install them and have them hug the inside corners like they used to, and also allows you to clean out the channels with a small brush. They don't have to be dry to re-install:
This will result in a gap at the bottom like this:
No big deal. Gravity is your friend, and no water will enter there.
Happy leaking. I gotta go put ONE of these damn green things back together in the morning, or I'm walking to work.
Been battling some water leaks. I did last winter, but licked 'em real quick. This year I got hit HARD with back seat and trunk leaks. Since Don covered the front-end leaks so well, I thought I'd concentrate this topic on the B-pillar to the rear.
I've pulled over 6 gallons of water out of here in the last 3 days:
Why? The old seals on the gutter have broken down, allowing water to enter the door weatherstripping, and wick down into the car, soaking under the rear seat and carpet in the rear. ZERO water in the front footwells:
After cleaning and drying, these will get a good thin bead of 3M weatherstripping adhesive (black stuff), and put back.
Trunk leaks? 3 major areas of concern:
Antenna. Make sure your drain tube is connected at both ends and clear of obstructions. Make sure the water doesn't wick in between the rubber seal and fender, or the rubber seal and antenna.
Taillight. When you install it, run a bead of the same sealant across the top and halfway down the sides of the foam rubber seal of the tail. Kinda like an eybrow, so the water that comes out of the trunk lid channels can't get in the light.. Carefully inspect the epoxied body seams in the light pocket. I found two of mine leaking.
Spoiler. Remove it, clean and wax the trunk where it was and the underside of the spoiler, then apply a thin bead around where each stud sticks thru, then reinstall. It'* worth it just for the cleaning.
In addition, a few cars (my SSEi included) have had a leaking rear window seal. Only the bottom edge where the glass meets the rubber. Seal this with black or clear silicone sealant (a very small bead) just between the glass and rubber along the bottom edge, and extending up the sides about 6".
Dry out the carpet and seat:
And empty your shopvac:
Then move on to the car that you should be pulling the engine from so you can drive your leaking winter beater, and get to the door seals:
Last winter, I found the door seals ONLY on the driver'* side to be leaking. I fixed them. It'* easy. Just pull 'em out, and warm them up so they're flexible, then start at the top and work down, pulling tight in the corners, which will leave a gap at the bottom (due to shrinking over time), and close the door. They'll 'learn' their new position and be fine. Do NOT use sealant in there to hold them together in the corners. I've learned that the sealant in the corners creates 'dams' so the water has to leak to the INSIDE since it'* blocked at the corners. Use NO sealant or adhesive when re-installing these. Here'* what they look like when pulled in tight:
(ignore the headliner issues, that'* next on the list)
Here'* what the other side looks like:
See the issue from shrinking with age?
Here'* the result:
Here'* what to do. Put 'em in a tub of warm water to make them more flexible. This allows you to install them and have them hug the inside corners like they used to, and also allows you to clean out the channels with a small brush. They don't have to be dry to re-install:
This will result in a gap at the bottom like this:
No big deal. Gravity is your friend, and no water will enter there.
Happy leaking. I gotta go put ONE of these damn green things back together in the morning, or I'm walking to work.
 01-09-2008, 12:23 AM
#2
Senior Member
True Car Nut

Join Date: May 2003
Location: Lethbridge, Alberta, _______Canada._______ West Coast Bonneville Fest ___05,06,07 Survivor___
Posts: 8,135
Likes: 0
Received 0 Likes
on
0 Posts

Whats a water Leak?
Actually, my first SSEi did that bad, took a fair ammount of patience to stop it 100%, but oh the satisfaction once its done.
You need a third green one.
Actually, my first SSEi did that bad, took a fair ammount of patience to stop it 100%, but oh the satisfaction once its done.
You need a third green one.
01-09-2008, 12:41 AM
#4
Junior Member
Posts like a Ricer Type-R
Thread Starter
SSEi door seals are done. That fast (this should be the first thing you go after for a rear footwell water problem.
Shot the pics, rinsed them off, and reinstalled them. Very easy, and very little time. Water shopvac'd out, and a couple days to work and back on defrost should get the rest of the moisture out.
SLE will take a couple days more.
Shot the pics, rinsed them off, and reinstalled them. Very easy, and very little time. Water shopvac'd out, and a couple days to work and back on defrost should get the rest of the moisture out.
SLE will take a couple days more.
01-09-2008, 06:52 AM
#5
Senior Member
True Car Nut
Join Date: Sep 2006
Location: Indianapolis, IN
Posts: 4,606
Likes: 0
Received 0 Likes
on
0 Posts
I found myself with a similar problem with my 94 SSEi, but instead I bought extra weather stripping from someone here on the forum. I took that and ran it like usual, even leaving the edges out of the picture. Then, I measured the length of the old weather stripping I needed to fill in the corners, cut the pieces a whole lot longer, and then crammed them into the corners. I guess this only works if you have extra weather stripping. But now, I have absolutely no leaks in my car. It'* beautiful.
 01-09-2008, 07:38 AM
#7
Senior Member
True Car Nut
Join Date: Sep 2006
Location: Indianapolis, IN
Posts: 4,606
Likes: 0
Received 0 Likes
on
0 Posts
I see that there'* a lot of room for additional weather stripping on the edge of each door. Has anyone tried putting weather stripping there?
01-09-2008, 07:59 AM
#8
Junior Member
Posts like a Ricer Type-R
Thread Starter
Originally Posted by radomirthegreat
I see that there'* a lot of room for additional weather stripping on the edge of each door. Has anyone tried putting weather stripping there?
01-09-2008, 08:05 AM
#9
Senior Member
True Car Nut
Join Date: Sep 2006
Location: Indianapolis, IN
Posts: 4,606
Likes: 0
Received 0 Likes
on
0 Posts
Well, yes....
I meant to ask if someone didn't know to remove the old weather stripping, but instead put new stuff on the doors. It might just work. That'* what I did to my trunk as a last resort because the lid kept shaking just from the 6x9s.
I meant to ask if someone didn't know to remove the old weather stripping, but instead put new stuff on the doors. It might just work. That'* what I did to my trunk as a last resort because the lid kept shaking just from the 6x9s.
01-09-2008, 09:38 AM
#10
Senior Member
Posts like a Northstar

Join Date: Dec 2006
Location: Niagara Region, ON, Canada
Posts: 635
Likes: 0
Received 0 Likes
on
0 Posts
When I had my leaking issues (same thread title, actually)
http://www.bonnevilleclub.com/forum/...ter+everywhere
I put a piece of weather strip in that little gap at the bottom from a a piece cut from the junk yard, just for good measure.
As Will mentioned, probably not necessary, but I didn't want to take the chance.
My main problem was those pesky sunroof drain tubes had come disconnected.
Good job chasing down those leaks!
Cheers,
Adam