how to fix a broken exterior door handle.
 10-04-2011, 04:34 PM
#1
Senior Member
Certified GM nut
Certified GM nut
Thread Starter

moddies, feel free to move this to where you see fit, i just chose general for the sole fact that these handles are on a ton of gm cars.
This is a tutorial on how to fix your broken exterior handle on alot of gm vehicles from 1997-2005.
tools you will need-
*small* flatblade screwdriver
phillips head screwdriver
10mm open end wrench, the longer the better.
to make it easier but not nesessary, a short 10mm socket on the longest extension you have.

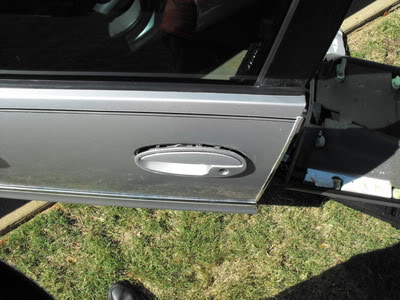
1) clean everything out of your doorhandle/doorpocket.
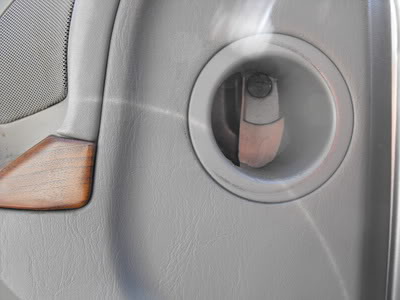
2) remove the plastic insert in the door handle to reveal (2) phillips head screws, and remove them
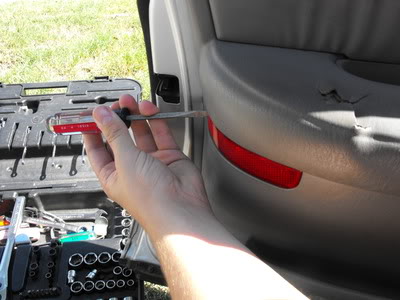
3) pry out the red light, and use the flatblade screw driver to remove the wiring to it to reveal (1) phillips head screw. remove it
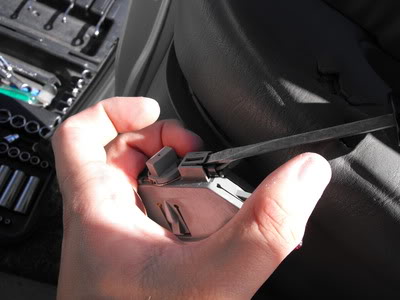
4) get your flatblade screwdriver behind the edge of this duct and pry it out. or if you are very talented with a pair of pliers just remove the black circle.
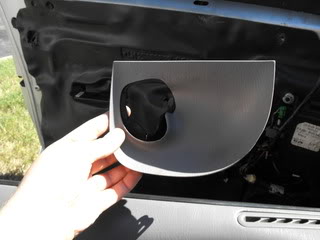
5) next, with one hand hold your door release handle in the out/open position, and at the same time lift up on the entire panel. it should come free without much effort.
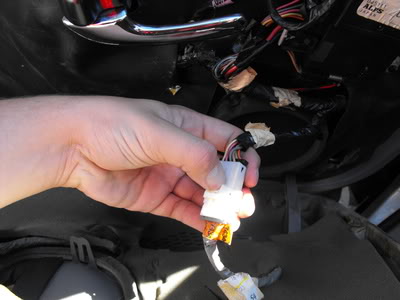
6) make sure the window for the door you are working on is rolled up, then unclip the harness going to the door panel so you can set it aside.
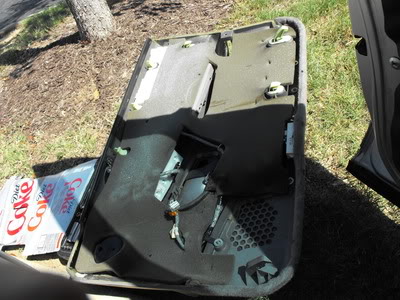
7) set the panel aside
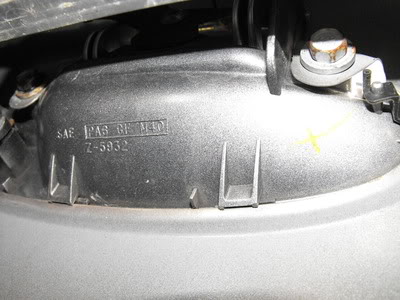
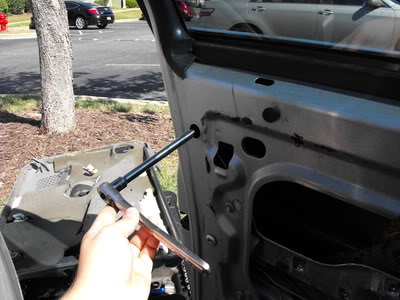
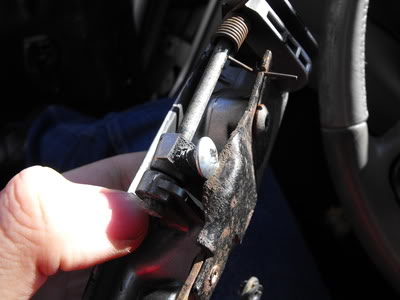
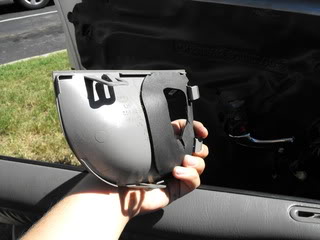
 get your 10mm, and remove this metal piece. its held on with 3 bolts. (this is the piece the door handle screws screwed into)
9) once the metal piece is removed, peel back the sound deadening mat.make sure you keep as much adhesive in tact as possible, you will be reusing it.

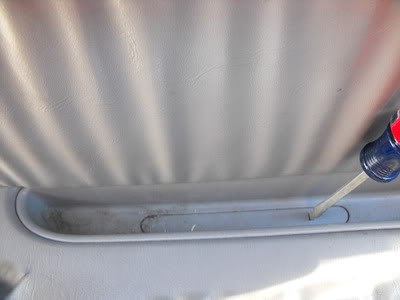
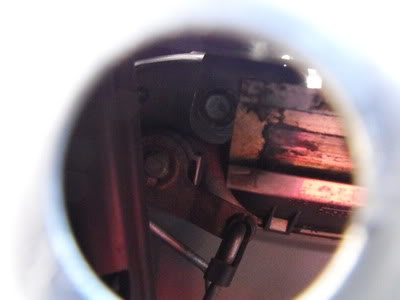
10) remove this rubber/plastic plug with your flatblade.

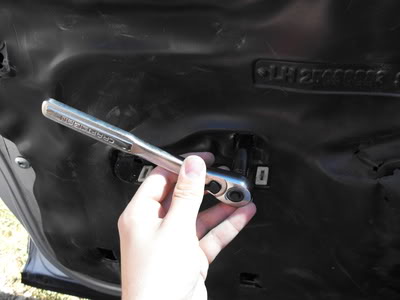
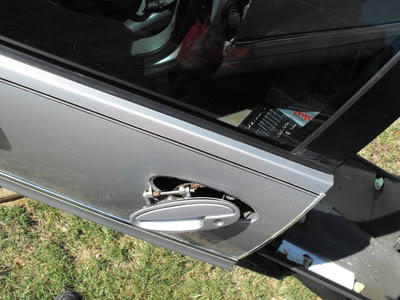
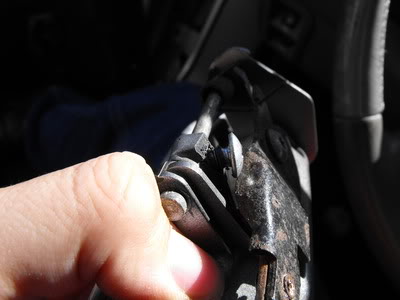
11) now its time to remove the (2) 10mm bolts holding on the handle itself. it doesn't really matter which one you remove first because the handle is held in with clips. i went for the front one. you can only get at this one with an open end because the window is in the way.
12) this is why you need the short, not deep well socket. (you can also use the open end here but if you have the socket its easier and faster) the window track is too wide for a deep well socket, but skinny enough for the extension. remove this bolt.
13) now that both bolts are removed, go to the outside of the door. you have 2 options. a) wedge your fingers under the bottom edge of the handle like i did to pop the 2 clips (seen in the step 11 pic) or b) wrap your flatblade in some masking tape and use it to pry it loose.
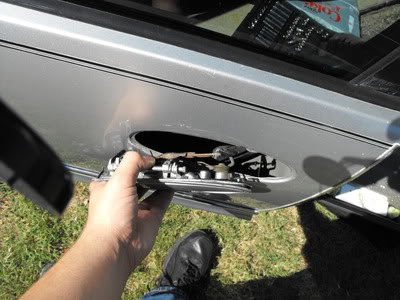
14) remove the front part first, then the back, then unhook the linkages to the lock and door latch. the handle will then be free
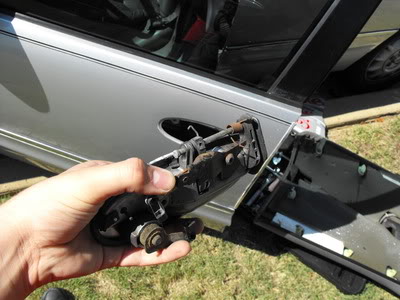
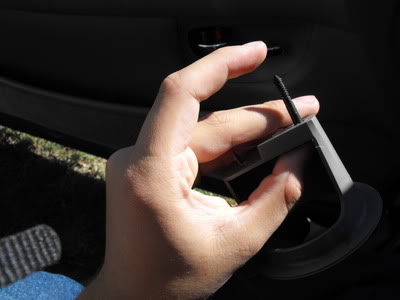
15) find a plastic/ metal screw you like. i used this one. it was originally from a honda scooter i think. make sure whatever you use is either for plastic or metal and is self tapping or the plastic will crack with repetitive use over the years.
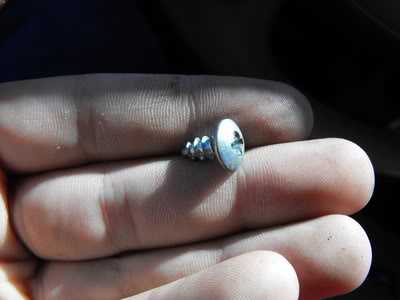
16) screw it into the nub where that plastic finger used to be. you should be able to do this in your lap with a screwdriver. if you cant, you need a better screw. do your best to keep it straight
17) reassemble. installation is the same as removal apart from one step. pop this plastic piece that goes around the handle out. it makes instalation 10x easier. then pop it back in once the panel is seated.
congrats! you now have a working door handle! admittedly its redneck, but think of it this way, its stronger than the original, you dont have to pay the dealer $20 for it, a painter to paint it and then every time you look at it cringe because it doesn't match perfect. (until it breaks again ofcourse)
ive done this to 2 of my handles already and they're holding up just perfect. thats 3 or 4 handles that have snapped on my car. im convinced its a design flaw lol.
id also like to point out this entire project took me about 45mins. admittedly, the first time i did one it took about 2 hrs and i had bloody hands but i also only had a crappy "1985-2005 full size gm vehicle" manual by Haynes to go by.
good luck!
This is a tutorial on how to fix your broken exterior handle on alot of gm vehicles from 1997-2005.
tools you will need-
*small* flatblade screwdriver
phillips head screwdriver
10mm open end wrench, the longer the better.
to make it easier but not nesessary, a short 10mm socket on the longest extension you have.
1) clean everything out of your doorhandle/doorpocket.
2) remove the plastic insert in the door handle to reveal (2) phillips head screws, and remove them
3) pry out the red light, and use the flatblade screw driver to remove the wiring to it to reveal (1) phillips head screw. remove it
4) get your flatblade screwdriver behind the edge of this duct and pry it out. or if you are very talented with a pair of pliers just remove the black circle.
5) next, with one hand hold your door release handle in the out/open position, and at the same time lift up on the entire panel. it should come free without much effort.
6) make sure the window for the door you are working on is rolled up, then unclip the harness going to the door panel so you can set it aside.
7) set the panel aside
9) once the metal piece is removed, peel back the sound deadening mat.make sure you keep as much adhesive in tact as possible, you will be reusing it.
10) remove this rubber/plastic plug with your flatblade.
11) now its time to remove the (2) 10mm bolts holding on the handle itself. it doesn't really matter which one you remove first because the handle is held in with clips. i went for the front one. you can only get at this one with an open end because the window is in the way.
12) this is why you need the short, not deep well socket. (you can also use the open end here but if you have the socket its easier and faster) the window track is too wide for a deep well socket, but skinny enough for the extension. remove this bolt.
13) now that both bolts are removed, go to the outside of the door. you have 2 options. a) wedge your fingers under the bottom edge of the handle like i did to pop the 2 clips (seen in the step 11 pic) or b) wrap your flatblade in some masking tape and use it to pry it loose.
14) remove the front part first, then the back, then unhook the linkages to the lock and door latch. the handle will then be free
15) find a plastic/ metal screw you like. i used this one. it was originally from a honda scooter i think. make sure whatever you use is either for plastic or metal and is self tapping or the plastic will crack with repetitive use over the years.
16) screw it into the nub where that plastic finger used to be. you should be able to do this in your lap with a screwdriver. if you cant, you need a better screw. do your best to keep it straight
17) reassemble. installation is the same as removal apart from one step. pop this plastic piece that goes around the handle out. it makes instalation 10x easier. then pop it back in once the panel is seated.
congrats! you now have a working door handle! admittedly its redneck, but think of it this way, its stronger than the original, you dont have to pay the dealer $20 for it, a painter to paint it and then every time you look at it cringe because it doesn't match perfect. (until it breaks again ofcourse)
ive done this to 2 of my handles already and they're holding up just perfect. thats 3 or 4 handles that have snapped on my car. im convinced its a design flaw lol.
id also like to point out this entire project took me about 45mins. admittedly, the first time i did one it took about 2 hrs and i had bloody hands but i also only had a crappy "1985-2005 full size gm vehicle" manual by Haynes to go by.
good luck!

 10-04-2011, 06:17 PM
#4
Senior Member
True Car Nut
If this gets approved to moved to the How-To section, I think we might have to do some picture adjusting.
While it'* great that you provided such detailed pics, they load very very slow. Now, this isn't a problem for me, but it could be for some. I think I have a way to fix that.
While it'* great that you provided such detailed pics, they load very very slow. Now, this isn't a problem for me, but it could be for some. I think I have a way to fix that.
10-04-2011, 07:23 PM
#6
Senior Member
Certified GM nut
Certified GM nut
Thread Starter
ill just resize them on my photobucket account and replace the original image. if they still load slow feel free to do watcha want with em
and sarah, i dont intentionally do that... i just have a digital slr camera. like super duper detailed pics lol.
and sarah, i dont intentionally do that... i just have a digital slr camera. like super duper detailed pics lol.
10-04-2011, 07:45 PM
#7
Senior Member
Certified GM nut
Certified GM nut
Thread Starter
well i'm officially confused. i resized and replaced every pic as 400x400. yet somehow here they're still big :\

Thread
Thread Starter
Forum
Replies
Last Post
Buickman104
Lounge
0
01-16-2008 02:11 AM