Adding Hella Optilux 2500 with Halo's
 04-03-2010, 07:59 PM
#1
Senior Member
True Car Nut
Thread Starter
Living in the country and dodging cats, skunks and deer in the road I've been on a search for better lighting. I was not happy with my fog lights, so I switched the 888 bulb, but still had too much of a diffused pattern. So, I installed the DDM Apexcone Raptor HID (35w 6000K) and did not like the light pattern which reflected too much to the sides. So....I decided to switch from fog lights, to driving lights. The driving lights should give me a good light pattern farther down the road and along with my DDM Apexcone Raptor 55w 6000K lights that replaced my 9006 bulb (lo-Beam), I might be able to get more cats now  .
.
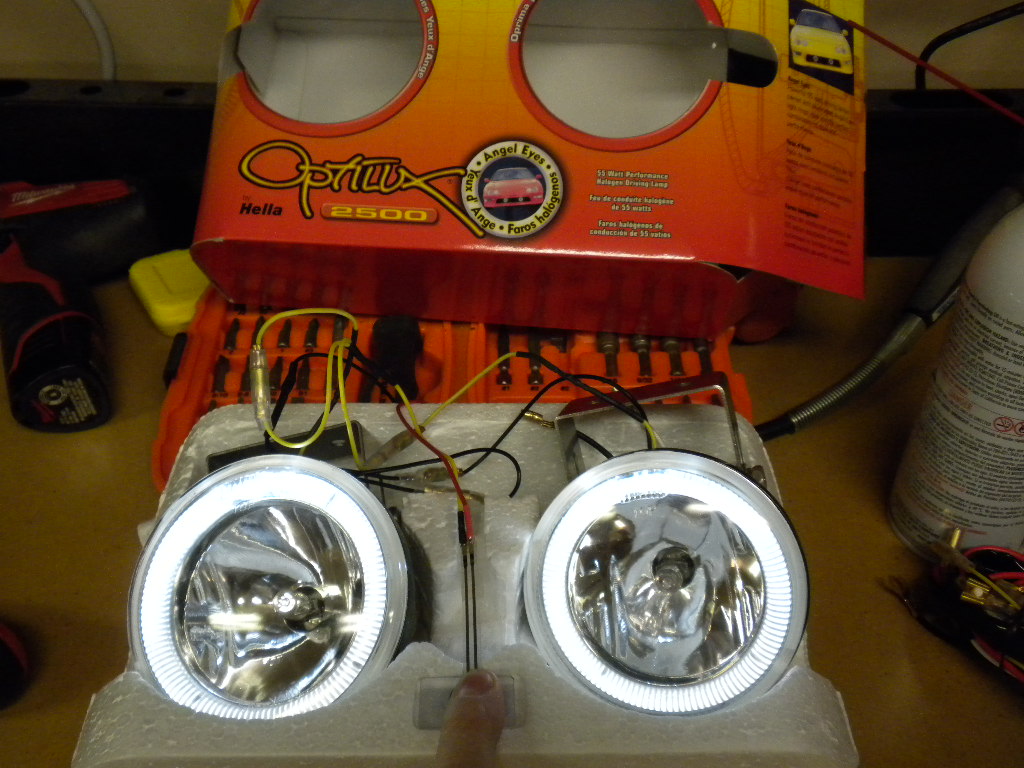
Here'* how the lights come. They have a small 12v batter and a test switch so you can light up the halos.
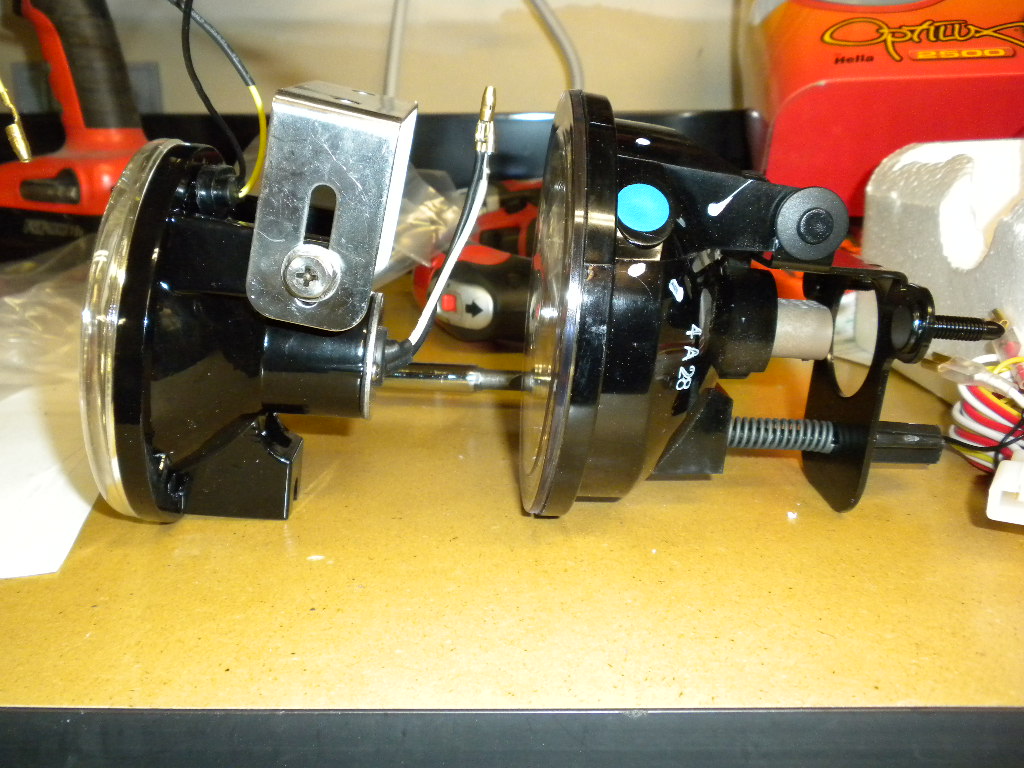
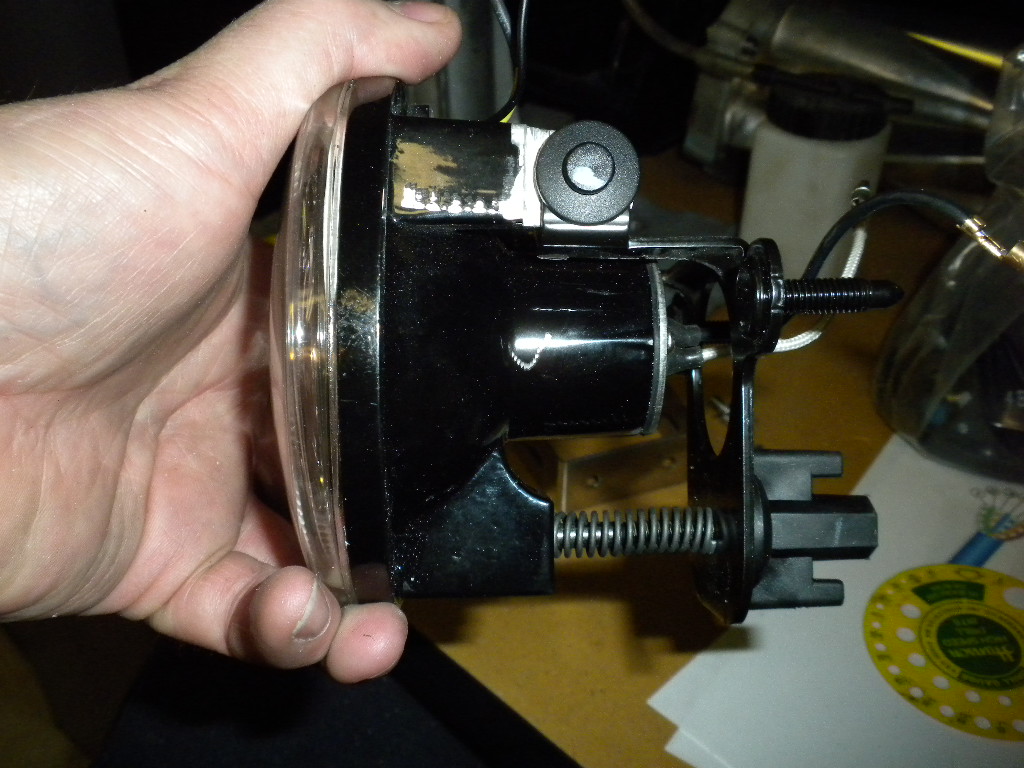
This is a side by side comparison of the stock fog lights assembly and the Hella assembly. Some slight modification will be needed to get the Hella to mount up to the stock fog assembly.
I needed to grind off about 1/8" of material from the Hella lamp housing. I also needed to cut out a section of the stock fog light hangar so that the Hella bulb housing would fit and allow for the up and down adjustment of the lights. I used a carbide bit on a die grinder to remove most of the material and a grinding stone to flatten it all out. The bolt holes on the angle pieces needed to be drilled out to accommodate the stock plastic push pin that keeps the light and bracket as one assembly.
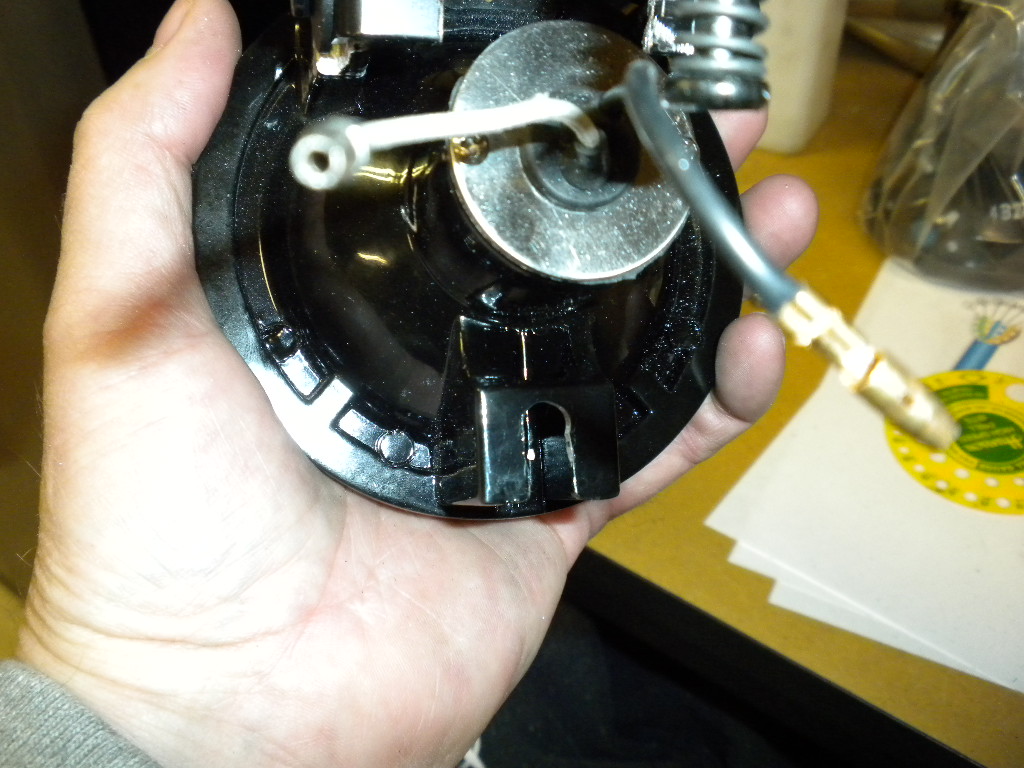
On the bottom of the Hella lamp housing, I needed to make the adjustment grove a bit longer so that the adjustment rod and spring assembly would sit flush on the back of the lamp bracket. I used a die grinder and a 3/8" carbide bit.
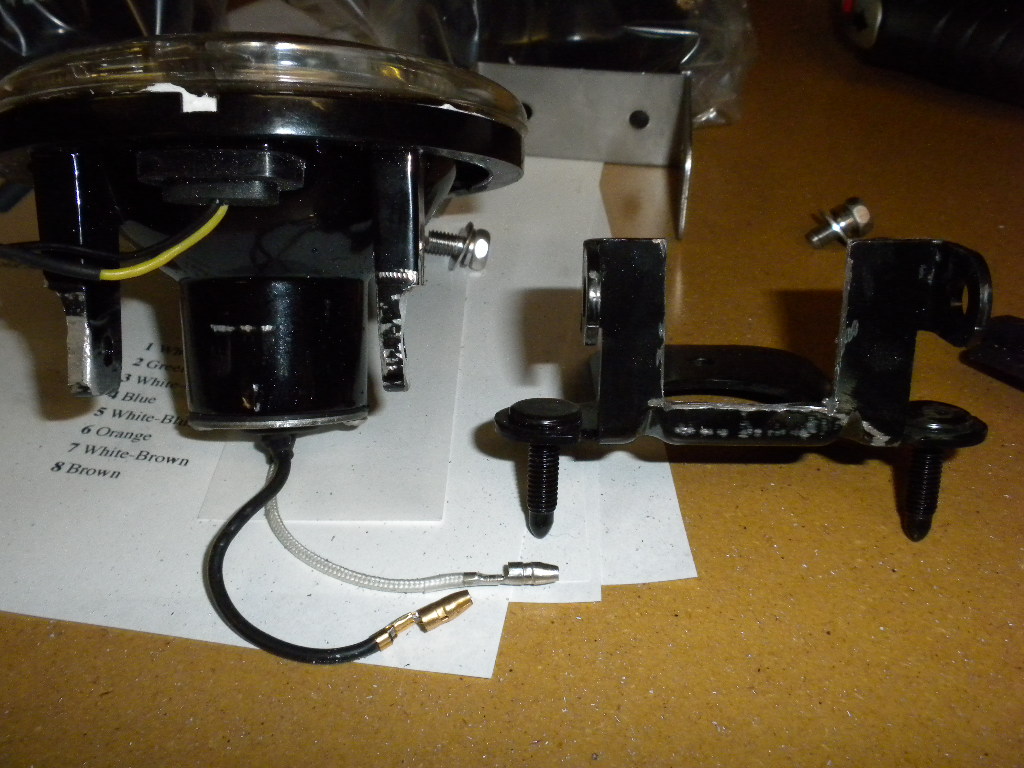
Below shows the final modification of the lamp bracket. It was cut out to accommodate the wider lamp socket on the Hella.
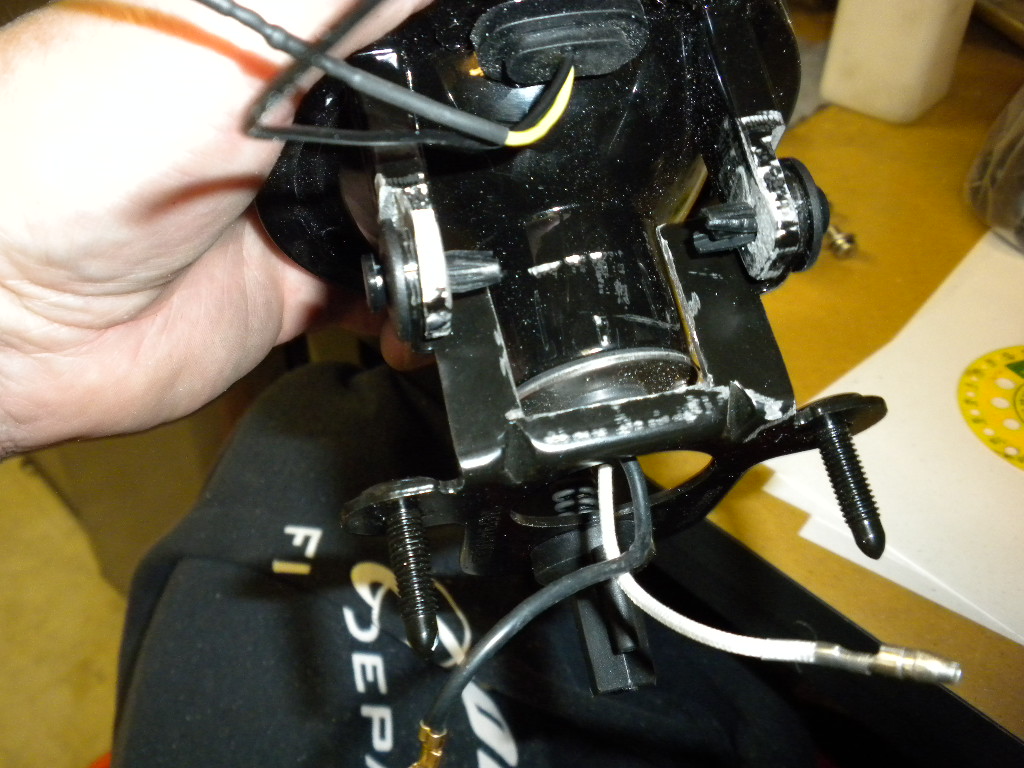
All assembled! You can see how the adjustment rod and spring sit parallel with the bulb socket housing. Prior to elongating the adjustment groove, the spring and rod were at about 30 degrees and the adjustment **** on the back of the bracket was not flush.
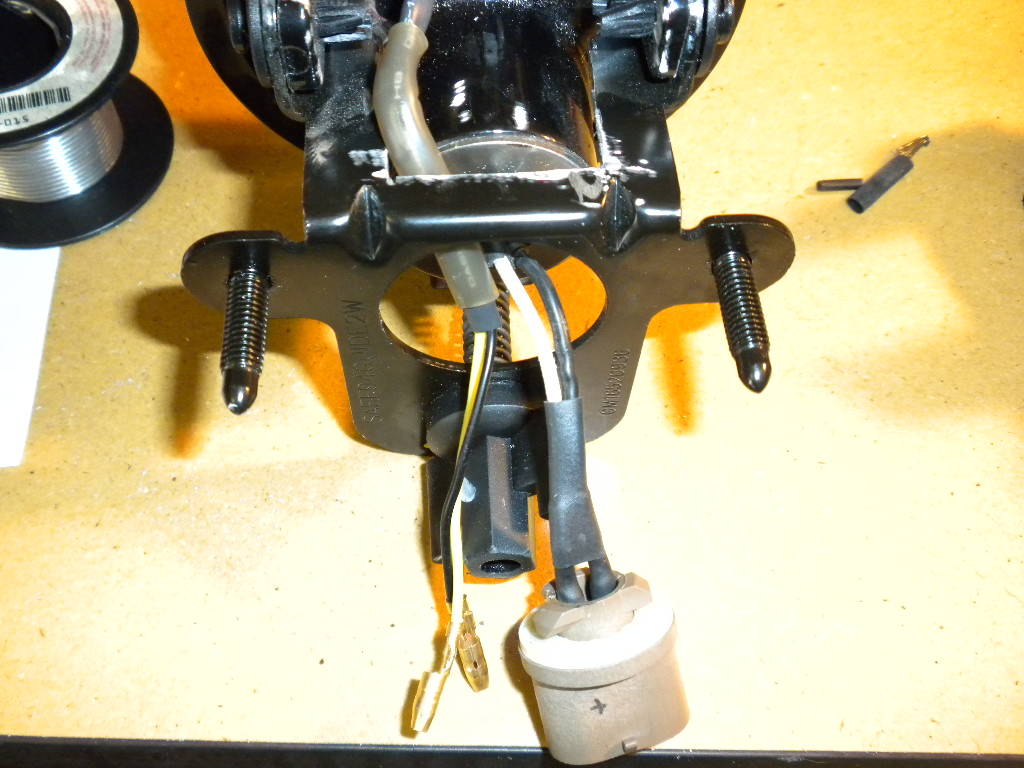
I happen to have some old stock fog light bulbs lying around. I gut the bulb from the bulb socket. This will be used to adapt the light for plug and play into the fog light harness. I dented the tungsten with some heavy duty side cutters and then had to use a pair of vice grips to hold the tungsten as low as I could and then snap the bulb/wire solder joint off. I tried to de-solder it, but whatever heavy duty solder the factory uses was too tough and I didn't want to melt the socket.
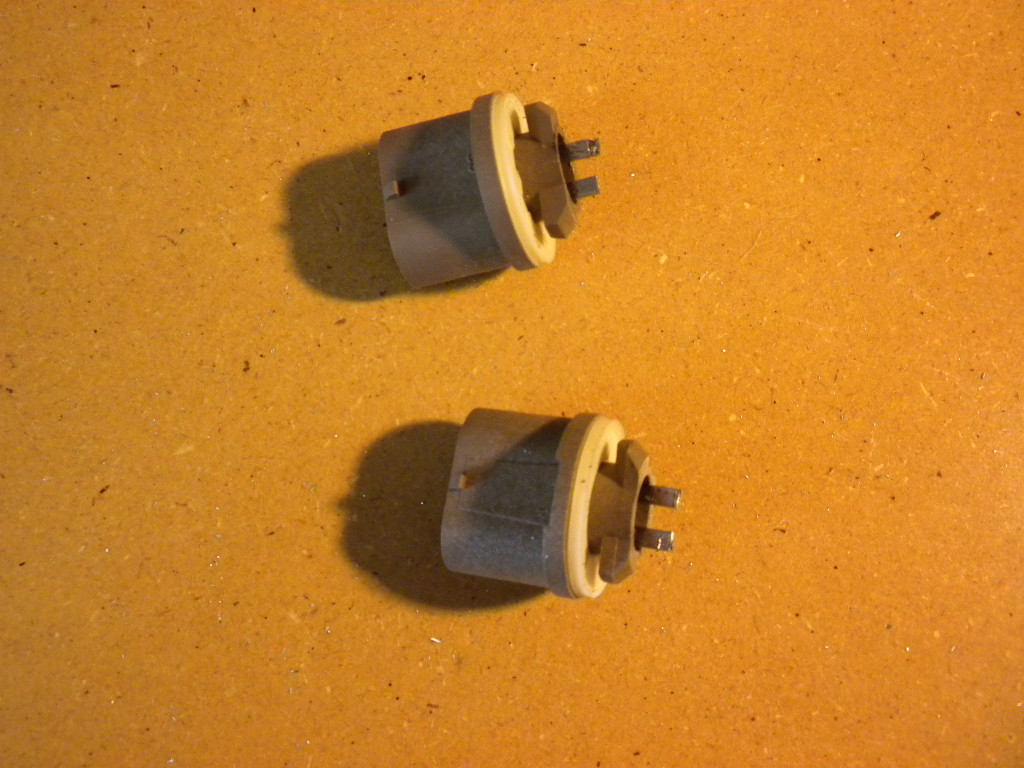
I believe in protecting all electrical wire the best you can. So, you'll see lots of heat shrink tubing in my projects. I verified the (+) and the (-) connections on the the fog light harness and marked the modified socket accordingly. This way I can be consistent with the ground buses our cars rely on. I cut the bullet plug off, stripped the wires and soldered the wires to the modified plug.
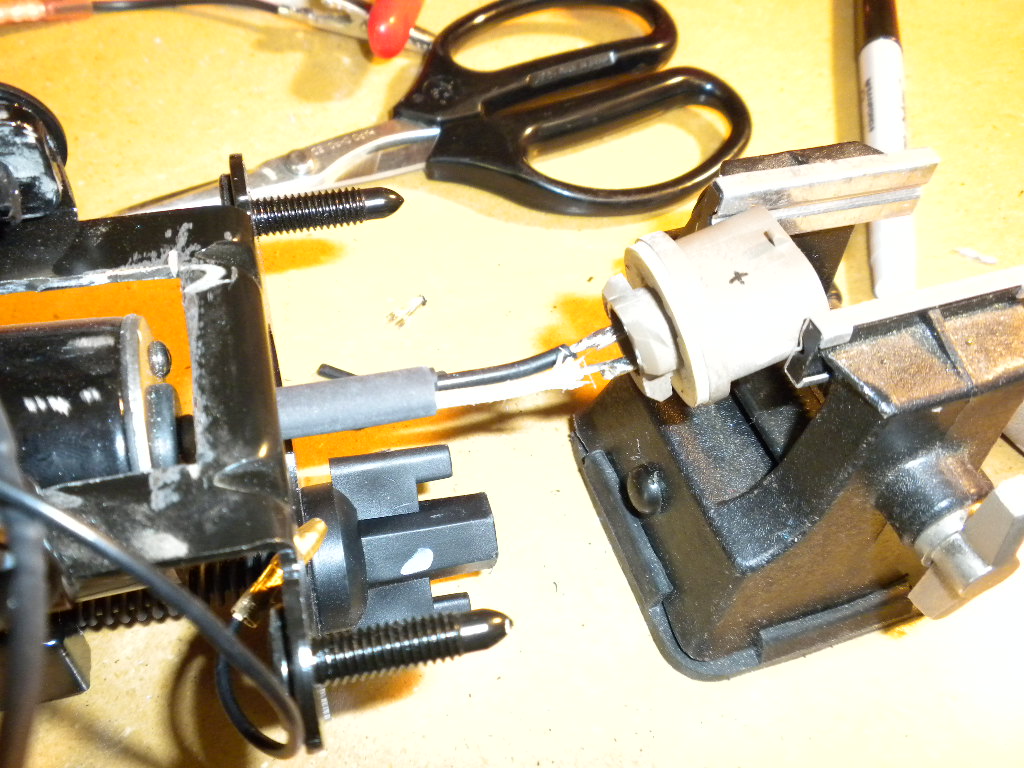
Small heat shrink tubing that fit over the wires and the sockets metal prongs was used to protect the connections and prevent accidental grounding. Larger pieces were used to hold the wires together for strength. The other set of wires are the wires that lead to the LED'* on the halo. I will leave the male bullet plugs on, but used heavy duty heat shrink to protect the wires that I needed to route through the lamp bracket.
I made up tow separate harnesses to use for powering the halo'* off the parking light circuit. These have the female bullet sockets on them and are color coded so I know which and where they need to go, top and bottom. I used a 3/8" loom and 12 gauge wire. The bullet sockets are crimp ons, only because I could not find solder able ones. The wires were stripped back 1/2" and folded over then pushed into the sockets and then crimped three times over the length of the crimping area. Again, heat shrink is used. This time to keep water from the connection as well as adding strength.
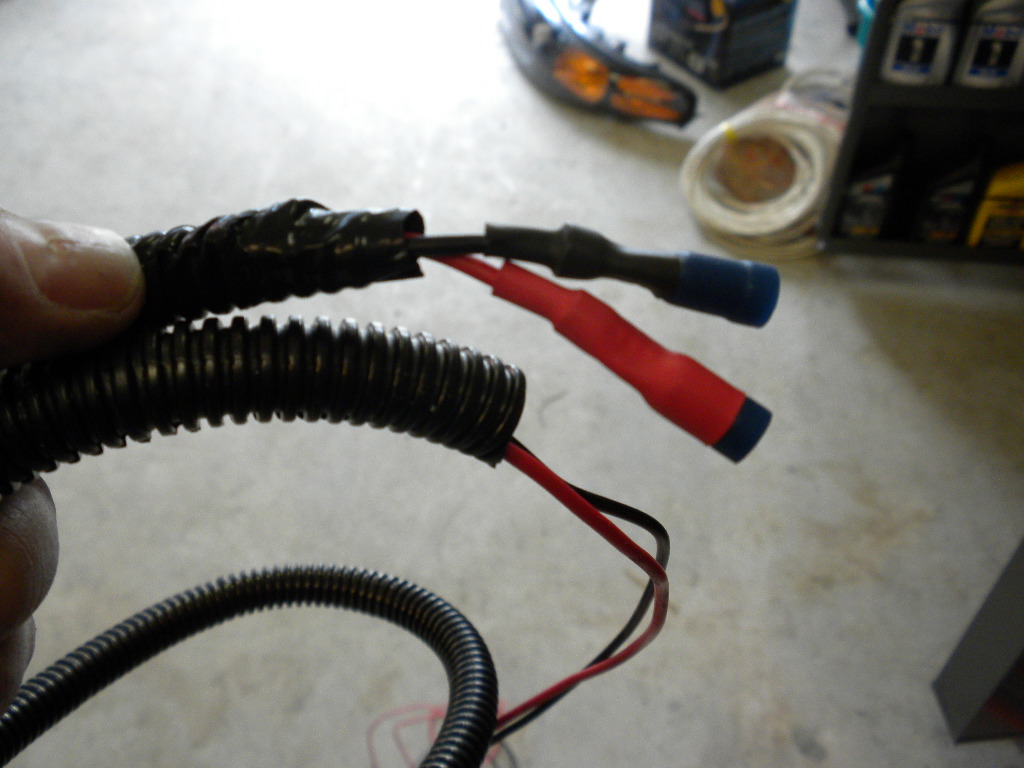
This is where I needed to hurry and get things done, so I didn't take any pictures of where I connected the looms I built for the halos to get there power. I tapped into the parking light power feed on both the right and left headlight assembly (RH - brown/white wire : LH - purple/white wire). By tapping, I mean I cut the wires, slipped on some heat tubing, splice the wires together, soldered them, slipped the heat shrink over the solder joint and shrunk it down. I used a scotch block tap for the grounds at the same location. Everything got tucked up neat and nice. The new looms were taped into the the existing wire looms by both headlights. Anywhere the looms giggled or needed support, wire ties were used to tie it all together or up.
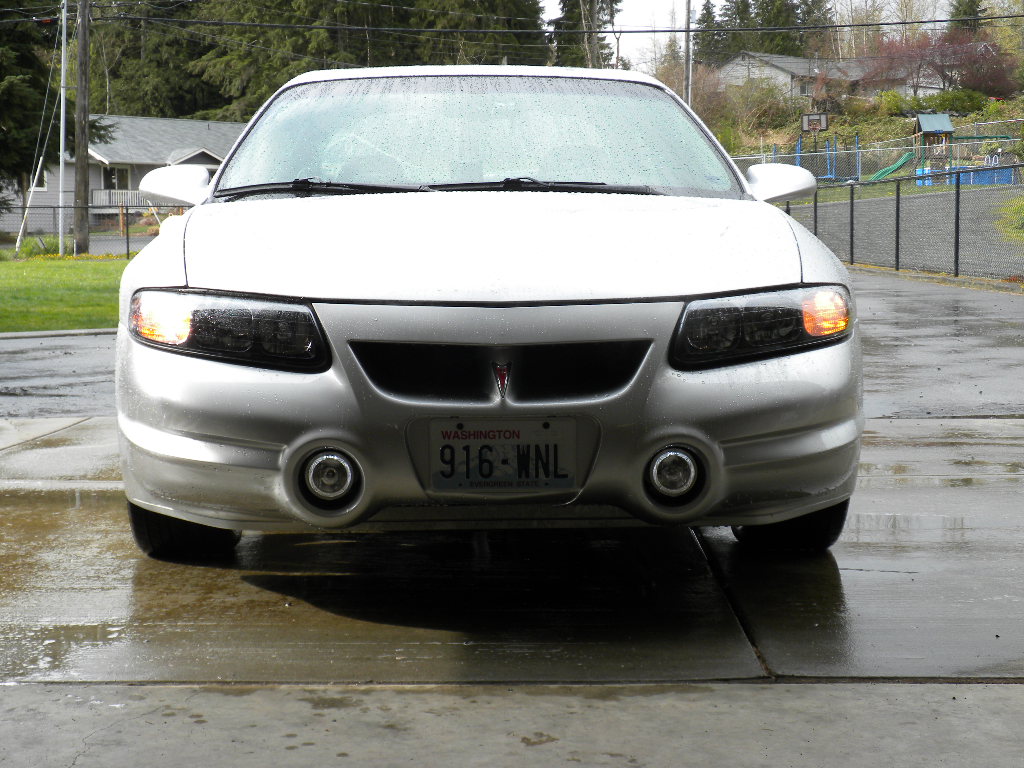
Hard to see the halo'* in the sunlight.
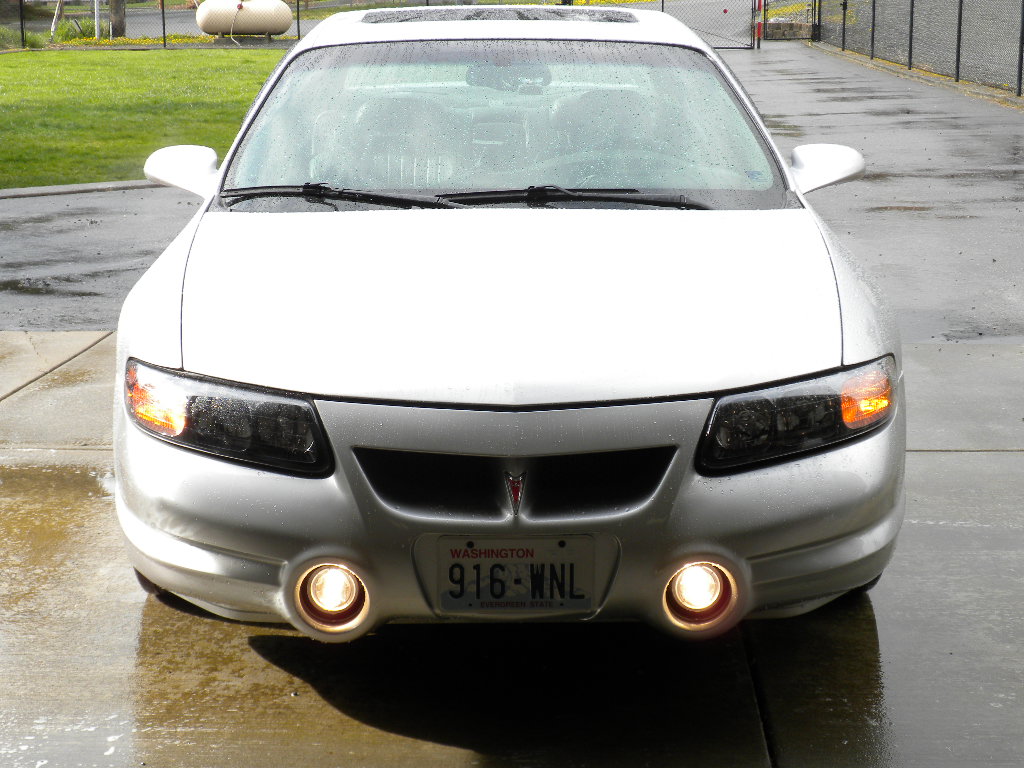
Driving lights are wicked bright!
.Here'* how the lights come. They have a small 12v batter and a test switch so you can light up the halos.
This is a side by side comparison of the stock fog lights assembly and the Hella assembly. Some slight modification will be needed to get the Hella to mount up to the stock fog assembly.
I needed to grind off about 1/8" of material from the Hella lamp housing. I also needed to cut out a section of the stock fog light hangar so that the Hella bulb housing would fit and allow for the up and down adjustment of the lights. I used a carbide bit on a die grinder to remove most of the material and a grinding stone to flatten it all out. The bolt holes on the angle pieces needed to be drilled out to accommodate the stock plastic push pin that keeps the light and bracket as one assembly.
On the bottom of the Hella lamp housing, I needed to make the adjustment grove a bit longer so that the adjustment rod and spring assembly would sit flush on the back of the lamp bracket. I used a die grinder and a 3/8" carbide bit.
Below shows the final modification of the lamp bracket. It was cut out to accommodate the wider lamp socket on the Hella.
All assembled! You can see how the adjustment rod and spring sit parallel with the bulb socket housing. Prior to elongating the adjustment groove, the spring and rod were at about 30 degrees and the adjustment **** on the back of the bracket was not flush.
I happen to have some old stock fog light bulbs lying around. I gut the bulb from the bulb socket. This will be used to adapt the light for plug and play into the fog light harness. I dented the tungsten with some heavy duty side cutters and then had to use a pair of vice grips to hold the tungsten as low as I could and then snap the bulb/wire solder joint off. I tried to de-solder it, but whatever heavy duty solder the factory uses was too tough and I didn't want to melt the socket.
I believe in protecting all electrical wire the best you can. So, you'll see lots of heat shrink tubing in my projects. I verified the (+) and the (-) connections on the the fog light harness and marked the modified socket accordingly. This way I can be consistent with the ground buses our cars rely on. I cut the bullet plug off, stripped the wires and soldered the wires to the modified plug.
Small heat shrink tubing that fit over the wires and the sockets metal prongs was used to protect the connections and prevent accidental grounding. Larger pieces were used to hold the wires together for strength. The other set of wires are the wires that lead to the LED'* on the halo. I will leave the male bullet plugs on, but used heavy duty heat shrink to protect the wires that I needed to route through the lamp bracket.
I made up tow separate harnesses to use for powering the halo'* off the parking light circuit. These have the female bullet sockets on them and are color coded so I know which and where they need to go, top and bottom. I used a 3/8" loom and 12 gauge wire. The bullet sockets are crimp ons, only because I could not find solder able ones. The wires were stripped back 1/2" and folded over then pushed into the sockets and then crimped three times over the length of the crimping area. Again, heat shrink is used. This time to keep water from the connection as well as adding strength.
This is where I needed to hurry and get things done, so I didn't take any pictures of where I connected the looms I built for the halos to get there power. I tapped into the parking light power feed on both the right and left headlight assembly (RH - brown/white wire : LH - purple/white wire). By tapping, I mean I cut the wires, slipped on some heat tubing, splice the wires together, soldered them, slipped the heat shrink over the solder joint and shrunk it down. I used a scotch block tap for the grounds at the same location. Everything got tucked up neat and nice. The new looms were taped into the the existing wire looms by both headlights. Anywhere the looms giggled or needed support, wire ties were used to tie it all together or up.
Hard to see the halo'* in the sunlight.
Driving lights are wicked bright!


 04-03-2010, 08:23 PM
#3
Senior Member
True Car Nut
Join Date: Jan 2009
Location: Dover, NH
Posts: 7,122
Likes: 0
Received 0 Likes
on
0 Posts

look good Kev! i'll have to see about those. If you would please get some shots from out the windshield at night with the headlights off i would like to see the pattern of them on the road thanks
04-03-2010, 08:52 PM
#5
Senior Member
Posts like a Northstar
Join Date: Dec 2006
Location: SW Florida
Posts: 699
Likes: 0
Received 0 Likes
on
0 Posts
looks good! Those driving lights should help out a lot for what you need! Would love to see the halos right before sunset to see how bright they are 

Thread
Thread Starter
Forum
Replies
Last Post
glanghus
Everything Electrical & Electronic
2
06-04-2004 11:26 PM

