My SLP upper grill installation
 04-03-2011, 10:41 AM
#1
Senior Member
Posts like a Turbo
Thread Starter
Join Date: Jul 2010
Location: Sacramento, CA.
Posts: 326
Likes: 0
Received 0 Likes
on
0 Posts

Some of you have already seen my grill but this is how I installed it
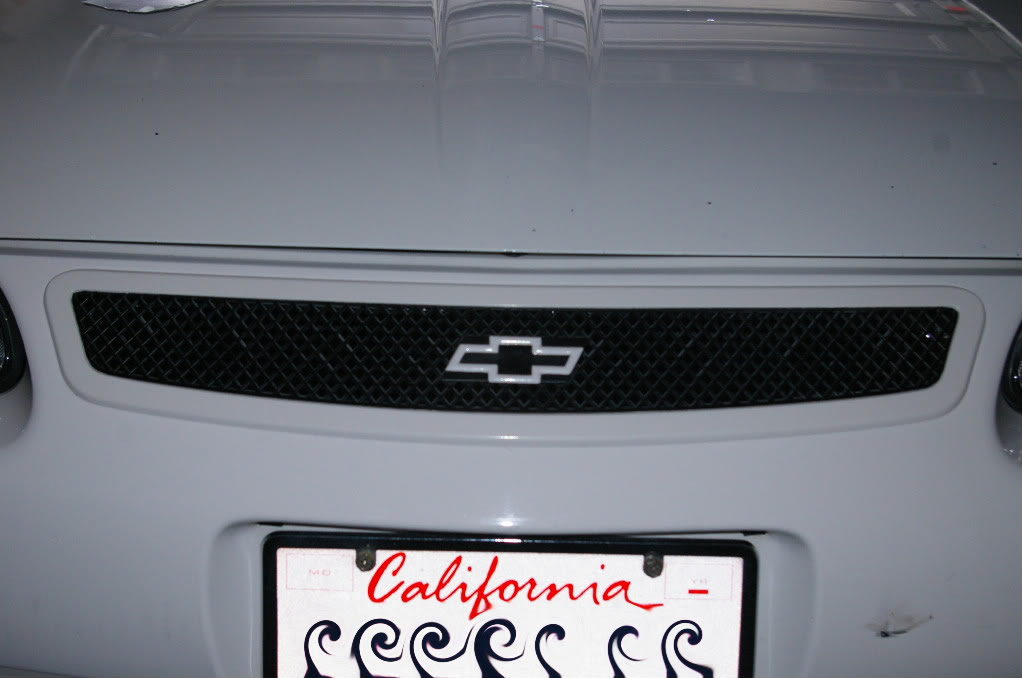
When you first get the SLP grill it'* all black, not painted, just the color of the plastic they used to mold it is black. So the first thing I did was paint for outer border body color and the chevy bowtie they include is red so that got the bodycolor treatment too.
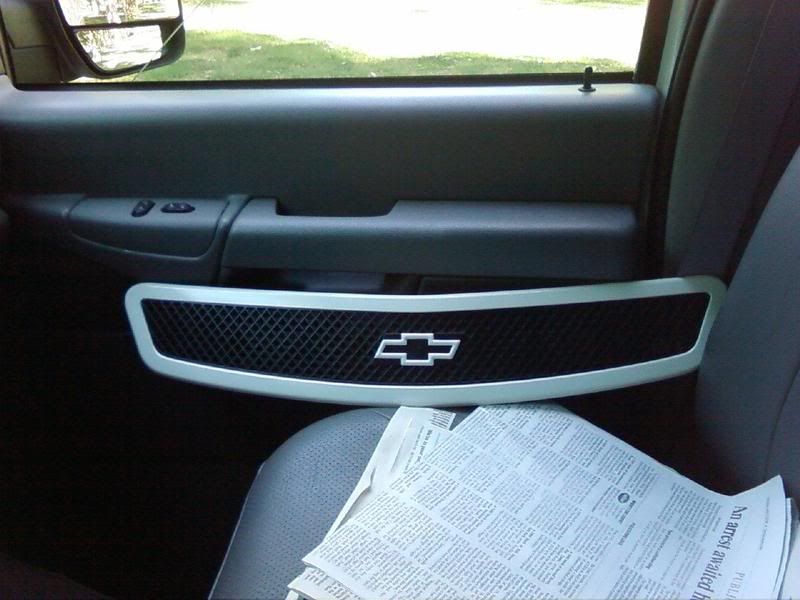
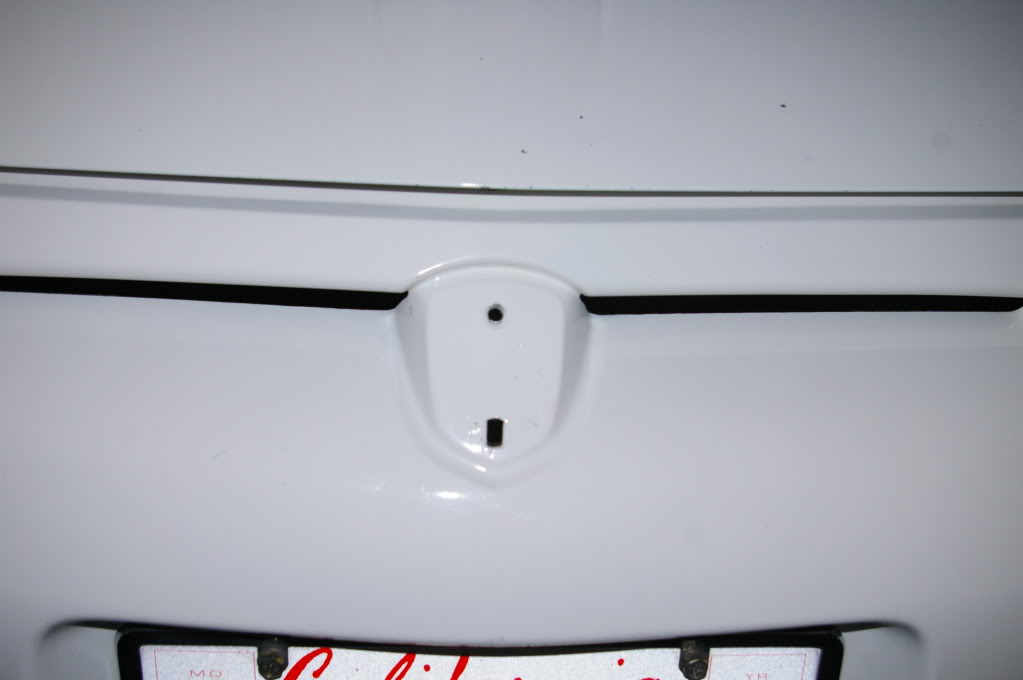
The grill just gets attached to the front bumper via 3m double sided tape so with my car being white and the center of the grill being black, I thought it would look tacky if I didn't blacken the area of the bumper that would shine through. I didn't want to paint it though cause that'* pretty permanent so I figured laying down some vinyl would be the way to go. So first thing I did was remove the Knight badge on the front bumper and clean up the leftover adhesive. I used a heat gun and a bondo spreader to get the badge off.
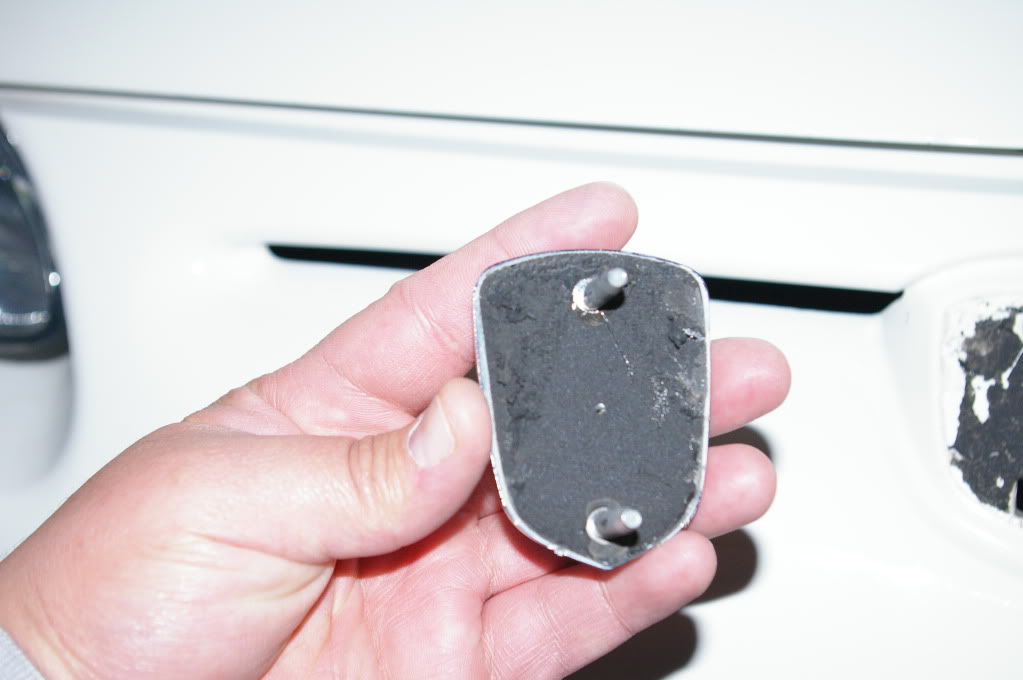
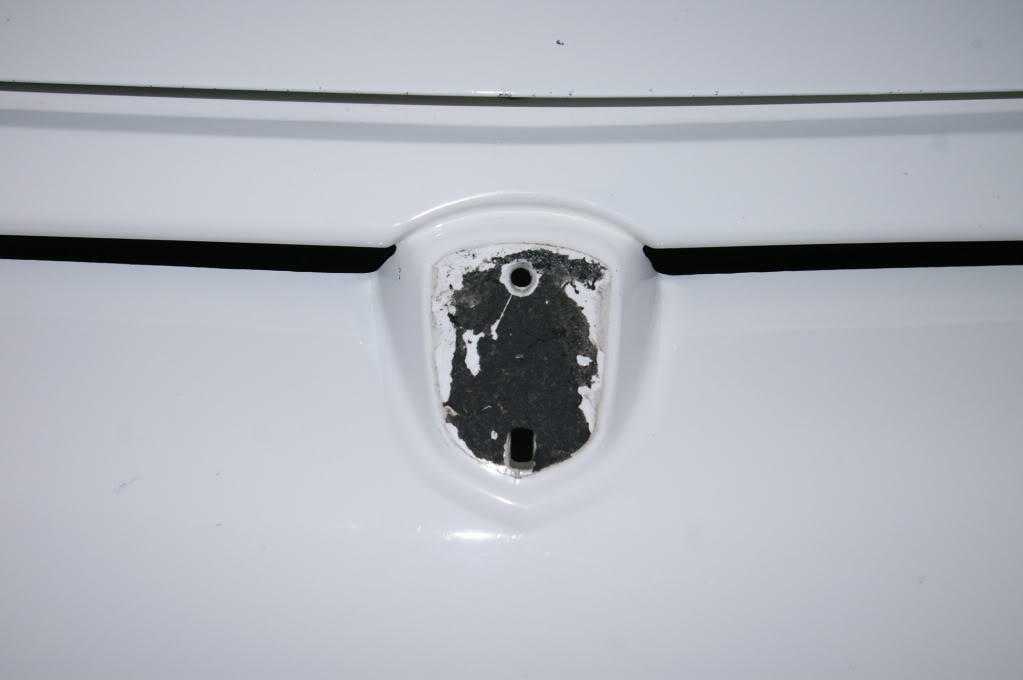
Cleaning the leftover adhesive started off as a royal pain in the a**. I first soaked it in goo gone and let it sit for a while....that got the top layer of foamy stuff taken off pretty easy but the adhesive was being stubborn. Then I brought in the heat gun to help, and some more goo gone, this time using a rag soaked in goo gone to rub it away....still not working too good. So finally I decided to try rubbing away the sticky stuff with my finger, worked like a charm!
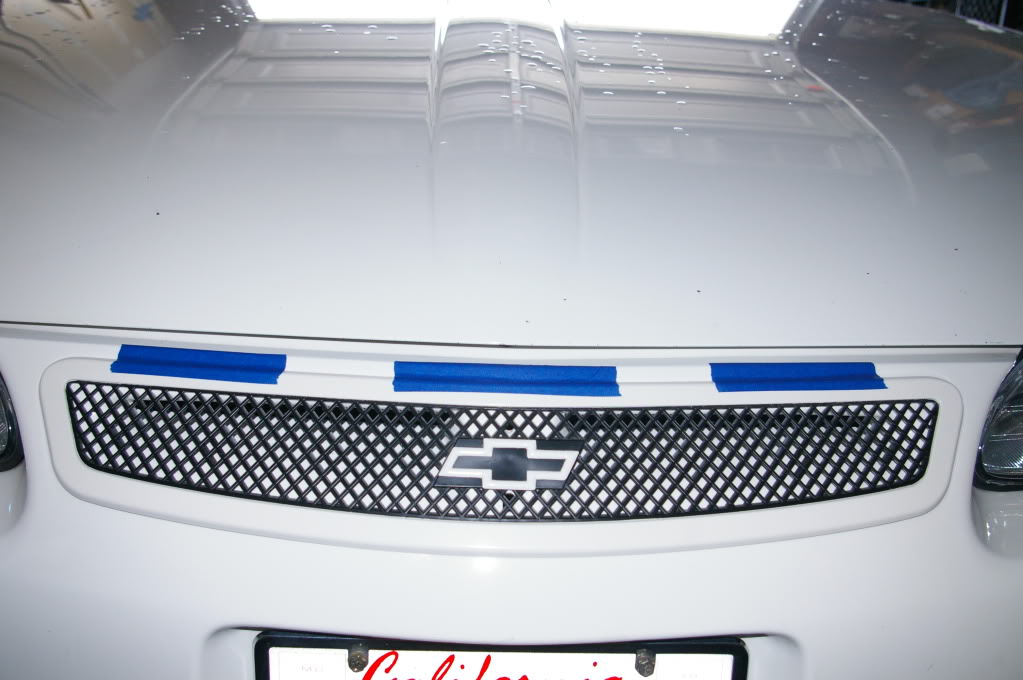
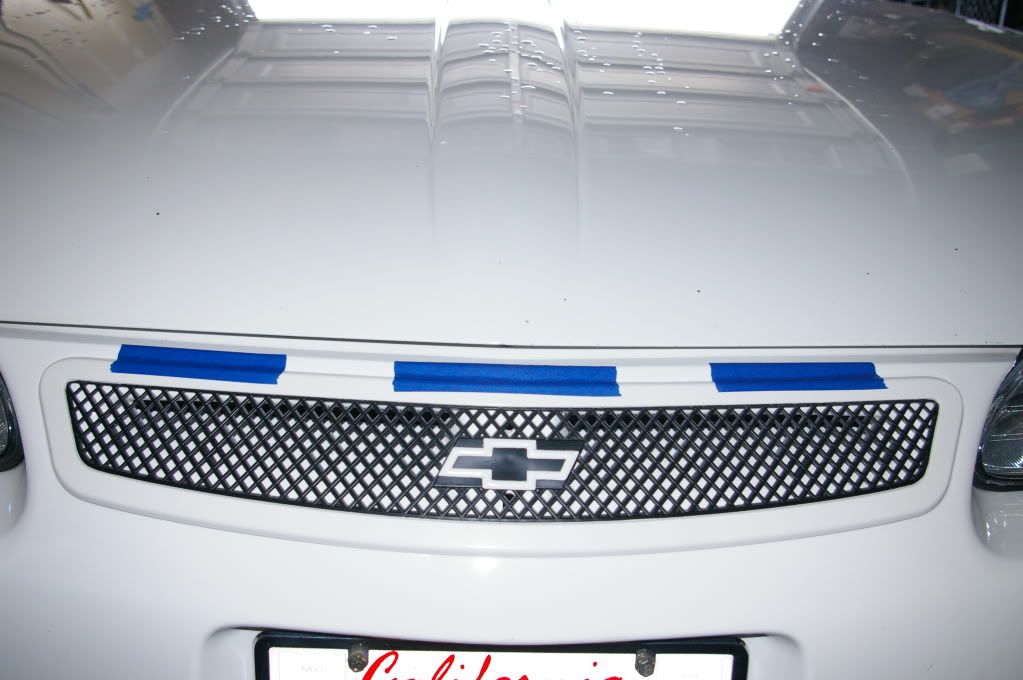
Then I found the spot I wanted the grill to be at and taped it in place so I could see the area that needed the vinyl applied
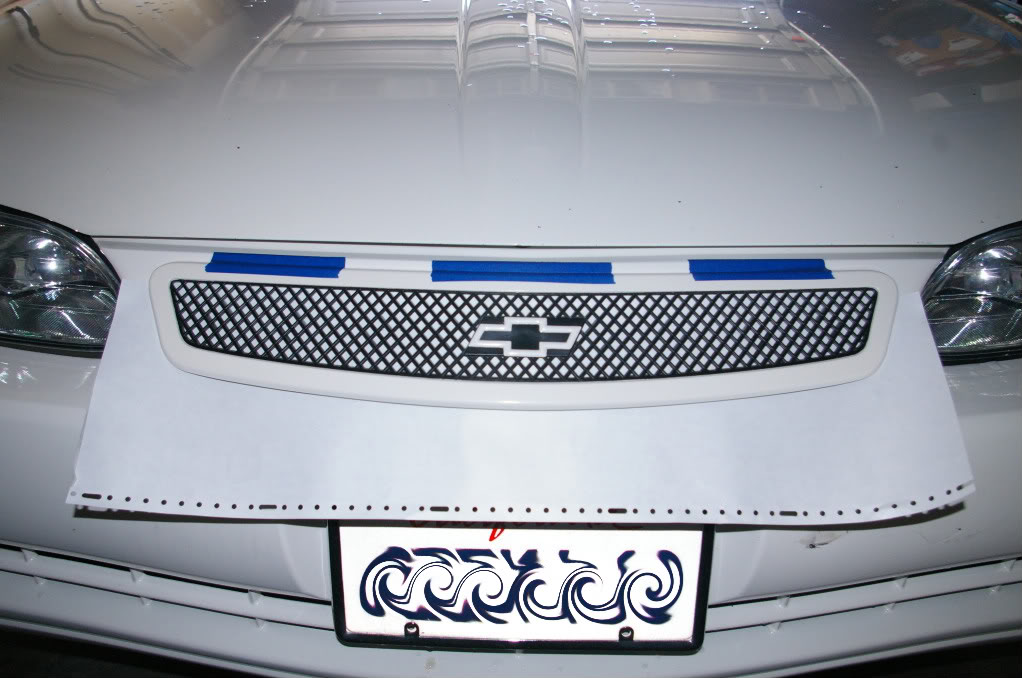
I went to Signs Now and picked up a couple pieces of the vinyl they use to do wraps on cars, placed that behind the grill and traced the outline of the area I needed to cover
After laying down that piece, I had gaps and crevices all over the place so I filled them in with the leftover vinyl.....this was definitely a humbling experience. I figured how hard could it be to lay down vinyl, heh, alot harder than I expected it to be. I could have done a half *** job but that'* not me, I tried to make it look as nice and clean as possible.
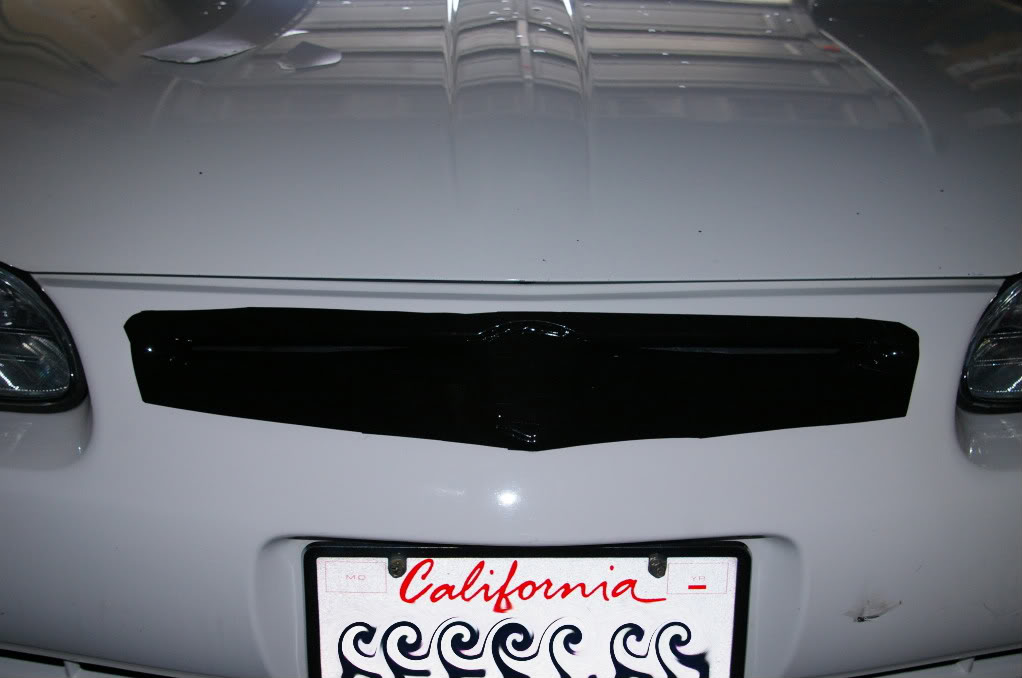
Then I gave the outer area of the vinyl a final wipedown with rubbing alcohol, applied the double sided tape to the outer edge of the grill and put it in place
When I got the vinyl they included the scraper/squeegee thingy they use to press it on and get all the air bubbles out and gave me some tips/instructions on how to get it done, very helpful folks at Signs Now. And they only charged me like $8 for 2 pieces of vinyl the size as pictured above. A different sign shop wanted to charge me $20 minimum
When you first get the SLP grill it'* all black, not painted, just the color of the plastic they used to mold it is black. So the first thing I did was paint for outer border body color and the chevy bowtie they include is red so that got the bodycolor treatment too.
The grill just gets attached to the front bumper via 3m double sided tape so with my car being white and the center of the grill being black, I thought it would look tacky if I didn't blacken the area of the bumper that would shine through. I didn't want to paint it though cause that'* pretty permanent so I figured laying down some vinyl would be the way to go. So first thing I did was remove the Knight badge on the front bumper and clean up the leftover adhesive. I used a heat gun and a bondo spreader to get the badge off.
Cleaning the leftover adhesive started off as a royal pain in the a**. I first soaked it in goo gone and let it sit for a while....that got the top layer of foamy stuff taken off pretty easy but the adhesive was being stubborn. Then I brought in the heat gun to help, and some more goo gone, this time using a rag soaked in goo gone to rub it away....still not working too good. So finally I decided to try rubbing away the sticky stuff with my finger, worked like a charm!
Then I found the spot I wanted the grill to be at and taped it in place so I could see the area that needed the vinyl applied
I went to Signs Now and picked up a couple pieces of the vinyl they use to do wraps on cars, placed that behind the grill and traced the outline of the area I needed to cover
After laying down that piece, I had gaps and crevices all over the place so I filled them in with the leftover vinyl.....this was definitely a humbling experience. I figured how hard could it be to lay down vinyl, heh, alot harder than I expected it to be. I could have done a half *** job but that'* not me, I tried to make it look as nice and clean as possible.
Then I gave the outer area of the vinyl a final wipedown with rubbing alcohol, applied the double sided tape to the outer edge of the grill and put it in place
When I got the vinyl they included the scraper/squeegee thingy they use to press it on and get all the air bubbles out and gave me some tips/instructions on how to get it done, very helpful folks at Signs Now. And they only charged me like $8 for 2 pieces of vinyl the size as pictured above. A different sign shop wanted to charge me $20 minimum
 04-03-2011, 03:02 PM
#2
Senior Member
Posts like a Turbo
Join Date: Aug 2009
Location: Indiana
Posts: 487
Likes: 0
Received 0 Likes
on
0 Posts


 04-03-2011, 03:22 PM
#4
Senior Member
Posts like a Turbo
Thread Starter
Join Date: Jul 2010
Location: Sacramento, CA.
Posts: 326
Likes: 0
Received 0 Likes
on
0 Posts
Cool, now when you get a Monte and do the SLP grill you'll know what to do 
LOL. Do you know how many red light tickets I've gotten out of because of that? 

Thread
Thread Starter
Forum
Replies
Last Post
GunsOfNavarone
General GM Chat
4
11-26-2014 12:45 PM