the tan car work log /observations
 03-20-2011, 07:48 AM
#1
Senior Member
Posts like a Corvette
Thread Starter

The quality is just Cell Phone quality but the pictures get the message across plus getting the DSLR greasy is not high on my to do list.
To start off with I have been having issues with "Sandy" so after some digging and looking around and advice on another board it was decided that the valves were floating and the springs needed replaced. I am still on stock springs after 70K miles and with the higher ratio rockers i needed stiffer springs. I picked up the L76 springs and the retainers and locks as a more cost effective approach since I will be doing so much at once.
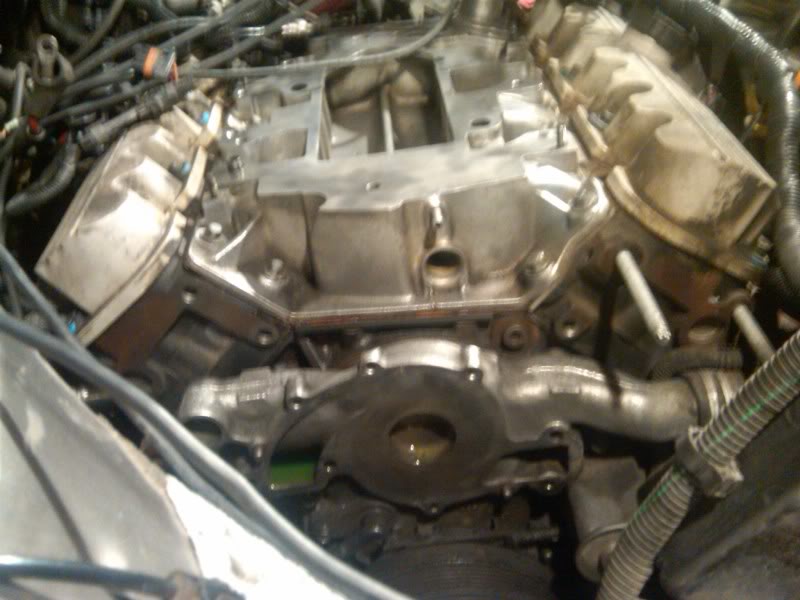
To start off here is the wide shot of the patient all torn down
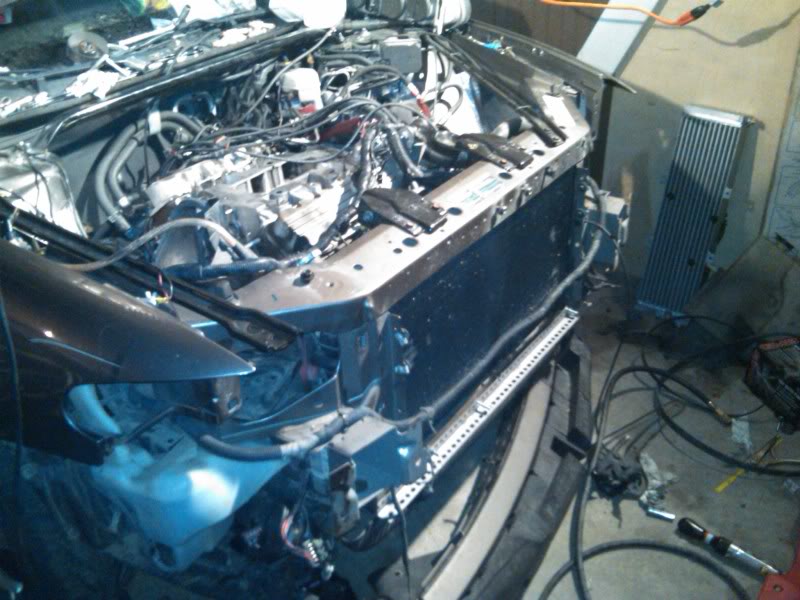
if you notice the angle Iron that is for the mounting of the FMHE and will be adjusted later when everything is said and done.
This is the block off plate for the EGR( this is not the zzp plate just a simple home grown DIY block off that I made for a fraction of zzp price) nothing fancy just a close up for some newer members.
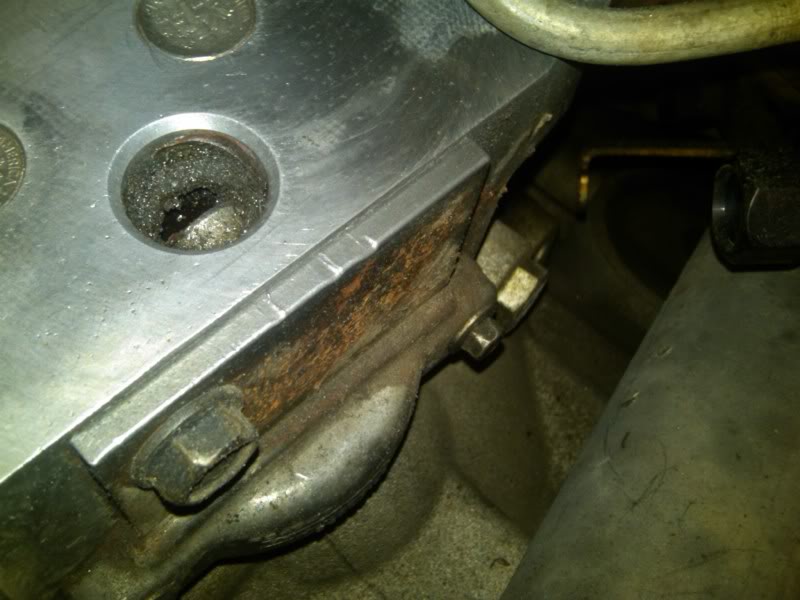
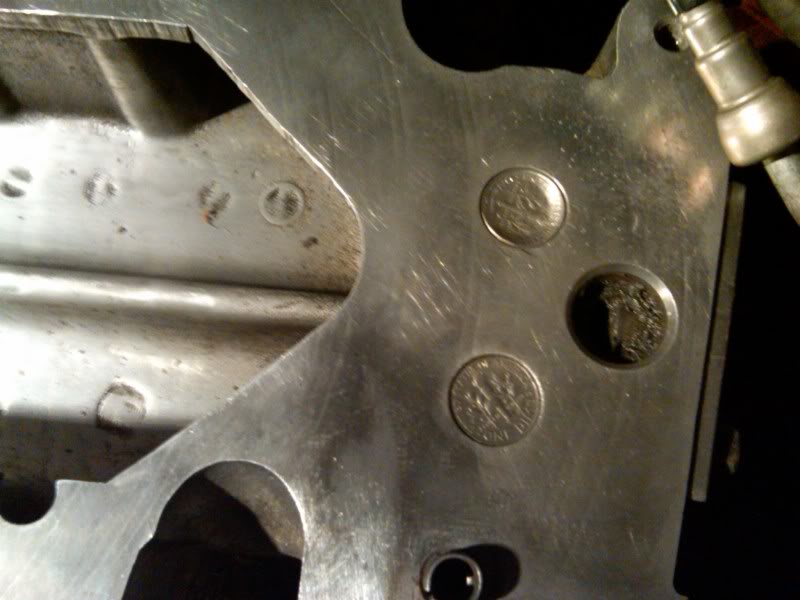
while in the same area there is the coolant T below the EGR that if you have time and a dremel or die grinder can be cut out or down to improve flow. Mine is cut all the way out and smoothed for greatest flow. If you look in the pic you also see that the coolant ports that feed the TB are blocked with a dime on each side. There are 2 ways to get the dime to seat down in there tight, the first is to sand the side of the dime down and use epoxy of choice to secure it either jb-weld or RTV. I used the RTV choice and had very little seepage so this time I used the second method, grabbed a bolt that had the same head size as the dime and tapped the dime that i had sanded the ridges down on into the hole with a hammer and it is sealed tight since aluminum gives and gave enough to allow the dime into the hole firmly. you can coat with RTV later if you so choose.
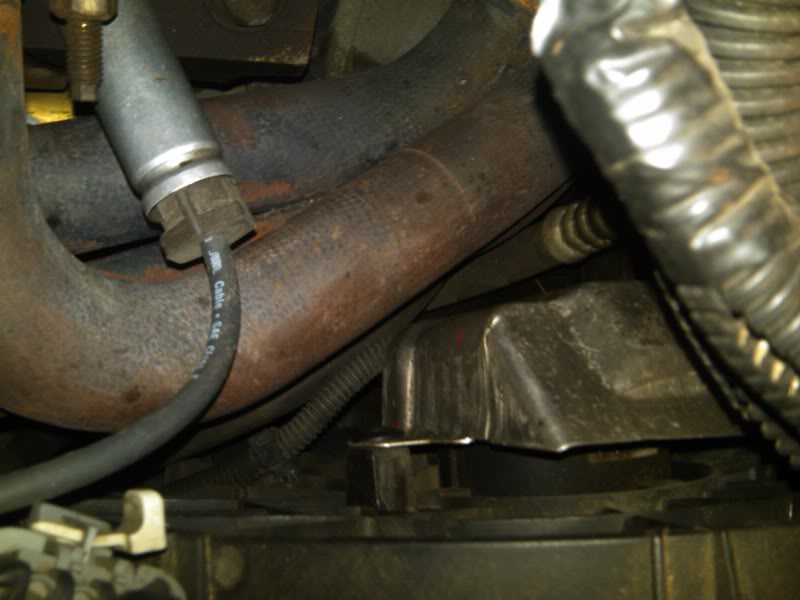
There has been question of space between the fan shroud and the headers with poly mounts. here is 2 pics of the clearance I have with poly dogbone mounts(round and square). headers are Pacesetter headers.
Passenger
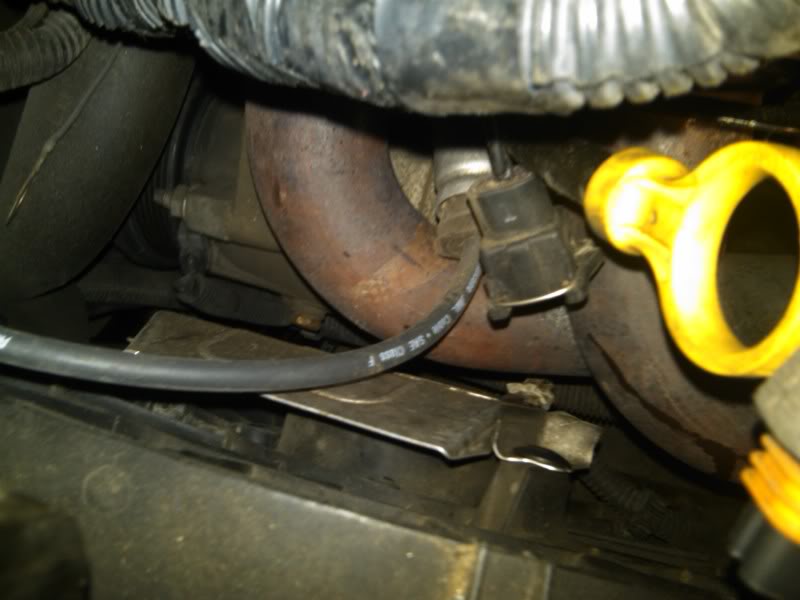
Driver
back to the egr delete topic, This is what the LIM looked like when it was installed over 40K miles ago
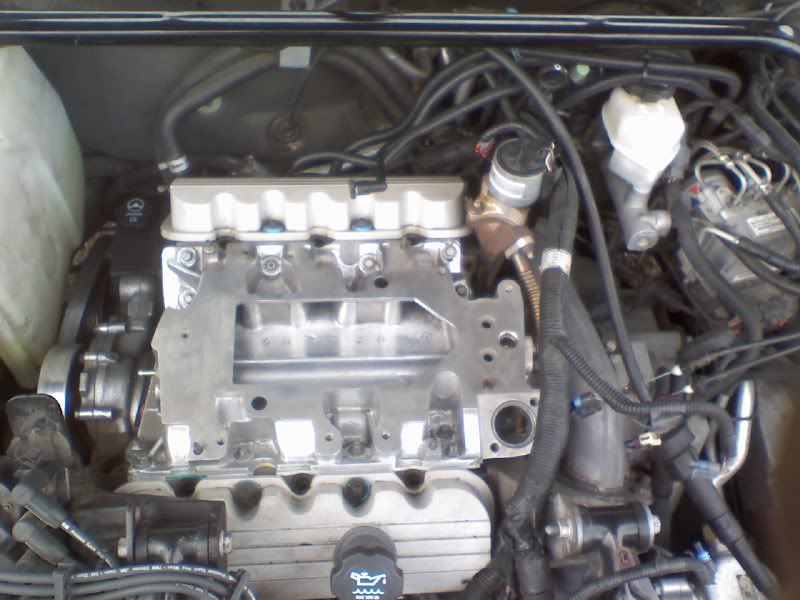
This is what the LIM looked like after nothing more then some wire wheel work on the gasket surface to remove the residue from the gasket. The only cleaning/ work to the opening of the LIM was a quick wipe out to remove the gasket material that had fallen or was flung into there from the wire wheel.
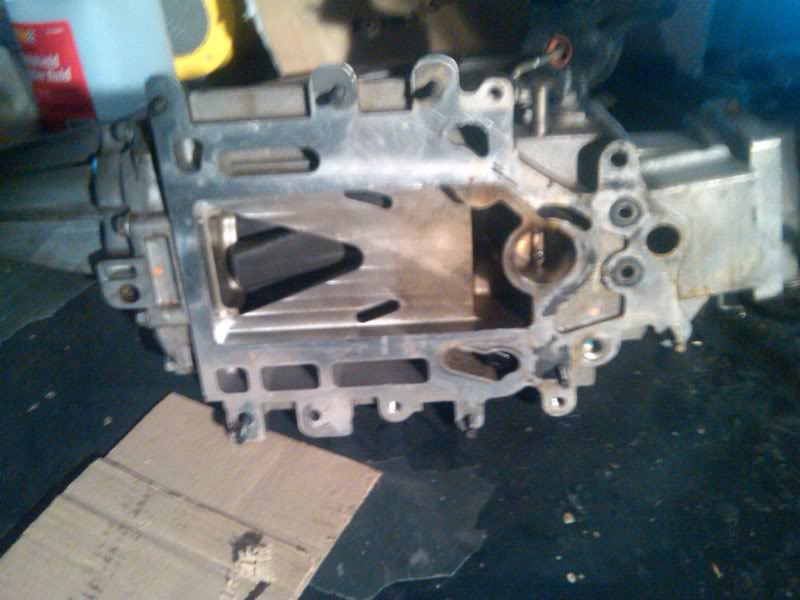
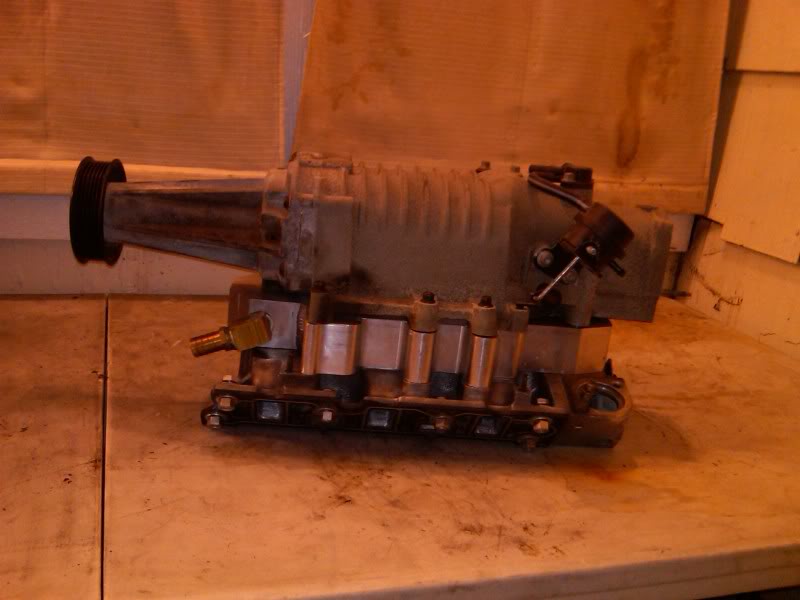
This is a picture of the bottom of the SC that has seen 40k+ miles egr less plus the 3Xk miles that were on it when I got it. Look at the lack of carbon build up on the outlet
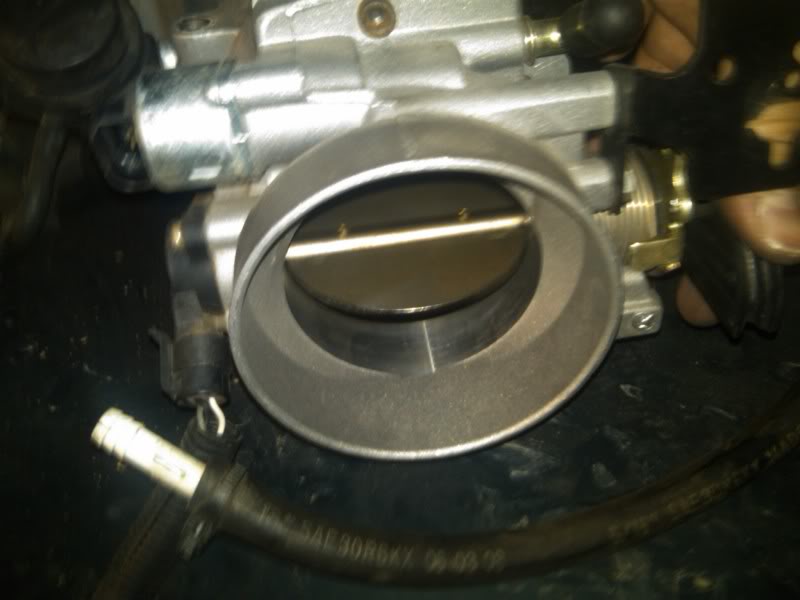
In addition here is another point of reference, Look at the lack of build up on the blade of the throttle body and the cleanliness of the bore of the TB. The TB like the SC has not been touched to be cleaned.
I know that the topic of egr delete is very subjective but this is just my finding when I have gone through the car. I am not looking to start an argument on here just posting what i find and giving all the pertinent info for those who wish to go this route to consider( disclaimer: the egr is part of the emissions system and in some states with tests there is no way around keeping it. Remove at your own risk)
Rockers and springs and observations about those will be edited in tomorrow after it is completed
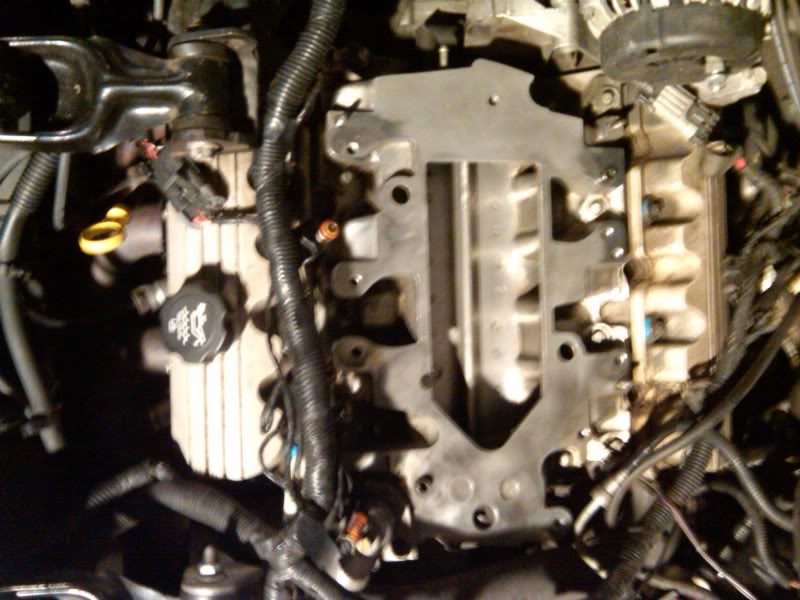
Water Pump died on this car so as a heads up you need to remove the power steering down and back to gain access to the one bolt that is perfectly in line with the power steering pulley.
This picture shows the area where the water pump goes with all the other surrounding accessories removed prepping for the rocker portion. The bolts at least on my car were quite rusted so be prepared to replace the bolts. there are 4 bolts that are bigger and are M8x1.25, Make sure to clean the threads and reapply sealant as they are in the coolant passage and can potentially weep coolant if not sealed.
On to the best part of the tear down and repair/ upgrade. the 1.9 in intense Gen V IC core and Frozen boost FMHE installation
I will update with more pics but this is the only pic I had of the core on my phone. This was mocked up in the basement of my old place using the other Gen V blower i had waiting to go on the 99 build.
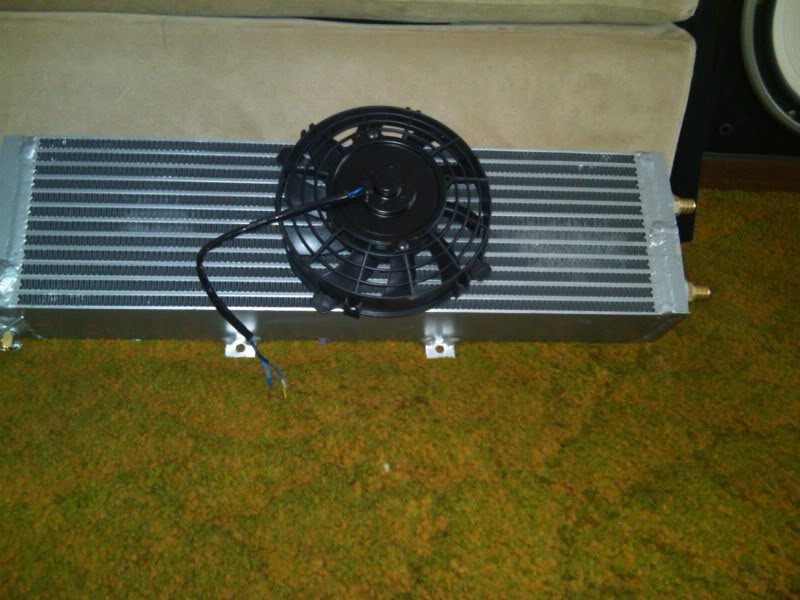
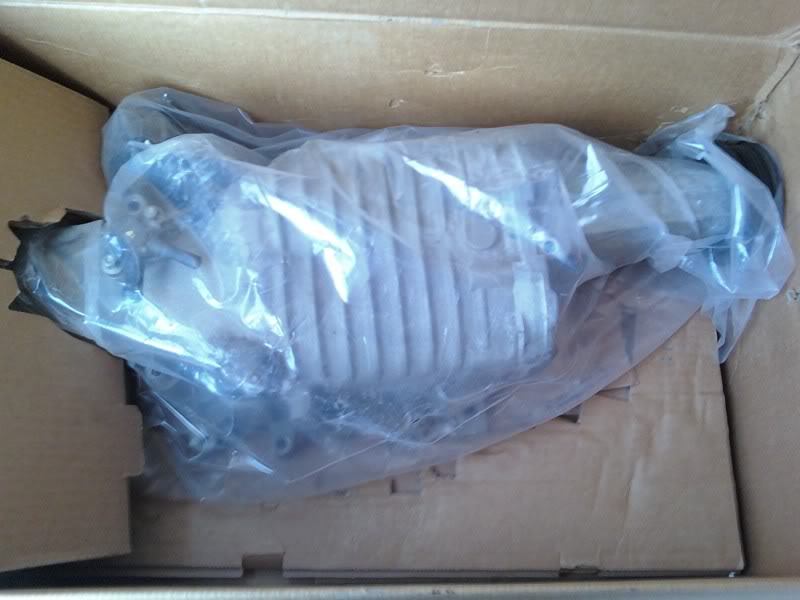
This is the picture that makes me smile everytime I think about what this will do to the car. This is the Frozen boost 26x7x3.5 FMHE with the optional 7 inch fan that Frozen boost sells. I am debating how to wire the fan but I think I am going to piggy back it into the pump wiring which will be tapped into the key on power that way it runs full speed at all times to keep the coolant circulating at a constant speed to reduce the likelihood of heatsoak that using the switch from zzp would more then likely encourage.
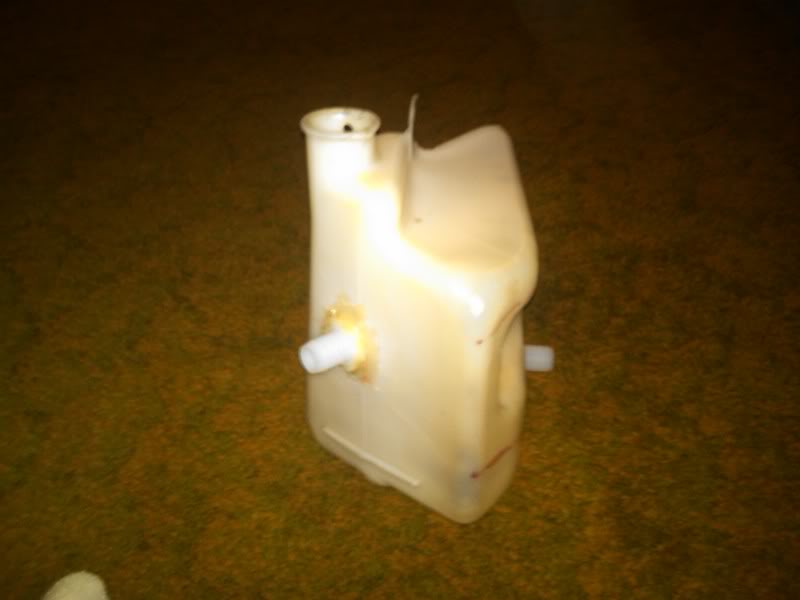
Along with the lines and fittings I will be using this as a way to increase capacity and decrease the ambient temperature of the coolant by allowing more coolant and greater cooling properties. I used a stock coolant overflow from a 97-98 w body and will pushpin it into the stock location. The fittings are from lowes and are epoxied into the bottle to prevent leaks and maintain the greatest capacity.
This is a post just for Reference only and for others to consider when planning their own systems. I DO NOT take responsibility if you follow this and something doesn't work. Just use all this as food for thought.
To start off with I have been having issues with "Sandy" so after some digging and looking around and advice on another board it was decided that the valves were floating and the springs needed replaced. I am still on stock springs after 70K miles and with the higher ratio rockers i needed stiffer springs. I picked up the L76 springs and the retainers and locks as a more cost effective approach since I will be doing so much at once.
To start off here is the wide shot of the patient all torn down
if you notice the angle Iron that is for the mounting of the FMHE and will be adjusted later when everything is said and done.
This is the block off plate for the EGR( this is not the zzp plate just a simple home grown DIY block off that I made for a fraction of zzp price) nothing fancy just a close up for some newer members.
while in the same area there is the coolant T below the EGR that if you have time and a dremel or die grinder can be cut out or down to improve flow. Mine is cut all the way out and smoothed for greatest flow. If you look in the pic you also see that the coolant ports that feed the TB are blocked with a dime on each side. There are 2 ways to get the dime to seat down in there tight, the first is to sand the side of the dime down and use epoxy of choice to secure it either jb-weld or RTV. I used the RTV choice and had very little seepage so this time I used the second method, grabbed a bolt that had the same head size as the dime and tapped the dime that i had sanded the ridges down on into the hole with a hammer and it is sealed tight since aluminum gives and gave enough to allow the dime into the hole firmly. you can coat with RTV later if you so choose.
There has been question of space between the fan shroud and the headers with poly mounts. here is 2 pics of the clearance I have with poly dogbone mounts(round and square). headers are Pacesetter headers.
Passenger
Driver
back to the egr delete topic, This is what the LIM looked like when it was installed over 40K miles ago
This is what the LIM looked like after nothing more then some wire wheel work on the gasket surface to remove the residue from the gasket. The only cleaning/ work to the opening of the LIM was a quick wipe out to remove the gasket material that had fallen or was flung into there from the wire wheel.
This is a picture of the bottom of the SC that has seen 40k+ miles egr less plus the 3Xk miles that were on it when I got it. Look at the lack of carbon build up on the outlet
In addition here is another point of reference, Look at the lack of build up on the blade of the throttle body and the cleanliness of the bore of the TB. The TB like the SC has not been touched to be cleaned.
I know that the topic of egr delete is very subjective but this is just my finding when I have gone through the car. I am not looking to start an argument on here just posting what i find and giving all the pertinent info for those who wish to go this route to consider( disclaimer: the egr is part of the emissions system and in some states with tests there is no way around keeping it. Remove at your own risk)
Rockers and springs and observations about those will be edited in tomorrow after it is completed
Water Pump died on this car so as a heads up you need to remove the power steering down and back to gain access to the one bolt that is perfectly in line with the power steering pulley.
This picture shows the area where the water pump goes with all the other surrounding accessories removed prepping for the rocker portion. The bolts at least on my car were quite rusted so be prepared to replace the bolts. there are 4 bolts that are bigger and are M8x1.25, Make sure to clean the threads and reapply sealant as they are in the coolant passage and can potentially weep coolant if not sealed.
On to the best part of the tear down and repair/ upgrade. the 1.9 in intense Gen V IC core and Frozen boost FMHE installation
I will update with more pics but this is the only pic I had of the core on my phone. This was mocked up in the basement of my old place using the other Gen V blower i had waiting to go on the 99 build.
This is the picture that makes me smile everytime I think about what this will do to the car. This is the Frozen boost 26x7x3.5 FMHE with the optional 7 inch fan that Frozen boost sells. I am debating how to wire the fan but I think I am going to piggy back it into the pump wiring which will be tapped into the key on power that way it runs full speed at all times to keep the coolant circulating at a constant speed to reduce the likelihood of heatsoak that using the switch from zzp would more then likely encourage.
Along with the lines and fittings I will be using this as a way to increase capacity and decrease the ambient temperature of the coolant by allowing more coolant and greater cooling properties. I used a stock coolant overflow from a 97-98 w body and will pushpin it into the stock location. The fittings are from lowes and are epoxied into the bottle to prevent leaks and maintain the greatest capacity.
This is a post just for Reference only and for others to consider when planning their own systems. I DO NOT take responsibility if you follow this and something doesn't work. Just use all this as food for thought.
 03-20-2011, 08:39 AM
#2
Retired Senior Admin


Expert Gearhead
Join Date: May 2006
Location: Sheboygan Wisconsin
Posts: 29,661
Likes: 0
Received 28 Likes
on
24 Posts


You should see a high RPM improvement with the new springs.
I love how clean the engine is without a EGR, it blows my mind that people think having a EGR runs so much cleaner. I noticed the same thing when I did my engine. All carboned up. Disabled the EGR and drove for a year, and no carbon.
Great job. And I wouldn't worry to much about the header being close to the fan. Mine is even closer.
03-22-2011, 06:24 AM
#3
Senior Member
Posts like a Corvette
Thread Starter
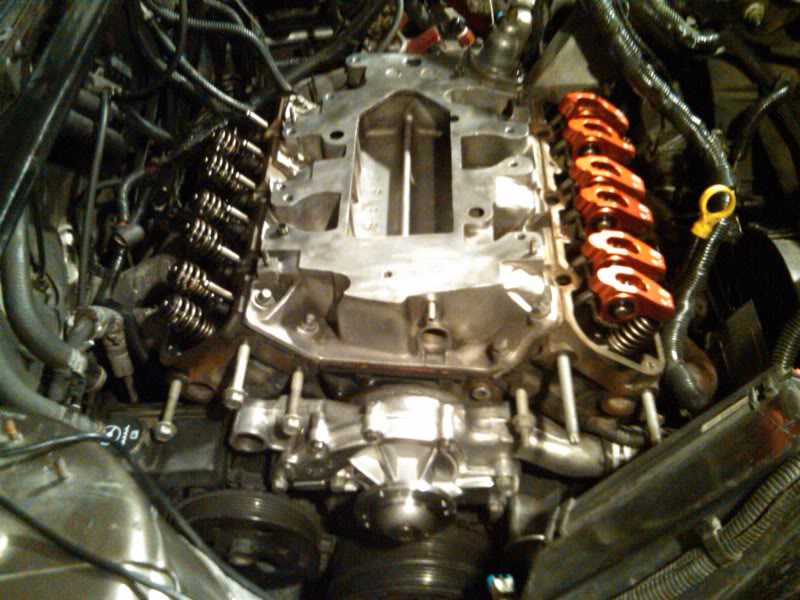
just a little update I got the WP on and the springs changed and the front bank of rockers bolted back on.
on to the pics
coolant block off
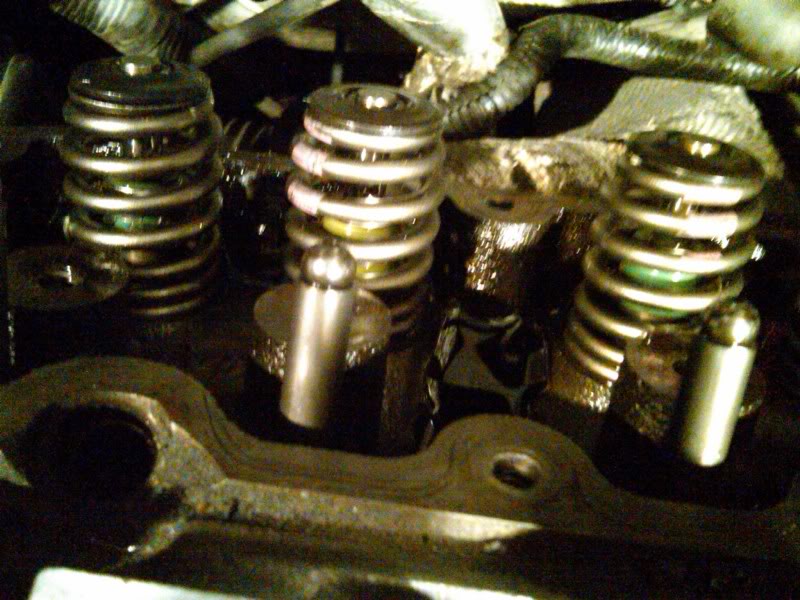
L76 springs
wide shot of the bay as she sleeps tonight
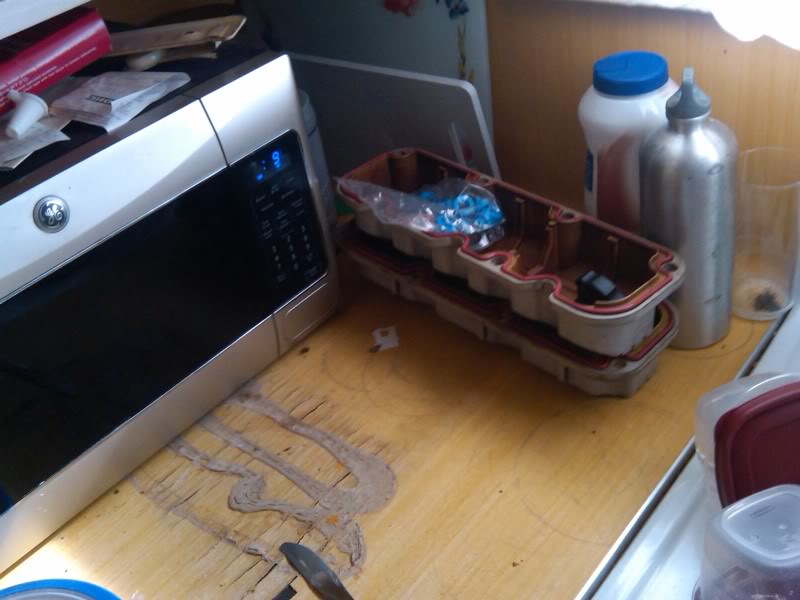
valve covers are in the sink soaking and degreasing
rockers will be cleaned up and bolted on tomorrow or wednesday and and hopefully bolted up together on thursday then run the FMHE and fan and pump and lines.
working as best i can between 40 hrs at work and school full time so if updates are scattered you will understand
on to the pics
coolant block off
L76 springs
wide shot of the bay as she sleeps tonight
valve covers are in the sink soaking and degreasing
rockers will be cleaned up and bolted on tomorrow or wednesday and and hopefully bolted up together on thursday then run the FMHE and fan and pump and lines.
working as best i can between 40 hrs at work and school full time so if updates are scattered you will understand
04-04-2011, 07:09 AM
#4
Senior Member
Posts like a Corvette
Thread Starter
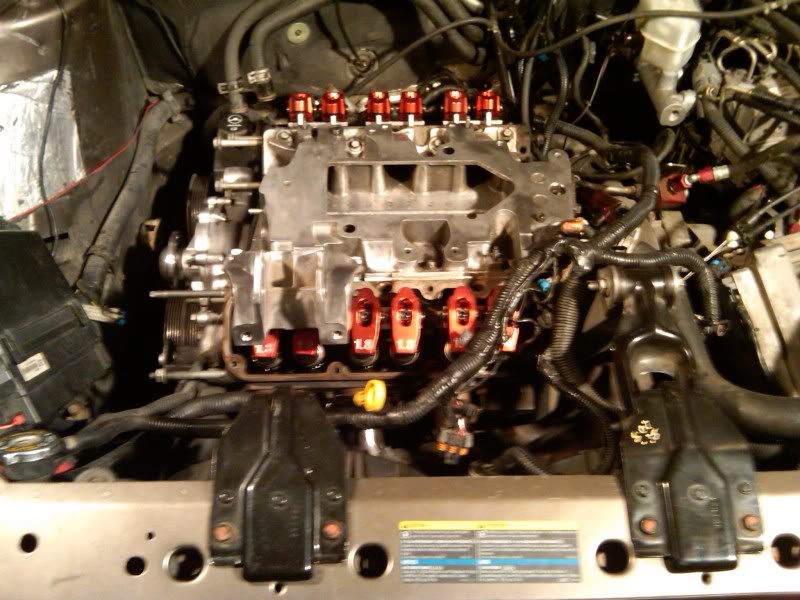
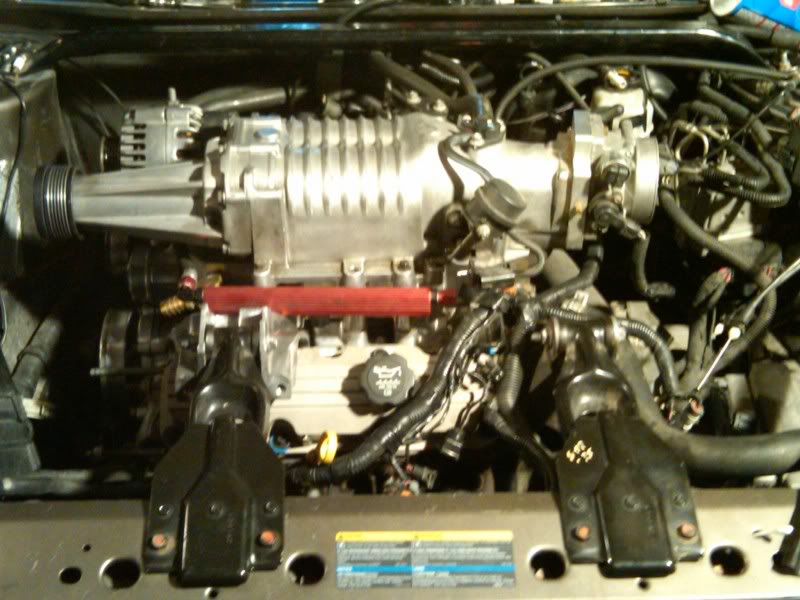
OK here is a little insight for the newbs... the gen v I have on my car does not come shiny like mine is, I have had a couple ppl ask me offline so here is a before and after
Before
After many many hrs and at least 2 wire wheels and a dremel and some sand paper and a couple cans of carb cleaner and some aluminum polish you get this
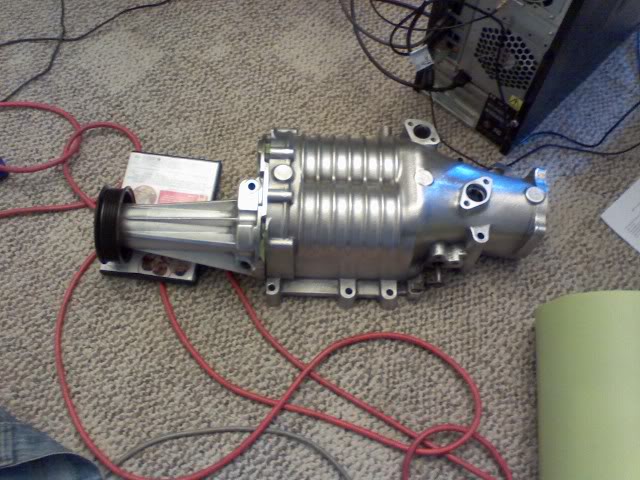
no that is not paint that is bare aluminum that is cleaned and shined to the point to make cleaning easier and smoother
does this gain anything no but it is very eye catching when all cleaned up and detailed
Onto the updates
had some time to get out in the garage and get some work done... Cleaned up the junk that had accumulated and got some other things moved to more proper places since the weather is now nicer and allows less bulky clothing and allows more work. The to do list for the garage is to finish the wiring and finish the insulation and wall board.
I started with a quick mock up to see what I needed fit wise so I shot a couple pics
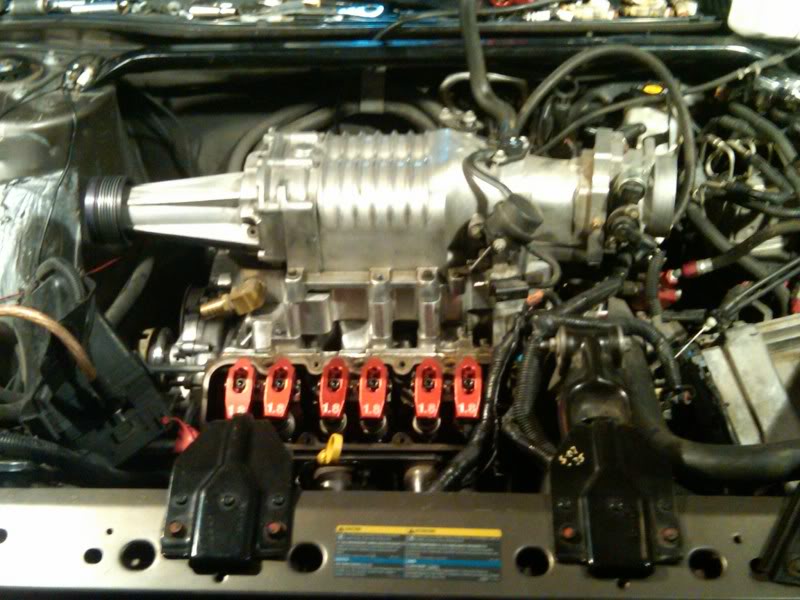
then with less light
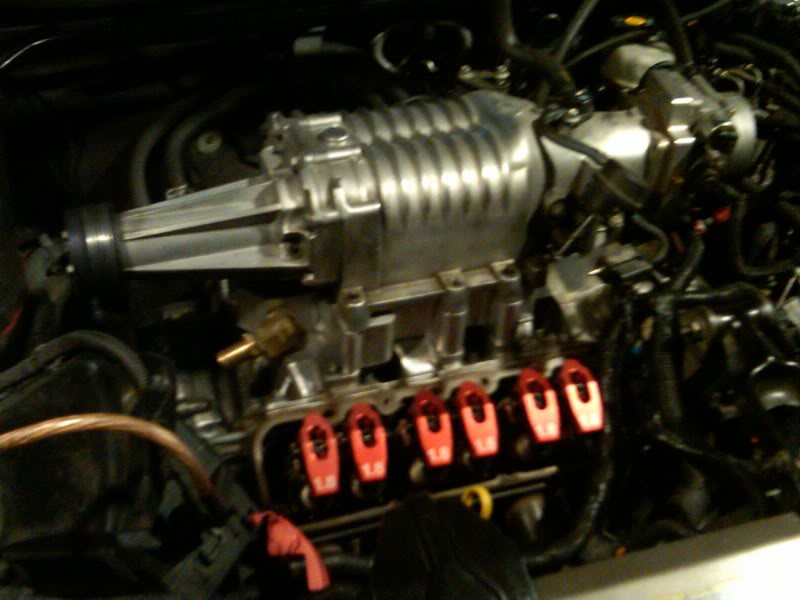
you can see the little bit of oil and dirt on the blower so it will get a clean up before final installation and I will re-shine the TB up some more too.
took the blower off and set it back where I had it and this is what the core looks like
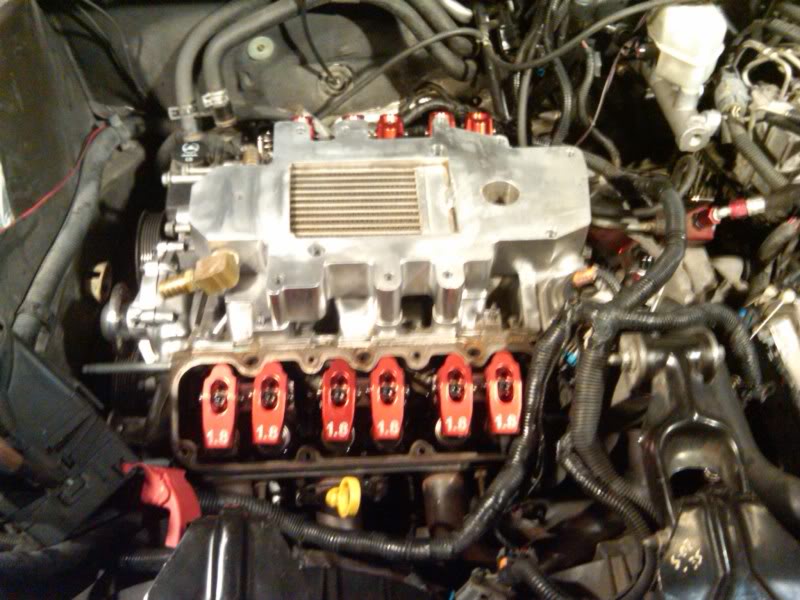
Some may notice that i have all but 1 rocker in well long story short make sure the pedestals don't catch and twist as you are tightening the bolt. I have pedestals coming from HS so when they get here the rockers will go on and get the final tq. I will spin the motor and see if the tq amount changes and post the results.
you know you have a wonderful GF when this is something that she doesn't say anything about. I don't have a parts washer and the other sink we have is too small to clean them in so I used the kitchen sink to get the gunk off lol
finally got the FMHE mounted and secured. The fan will cause me to have to notch the impact bar to account for the fan clearance

The 2 questions I have now is where and how to wire the pump into the fuse block and whether to wire the fan to the fog lights so i can control it with the foglight switch in the cabin. The next big project will be trying to fit the HUD into the car and make it work not too long after the IC goes in. The wheel bearing and wire tuck and N2O will finally get done and get the car ready to make some 1320 ft runs this summer
Before
After many many hrs and at least 2 wire wheels and a dremel and some sand paper and a couple cans of carb cleaner and some aluminum polish you get this
no that is not paint that is bare aluminum that is cleaned and shined to the point to make cleaning easier and smoother
does this gain anything no but it is very eye catching when all cleaned up and detailed
Onto the updates
had some time to get out in the garage and get some work done... Cleaned up the junk that had accumulated and got some other things moved to more proper places since the weather is now nicer and allows less bulky clothing and allows more work. The to do list for the garage is to finish the wiring and finish the insulation and wall board.
I started with a quick mock up to see what I needed fit wise so I shot a couple pics
then with less light
you can see the little bit of oil and dirt on the blower so it will get a clean up before final installation and I will re-shine the TB up some more too.
took the blower off and set it back where I had it and this is what the core looks like
Some may notice that i have all but 1 rocker in well long story short make sure the pedestals don't catch and twist as you are tightening the bolt. I have pedestals coming from HS so when they get here the rockers will go on and get the final tq. I will spin the motor and see if the tq amount changes and post the results.
you know you have a wonderful GF when this is something that she doesn't say anything about. I don't have a parts washer and the other sink we have is too small to clean them in so I used the kitchen sink to get the gunk off lol
finally got the FMHE mounted and secured. The fan will cause me to have to notch the impact bar to account for the fan clearance
The 2 questions I have now is where and how to wire the pump into the fuse block and whether to wire the fan to the fog lights so i can control it with the foglight switch in the cabin. The next big project will be trying to fit the HUD into the car and make it work not too long after the IC goes in. The wheel bearing and wire tuck and N2O will finally get done and get the car ready to make some 1320 ft runs this summer
04-18-2011, 04:11 PM
#5
Senior Member
Posts like a Corvette
Thread Starter
sunday started with the car looking like this
and ended up looking like this
that is just a mock up pic but the IC core is rtved to the lim and the the rails are mocked up but the accessories on there ready to get reassembled all i got to do now is finish shining up the Bonne coil pack setup and get it put on and all the accessories will be ready to go and i am shooting for a Thursday or Friday first start up and break in and initial tune because mine is going to be way off now since there is 42.5# injectors going in for this setup. While this may not be needed just yet i am sure when I get down to the 3.0 after some tuning and dialing in they will be the safety net i need.
as for the fitment of the NA bracket I will say this up front drilling into the head took a lot of nerves to do. that said it is slow going it prolly took me 4+ hrs to drill it and tap it since the bit needs to stay lubed or goes dull super quick. for those looking to do this on the car a second set of hands and a corded drill or a big air compressor and air drill will be very handy since you will burn through cordless batteries really fast and not make much headway. also gradually work the bit size up to get the best and cleanest hole. shop vac and play-dough will be handy as a buffer to prevent accidental metal shavings getting in the head. also make sure you use thread sealer since the hole goes into where oil is and you dont need oil seepage.
for those of you who wondered about the tqing of the rockers I did roll the motor over just to be safe but it seemed that it made no difference in the tq as none really seemed to need additional tq when either opened or shut.
an additional note for those of you that have the PRJ rails and want to do the NA bracket be warned that you will have to shave some metal on the bracket to get the rails to set right. I will update on this when I have it finally shaved to allow them to sit properly there appears to only be like a 1/4 inch and a nub that needs to be addressed not a huge issue.
the final thing i need to figure out is to where to stick the pump if I dont use the crash bar as a place to mount it to. Other than the loose ends I hope to see what a crap tune on an IC car will do and I am hoping to get a ve and maf tune dialed in by monday to start adding timing and see what kind of results it gets me. then starts the 2.25 in IC install and rocker install on the 99 regal then drop it in and try and get it back on the road and drivable so that the trans ams can get the heart transplants finished and get them ready for the track.
 04-18-2011, 11:45 PM
#8
-- SITE DONATOR --
True Car Nut
There are many different ways you can wire your pump up, but here is what worked for me. I ran one of my ignition switched lines inside the cabin into a switch, then out to a relay by the pump to trigger the switch. This can be a thin wire as it is not actually powering anything. Then I spliced a wire into the ignition wire from the fuse box under the hood (which I also fused) and ran it to the relay for constant power. The reason for the switch in the cabin is so that I could shut the pump off when I needed the car on for tuning but the engine wasn't actually running.
Bill also made a great suggestion to me after I did mine. When wiring up the relay you want it to be default on, so when you turn the car on it will feed power to the relay and start the pump unless you have the switch flipped which will disable the relay. This way if for some reason the switch fails your relay will fault on rather than disable your pump.
Bill also made a great suggestion to me after I did mine. When wiring up the relay you want it to be default on, so when you turn the car on it will feed power to the relay and start the pump unless you have the switch flipped which will disable the relay. This way if for some reason the switch fails your relay will fault on rather than disable your pump.
04-20-2011, 12:26 PM
#9
Senior Member
Posts like a Corvette
Thread Starter
04-25-2011, 05:45 AM
#10
Senior Member
Posts like a Corvette
Thread Starter
no pics but a little info update for all you guys that are watching this
I put the bonneville setup and the NA bracket on the scale and the difference is a 7 lb savings going with the alum bracket and the bonne tensioner.
After the trimming and grinding to get it to fit perfect it may be closer to 7.33-7.5 lbs savings. the stock w body bracket not including the other tensioner is 10 lbs and the stock bonneville setup is right at 3 lbs. may not seem like much but every little bit helps. That is the update for today, today was spent shaping and smoothing and clearancing. If all works out the car should fire over this week if I have time to play with it.