Installed new power steering pump w/pics -( 56K )-
 01-05-2008, 07:47 PM
#1
Senior Member
Posts like a 4 Banger
Thread Starter

Join Date: Oct 2003
Location: SW Indiana
Posts: 133
Likes: 0
Received 0 Likes
on
0 Posts

Finally got fed up with that old power steering pump. What a whiner!!! Picked up a new (remanufactured) pump at Auto Zone for $60.00 and went to work. If you want to tackle a pump replacement you will need a 13 mm socket and a short extension to remove the 2 mounting bolts and a 16 mm flare nut wrench to remove the steel pressure line fitting from the pump. There is also a rubber low pressure return hose that can be removed with pliers.
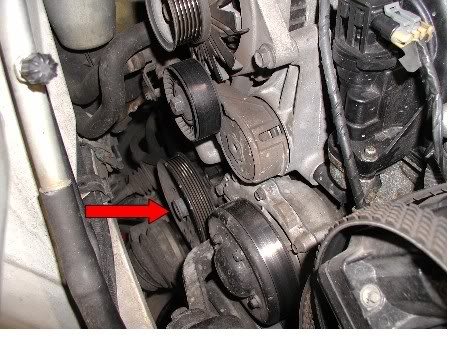
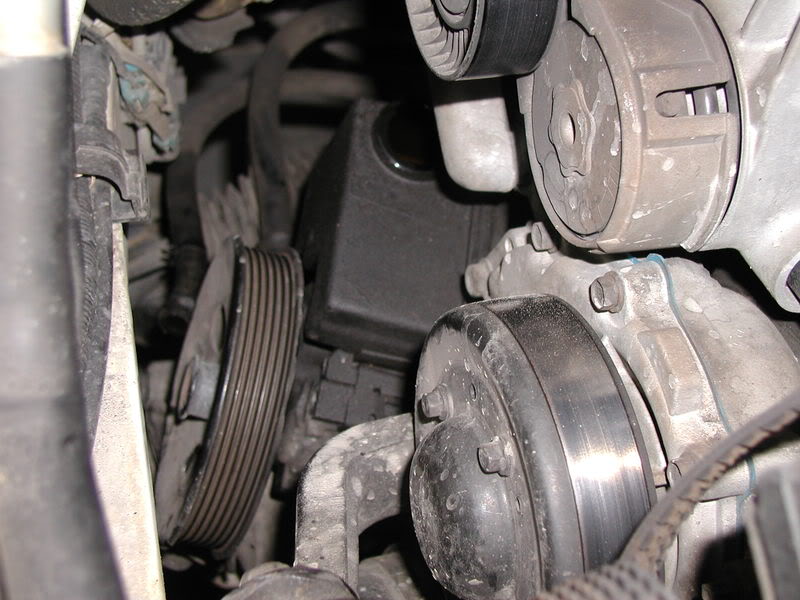
Remove the serpentine belt from the power steering pump pulley. The first picture is a top view of the pump pulley with the belt removed.
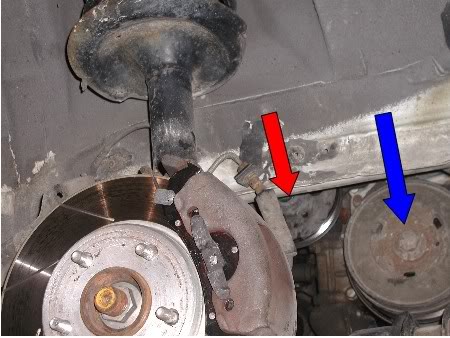
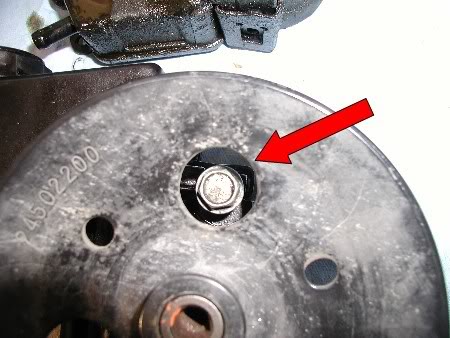
Lift the car, support with jack stands and remove the front right tire. Remove the plastic fender liner to gain access to the pump from under the fender well. Next picture is a view above the brake rotor looking through the fender. Red arrow shows the power steering pump. Blue arrow shows crank shaft pulley.
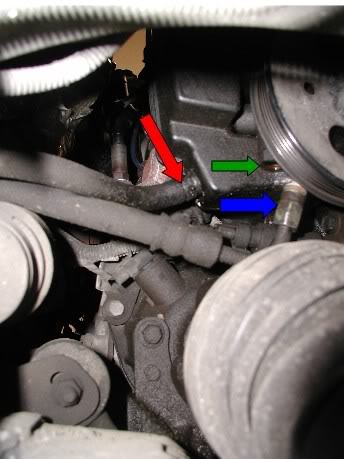
Using a 16 mm flare nut wrench or open end wrench remove steel flared line. (Blue arrow) Green arrow shows open hole in pump housing where line was removed. At red arrow, squeeze hose clamp with pliers and remove hose from barb. Better have a catch pan handy when you remove the lines.
Rotate pump pulley to gain access to 13 mm mounting bolt heads through larger holes in pulley face. I had pretty good luck removing the upper bolt working from the top of the engine and then removed the lower bolt working through the fender well.
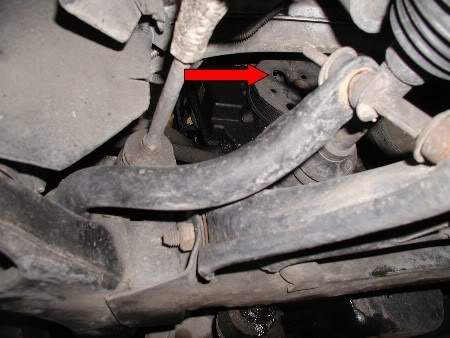
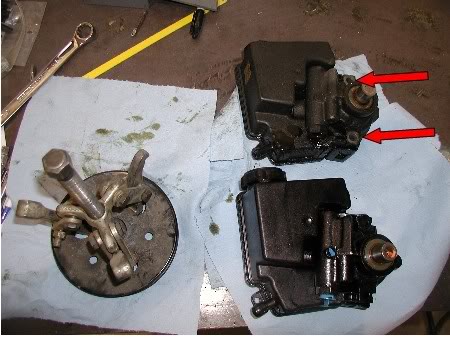
Next picture shows the pump with all bolts and lines removed and ready to be lifted out from the top.
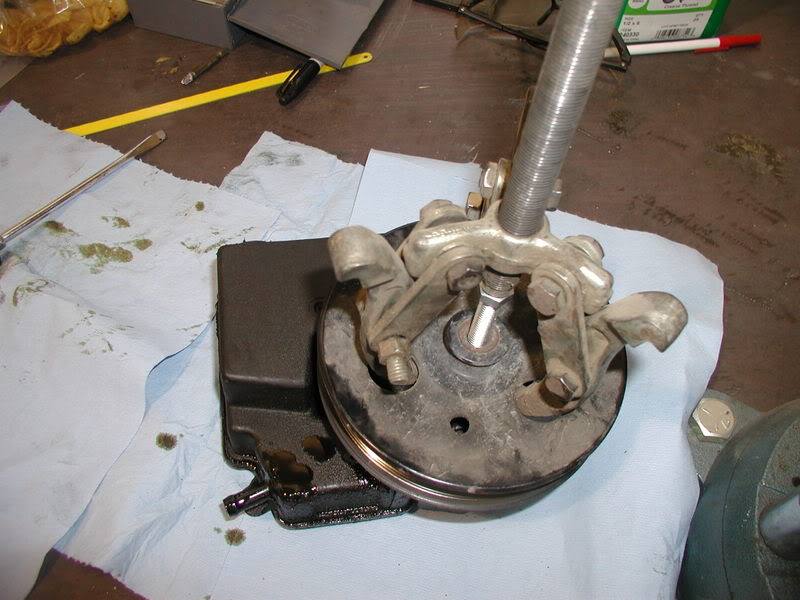
I used a 3 legged puller to remove the pulley from the old pump. Not sure if this is the official tool for the job but hey, I'm not Mr. Goodwrench.
Now we have the pulley removed. The red arrows show the mounting holes in the pump body where the 13 mm bolts pass through to the tapped holes in the block.
Now the pulley is installed on the new pump and it'* ready to find a new home on my Bonnie.
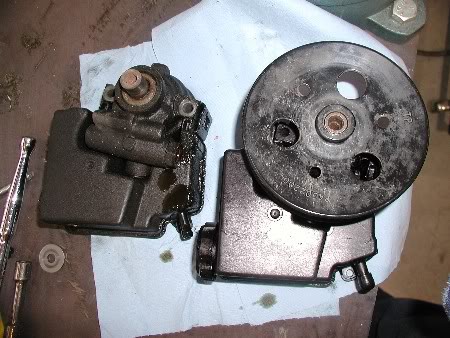
This shows the 13 mm bolt head lined up with the hole in the pulley face. This shows a little better view of the mounting bolts that were removed earlier.
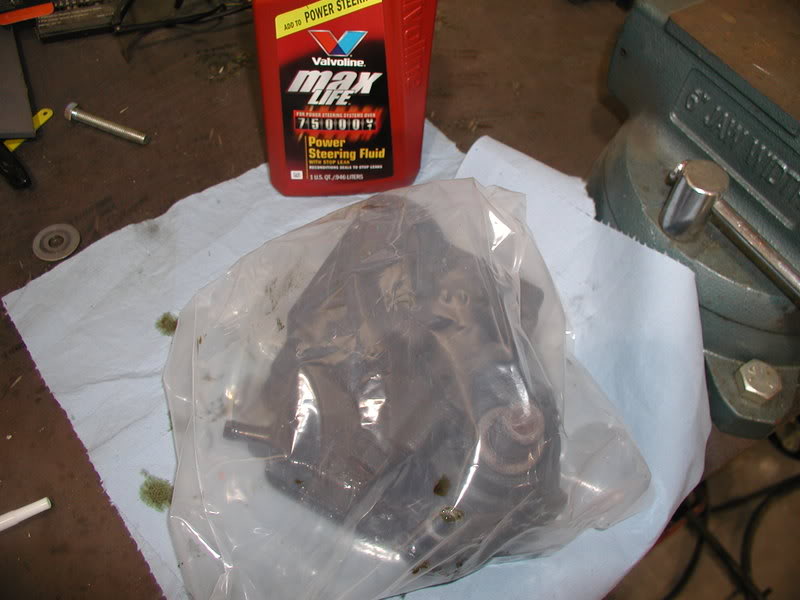
Old pump is back in the plastic bag and ready for a ride to town so I can get my $22.00 core charge back.
THE END!
Remove the serpentine belt from the power steering pump pulley. The first picture is a top view of the pump pulley with the belt removed.
Lift the car, support with jack stands and remove the front right tire. Remove the plastic fender liner to gain access to the pump from under the fender well. Next picture is a view above the brake rotor looking through the fender. Red arrow shows the power steering pump. Blue arrow shows crank shaft pulley.
Using a 16 mm flare nut wrench or open end wrench remove steel flared line. (Blue arrow) Green arrow shows open hole in pump housing where line was removed. At red arrow, squeeze hose clamp with pliers and remove hose from barb. Better have a catch pan handy when you remove the lines.
Rotate pump pulley to gain access to 13 mm mounting bolt heads through larger holes in pulley face. I had pretty good luck removing the upper bolt working from the top of the engine and then removed the lower bolt working through the fender well.
Next picture shows the pump with all bolts and lines removed and ready to be lifted out from the top.
I used a 3 legged puller to remove the pulley from the old pump. Not sure if this is the official tool for the job but hey, I'm not Mr. Goodwrench.
Now we have the pulley removed. The red arrows show the mounting holes in the pump body where the 13 mm bolts pass through to the tapped holes in the block.
Now the pulley is installed on the new pump and it'* ready to find a new home on my Bonnie.
This shows the 13 mm bolt head lined up with the hole in the pulley face. This shows a little better view of the mounting bolts that were removed earlier.
Old pump is back in the plastic bag and ready for a ride to town so I can get my $22.00 core charge back.
THE END!
 01-05-2008, 09:26 PM
#2
Senior Member
Posts like a Camaro

Join Date: Jul 2004
Location: Canada, Ontario
Posts: 1,090
Likes: 0
Received 0 Likes
on
0 Posts
Thanks for the great write up, I was just about to replace my power steering pump, this helps alot, How long did it take? Did you have to bleed out the system or anything?
Cheers
Cheers
01-05-2008, 09:44 PM
#3
Senior Member
Posts like a 4 Banger
Thread Starter
Join Date: Oct 2003
Location: SW Indiana
Posts: 133
Likes: 0
Received 0 Likes
on
0 Posts
It took about 3 hours and that included a little extra time messing around with the pictures.
I just hooked up the lines to the new pump, filled the reservoir to the full mark and started the engine keeping it at the lowest idle speed for a couple minutes to let the pump build pressure and then I shut the engine off and let some air bubbles settle out of the fluid. Next I rechecked fluid level and started engine again. This time I worked the steering wheel back and forth lock to lock 15-20 times and then rechecked level.
After agitating the fluid a while, I used a suction device to empty the reservoir and refilled with fresh fluid. I think I will empty and refill a couple more times after I drive it a while.
Not sure if this is the official way to do it but it seem to work ok for me. It drives good with no whining or strange noises. Probably be a good idea to watch the fluid level pretty close for a few days and see if any more air works its way out of the system.
Please use at your own risk. Your mileage may vary..........

 I will be doing mine sometime soon

 01-07-2008, 12:06 PM
#8
Senior Member
Certified GM nut

Join Date: Jul 2004
Location: West Point, Utah - Village Idiot
Posts: 1,606
Likes: 0
Received 2 Likes
on
2 Posts
Originally Posted by toolmaker
I'm going to change mine tomorrow, will the pump come out through the top the same on the supercharged engines ?
 01-07-2008, 12:37 PM
#10
Senior Member
Posts like a Northstar

I'm glad to hear that your replacement went smoothly.
I'm wondering how you were able to remove the pump up through the engine compartment. When I replaced the pump on my '92 SSE */c, it was extremely difficult to manouver the pump to get it out of the engine compartment. There didn't appear to be any way to remove it from above. I removed it from below, and I had to rotate and manouver it for quite a while before I was able to finally get it out.
And getting the right version of the pump for my '92 was also very difficult. I ordered and returned a few wrong versions before I found the right one.