New and improved upper door panel trim
 11-20-2004, 04:37 PM
#1
Senior Member
True Car Nut
Thread Starter

If you've ever removed your door panels, you know how much of a nightmare it is to unclip the upper trim. You might have even broken the trim as i did. Between my car and the parts car, I was able to get four door panels that I was happy with but only three upper trim pieces. I've been driving around without one on the passenger'* front door for some time. We can't have that now... can we. Here is my resolution to the upper trim replacement.
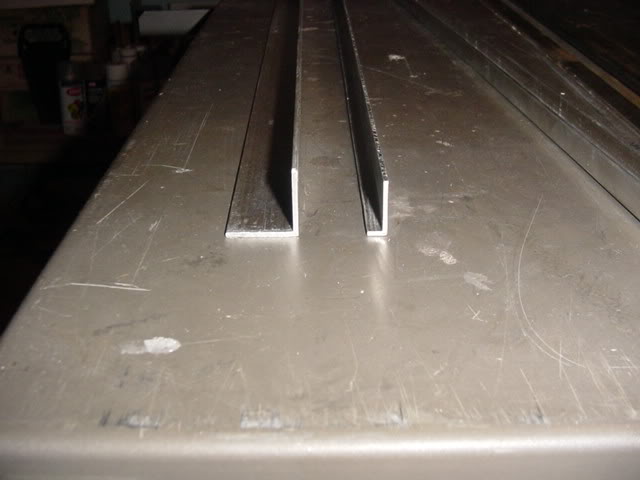
I went to the hardware store and bought a 6' piece 1/2" aliminum channel and a 8' piece (they didn't have a 6 footer) of 1" x 1/16" angle aluminum. The longer length were cut to a managable 36" or so. I also had to cut the angle legs to 5/16" X 13/16". I did this on my table saw with an aluminum cutting blade. Here'* the original and the cut pieces:
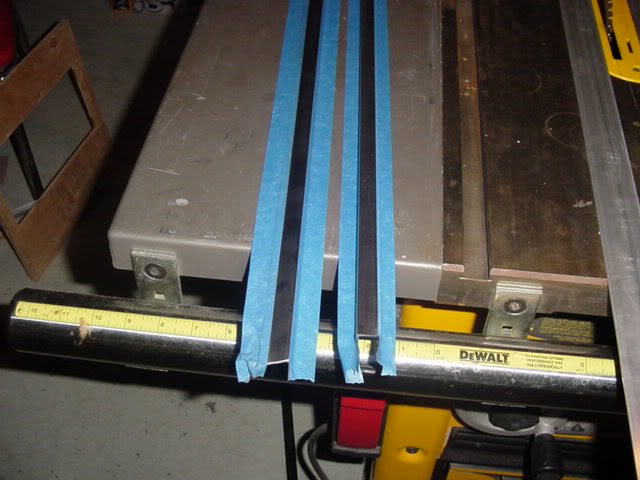
In order to bond the two pieces of aluminum, I used contact cement. I taped the areas that I did not want any cement on and applied after cleaning the surfaces with 0000 steel wool.
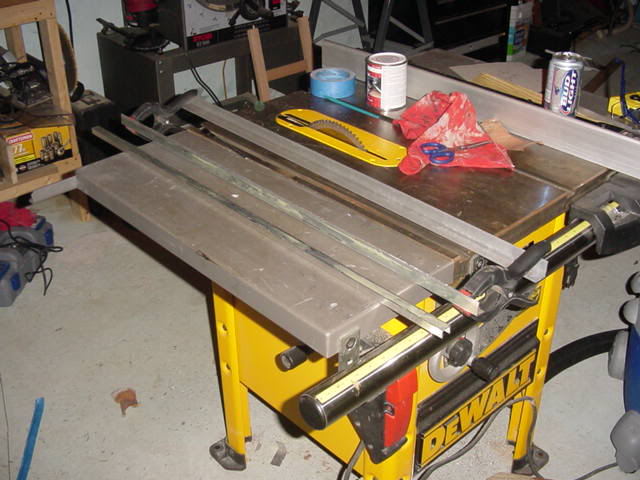
Once the contact cement was ready, I joined the two pieces. This was a little difficult because I wanted to duplicate the shape of the OEM piece by recessing the part that faces the window. I did this by clamping the remains of the 5/16" cut to the bottom of the angle material. This produces a 1/16" recess.
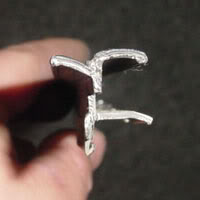
Here'* a side-by-side comparo of the two profiles:

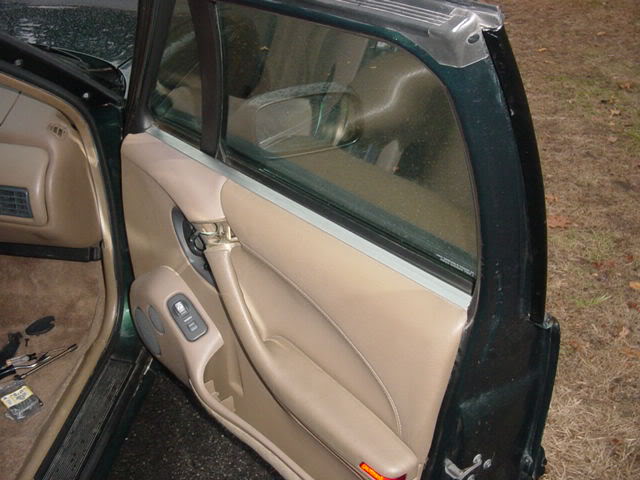
Unlike the OEM piece, the new and improved one does not lock the panel at the top of the door. My observations when I had no trim at all showed that it was really not necessary. The bolt at the top of the handle provided enough support to hold the top of the panel.
I just have to decide on a finish for the new trim piece. I've narrowed it to three choices:
Body color (green)
Polished aliminum
Textured and painted just like my new dash trim panel.
I went to the hardware store and bought a 6' piece 1/2" aliminum channel and a 8' piece (they didn't have a 6 footer) of 1" x 1/16" angle aluminum. The longer length were cut to a managable 36" or so. I also had to cut the angle legs to 5/16" X 13/16". I did this on my table saw with an aluminum cutting blade. Here'* the original and the cut pieces:
In order to bond the two pieces of aluminum, I used contact cement. I taped the areas that I did not want any cement on and applied after cleaning the surfaces with 0000 steel wool.
Once the contact cement was ready, I joined the two pieces. This was a little difficult because I wanted to duplicate the shape of the OEM piece by recessing the part that faces the window. I did this by clamping the remains of the 5/16" cut to the bottom of the angle material. This produces a 1/16" recess.
Here'* a side-by-side comparo of the two profiles:
Unlike the OEM piece, the new and improved one does not lock the panel at the top of the door. My observations when I had no trim at all showed that it was really not necessary. The bolt at the top of the handle provided enough support to hold the top of the panel.
I just have to decide on a finish for the new trim piece. I've narrowed it to three choices:
Body color (green)
Polished aliminum
Textured and painted just like my new dash trim panel.


 11-20-2004, 08:16 PM
#4
Senior Member
Posts like a Camaro

Join Date: Jul 2004
Location: Manassas, Virginia NOVA
Posts: 827
Likes: 0
Received 0 Likes
on
0 Posts

Dude can you make some for the outside part because I need them bad! I will pay good money, oh and I would also probably like some of the inside ones too. LMK and I'll buy them for Christmas.
11-20-2004, 09:01 PM
#5
Senior Member
True Car Nut

Join Date: Dec 2003
Location: Corn Fields, IN
Posts: 2,767
Likes: 0
Received 0 Likes
on
0 Posts
randman1: 
me:
if you go for the polished aluminum, you'll be polishing those suckers every month, with all the moisture that collects on cold days.
me:
if you go for the polished aluminum, you'll be polishing those suckers every month, with all the moisture that collects on cold days.
11-21-2004, 12:50 PM
#6
Senior Member
True Car Nut
Thread Starter
Originally Posted by CmptrNerd
Dude can you make some for the outside part because I need them bad! I will pay good money, oh and I would also probably like some of the inside ones too. LMK and I'll buy them for Christmas.
If there is enough response to these, I can look into having a custom extrusion made. I have no idea how much it would be but I would guess around $300 just for the pattern. They then could painted, polished or anodized. The finishing would be your responsibility. Are there enough people with broken trim or the desire to change to aluminum?
11-21-2004, 12:59 PM
#8
Senior Member
True Car Nut
Thread Starter
Extruding is what those Play Dough machines do when they put out different shaped lengths of clay. Like stars, hearts, etc. Or a tube of toothpaste puts out a round extrusion. A new shape requires a "pattern" to be developed presumabaly with CAD drawings and machining. Once that is done, the new shapes can be produced at any time. Since it is so small, I dont think it would be too expensive.
11-21-2004, 01:09 PM
#10
Senior Member
True Car Nut
Thread Starter
It was $17 of aluminum and I already had the tape and contact cement here. This made two pieces.
I wouldn't be doing the extruding. A company like this would have to do it. There are many that do this kind of work but this was from a Google search. I'd prefer a local company to do it. It might help with the small quantities.
I wouldn't be doing the extruding. A company like this would have to do it. There are many that do this kind of work but this was from a Google search. I'd prefer a local company to do it. It might help with the small quantities.