1998 SSEi oil leak
 11-03-2014, 09:20 AM
#31
Retired


Certified Car Nut


My bad, I never did check the actual image output.
__________________
Retired Administrator
2002 *-10 5.7 V8
2023 Jeep Rubicon Diesel
Retired Administrator
2002 *-10 5.7 V8
2023 Jeep Rubicon Diesel
 11-03-2014, 04:10 PM
#32
Senior Member

True Car Nut
to zoom in, right click on one of the thumbnails.....then click on open in new window.......now hit CTRL and + at the same time....this will blow up the page for you.....everytime you hit both keys it will zoom in more....to reduce it, hit CTRL and - at the same time.....just keyboard shortcuts.....
Last edited by Tech II; 11-03-2014 at 04:12 PM.
11-08-2014, 09:52 PM
#33
Senior Member
Posts like a Turbo
Thread Starter

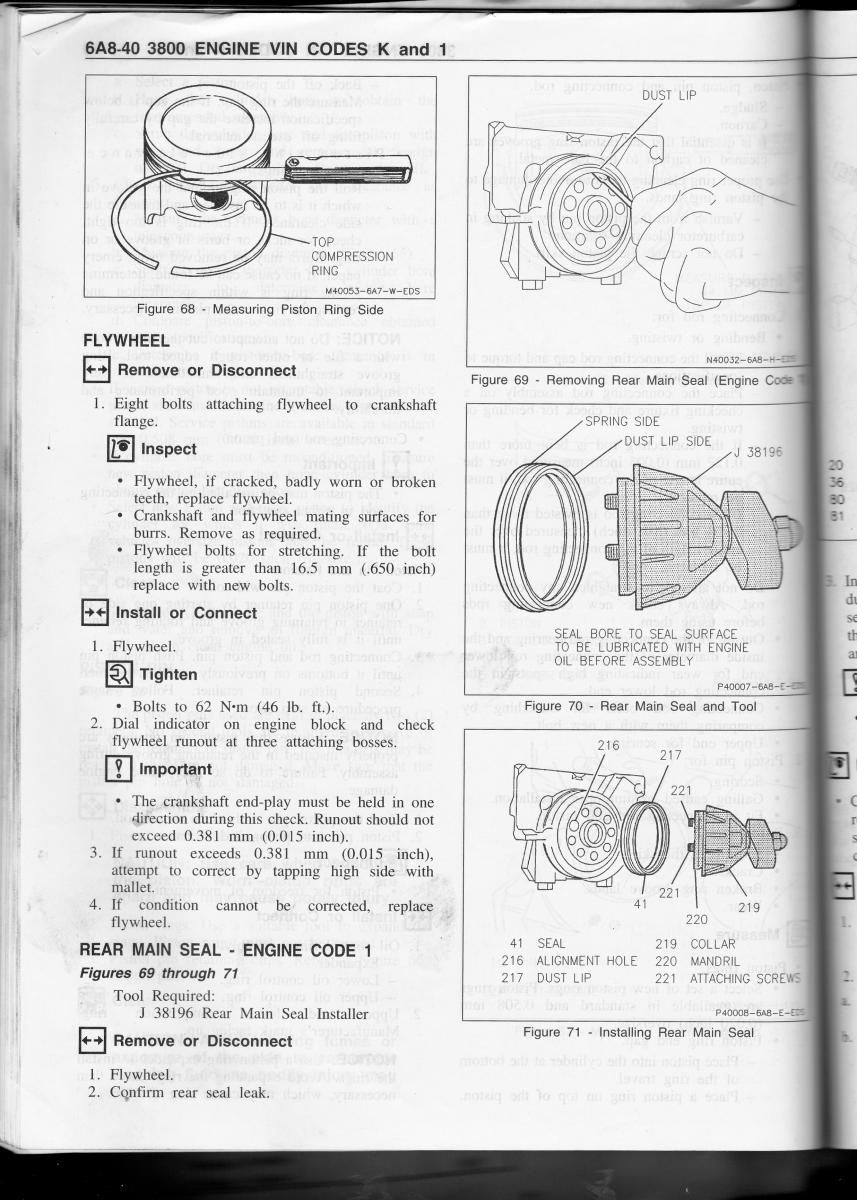
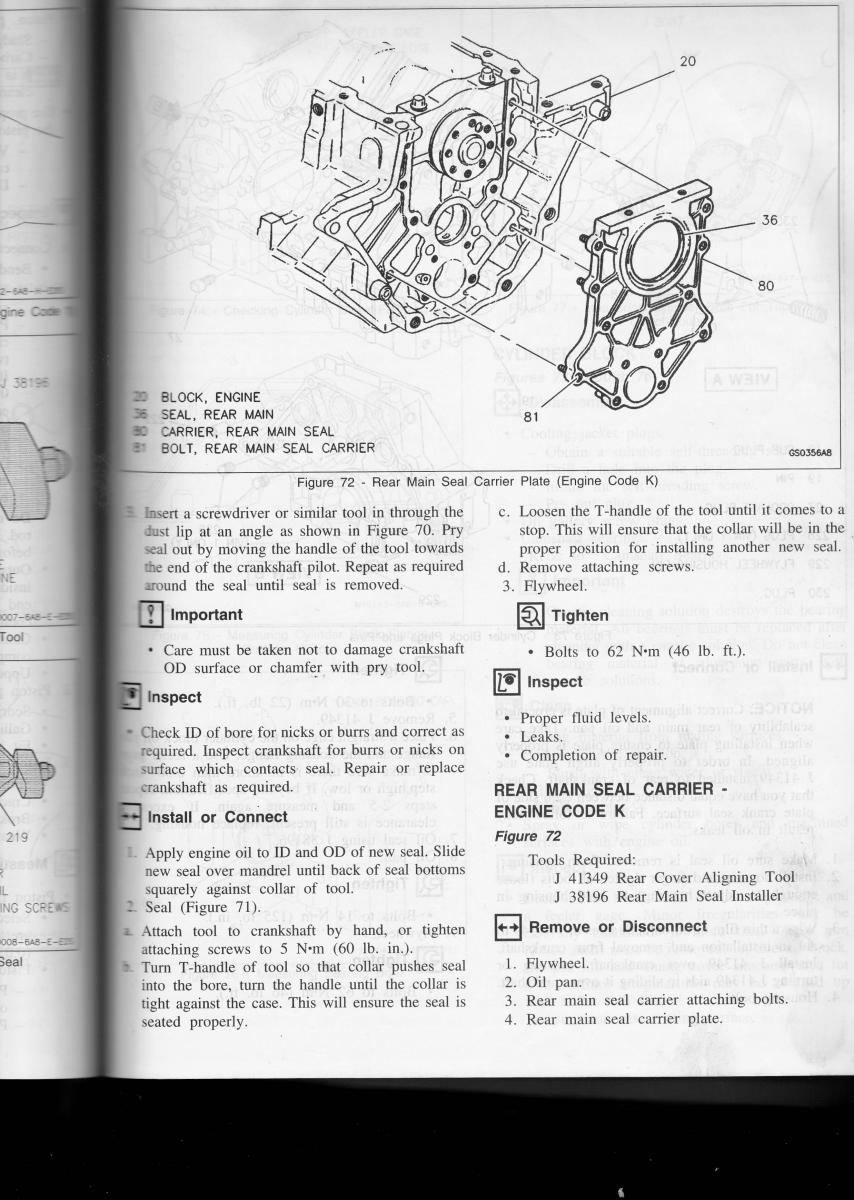
Unable to work on it this week. Life happens. Back at it today.. The way I read this there is a special tool to mount the plate so it is perfectly centered on the crankshaft and then the seal is installed with a special tool that mounts on the crankshaft and pulls the seal into position. I have neither tool.
I am thinking if I don't put the seal in first I won't be able to install it without the special tool. If I do install it first how will I be sure to center the plate n the crankshaft?
I am thinking if I don't put the seal in first I won't be able to install it without the special tool. If I do install it first how will I be sure to center the plate n the crankshaft?
11-08-2014, 10:34 PM
#34
Senior Member
Posts like a Turbo
Thread Starter
found both tools on ebay for less than $50.. best to do the job right with the right tools. I will have to wait a few more days.
11-16-2014, 07:24 PM
#35
Senior Member
Posts like a Turbo
Thread Starter
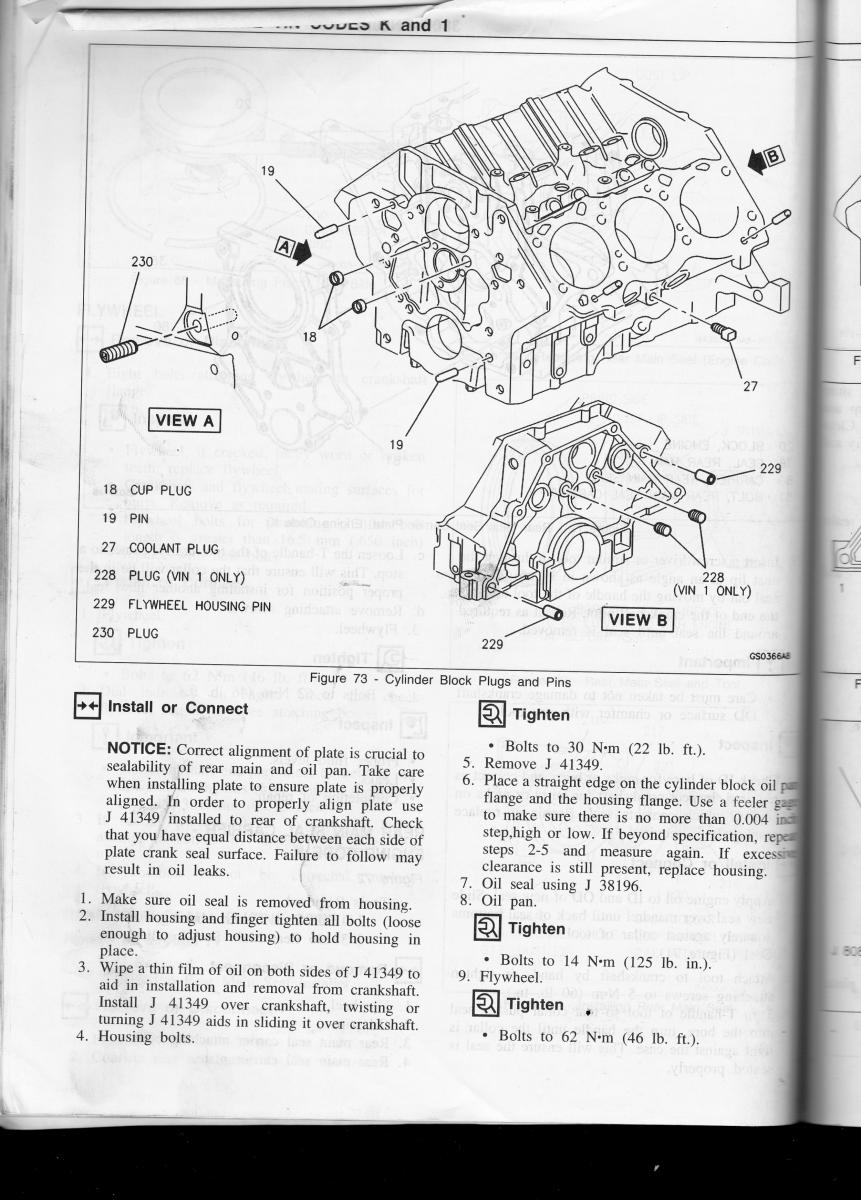
Okay, the tools came in this week and I installed the rear main plate and seal. It was actually very simple with the proper tools. The one tool is simply a sleeve that fits snugly on the crankshaft and then is just the right size for the opening in the plate. It centers plate exactly on the crankshaft. The the other tool bolts to the crankshaft and pushes the seal perfectly into place , works great ! I cannot imagine trying to do this without these tools.
FSM says install new bolts in the crankshaft to secure the flex plate at 11 foot pounds plus 50 degrees. How tight should the bolts be if I reuse the originals {I assume that'* what everyone else is doing}.
Also, when I took it apart I marked the crank and the flex plate and the flexplate to the torque converter with a black magic marker. No problem putting the flex plate back on in the same position it was in originally but, the marks on the torque converter wiped off so I have no idea how they mated. Is that a big deal?
11-19-2014, 01:38 PM
#37
Senior Member
Posts like a Turbo
Thread Starter
Its alive!!! Success, got it all put back together and it runs great. I will have to put a few miles on it to see how the oil leak is but, I think I have the problem solved..
Thanks soo much to all the folks that gave me advice and posted previous threads on the subject..
Ps. how many extra bolts are you supposed to have on project like this. I have one. Its about 2 1/2" long about 3/8 ' diameter. Looks like something in the chassis or it mounts something to the engine ( like the bolts to the power steering pump or the alternator)
11-19-2014, 01:42 PM
#38
Senior Member

Posts like a Camaro

Its alive!!! Success, got it all put back together and it runs great. I will have to put a few miles on it to see how the oil leak is but, I think I have the problem solved..
Thanks soo much to all the folks that gave me advice and posted previous threads on the subject..
Ps. how many extra bolts are you supposed to have on project like this. I have one. Its about 2 1/2" long about 3/8 ' diameter. Looks like something in the chassis or it mounts something to the engine ( like the bolts to the power steering pump or the alternator)
Thanks soo much to all the folks that gave me advice and posted previous threads on the subject..
Ps. how many extra bolts are you supposed to have on project like this. I have one. Its about 2 1/2" long about 3/8 ' diameter. Looks like something in the chassis or it mounts something to the engine ( like the bolts to the power steering pump or the alternator)
11-22-2014, 08:45 PM
#39
Senior Member
Posts like a Turbo
Thread Starter
Here is a pic of the bolt. It looks important. I don't think GM put a bolt that large in a vehicle if there was not a good reason for it. I would really feel better about it if I could figure out where it came from and put it back.
I have driven it 350 miles since the repair and it runs fine and have not used a drop of oil!!
I have driven it 350 miles since the repair and it runs fine and have not used a drop of oil!!
11-30-2014, 03:23 PM
#40
Senior Member
Posts like a Turbo
Thread Starter
Really nice day today thought I might rotate the tires. While the front tires were off I crawled under there to see if I could find where that bolt was supposed to go. Sure enough I found it! There were supposed to be four bolts holding the subframe right under the driver feet, I had only installed three. That gives me peace of mind.
The following users liked this post:
Soft Ride (12-01-2014)

Thread
Thread Starter
Forum
Replies
Last Post
Bonneville92V688
General GM Chat
2
01-31-2007 02:25 PM