1963 Pontiac Catalina massive project build thread
 01-25-2011, 11:38 PM
#31
Senior Member
Posts like a Turbo
Thread Starter

This is a video of the storm where it came down on the far eastern side of the city. The hail was twice as big as the video and lasted twice as long by our house on the northwest side. My wife and I were standing right next to all the windows that broke when it hit. They had just put out a warning of heavy hail on the TV and I was just about to step out to take down our hanging stuff on the patio. The hail hit like a dump truck dumping gravel. It just hit all at once. I had to grab my wife away form the windows as they were breaking and I could have sworn the roof was coming down. I looked out a the pool and because of all the splashing it was like a big solid wall of water fogging up. It was really sureal.
This is the video:
http://www.bing.com/videos/watch/vid...nhed>1=42007
The good side of all this is the home repair and construction businesses. At any given time and anywhere you go all you hear is hammers and air nailers thumpin' away. By the time they are done almost every house in the 6 mile area will be reroofed. And everywhere you go, when you pull up to a car at a light or a parking lot, they all look like golf balls, all dinged up. Mark L
 01-25-2011, 11:55 PM
#32
Senior Member
Posts like a Turbo
Thread Starter
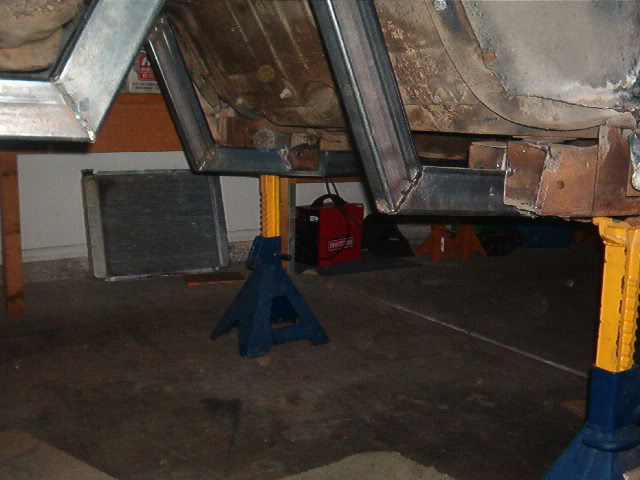
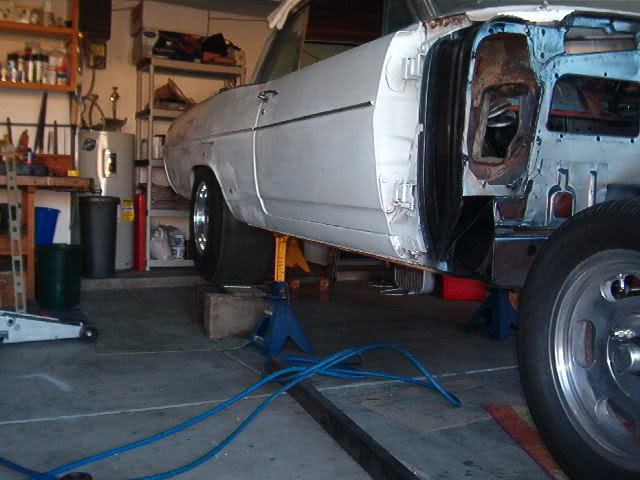
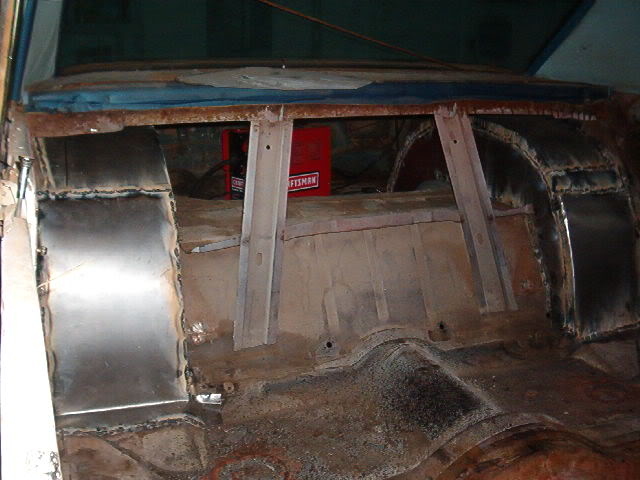
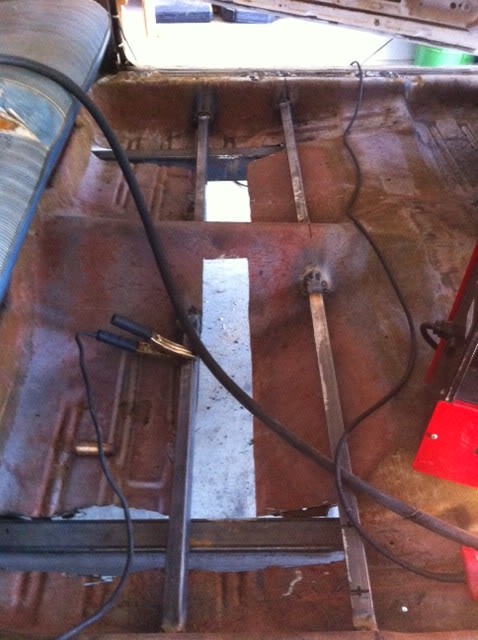
Been getting the rails welded in.
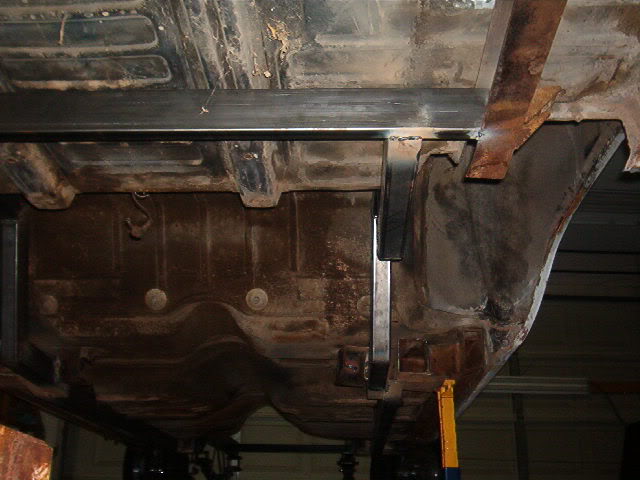
Took off the trunk and cut out the inside reinforcement panel. Cut the weight in half. Then I removed the hinges and all the parafinalia that supports them.
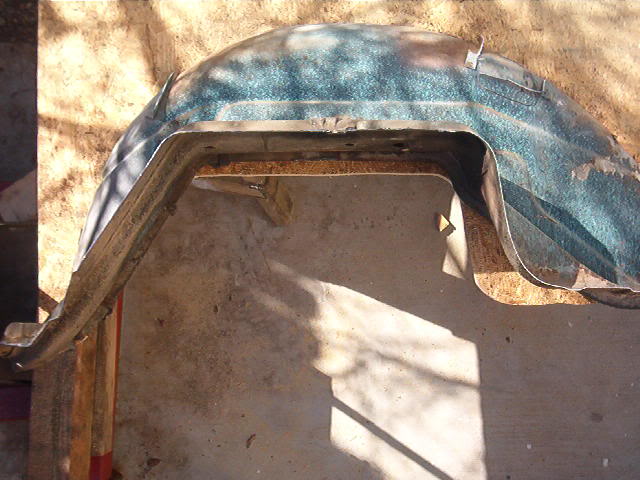
Then I spent today cutting out the passenger side wheelwell and lined the floor cut edge with angle to support the new inner wall of the wheel tub.

Next I have to cut out the drivers side. Then I can finally get the tires/wheels into the their final resting place and measure for the width. Then I can take the rear end to the guy to widen it. Once that is done I can get the axles and I can mock up the rear placement and finish putting in the cross members for the springs and shocks. I'm trying to get it to a roller condition so I can take it to a Pontiac show around Easter.
Mark L
Took off the trunk and cut out the inside reinforcement panel. Cut the weight in half. Then I removed the hinges and all the parafinalia that supports them.
Then I spent today cutting out the passenger side wheelwell and lined the floor cut edge with angle to support the new inner wall of the wheel tub.
Next I have to cut out the drivers side. Then I can finally get the tires/wheels into the their final resting place and measure for the width. Then I can take the rear end to the guy to widen it. Once that is done I can get the axles and I can mock up the rear placement and finish putting in the cross members for the springs and shocks. I'm trying to get it to a roller condition so I can take it to a Pontiac show around Easter.
Mark L
01-27-2011, 09:00 PM
#33
Senior Member
Posts like a Turbo
Thread Starter
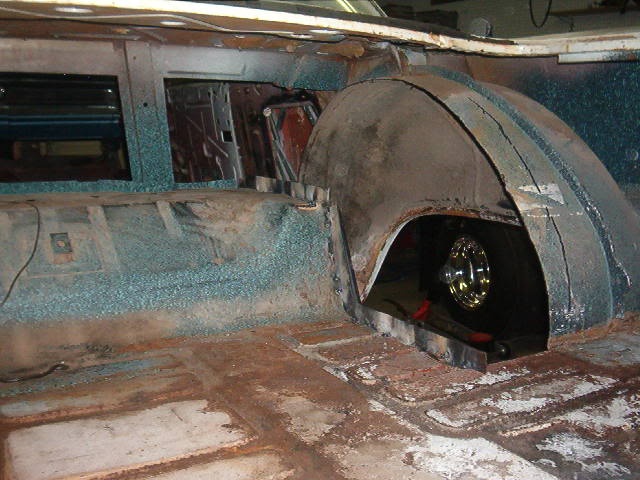
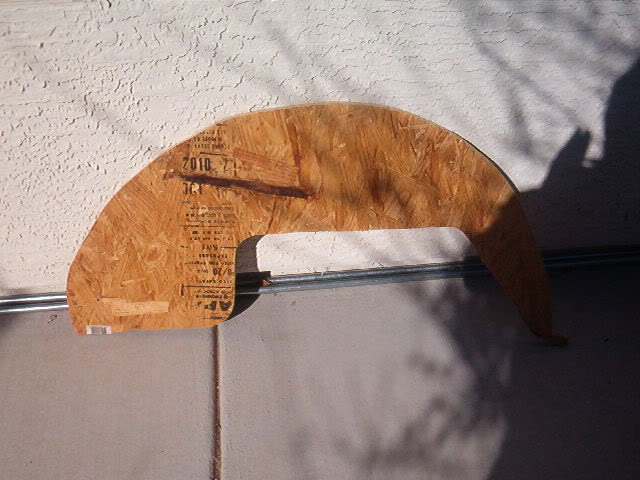
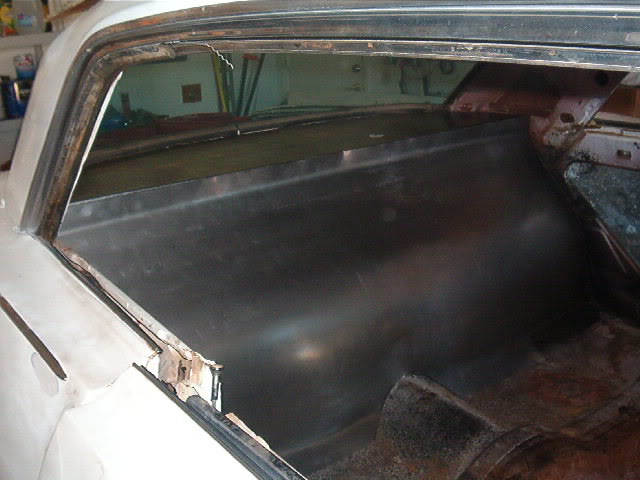
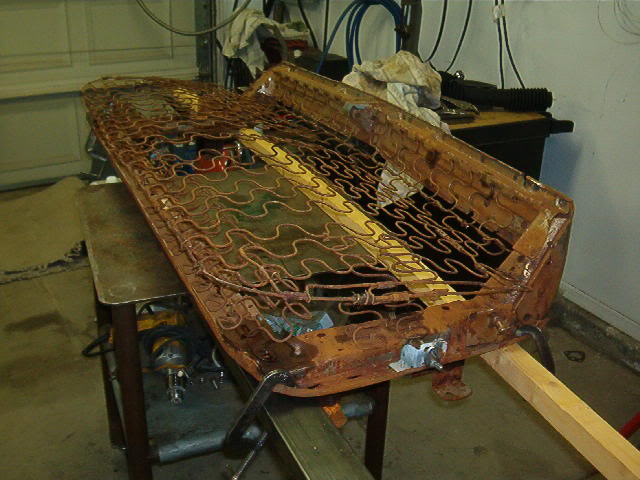
Did some more on the tubs. I used the old metal I cut out to shape the bottom of the tub form (out of press board),
Then turned it around to form the top curve of the form. Which came out like this.
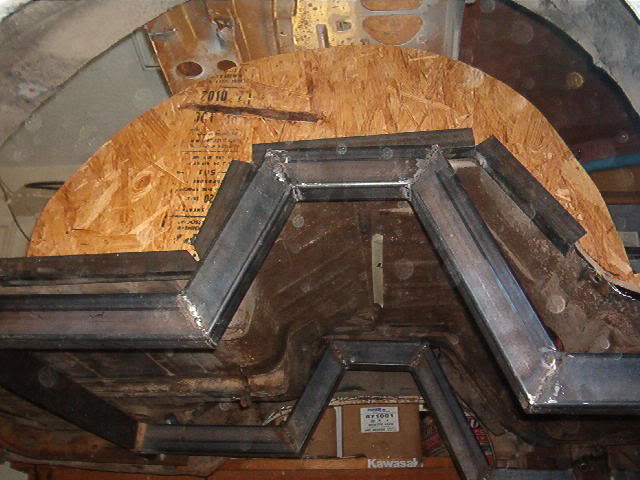
This is how it ended up inside the trunk against the angle iron edges.
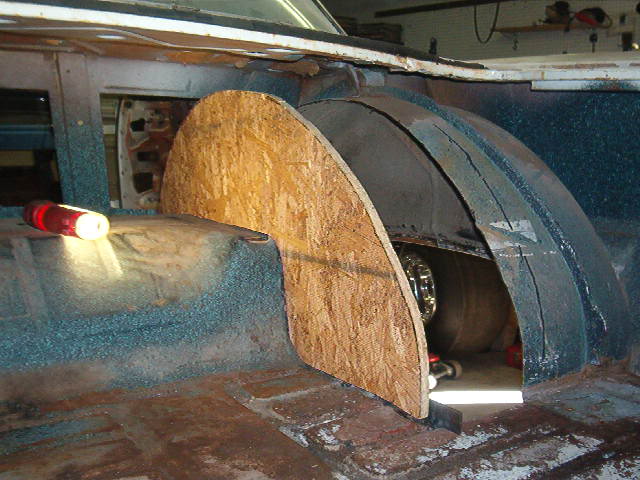
Once I'm happy with the fit I'll form the wall of the tub on the form with an extra 1.5 inches over the top. I'll use the form to bend and hammer the top overlap over the top of the form to make the top angle. Then I'll form the wide curved tub by laying it over the top of the old wheelwell still remaining. And span across over the form with another added 1.5 overlap. I'll bend and hammer that edge over the form again forming two overlapping edges that will get tack welded together once everything is in place.
I hope. I did that on my '67 Nova years ago and it turned out well.
Mark L
Then turned it around to form the top curve of the form. Which came out like this.
This is how it ended up inside the trunk against the angle iron edges.
Once I'm happy with the fit I'll form the wall of the tub on the form with an extra 1.5 inches over the top. I'll use the form to bend and hammer the top overlap over the top of the form to make the top angle. Then I'll form the wide curved tub by laying it over the top of the old wheelwell still remaining. And span across over the form with another added 1.5 overlap. I'll bend and hammer that edge over the form again forming two overlapping edges that will get tack welded together once everything is in place.
I hope. I did that on my '67 Nova years ago and it turned out well.
Mark L

 02-14-2011, 12:15 AM
#35
Senior Member
Posts like a Turbo
Thread Starter
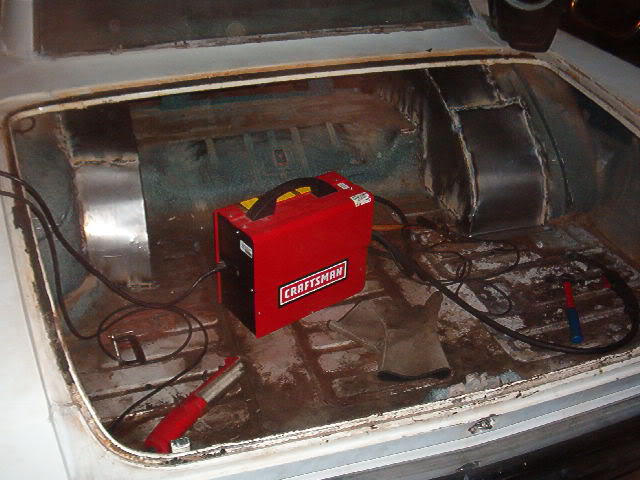
A little 110 Sears using .030 wire. I aso have a lincoln 225 AC stick welder but it is older than dirt. Bought it from a guy back in '72 that was mating two smashed Road Runners together to sell. He'd buy up everything that was smashed front or rear, cut them at a certain spot and mate the two good halves back together. When I got it from him it was old.
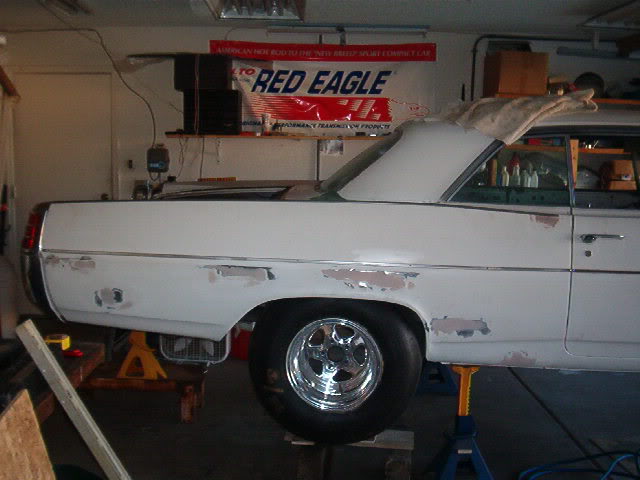
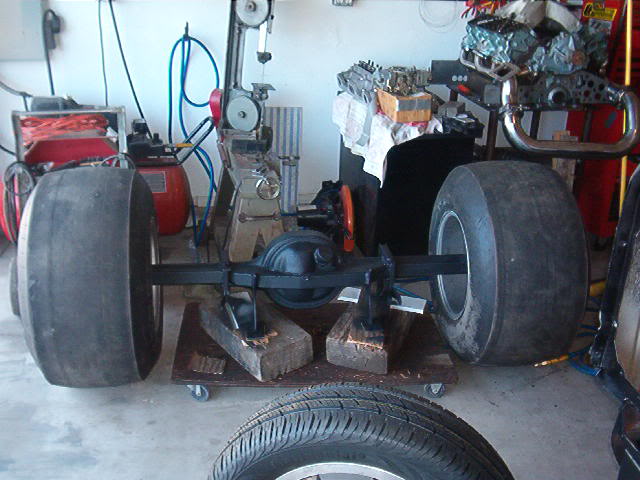
I got the drivers side all cut out, the inner tub wall done (again with the drivers side cut out making a form) and finally put in both rear wheels/rims to get a final rear axle width. Still need to build and install the tubs.The axle is getting widened right now. This is the final placement of the tire/rim unit.
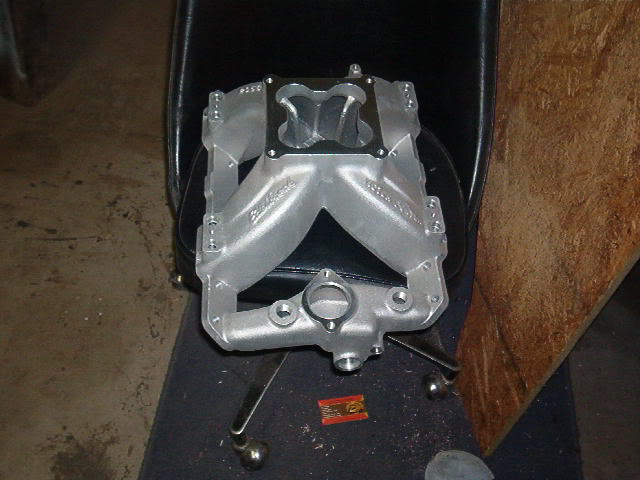
Edelbrock was having a firesale of their dominator flanged EFI Victor manifolds for $168.00. So I had to jump at that. So now I'm tryig to figure out how to finance an EFI changeover. This is th emanifold.
So I'm moving right along. Mark L
I got the drivers side all cut out, the inner tub wall done (again with the drivers side cut out making a form) and finally put in both rear wheels/rims to get a final rear axle width. Still need to build and install the tubs.The axle is getting widened right now. This is the final placement of the tire/rim unit.
Edelbrock was having a firesale of their dominator flanged EFI Victor manifolds for $168.00. So I had to jump at that. So now I'm tryig to figure out how to finance an EFI changeover. This is th emanifold.
So I'm moving right along. Mark L
05-29-2011, 03:15 PM
#37
Senior Member
Posts like a Turbo
Thread Starter
Hey guys. So sorry for not keeping up. I've been building all along but never remembered to come back to this board. I've been keeping a journal on several other boards blew out the previous hard drive and I'm still recovering some files. Found an old copy of the desktop and I saw your board again.
Basically I got most of the frame all done except for going back under and gusseting the weld seams. I still have to make a crossmember over the rear end for the shocks and springs. I have the DOM tubing to build the ladder bars but have not started that yet. Biggest accomplishments have been getting the rearend widened to fit the widetrack Pontiac. The rearend guy laughed his *** off when I told him I had to widen it. Said he'* never widened one before.
I got all the rear wheelwells tubbed and painted. Then I built the rear package shelf and seat back firewall. Still working onthat stuff.
Not sure how many pics I can place in a single post so I'm going to go to a new one.
Mark L
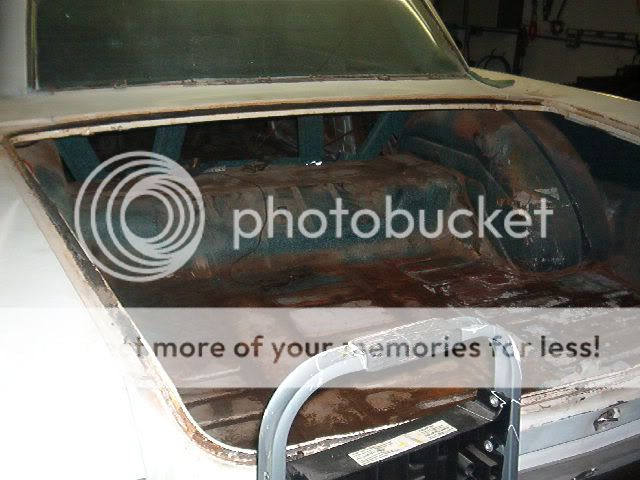
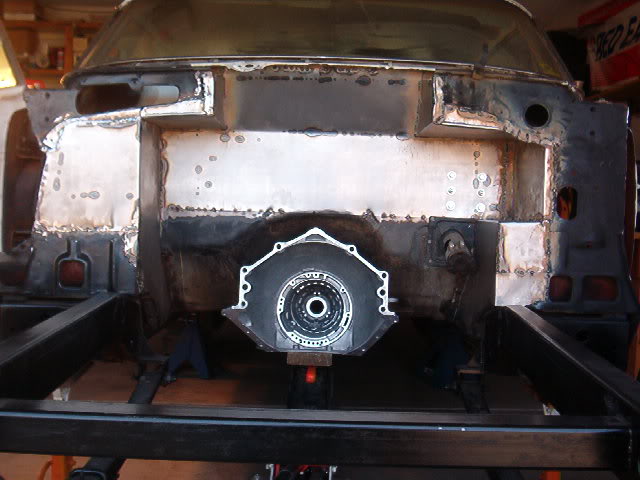
I cut out the firewall, moved it back and tacked in in place, then I filled it all in with sheet metal.
[img]
Basically I got most of the frame all done except for going back under and gusseting the weld seams. I still have to make a crossmember over the rear end for the shocks and springs. I have the DOM tubing to build the ladder bars but have not started that yet. Biggest accomplishments have been getting the rearend widened to fit the widetrack Pontiac. The rearend guy laughed his *** off when I told him I had to widen it. Said he'* never widened one before.
I got all the rear wheelwells tubbed and painted. Then I built the rear package shelf and seat back firewall. Still working onthat stuff.
Not sure how many pics I can place in a single post so I'm going to go to a new one.
Mark L
I cut out the firewall, moved it back and tacked in in place, then I filled it all in with sheet metal.
[img]

 05-29-2011, 03:24 PM
#39
Senior Member
Posts like a Turbo
Thread Starter
I cut out the firewall, moved it back and tacked in in place, then I filled it all in with sheet metal.
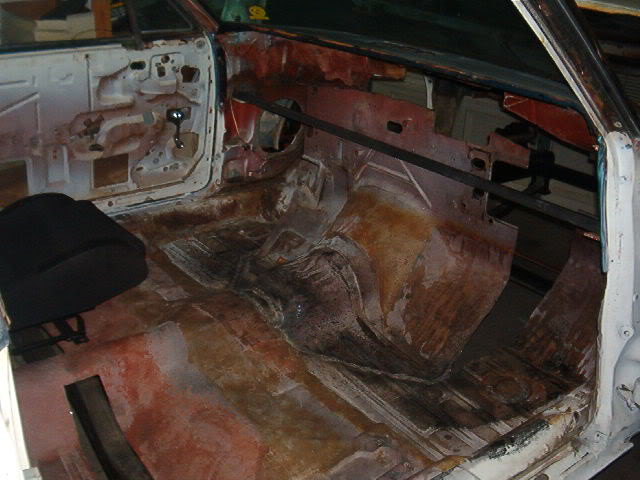
I also got the steering wheel mount and the brake pedal assembly all built in.

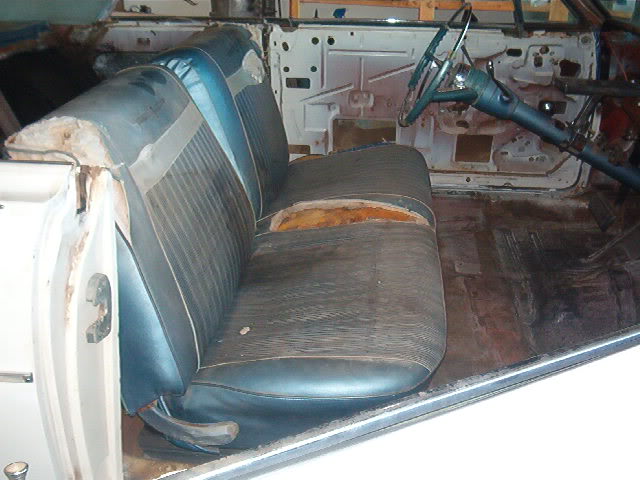
New seat location mounts. I decided to go back to the original bench seat.
[/img]http://i601.photobucket.com/albums/tt97/marks73turbota/seatmount.jpg[/img]
I'm going to do the interior in black vinyl but for now I'm doing the seat in two Indian blankets. I rebuilt the seat and attached the blankets. I still have to clip down all the loose ends of the blanket to finish, and split the seat back blanket to make basically slip on seat covers.

I'll get the seat redone later by an upholsterer to match the interior.
Mark L
I also got the steering wheel mount and the brake pedal assembly all built in.
New seat location mounts. I decided to go back to the original bench seat.
[/img]http://i601.photobucket.com/albums/tt97/marks73turbota/seatmount.jpg[/img]
I'm going to do the interior in black vinyl but for now I'm doing the seat in two Indian blankets. I rebuilt the seat and attached the blankets. I still have to clip down all the loose ends of the blanket to finish, and split the seat back blanket to make basically slip on seat covers.
I'll get the seat redone later by an upholsterer to match the interior.
Mark L
05-29-2011, 03:42 PM
#40
Senior Member
Posts like a Turbo
Thread Starter
New seat location pic, I screwed it up on the previous.
I used an extra 400 block to mock up the engine configuration and placement. Had to modify the front engine plate for the turbo headers and had a great deal on a Moon front timing cover. A friend had an original top fuel Hilborn fuel pump off of a local (Lopers Speed Shop) dragster and he gave it to me to see if I could incorporate it into the build. Like, he didn't have to ask me twice. I tried to find a spud that would drive the pump off of the cam as would be original to the pump, but no one makes one and I don't have the funds to make one. So I dry attached the pump to the Moon cover so it just sits on th ecover, non operational. But I'm going to plumb the fuel system to the carb by using a high flow electric pump and filter back at the tank. Run the fuel conventionally up to the bypass regulator at the carb, but, run the return line down and through the Hilborn pump. To the uninformed the fule supply line will look like it comes through the pump to the regulator. This is how the pump looks on the cover.
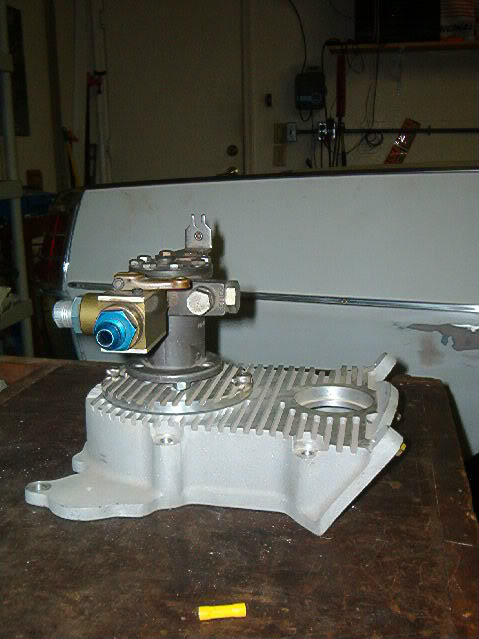
And the cover and motor plate on the motor.
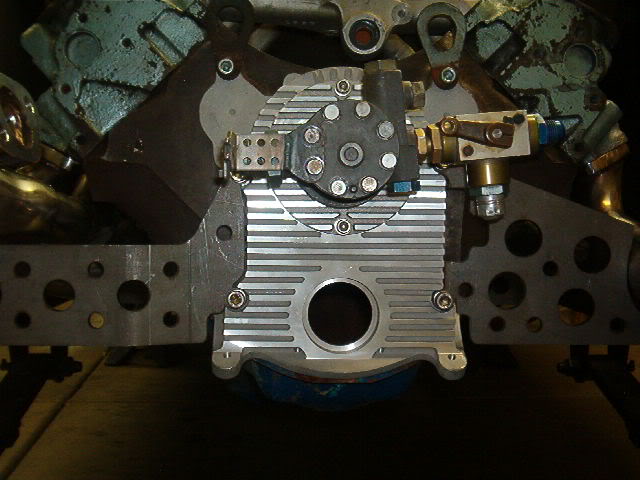
And the motor in the car and in place in the cut out firewall. Turbo headers, turbo, intake etc all in place.
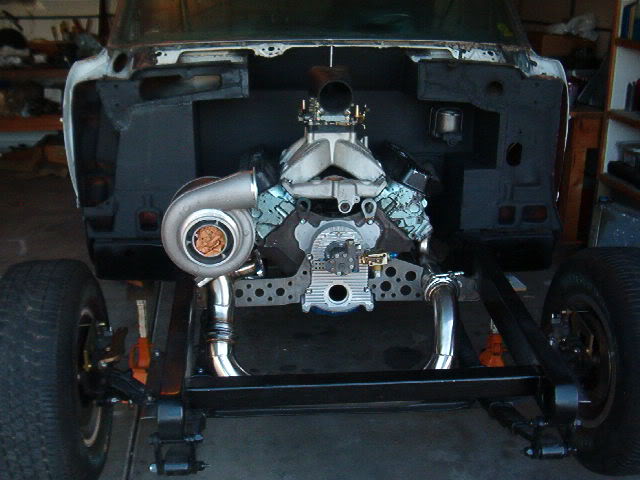
Mark L
I used an extra 400 block to mock up the engine configuration and placement. Had to modify the front engine plate for the turbo headers and had a great deal on a Moon front timing cover. A friend had an original top fuel Hilborn fuel pump off of a local (Lopers Speed Shop) dragster and he gave it to me to see if I could incorporate it into the build. Like, he didn't have to ask me twice. I tried to find a spud that would drive the pump off of the cam as would be original to the pump, but no one makes one and I don't have the funds to make one. So I dry attached the pump to the Moon cover so it just sits on th ecover, non operational. But I'm going to plumb the fuel system to the carb by using a high flow electric pump and filter back at the tank. Run the fuel conventionally up to the bypass regulator at the carb, but, run the return line down and through the Hilborn pump. To the uninformed the fule supply line will look like it comes through the pump to the regulator. This is how the pump looks on the cover.
And the cover and motor plate on the motor.
And the motor in the car and in place in the cut out firewall. Turbo headers, turbo, intake etc all in place.
Mark L