my 98 SE


 08-13-2009, 09:03 PM
#32
Senior Member
Posts like a Turbo
Thread Starter
Join Date: May 2009
Location: Hibbing MN
Posts: 327
Likes: 0
Received 0 Likes
on
0 Posts

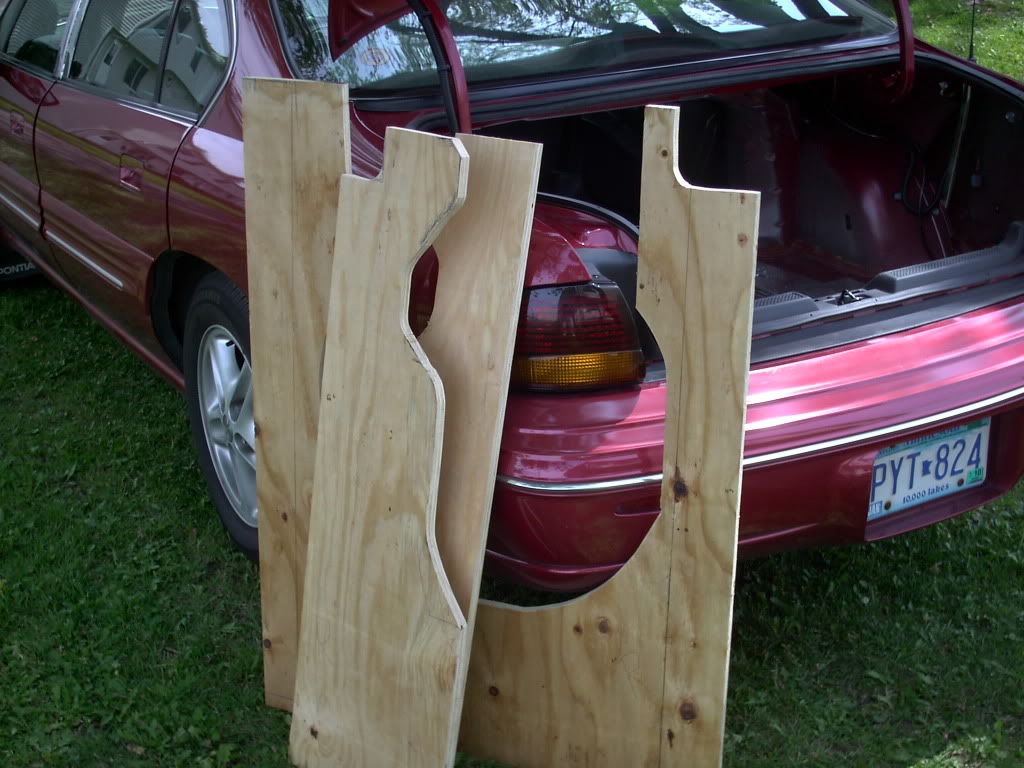
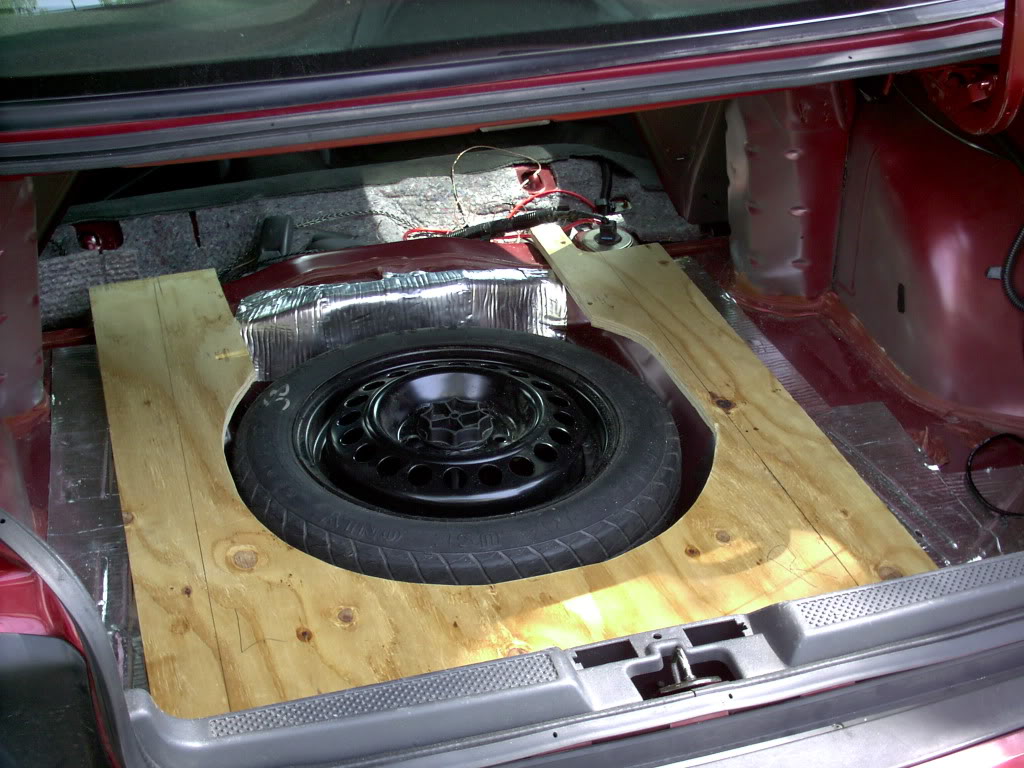
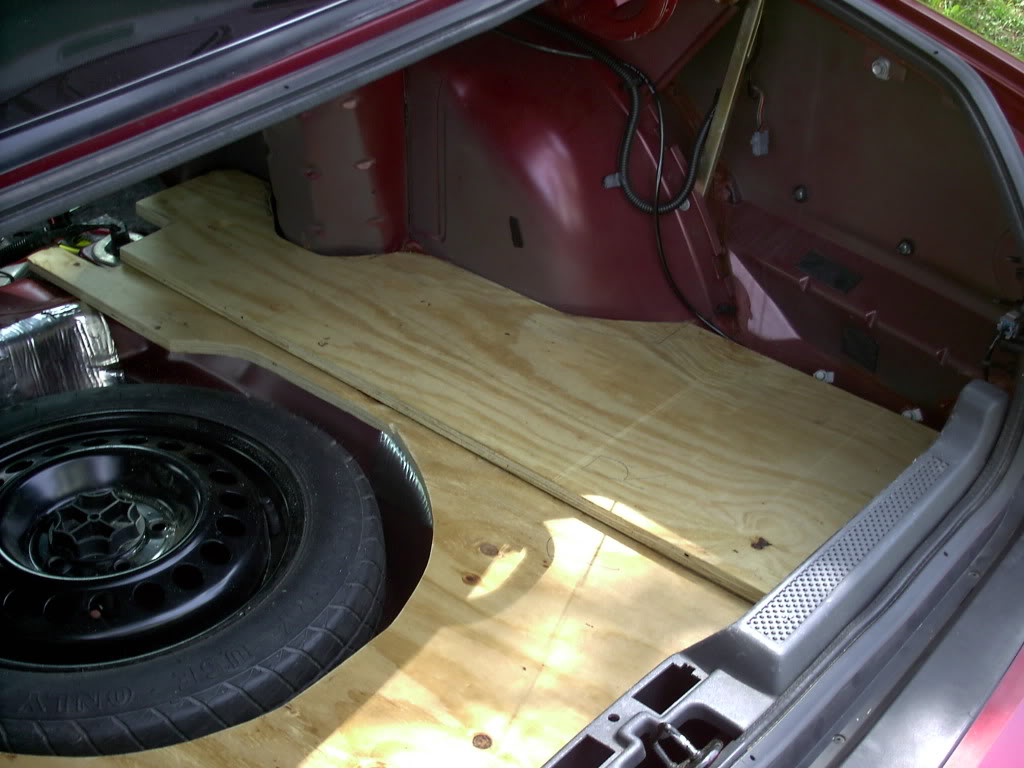
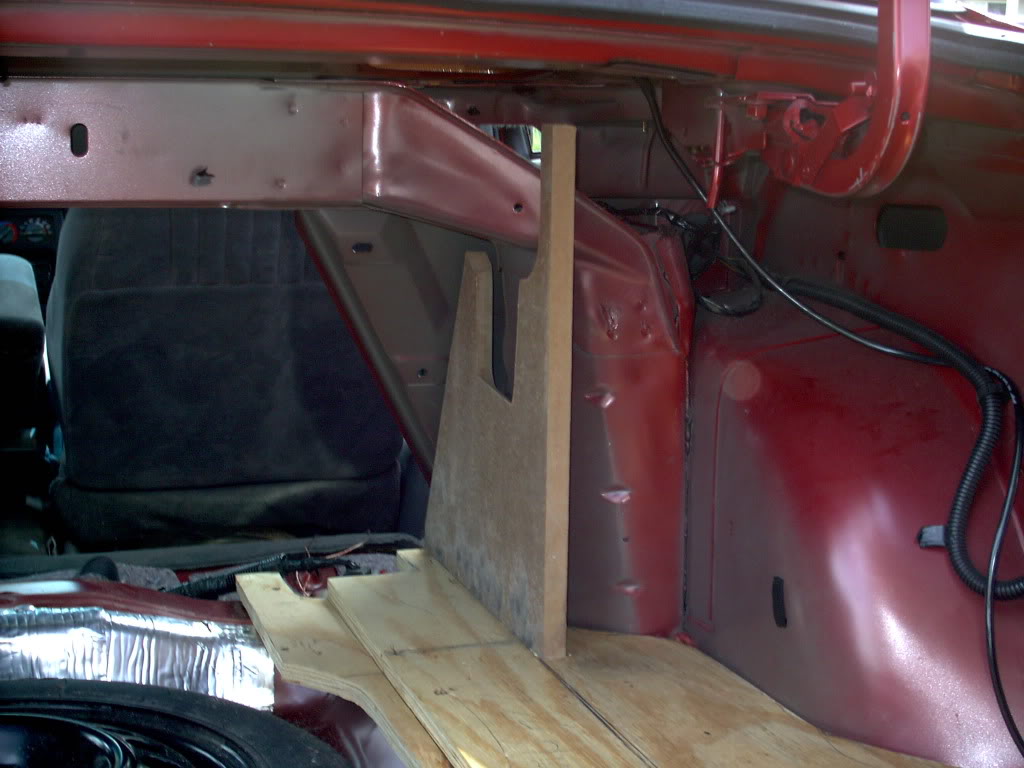
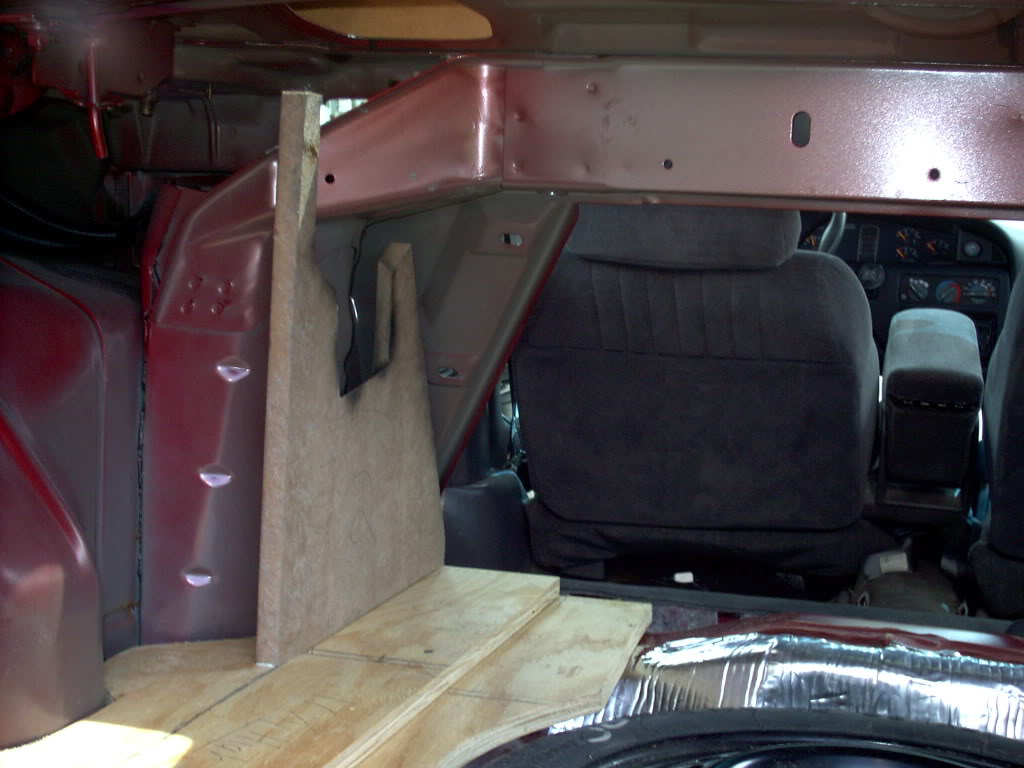
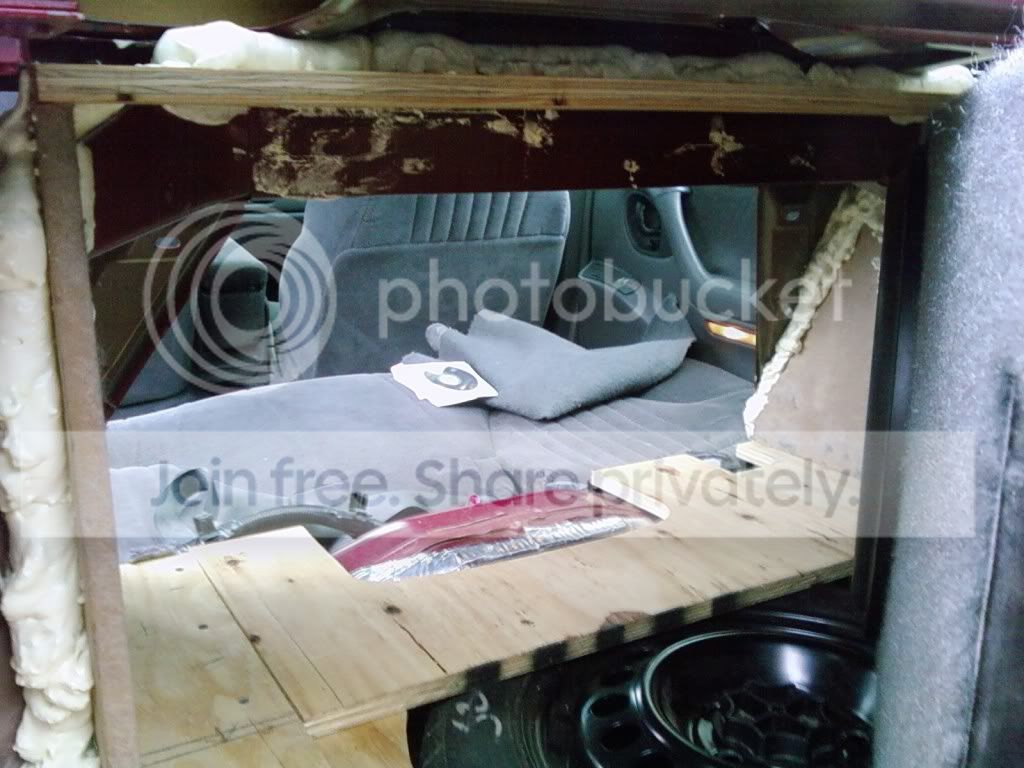
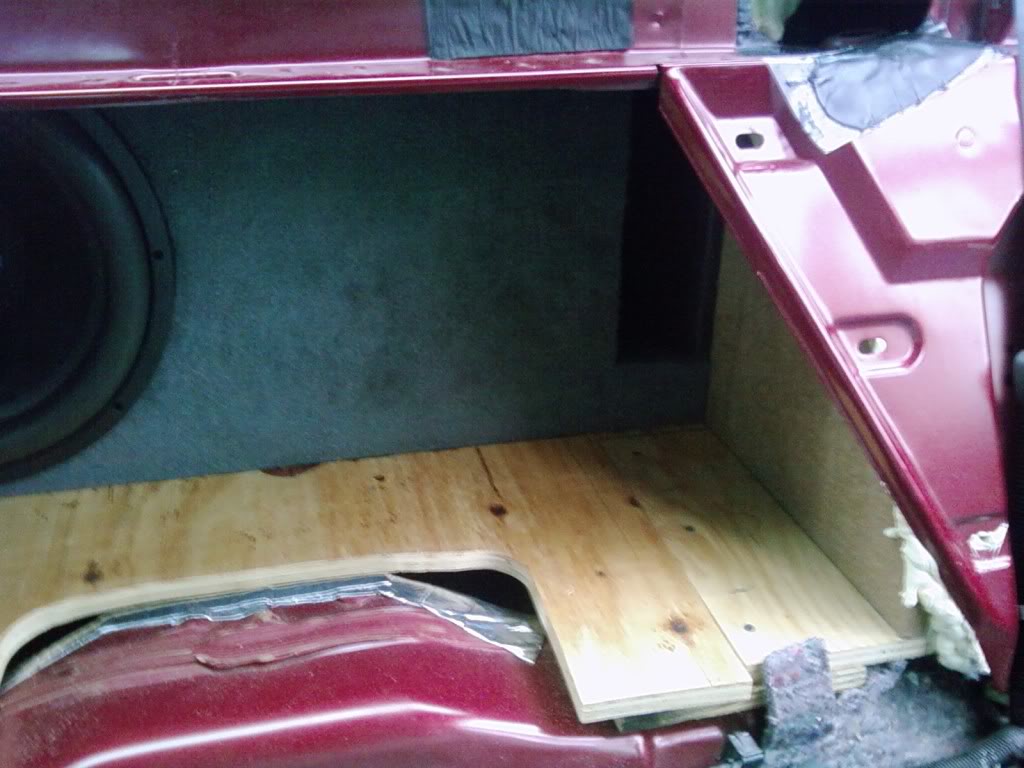
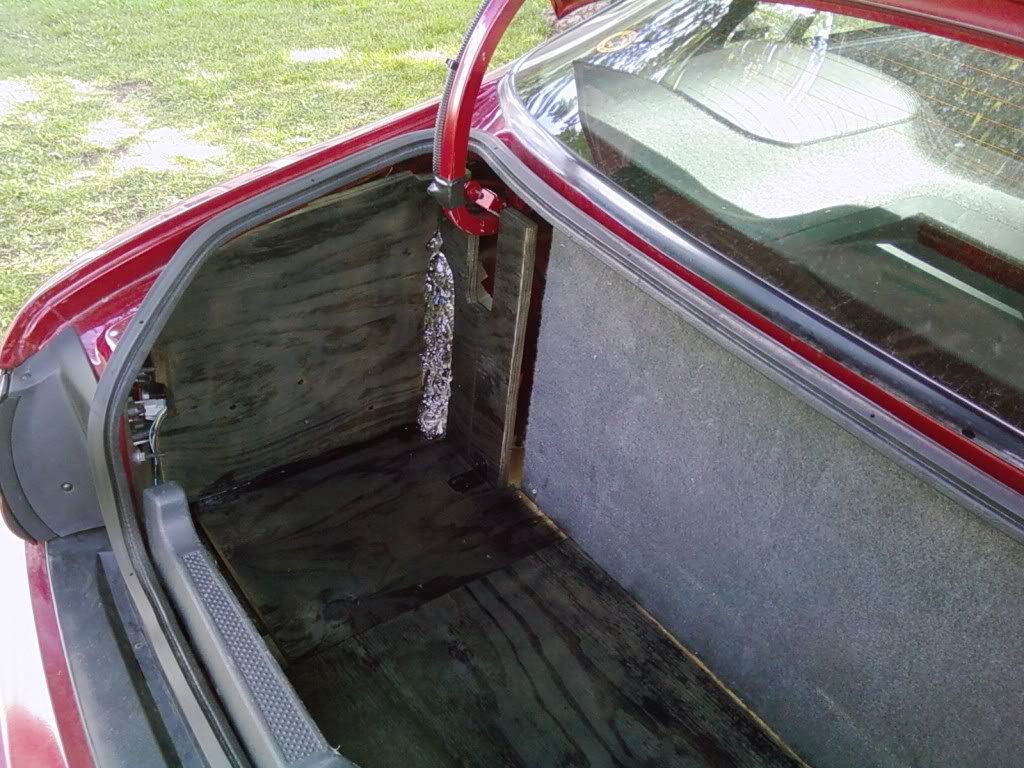
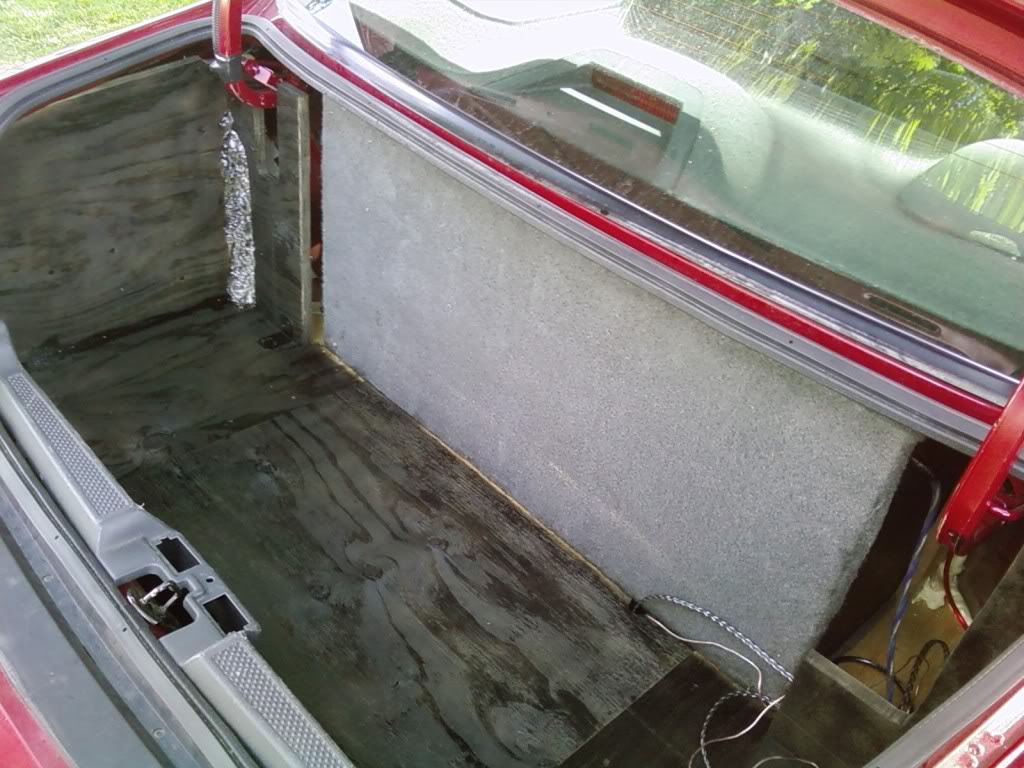
thanks for the props  well i got sun burned pretty good lol and decided to hit the store. picked up a sheet of 3/4 plywood for the trunk. figured it will work just fine for the floor and the rest of what im doing. figured id have to make a few pieces and assemble it while its in the trunk.
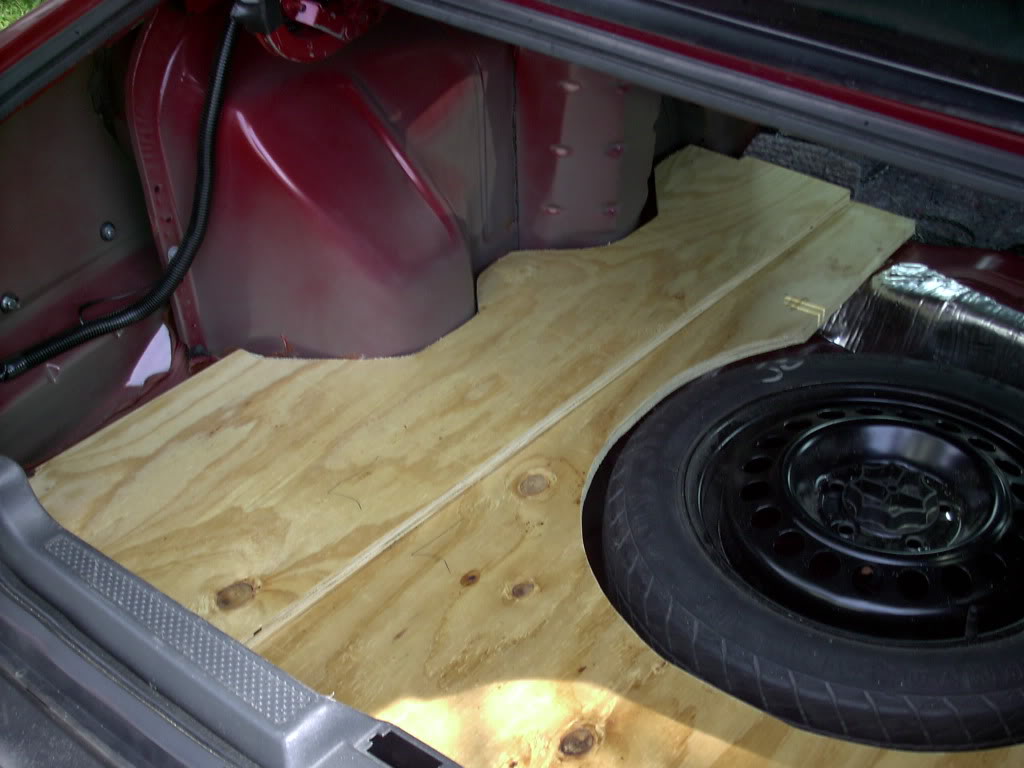
its all just cut and since my girl has the car with her at work for the day ill be starting to mock it up in my basement. once again my goal is to fit the sub and everything, it needs to be clean(as clean as i can get ha) ill need to be able to pull the spare without takin the sub out(working on figuring out some 60/40 fold down rear seat back) and fit my lil girls stroller whilethe sub is pretty much sealed off form the trunk. i know it wont be completly sealed but i got a few ideas. ill be posting more soon. its been warm and DRY enough out to do some stuff lol. one thing i still need to decide on is how to atatch this frame/floor to the car itself. it dosnt need to be really on there just dont want anythin to be sliding around.
well i got sun burned pretty good lol and decided to hit the store. picked up a sheet of 3/4 plywood for the trunk. figured it will work just fine for the floor and the rest of what im doing. figured id have to make a few pieces and assemble it while its in the trunk. its all just cut and since my girl has the car with her at work for the day ill be starting to mock it up in my basement. once again my goal is to fit the sub and everything, it needs to be clean(as clean as i can get ha) ill need to be able to pull the spare without takin the sub out(working on figuring out some 60/40 fold down rear seat back) and fit my lil girls stroller whilethe sub is pretty much sealed off form the trunk. i know it wont be completly sealed but i got a few ideas. ill be posting more soon. its been warm and DRY enough out to do some stuff lol. one thing i still need to decide on is how to atatch this frame/floor to the car itself. it dosnt need to be really on there just dont want anythin to be sliding around.
08-16-2009, 01:38 PM
#33
Senior Member
Posts like a Turbo
Thread Starter
Join Date: May 2009
Location: Hibbing MN
Posts: 327
Likes: 0
Received 0 Likes
on
0 Posts
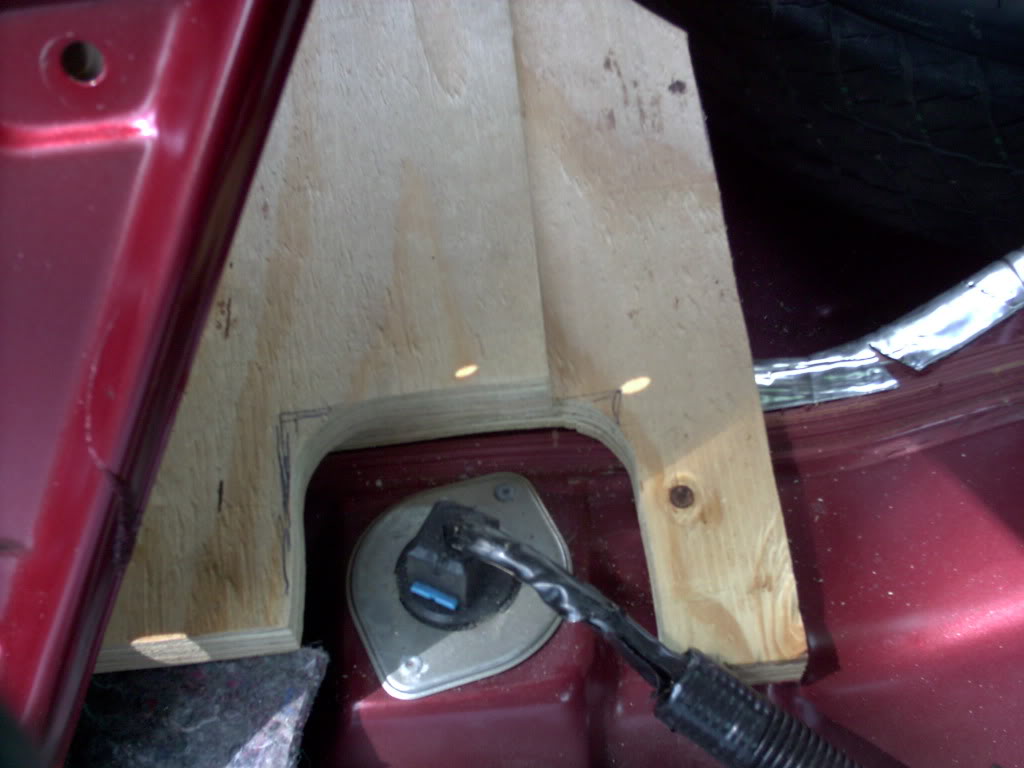
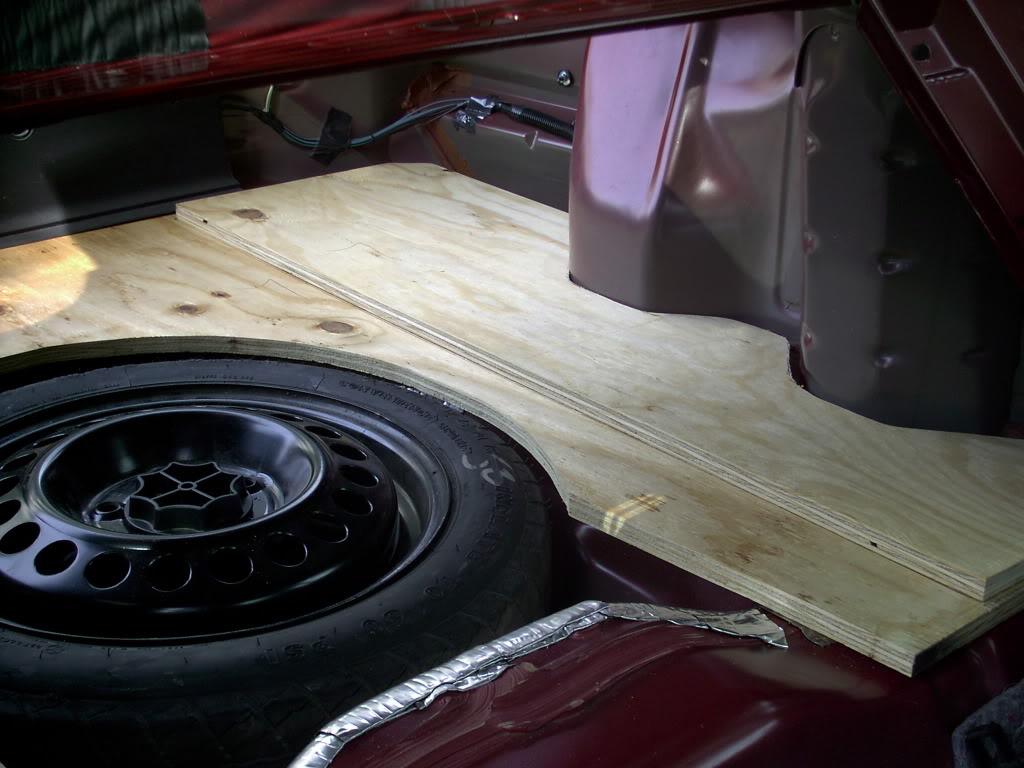
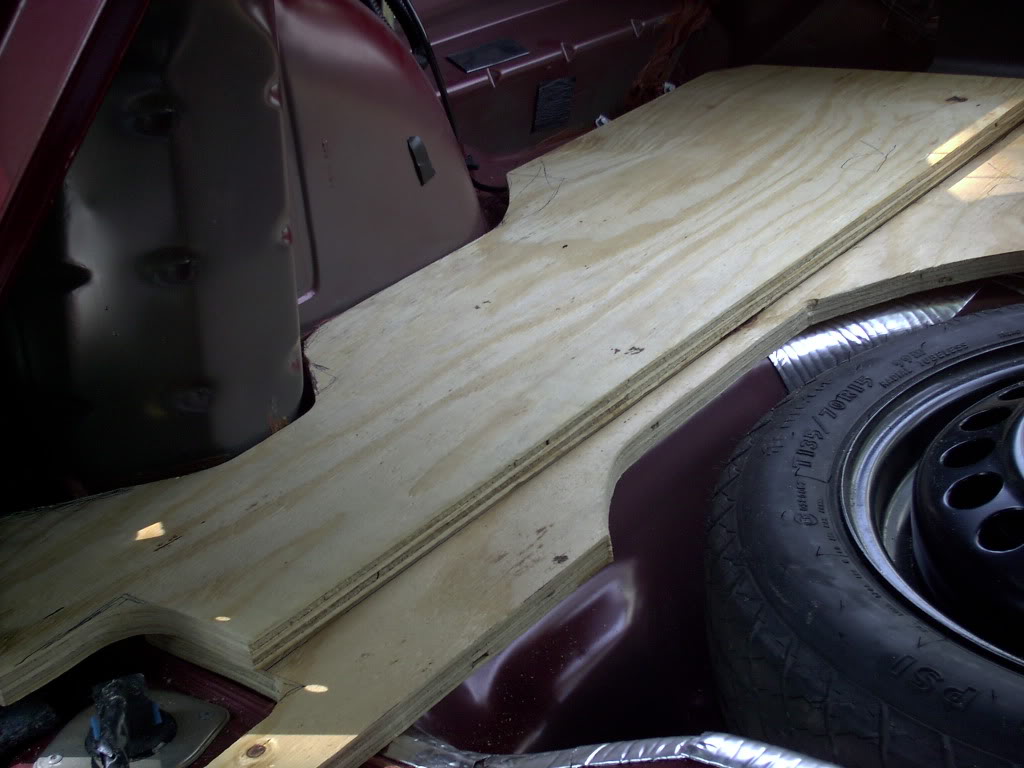
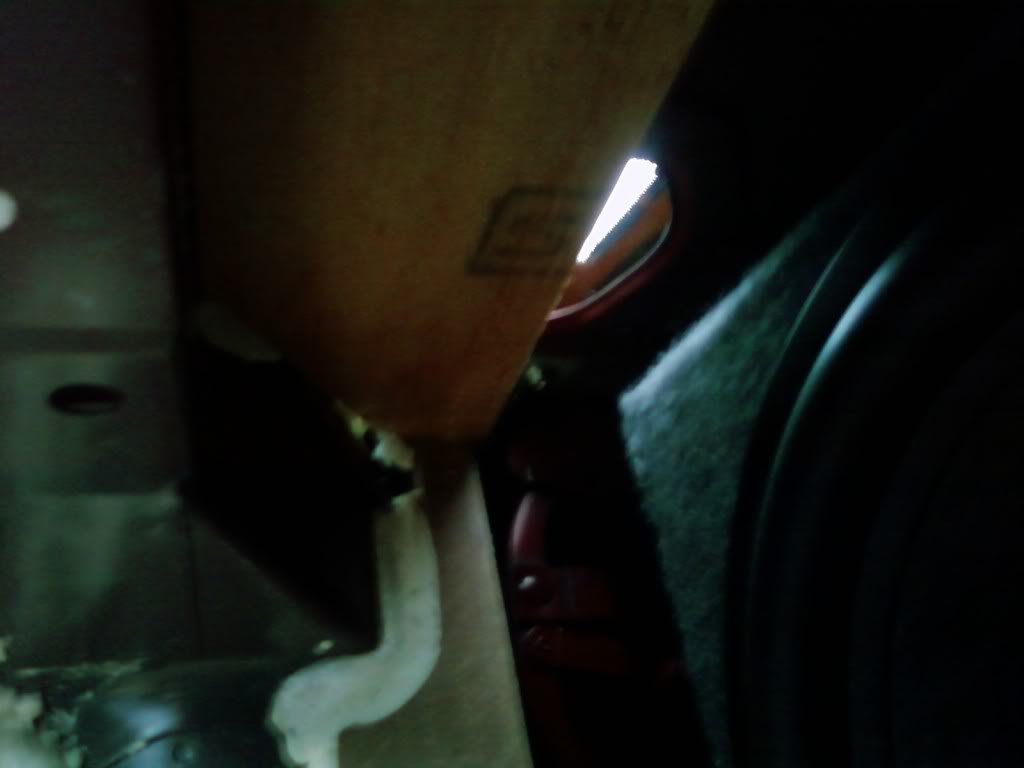
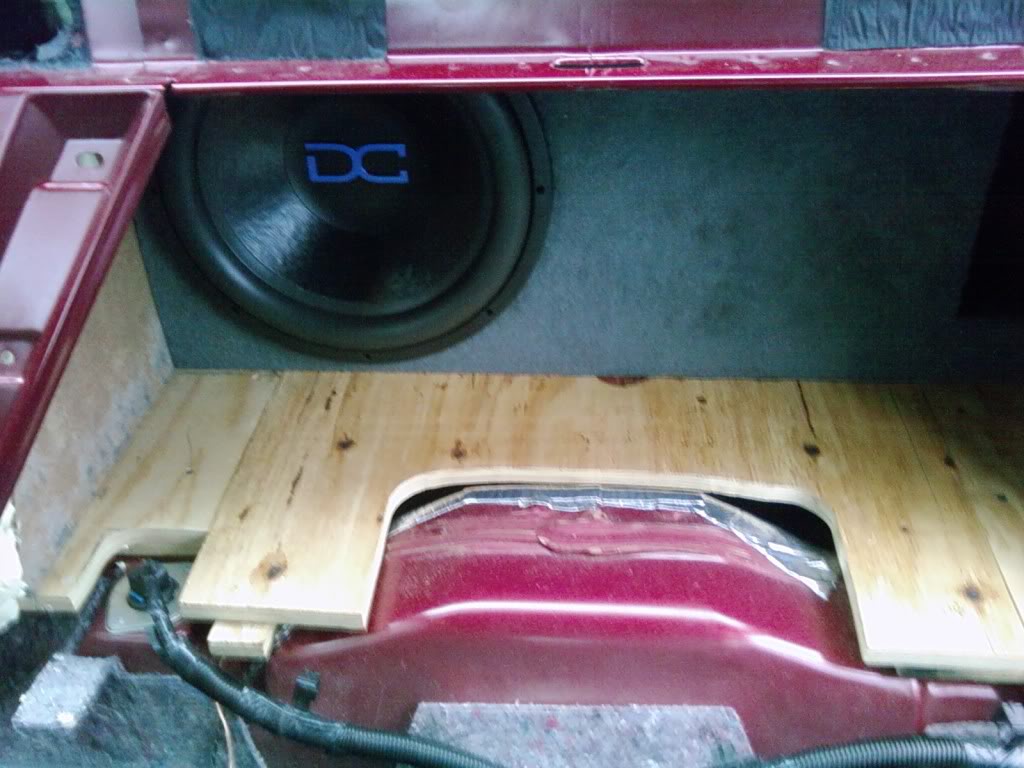
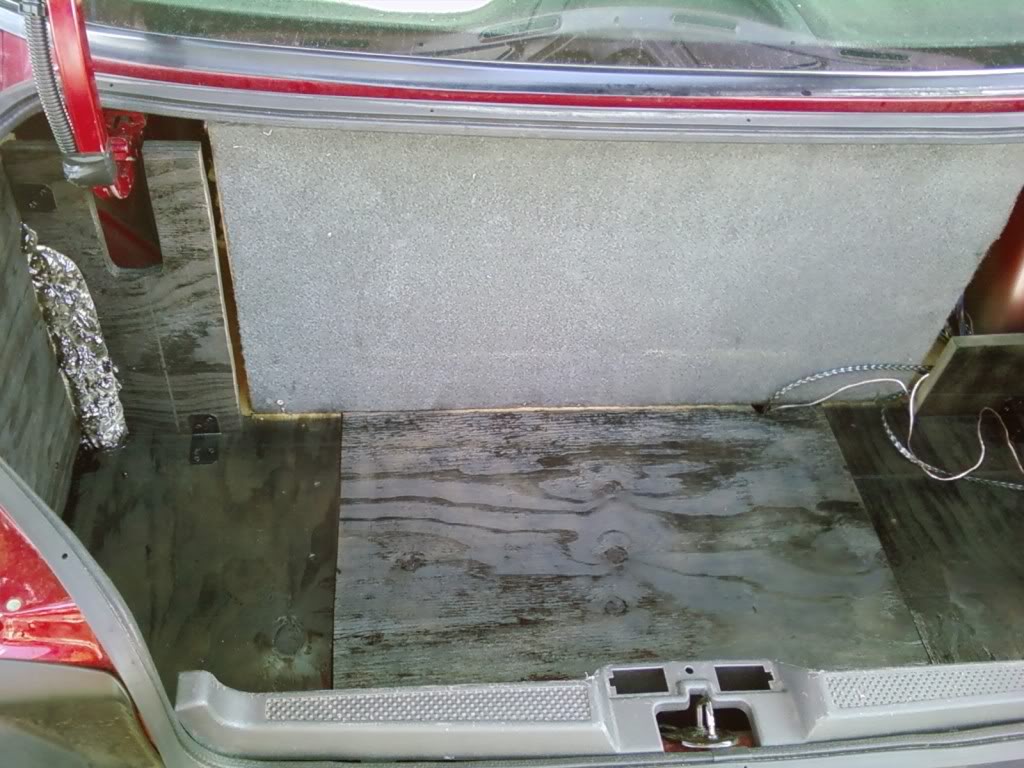
got some more done but when my and my lil man went down to the basement he dropped the cam so im having a tough time gettin all the pics off it now.. but got a few to put up for now lol. i made some side pieces that the box will slide between. the highest points on the sides is how tall the box is. ill have to make that top peice yet to seal off the top too.
started sealing with some great stuff
and this was the box slid into the frame, its helping to hold it all where it needs to be til the foam is dryed and all that
thats all the pics i could get off the cam but i have more too lol. i have some from when i mocked up all the pieces inside and as it sits now. i put the sub in(needed some beats) and waiting on more funds for carpeting, wire and ill be posting more as soon as i can get a cam goin lol. ill be doing some work for sure cuz the show must go on right lol?[/
08-19-2009, 06:16 PM
#34
Senior Member
Posts like a Turbo
Thread Starter
Join Date: May 2009
Location: Hibbing MN
Posts: 327
Likes: 0
Received 0 Likes
on
0 Posts
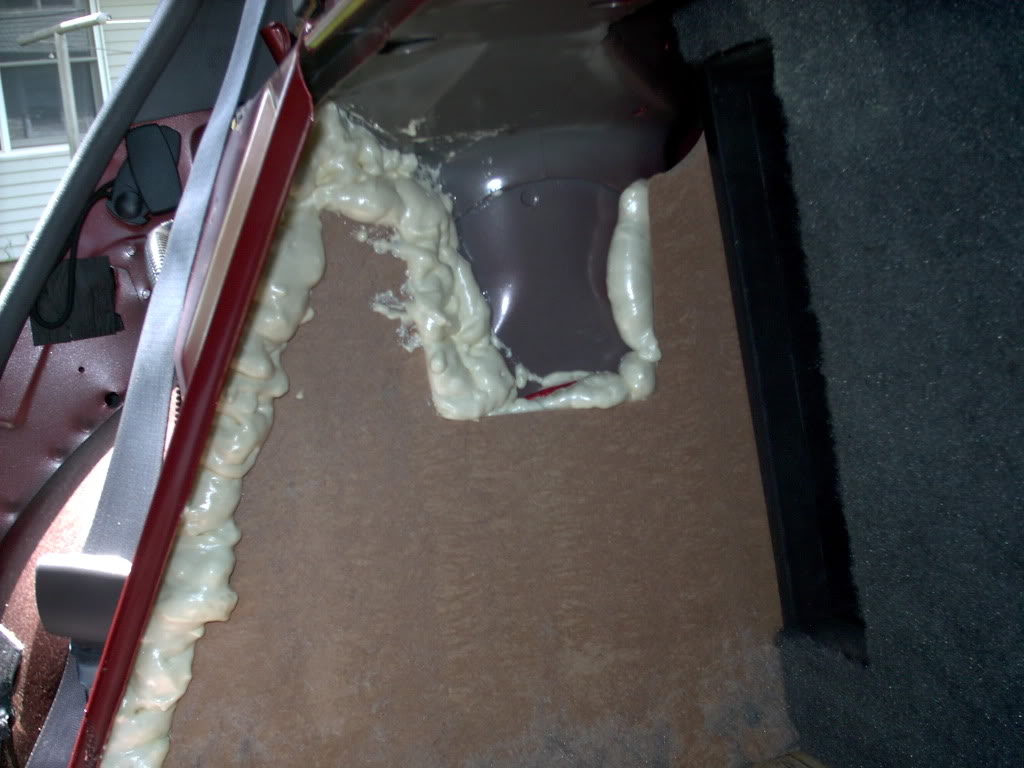
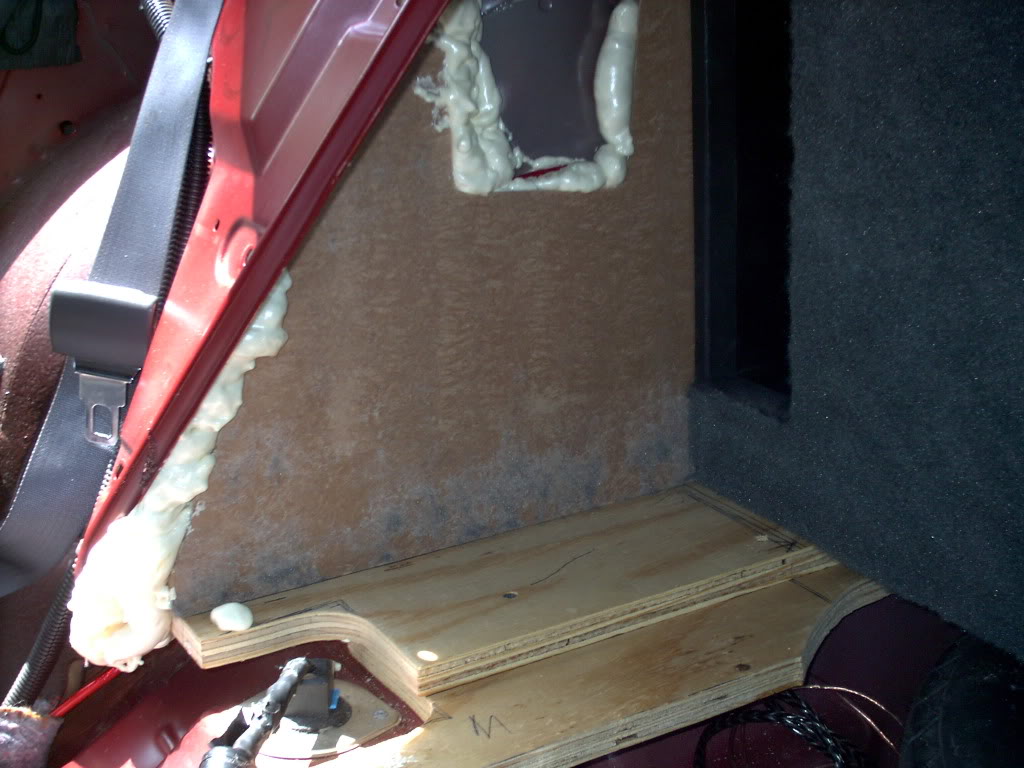
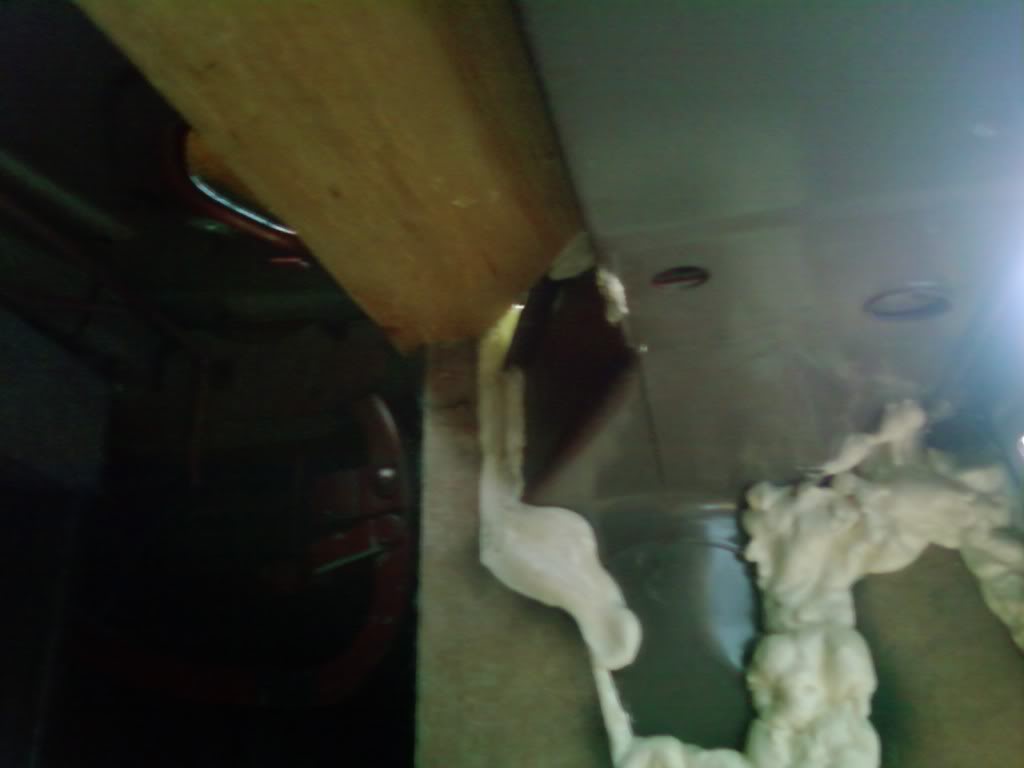
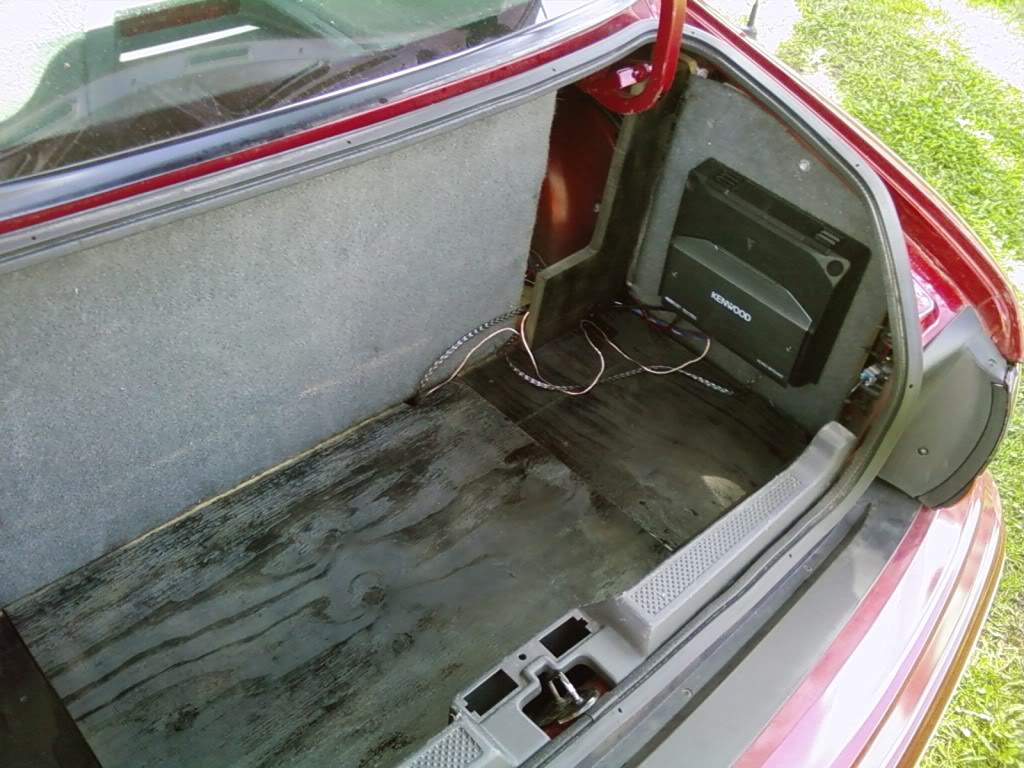
well got a memory card for the celly so i could get a lil updated on here, so dont mind the low quality. anyways i started filling in the gaps and all that, 2 cans of greatstuff down, a bit more to go. got the top piece of the "frame" on
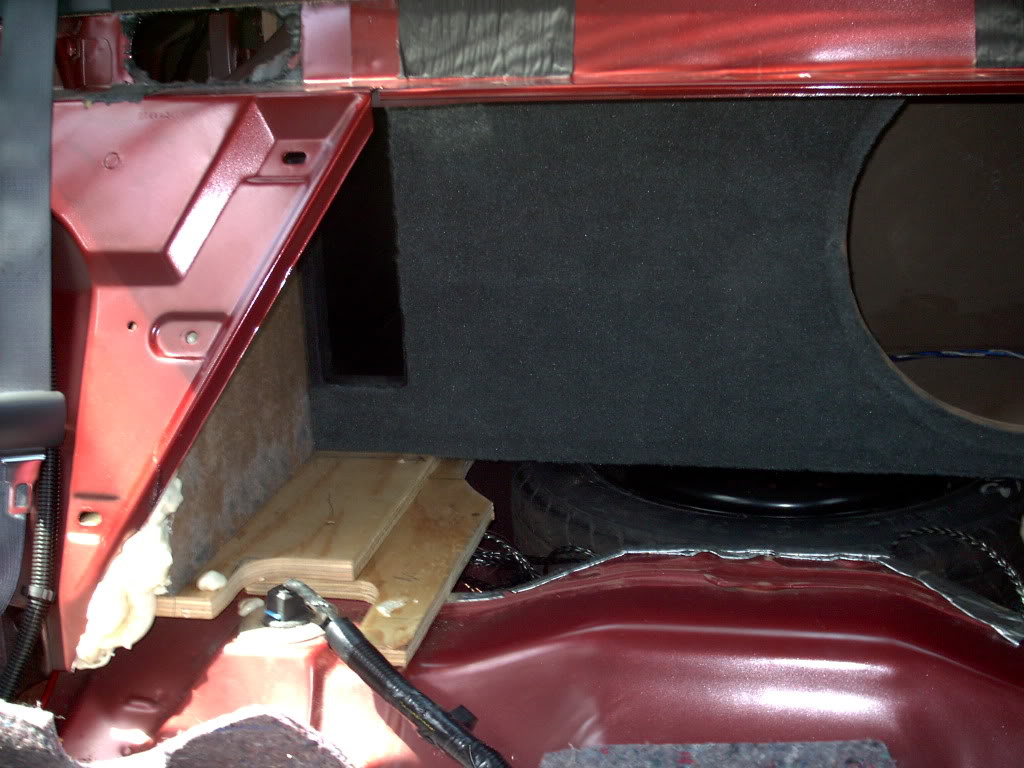
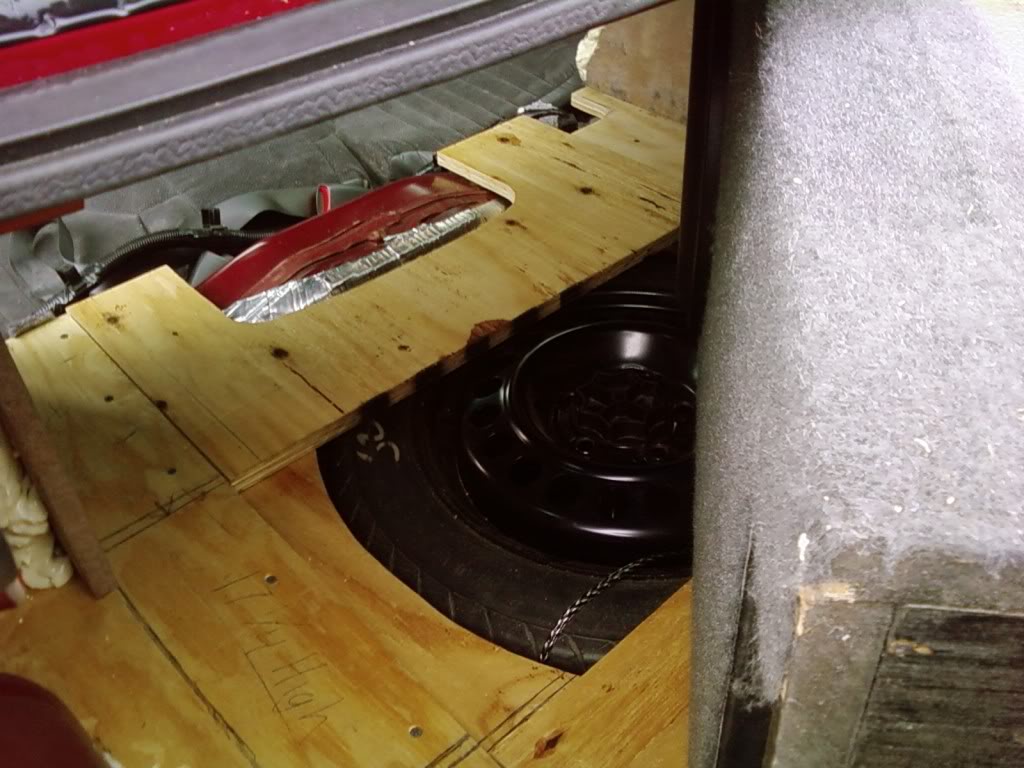
i also cut out some more wood to start filling in the rest, and the one closest to the inside of the car(with the cutout for the hump) will be attatched to 1 more that will go across in front of the sub. it will kinda lock in, in a way ha

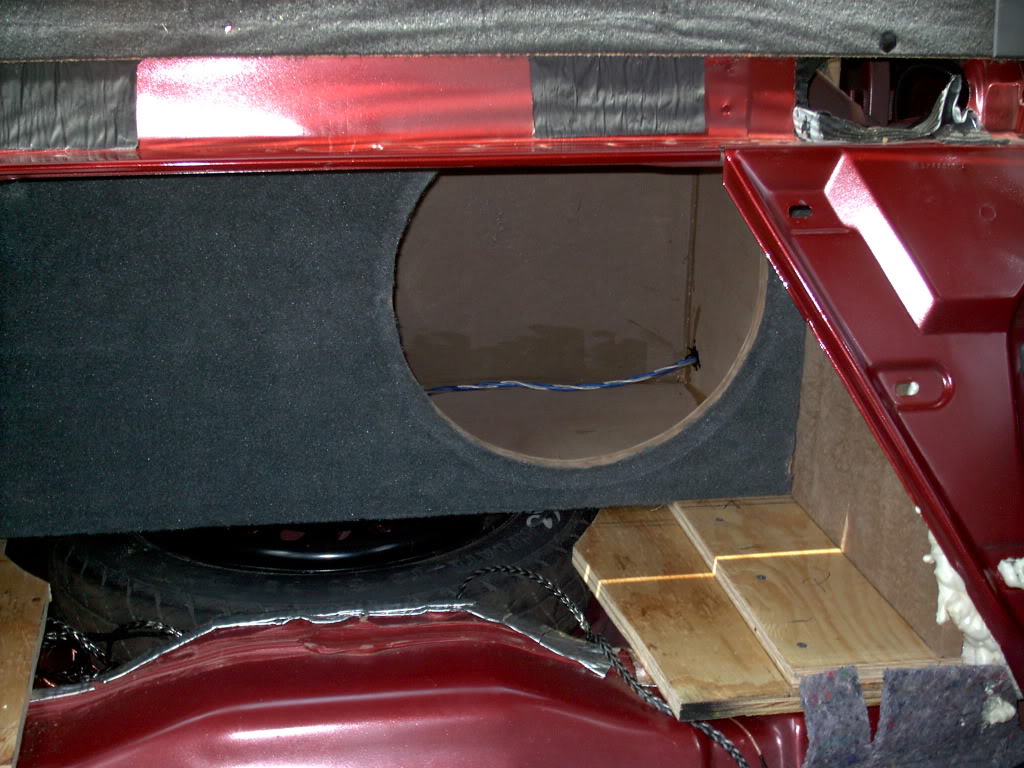
and also the sub shoved into the frame lol
when funds are ready im getting a run of 0 gauge goin(or 2), a batt(or 2)a amp for mids n highs,and bigger sub amp, i see this as the "break in"amp for now lol. i still need to make a couple mdf plates to cover the 6x9 openings and empty out another can or 2 of great stuff ha. after that im gonna figure out something with a amp rack and finish the trunk up. id like to do some glassing(color mathed to the exterior),and some carpet in there. ell let me know ya thoughts
i also cut out some more wood to start filling in the rest, and the one closest to the inside of the car(with the cutout for the hump) will be attatched to 1 more that will go across in front of the sub. it will kinda lock in, in a way ha
and also the sub shoved into the frame lol
when funds are ready im getting a run of 0 gauge goin(or 2), a batt(or 2)a amp for mids n highs,and bigger sub amp, i see this as the "break in"amp for now lol. i still need to make a couple mdf plates to cover the 6x9 openings and empty out another can or 2 of great stuff ha. after that im gonna figure out something with a amp rack and finish the trunk up. id like to do some glassing(color mathed to the exterior),and some carpet in there. ell let me know ya thoughts
08-21-2009, 01:40 PM
#36
Senior Member
Posts like a Turbo
Thread Starter
Join Date: May 2009
Location: Hibbing MN
Posts: 327
Likes: 0
Received 0 Likes
on
0 Posts
thanks man...but the pilars might be getting rebuilt. not sure if my new 4" will fit with the grills but will see. got more coming in the next week or so. stay tuned
08-29-2009, 10:11 PM
#37
Senior Member
Posts like a Turbo
Thread Starter
Join Date: May 2009
Location: Hibbing MN
Posts: 327
Likes: 0
Received 0 Likes
on
0 Posts
got something in the mail today
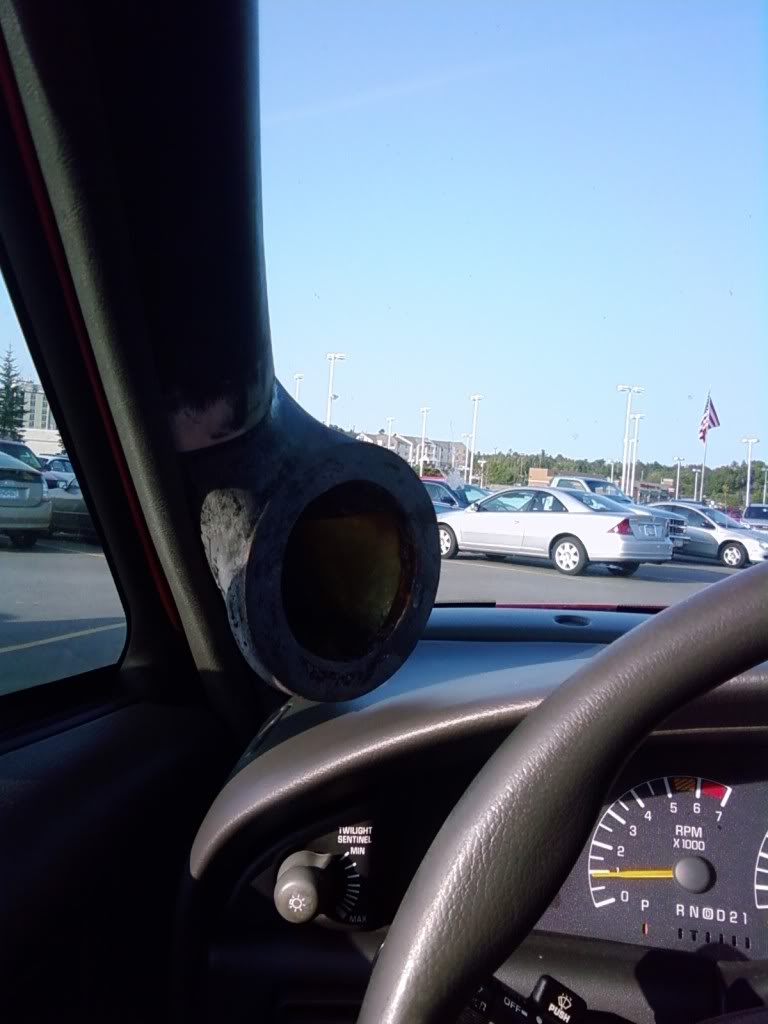
turns out they wont fit in my pilars as is.
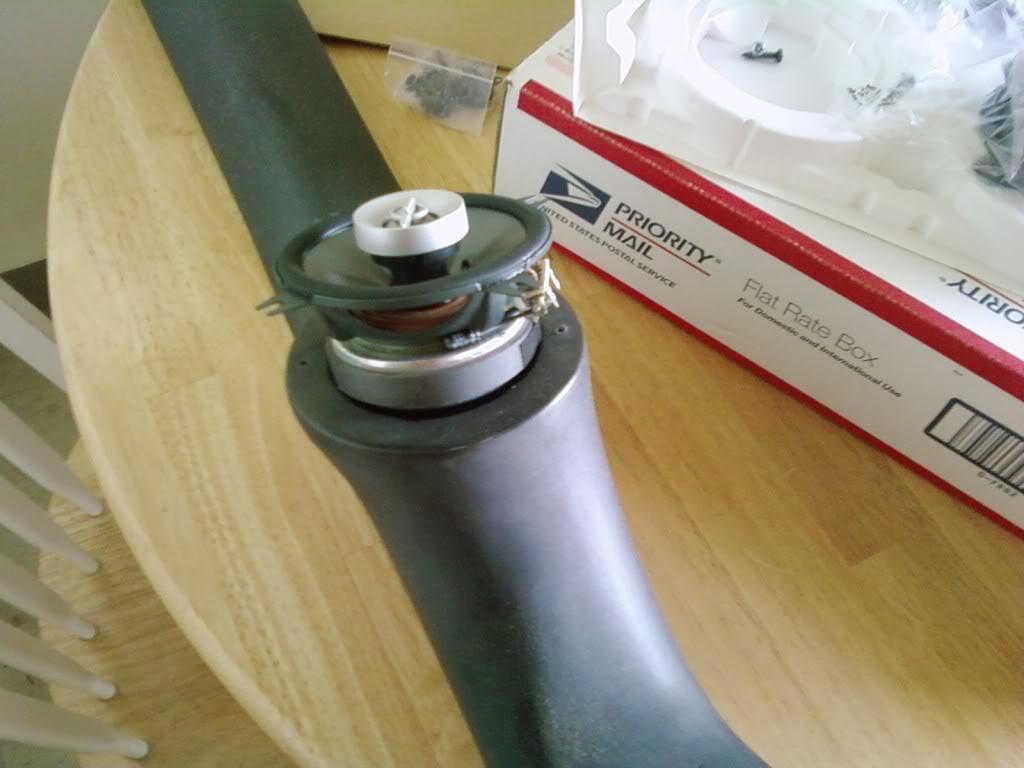
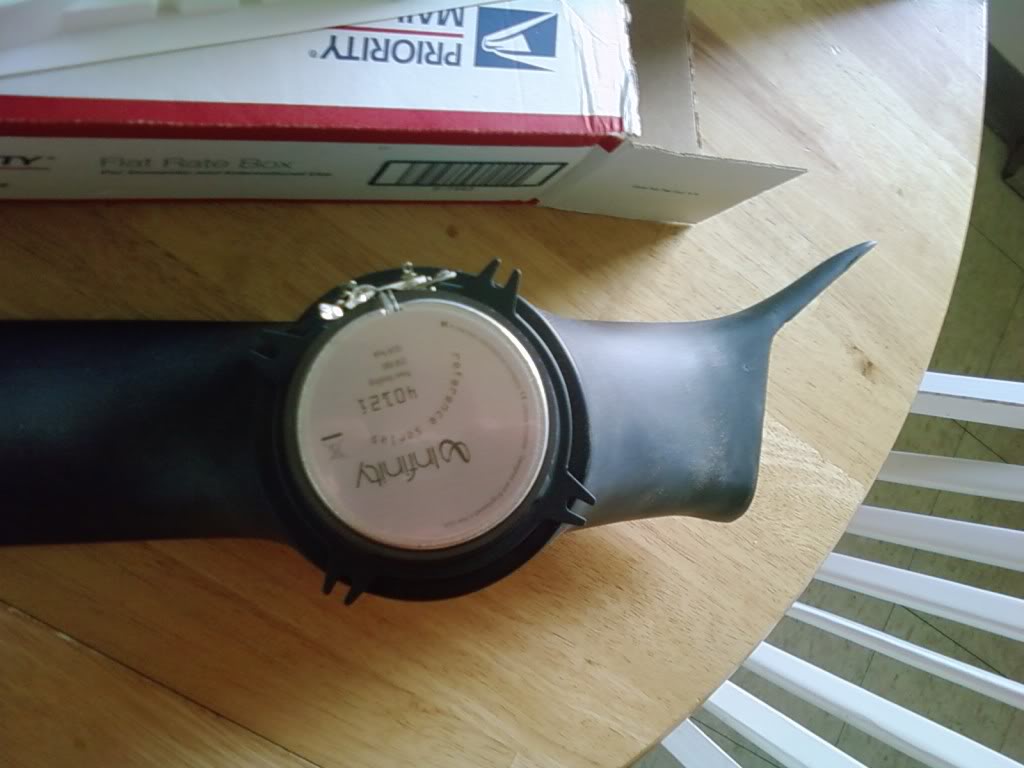
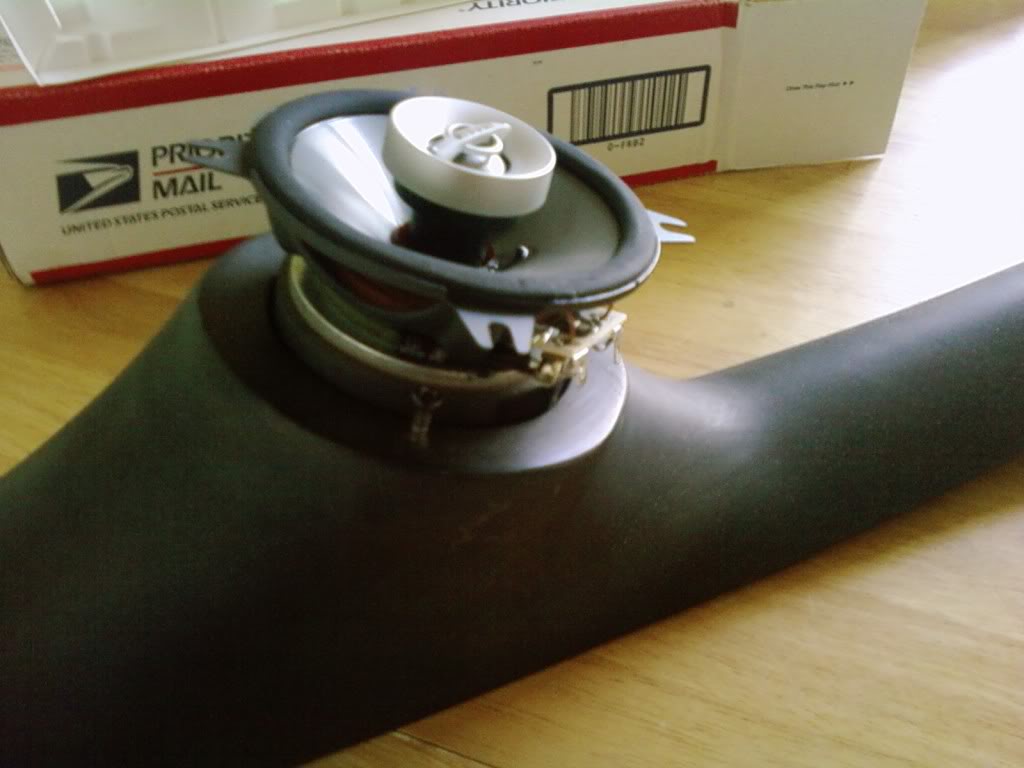
just a lil too big, sad? hell no i get to do a better job with these lol picked up a new saw and new blades FTMFW, had a janky *** saw and bent blade the first go around
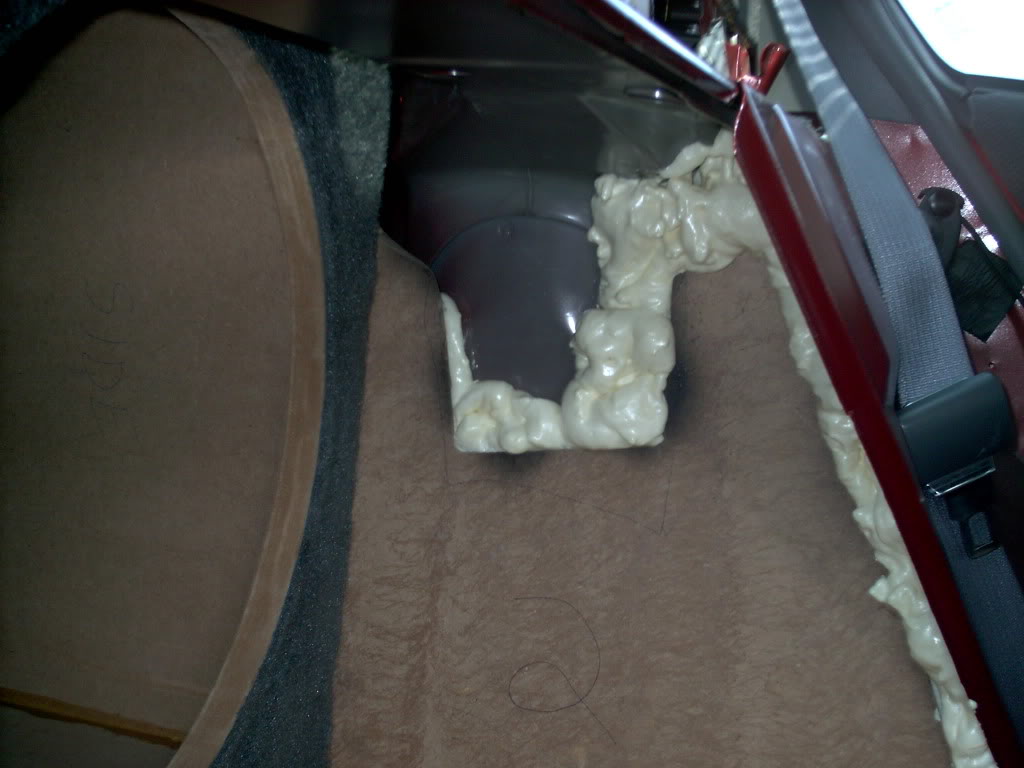
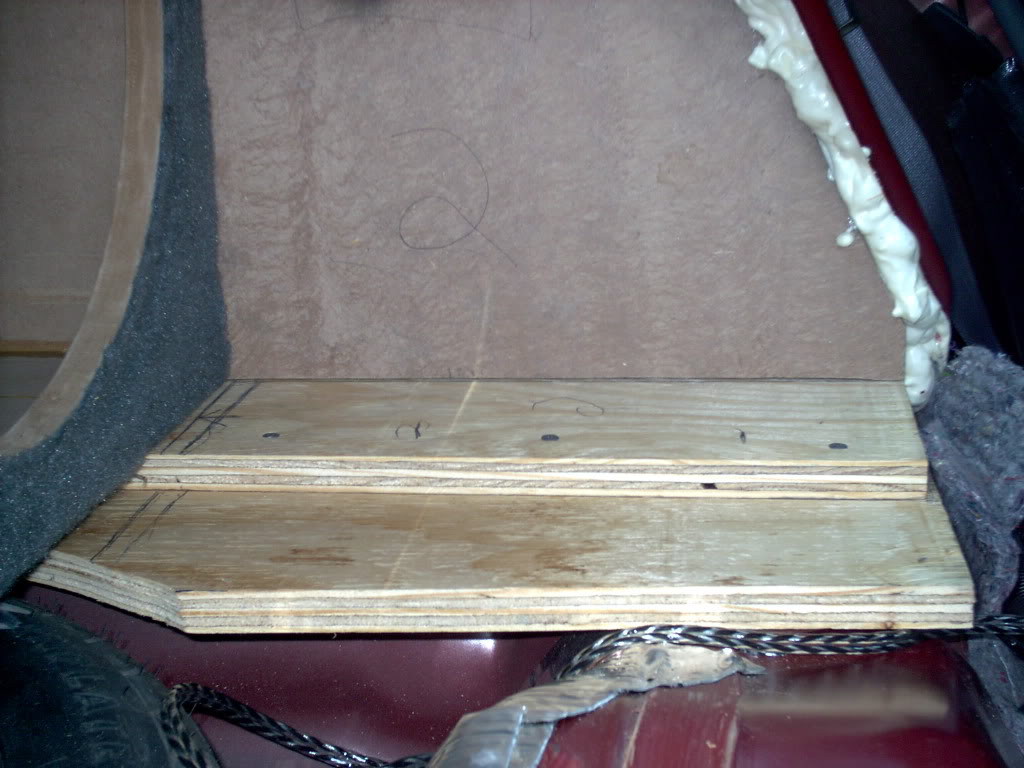
i have wiring on the way and a few more goodies, plus need to pick up some 1/2' plywood, carpet and spray adhesive for the rest of the trimming up. heres how its looking as of today. i just tossed a can of cheap spray paint so it wasnt just looking like i carry a bunch of wood around in the trunk lol
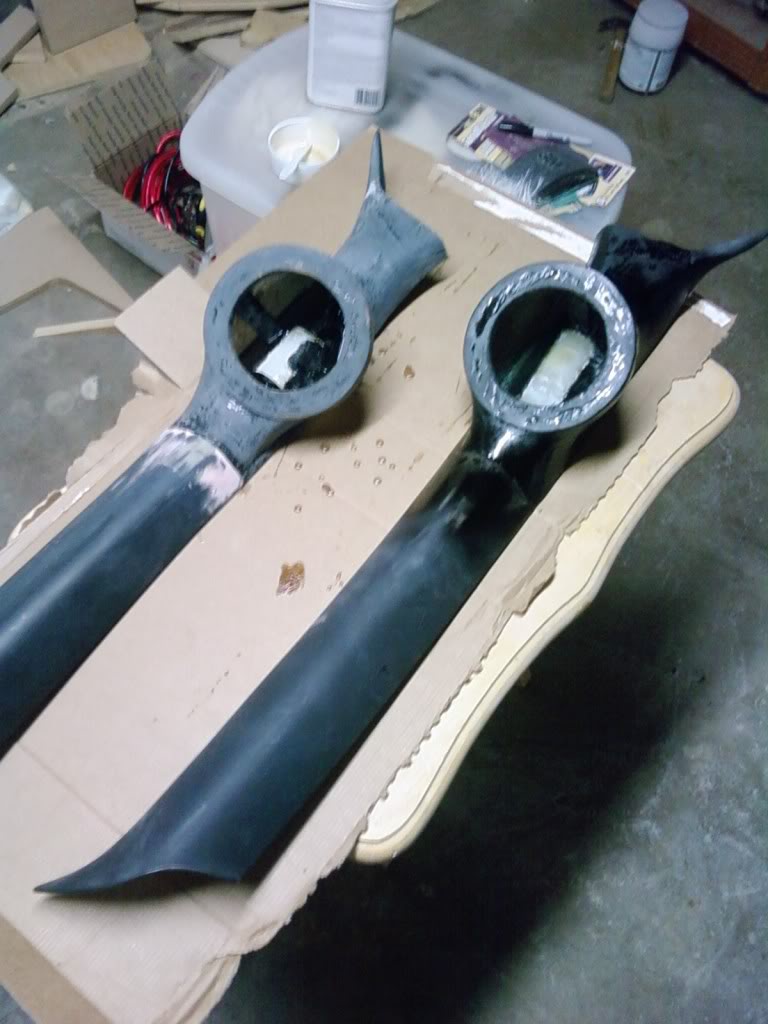
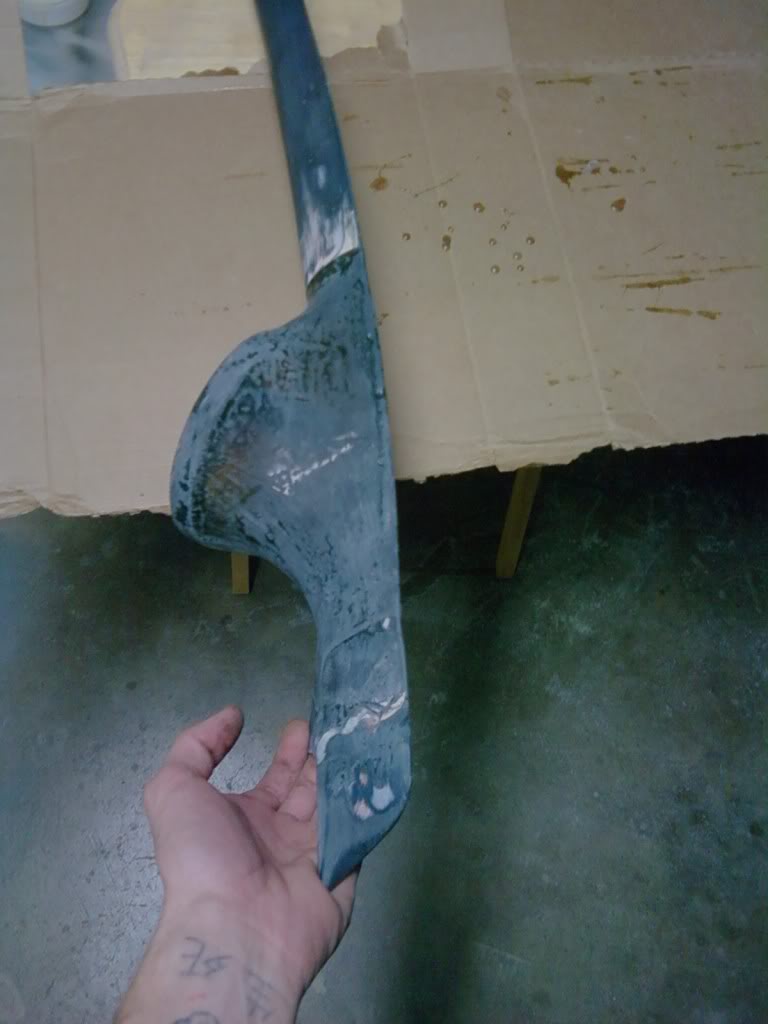
thats just some greatstuff in that one corner. the gas filler is right there so had to fill with something and wood wasnt gonna cut it. dont really know what im doing but figuring it all out as i go. learning as i go. got 1 ring cut out of 1/2" partical board since its what i had for thinner stuff. no need to use 3/4 MDF, would be too bulky IMO, and DAMN it was pain to get the old **** off my pilar...yeah i know i could of gone to a salvage yard n grabbed another pair for 15 or so, but these are paid for and i have more time then money
well gotto get the other pilar ripped apart so i can get the angles they will be sitting tomorrow before the woman needs to go to work. more to come this week, and let me know what ya think
turns out they wont fit in my pilars as is.
just a lil too big, sad? hell no i get to do a better job with these lol picked up a new saw and new blades FTMFW, had a janky *** saw and bent blade the first go around
i have wiring on the way and a few more goodies, plus need to pick up some 1/2' plywood, carpet and spray adhesive for the rest of the trimming up. heres how its looking as of today. i just tossed a can of cheap spray paint so it wasnt just looking like i carry a bunch of wood around in the trunk lol
thats just some greatstuff in that one corner. the gas filler is right there so had to fill with something and wood wasnt gonna cut it. dont really know what im doing but figuring it all out as i go. learning as i go. got 1 ring cut out of 1/2" partical board since its what i had for thinner stuff. no need to use 3/4 MDF, would be too bulky IMO, and DAMN it was pain to get the old **** off my pilar...yeah i know i could of gone to a salvage yard n grabbed another pair for 15 or so, but these are paid for and i have more time then money
well gotto get the other pilar ripped apart so i can get the angles they will be sitting tomorrow before the woman needs to go to work. more to come this week, and let me know what ya think
08-29-2009, 10:14 PM
#38
Senior Member
Posts like a Turbo
Thread Starter
Join Date: May 2009
Location: Hibbing MN
Posts: 327
Likes: 0
Received 0 Likes
on
0 Posts
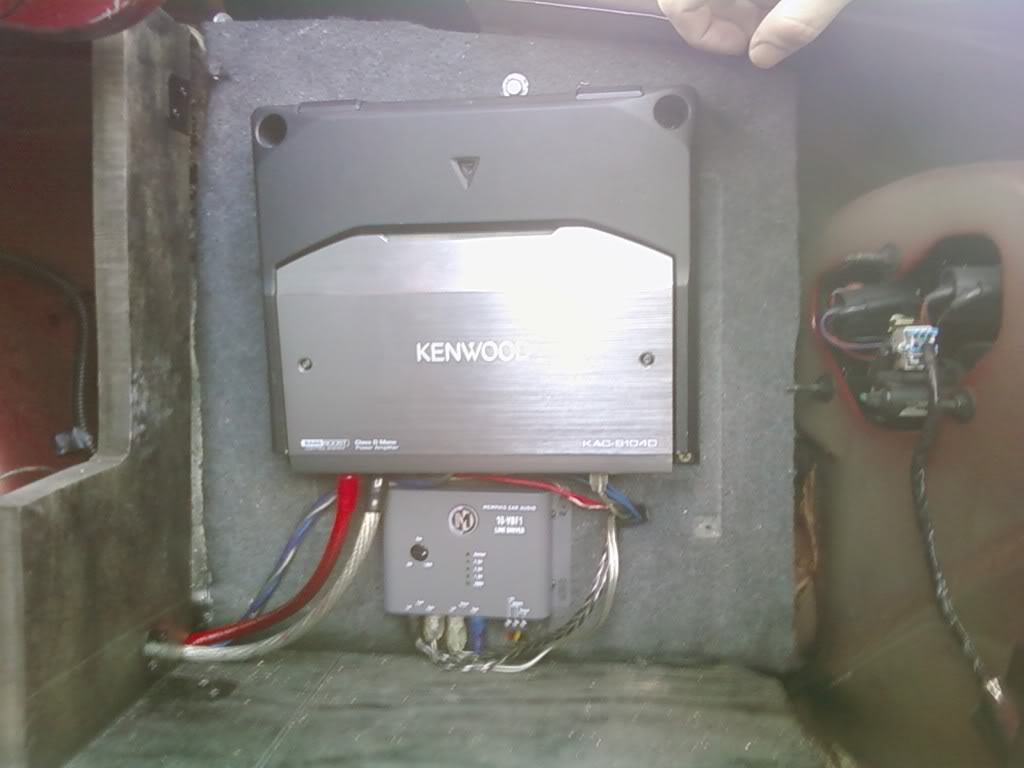
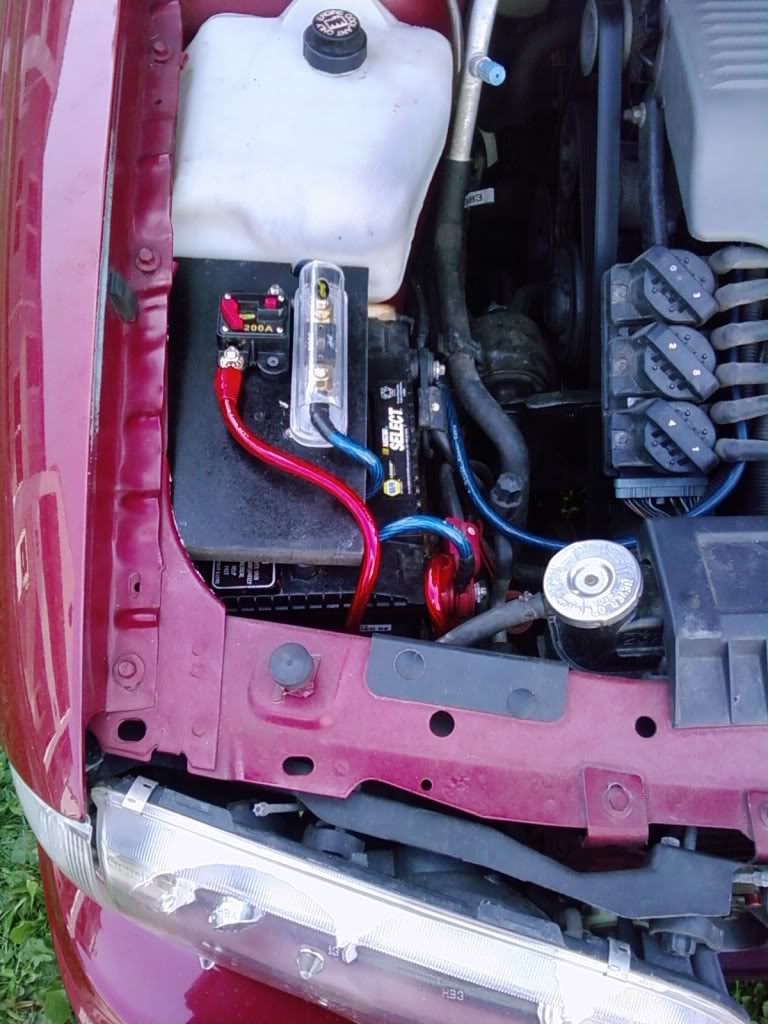
on the way i have a memphis 9v linedriver, stinger batt terminals, wiring, and working on a memphis amp for my mids and highs. hopefully in the next few weeks ill have that and more power for the starving sub lol. stay tuned...
09-02-2009, 02:54 PM
#39
Senior Member
Posts like a Turbo
Thread Starter
Join Date: May 2009
Location: Hibbing MN
Posts: 327
Likes: 0
Received 0 Likes
on
0 Posts
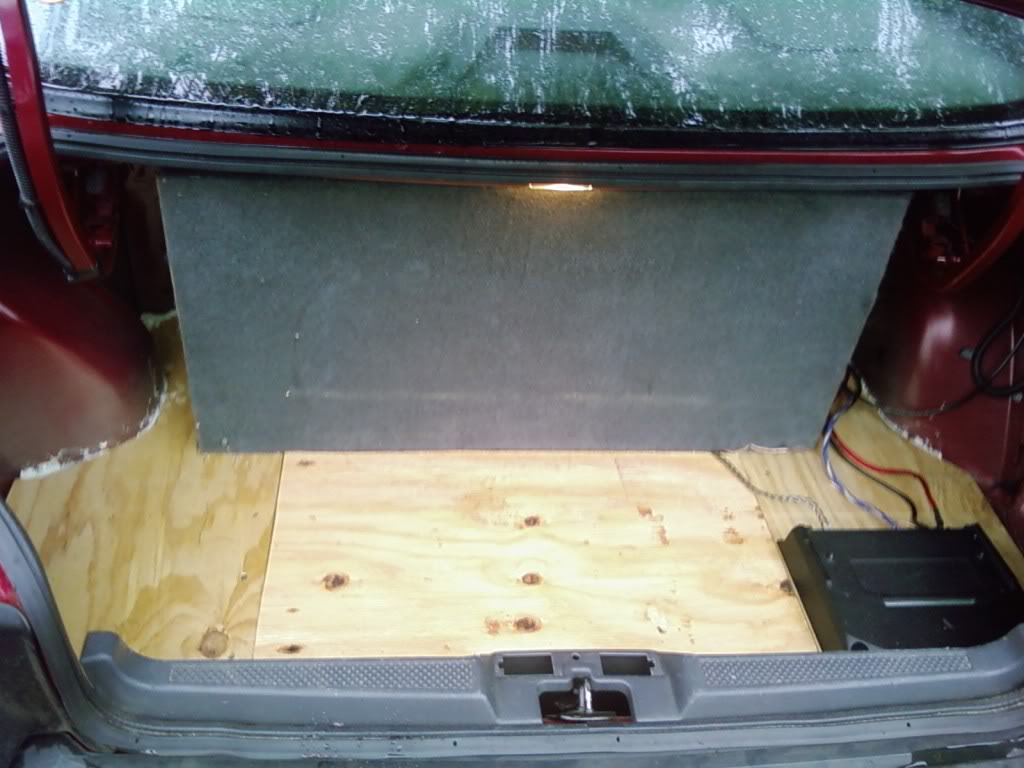
got some wire n stuff the other day

got it all ran and couldnt find any good place to mount fuse holder/breaker so grabbed a random chunk of mdf, put a top mount batt terminal on the mdfs bottom side with some epoxy, and the terminal holds it in place. just temp til i figure something else out and will get another fuse/ holder to replace the breaker
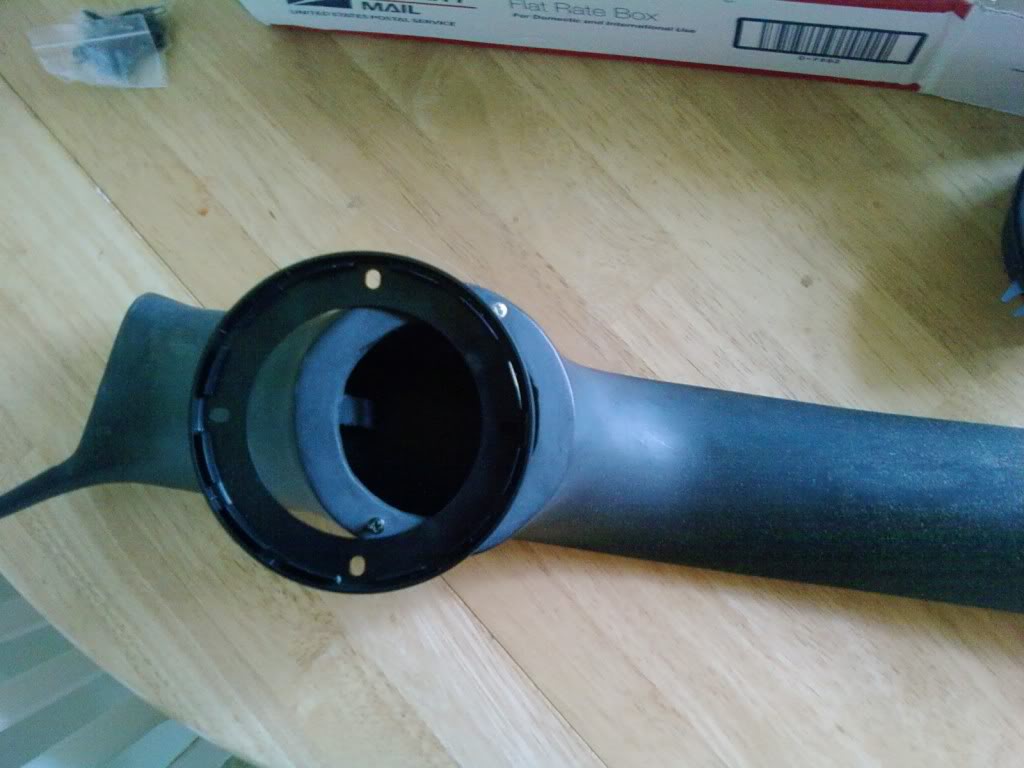
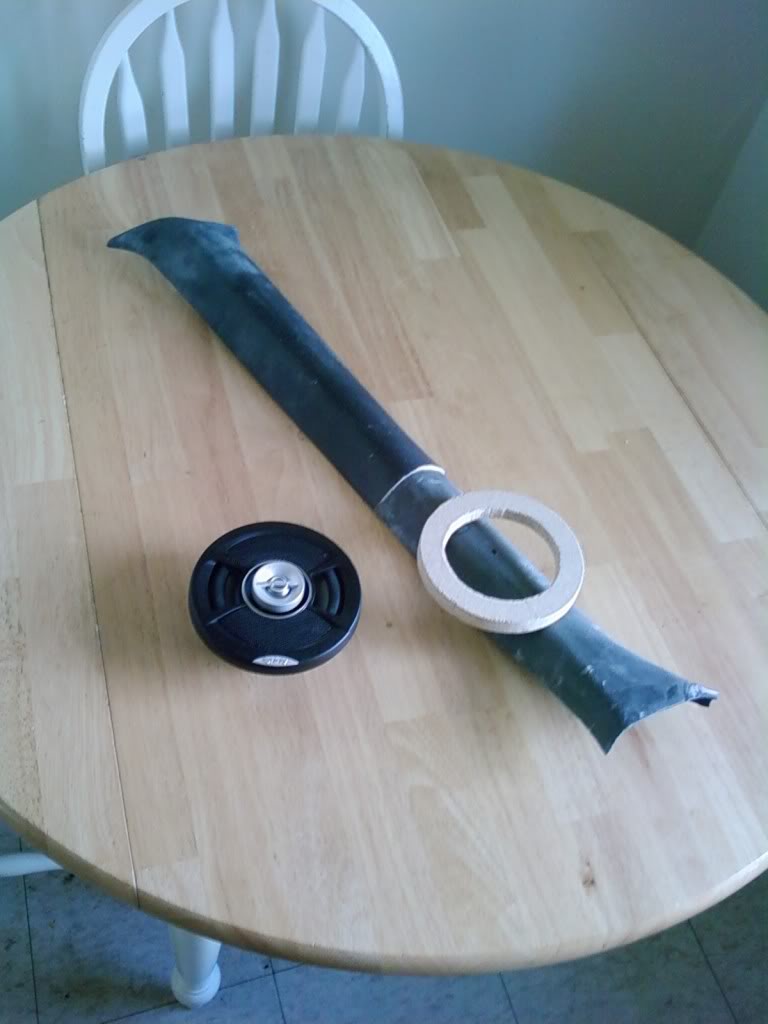
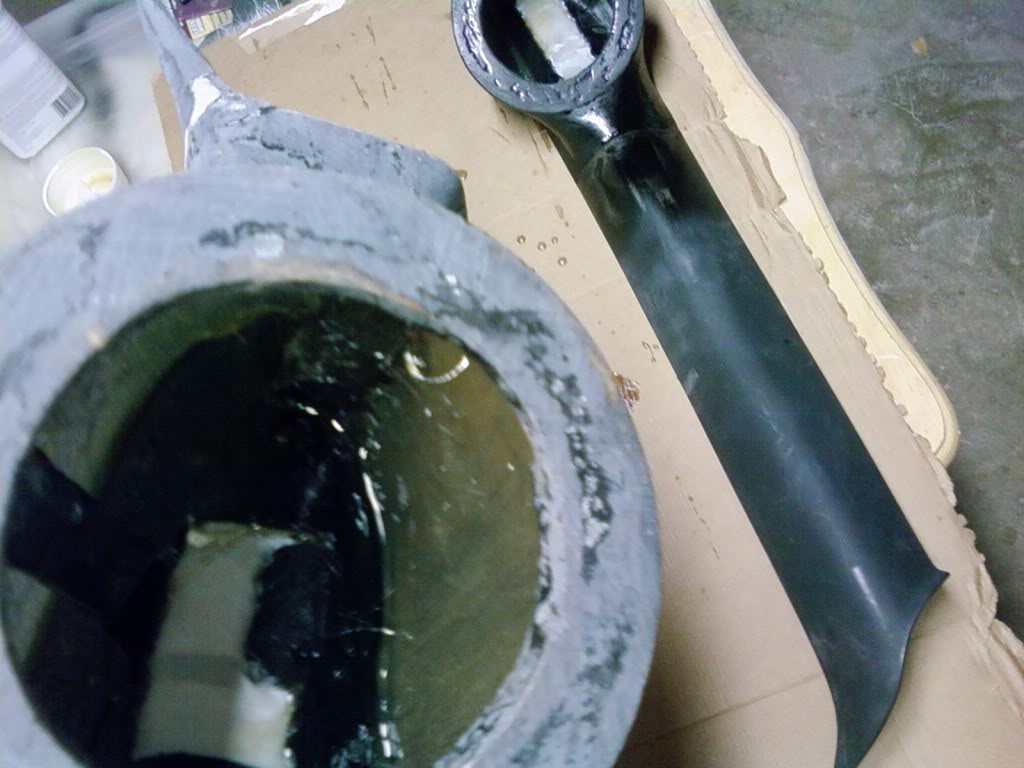
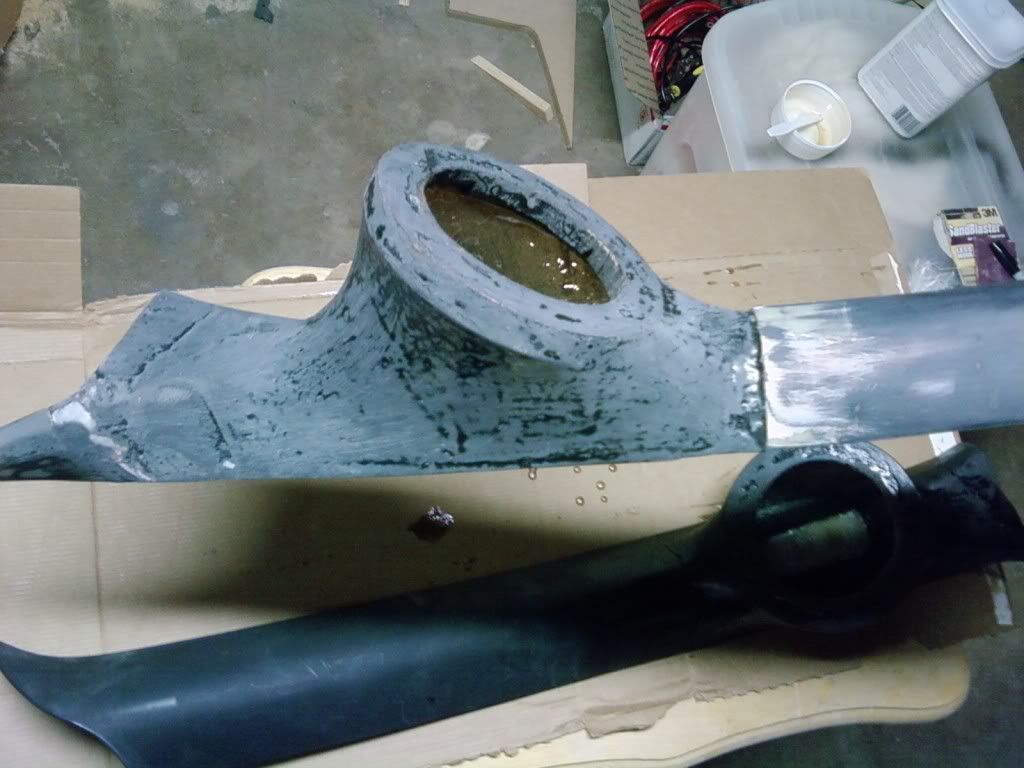
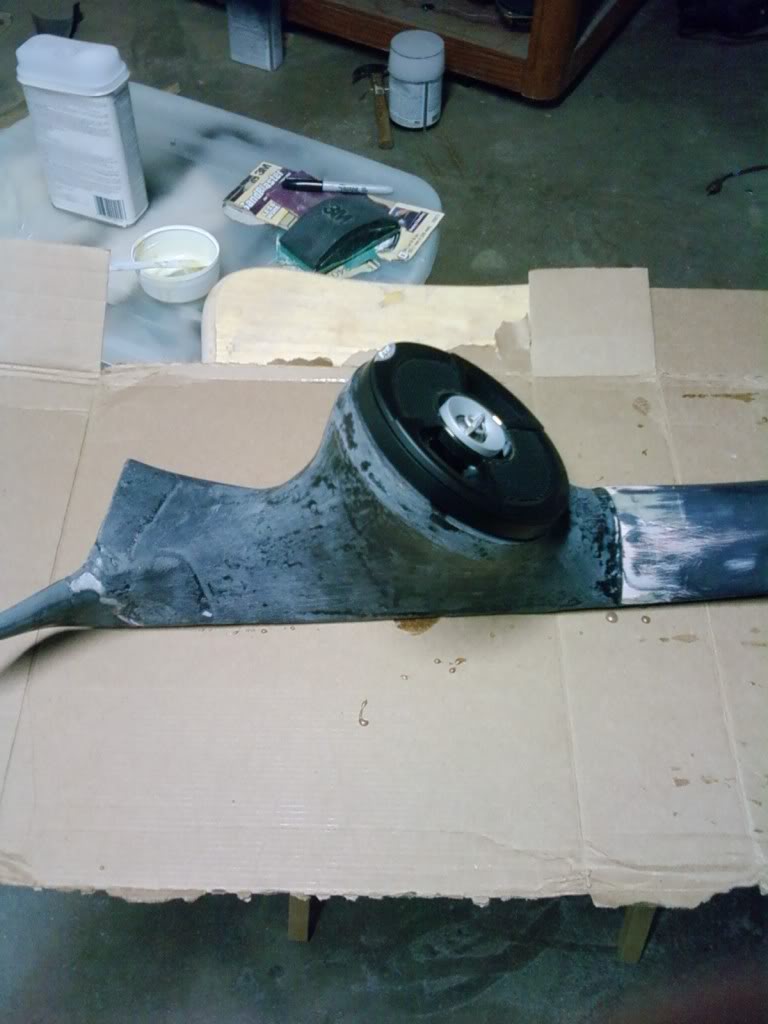
more pilar work ha. used a nylon sock this time, just to try something a lil dif from before. worked pretty good except one spot got a bit hot and warped, but nothing that cant be sanded down nice lol
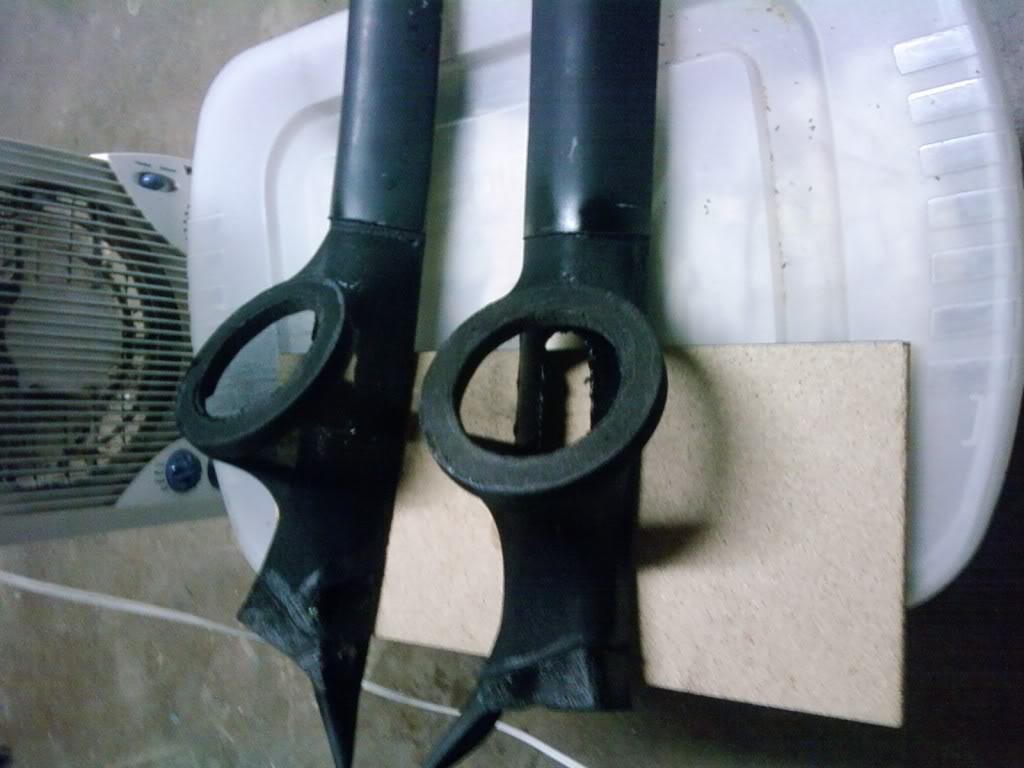
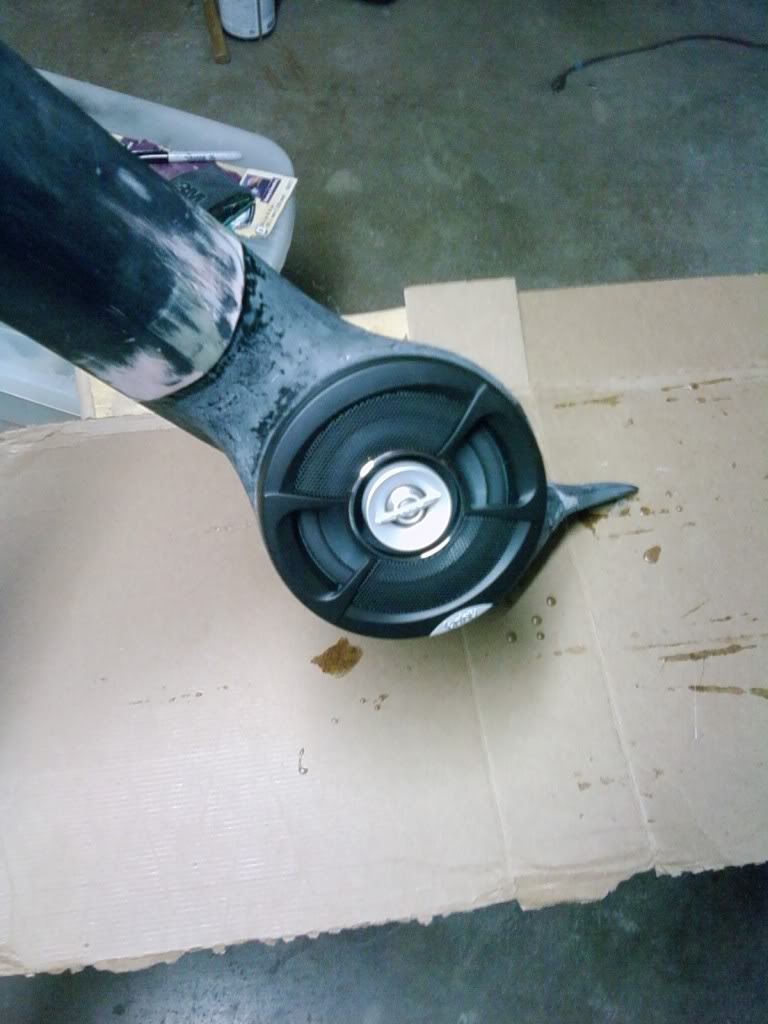
test fit with speaker, its just sitting in there so its prob somewhat off lol
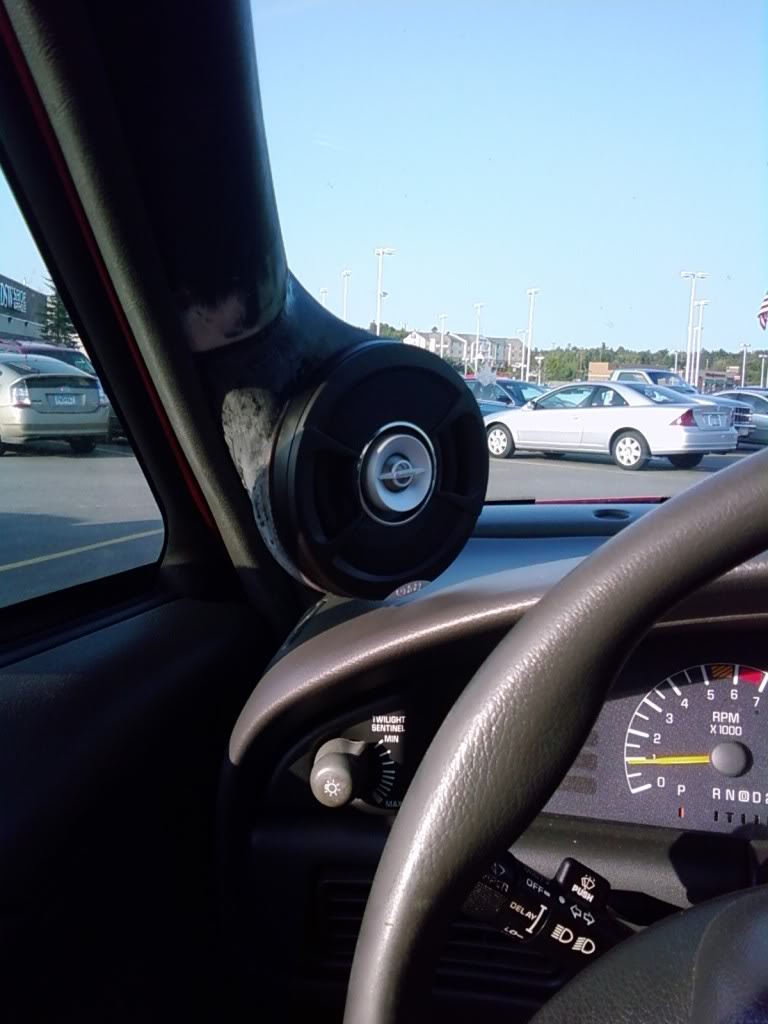
i got 2 layers on the inside of one and workin on the other one. word of the day is sanding lol. hopefully ill be able to get some body filler on them today. i think they are turning out way better then the first ones. new saw and new blades FTMFW for sure lol. had bent lade for the last rings i had to cut. nylons work pretty good also, down side is they dont take **** for resin, but they do hold shape pretty damn good and no creases or overlap = less sanding lol.
got it all ran and couldnt find any good place to mount fuse holder/breaker so grabbed a random chunk of mdf, put a top mount batt terminal on the mdfs bottom side with some epoxy, and the terminal holds it in place. just temp til i figure something else out and will get another fuse/ holder to replace the breaker
more pilar work ha. used a nylon sock this time, just to try something a lil dif from before. worked pretty good except one spot got a bit hot and warped, but nothing that cant be sanded down nice lol
test fit with speaker, its just sitting in there so its prob somewhat off lol
i got 2 layers on the inside of one and workin on the other one. word of the day is sanding lol. hopefully ill be able to get some body filler on them today. i think they are turning out way better then the first ones. new saw and new blades FTMFW for sure lol. had bent lade for the last rings i had to cut. nylons work pretty good also, down side is they dont take **** for resin, but they do hold shape pretty damn good and no creases or overlap = less sanding lol.
09-03-2009, 03:41 PM
#40
Senior Member
Posts like a Turbo
Thread Starter
Join Date: May 2009
Location: Hibbing MN
Posts: 327
Likes: 0
Received 0 Likes
on
0 Posts
the mail man brought me a little box today,memphis 9v linedriver. just temp mounted, ill figure out how i want to lay everything out once all the equipment shows. still have another memphis PR100.2 amp for my fronts on the way.