Gold Crosslace installation!
 04-12-2007, 01:00 PM
#1
Senior Member
Posts like a Northstar
Thread Starter

Join Date: Dec 2006
Location: Niagara Region, ON, Canada
Posts: 635
Likes: 0
Received 0 Likes
on
0 Posts

Hi Everyone,
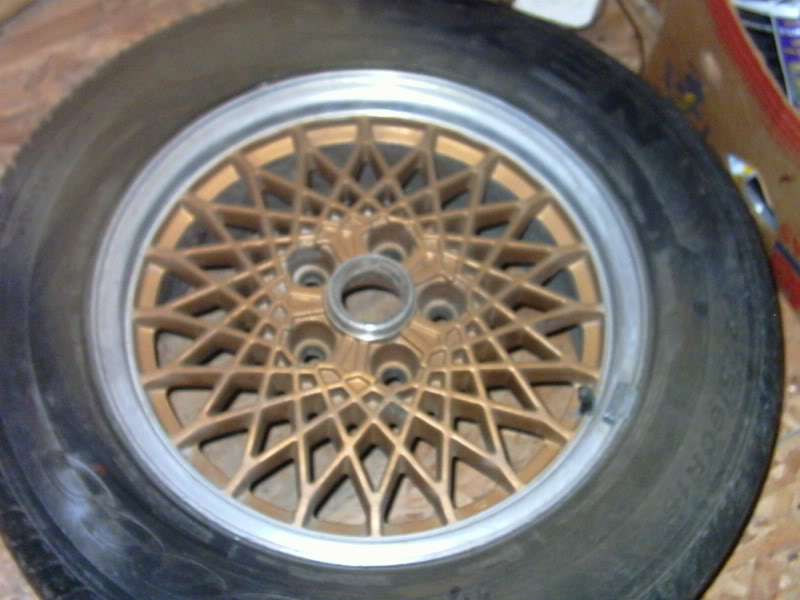
Over the winter, I sanded, polished, and re-painted a set of used gold cross lace rims for my car. They were a little rough at the beginning, lots of clear coat flaking off:
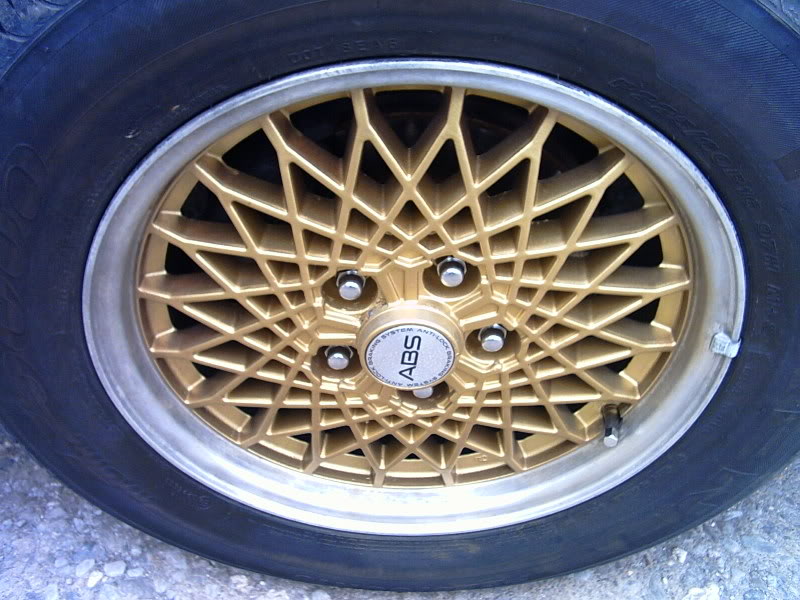
So, after a bit of elbow grease, I managed to polish the outer edges up after some light sanding. I then re-painted the gold portion, and re-clear coated them (6 coats)
To cap them off, a used set of center caps from Pat brought them back to life:
So, here they are on the car:
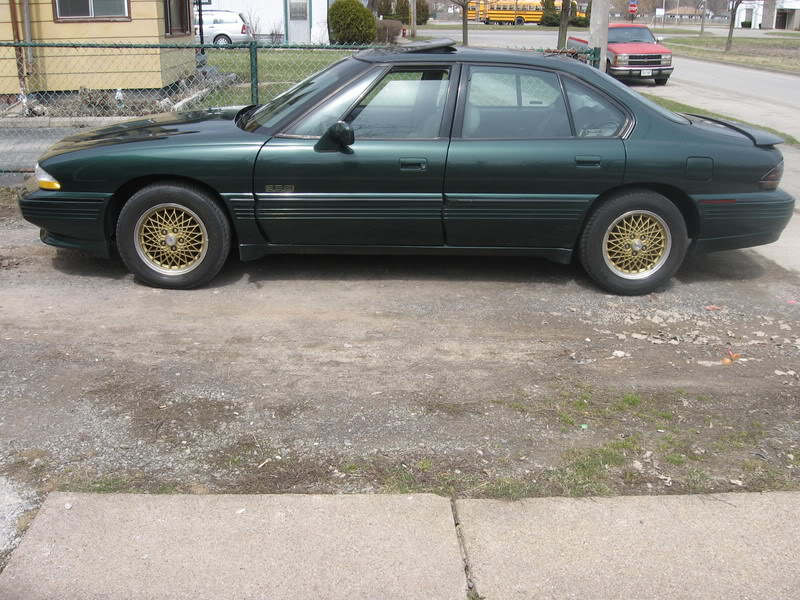
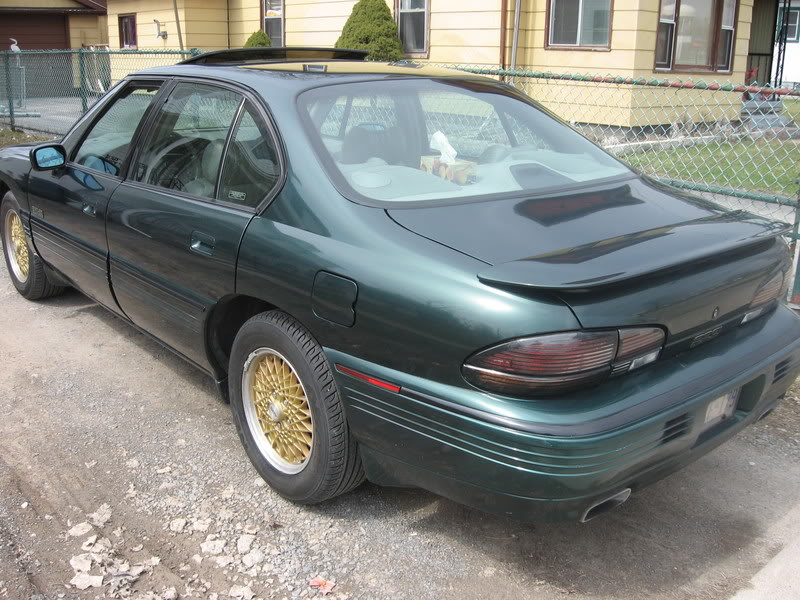
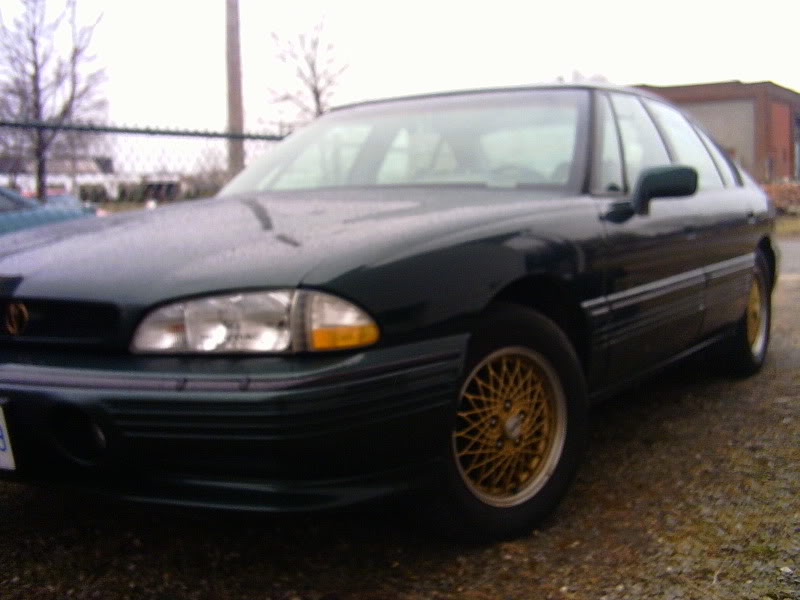
Not a very pretty back drop, I just took a few quick pics in my driveway!
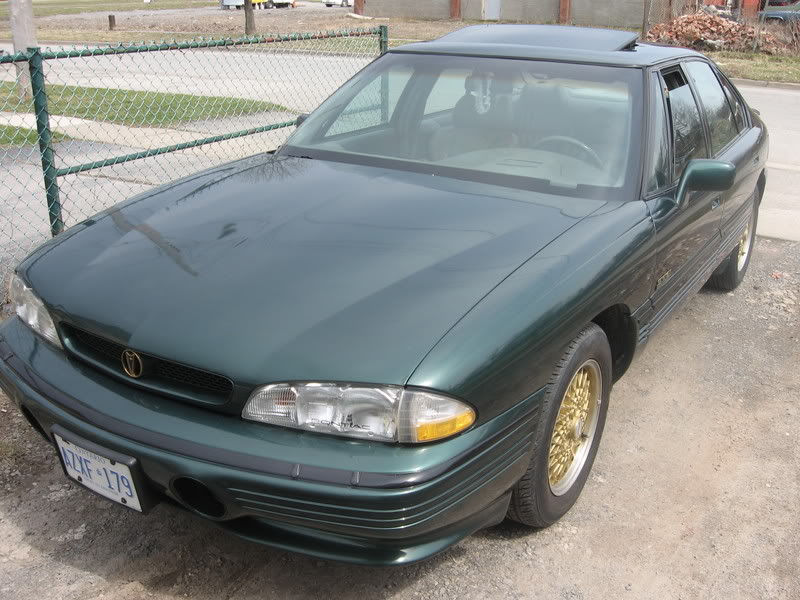
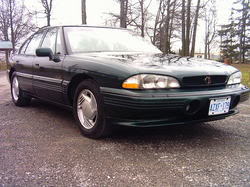
Here is how the car looked before:
I think the gold dressed it up a bit. Hope you folks like it!
PS: The new tires give the car a nice ride.
Cheers,
Adam
Over the winter, I sanded, polished, and re-painted a set of used gold cross lace rims for my car. They were a little rough at the beginning, lots of clear coat flaking off:
So, after a bit of elbow grease, I managed to polish the outer edges up after some light sanding. I then re-painted the gold portion, and re-clear coated them (6 coats)
To cap them off, a used set of center caps from Pat brought them back to life:
So, here they are on the car:
Not a very pretty back drop, I just took a few quick pics in my driveway!
Here is how the car looked before:
I think the gold dressed it up a bit. Hope you folks like it!
PS: The new tires give the car a nice ride.
Cheers,
Adam
 04-12-2007, 01:08 PM
#2
Senior Member
True Car Nut

Join Date: Feb 2005
Location: Brampton, Ontario
Posts: 3,014
Likes: 0
Received 0 Likes
on
0 Posts
Looks great, I noticed you mentioned that you sanded along the edges, I'm in the process of doing that on one of mine but just can't seem to get them to come out smooth and clean. The curb rash was pretty severe so I started with about 180 grit and it seems to be a very very slow process. I've put in about 2 hours into one rim so far and it looks like I'm about 20% there.


 04-12-2007, 02:58 PM
#6
Senior Member
Posts like a Northstar
Thread Starter
Join Date: Dec 2006
Location: Niagara Region, ON, Canada
Posts: 635
Likes: 0
Received 0 Likes
on
0 Posts
Hi, and thanks for the compliments!
As far as I know, the car does have the original paint on it. Not bad for being 14 years old, and enduring Canadian winters! I always try to keep in clean.
It has a few spots on it which touched up nicely using a small touch up kit. The bumpers are flaked slightly, but overall the paint is in great shape. I don't think it needs repainting just yet.
Yes Pat, the caps look great!!
Yes, I sanded and sanded. Actually, I started off using an SOS pad. Seems a little harsh, but it got the worst of it off. I tried a wire wheel on the end of the drill for the real stubborn stuff. There was lots of that!
If you leave some scuff marks, it'* okay, as long as you get the stuff off you don't want. Scuff marks sand right out when you use a coarse grit of sand paper than gradually go to a smoother grit.
My final sanding was a wet sand, then a trip to the car wash to blast off the old brake dust prior to painting.
The wheels with brand new tires cost me $100.00, and the paint & clear coat was about $18.00, followed by caps from Pat for $20.00
04-12-2007, 04:32 PM
#7
Senior Member
Posts like a Turbo

Join Date: Sep 2005
Location: Puerto Rico
Posts: 409
Likes: 0
Received 0 Likes
on
0 Posts
When I did mine (Trans Am) I put the car on 4 towers & the trans on 1st gear. That & an electric drill goin the oposite direction made the job a loot faster. 
04-12-2007, 04:36 PM
#8
BANNED

Join Date: Mar 2004
Location: Purgatory
Posts: 0
Likes: 0
Received 0 Likes
on
0 Posts
Originally Posted by alexcoqui
When I did mine (Trans Am) I put the car on 4 towers & the trans on 1st gear. That & an electric drill goin the oposite direction made the job a loot faster.
as long as that car doesnt get away from ya
04-12-2007, 05:12 PM
#9
Senior Member
Certified GM nut

Join Date: Apr 2003
Location: Davison,Michigan
Posts: 1,867
Likes: 0
Received 0 Likes
on
0 Posts
Originally Posted by alexcoqui
When I did mine (Trans Am) I put the car on 4 towers & the trans on 1st gear. That & an electric drill goin the oposite direction made the job a loot faster.

