time to paint the scooter!!!
 02-15-2014, 10:35 PM
#1
Senior Member
Certified GM nut
Certified GM nut
Thread Starter

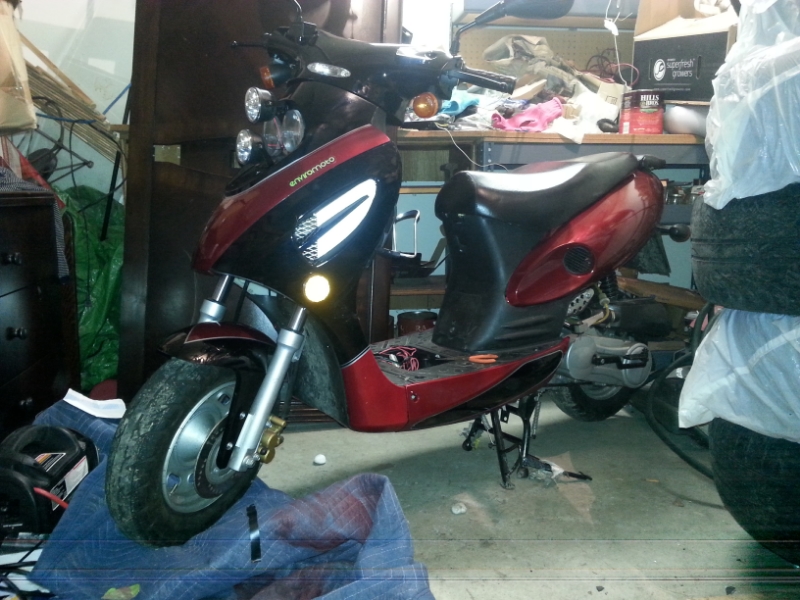
hey all. ive been looking for a winter project. and seeing how the scoot has been looking rough this past year, i figured id throw some makeup on er!
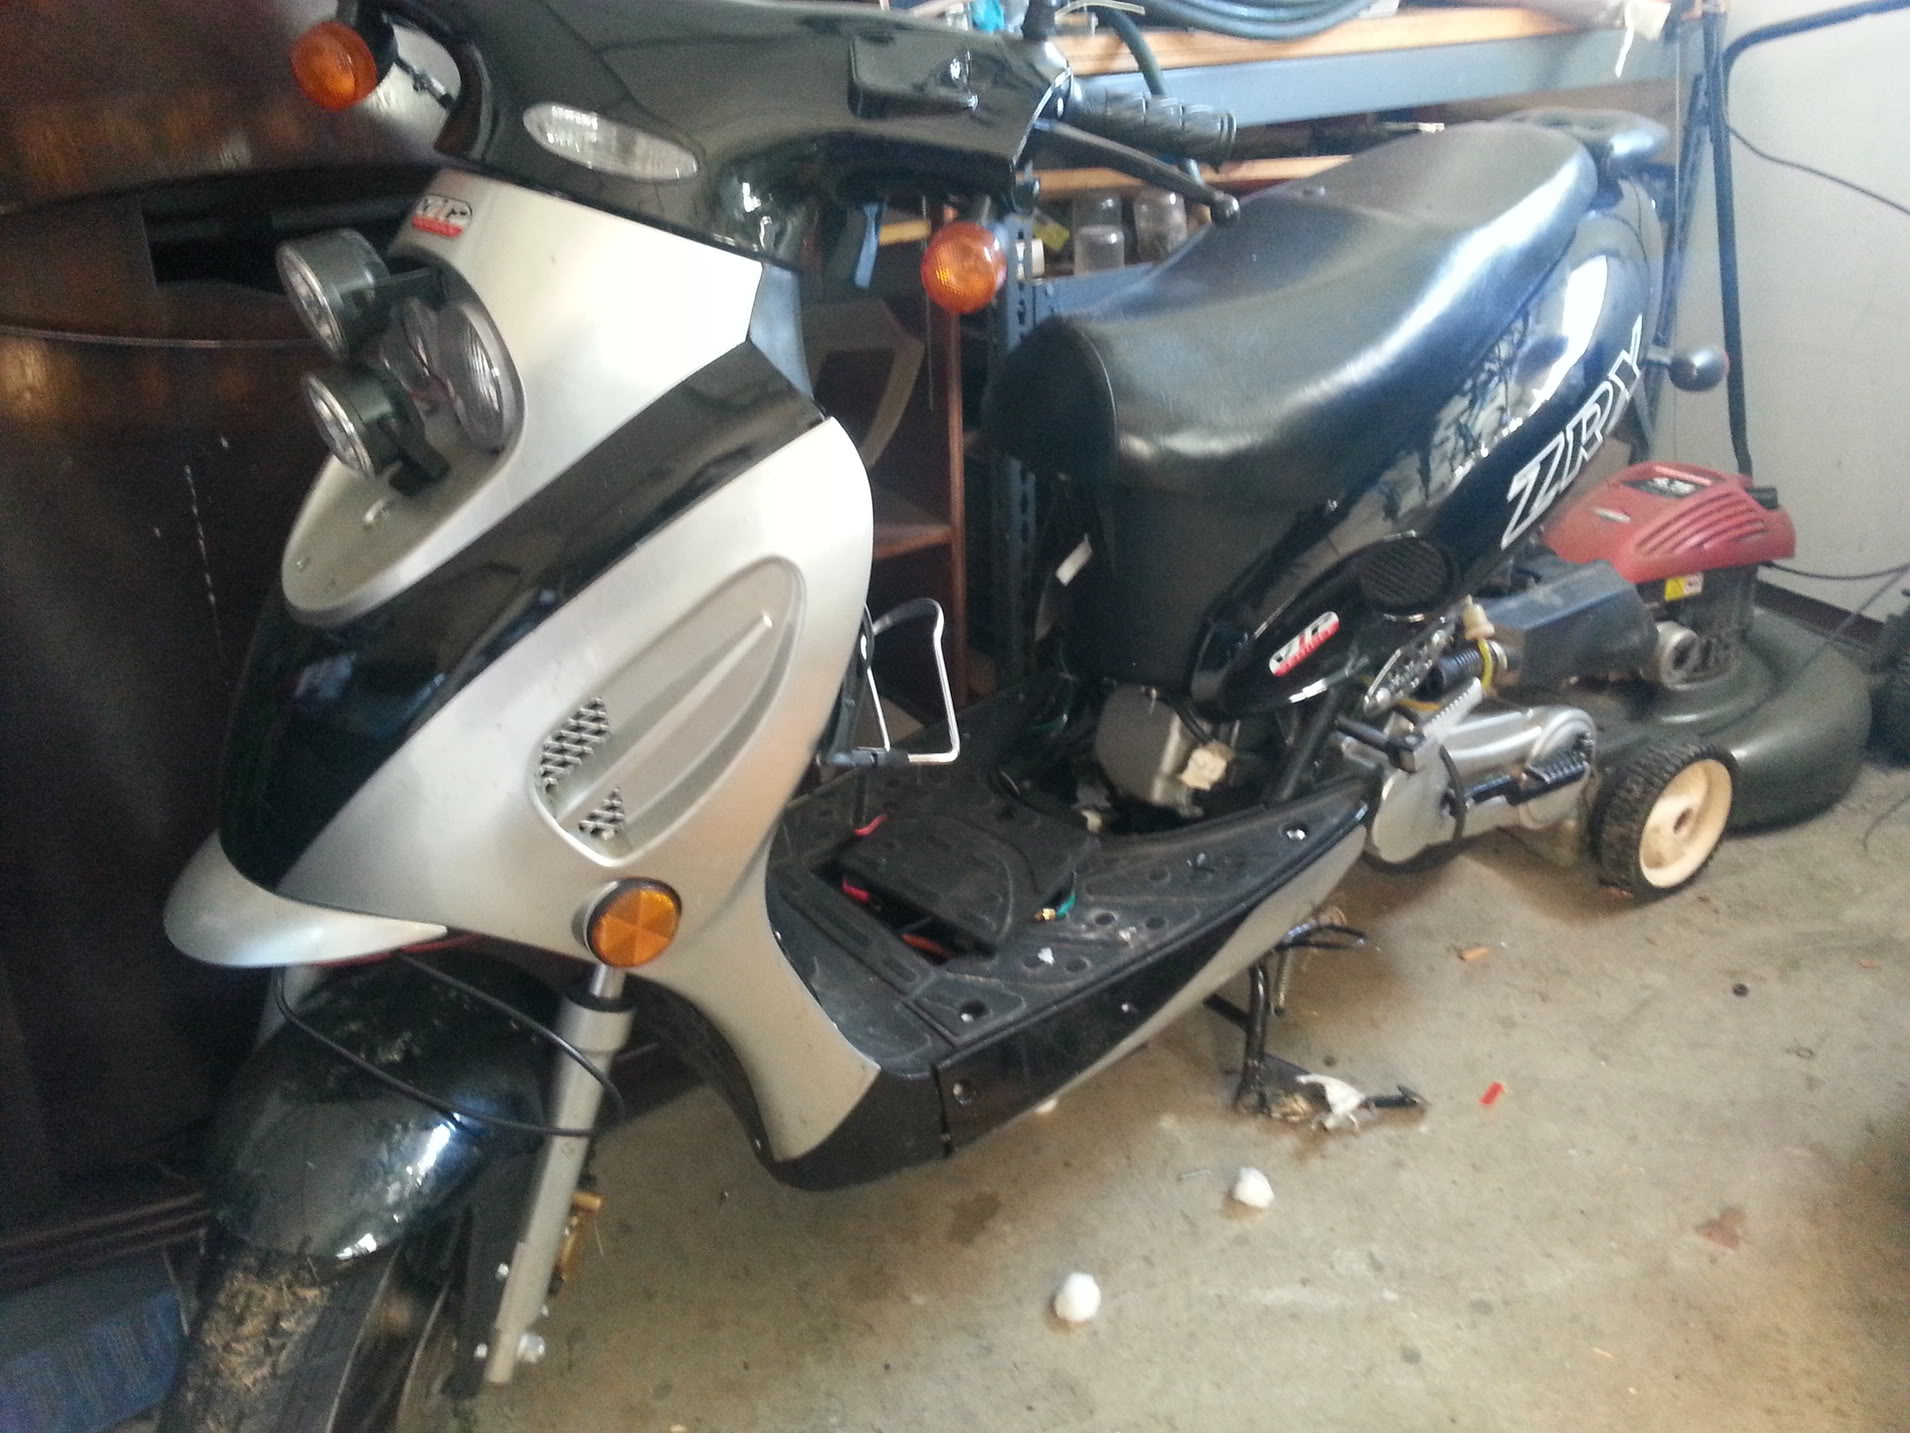
the thing was scratchless. never, ever dropped and always covered since i bought it in 2008. after i installed the big bore kit, i did not realize the thing had a massive vacuum leak where i forgot to install the intake gasket. (im sure you can see where this is going.....) started it for the first time, not on the center stand, because that wasn't installed yet. thing rode a wheelie about 20 feet before catching the luggage rack and falling on its side. i was very happy that noone was injured, and even happier that i had the forethought to install a tilt activated kill switch so it wasnt starved for oil on the nice fresh rebuilt not broken in engine.
as a result of that mishap, i had some pretty torn up right side plastics. so i plastic welded them back together with my soldering iron, sanded them and am currently waiting on the second coat of clear to dry on the first piece so i can wetsand.
figured id update this thread as i slowly paint er all up.
the black is called "HONDA nighthawk black pearl" and the red is called "GM dark cherry metallic" if anyone was interested.
i really like the black. it looks like a very dark blue at just the right angle.
pic of her "good side"
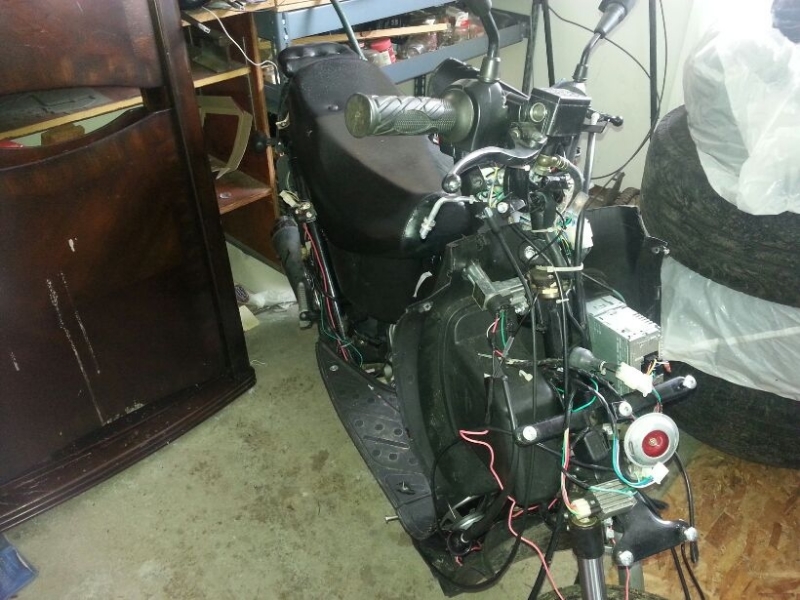
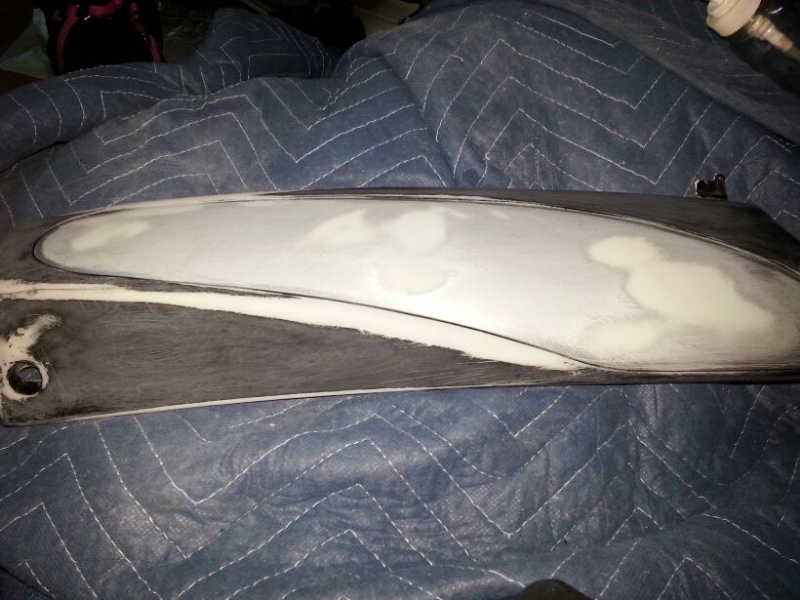
her stripped.
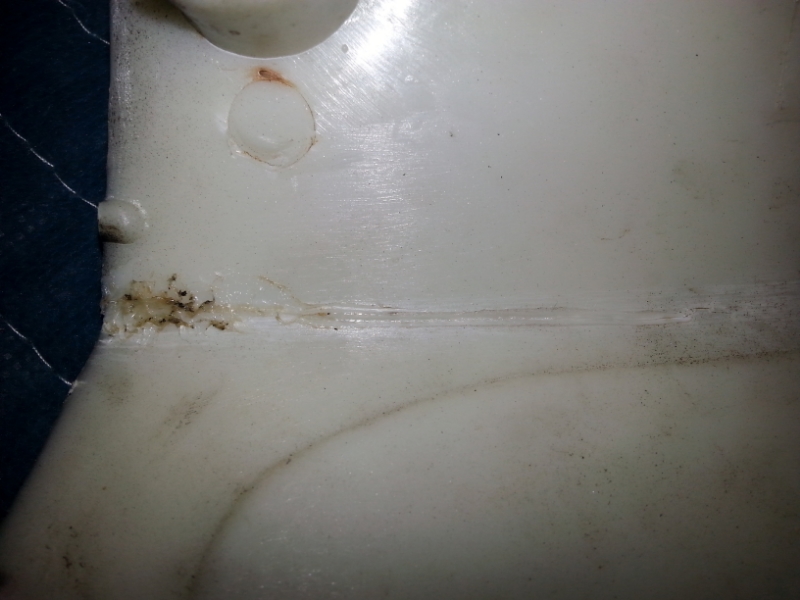
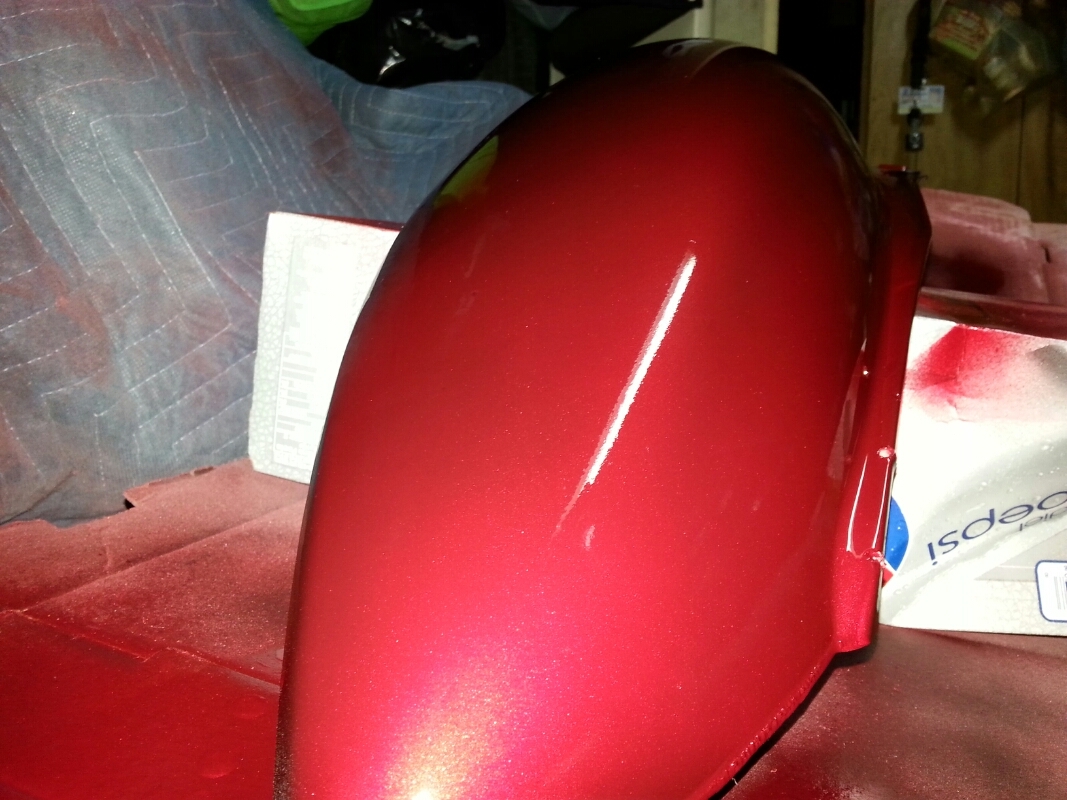
the damage to one of the pieces.
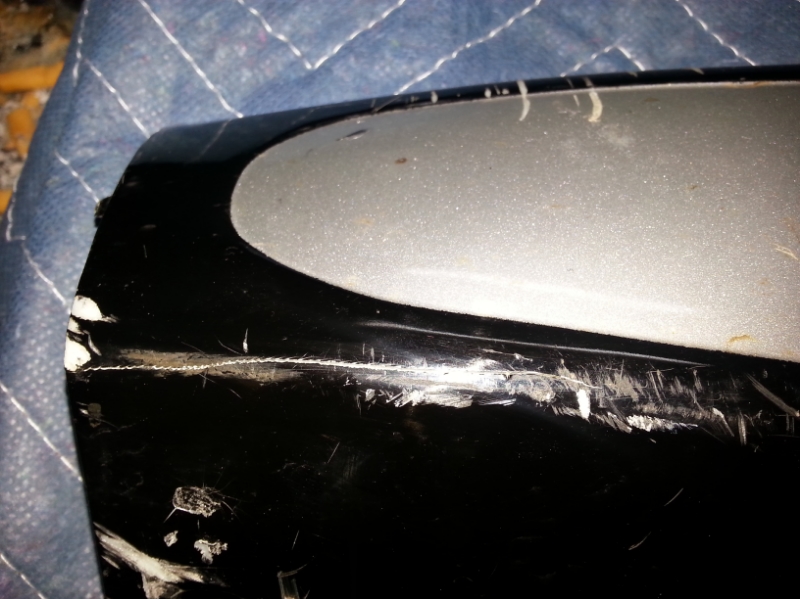
the fixed crack
and the fixed scratches. i love working with thick plastic. like working bondo but without the mess.
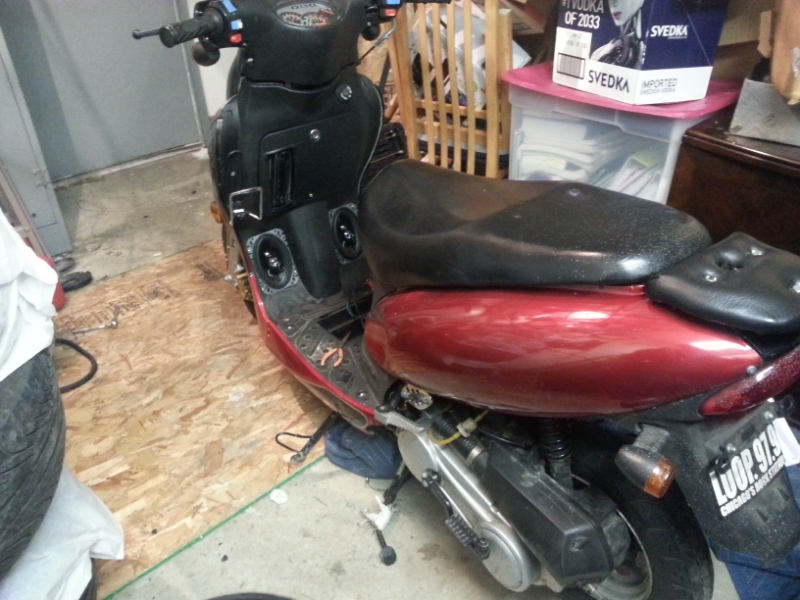
here is where im at now. all the black parts will be red, and all the silver parts will be that cool honda black pearl.
the thing was scratchless. never, ever dropped and always covered since i bought it in 2008. after i installed the big bore kit, i did not realize the thing had a massive vacuum leak where i forgot to install the intake gasket. (im sure you can see where this is going.....) started it for the first time, not on the center stand, because that wasn't installed yet. thing rode a wheelie about 20 feet before catching the luggage rack and falling on its side. i was very happy that noone was injured, and even happier that i had the forethought to install a tilt activated kill switch so it wasnt starved for oil on the nice fresh rebuilt not broken in engine.
as a result of that mishap, i had some pretty torn up right side plastics. so i plastic welded them back together with my soldering iron, sanded them and am currently waiting on the second coat of clear to dry on the first piece so i can wetsand.
figured id update this thread as i slowly paint er all up.
the black is called "HONDA nighthawk black pearl" and the red is called "GM dark cherry metallic" if anyone was interested.
i really like the black. it looks like a very dark blue at just the right angle.
pic of her "good side"

her stripped.

the damage to one of the pieces.

the fixed crack

and the fixed scratches. i love working with thick plastic. like working bondo but without the mess.


here is where im at now. all the black parts will be red, and all the silver parts will be that cool honda black pearl.

 02-16-2014, 05:39 AM
#2
Senior Member


True Car Nut

Wow that is an interesting story!
How you've come from a bad position of being up in the air, and then on your side, only to be aware that the a simple mistake of a gasket, can cause a real bad day.
I credit you with your ability to restore her and select the right makeup!
Just remember similar to makeup, you want to allow a long drying period, so that if you do accidentally rub against her, you wont leave any....... scratches!
__________________
1997 Buick Pk Ave (Soft Ride) Suspension!
1997 Buick Pk Ave (Soft Ride) Suspension!
02-18-2014, 01:36 PM
#3
Senior Member
Certified GM nut
Certified GM nut
Thread Starter
yep. ive taken a week to do just those 2 pieces. each day ive been doing a couple coats, fix the odd car, work a late night couple more coats, etc etc. hopefully ill make more progress tonight and tomorrow, as i am off. im getting the weekend going into march off, so i hope to have the parts completed and get er back together by then. still trying to find a good supplier for the stator and the jets so i can get her really humming.
02-19-2014, 06:55 PM
#4
Senior Member
Certified GM nut
Certified GM nut
Thread Starter
well, i am in the process of painting more panels today. so far ive prepped and painted the panel that is unfinished in the above pic, and painted the 2 panels that used to say "zrx" not sure what the hell zrx was supposed to stand for, but its all sanded off and painted over now.
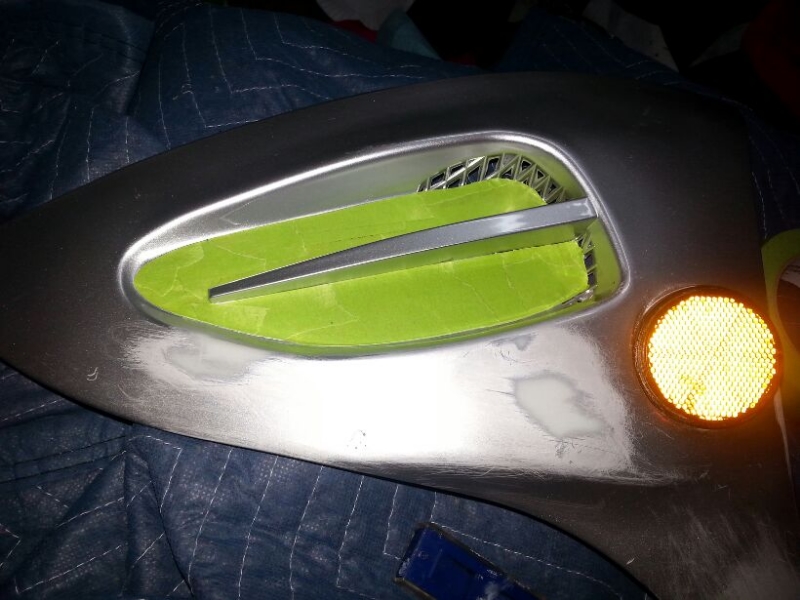
im ecstatic with the quality of the side "zrx" panels. the front vent panels need to be wetsanded, but the zrx panels look ready to mount after 2 coats of clear.
here is a picture of the painted vent panel next to the unpainted stock one
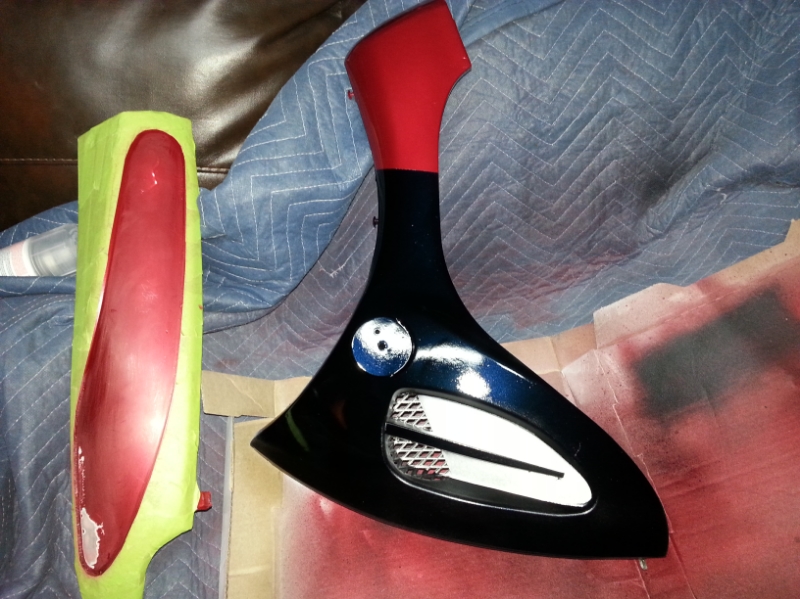
and a closeup of the "zrx" panel
it looks better in person. the flash on my phone makes it look brighter than it really is. its a nice warm darker red.
im ecstatic with the quality of the side "zrx" panels. the front vent panels need to be wetsanded, but the zrx panels look ready to mount after 2 coats of clear.
here is a picture of the painted vent panel next to the unpainted stock one

and a closeup of the "zrx" panel

it looks better in person. the flash on my phone makes it look brighter than it really is. its a nice warm darker red.
02-20-2014, 05:28 PM
#5
Senior Member
True Car Nut
Very nice work again. 2 coats clear..
I did my boat trailer as a summer project once, as boat was at Marina, off trailer, 6 weeks to disassemble, sand, repair stuff incl bearings, then re-paint.
Because of salt water use, it got 6 coats clear. Never want to do that again....huge job!
I did my boat trailer as a summer project once, as boat was at Marina, off trailer, 6 weeks to disassemble, sand, repair stuff incl bearings, then re-paint.
Because of salt water use, it got 6 coats clear. Never want to do that again....huge job!
__________________
1997 Buick Pk Ave (Soft Ride) Suspension!
1997 Buick Pk Ave (Soft Ride) Suspension!
02-20-2014, 08:23 PM
#6
Senior Member
Certified GM nut
Certified GM nut
Thread Starter
well, ive got 4 pieces left. one of them ive got some serious crinkling issues with.
im starting to question the rustoleum plastic primer. seems like it dont get along with the duplicolor.
im starting to question the rustoleum plastic primer. seems like it dont get along with the duplicolor.
02-21-2014, 05:45 PM
#7
Senior Member
True Car Nut
Crinkling often comes from clear coat laid on too thick...and base color not allowed to dry for 48 hours before clear applied.
Are u allowing lots of time from prime to color as well?
Are u allowing lots of time from prime to color as well?
__________________
1997 Buick Pk Ave (Soft Ride) Suspension!
1997 Buick Pk Ave (Soft Ride) Suspension!
03-01-2014, 11:11 PM
#8
Senior Member
Certified GM nut
Certified GM nut
Thread Starter
well, the crinkle was caused by a reaction between what is in rustoleum primer and duplicolor paint.
sanded it down and did a few more coats with no issues.
today, i replaced the stator, and installed a #93 jet to replace the stock #11 jet that was designed for a 50cc.
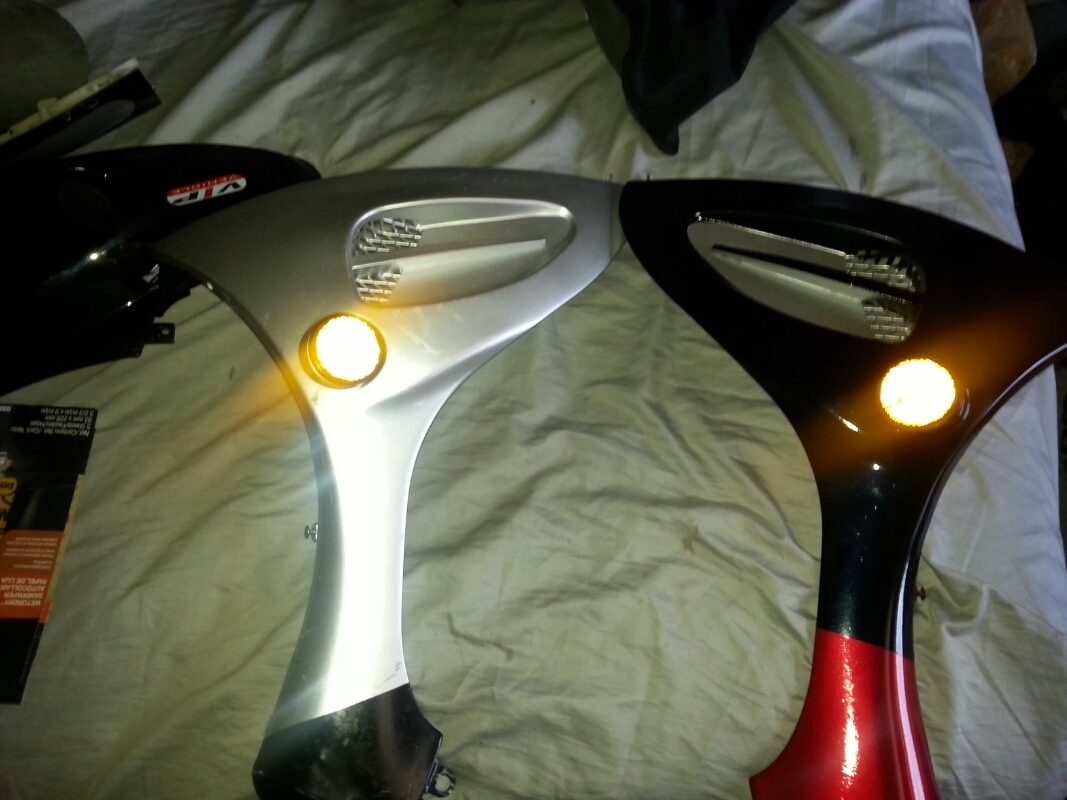
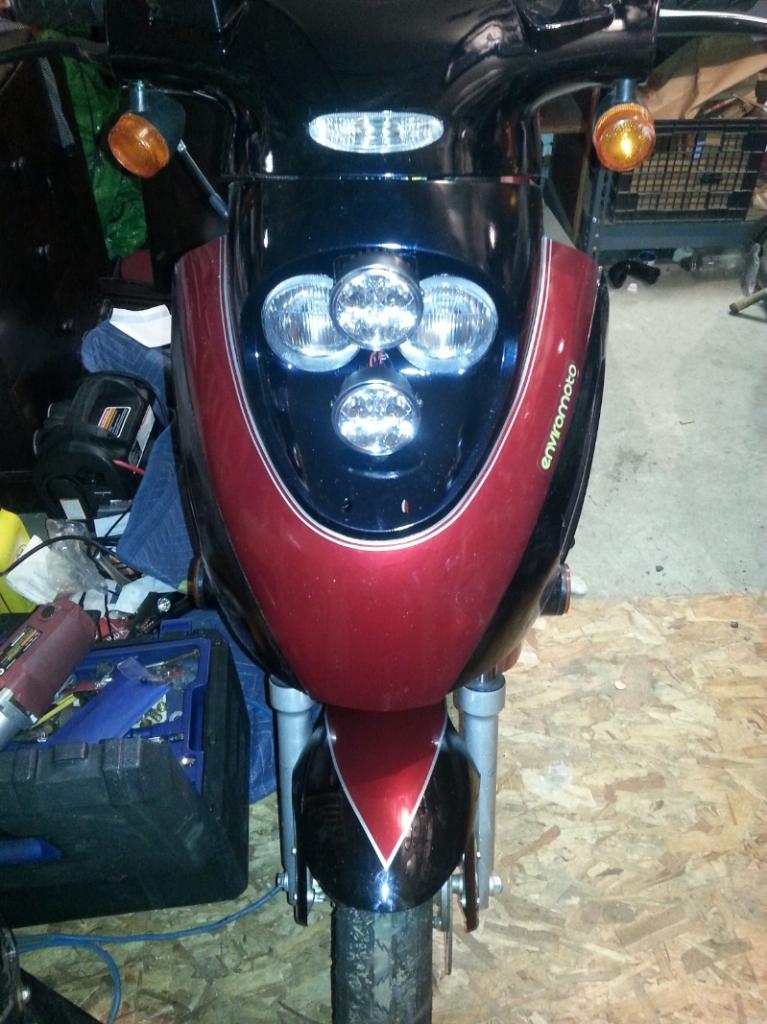
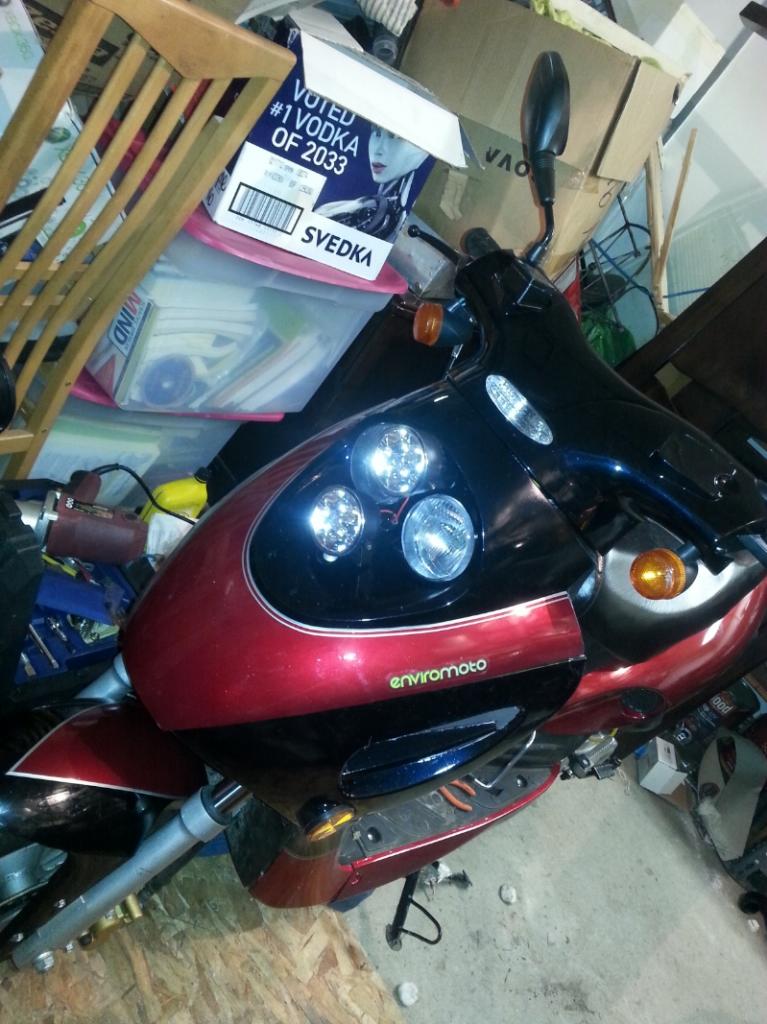
i then mounted all the plastics. im ecstatic with how it turned out.
i couldnt have hoped for it to look any better considering i used $25.00 worth of rattle cans and some stick on pinstripes.
sanded it down and did a few more coats with no issues.
today, i replaced the stator, and installed a #93 jet to replace the stock #11 jet that was designed for a 50cc.
i then mounted all the plastics. im ecstatic with how it turned out.
i couldnt have hoped for it to look any better considering i used $25.00 worth of rattle cans and some stick on pinstripes.


 03-01-2014, 11:23 PM
#9
Senior Member
True Car Nut
Very Nice Work!
It like you are almost ready for riding, once the snow and warmer weather arrives!
How difficult was it to replace the stator?
It like you are almost ready for riding, once the snow and warmer weather arrives!
How difficult was it to replace the stator?
__________________
1997 Buick Pk Ave (Soft Ride) Suspension!
1997 Buick Pk Ave (Soft Ride) Suspension!
03-02-2014, 12:21 AM
#10
Senior Member
Certified GM nut
Certified GM nut
Thread Starter
fairly easy actually. just removed the nut from the flywheel with an impact, and used my gear puller to remove the flywheel itself. stator itself was about a 2 minute job. the hard part was getting the hooks on the backside of the flywheel.

Thread
Thread Starter
Forum
Replies
Last Post
eltatertoto
Your Other Rides: Pics & Videos
5
01-11-2014 07:46 PM
Peterg22000
Detailing & Appearance
16
07-08-2006 02:55 PM

