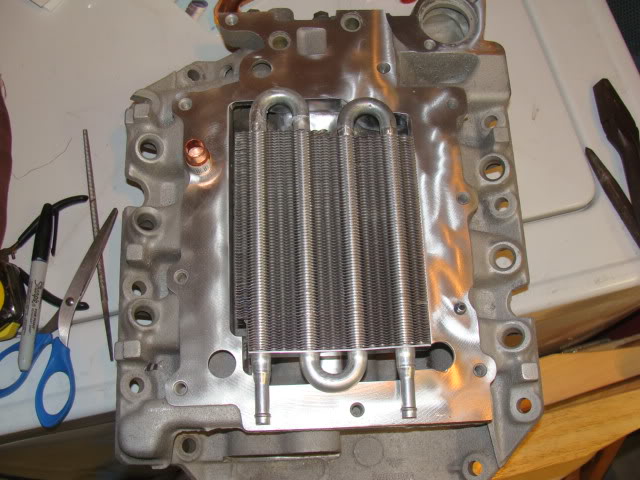
Series 1 Intercooler. working well, VIDS on page 11.
 01-28-2008, 03:39 AM
#41
Junior Member
Posts like a Ricer Type-R
Thread Starter

I calculated worst-case flow using CAD. Even after cutting the core, it will outflow the normal outlet area of the M62 by nearly triple. The M90 will be in better shape.
We have a mini-meet coming up in a couple weeks where I'll give some more details and have others run my numbers and repeat my bench-testing. It should be ready for install by then.
I tend to try to out-think every possibliity before I move on it, and have 2 or 3 contingency plans in place before I buy or cut anything.
FOR THOSE THAT MISSED IT, THERE IS A PIC UPDATE ON THE PREVIOUS PAGE.
 01-28-2008, 03:44 PM
#42
Junior Member
Posts like a Ricer Type-R
Thread Starter
Doing final fitting before disassembling it and porting it to match my heads. That has to be done before final installation of the core, as the install will be semi-permanent.
Adjusting the length:

Determining outlet locations:
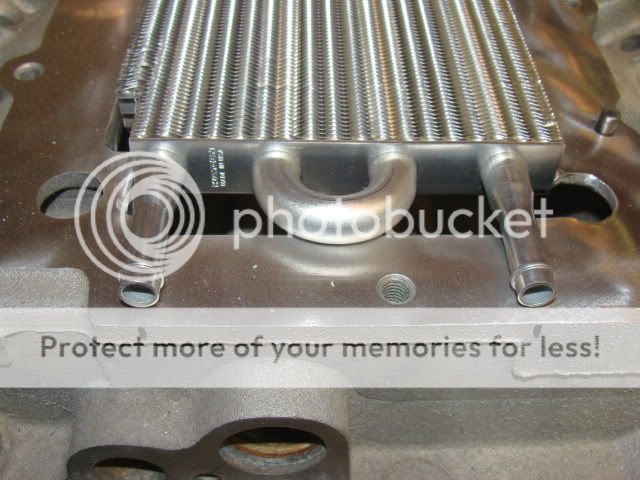
Making more adjustments (outlets and the 180 degree return require hogging out the underside of the LIM roof):
I'll need to do some test-fits on the cars to make sure my angles won't interfere with anything:
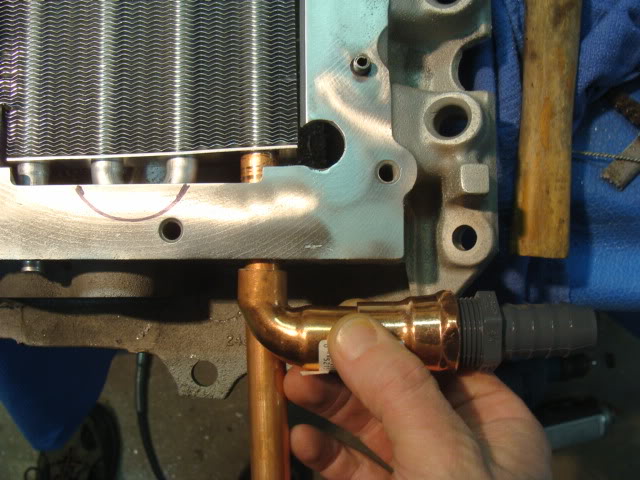
The necked-down outlets will be cut off back to the largest diameter for improved flow. My bench-test used the very small restricted ends. Final version won't. It'll flow nearly 3 times the volume through the core as a result.
What binds and seals all this?
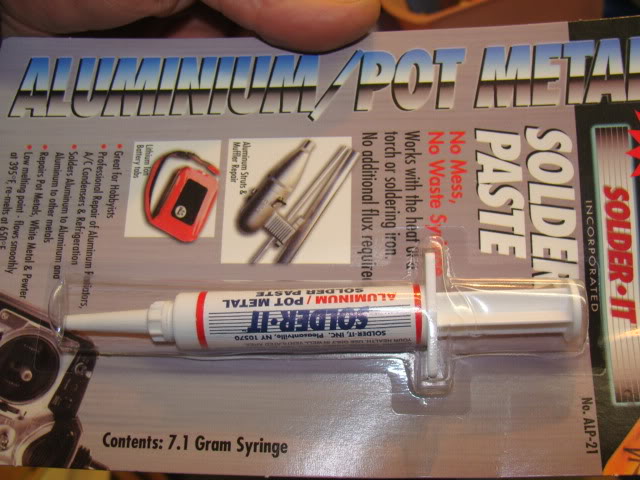
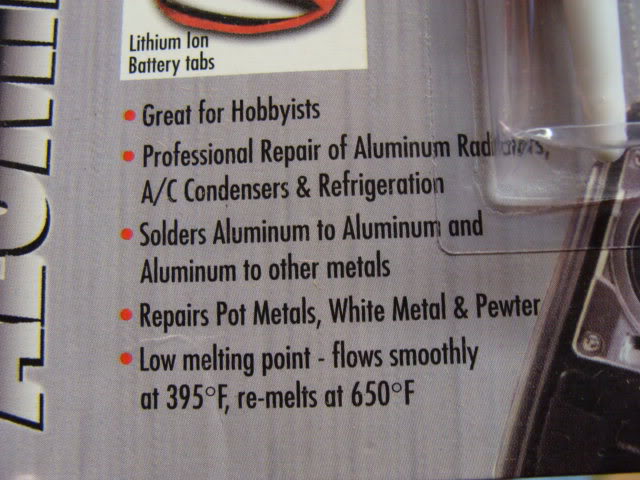
However, the sealant for the passages out through the LIM wall will be semi-permanent and flexible, and will be easily capable of withstanding 15psi of boost.
Adjusting the length:
Determining outlet locations:
Making more adjustments (outlets and the 180 degree return require hogging out the underside of the LIM roof):
I'll need to do some test-fits on the cars to make sure my angles won't interfere with anything:
The necked-down outlets will be cut off back to the largest diameter for improved flow. My bench-test used the very small restricted ends. Final version won't. It'll flow nearly 3 times the volume through the core as a result.
What binds and seals all this?
However, the sealant for the passages out through the LIM wall will be semi-permanent and flexible, and will be easily capable of withstanding 15psi of boost.
01-28-2008, 05:05 PM
#43
Senior Member
True Car Nut
Join Date: Sep 2006
Location: Indianapolis, IN
Posts: 4,606
Likes: 0
Received 0 Likes
on
0 Posts

I should probably bring up the question of which spark plug heat range to use. I haven't looked into intercoolers much at all, so I'm not versed if pre-IC plugs that are 2 heat ranges colder would be too cold post-IC. And if my non-credible idea is correct, then you would be set for even lower pulley sizes with your current spark plugs, right?
01-28-2008, 05:48 PM
#44
Junior Member
Posts like a Ricer Type-R
Thread Starter
I should be able to run lower octane fuel with last year'* pulley and run maybe one heatrange warmer than then (I was 2 heatranges). But keep in mind, I'm dropping back down to a 2.0" pulley.
I'll lean a little on INTENSE and their intercooling experience to select my plugs. And I'm prepared to have to replace them a couple times before I hit the track.
Here'* some more pics. In a nutshell, I found some repairs are necessary on this LIM, so I stopped short of finishing the porting right now for repairs (and I'll move onto another LIM in the meantime).
Here'* where I am so far.
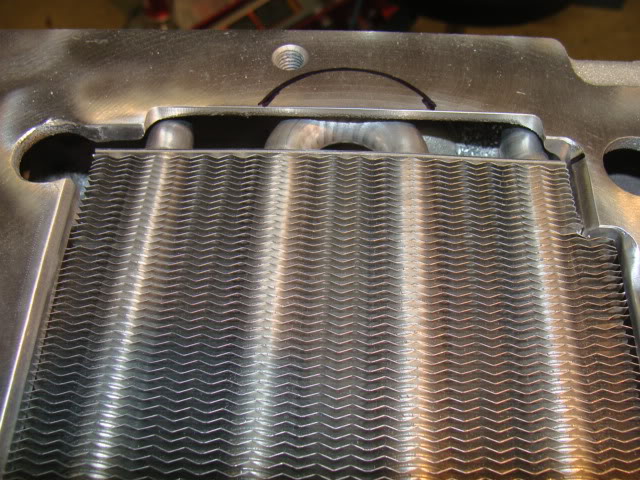
Weight reduction:
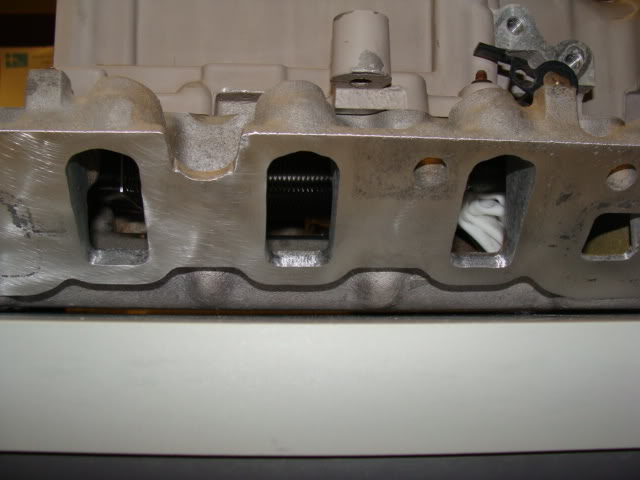
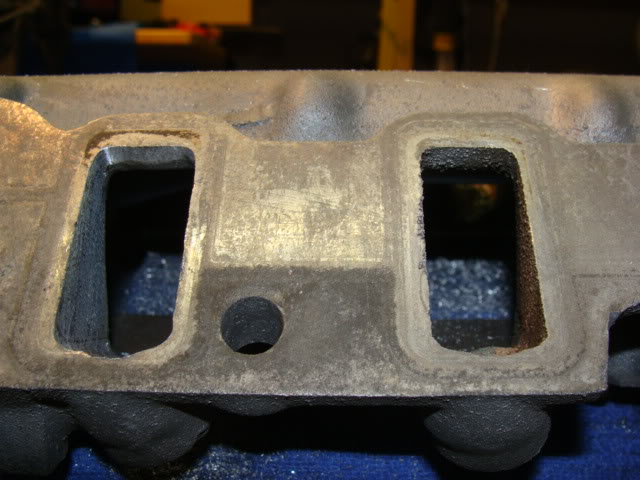
Stock OEM under-cast-porting criminal action:
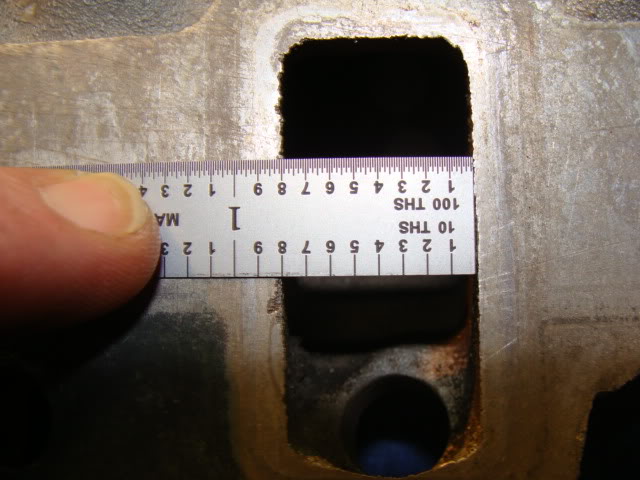
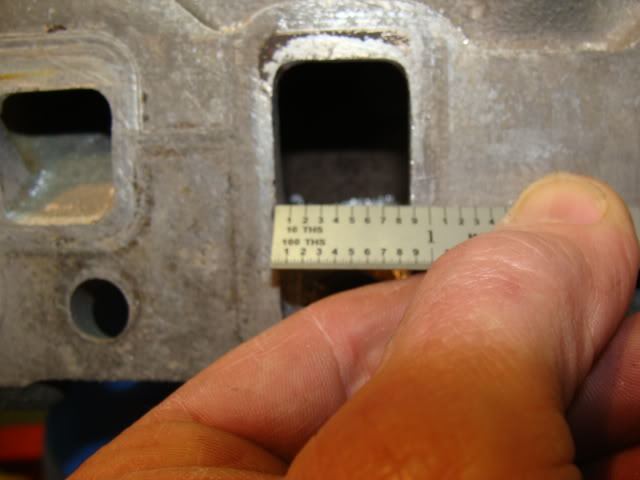
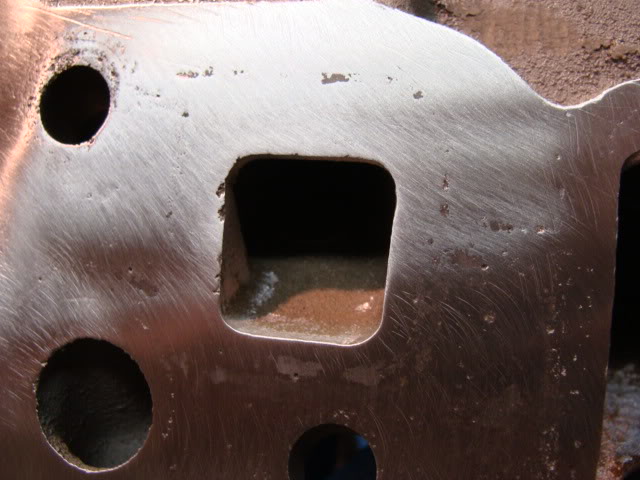
Stock head ports are .9 by 1.9". You want to port out to just 3.553 whiskers LESS than that. My current heads are ported out larger than that though, so I'll take this one farther to match.
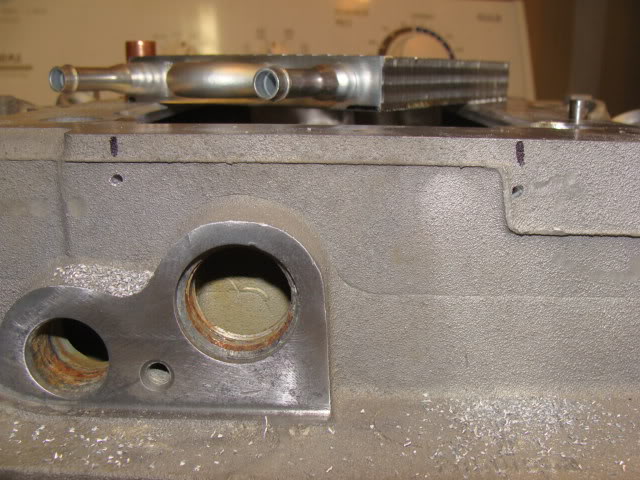
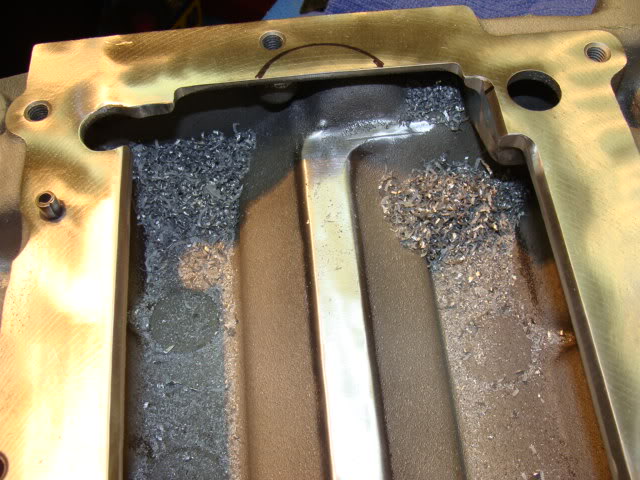
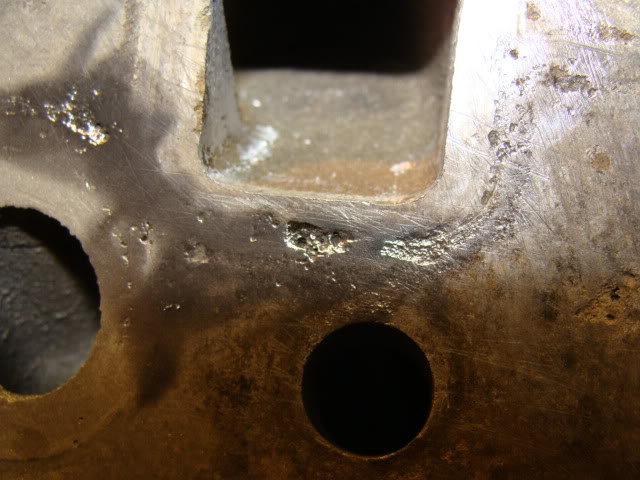
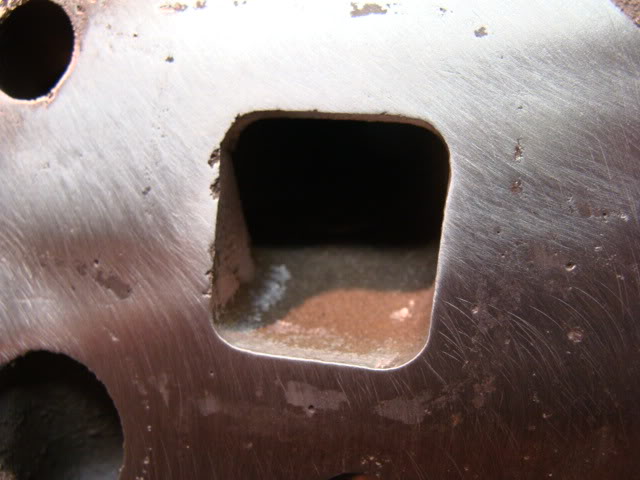
Found some nasty pitting in the coolant port areas that I'm going to have to repair:


Nice little casting flaws here on two different ports:
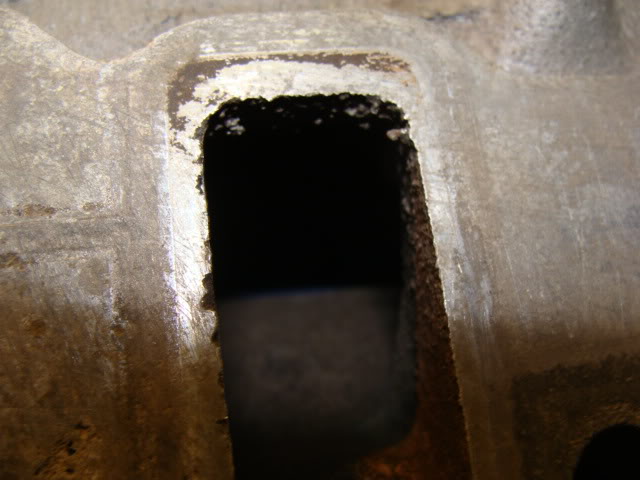
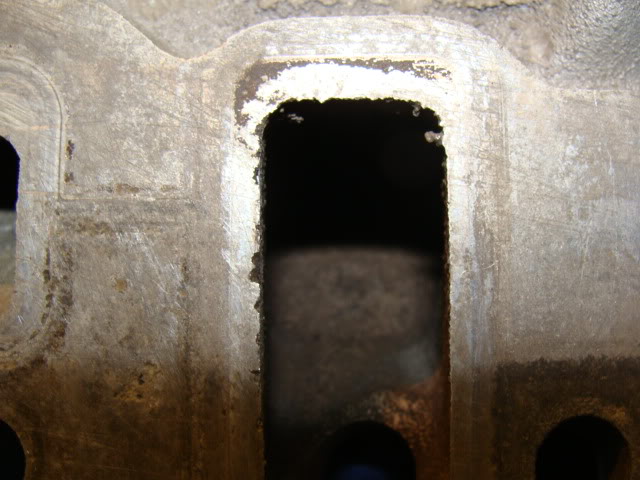
Not to mention edge quality:
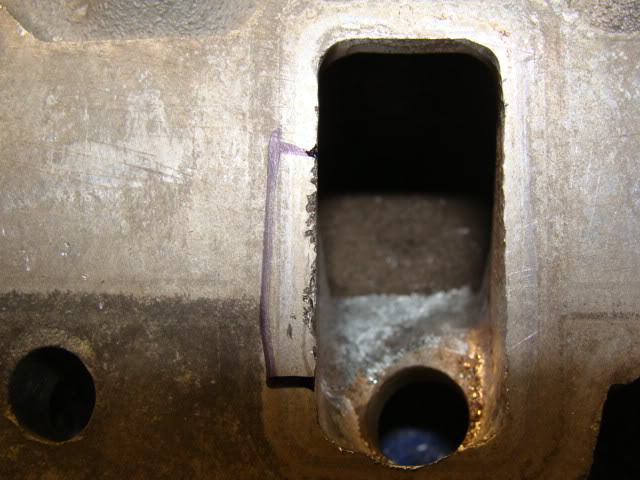
All of the above port flaws create 'hot spots' under boost. The edge chipping will go away naturally with porting.
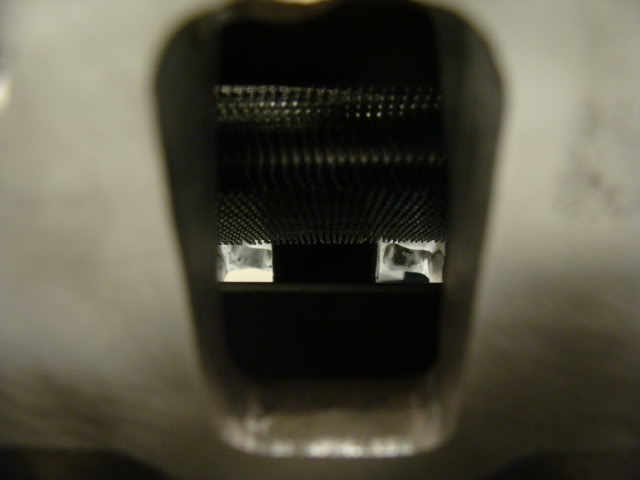
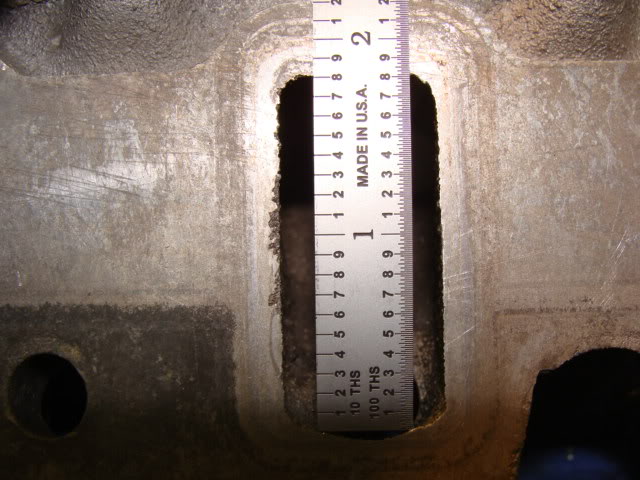
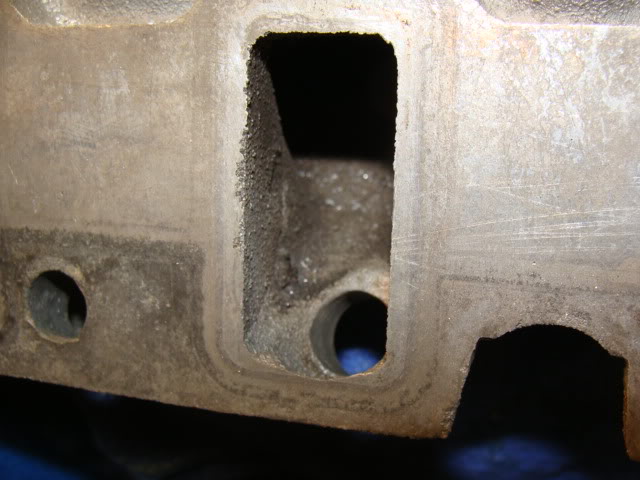
Here'* where you want to stop porting for stock heads:
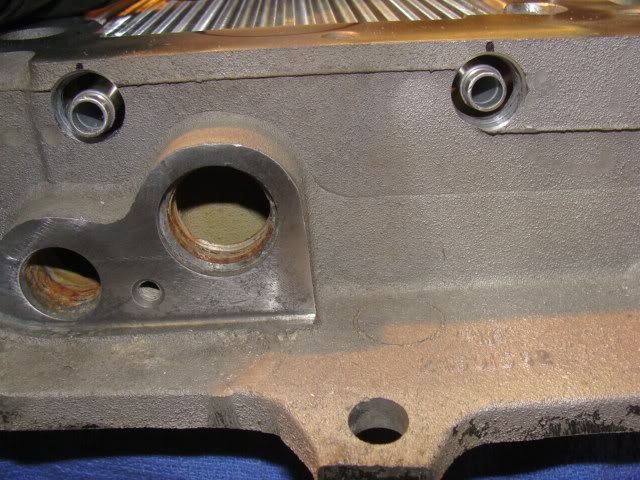
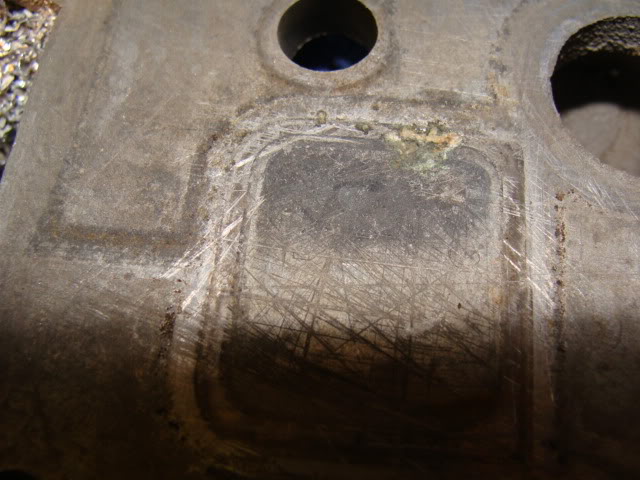
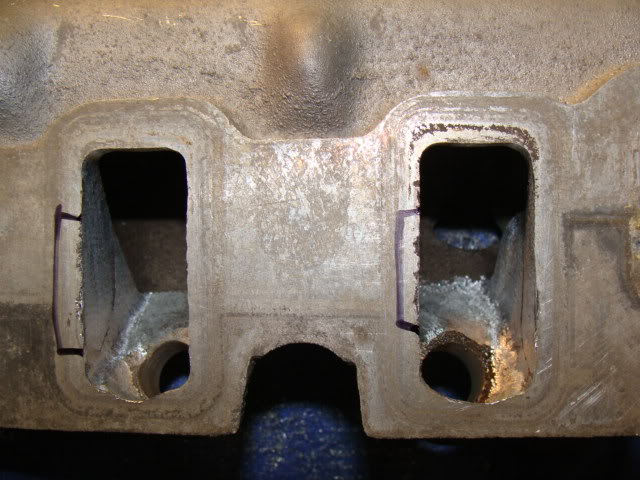
Here'* the difference on the bottom of the port. I roll the bottom corner out a bit rounder than stock. Don't go too deep or you'll break through the casting to the lifter valley. There'* a casting depression on the other side. The left is roughed in with the blend, the right port is not. Can you see the difference? I do the same basic thing to the bump inside the port for the injector boss, but only light blending:
I'll show more pics of these details later.
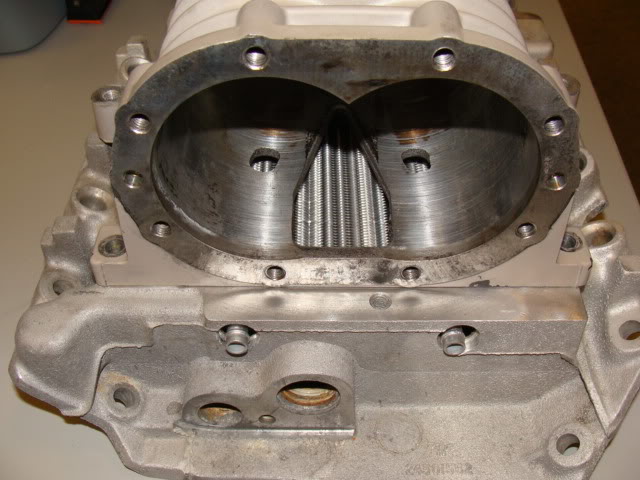
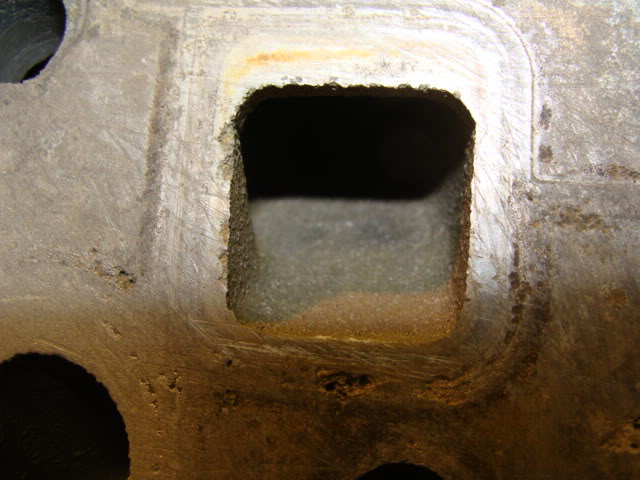
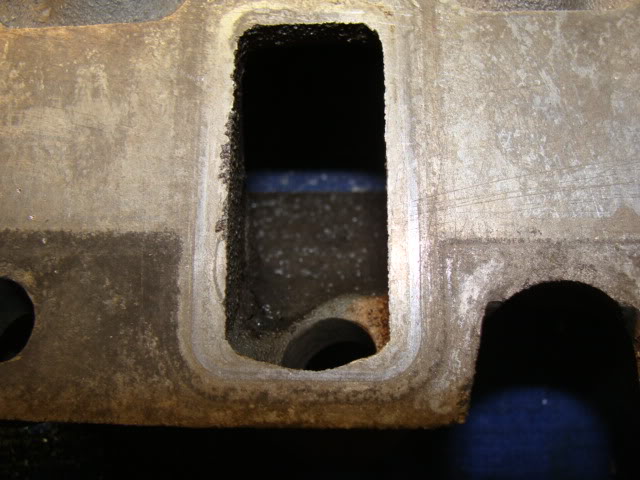
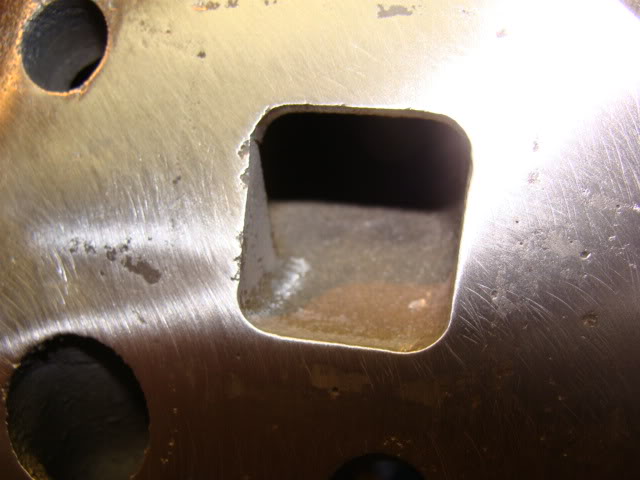
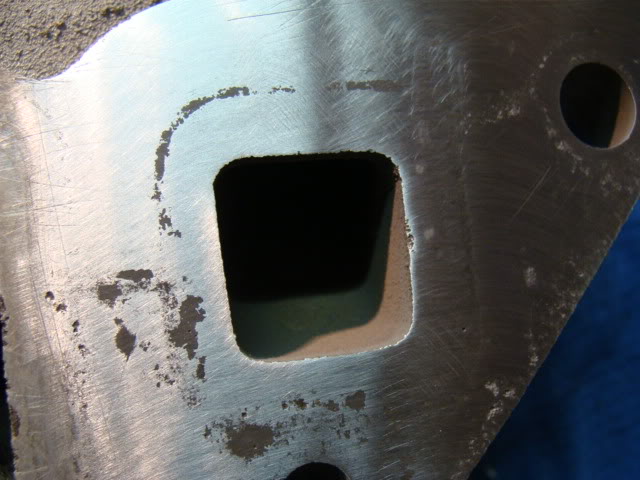
Here'* after cleaning the corrosion out of the pits in the water passage areas:

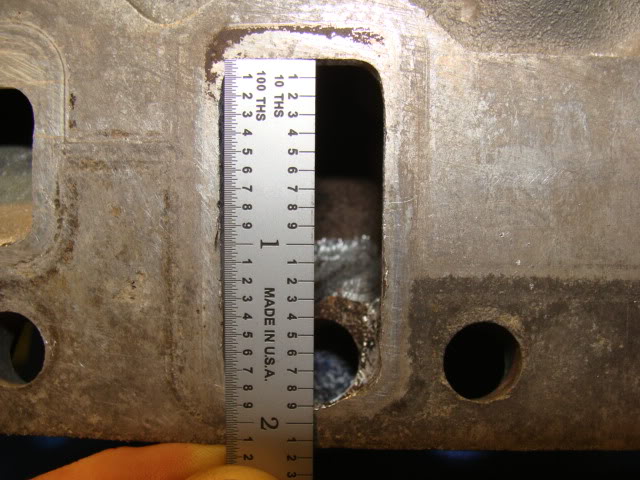
And here'* where my porting stops. Shaved down to 3.335 whiskers smaller in width and height than my ported heads:
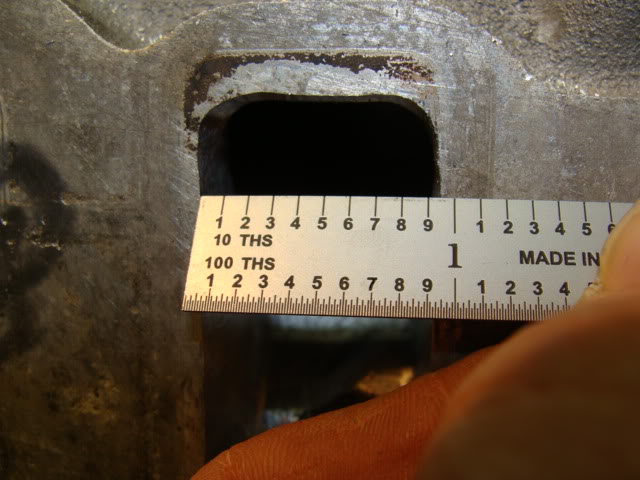
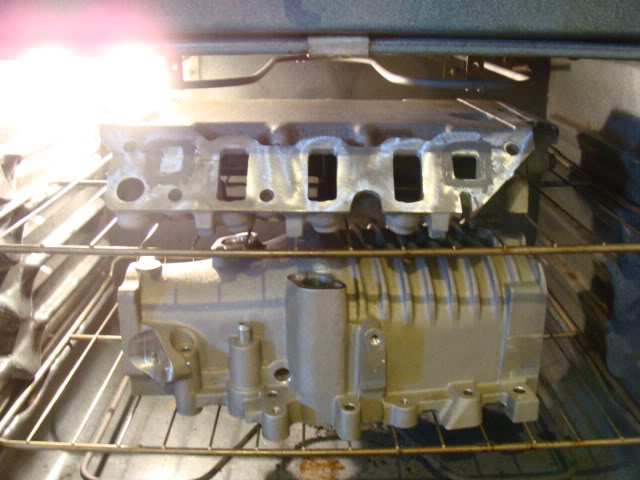
These ports will get some finish work, but not until they're all roughed in to the correct dimensions. Right now, that LIM is in the oven pre-heating for corrosion/pitting repair. While that dries, I'll move onto another LIM (not the same one I did last night).
I'll lean a little on INTENSE and their intercooling experience to select my plugs. And I'm prepared to have to replace them a couple times before I hit the track.
Here'* some more pics. In a nutshell, I found some repairs are necessary on this LIM, so I stopped short of finishing the porting right now for repairs (and I'll move onto another LIM in the meantime).
Here'* where I am so far.
Weight reduction:
Stock OEM under-cast-porting criminal action:
Stock head ports are .9 by 1.9". You want to port out to just 3.553 whiskers LESS than that. My current heads are ported out larger than that though, so I'll take this one farther to match.
Found some nasty pitting in the coolant port areas that I'm going to have to repair:
Nice little casting flaws here on two different ports:
Not to mention edge quality:
All of the above port flaws create 'hot spots' under boost. The edge chipping will go away naturally with porting.
Here'* where you want to stop porting for stock heads:
Here'* the difference on the bottom of the port. I roll the bottom corner out a bit rounder than stock. Don't go too deep or you'll break through the casting to the lifter valley. There'* a casting depression on the other side. The left is roughed in with the blend, the right port is not. Can you see the difference? I do the same basic thing to the bump inside the port for the injector boss, but only light blending:
I'll show more pics of these details later.
Here'* after cleaning the corrosion out of the pits in the water passage areas:
And here'* where my porting stops. Shaved down to 3.335 whiskers smaller in width and height than my ported heads:
These ports will get some finish work, but not until they're all roughed in to the correct dimensions. Right now, that LIM is in the oven pre-heating for corrosion/pitting repair. While that dries, I'll move onto another LIM (not the same one I did last night).

 01-28-2008, 07:47 PM
#48
Junior Member
Posts like a Ricer Type-R
Thread Starter
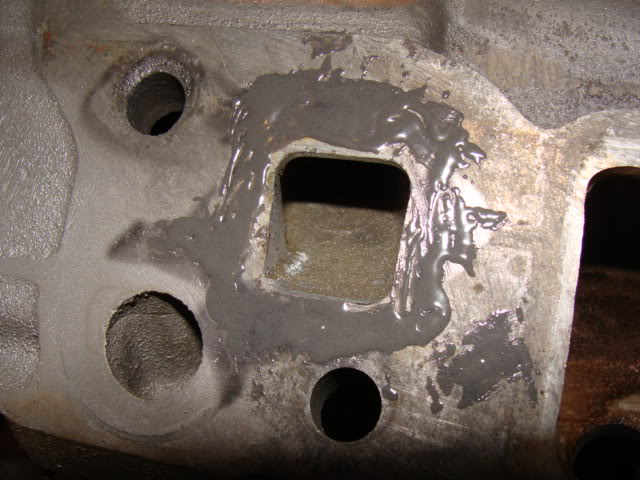
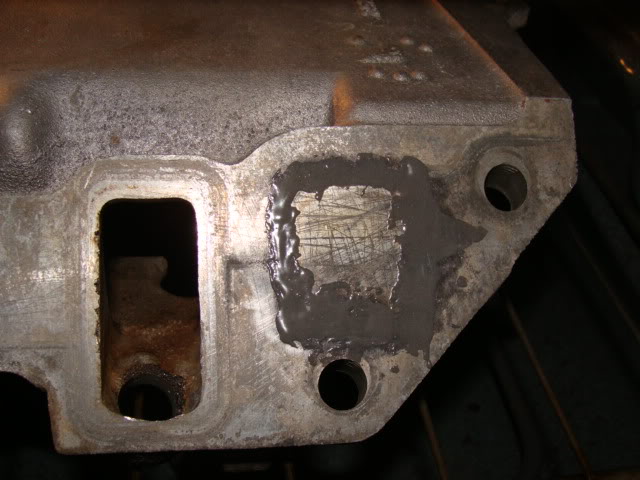
Same thing that blocked 2000SilverBullet'* own EGR port in his GenV as well. Yes, that'* JB Weld. It'll be lightly filed down smooth, and then gasket prepped again.
Heading out to do that now (right after my SLE alternator break....it'* giong to snow AGAIN tomorrow).
I'm hoping to have two more LIM'* done tonight, and the IC core assembled and mounted.
Heading out to do that now (right after my SLE alternator break....it'* giong to snow AGAIN tomorrow).
I'm hoping to have two more LIM'* done tonight, and the IC core assembled and mounted.
01-28-2008, 10:23 PM
#49
Junior Member
Posts like a Ricer Type-R
Thread Starter
Hey, we've got company!
Pitted areas repaired:
Not planning to do alot more tonight. I'll update when there'* something worthwhile (next step is assembling the outlets and installing the core). LIM'* are almost done.
Pitted areas repaired:
Not planning to do alot more tonight. I'll update when there'* something worthwhile (next step is assembling the outlets and installing the core). LIM'* are almost done.