Matt's SSEi IS DONE!!!! :)
 12-03-2005, 06:19 PM
#11
Senior Member
True Car Nut
Thread Starter

Join Date: May 2003
Location: Lethbridge, Alberta, _______Canada._______ West Coast Bonneville Fest ___05,06,07 Survivor___
Posts: 8,135
Likes: 0
Received 0 Likes
on
0 Posts

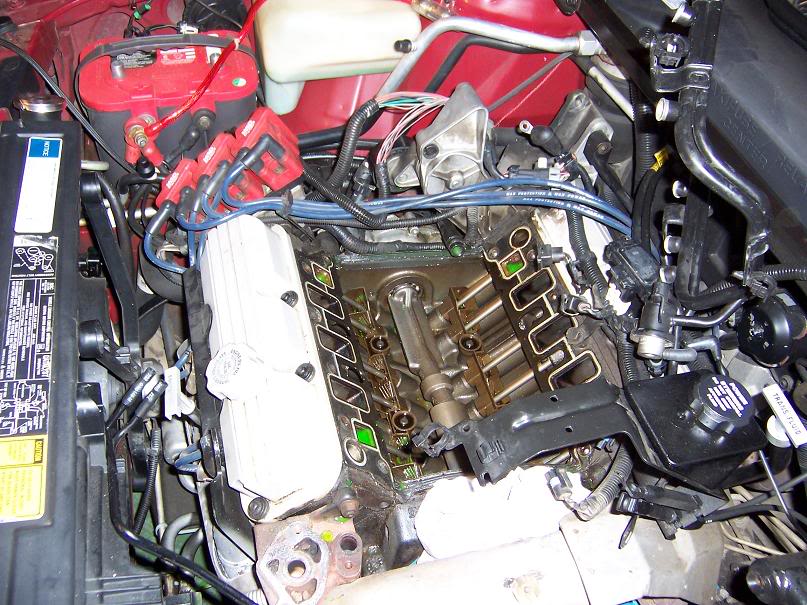
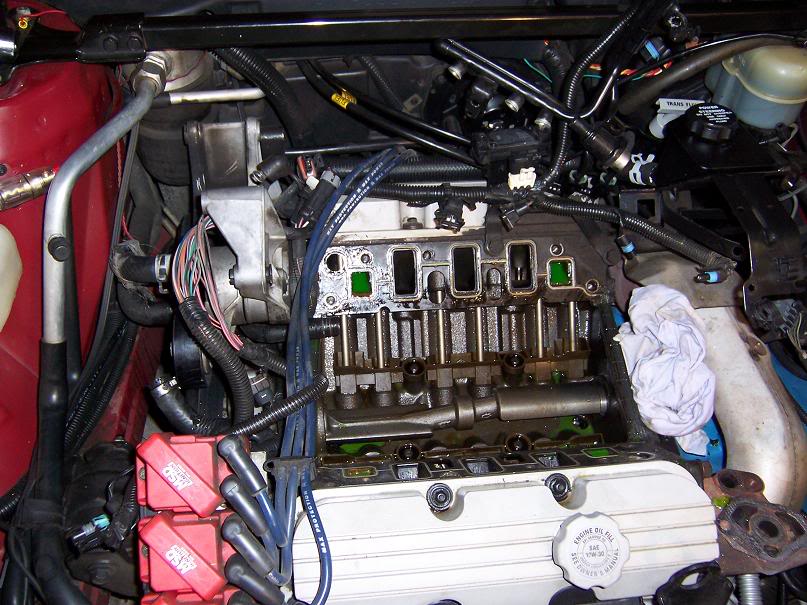
Okay, i removed the LIM, took a look at the engine, was quite impressed on how clean it was after 112,400miles, i left the gaskets in place, poured a litre of oil over the balancer shaft and area, clean up any spilled coolant, calling it a day.
Tomorrow, tackling the EM'*..any tips?
Also, for when i take my SC apart to remove and change the coupler, does the rotor plate seperate from the nose drive easily enough..?
I know i have to use RED rtv to reseal the nose drive to the rotorplate then rotorplate to the SC itself, any specific number?
 12-03-2005, 07:32 PM
#12
Junior Member
Posts like a Ricer Type-R

SC will fight you coming apart. That'* what the notches are for, to pry it apart if necessary.
Do NOT use RTV. Use the red gasket maker from the dealer. Get the small tube (I have 2 L67'* and spare SC'* for both, so I get the big tube):
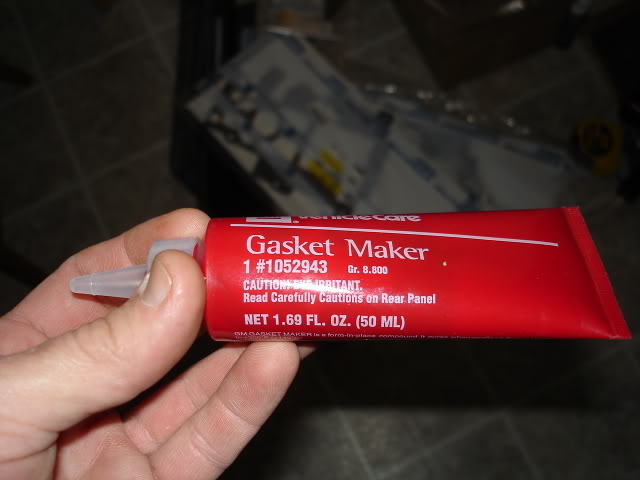
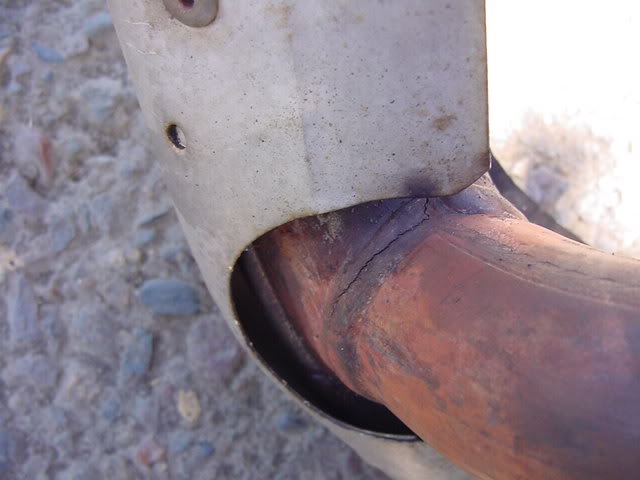
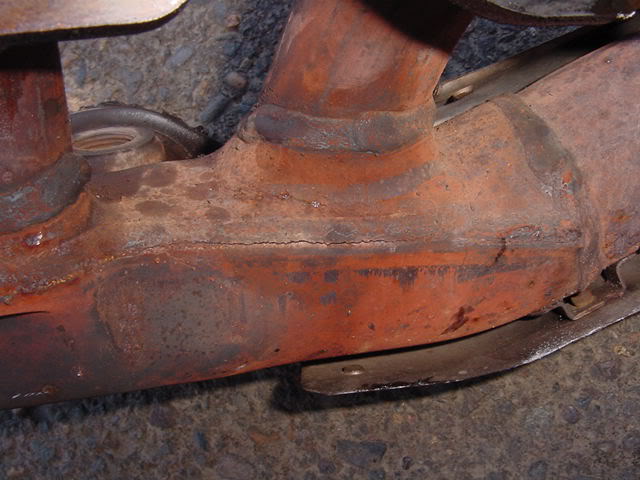
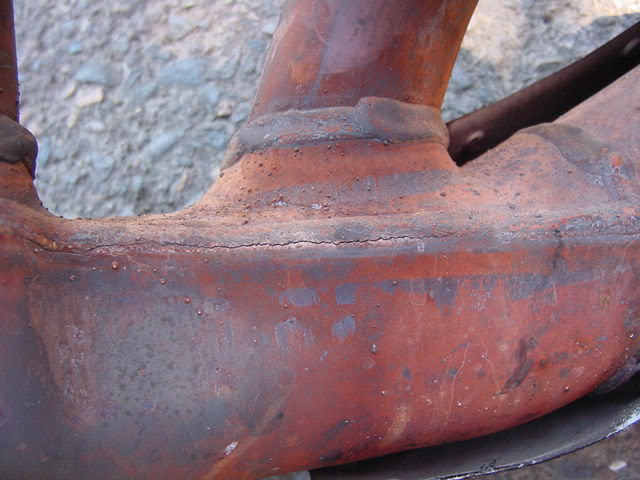
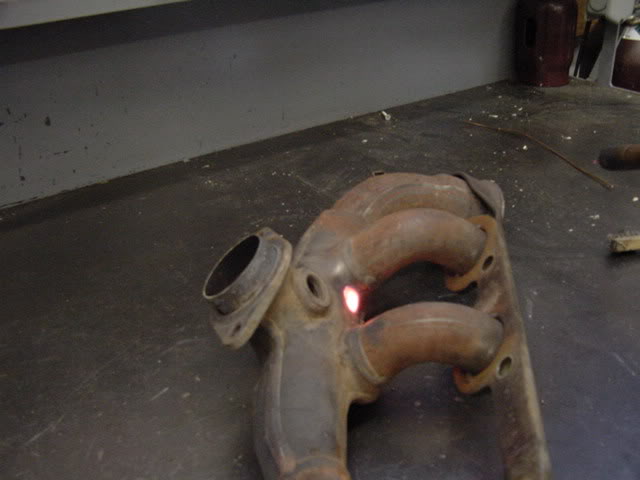
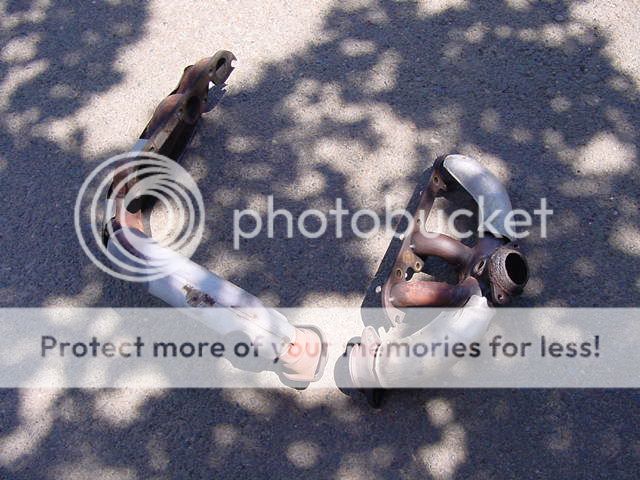
For the EM'*, inspect them CAREFULLY for any cracks. Have all of them welded. Then stitch weld the OUTSIDE of the flanges one weld at a time. By this I mean one stitch on port 1. One stitch on port 2 (other manifold) one stitch on port 5 (furthest from 1), one stitch on 6, furtherst from 2, back and forth. This will keep the manifold flanges from warping while welding. Having them clamped to a flat surface would be ideal. In a perfect world, I would weld studs in the locations to bolt the flanges down on a scrap piece of steel while doing this.
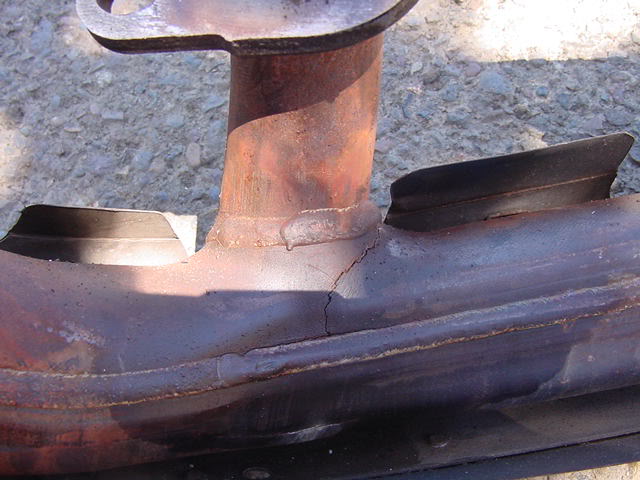
Cracks:
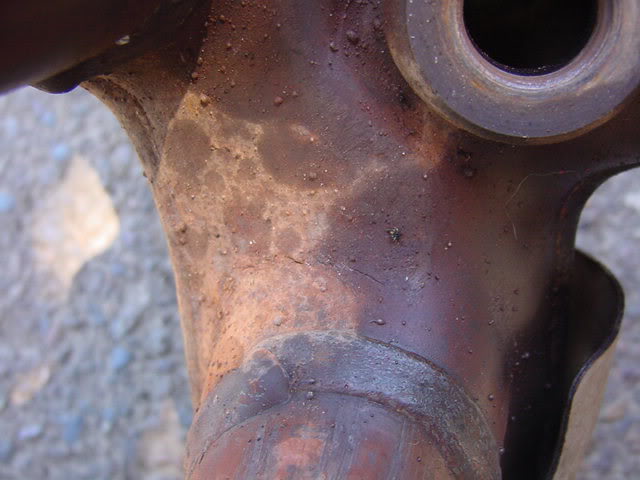
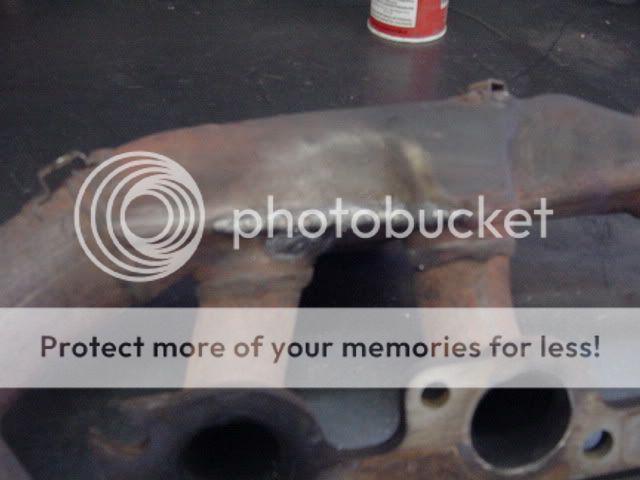
Repairs:
Stitch welds:
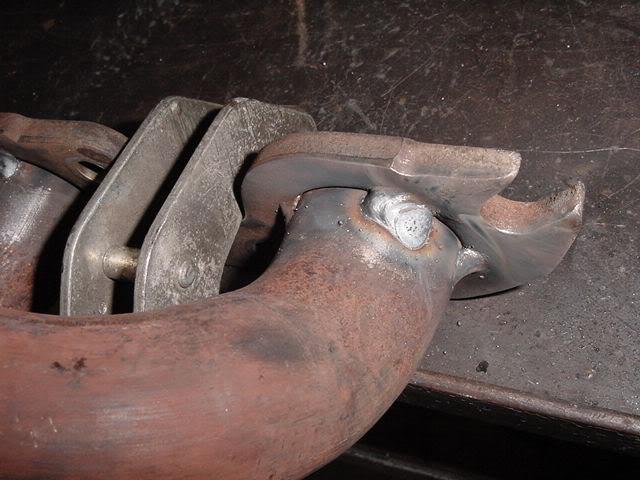

Before:
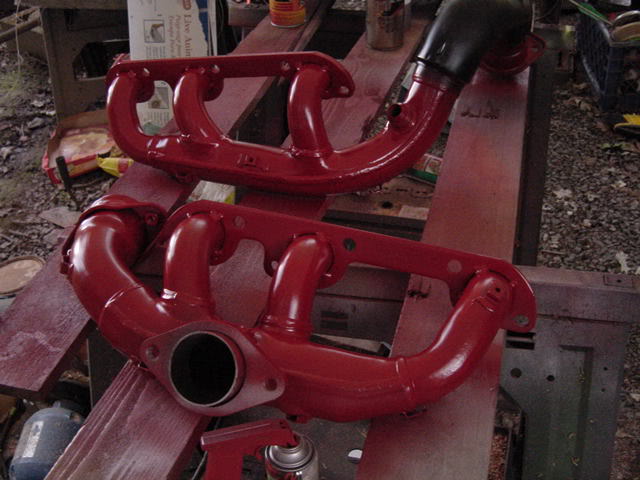
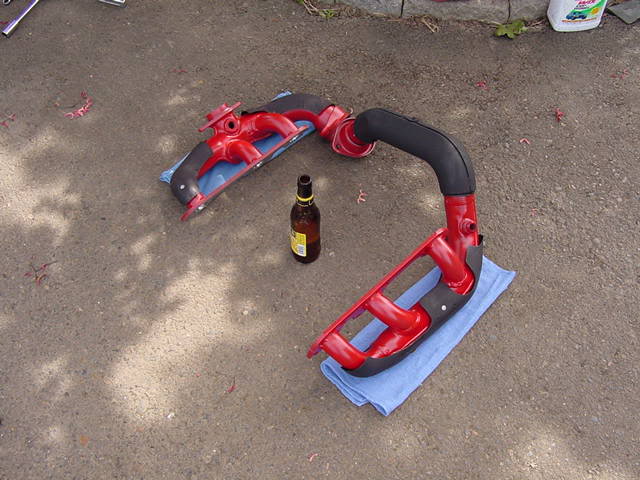
After:
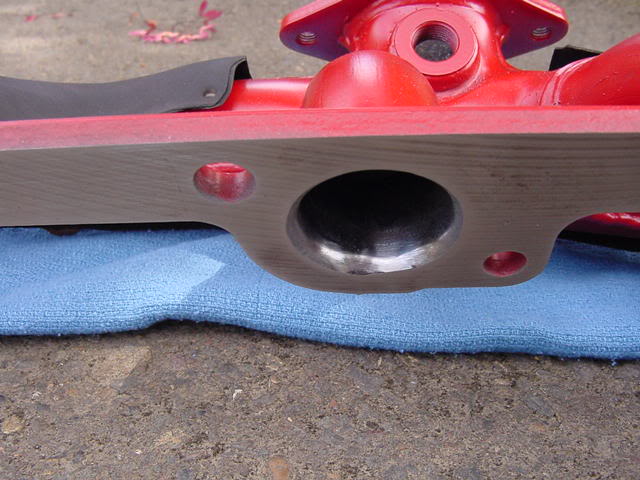
Before painting, and after all the repairs and outside stitchwelds are done, use a die-grinder to grind out all the OEM welds on the inside of the ports. I gained over 15% cross-sectional area per port.
Finished port:
Do NOT use RTV. Use the red gasket maker from the dealer. Get the small tube (I have 2 L67'* and spare SC'* for both, so I get the big tube):
For the EM'*, inspect them CAREFULLY for any cracks. Have all of them welded. Then stitch weld the OUTSIDE of the flanges one weld at a time. By this I mean one stitch on port 1. One stitch on port 2 (other manifold) one stitch on port 5 (furthest from 1), one stitch on 6, furtherst from 2, back and forth. This will keep the manifold flanges from warping while welding. Having them clamped to a flat surface would be ideal. In a perfect world, I would weld studs in the locations to bolt the flanges down on a scrap piece of steel while doing this.
Cracks:
Repairs:
Stitch welds:
Before:
After:
Before painting, and after all the repairs and outside stitchwelds are done, use a die-grinder to grind out all the OEM welds on the inside of the ports. I gained over 15% cross-sectional area per port.
Finished port:
 12-03-2005, 07:51 PM
#14
Junior Member
Posts like a Ricer Type-R
Good point. I cleaned mine out with a wire brush before assembly.
Also keep in mind that you should reassemble WITH EM gaskets, regardless of the fact that the car came from the factory without them.
In addition, you'll need two donut seals. One for the crossover pipe, and one for the downpipe.
Also keep in mind that you should reassemble WITH EM gaskets, regardless of the fact that the car came from the factory without them.
In addition, you'll need two donut seals. One for the crossover pipe, and one for the downpipe.
12-03-2005, 07:51 PM
#15
Senior Member
True Car Nut
Thread Starter
Join Date: May 2003
Location: Lethbridge, Alberta, _______Canada._______ West Coast Bonneville Fest ___05,06,07 Survivor___
Posts: 8,135
Likes: 0
Received 0 Likes
on
0 Posts
Thanks Bill, i knew u had the book of tricks somewere...the welding will be done at an exhaust shop, as i have no access to a welder. I will have to look into getting a die grinder.
And, thanks John for passing that on too, good info on on the 02
can i drink beer and paint my EMs too
LOL
And, thanks John for passing that on too, good info on on the 02
can i drink beer and paint my EMs too
LOL
12-03-2005, 08:03 PM
#16
Junior Member
Posts like a Ricer Type-R
You'll need a compressor for the die grinder.
Also keep in mind you NEED a torque wrench with a swivel head in order to properly torque the EM'* back on. This is critical.
Also keep in mind you NEED a torque wrench with a swivel head in order to properly torque the EM'* back on. This is critical.
12-03-2005, 08:04 PM
#17
Senior Member
True Car Nut
Thread Starter
Join Date: May 2003
Location: Lethbridge, Alberta, _______Canada._______ West Coast Bonneville Fest ___05,06,07 Survivor___
Posts: 8,135
Likes: 0
Received 0 Likes
on
0 Posts
bill, i have acess to two 20 gallon compressors, one is feet from my car, thats not a problem heheh. A swivel head tourque wrench? Sure, Joel now works for House of Tools, im sure i can get something hehehehe
Also my alternator is quite black, and it squeaks, hehe, hello 140
Also my alternator is quite black, and it squeaks, hehe, hello 140
 12-03-2005, 09:09 PM
#19
Senior Member
True Car Nut
Thread Starter
Join Date: May 2003
Location: Lethbridge, Alberta, _______Canada._______ West Coast Bonneville Fest ___05,06,07 Survivor___
Posts: 8,135
Likes: 0
Received 0 Likes
on
0 Posts
I doubt any psi drop. Its Flow that makes the difference, you can produce all the PSI you want hehe, but if it has no were to go, its pointless

