L27 heads - Rockers on 3/8 bolts
 03-30-2010, 11:16 AM
#11
Retired Senior Admin


Expert Gearhead
Join Date: May 2006
Location: Sheboygan Wisconsin
Posts: 29,661
Likes: 0
Received 28 Likes
on
24 Posts


Any autoparts shop should have the kits. It'* just a thread with a hole in the center that'* also threaded. I see no reason why it wouldn't hold just fine. Although the size difference is a bit close.
 03-30-2010, 12:23 PM
#12
Senior Member
True Car Nut
Thread Starter
Join Date: Jun 2007
Location: New Lenox, IL
Posts: 2,478
Likes: 0
Received 0 Likes
on
0 Posts
In any case, I have a machine shop doing the work for me now. They'll drill out the holes and put in solid inserts for the 5/16" bolts. The rockers can't be drilled through since the fulcrum is hardened steel. My other option was to contact yella terra for a different fulcrum size, but I doubt they're going to have anything for me.
03-30-2010, 12:31 PM
#13
Senior Member
True Car Nut
Join Date: Feb 2003
Location: Philly
Posts: 4,508
Likes: 0
Received 0 Likes
on
0 Posts
In any case, I have a machine shop doing the work for me now. They'll drill out the holes and put in solid inserts for the 5/16" bolts. The rockers can't be drilled through since the fulcrum is hardened steel. My other option was to contact yella terra for a different fulcrum size, but I doubt they're going to have anything for me.
You may want to do whatever porting etc. you want to do first then have the machine shop do a valve job while they're there.
03-30-2010, 01:26 PM
#14
Senior Member
True Car Nut
Thread Starter
Join Date: Jun 2007
Location: New Lenox, IL
Posts: 2,478
Likes: 0
Received 0 Likes
on
0 Posts
I'll do some light porting after I get the heads back.
04-01-2010, 11:49 AM
#15
Senior Member
True Car Nut
Thread Starter
Join Date: Jun 2007
Location: New Lenox, IL
Posts: 2,478
Likes: 0
Received 0 Likes
on
0 Posts
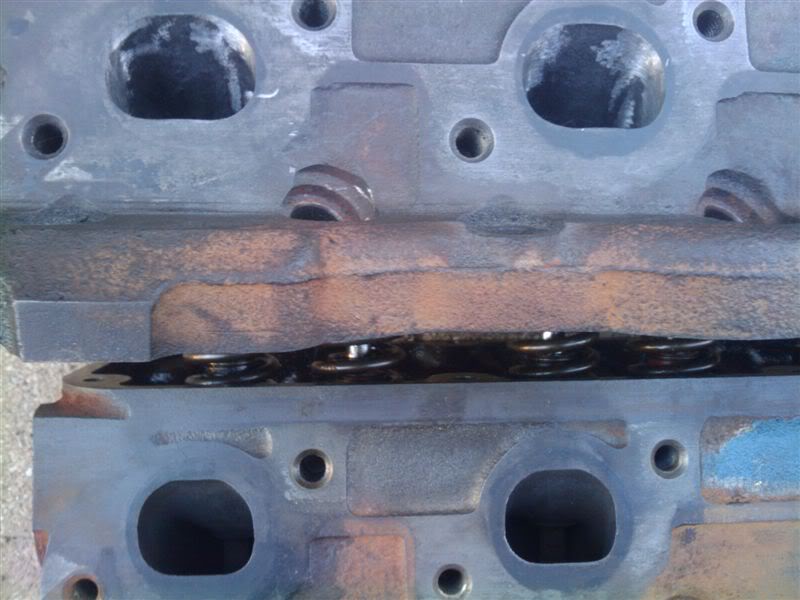
So I cleaned up the heads with a wire brush and they look great.
I later discovered that the rocker bolts on these heads are 3/8", and on mine they're 5/16", which is a big problem because I have roller rockers on there and the fulcrums are hardened steel and can't be drilled. So for another $160, I took them to a machine shop and had them drill out the original threads, tap them, and screw in 1/2" to 5/16" inserts. I needed them to be very precise, so its not something I could have done without a drill press.
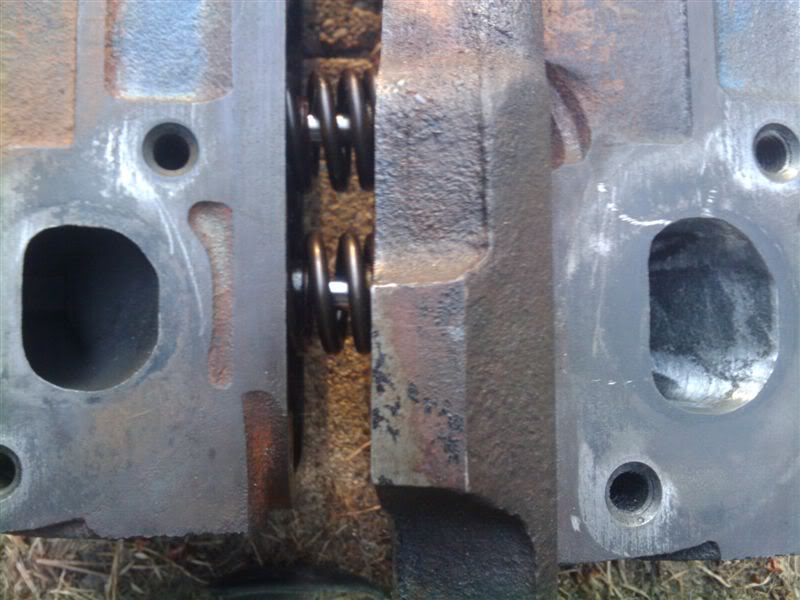
I also tore apart most of my engine and got the front head off. Still need to get to the rear one after I disconnect the downpipe, but most everything is off the engine. The head I took off really doesn't look too bad. All of the valves seem to be in decent shape, so we'll see if the burned valve is on the rear head.
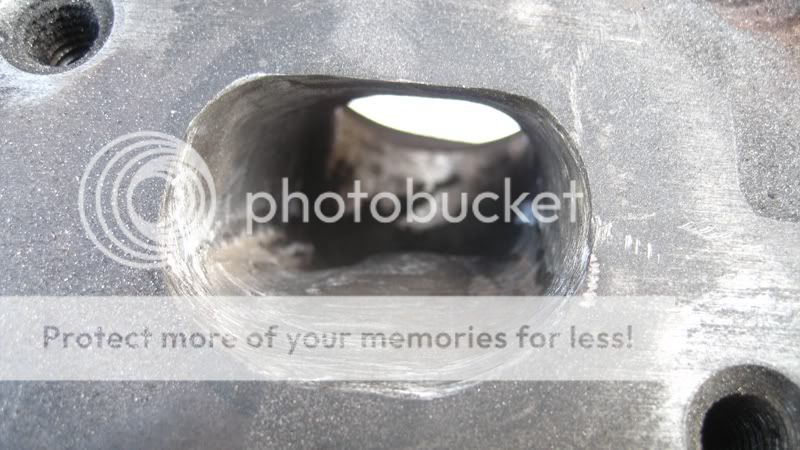
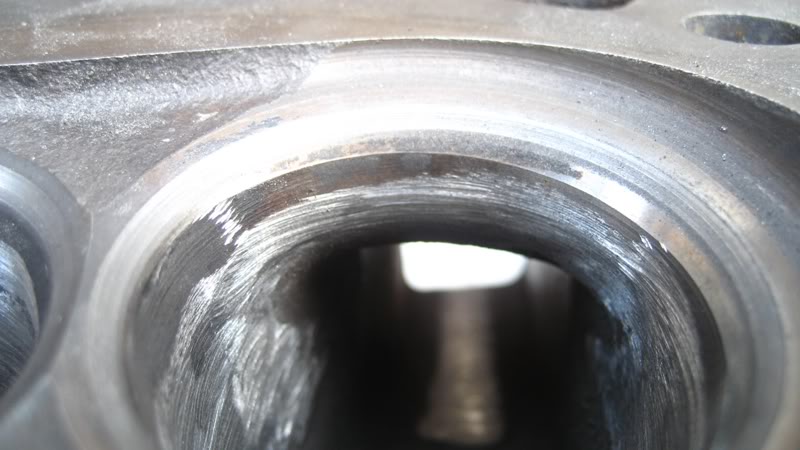
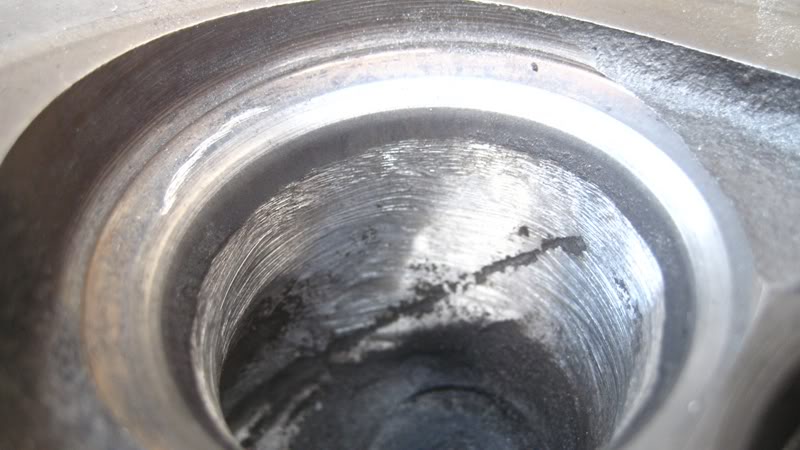
After a while I got sick of unbolting **** so i started porting my new heads, and made some massive improvements with the exhaust ports. I'm 100% sure this will make a huge difference. You can see the size of the actual exhaust manifold in black around the port, just to give you an idea of how tiny these ports really are.
This was all done with grinding stones on my dremel and my cordless drill. I wish I had my air die grinder back.
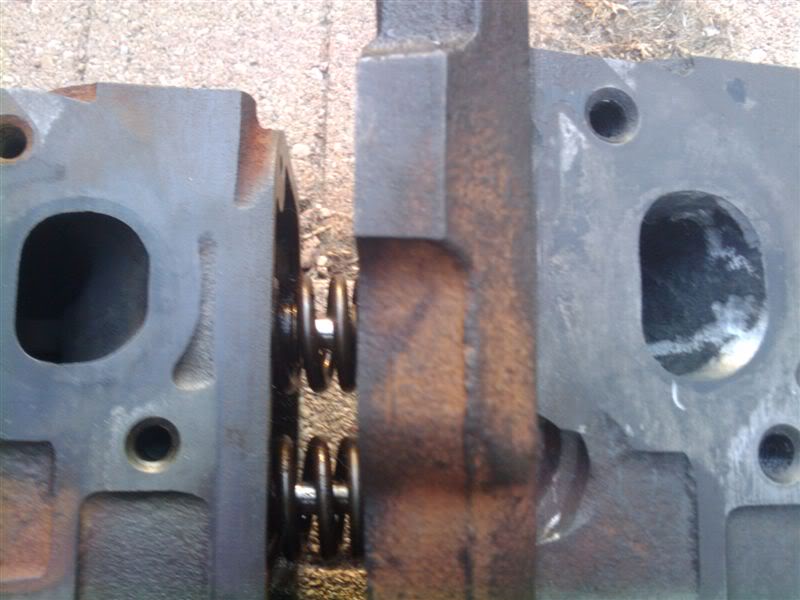

I kept the ports d-shaped as they were from the factory because A. there isn't much you can do with the floor of the ports as far as flow goes, and B. they were made that way to prevent reversion.
I still have to do some light sanding to smooth out the ports a bit, but that'* where I am so far.
I later discovered that the rocker bolts on these heads are 3/8", and on mine they're 5/16", which is a big problem because I have roller rockers on there and the fulcrums are hardened steel and can't be drilled. So for another $160, I took them to a machine shop and had them drill out the original threads, tap them, and screw in 1/2" to 5/16" inserts. I needed them to be very precise, so its not something I could have done without a drill press.
I also tore apart most of my engine and got the front head off. Still need to get to the rear one after I disconnect the downpipe, but most everything is off the engine. The head I took off really doesn't look too bad. All of the valves seem to be in decent shape, so we'll see if the burned valve is on the rear head.
After a while I got sick of unbolting **** so i started porting my new heads, and made some massive improvements with the exhaust ports. I'm 100% sure this will make a huge difference. You can see the size of the actual exhaust manifold in black around the port, just to give you an idea of how tiny these ports really are.
This was all done with grinding stones on my dremel and my cordless drill. I wish I had my air die grinder back.
I kept the ports d-shaped as they were from the factory because A. there isn't much you can do with the floor of the ports as far as flow goes, and B. they were made that way to prevent reversion.
I still have to do some light sanding to smooth out the ports a bit, but that'* where I am so far.
Last edited by xtremerevolution; 04-01-2010 at 01:01 PM.
04-01-2010, 12:39 PM
#16
Retired Senior Admin
Expert Gearhead
Join Date: May 2006
Location: Sheboygan Wisconsin
Posts: 29,661
Likes: 0
Received 28 Likes
on
24 Posts
Looking good so far. Just be careful. there are cooling jackets in the head and you don't want to open one of them up. Here'* some light reading for you. http://www.popularhotrodding.com/eng.../photo_01.html
04-01-2010, 01:00 PM
#17
Senior Member
True Car Nut
Thread Starter
Join Date: Jun 2007
Location: New Lenox, IL
Posts: 2,478
Likes: 0
Received 0 Likes
on
0 Posts
Looking good so far. Just be careful. there are cooling jackets in the head and you don't want to open one of them up. Here'* some light reading for you. http://www.popularhotrodding.com/eng.../photo_01.html
Don't worry, I once made the mistake of hitting a water jacket on a Jaguar V12 head. I was PISSED. Then again, I was also reckless. I definitely won't be doing that again.
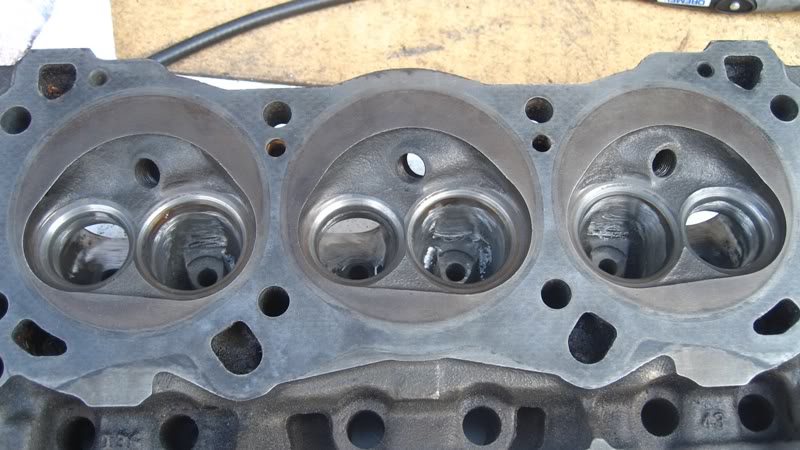
This is as far as I'm going to open up. I'm not going to remove the valves to do work around the bowl much, but this really felt like a restriction point. I'll do some minor cleaning up on the intake ports, but I won't be cutting into too much material.
I also just noticed I had 3 of the photos duplicated, so I updated that post with the right photos.
Last edited by xtremerevolution; 04-01-2010 at 01:02 PM.
04-01-2010, 05:50 PM
#18
Member
Posts like a V-Tak

Join Date: Mar 2010
Posts: 70
Likes: 0
Received 0 Likes
on
0 Posts
As a retired mechanical engineer I can tell you better make sure you have your rocker arms drilled properly and they have to be taken apart to do the job right.
Also if you have somebody installing Helicoils this has to be done properly and you can have them installed with some Locktite or you can install some special inserts (more expensive)
Either way you have to spend some more money. Sorry I could not give you a cheaper answer.
Velo.
Also if you have somebody installing Helicoils this has to be done properly and you can have them installed with some Locktite or you can install some special inserts (more expensive)
Either way you have to spend some more money. Sorry I could not give you a cheaper answer.
Velo.
04-02-2010, 04:27 AM
#19
Senior Member
True Car Nut
Thread Starter
Join Date: Jun 2007
Location: New Lenox, IL
Posts: 2,478
Likes: 0
Received 0 Likes
on
0 Posts
As a retired mechanical engineer I can tell you better make sure you have your rocker arms drilled properly and they have to be taken apart to do the job right.
Also if you have somebody installing Helicoils this has to be done properly and you can have them installed with some Locktite or you can install some special inserts (more expensive)
Either way you have to spend some more money. Sorry I could not give you a cheaper answer.
Velo.
Also if you have somebody installing Helicoils this has to be done properly and you can have them installed with some Locktite or you can install some special inserts (more expensive)
Either way you have to spend some more money. Sorry I could not give you a cheaper answer.
Velo.
04-06-2010, 07:44 PM
#20
Senior Member
True Car Nut
Thread Starter
Join Date: Jun 2007
Location: New Lenox, IL
Posts: 2,478
Likes: 0
Received 0 Likes
on
0 Posts
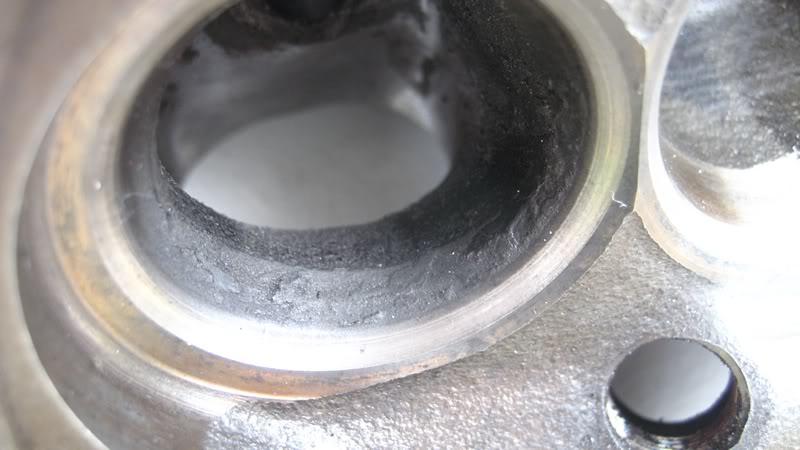
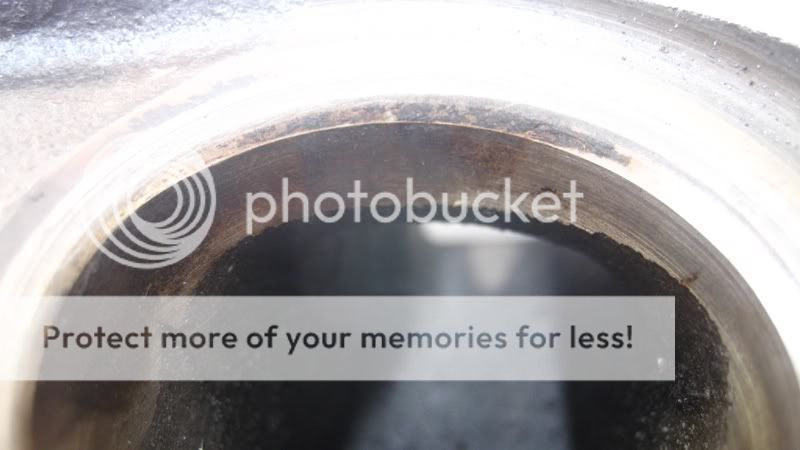
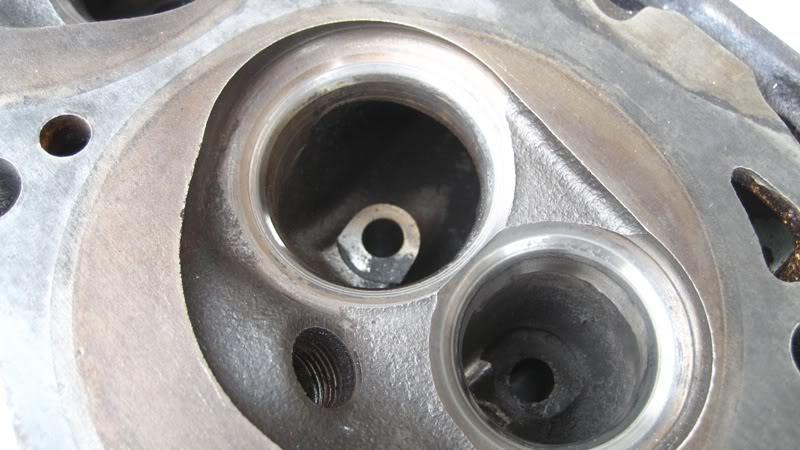
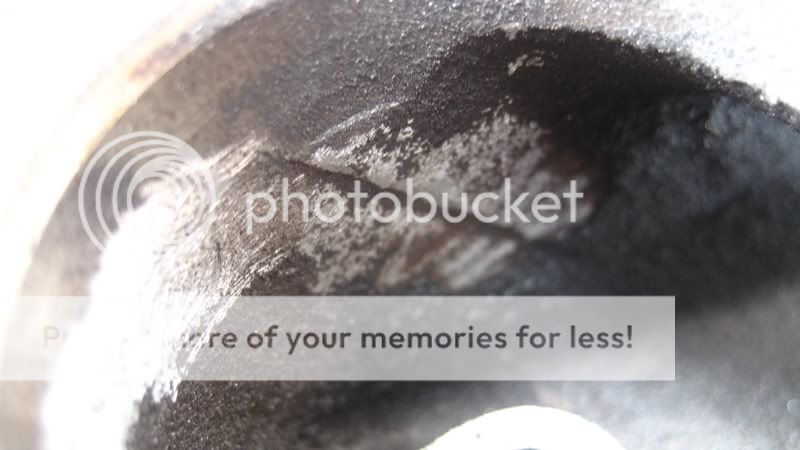
Got some more porting work done today.
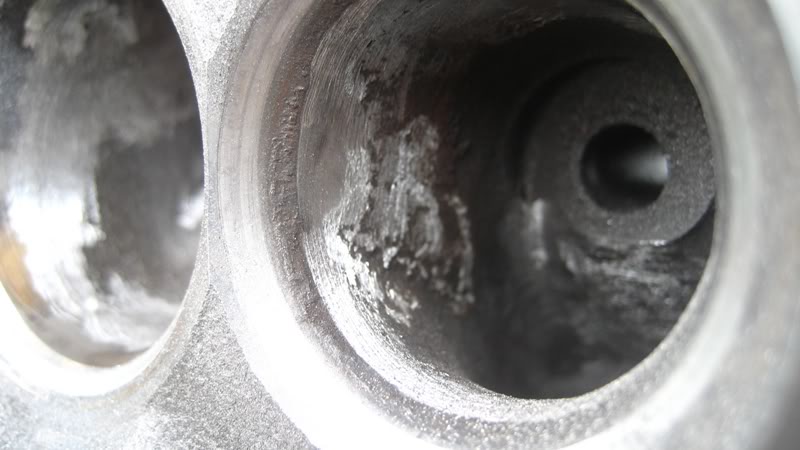
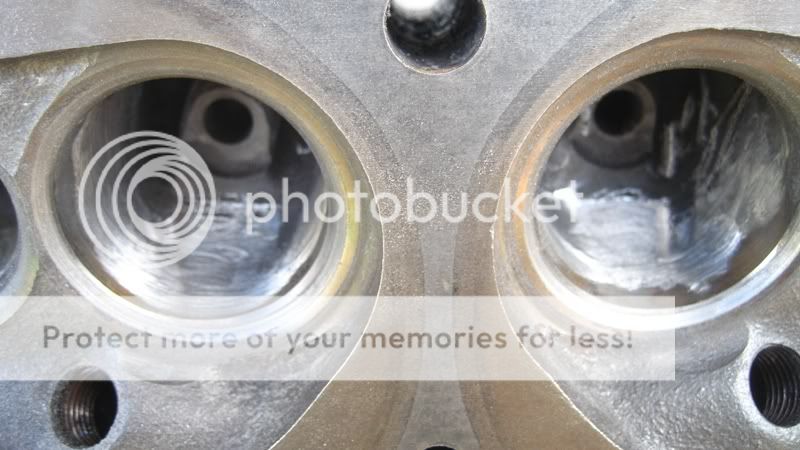
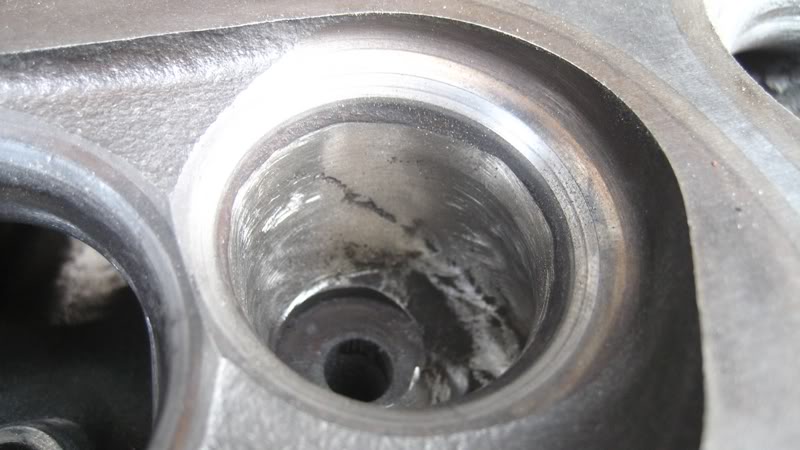
There are some pretty big casting imperfections that I smoothed out. Keep a close eye on the before and after shots of the floor of the intake ports, and the edges of the exhaust ports near the valve seat. Also look at the casting around the valve guide.
Ridges on the exhaust port:
Ridge on the floor of the intake port:
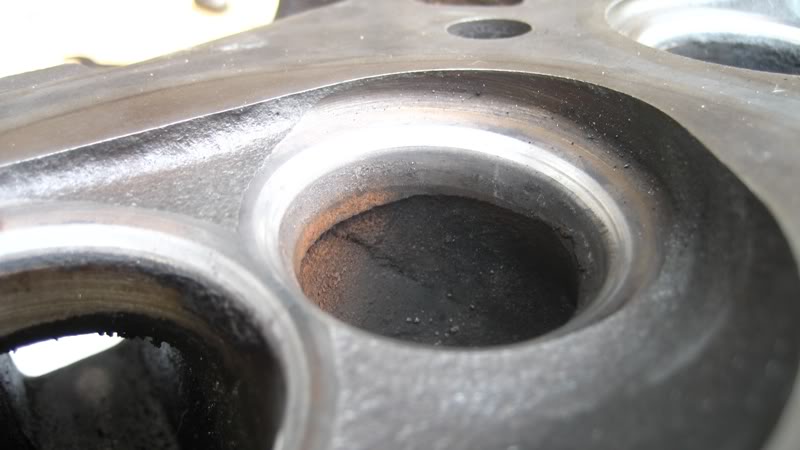
Casting around valve guide:
Other rough casting imperfections:
After shots:
There are some pretty big casting imperfections that I smoothed out. Keep a close eye on the before and after shots of the floor of the intake ports, and the edges of the exhaust ports near the valve seat. Also look at the casting around the valve guide.
Ridges on the exhaust port:
Ridge on the floor of the intake port:
Casting around valve guide:
Other rough casting imperfections:
After shots: