1995-1999 aurora 4.0 alternator swap
 12-29-2010, 09:50 PM
#1
Member
Posts like a V-Tak
Thread Starter
Join Date: Nov 2010
Posts: 30
Likes: 0
Received 0 Likes
on
0 Posts

couldn't post this in the how to (being a new member and all)
but this is a proper,step by step.
maybe if found worthy, an administer can move it
---------------------------------------------------------------------------------------------------------------------
well for the last month or so, my alternator was makeing a very ugly noise.
(probably the bearing because it was charging properly) right up till the time
it stoped makeing noise, and the "check charging sys" message came up....LOL
it was time to fix it, so i figured i may as well do a write up.
first a couple notes and opinions:
this is not a hard job.i've included assembly pictures,because i feel
if you know how something is put together, it makes it easier to take apart.
it'* said the job can be done without removeing the radiator, and after
the radiator cover,top hose and fans are removed, yes theres room to squeak it out.but not much room to work thou.
frankly, for about ten more minutes of time, it afforded much,much more room to work in, and no risk of the added expense of damaging a costly part! (ie said radiator)
i only went under the car to take photo'*, all bolts are assessable from the
top. so i never had to get the car in the air.
i had the alternator rebuilt locally, at a cost of $106.40, with a 5 year warranty.no core charge,and one day turn around.
i had about, maybe 2 1/2-3 hour'* of actual work time,doing this job.
and needed very few tools.all the bolts on the alternator were 15mm,as was the trany hoses.the fans,radiator cover,and radiator bolts all 10mm.
Finally, as a matter of personal preference, i don't like reuseing factory type
"snap" hose clamps. so i replaced what i took off with band clamps.also the other ones i had access too, while i was at it
-------------------------------------------------------------------------------
first thing (obviously) remove the positive battery cable.
(under the back seat) 5/16
drain the radiator by way of the petcock,(drivers side)it'* a plastic butterfly plug so if you can't twist it by hand, use a short pair of pliers
in the open slot position, and twist it off from the wings
(DO NOT grasp the center of the plug!) and don't overly force it!
if you can't get it to drain from the plug,it'll drain when you pull
the lower hose (messy but effective) -------------------------------------------------------------------------------
radiator cover, and hose removal
8-10mm nut'* bolts
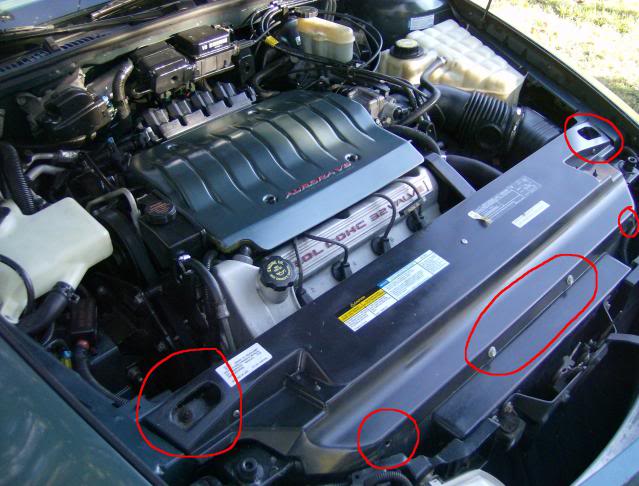
on the back side of the cover,you'll find a brace
cover off,now the top hose
if you can't twist the hose off by hand, use a pair of channel locks
(the side tanks and nozzle are plastic, so don't clamp down to tight)
--------------------------------------------------------------------------------
fan and radiator removal
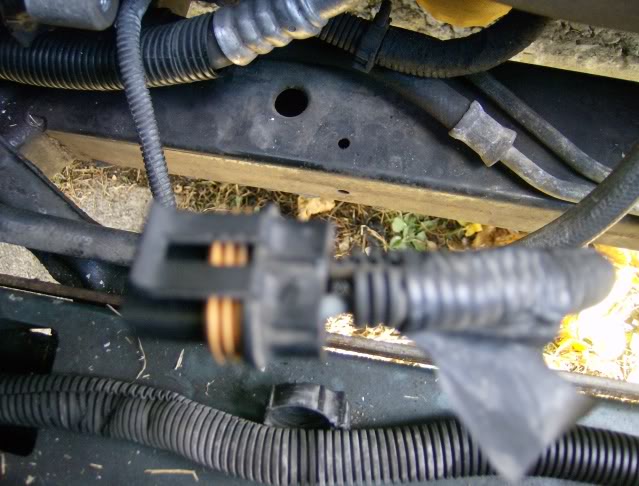
you can pull the wires out now or when it'* lose from the mounts.
(fan wires plug in here,just slip a flat head screw driver under the clip and pull it out)
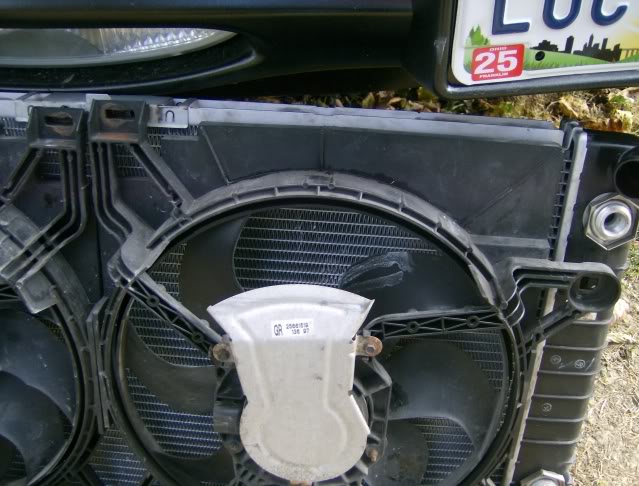
each fan has two 10mm bolts holding it in one at the top and one on the side,with slide on flanges at the bottom.
(you'll find it easier to remove the drivers side fan first,it'll give you more room because of less room on the other side)
you'll need to take off the lower radiator hose, and the trany cooler lines next.i pulled the top trany line first (15mm and channel locks) at the
radiator, and took off the lower one at the transmission (much easier
then trying to take it off at the bottom of the radiator)
then loosen and pull the radiator hose at the pump.
** some earlier models have oil cooler lines, on the other side tank.
if this is your case,obviously you'll have to disconnect one end or the other
to get the radiator out**
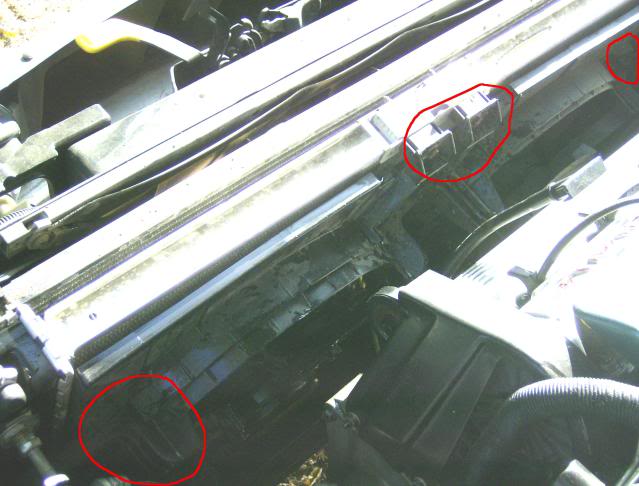
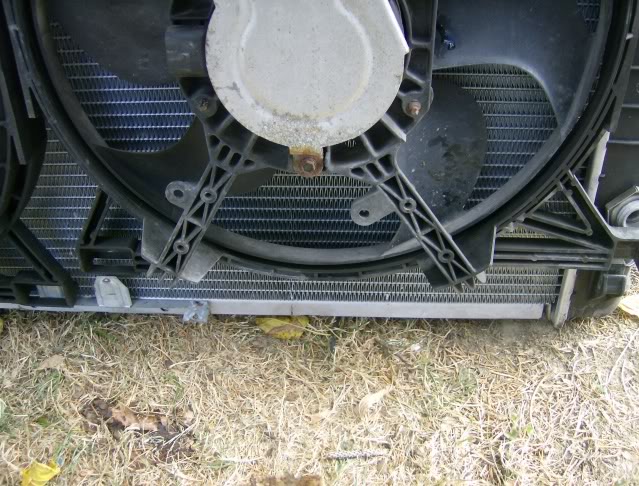
the radiator only has two 10mm bolts,and two slide on clips holding it to the AC/radiator, then you pull it up and out!
left side
right side
bottom clips
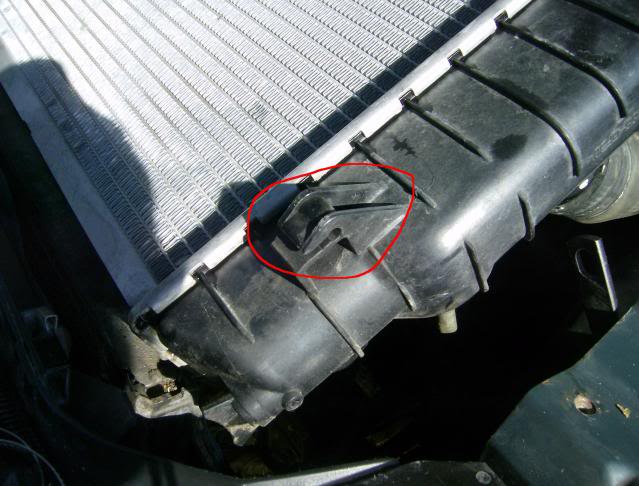
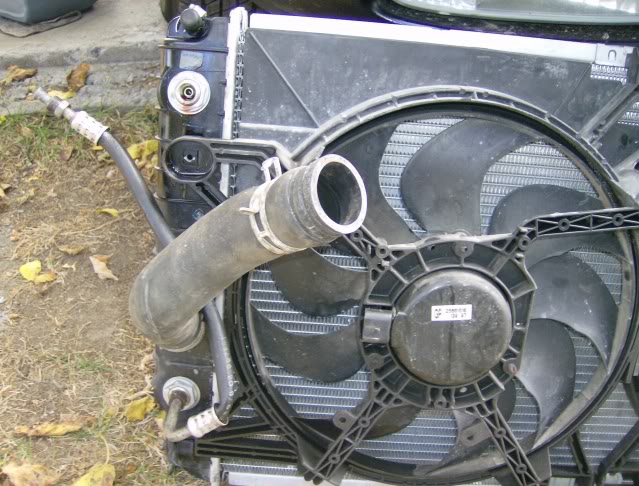
heres the radiator out, with the fan for reference.
-------------------------------------------------------------------------------
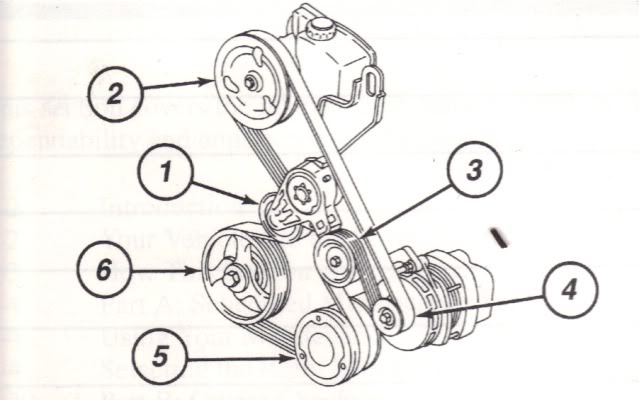
accessory belt removal
very simple, you'll find a 1/2in square on the tensioner pulley, just
stick in a 1/2 in drive extension, and push down, then slide the belt
off the top pulley. you can then you can move it off the alternator
-------------------------------------------------------------------------------
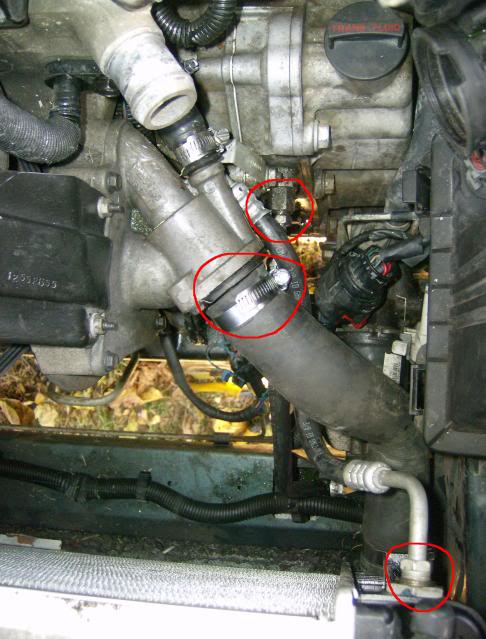
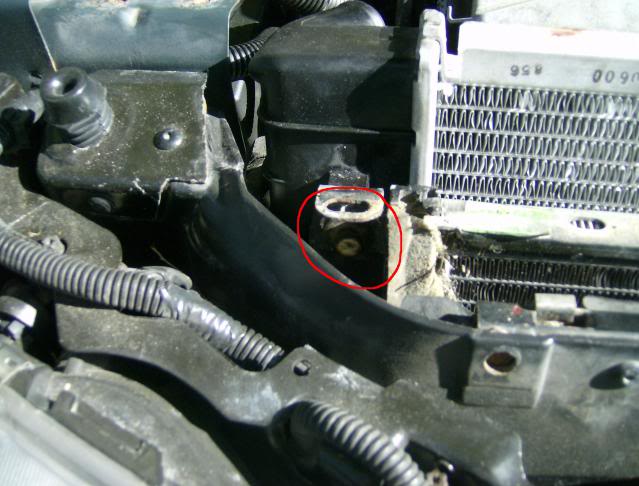
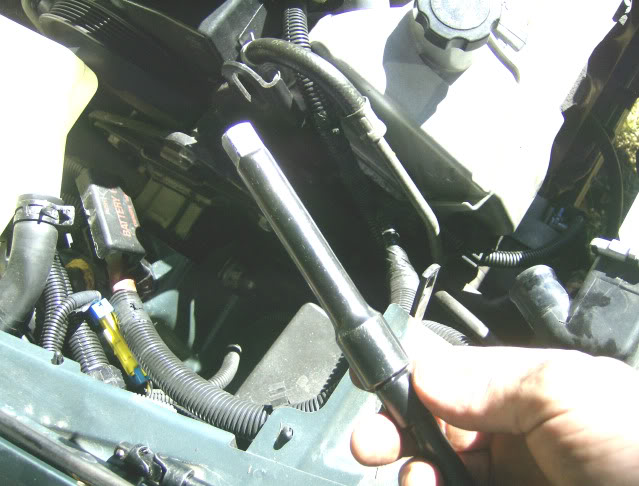
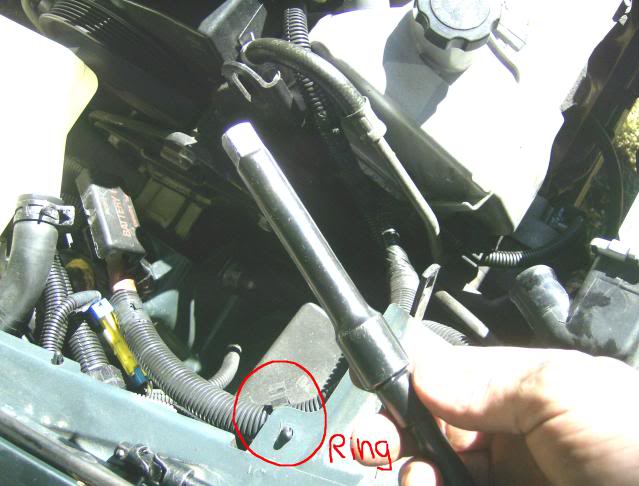
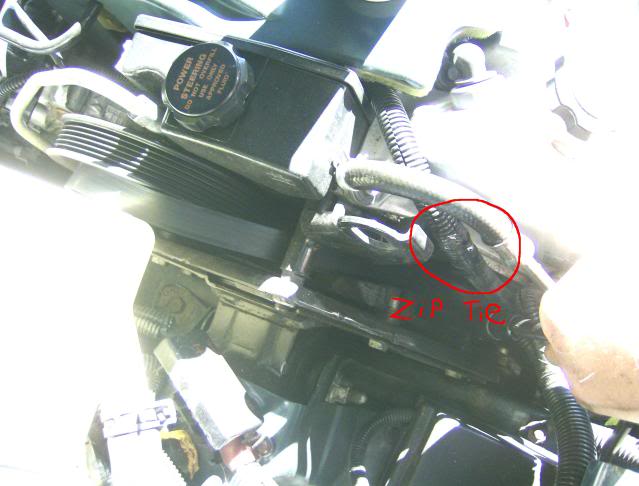
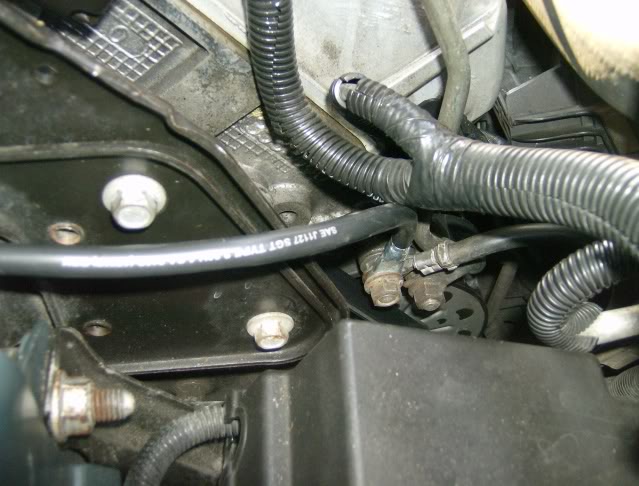
ok,just a couple things before the alternator, go ahead and undo the power steering hose clamp,then the big harness ring.
on the smaller wire set coming off that,theres an attachment point (tape and zip ties) beside the valve cover,the nut on the alternator,and the other plug.
the power steering hose,is attached to two stud nuts on the alternator (one high and one low 15mm) those are the first nuts you'll want to take off,that way
you can move the hose out of your way.but you can move the wires now
-------------------------------------------------------------------------------
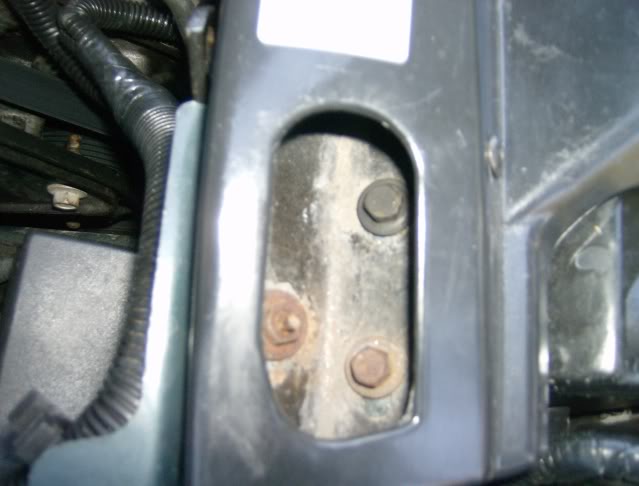
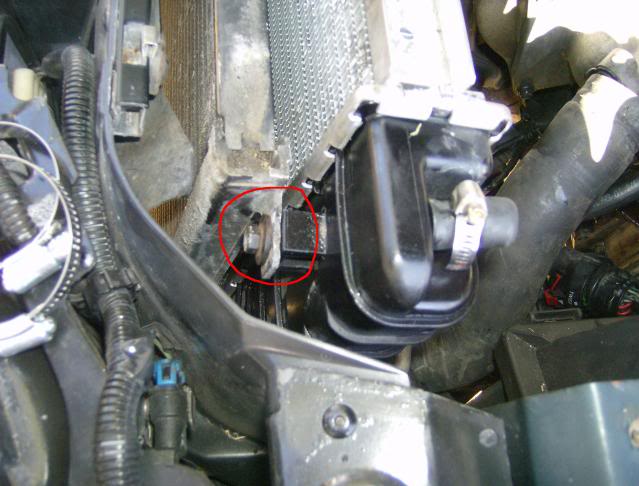
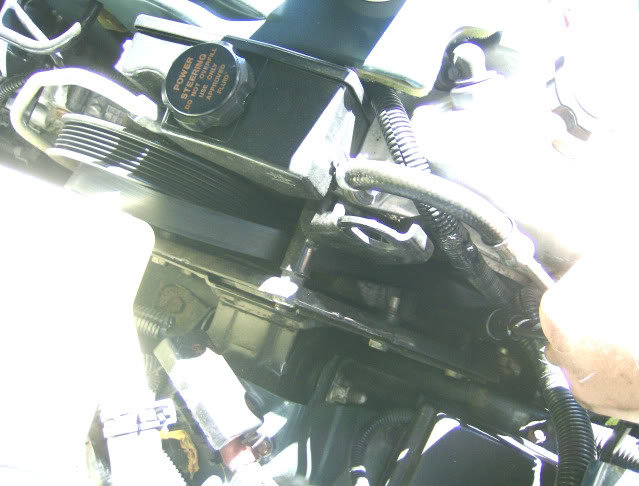
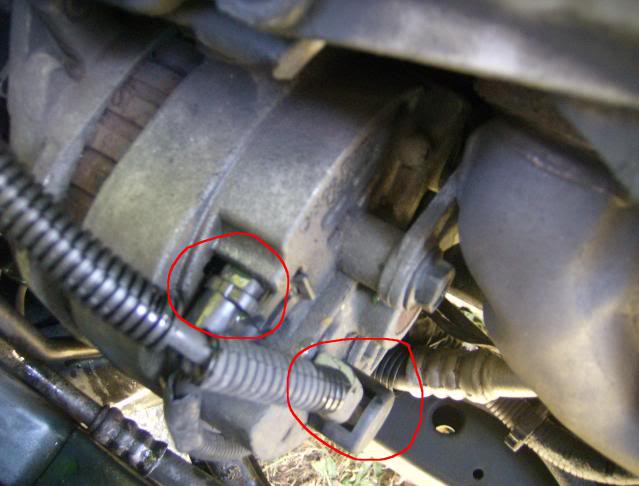
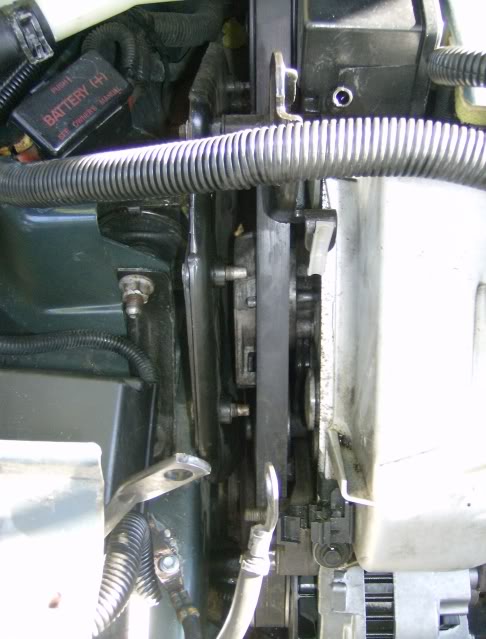
these are the nuts to come off next.
the top one is the ground wire and the bottom one is the aforementioned
power steering hose top nut.the arrow points to a bolt you can't see now, but
you'll need to loosen that too,(no need to remove it) so that when it'* time for the alternator to come out you can swing this bracket up and out of your way.
and this is the bottom stud nut for the power steering hose (15mm)
now you can gently pull the hose back and out of your way
-------------------------------------------------------------------------------
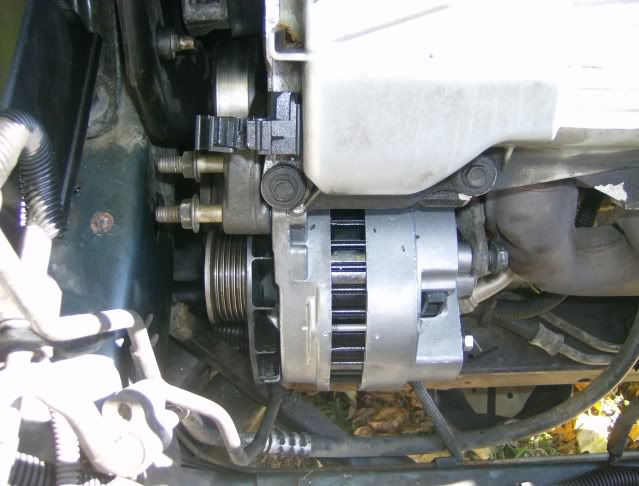
alternator removal
while your on the bottom alternator stud,(15mm) go ahead and loosen it about half way.you'll find that it hits a bracket under the car,before it'll come out all the way. but thats ok! you don't have to remove the bracket!!!!!
stick with me and i'll show you how it comes out in a couple steps!
--------------------------------------------------------------------------------
i'm going to stop here to say i kind of did a boneheaded thing.
i went to take off the other end of the ground cable, thinking it was in the way
of the bottom of the two top two alternator studs. and snaped it off!
when i could have just tryed a little harder with a pipe on the end of a wrench
and i wouldn't have to of touched the body side of the ground.
oh well,lesson'* learned! i did a temporary fix (hack) till i can get a
proper fix on it.
-------------------------------------------------------------------------------
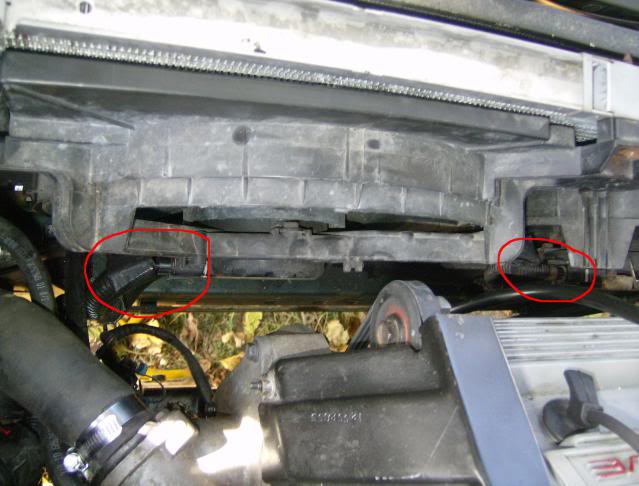
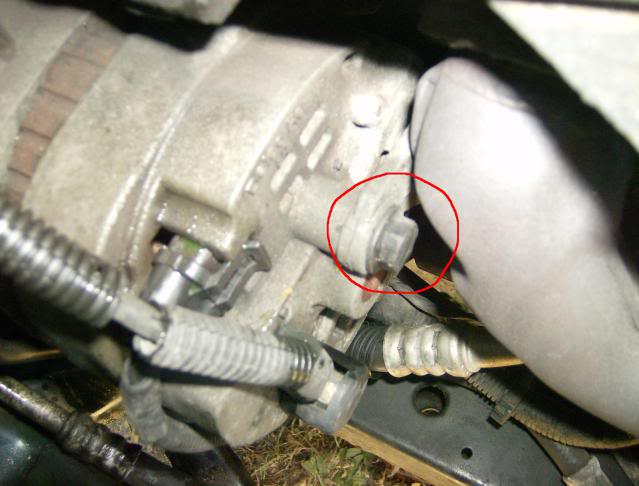
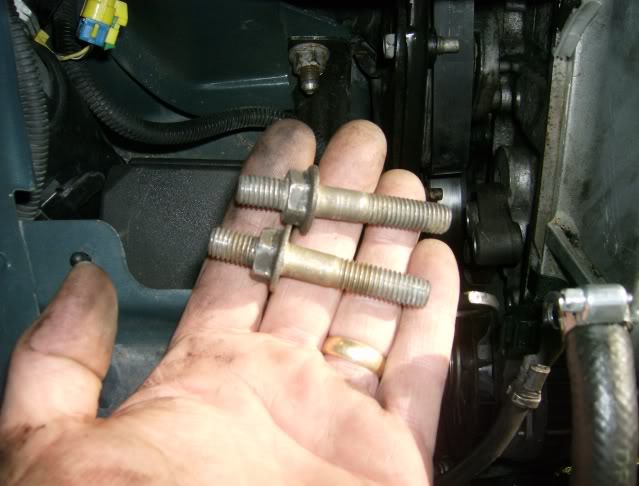
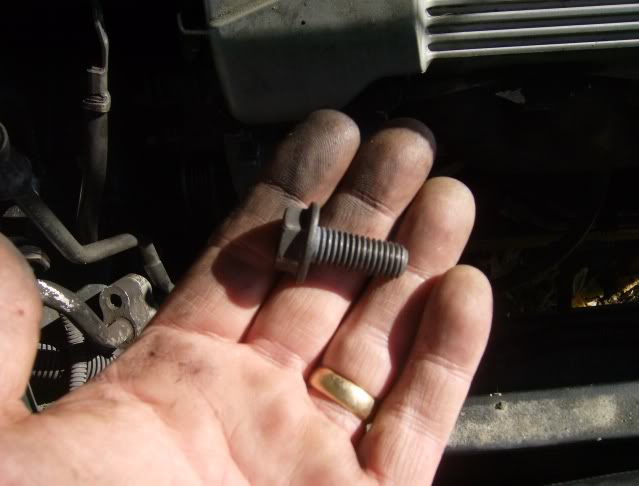
now pull the top two studs that the ground and power steering hose was attached
to (15mm) and swing the bracket up and out of the way
the body ground stud that snaped off
one of the two studs
the bracket you'll lift up out of the way
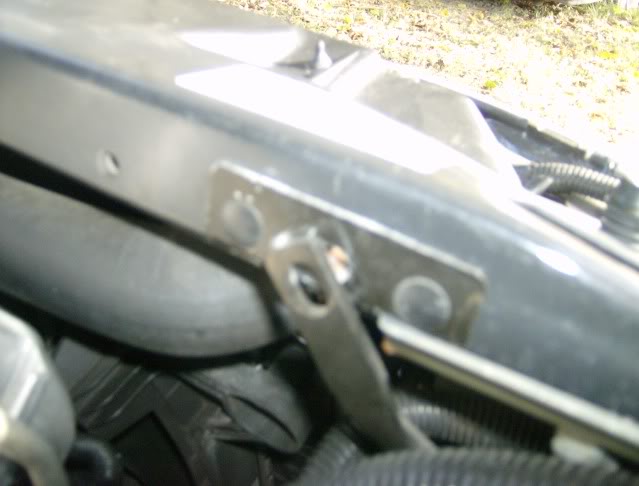
loosen this bolt next, again you'll find it wont back out all the way
and thats ok too, just run it out as far as you can for now.
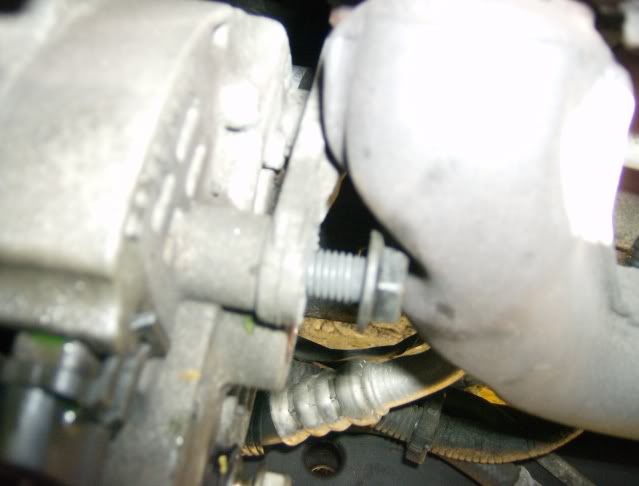
the only time i had to go under the car, (to take these pictures)
so you can see where this bolt is, now that you know. you can get a 15mm
wrench on it from the top. by the way here is where a ratchet wrench is your best friend it'* a very tight spot with no room to get a socket on.
whether you decide to get it from the top or bottom!
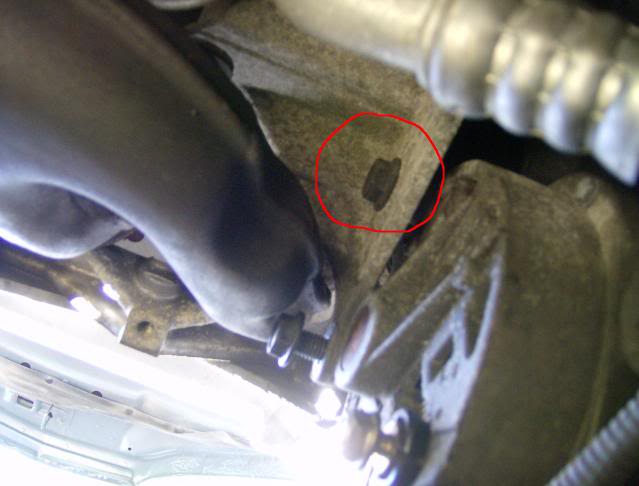
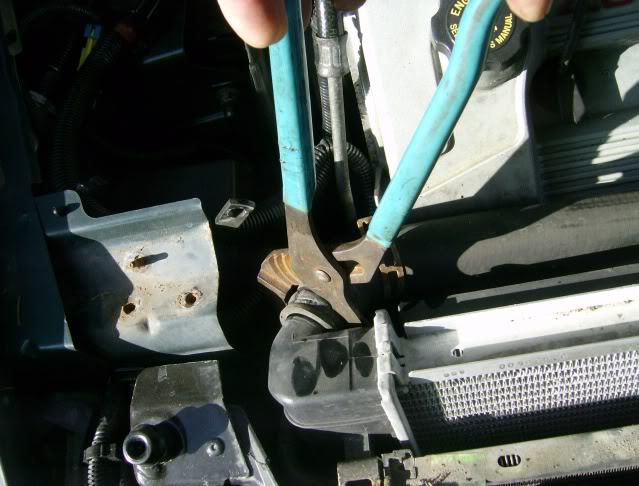
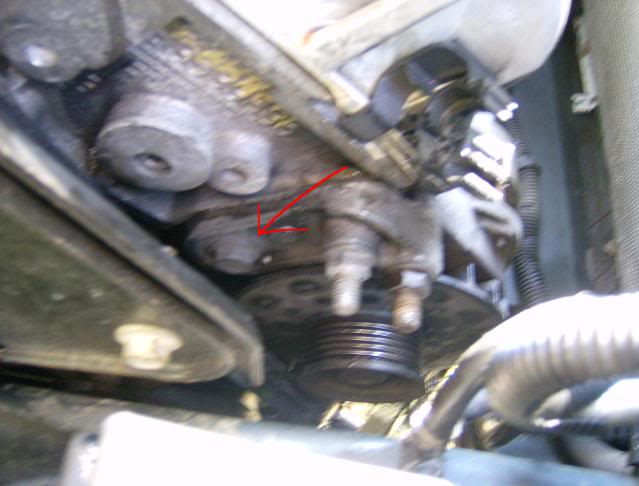
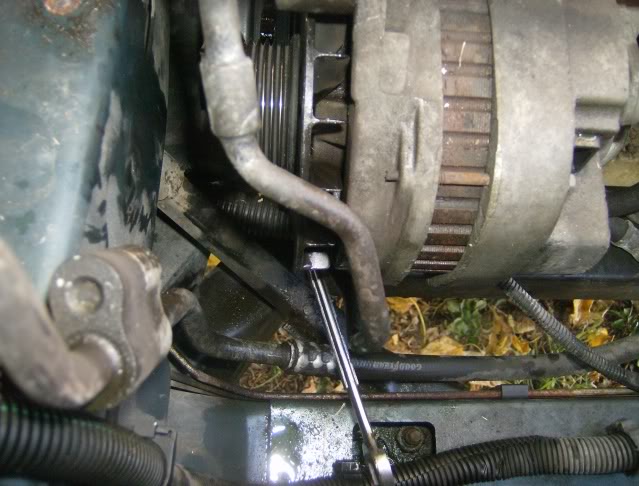
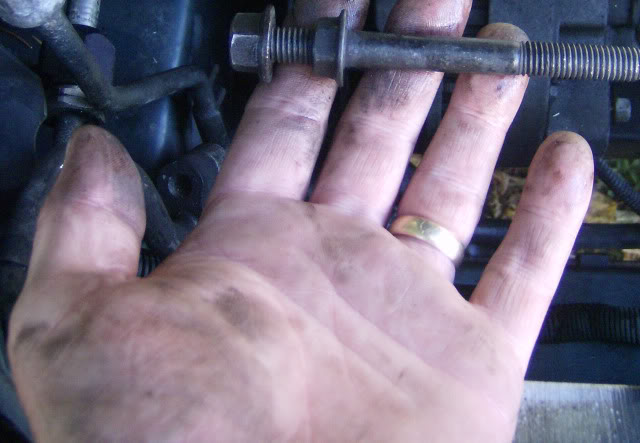
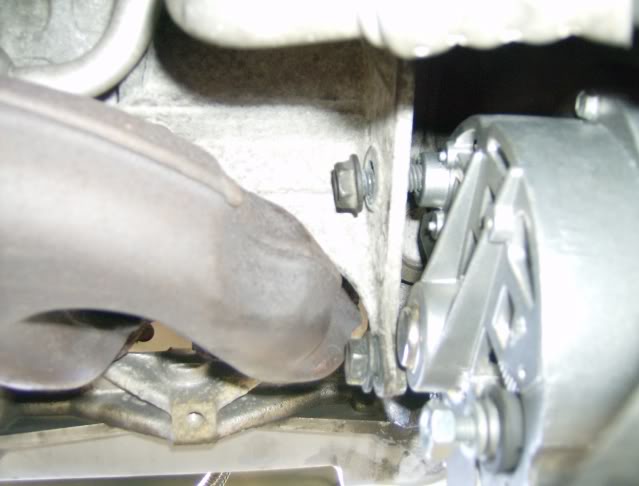
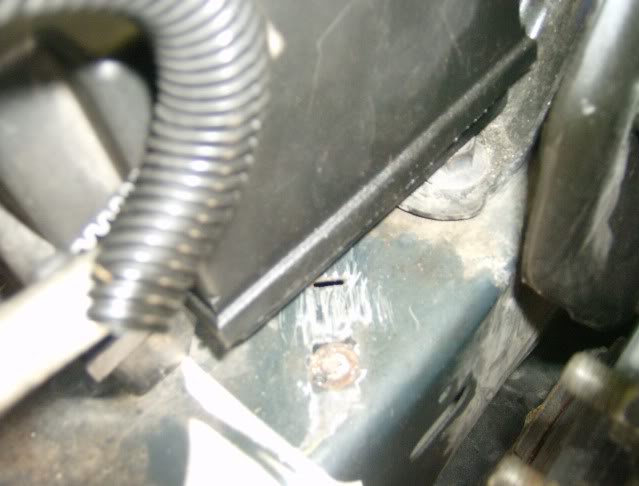
ok so now you have that bottom stud,that seemingly hits the a brace and the bolt that hits the exhaust pipe,and it'* out!
i'll try to explain this the best way i can! you have to work both at the
sametime.the bottom stud slides through the alternator and threads into a bracket. what you have to do is slide the alternator to the left on the the stud as you unscrew the exhaust side bolt,if you hit the end of the stud just loosen
it a little more till the exhaust side come'* off.
then you can let the alternator tilt forward and slide back into the bracket as you unscrew the stud. finish by cocking the alternator down a bit to the left and the stud will slip right by that brace and the alternator falls out and into you hands!!!
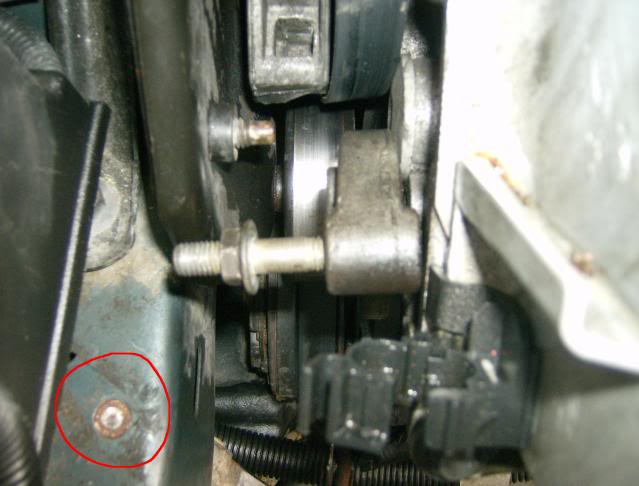
in this picture the circle is the where the stud threads into
and the arrow is where it slips past the brace.
--------------------------------------------------------------------------------
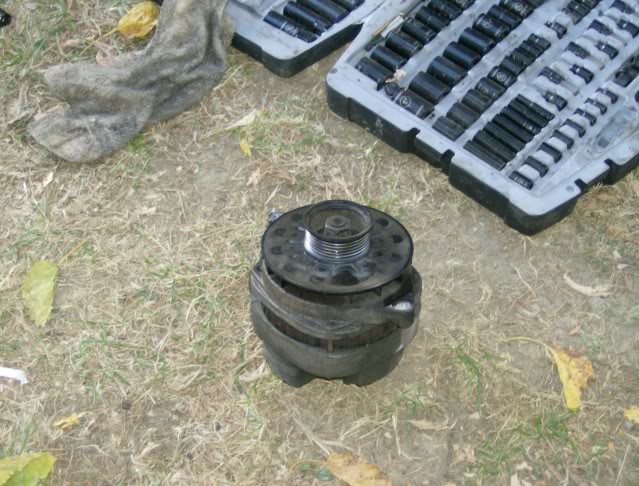
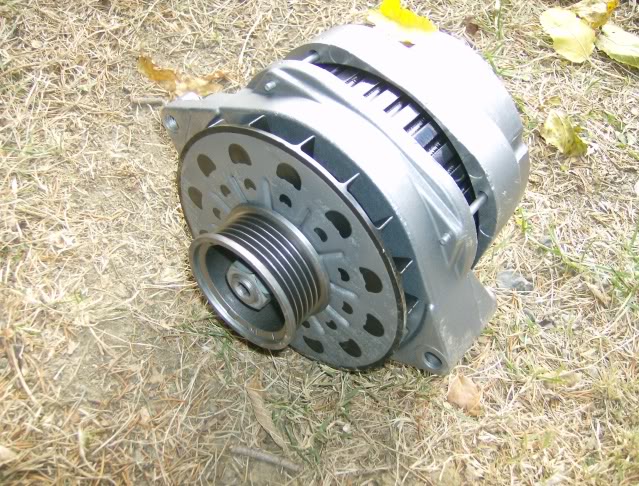
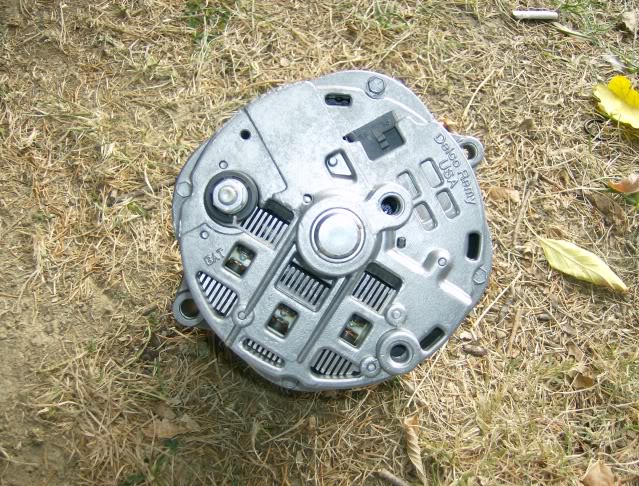
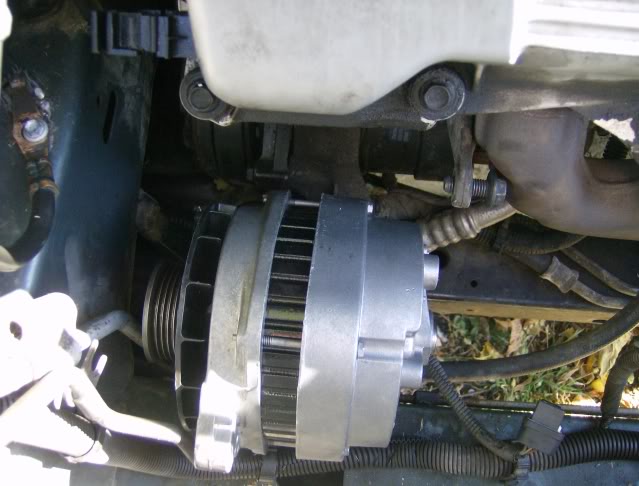
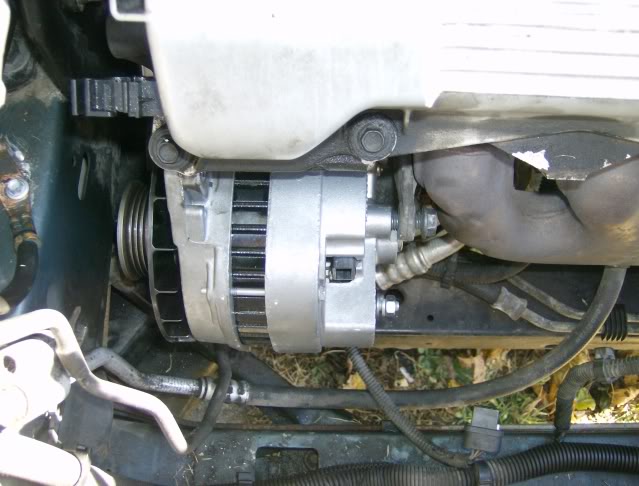
ok here it is out on the ground,and off the be rebuilt.
and after i got it back the next day, ain't it perity?...LOL
and i know it fits!
-------------------------------------------------------------------------------
welp we need to get it back in, so i'm not going to leave you hanging
by saying just follow these instructions backwards..............
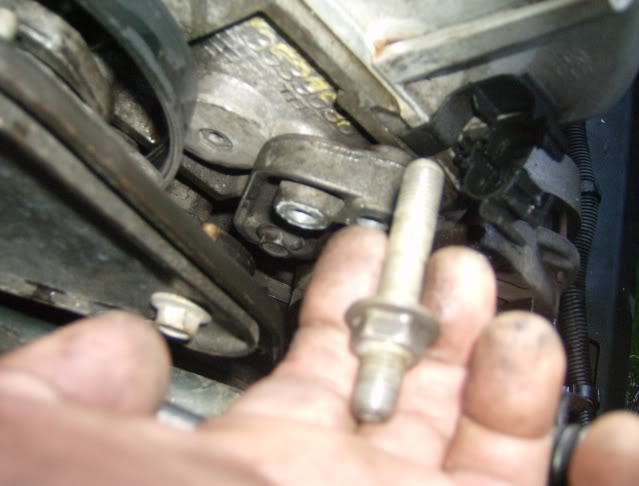
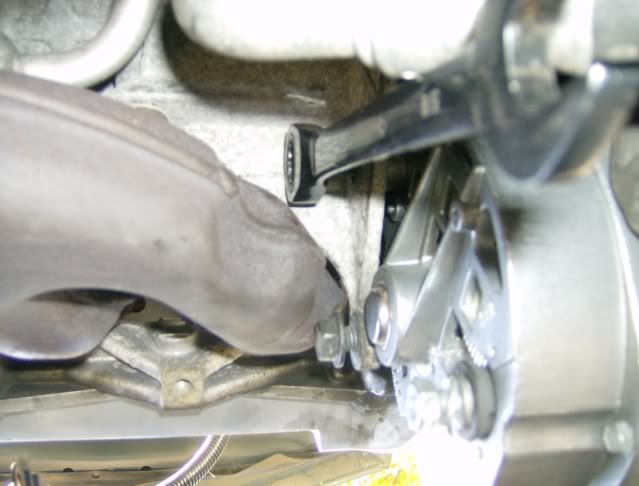
start by taking the bottom stud and slide it into the alternator.
then tilted forward and at a slight angel get the threads started into
the bracket,like this
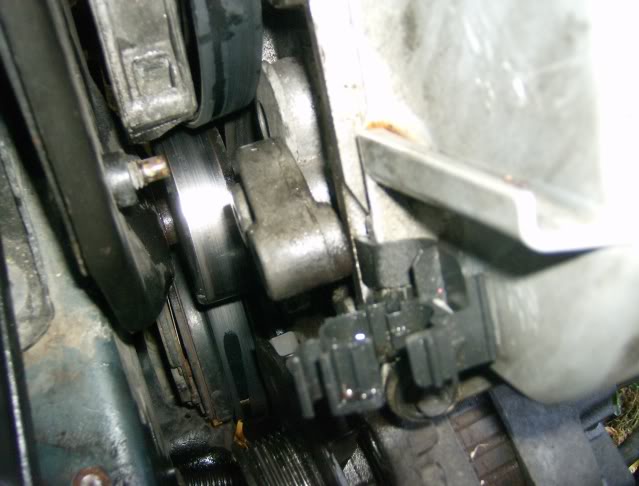
tilt it up and get the exhaust side bolt started
and work them both in at the sametime, just as you did to get them out.
don't tighten anything up yet till all the bolts and studs are in and started
now get the top two studs started
and finally the bolt behind the exhaust side bolt.
it might not look it in the picture (it'* just hanging their for the pic)but if you do this one last, it'll
line up real well and you wont have to fight it
now you can tighten up all six studs and bolts,start with the bottom stud then
the exhaust side bolt, then the top studs (when you do the top.
tighten the ground/block stud and the alternator/power steering hose stud
before you tighten the bracket bolt) and lastly the bolt behind the exhaust side bolt.
--------------------------------------------------------------------------------
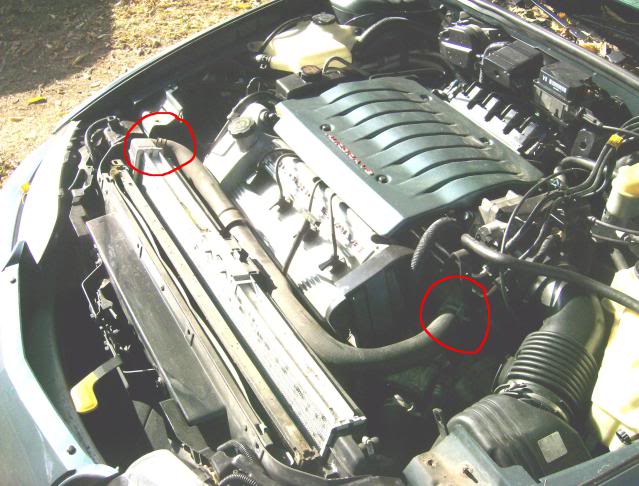
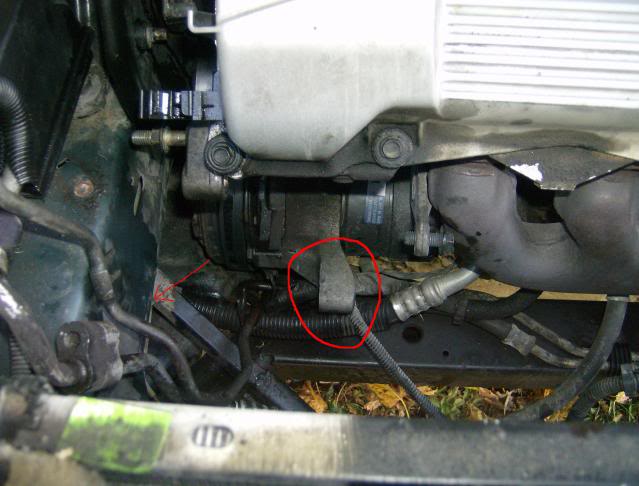
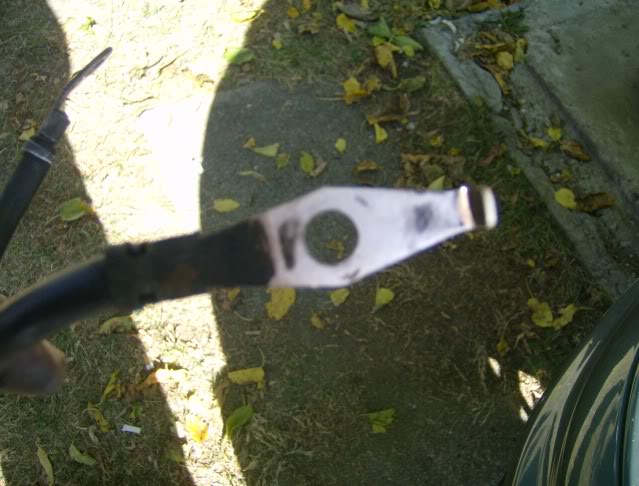
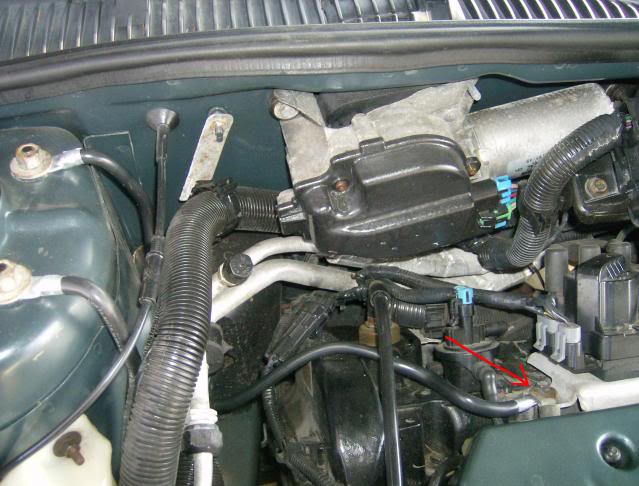
]while i have the room i'll get that body side ground back on.
i filed down to clean metal on the frame and wire,and used a self taping screw.
ya,it'* hack. but it'll work for now, till i can run a better connection[
--------------------------------------------------------------------------------
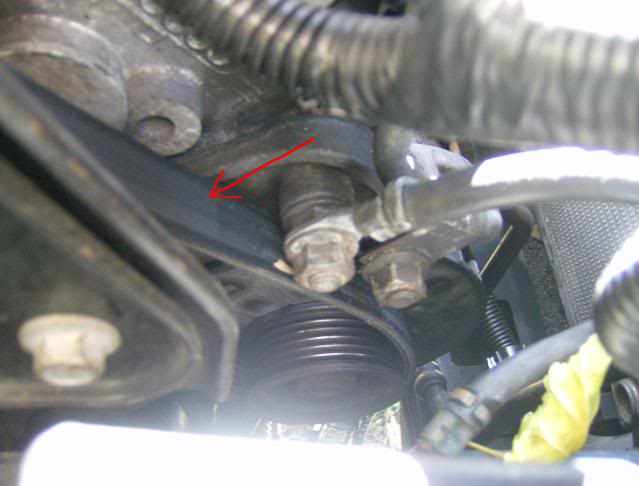
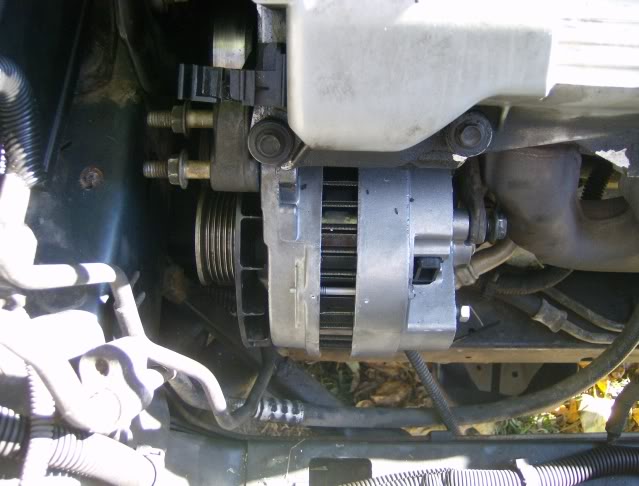
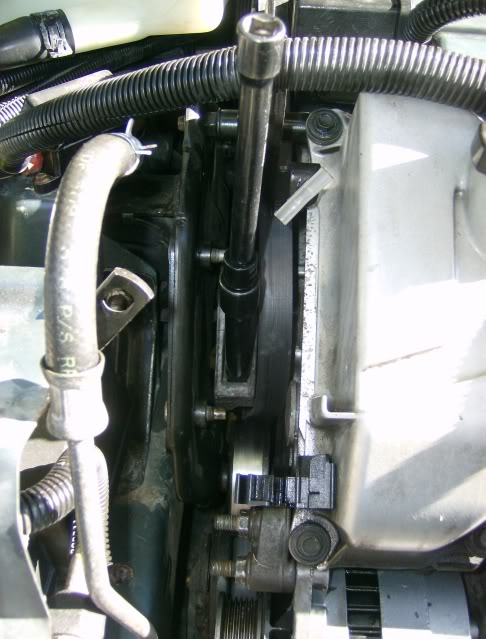
ok get the accessory belt back on, slip it on to the alternator first.
and again while pushing down on the tensioner pulley slide it over the top pulley, make sure it'* all lined up and on properly!
--------------------------------------------------------------------------
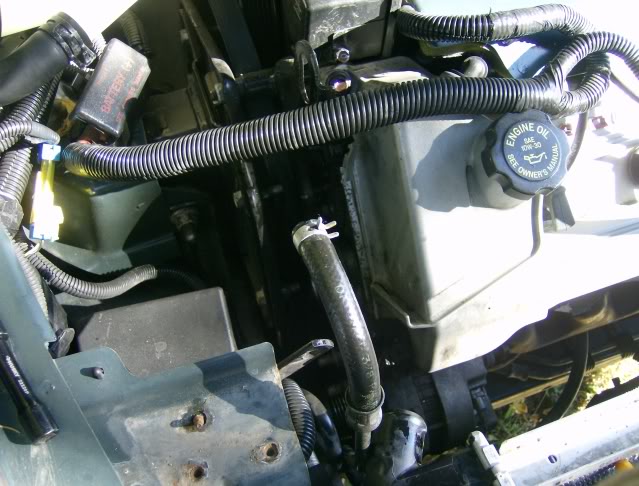
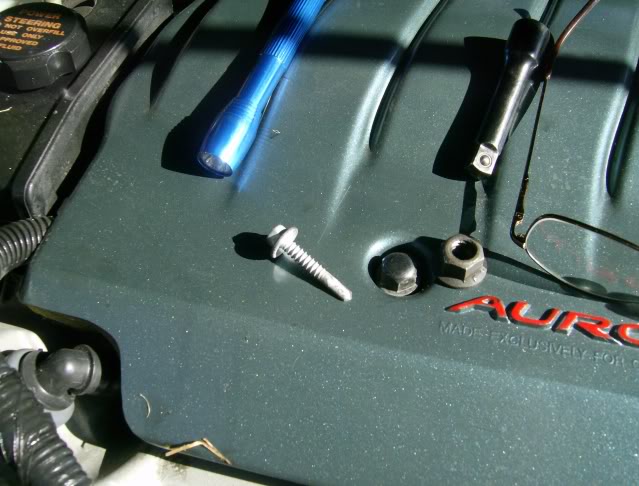
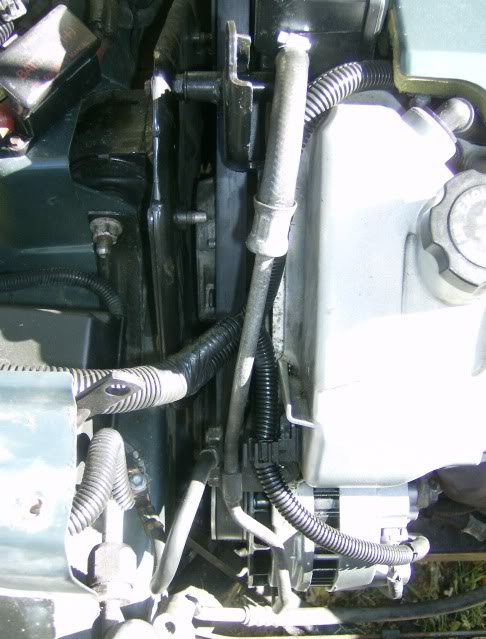
now you can bring the wire harness back down,clean up the battery ring, tighten the nut and put the plug back in.
(forgot to take a picture so this one will do)
don't fasten the harness just yet,you'll have to move it around a bit to get the ground wire and the top power steering hose nut'* back on.
then after them three nut'* and the hose is in place
go ahead and secure the wire harness,and put the hose back on the reservoir
(you can see i changed the clamp)
i changed this hose altogether, it looked like it was just a short matter of time before it sprang a leak (2" ID)

now the rest is gravy!
1: get the radiator back in.
2: put the lower trany cooling hose back on the transmission
3: put the lower radiator hose back on the water pump
(i changed both clamps,don't over tighten the one on the radiator
remember the tank is just plastic, and if you do change them make sure
they are positioned so you can get to it if you've got to retighten the clamp
because you find it leaks)
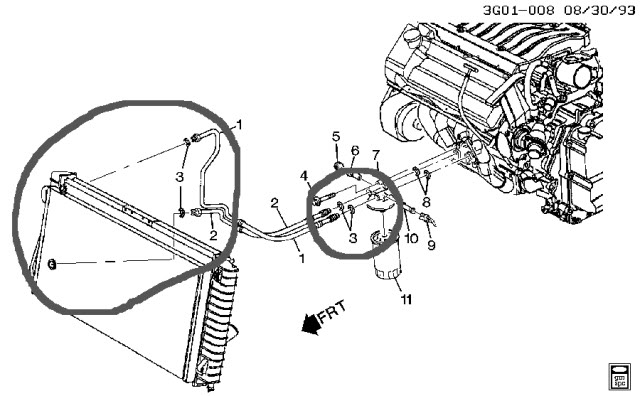
4: put the top trany cooling hose back on the radiator
(5) if you've got the oil cooling lines, get them back on
6: left fan and wire plug then the right fan and wire plug
7: make sure you've closed the petcock,start filling the tank with 50/50 coolant
8: go hook the battery back up,start her up (may need a jump...LOL)
9: let it come up to temp,and the thermostat opens and the fans kick on
(keep an eye on the coolantlevel in the tank and add accordingly)
10: look for any leaks/and anything you may have not tighten properly
11: if all is good shut her down, get the radiator cover back on
and take it for a short ride,recheck for leaks then enjoy!
i did this write up for another fourm.
so if it helps ya, and you save a little (lot) of money doing this yourself
it'll make us both pleased!
ground fix
belt diagram (just incase)

but this is a proper,step by step.
maybe if found worthy, an administer can move it
---------------------------------------------------------------------------------------------------------------------
well for the last month or so, my alternator was makeing a very ugly noise.
(probably the bearing because it was charging properly) right up till the time
it stoped makeing noise, and the "check charging sys" message came up....LOL
it was time to fix it, so i figured i may as well do a write up.
first a couple notes and opinions:
this is not a hard job.i've included assembly pictures,because i feel
if you know how something is put together, it makes it easier to take apart.
it'* said the job can be done without removeing the radiator, and after
the radiator cover,top hose and fans are removed, yes theres room to squeak it out.but not much room to work thou.
frankly, for about ten more minutes of time, it afforded much,much more room to work in, and no risk of the added expense of damaging a costly part! (ie said radiator)
i only went under the car to take photo'*, all bolts are assessable from the
top. so i never had to get the car in the air.
i had the alternator rebuilt locally, at a cost of $106.40, with a 5 year warranty.no core charge,and one day turn around.
i had about, maybe 2 1/2-3 hour'* of actual work time,doing this job.
and needed very few tools.all the bolts on the alternator were 15mm,as was the trany hoses.the fans,radiator cover,and radiator bolts all 10mm.
Finally, as a matter of personal preference, i don't like reuseing factory type
"snap" hose clamps. so i replaced what i took off with band clamps.also the other ones i had access too, while i was at it
-------------------------------------------------------------------------------
first thing (obviously) remove the positive battery cable.
(under the back seat) 5/16
drain the radiator by way of the petcock,(drivers side)it'* a plastic butterfly plug so if you can't twist it by hand, use a short pair of pliers
in the open slot position, and twist it off from the wings
(DO NOT grasp the center of the plug!) and don't overly force it!
if you can't get it to drain from the plug,it'll drain when you pull
the lower hose (messy but effective) -------------------------------------------------------------------------------
radiator cover, and hose removal
8-10mm nut'* bolts
on the back side of the cover,you'll find a brace
cover off,now the top hose
if you can't twist the hose off by hand, use a pair of channel locks
(the side tanks and nozzle are plastic, so don't clamp down to tight)
--------------------------------------------------------------------------------
fan and radiator removal
you can pull the wires out now or when it'* lose from the mounts.
(fan wires plug in here,just slip a flat head screw driver under the clip and pull it out)
each fan has two 10mm bolts holding it in one at the top and one on the side,with slide on flanges at the bottom.
(you'll find it easier to remove the drivers side fan first,it'll give you more room because of less room on the other side)
you'll need to take off the lower radiator hose, and the trany cooler lines next.i pulled the top trany line first (15mm and channel locks) at the
radiator, and took off the lower one at the transmission (much easier
then trying to take it off at the bottom of the radiator)
then loosen and pull the radiator hose at the pump.
** some earlier models have oil cooler lines, on the other side tank.
if this is your case,obviously you'll have to disconnect one end or the other
to get the radiator out**
the radiator only has two 10mm bolts,and two slide on clips holding it to the AC/radiator, then you pull it up and out!
left side
right side
bottom clips
heres the radiator out, with the fan for reference.
-------------------------------------------------------------------------------
accessory belt removal
very simple, you'll find a 1/2in square on the tensioner pulley, just
stick in a 1/2 in drive extension, and push down, then slide the belt
off the top pulley. you can then you can move it off the alternator
-------------------------------------------------------------------------------
ok,just a couple things before the alternator, go ahead and undo the power steering hose clamp,then the big harness ring.
on the smaller wire set coming off that,theres an attachment point (tape and zip ties) beside the valve cover,the nut on the alternator,and the other plug.
the power steering hose,is attached to two stud nuts on the alternator (one high and one low 15mm) those are the first nuts you'll want to take off,that way
you can move the hose out of your way.but you can move the wires now
-------------------------------------------------------------------------------
these are the nuts to come off next.
the top one is the ground wire and the bottom one is the aforementioned
power steering hose top nut.the arrow points to a bolt you can't see now, but
you'll need to loosen that too,(no need to remove it) so that when it'* time for the alternator to come out you can swing this bracket up and out of your way.
and this is the bottom stud nut for the power steering hose (15mm)
now you can gently pull the hose back and out of your way
-------------------------------------------------------------------------------
alternator removal
while your on the bottom alternator stud,(15mm) go ahead and loosen it about half way.you'll find that it hits a bracket under the car,before it'll come out all the way. but thats ok! you don't have to remove the bracket!!!!!
stick with me and i'll show you how it comes out in a couple steps!
--------------------------------------------------------------------------------
i'm going to stop here to say i kind of did a boneheaded thing.
i went to take off the other end of the ground cable, thinking it was in the way
of the bottom of the two top two alternator studs. and snaped it off!
when i could have just tryed a little harder with a pipe on the end of a wrench
and i wouldn't have to of touched the body side of the ground.
oh well,lesson'* learned! i did a temporary fix (hack) till i can get a
proper fix on it.
-------------------------------------------------------------------------------
now pull the top two studs that the ground and power steering hose was attached
to (15mm) and swing the bracket up and out of the way
the body ground stud that snaped off
one of the two studs
the bracket you'll lift up out of the way
loosen this bolt next, again you'll find it wont back out all the way
and thats ok too, just run it out as far as you can for now.
the only time i had to go under the car, (to take these pictures)
so you can see where this bolt is, now that you know. you can get a 15mm
wrench on it from the top. by the way here is where a ratchet wrench is your best friend it'* a very tight spot with no room to get a socket on.
whether you decide to get it from the top or bottom!
ok so now you have that bottom stud,that seemingly hits the a brace and the bolt that hits the exhaust pipe,and it'* out!
i'll try to explain this the best way i can! you have to work both at the
sametime.the bottom stud slides through the alternator and threads into a bracket. what you have to do is slide the alternator to the left on the the stud as you unscrew the exhaust side bolt,if you hit the end of the stud just loosen
it a little more till the exhaust side come'* off.
then you can let the alternator tilt forward and slide back into the bracket as you unscrew the stud. finish by cocking the alternator down a bit to the left and the stud will slip right by that brace and the alternator falls out and into you hands!!!
in this picture the circle is the where the stud threads into
and the arrow is where it slips past the brace.
--------------------------------------------------------------------------------
ok here it is out on the ground,and off the be rebuilt.
and after i got it back the next day, ain't it perity?...LOL
and i know it fits!
-------------------------------------------------------------------------------
welp we need to get it back in, so i'm not going to leave you hanging
by saying just follow these instructions backwards..............
start by taking the bottom stud and slide it into the alternator.
then tilted forward and at a slight angel get the threads started into
the bracket,like this
tilt it up and get the exhaust side bolt started
and work them both in at the sametime, just as you did to get them out.
don't tighten anything up yet till all the bolts and studs are in and started
now get the top two studs started
and finally the bolt behind the exhaust side bolt.
it might not look it in the picture (it'* just hanging their for the pic)but if you do this one last, it'll
line up real well and you wont have to fight it
now you can tighten up all six studs and bolts,start with the bottom stud then
the exhaust side bolt, then the top studs (when you do the top.
tighten the ground/block stud and the alternator/power steering hose stud
before you tighten the bracket bolt) and lastly the bolt behind the exhaust side bolt.
--------------------------------------------------------------------------------
]while i have the room i'll get that body side ground back on.
i filed down to clean metal on the frame and wire,and used a self taping screw.
ya,it'* hack. but it'll work for now, till i can run a better connection[
--------------------------------------------------------------------------------
ok get the accessory belt back on, slip it on to the alternator first.
and again while pushing down on the tensioner pulley slide it over the top pulley, make sure it'* all lined up and on properly!
--------------------------------------------------------------------------
now you can bring the wire harness back down,clean up the battery ring, tighten the nut and put the plug back in.
(forgot to take a picture so this one will do)
don't fasten the harness just yet,you'll have to move it around a bit to get the ground wire and the top power steering hose nut'* back on.
then after them three nut'* and the hose is in place
go ahead and secure the wire harness,and put the hose back on the reservoir
(you can see i changed the clamp)
i changed this hose altogether, it looked like it was just a short matter of time before it sprang a leak (2" ID)
now the rest is gravy!
1: get the radiator back in.
2: put the lower trany cooling hose back on the transmission
3: put the lower radiator hose back on the water pump
(i changed both clamps,don't over tighten the one on the radiator
remember the tank is just plastic, and if you do change them make sure
they are positioned so you can get to it if you've got to retighten the clamp
because you find it leaks)
4: put the top trany cooling hose back on the radiator
(5) if you've got the oil cooling lines, get them back on
6: left fan and wire plug then the right fan and wire plug
7: make sure you've closed the petcock,start filling the tank with 50/50 coolant
8: go hook the battery back up,start her up (may need a jump...LOL)
9: let it come up to temp,and the thermostat opens and the fans kick on
(keep an eye on the coolantlevel in the tank and add accordingly)
10: look for any leaks/and anything you may have not tighten properly
11: if all is good shut her down, get the radiator cover back on
and take it for a short ride,recheck for leaks then enjoy!
i did this write up for another fourm.
so if it helps ya, and you save a little (lot) of money doing this yourself
it'll make us both pleased!
ground fix
belt diagram (just incase)
 12-29-2010, 09:56 PM
#2
Senior Member


True Car Nut
Wow very very nicely documented and explained definatley an A+++ i will recommend that his be put in tech info..Thank you im sure this will help other aurora owners thumbs up
12-29-2010, 10:11 PM
#3
Member
Posts like a V-Tak
Thread Starter
Join Date: Nov 2010
Posts: 30
Likes: 0
Received 0 Likes
on
0 Posts
thanks,much appreciated.
LOL, it took longer to do the write up, then the job it'* self.
seeing a shop price will run about 3 to 500 clams!
i'm all about saveing (someone) some coin!
LOL, it took longer to do the write up, then the job it'* self.
seeing a shop price will run about 3 to 500 clams!
i'm all about saveing (someone) some coin!
12-29-2010, 10:15 PM
#4
Senior Member
True Car Nut
Yeah its not up to me if it makes it or not but i do not see why it wouldn't i sent a admin a mesage so we shall see but none the less great work and amazing write up..i've done alts n these auroras and they are work lol
12-30-2010, 12:27 AM
#5
Retired Senior Admin

Expert Gearhead
Join Date: May 2006
Location: Sheboygan Wisconsin
Posts: 29,661
Likes: 0
Received 28 Likes
on
24 Posts

Thanks for the write up. I moved a copy to the gearhead area and I will look it over. And it will find a place in techinfo. Again, thanks.
12-30-2010, 04:29 PM
#6
Administratus Emeritus
Certified Car Nut
Always good to see members getting involved in Tech Write Ups, especially with photos!. We get it buffed and put the pics on our server. Hosted forever with your name on it. Or in till we all die. Whichever comes first.

Thread
Thread Starter
Forum
Replies
Last Post
tipsymcstager
Bonneville GXP/ Northstar Powered Cars
0
12-29-2010 09:50 PM
rwe62382
General GM Chat
57
11-05-2003 12:49 AM