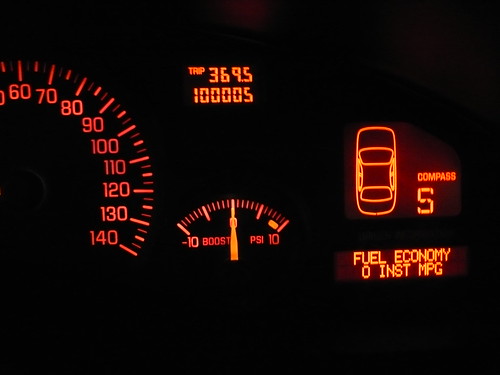
100,000 mile present.
 08-26-2010, 03:47 AM
#1
-- SITE DONATOR --

True Car Nut
Thread Starter


Car rolled 100,000 today so I decided to give it some attention, had some parts sitting in the basement waiting to go on. FE5 sway swap and some new plugs was today'* agenda. Took pictures for anyone else who plans on doing the swap. As with most things I do for the first time it was a PITA.
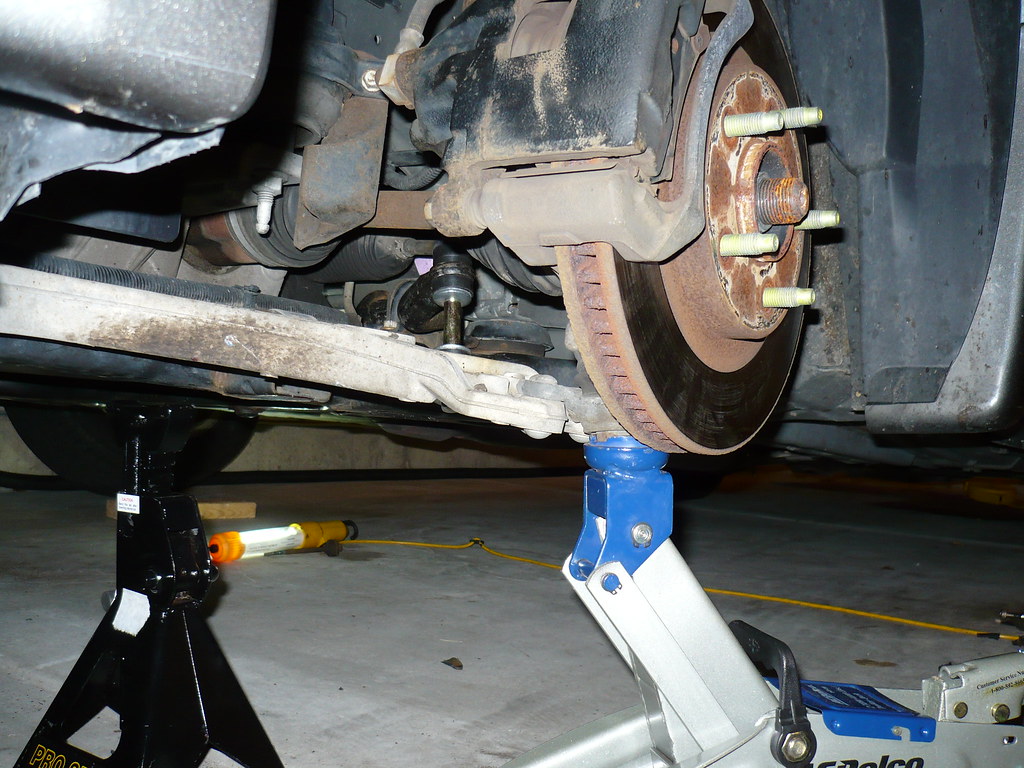
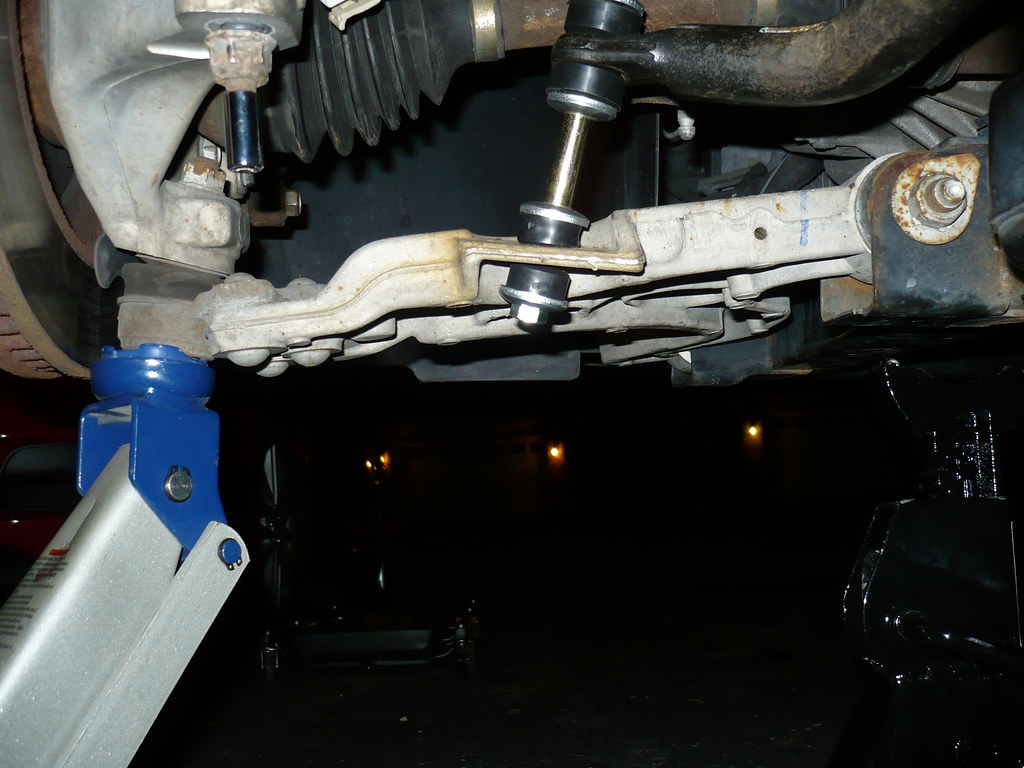
Here is a good spot to jack from on the front, then put a jack stand right behind and move to the other side of the car. (Also, if your using a crappy jack like mine that doesn't get the car far enough off the ground, you can use a wooden block to get a little extra height for the jack stand.)
[IMG]arm5.static.flickr.com/4114/4928884074_d80668f203_b.jpg[/IMG]
Don't kid yourself like I did, you are going to have to remove the front tires. Also, when removing the current bolts and putting the new bolts on the sway bar, it helps to jack the suspension up a bit to put less pressure on the bolt and bring it a little closer to the bar.
Also a good idea to disconnect the Wheel Spin Sensor to make sure you don't accidentally damage it.

Tried disconnecting the power steering to get a little more room to work and wiggle but ended up being a no go. You have to hold the bolt while turning the nut, and it seems like the nut keeps coming out until you have nothing left to get your socket on to hold the bolt from turning. Still got it loosened up a bit.
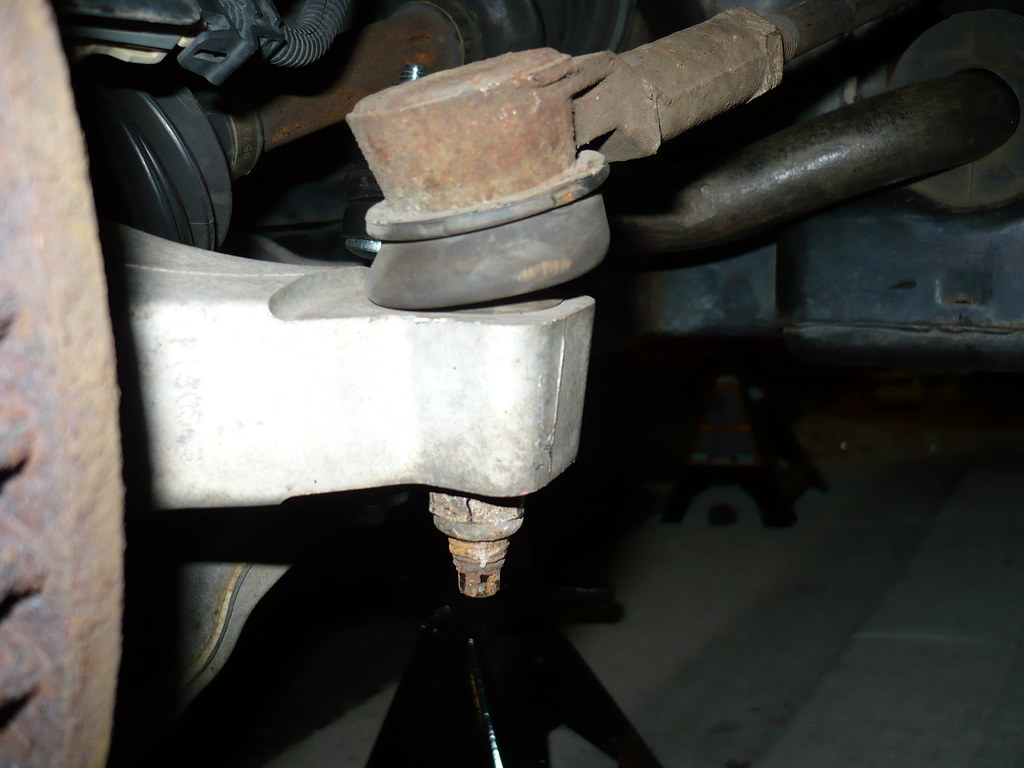
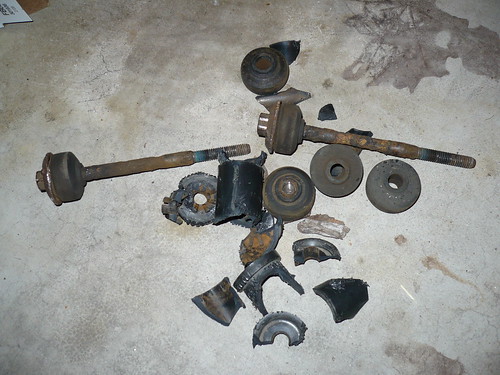
There are 6 bolts holding the sway bar on. 2 holding the clamp on each side (13 mm) and one connecting the bar to each control arm.


The bolts holding the sway bar to the control arm were rusted worse than I thought they would be, my guess is those stupid plastic barrels in the middle held water in and was eating the bolts away fairly quickly. Glad I got to this before they broke.
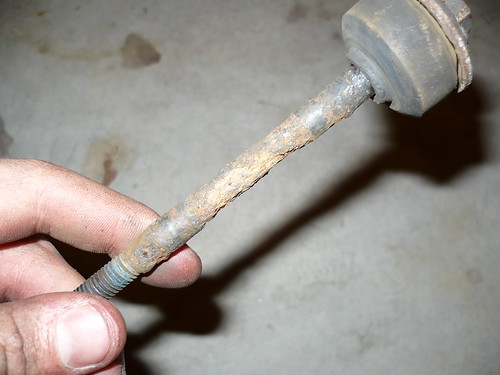
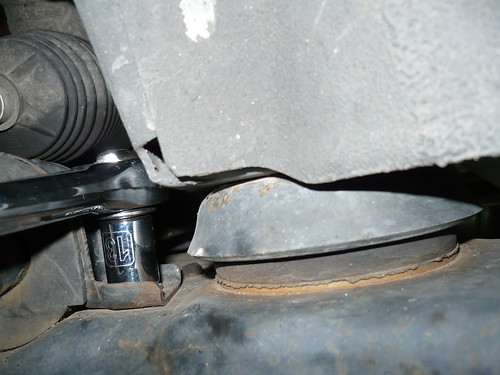
Stupid plastic barrel from the bolt, this one is from the new sway bar. I ended up using new parts from moog that look completely different (and better, bigger bolt, better design that doesn't hold water) but wanted you to see what they are supposed to look like.
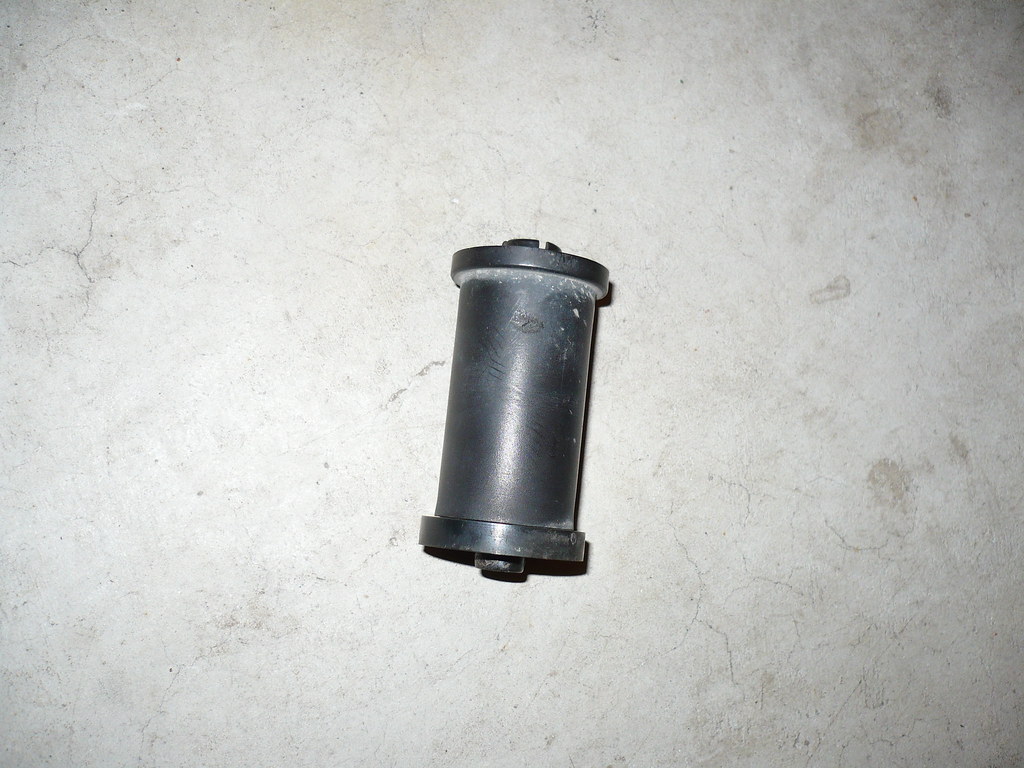
Here is what was left of mine... I had to destroy them to get them off.
After lots of adjusting the position of the wheel and some luck I was able to get the old sway bar out through the drivers wheel well. The new bar weighs 3x the old one which made it a little more difficult going back in.

No shortage of spark plugs here.

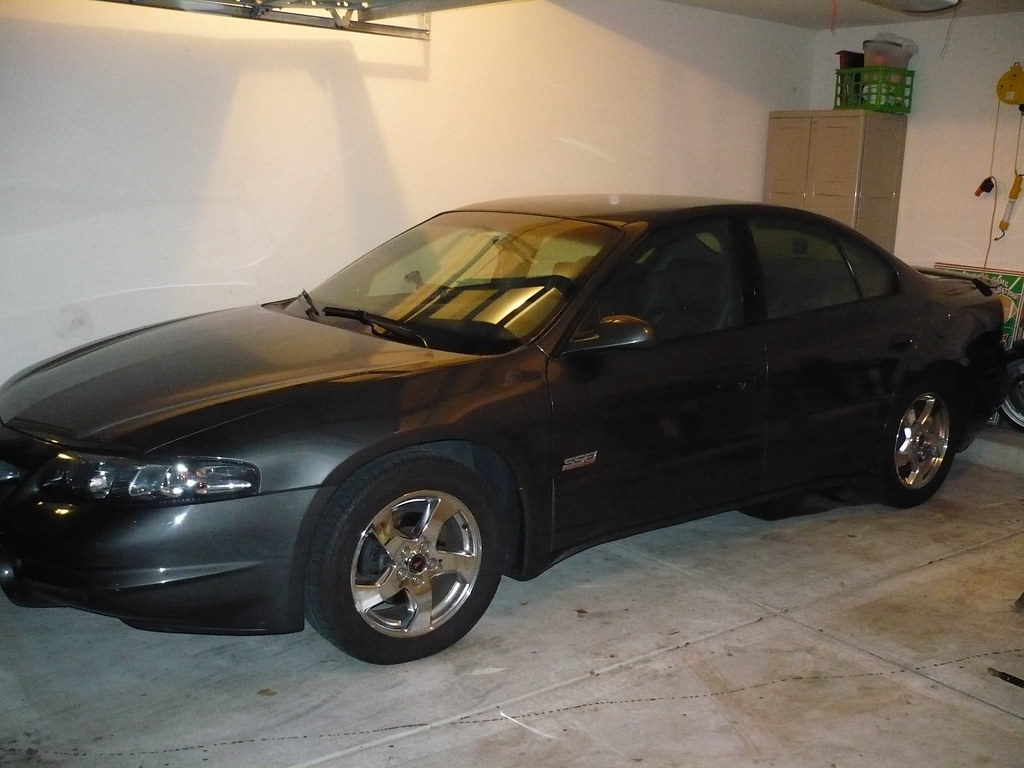
Finally got it all back together and on the ground.

Did my figure 8'* and jogged left to right a bit, then re torqued the wheel lugs and back into the garage it went. Clean and ready for bed.
Here is a good spot to jack from on the front, then put a jack stand right behind and move to the other side of the car. (Also, if your using a crappy jack like mine that doesn't get the car far enough off the ground, you can use a wooden block to get a little extra height for the jack stand.)
[IMG]arm5.static.flickr.com/4114/4928884074_d80668f203_b.jpg[/IMG]
Don't kid yourself like I did, you are going to have to remove the front tires. Also, when removing the current bolts and putting the new bolts on the sway bar, it helps to jack the suspension up a bit to put less pressure on the bolt and bring it a little closer to the bar.
Also a good idea to disconnect the Wheel Spin Sensor to make sure you don't accidentally damage it.
Tried disconnecting the power steering to get a little more room to work and wiggle but ended up being a no go. You have to hold the bolt while turning the nut, and it seems like the nut keeps coming out until you have nothing left to get your socket on to hold the bolt from turning. Still got it loosened up a bit.
There are 6 bolts holding the sway bar on. 2 holding the clamp on each side (13 mm) and one connecting the bar to each control arm.
The bolts holding the sway bar to the control arm were rusted worse than I thought they would be, my guess is those stupid plastic barrels in the middle held water in and was eating the bolts away fairly quickly. Glad I got to this before they broke.
Stupid plastic barrel from the bolt, this one is from the new sway bar. I ended up using new parts from moog that look completely different (and better, bigger bolt, better design that doesn't hold water) but wanted you to see what they are supposed to look like.
Here is what was left of mine... I had to destroy them to get them off.
After lots of adjusting the position of the wheel and some luck I was able to get the old sway bar out through the drivers wheel well. The new bar weighs 3x the old one which made it a little more difficult going back in.
No shortage of spark plugs here.
Finally got it all back together and on the ground.
Did my figure 8'* and jogged left to right a bit, then re torqued the wheel lugs and back into the garage it went. Clean and ready for bed.
 08-26-2010, 07:59 AM
#3
DINOSAURUS BOOSTUS

Expert Gearhead
Looks good Tom. I've had to cut the end links, sometimes they snap when trying to get them off etc etc. Snapping is the best, then you don't have to think of why the bolt is as long as it is while you are removing the nut from it.
Snapping 2 seconds
Cutting 15 seconds
Unbolting 10 minutes

That end that you undid is called a tie rod BTW.
Snapping 2 seconds
Cutting 15 seconds
Unbolting 10 minutes
That end that you undid is called a tie rod BTW.
08-26-2010, 10:35 AM
#4
Artist
True Car Nut
Nice. I can't wait until I can get mine done after seeing how much of a difference it made in Gunner'* car (and I think he'* only installed the back FE5 so far).
08-26-2010, 11:17 AM
#5
-- SITE DONATOR --
True Car Nut
Thread Starter
Gotcha, so tie rods are the power steering arms. How in the heck do you get them off?
Good luck Brian! A couple tips: If you disconnect the down pipe you will get a little extra wiggle room (Which you will likely need). Also make sure you get the car up as high as you can. Oh, and don't try to jack with your jack wheels on blacktop. I now have some nice wheel impressions in my driveway...
Oh, and here is the new end link. The bolt is much bigger and instead of a stupid plastic film canister its got a metal sleeve. You can kinda see how everything needs to be put in, putting the smaller rubber pieces on the bottom and the bigger ones on top worked for me. They don't fit right the other way since they are formed to the holes.
08-26-2010, 11:56 AM
#6
DINOSAURUS BOOSTUS
Expert Gearhead
The tie rod end nuts usually have plastic etc in them to keep them from backing out. Easy way to remove them is to torch them or destroy them. There'* no need to pull them though, support the body of the car, then support the rear of the subframe with your jack and lower the rear bolts a little to bring the subframe down 1"-3" and you'll be able to do anything you need.
LOL on the driveway dimples.

LOL on the driveway dimples.
08-26-2010, 12:11 PM
#7
-- SITE DONATOR --
True Car Nut
Thread Starter
I was just curious how to remove them in case I ever had to replace one. Looks like the tie rod is a one time use part unless you get lucky with some PB Blaster and the torch.
The "drive way dimples" wouldn't have been as bad if I had a real jack with bigger wheels, not that dinky thing with tiny wheels. I added a real jack to my shopping list.
Also, I meant to ask about the rear sway bar. Think that could be done on a set of ramps? If not, where is the best spot to jack the rear of the car up from. I talked to Steve and he mentioned a mount in the back, but that doesn't look like it'* going to work for me since the one side has a metal guard with the e-brake cable running through it.
 08-26-2010, 01:01 PM
#9
DINOSAURUS BOOSTUS
Expert Gearhead
Jack size really doesn't matter. I've got monster jacks with very wide wheels and they'd leave marks. Chunks of wood or pieces of plywood are your friends.
Tie rods are usually pretty easy with air tools, add the compressor and stuff to the list.
Tie rods are usually pretty easy with air tools, add the compressor and stuff to the list.
08-26-2010, 01:05 PM
#10
-- SITE DONATOR --
True Car Nut
Thread Starter
Air tools would be great, those compressors generally aren't cheap though. It'* on the list but that one will probably have to wait a bit. I also need to add a bigger garage to that list.