
Pulling the motor
 04-01-2007, 08:01 PM
#31
PopaDopaDo
True Car Nut
Originally Posted by Peterg22000
Originally Posted by popatim
Why do pistons have to go in from the top esp if the crank is out?
I've wondered about that for a long time but I've never done one to actually know.
I've wondered about that for a long time but I've never done one to actually know.
I think that about sums it up...did i miss anything?
Are you saying the compressor won't fit on the bottomside or that you shouldn't tap the pistions in from the bottom up? I'm guessing the compressors won't fit on the bottomside since not being able to tap them from bottom up makes no sense to me.
Thanks again. Me like free edumacation!!
 04-01-2007, 08:54 PM
#32
Senior Member
True Car Nut

Join Date: Feb 2006
Location: Melrose
Posts: 4,596
Likes: 0
Received 0 Likes
on
0 Posts

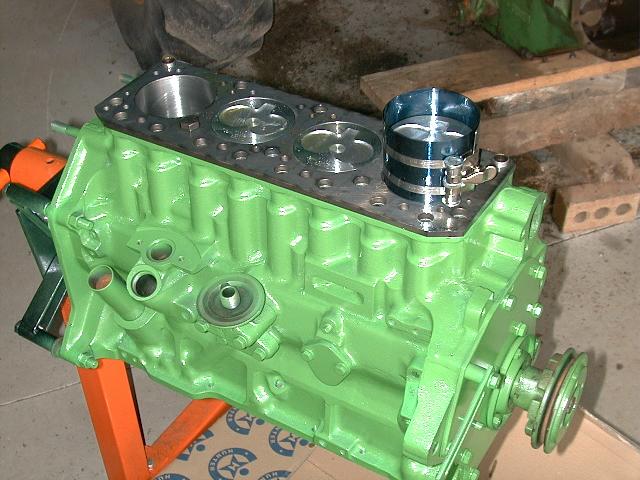
The ring compressor will not run the length of the connecting rod to the piston to knock it into the cylinder wall from the bottom. The Ring compressor is usually a little longer than the piston itself and only compresses the rings enough so that you can knock it into place from the top of the piston.
When your tapping it down, the ring compressor stays on top of the block while the piston moves down into place.
Hope that clears it up
EDIT: Pic added.
When your tapping it down, the ring compressor stays on top of the block while the piston moves down into place.
Hope that clears it up
EDIT: Pic added.
04-01-2007, 09:02 PM
#33
Senior Member
Posts like a Camaro

Join Date: Jun 2005
Location: n.h.
Posts: 1,066
Likes: 0
Received 0 Likes
on
0 Posts
I was there when this whole thing went down too....as soon as it happened I kinda stepped back and wondered if Bill was gonna blow his top or not  But he kept his cool!!
 04-01-2007, 09:54 PM
#35
Senior Member
True Car Nut
Join Date: Feb 2006
Location: Melrose
Posts: 4,596
Likes: 0
Received 0 Likes
on
0 Posts
I think they went fairly well. Bill did most, if not all of the work, but once he got rolling, the old springs were flying off and the new ones were done in no time.
04-01-2007, 10:00 PM
#36
DINOSAURUS BOOSTUS


Expert Gearhead
Thread Starter

Well...The underside isn't easy access, has casting in the way (kinda..ask my old #1 piston) and overall..it would be more trouble to put them in from the bottom. Top is much easier.
Overall..we all stayed busy. Pete worked non stop making his car cleaner and prettier than before, Tony was cleaning and getting tools, taking pics etc. Me? I was sitting round cleaning gasket surfaces and breaking pistons.
Overall..we all stayed busy. Pete worked non stop making his car cleaner and prettier than before, Tony was cleaning and getting tools, taking pics etc. Me? I was sitting round cleaning gasket surfaces and breaking pistons.
04-02-2007, 09:18 AM
#37
Senior Member
Certified Car Nut

Join Date: Oct 2002
Posts: 11,308
Likes: 0
Received 0 Likes
on
0 Posts
Nice pics Tony!
Nice clean engine block Bill! Keep us updated on the 'rebuilding.'
I'm dressed nice for work this morning but my hands are NASTY from all the work I did this past weekend. I wish I snapped pics of what I was doing, but I didn't think it would interest anyone. Now I wish I at least had the pics for myself.
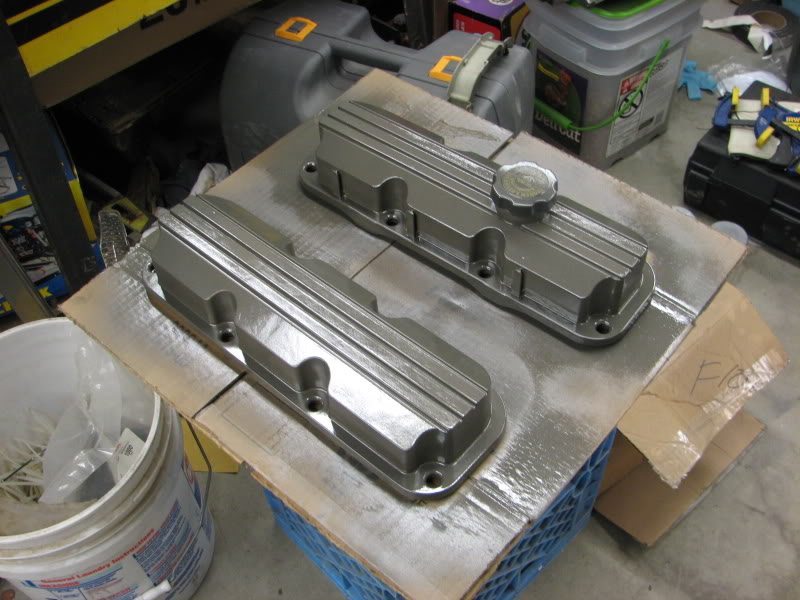
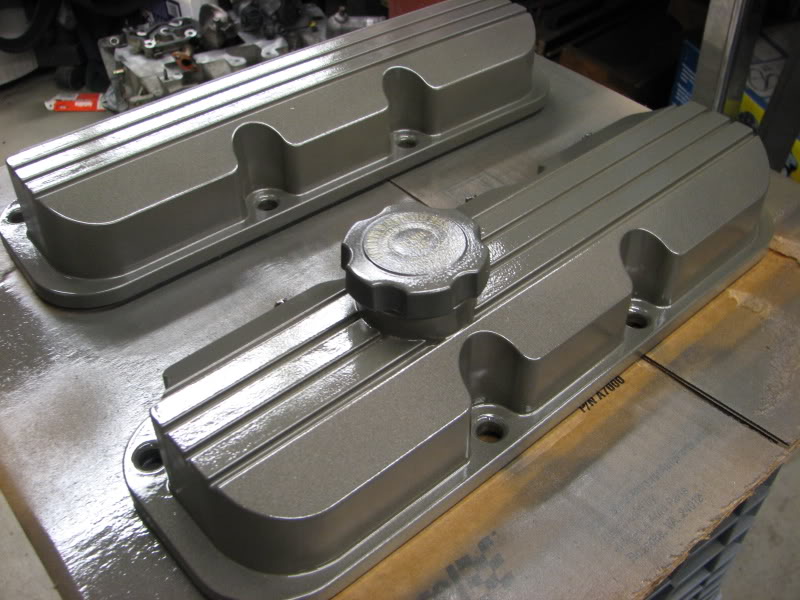
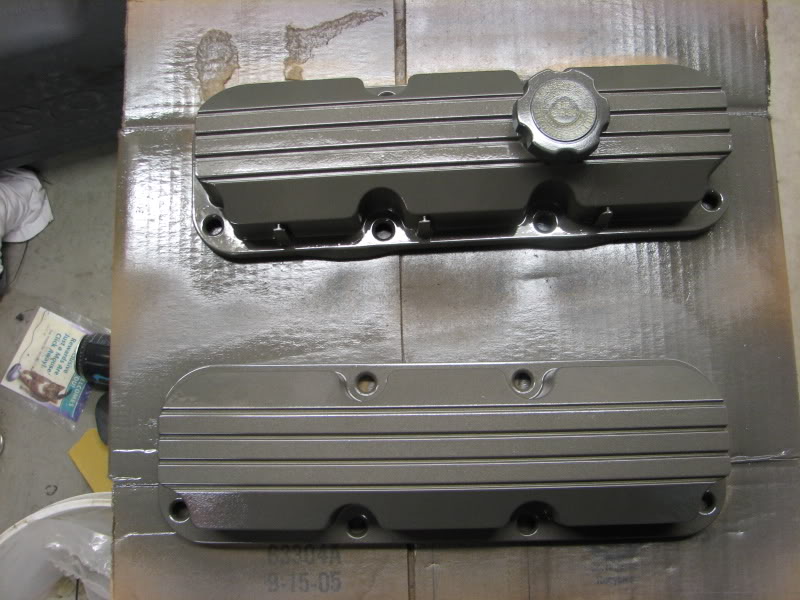
I changed gaskets:
LIM (which looked perfect )
)
Valve covers
SC
TB
Oil pan
I ported the LIM while it was out. I can't say my port job was professional (no precise measuring going on), but I'm sure it helped. Valve covers got a nice paint job as well.
Nice clean engine block Bill! Keep us updated on the 'rebuilding.'
I'm dressed nice for work this morning but my hands are NASTY from all the work I did this past weekend.
I changed gaskets:
LIM (which looked perfect
)Valve covers
SC
TB
Oil pan
I ported the LIM while it was out. I can't say my port job was professional (no precise measuring going on), but I'm sure it helped. Valve covers got a nice paint job as well.
 04-02-2007, 10:18 AM
#40
DINOSAURUS BOOSTUS
Expert Gearhead
Thread Starter
Moving this from P&B to General so others see it. I did a write up of the problem in P&B...Mike'* comment warranted this in general.
As Gearheads here, we try and give the best sound advice. Without risking the posters motor/car etc. In my motor'* case..it was simply not following the steps properly. We all make mistakes, here is mine. I like anyone else on the forum do make them. The little ones are swept under the carpet... (everyone does this), the bigger ones.. should serve as learning for all.
Sure I could have gotten mad, honestly..in an emergency or crisis situation my first reaction is calm and collected. That was my reaction. Now... slam my toolbox drawers and I'll lay into the person pretty hard. I'm wayyy past sick of pulling all the tools back to the front of the drawer and the occasional removing the drawer above to unlock the tools that slammed to the back and jambed up.
Made a few calls to friends... Mechanic Dan stopped by and his assessment was one new piston and rings only. Machinist Dave cruised past and is stopping by again tonight with measuring tools to check some specs. His first thoughts were one new piston and rings.
At the moment I can only get a full set of rings and that is the only suggestion I'd ever give to a fellow clubber. Being that this is my personal motor..if the parts are available I'll ring only this one and take the chance of having to redo the entire job.
Originally Posted by lash
I appreciate the matter-of-fact way you've addressed your oops, including how it occured and what you're doing to properly deal with it without going overboard. It'* a great way to arm others who might try this with knowledge so that maybe they won't make the same mistake.
Great pics too!
Great pics too!
Sure I could have gotten mad, honestly..in an emergency or crisis situation my first reaction is calm and collected. That was my reaction. Now... slam my toolbox drawers and I'll lay into the person pretty hard. I'm wayyy past sick of pulling all the tools back to the front of the drawer and the occasional removing the drawer above to unlock the tools that slammed to the back and jambed up.
Made a few calls to friends... Mechanic Dan stopped by and his assessment was one new piston and rings only. Machinist Dave cruised past and is stopping by again tonight with measuring tools to check some specs. His first thoughts were one new piston and rings.
At the moment I can only get a full set of rings and that is the only suggestion I'd ever give to a fellow clubber. Being that this is my personal motor..if the parts are available I'll ring only this one and take the chance of having to redo the entire job.